These Greeting Cards Will Spice Up the Holidays

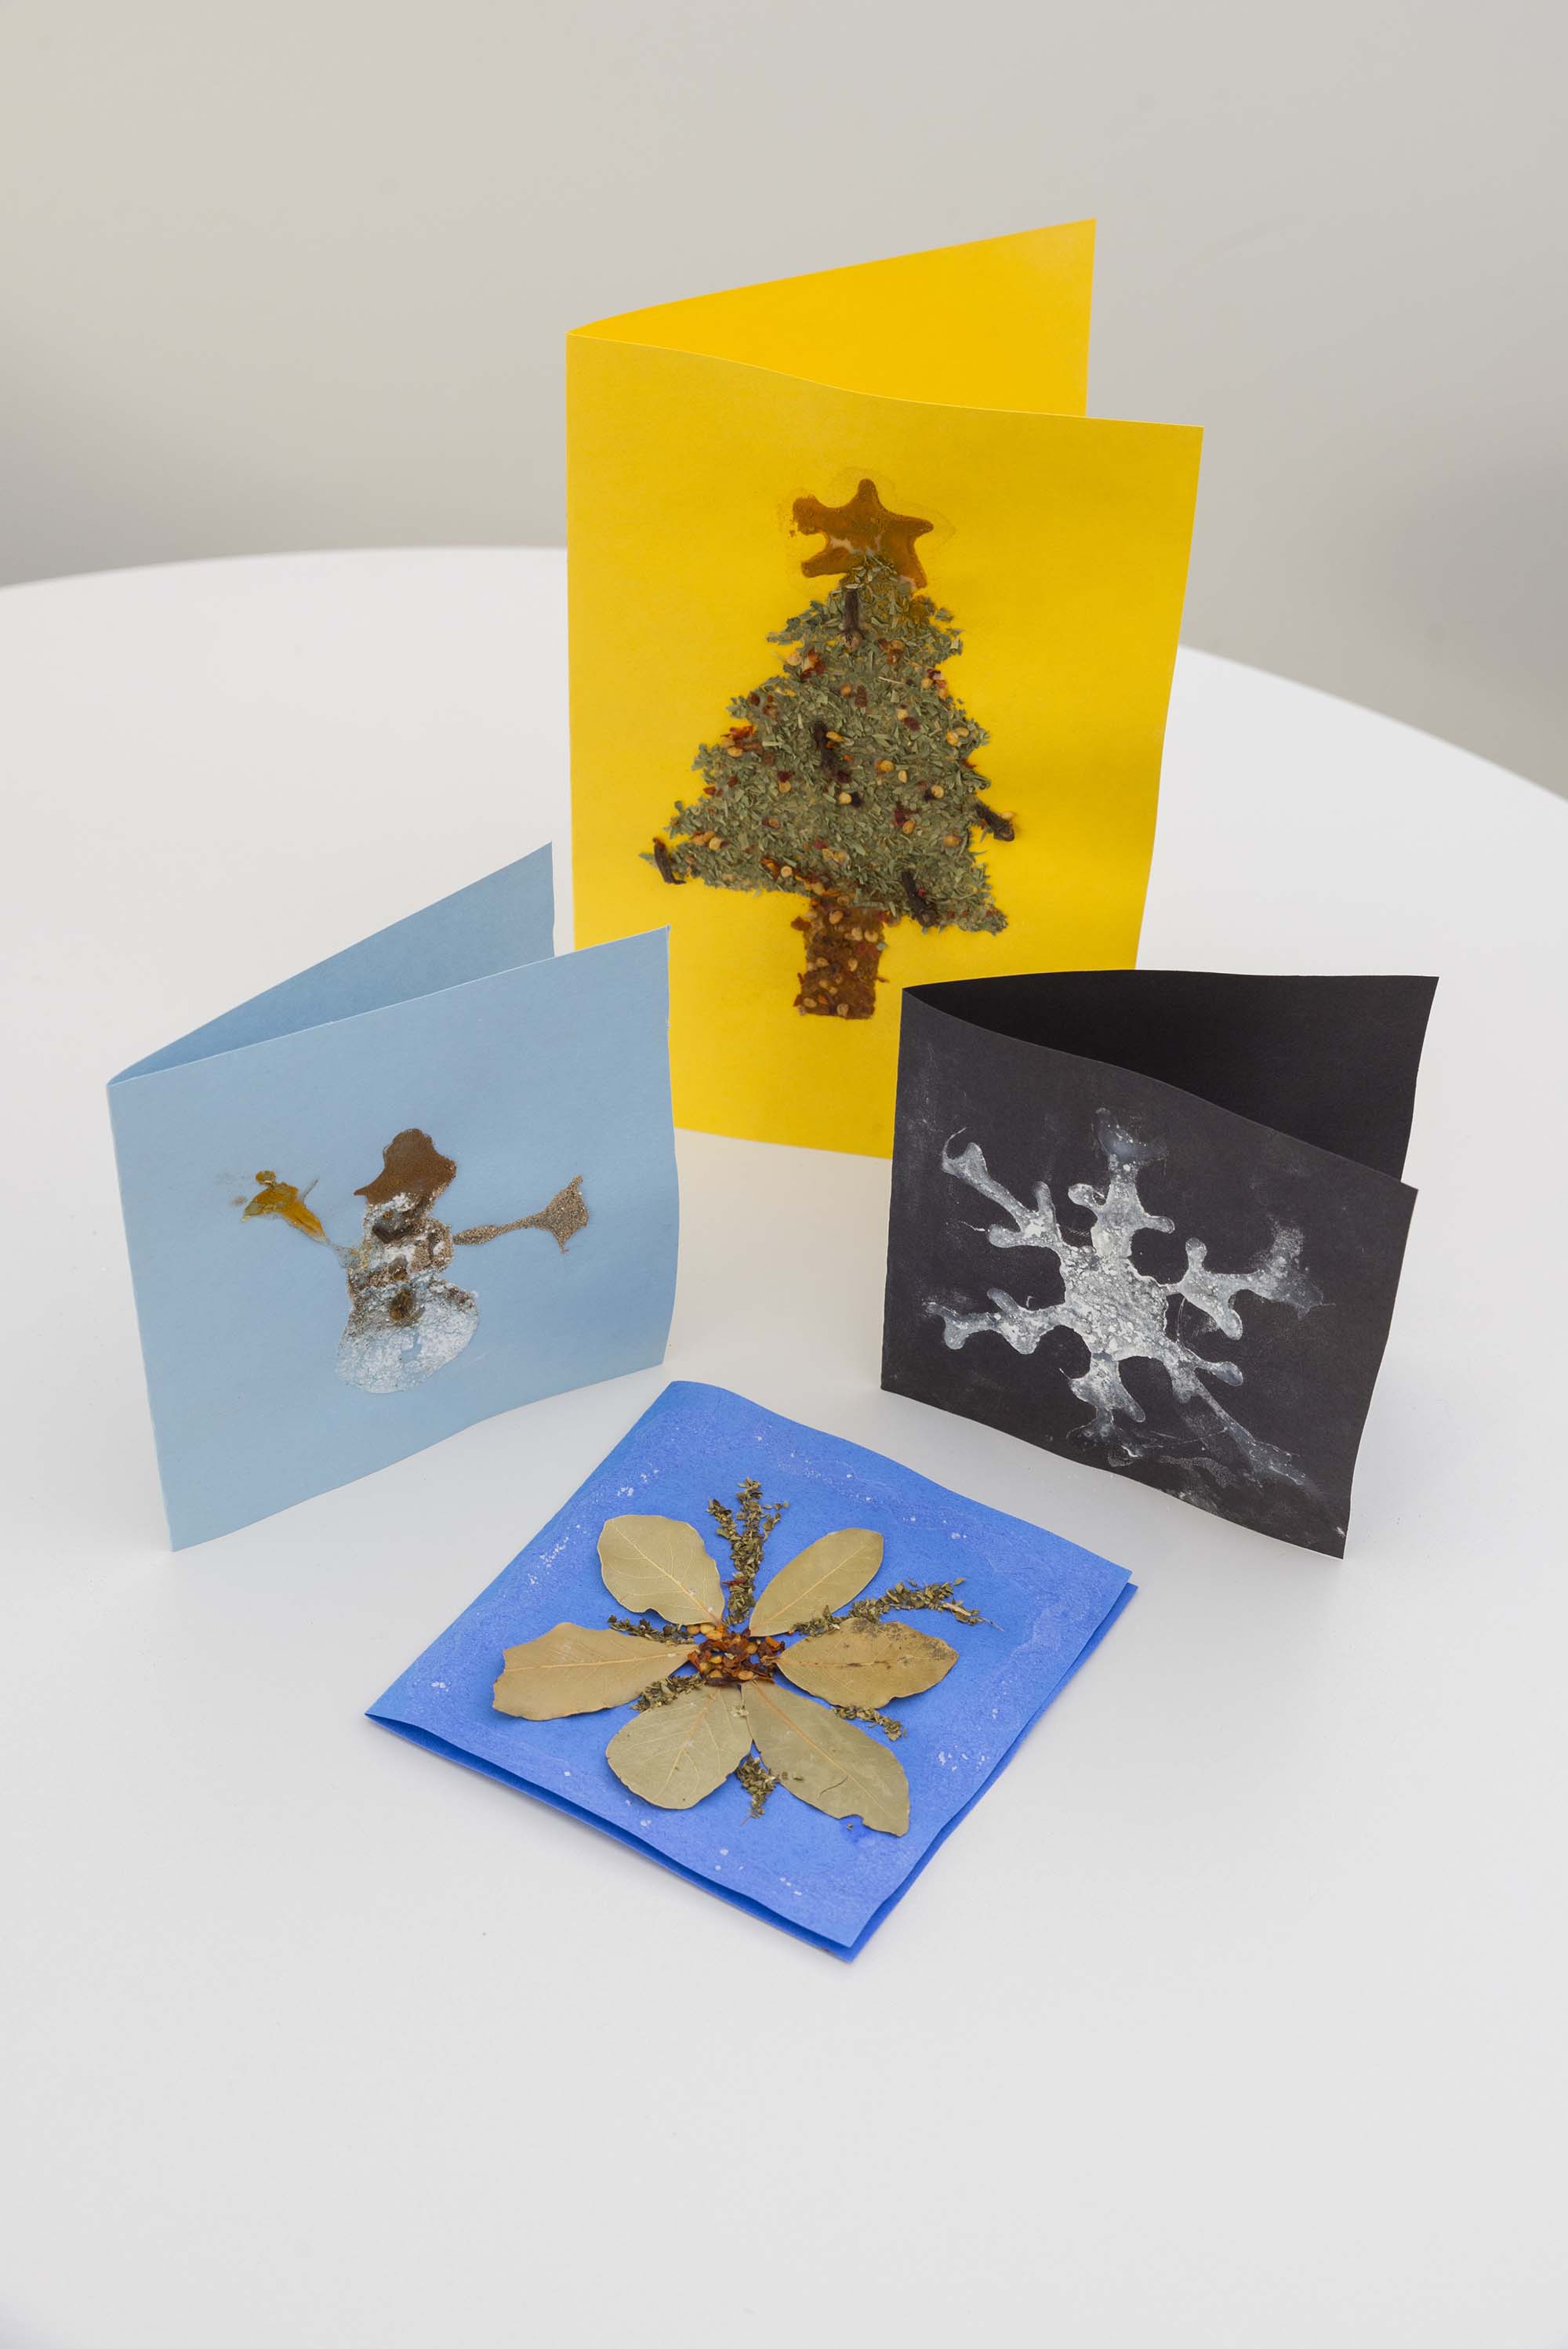
Handmade greeting cards make people feel loved. Here is a fun and festive way to show friends and relatives that you care about them. It’s a great project for kids who need something to do during Thanksgiving break. (It’s also a way to use up some of those 20-year-old spices that are languishing in your kitchen cabinet!)

PHOTO: Spice holiday cards.
Finished spicy holiday cards smell absolutely fantastic.

MATERIALS

  • White glue in a squeeze bottle
  • Construction paper 
  • Dried herbs and spices, whole or ground 
  • Salt and water in a small dish, with a paint brush
  • Markers, crayons, or colored pencils

Work over a large paper towel or mat, because this project is messy!

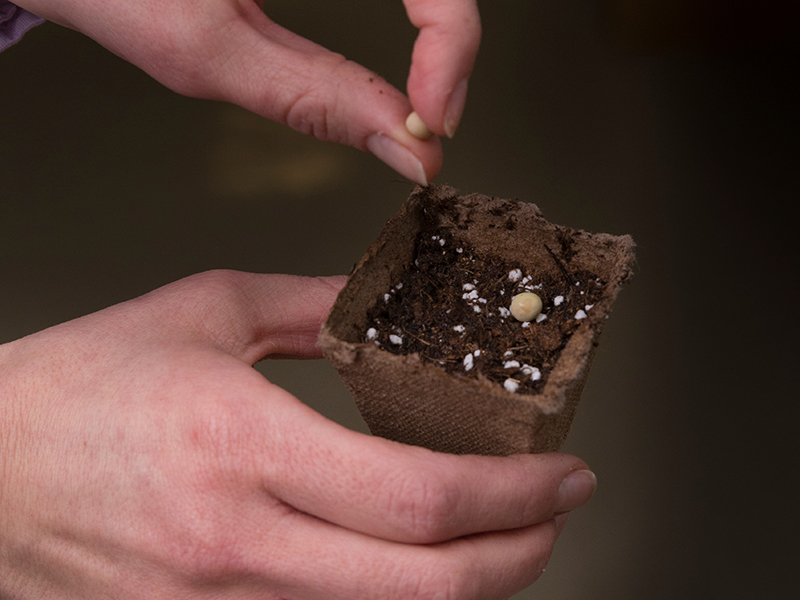
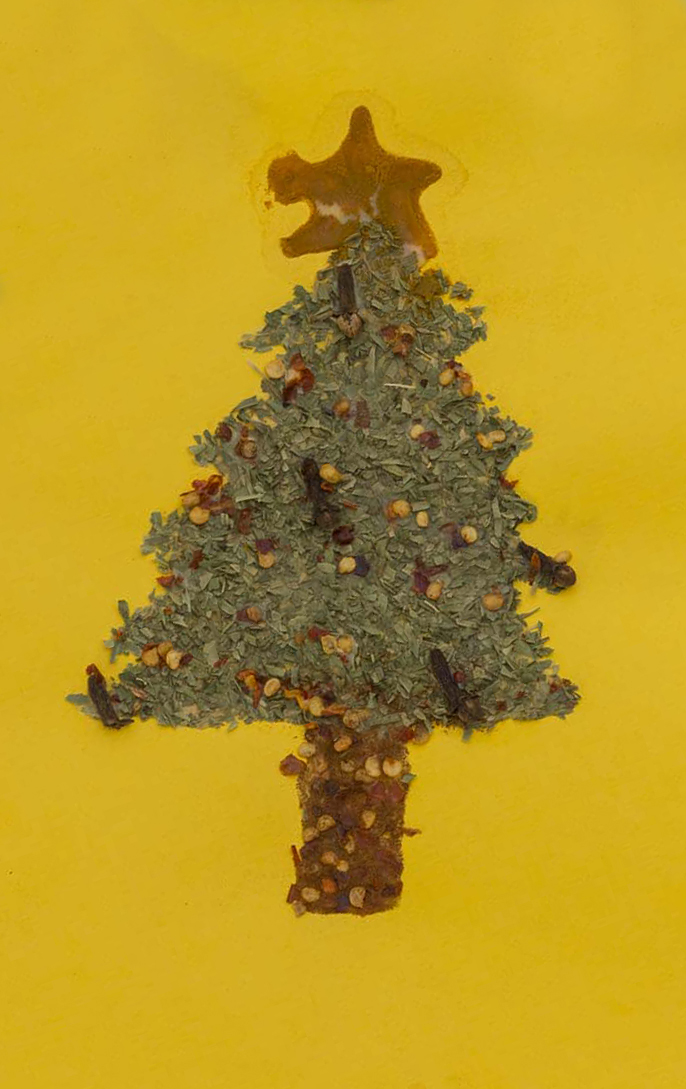
Fold a piece of stiff paper (construction paper or card stock) in half. Draw a design with glue on the front of the card. Try to use glue sparingly, because the paper will warp if the glue is too thick or wet. Sprinkle the herbs or spices of your choice on the wet glue.

You can apply the spices by gently tapping them out of the jar onto the page, or take small pinches and apply them where you want them to go. If you want more control, fold a small piece of paper in half, put some spices in the crease, and gently tap the paper to slide the spices down the crease to apply them to your picture. 

It helps if you make the glue design for one spice at a time, and let each spice dry before putting a new one on. When each spice has dried, shake the card to remove excess, and apply glue for the next spice. This reduces blending.

PHOTO: Spice holiday card: snowman.
Cream of tartar dries white to make this snowman. Other dried spices were used for hat and arms, and whole cloves make the face and buttons.
PHOTO: Spice holiday card: wreath.
One of my daughters combined different herbs to make this wreath, and decorated it with dots of cinnamon, whole cloves, and a bay leaf and paprika bow.

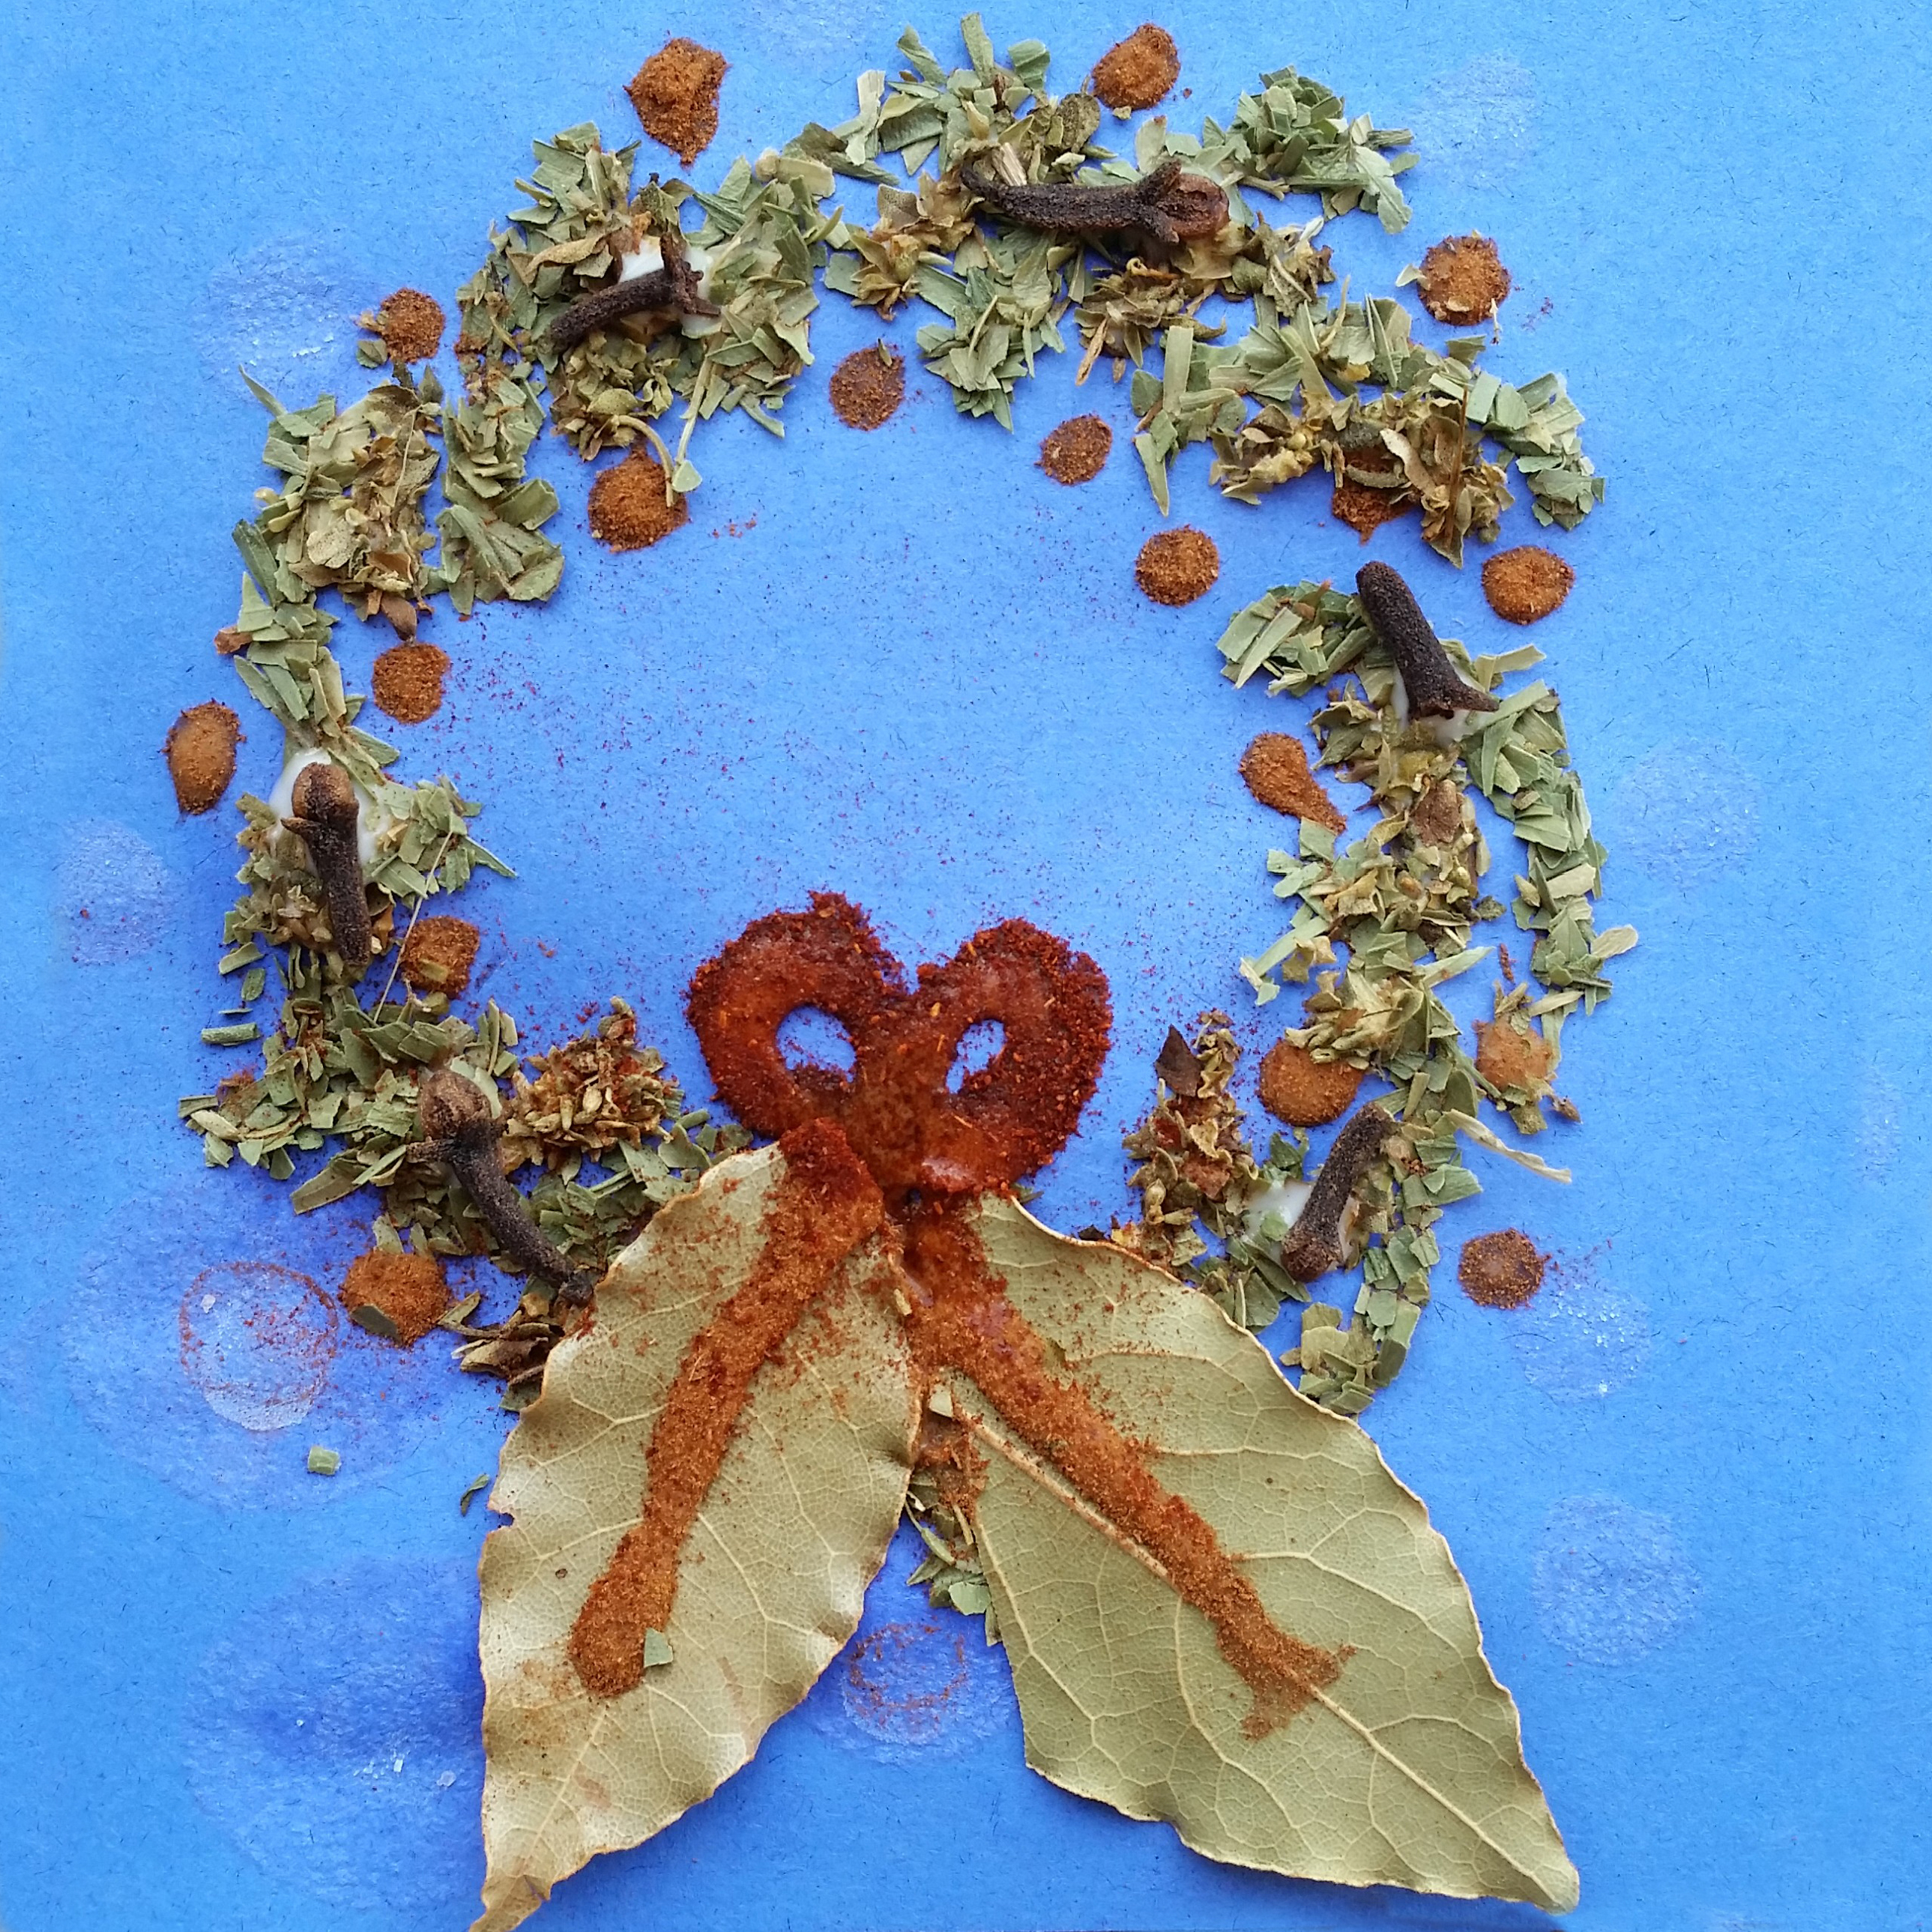
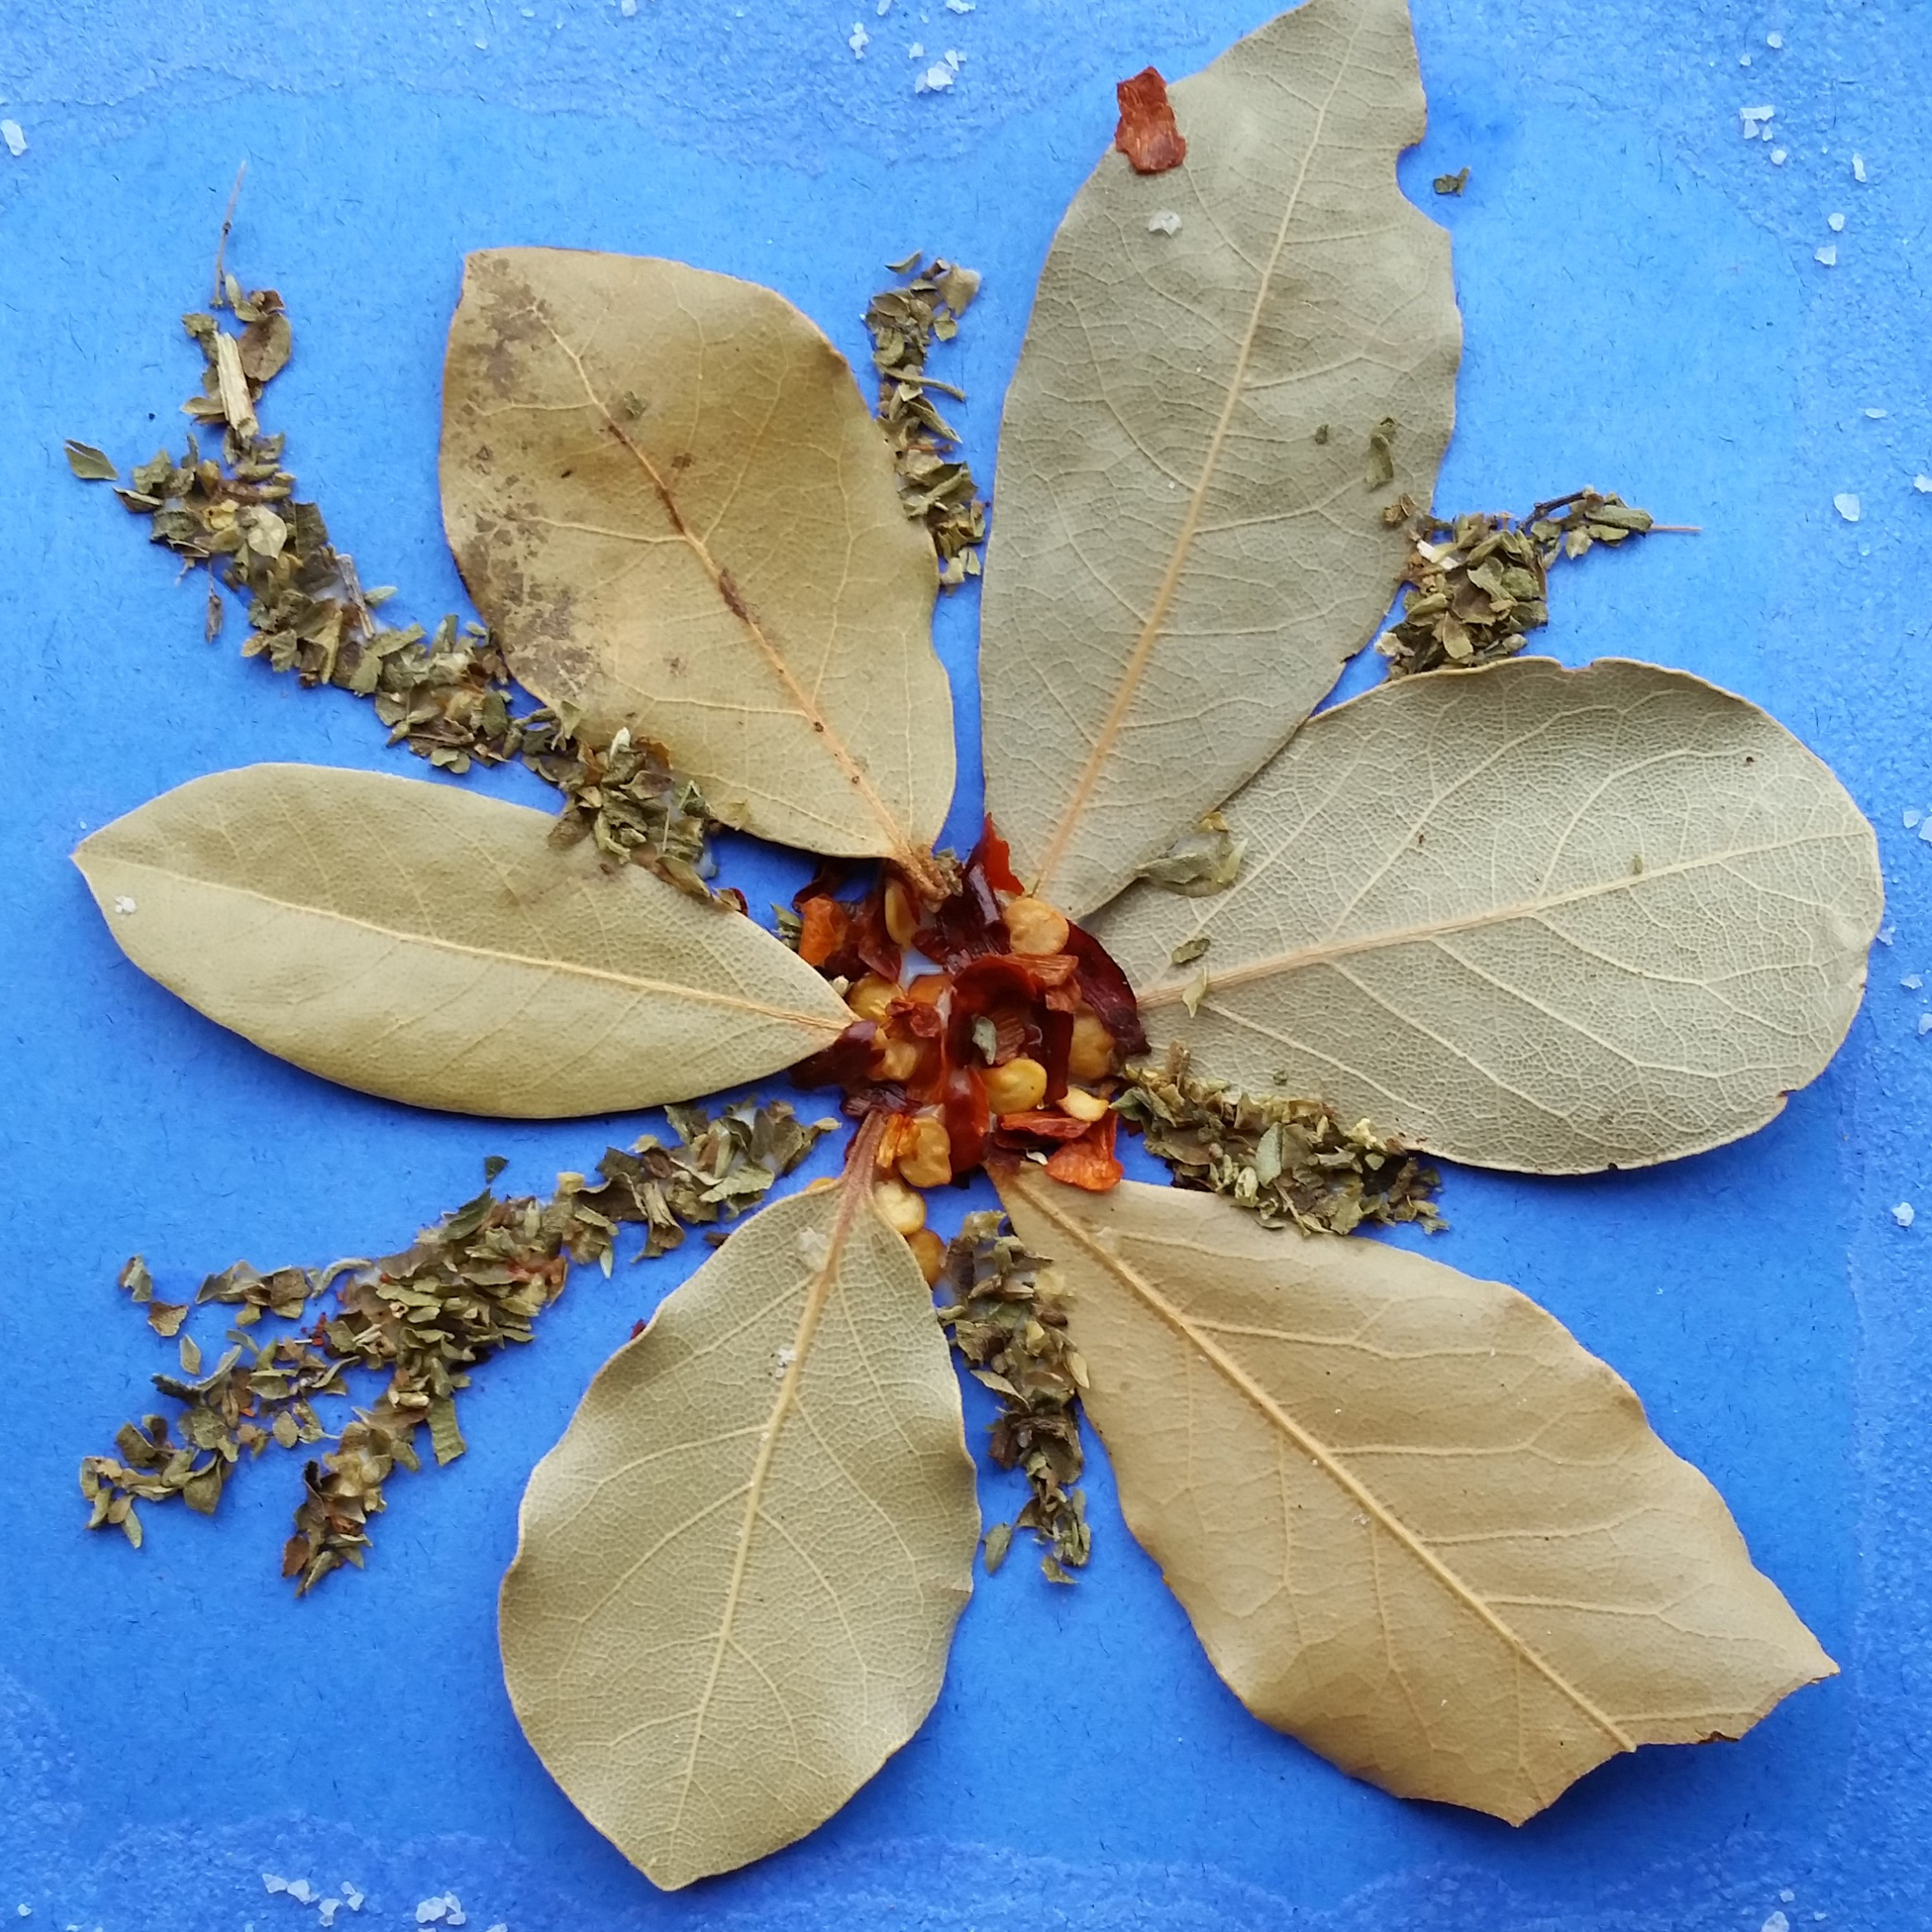
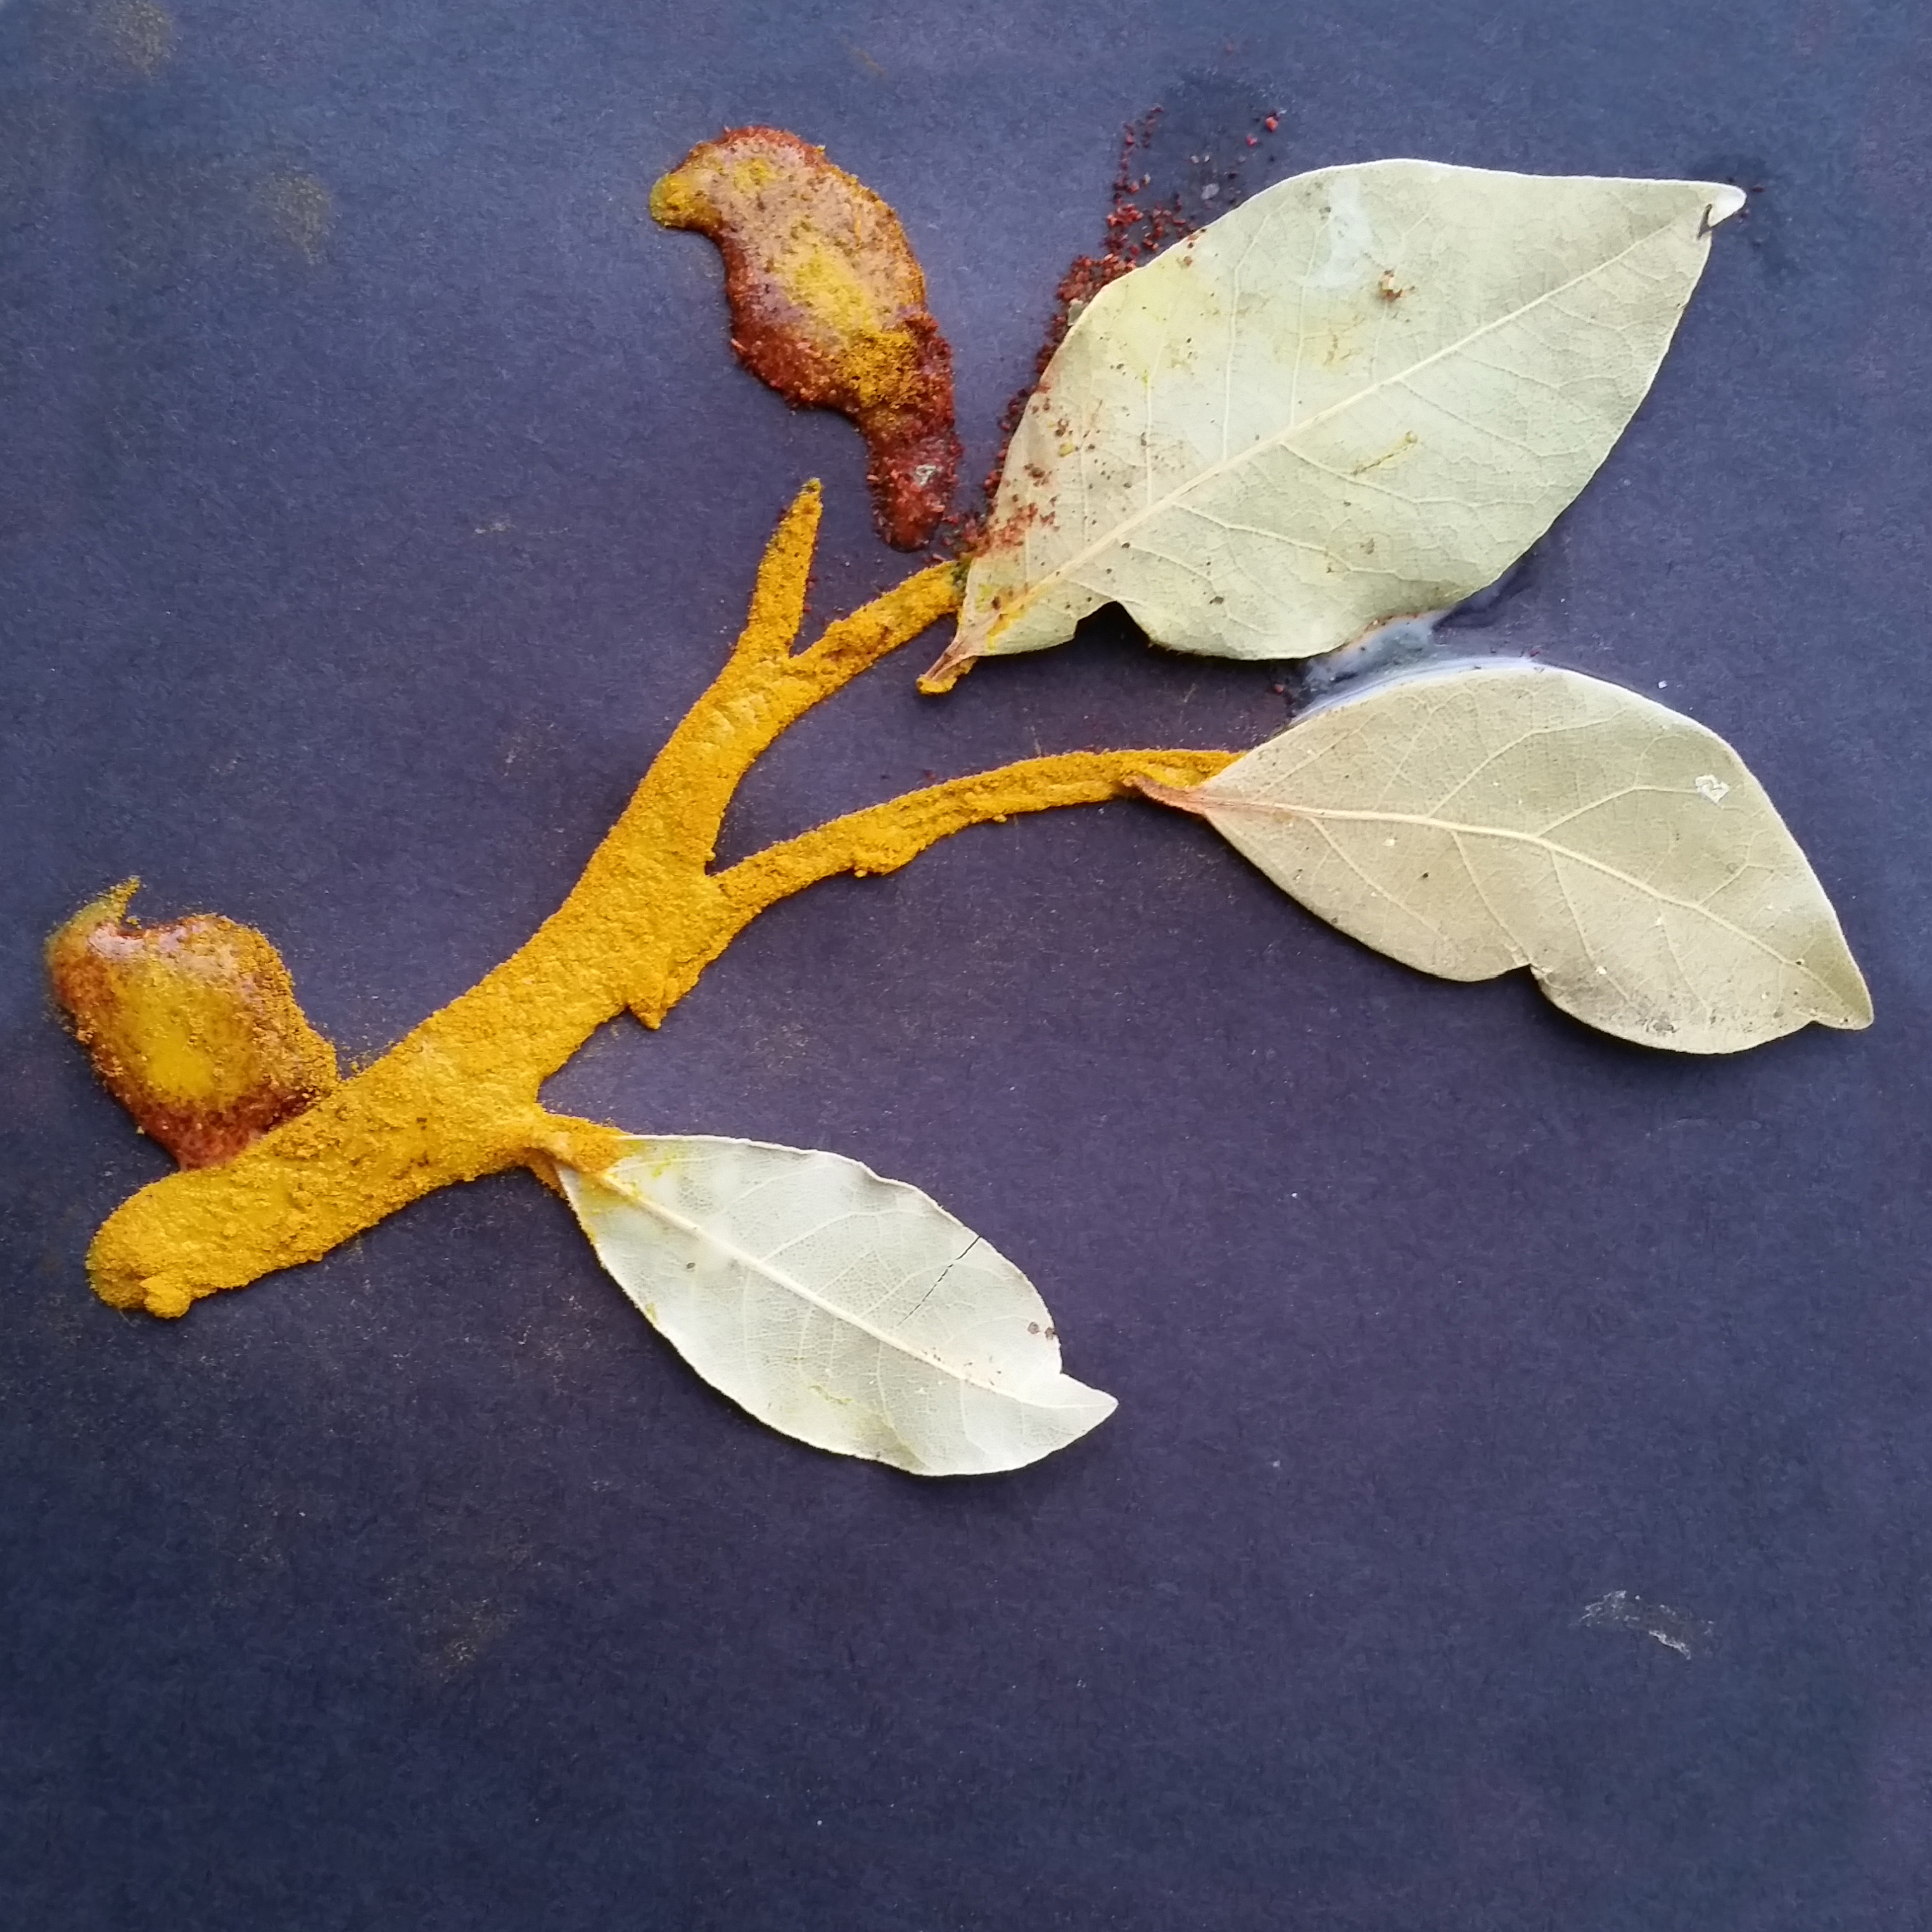
Dried herbs are all slightly different shades of green. Tarragon leaves are a lighter green, and a little brighter than oregano. For yellow, try ground turmeric or curry. Paprika, cinnamon, chili powder, and crushed red pepper flakes deliver warm reds. Pink and green peppercorns make nice accents. Cream of tartar and alum powder dry white, but require special handling or they will flake off. Everything sticks better if you gently press the herbs into the glue.

You can also glue whole spices such as bay leaves, cloves, fennel seed, or pieces of cinnamon bark to the card. Keep in mind that whole spices will make the card bulkier and may make it difficult to fit the card into the envelope. 

PHOTO: Spice holiday card: birds.
Turmeric, paprika, and bay leaves were used to create this scene of birds perched on a branch.
PHOTO: Spice holiday card: snowflakes.
It’s too bad your screen is not “scratch and sniff,” because this card smells of cinnamon, cardamom, paprika, oregano, and tarragon.

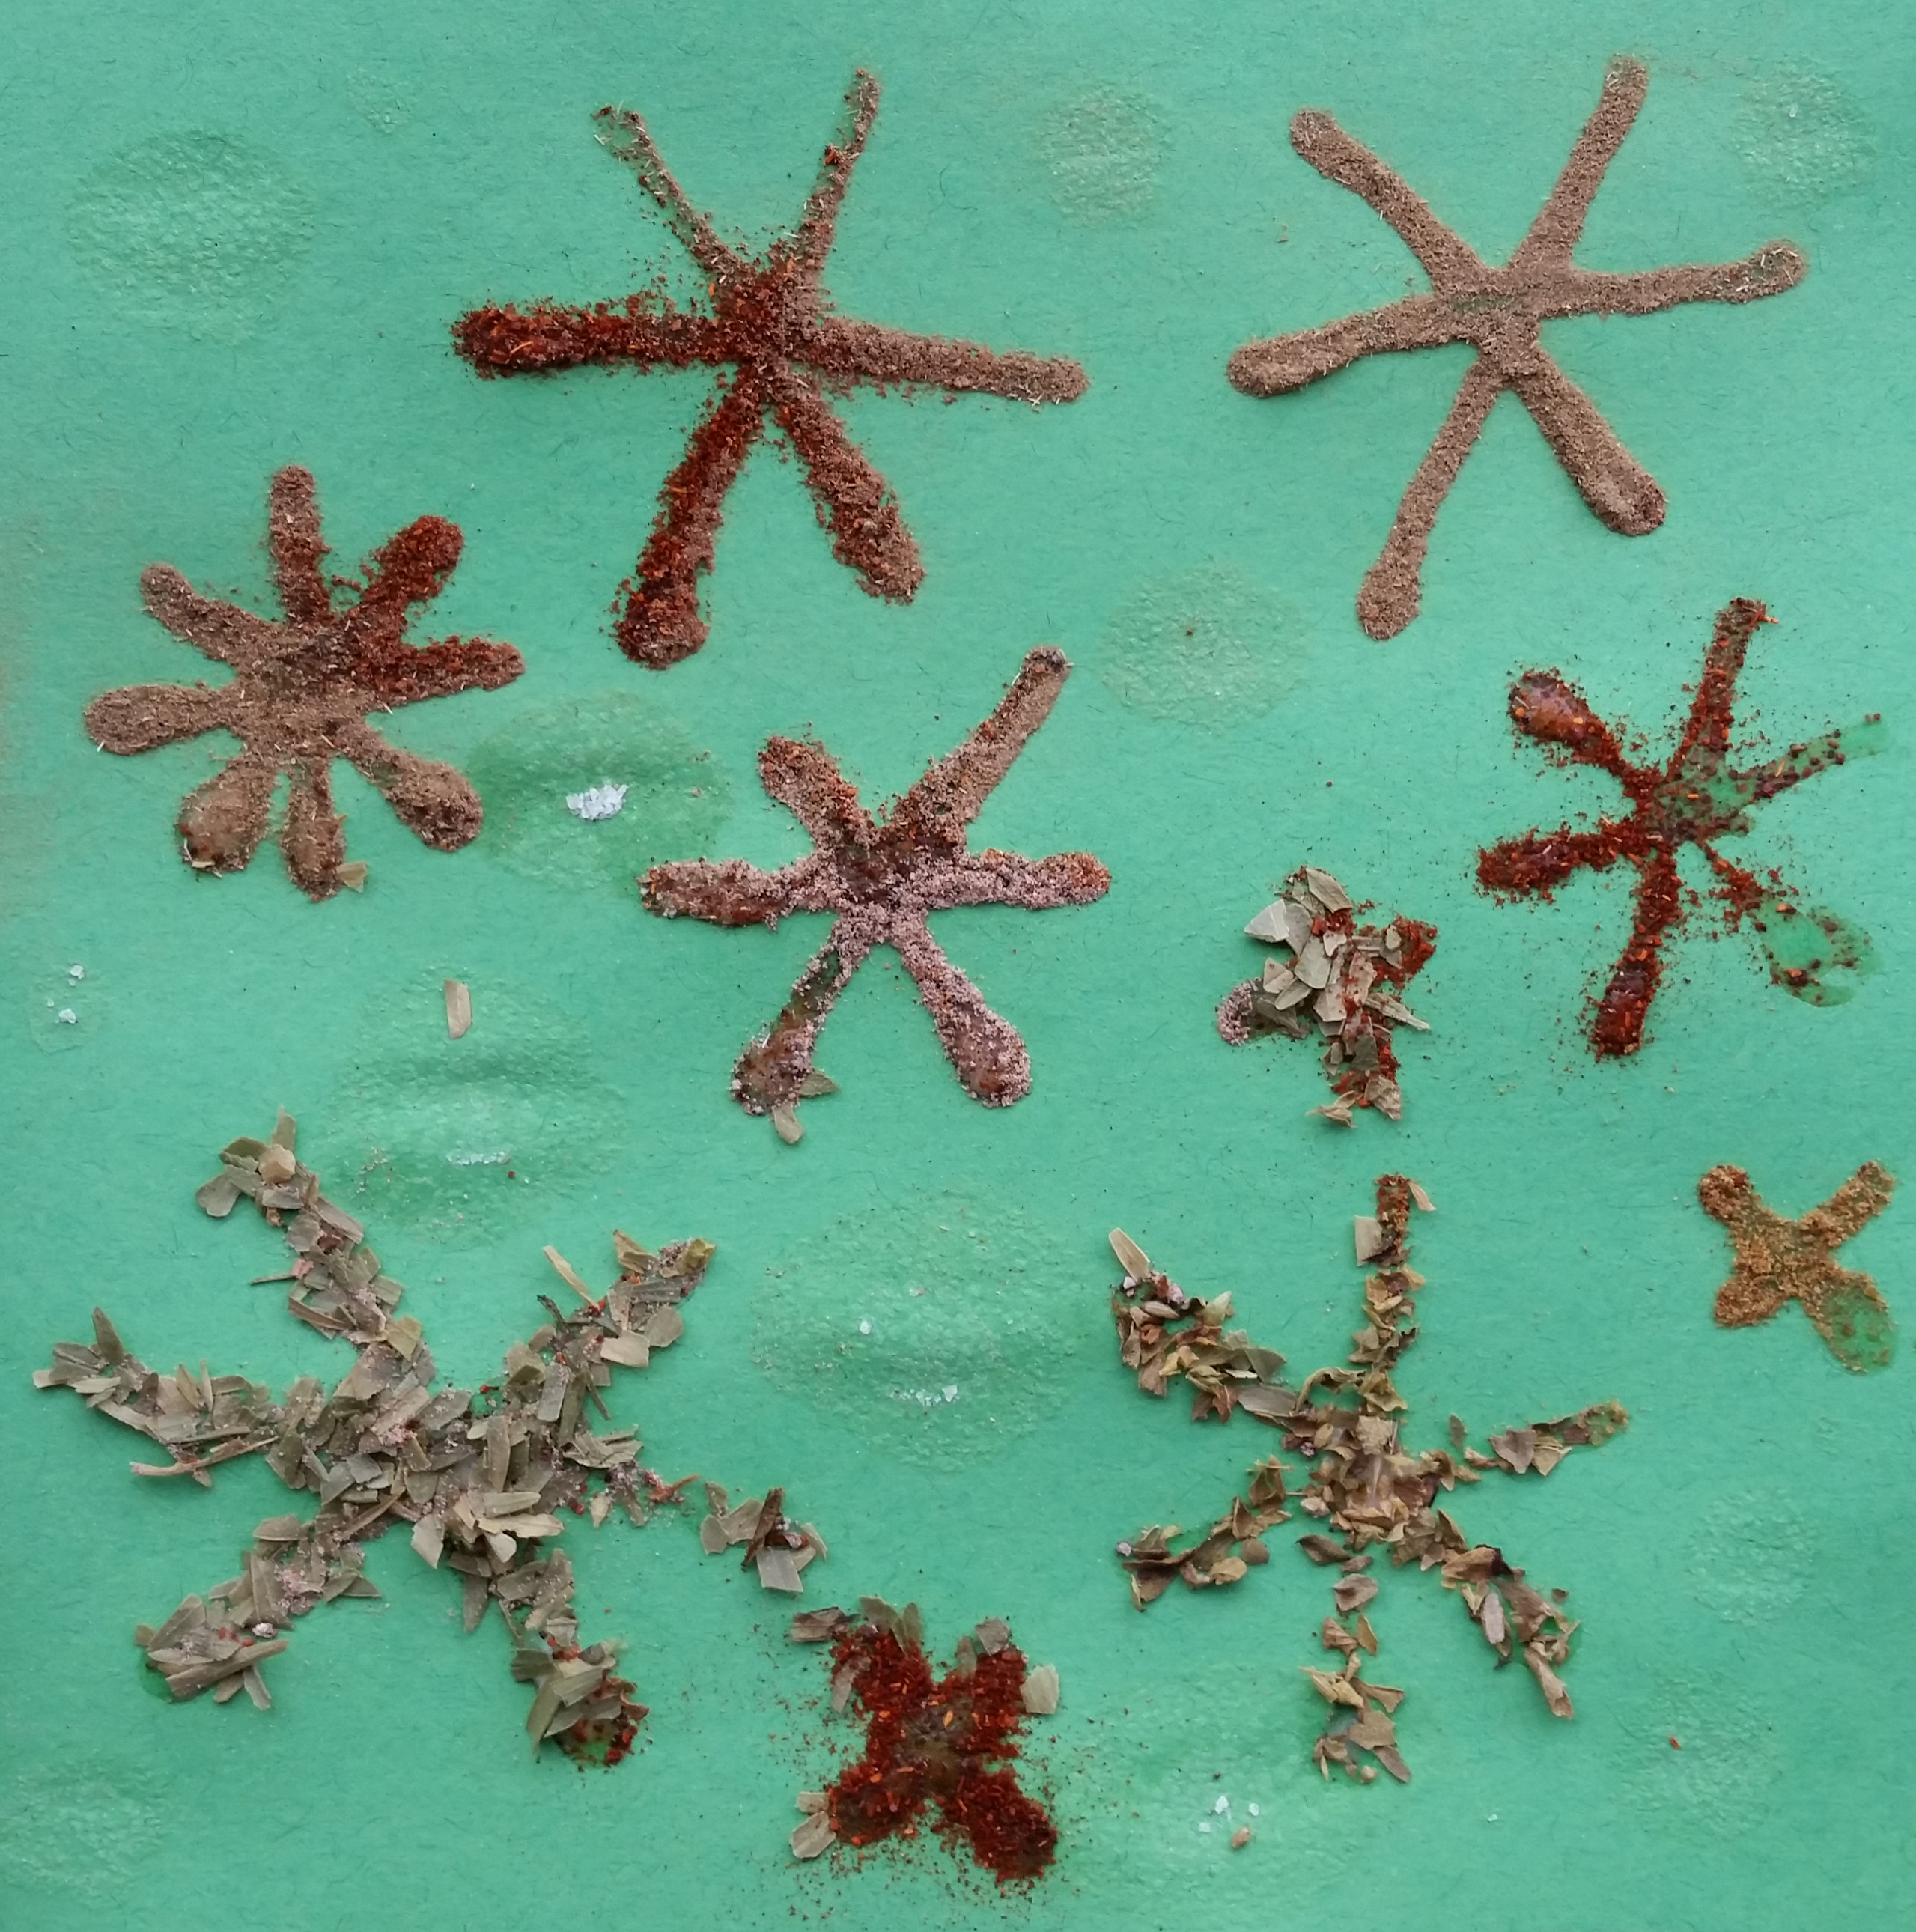
Want to add some sparkle? Glue salt crystals in some areas or paint salt water on the paper with a fine paintbrush or cotton swab. Like glue, you’ll want to use a light touch so the paper does not become too wet and wrinkled.

My daughters are teenagers, so they made an effort to make a picture of something recognizable. If you have younger children, they will probably make a picture that resembles abstract art. It doesn’t matter, because it will still smell wonderful! What’s important is that they make it themselves and have fun doing it.

PHOTO: Spice holiday card: Christmas tree.
My daughter used tarragon for the tree, crushed red pepper for the trunk and garland, whole cloves for ornaments, and turmeric to make the star.

After the glue is completely dry, gently shake the card over a bowl one final time to remove the loose spices. When you are finished working on this project, you can place all of the leftover spices from your work area into a bowl and place them in a room to make the air fragrant. 

One final step: don’t forget to write your message on the inside! You might say something clever like, “Seasoning’s Greetings,” “Merry Christmas Thyme,” “Have a Scent-sational Hanukkah,” or “Wishing You a Spicy New Year.” Don’t forget to sign your name!

A card like this does not fit into an envelope easily and is best hand-delivered. If you must mail it, cover the front with a piece of paper to protect it. Carefully pack the card with a stiff piece of cardboard in a padded envelope to reduce bending and crushing while it’s in transit. If you are delivering a small bundle to the post office, ask them to hand-cancel your cards (they’ll appreciate the tip).

I hope your special creations brighten someone’s day and fill them with memories of good times with family and friends!

Want more fun, craft projects for kids over the holidays? Check out our blogs on making Fruit and Veggie Prints, Wearable Indian Corn necklaces, and Bottle Cap Bouquets.


©2015 Chicago Botanic Garden and my.chicagobotanic.org

Top Five Reasons to Choose Nature Preschool

Anyone who reads the volumes of research can easily see all the reasons why a nature preschool is not just a real preschool, but should be a standard for all preschool environments to aspire to attain.

Here are my top five reasons why a nature preschool should be the choice of all parents when deciding on their child’s first preschool experience.

Growing and planting teaches a valuable lesson in change over time, and sticking with a project to see results that may take a while to be revealed.

No. 1: Children in nature preschools learn by doing and with hands-on activities.

You must be hands-on when you learn in nature. You cannot be a passive learner; you must engage. Most nature preschools do not put a heavy emphasis on early academics. Instead, they opt for a balanced curriculum that seeks to develop the “whole child”—i.e., cognitive, physical, social, emotional, and creative development.

According to Ken Finch, president and founder of Green Hearts (a conservation organization dedicated to restoring and strengthening the bonds between children and nature), “Nature preschool students truly learn how to learn…developing the curiosity and joy that should pervade all education, while practicing key social skills such as sharing, waiting one’s turn, and following simple directions.”

These are all principles that the National Association for the Education of Young Children endorses and embraces.

No. 2: Time learning in nature supports creativity and problem solving.

Many children spend time in preschool working on one-answer solutions. Their work is very cut and dry, limiting the amount of critical thinking or creativity needed for the answer. Play in nature allows children to try several solutions to a problem. Nature is unpredictable, and often, answers might not be what we would like, but we learn from this too. A great example is “Spike”, the titan arum that did not bloom here at the Chicago Botanic Garden. Was the anticipation and all the new knowledge that so many people learned while waiting a waste of time? Of course not! Spike went back to the greenhouses and is being studied. Our horticulturists have gained even greater knowledge of titan arum cultivation for Spike’s failure to bloom.

Stephen Kellert, social ecologist and senior research scholar at Yale University’s School of Forestry and Environmental Studies states, “Play in nature, particularly during the critical period of middle childhood, appears to be an especially important time for developing the capacities for creativity, problem-solving, and emotional and intellectual development.”

Children engaging with nature experience similar failures, and learn from them. They try new ways to solve problems, and find out more about why their solutions did not work for the next time. Nature allows for children to discover how to adapt.

No. 3: Time spent in nature helps reduce symptoms of ADHD.

PHOTO: Infographic of health benefits of children being active in nature.
This infographic created by the National Environmental Education Foundation is also a quick scan of facts about why being active in nature makes kids healthier. Click here to download or view larger.

Researchers Dr. Frances Kuo and Andrea Faber Taylor of the University of Illinois’ Landscape and Human Health Laboratory have dedicated themselves to studying the relationship between physical environment and wellness. They have done a number of studies in particular related to ADHD and time in nature. These studies have shown children with ADHD have improved concentration after time spent in nature. I have witnessed firsthand how children respond inside the classroom after spending time outside in nature. They really are ready to listen, concentrate, and settle into tasks either on their own or with others. Think about how you feel after you return from a walk or time outside in your garden—don’t you feel stress-free?

There are many other health benefits related to nature preschool. A good report to find out about more of them is Health Benefits to Children from Contact with the Outdoors and Nature

No. 4: Children who attend a nature preschool are better observers.

“Nature literacy awakens habits of perception (sensory awareness) and cultivates a rich vocabulary of search images (knowledge of place). Through these, our students connect to the natural world in a meaningful way.”—Fostering Outdoor Observation Skills, A Project of the Association of Fish and Wildlife Agencies’ North American Conservation Education Strategy 2011.

Children must take the time to listen for birds, look for small clues that animals might have come down a trail, and notice the differences between leaves on two different plants or trees. Observation in nature is not just about knowing the names for plants or creatures, but being able to recognize them when out on a hike.

Allowing time to examine the outdoors in detail makes children better overall observers, and better able to focus in class.

No. 5: Nature Preschool fosters an appreciation of the world around children.

When a child engages in an activity of any kind, an appreciation develops. Think of children exposed to various genres of music; they become better attuned to musical nuances. It is the same for children who spend time on a regular basis in nature. They see the beauty, explore the changes, and learn to enjoy their time outside. This appreciation is carried over to adulthood.

“Research on human development and learning has long established that the early childhood years are a crucial period in the formation of lasting adult values. Could we do any better than to ensure that one of those values is a deep love for the outdoors?”

“Children enrolled in a nature-focused preschool for even a single year, will probably get more direct contact with the outdoors than they will have in all their subsequent years of K-12 schooling.”Nature-Focused Preschools: Putting the Heart First in Environmental Education by Ken Finch

It is the frequency of explorations in nature that are probably the greatest benefit of a nature preschool.

In her article, “The Wonders of Nature: Honoring Children’s Way of Knowing,” Ruth Wilson, Ph.D., notes, “Early experiences with the natural world have also been positively linked with the sense of wonder. This way of knowing, if recognized and honored, can serve as a lifelong source of joy and enrichment, as well as an impetus, or motivation, for further learning.

Sadly, the ability to experience the world…as a source of wonder tends to diminish over time. This seems to be especially true in Western cultures, where for the sake of objective understandings; children are encouraged to focus their learning on cognitive models, rather than on first-hand investigations of the natural environment.”

Further reading and resources:

As a parent, can you choose a learning outcome for your child that is more important than that “sense of wonder?” Even for an adult, wonder is so important in order to be a lifelong learner.

As you make the choice of a preschool for your child, I hope that you will take some time to read a bit more on nature preschool values. Are these indoor/outdoor classrooms just the latest new kid on the block, or is there more to this trend? Which ways do you find best for children to learn?

Online registration for the Garden’s 2016 Nature Preschool program begins December 7, 2015. Save the date: Open Houses for the program will be held January 14 and April 7. Click here for more information on the program.


©2015 Chicago Botanic Garden and my.chicagobotanic.org

An Ode to OAKtober!

Did you know that pin oaks hold their anthocyanin-rich leaves through the fall? Or that the oldest oak at the Chicago Botanic Garden is a white oak that lives near the Lake Cook entrance? Download our infographic below to learn more about the popular and beautiful native oak trees we are celebrating this October and beyond.

Oaktober infographic to color


©2015 Chicago Botanic Garden and my.chicagobotanic.org

Save the Earth, Watch Dandelions Grow

I am often asked, “What can kids do to help the Earth?”

There is a standard litany of “Reduce, Reuse, Recycle” suggestions that almost everyone can tell you: recycle your garbage, turn the lights off when you leave a room, turn the water off while brushing your teeth, and so forth. 

Earth
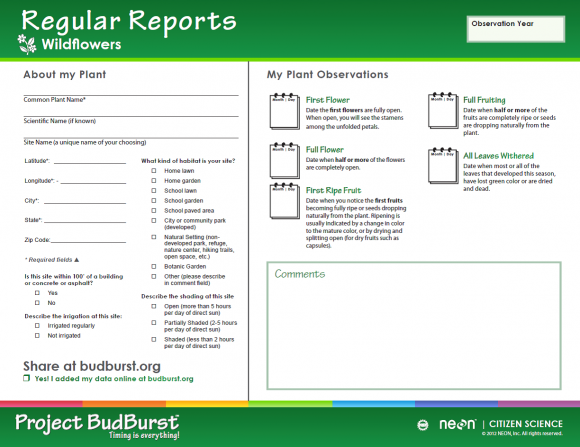
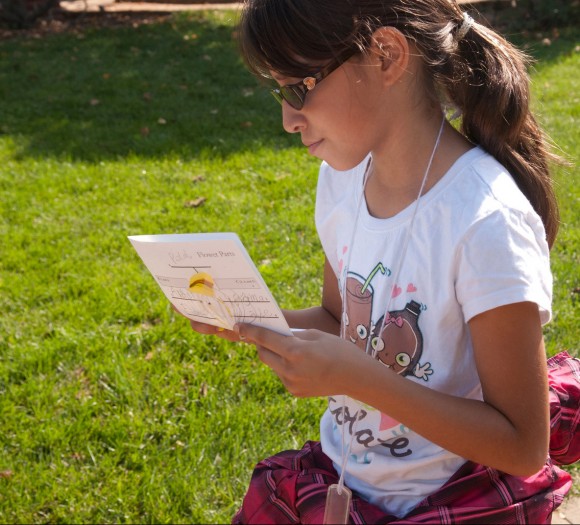
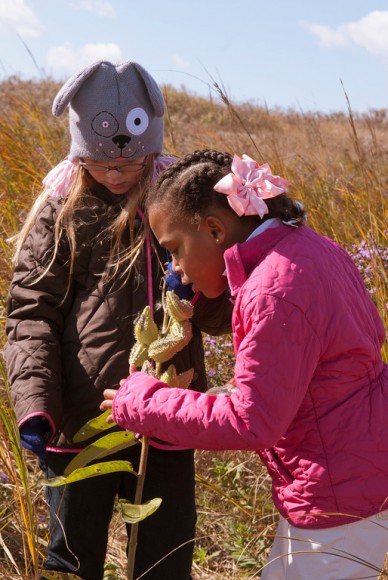
We’ve been saying these same things for decades. And while they’re great ideas, they’re things we should all be doing. It’s time to give kids a chance to do something bigger. During Climate Week this year, I am offering a different suggestion: Watch dandelions grow and participate in Project BudBurst.

PHOTO: Dandelions.
These happy dandelions could contribute valuable information to the science of climate change.

Project BudBurst is a citizen science program in which ordinary people (including kids 10 years old and up) contribute information about plant bloom times to a national database online. The extensive list of plants that kids can watch includes the common dandelion, which any 10-year-old can find and watch over time.

Why is this an important action project?

Scientists are monitoring plants as a way to detect and measure changes in the climate. Recording bloom times of dandelions and other plants over time across the country enables them to compare how plants are growing in different places at different times and in different years. These scientists can’t be everywhere watching every plant all the time, so your observations may be critical in helping them understand the effects of climate change on plants.

What to Do:

1. Open the Project Budburst website at budburst.org and register as a member. It’s free and easy. Click around the website and read the information that interests you.

2. Go to the “Observing Plants” tab and print a Wildflower Regular Report form. Use this form to gather and record information about your dandelion. 

3. Find a dandelion in your neighborhood, preferably one growing in a protected area, not likely to be mowed down or treated with weed killers, because you will want to watch this plant all year. It’s also best if you can learn to recognize it without any flowers, and that you start with a plant that has not bloomed yet.

4. Fill in the Wildflower Regular Report with information about the dandelion and its habitat.

Common Plant Name: Common dandelion

Scientific Name: Taraxacum officinale

Site Name: Give the area a name like “Green Family Backyard” or “Smart Elementary School Playground”

Latitude and Longitude: Use a GPS device to find the exact location of your dandelion. (Smartphones have free apps that can do this. Ask an adult for help if you need it.) Record the letters, numbers, and symbols exactly as shown on the GPS device. This is important because it will enable the website database to put your plant on a national map.

Answer the questions about the area around your plant. If you don’t understand a question, ask an adult to help you.

PHOTO: This is a printout from the Project BudBurst Website, that asks about the location of the plant and provides places to record bloom times, as well as other comments.
The BudBurst Wildflower Regular Report is easy to use and will guide you through the process.
girl with data sheet
After you find a dandelion you want to watch, record information about the location of the plant.

5. Now you’re ready to watch your dandelion. Visit it every day that you can. On the right side of the form, record information as you observe it.

budburst notebook

  • In the “First Flower” box, write the date you see the very first, fully open yellow flower on your dandelion.
  • As the plant grows more flowers, record the date when it has three or more fully open flowers.
  • Where it says “First Ripe Fruit,” it means the first time a fluffy, white ball of seeds is open. Resist the temptation to pick it and blow it. Remember, you are doing science for the planet now!
  • For “Full Fruiting” record the date when there are three seedheads on this plant. It’s all right if the seeds have blown away. It may have new flowers at the same time.
  • In the space at the bottom, you can write comments about things you notice. For example, you may see an insect on the flower, or notice how many days the puffball of seeds lasts. This is optional.
  • Keep watching, and record the date that the plant looks like it is all finished for the year—no more flowers or puffballs, and the leaves look dead.
  • When your plant has completed its life cycle, or it is covered in snow, log onto the BudBurst website and follow directions to add your information to the database.


Other Plants to Watch

You don’t have to watch dandelions. You can watch any of the other plants on the list, such as sunflower (Helianthus annuus) or Virginia bluebell (Mertensia virginica). You can also watch a tree or grass—but you will need to use a different form to record the information. Apple (Malus pumila), red maple (Acer rubrum), and eastern white pine (Pinus strobus) trees are easy to identify and interesting to watch. If you are an over-achiever, you can observe the butterfly milkweed (Asclepias tuberosa) bloom times and do citizen science research for monarchs at the same time! (The USDA Forest Service website provides information about that; click here for more information.) 

PHOTO: Two girls are looking closely at a milkweed plant that has about eight green seed pods.
These students are observing a milkweed that is in the “First Ripe Fruit” stage.

For the past two springs, educators at the Chicago Botanic Garden have taught the fifth graders at Highcrest Middle School in nearby Wilmette how to do Project BudBurst in their school’s Prairie Garden. The students are now watching spiderwort, red columbine, yellow coneflower, and other native plants grow at their school. Some of these prairie plants may be more difficult to identify, but they provide even more valuable information about climate.

So while you are spending less time in the shower and you’re riding your bike instead of asking mom for a ride to your friend’s house, go watch some plants and help save the planet even more!


©2015 Chicago Botanic Garden and my.chicagobotanic.org

Easy Peas-y: Planting Pea Seeds with Little Sprouts

Plant, water, and grow! Whether you are a parent, teacher, or caregiver, teaching children to plant seeds is a simple and authentic way to help them engage with nature. It’s an activity that the littlest of sprouts can do “all by myself,” or at least with minimal help from you.

PHOTO: Little Diggers pea planting in the raised beds.
Growing future gardeners in the Regenstein Fruit & Vegetable Garden

Planting seeds leads to discussions about what seeds and plants need to grow and how food gets to our tables. Watering is a simple chore young children are capable of doing; it teaches them about responsibility and helps them feel they are making a contribution to the family or classroom. 

Students from our Little Diggers class, ages 2 to 4, planted peas indoors in mid-March and transplanted them outside into the raised beds in the Regenstein Fruit & Vegetable Garden in mid-April. Come follow the steps we took to get there.

March: Planting the Pea Seeds Indoors

Supply List:

  • Seeds
  • Soilless potting mix or seed-starting potting mix in a wide-mouth container
  • Plant pots (plastic or biodegradable, roughly 2.5 inches in diameter)
  • Trowels, spray bottles, or watering cans
  • Plastic seedling tray with lid

Set-up Time: 10 minutes

Activity Time: 10–40 minutes of actual planting (depending on the size of the group)

Appropriate for Ages: 2 and up

Clean-up Time: 10–15 minutes

PHOTO: Large pea seeds are easy for small fingers to grasp.
Large pea seeds are easy for small fingers to grasp.
PHOTO: Use this kind of plastic seedling tray and lid.
Here I am modeling the latest in seedling trays. You can purchase these and our other supplies at your local garden center or home improvement store.

Select seeds that are big—the smaller the hands, the bigger the seed should be—and quick to sprout, or germinate. Also consider the amount of space the mature plants will occupy, and the time of year you are planting. Some seeds can be planted during the cool spring, while others should go in the ground once the threat of frost has passed.

We chose ‘Tom Thumb’ pea seeds because they are large enough for little hands to easily manipulate, they germinate in 7–14 days, they thrive in the cool spring weather, and they only grow to be 8 inches tall and 8 inches wide, making them great for small-space gardens and containers.

Tip: Some other large seeds suitable for little hands are sunflowers, beans, nasturtium (edible flower), pumpkin, and other squash. For more details about how and when to plant these seeds visit www.kidsgardening.org/node/101624.

PHOTO: A low, wide trug full of soil makes filling pots easy for younger gardeners.
A low, wide trug full of soil makes filling pots easy for younger gardeners.
PHOTO: Watering the seeds in is the best part of planting.
Watering in the seeds is the best part of planting.
 

Set out the potting mix in a wide-mouth container such as a flexible plastic tub, sand bucket, or cement mixing tray on the ground. Have trowels, pots, seeds, and spray bottles ready.

Tip: A soil container with a wide opening will lead to less soil on the ground. Also, more children will be able to plant at the same time.

Using a trowel, fill the pot with soil. Set two pea seeds on the soil and push them down ½- to 1-inch deep. Then cover the seeds with soil. Spray with a spray bottle until the soil is saturated.

Tip: Planting depth will depend on the type of seeds you are planting. Read the back of the seed packet for details.

Finally, each child should label their pot. We used craft sticks to easily identify each child’s plant.

Tip: Pot up extra seeds in case some don’t germinate. I potted up 10–15 extras. Every child needs to feel successful and have peas to transplant when the time comes. Once kids have planted seeds a few times and are a little older, you won’t need to pot up extras. Having seeds fail is the next great gardening lesson for more experienced young gardeners.

PHOTO: Our young grower adds his pot to the tray. It's a good idea to pot up extra seeds in case some don’t germinate.
Our young grower adds his pot to the tray. It’s a good idea to pot up extra seeds in case some don’t germinate.
PHOTO: Craft sticks easily identify each child’s plant. Keeping the top lid on slightly open helps air circulate around the plantings, so they don't grow fungus.
Craft sticks easily identify each child’s plant. Keeping the top lid on, but slightly open, helps air circulate around the plantings, so they don’t grow fungus.

Put the containers on the plastic tray and cover with a clear plastic lid. This will keep moisture in and will require less frequent watering. Allow the soil surface to dry out slightly between watering. Using the misting setting on the sprayer works well because it doesn’t create a hole in the soil and expose the seed like a watering can will.

Tip: Watch for white fungus growing on the soil surface. If this occurs, remove the plastic lid. This will kill the fungus and promote germination. If you will be away from the classroom or home for a few days, put the plastic lid on so the soil doesn’t dry out. Remove it when you return.

Tip: Peas don’t respond well to transplanting, so we planted the seeds in biodegradable pots to avoid this problem. These pots break down in the soil, allowing the roots to continue to grow undisturbed.

April: Transplanting the Pea Plants into the Garden

Supply List:

  • Pea plants
  • Trowels
  • Spray bottles or watering cans

Set-up Time: 10 minutes

Activity Time: 20–30 minutes or more (depending of the size of the group and the number of helpers)

Appropriate for Ages: 2 and up

Clean-up Time: 10 minutes

Choose a sunny location that receives at least six hours of direct sunlight every day and has well-drained soil. We planted our peas in the raised beds at the Fruit & Vegetable Garden.

Bring all the supplies out to the site. Have each child choose where they would like to dig their hole. Pass out a trowel and plant to each child. Dig a hole as deep as the soil in the pot. Place the plant, pot and all, in the hole. Fill in the space around the plant with soil and water the plants.

Check the peas daily and water them with a watering can or hose when the soil is slightly dry. About 50 – 55 days after planting, these shelling peas will be ready to harvest and eat! Come see the plants that the students of our Little Diggers class planted in the raised beds, just south of the orchard at the Fruit & Vegetable Garden!

PHOTO: Watering seedlings in the raised beds.
Remember to water in your seedlings when you put them in the ground!
PHOTO: Watering seedlings in the raised bed.
Sunshine and a good squirt of water will help this pea seedling grow!

Direct Sowing: Easy Peas-y Approach

PHOTO: Direct sowing is the easiest approach—and often the most successful with early spring vegetables. Not to mention: it's fun.
Direct sowing is the easiest approach—and often the most successful with early spring vegetables. Not to mention: it’s fun.

As a working parent, I chose this approach with my almost three-year-old. All you really need is a sunny spot with well-drained soil, seeds (we used ‘Tom Thumb’ peas because we have a small garden), a small shovel (trowel) and water. Choose a sunny spot for planting (6–8 hours of direct sun).

First I showed him how to draw lines in the soil with his trowel (they should be ½– to 1-inch deep). Then he dropped seeds along the lines. I wasn’t concerned about spacing 2 inches apart as recommended on the seed packet because I can always thin them out once the seeds start to grow. He covered the seeds up and watered them with the hose. Every evening, we enjoy checking to make sure the soil is damp.

Tip: If you’re little one is getting impatient, these peas can be harvested early and eaten, pod and all, like snow peas!


©2015 Chicago Botanic Garden and my.chicagobotanic.org