Join us for a new program at the Chicago Botanic Garden on Saturday, May 9: World Bonsai Day!
Observed on the second Saturday in May, this day was established by the World Bonsai Friendship Federation (WBFF) in 2010 to honor WBFF founder and bonsai master Saburo Kato’s contributions to the world of bonsai, and to bring all bonsai enthusiasts together for a day to promote bonsai and friendship throughout the world.
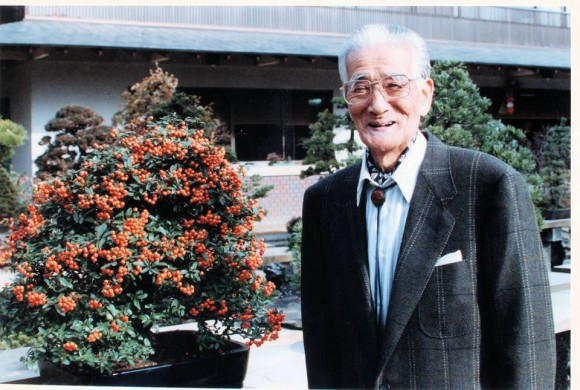
The late bonsai master Saburo Kato
The oldest son of bonsai master Tomekichi Kato, Saburo Kato followed in his father’s footsteps cultivating bonsai, and at his father’s death, became the third-generation owner of Mansei-en Bonsai Garden in Japan, one of the most famous bonsai nurseries in the world. As an author, teacher, and poet, Kato inspired countless people throughout the world to learn the art of bonsai cultivation. He believed so strongly that bonsai could bring peace throughout the world that he founded the WBFF.
In 2014, the following organizations celebrated World Bonsai Day: National Bonsai & Penjing Museum (at the United States National Arboretum), the North Carolina Arboretum, the Morikami Museum and Japanese Gardens, the Pacific Bonsai Museum, and Rosade Bonsai Studio.
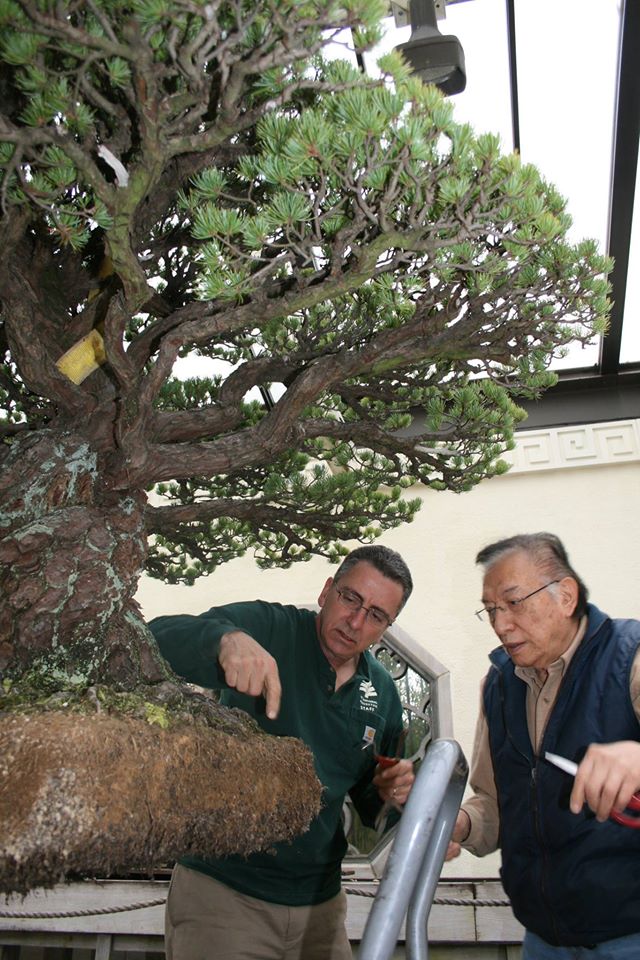
Jack Sustic (left), curator, National Bonsai & Penjing Museum (at the United States National Arboretum), with a volunteer, World Bonsai Day 2014
Curator Chris Baker of the Chicago Botanic Garden trims a bonsai, under the watchful eyes of Jack Sustic (far left) and bonsai master Harry Hirao (seated).
Join me, curator Chris Baker, and some of our bonsai volunteers in the activities below on World Bonsai Day at the Chicago Botanic Garden. The stages of growing bonsai will be featured with specific examples. Explore the tools, pots, wire, etc., used to practice bonsai, and get information on upcoming bonsai classes.
Program Schedule:
10 a.m. to 12:30 p.m.: Demonstration: Bonsai Tree Styling I will demonstrate how major tree shaping is done, with a tree being formed into a bonsai.
1 p.m.: Spring Garden Walk: Bonsai Collection Highlights During the scheduled Spring Garden Walk, I’ll be showcasing selections from the Garden’s Bonsai Collection and pointing out special spring highlights. (Note: due to the recent warm weather, the Korean lilac, wisteria, crabapple, or azalea bonsai may be in bloom.)
1 to 4 p.m.: Demonstration: Bonsai Landscape Planting I will demonstrate how I create a “landscape planting” with multiple bonsai on a rock slab.
Americans are getting comfortable with the idea of edible flowers. But how—aside from sugar-candied flowers for bakers—do you use them?
We asked horticulturist Nancy Clifton, who brought five really fresh ideas to the table.
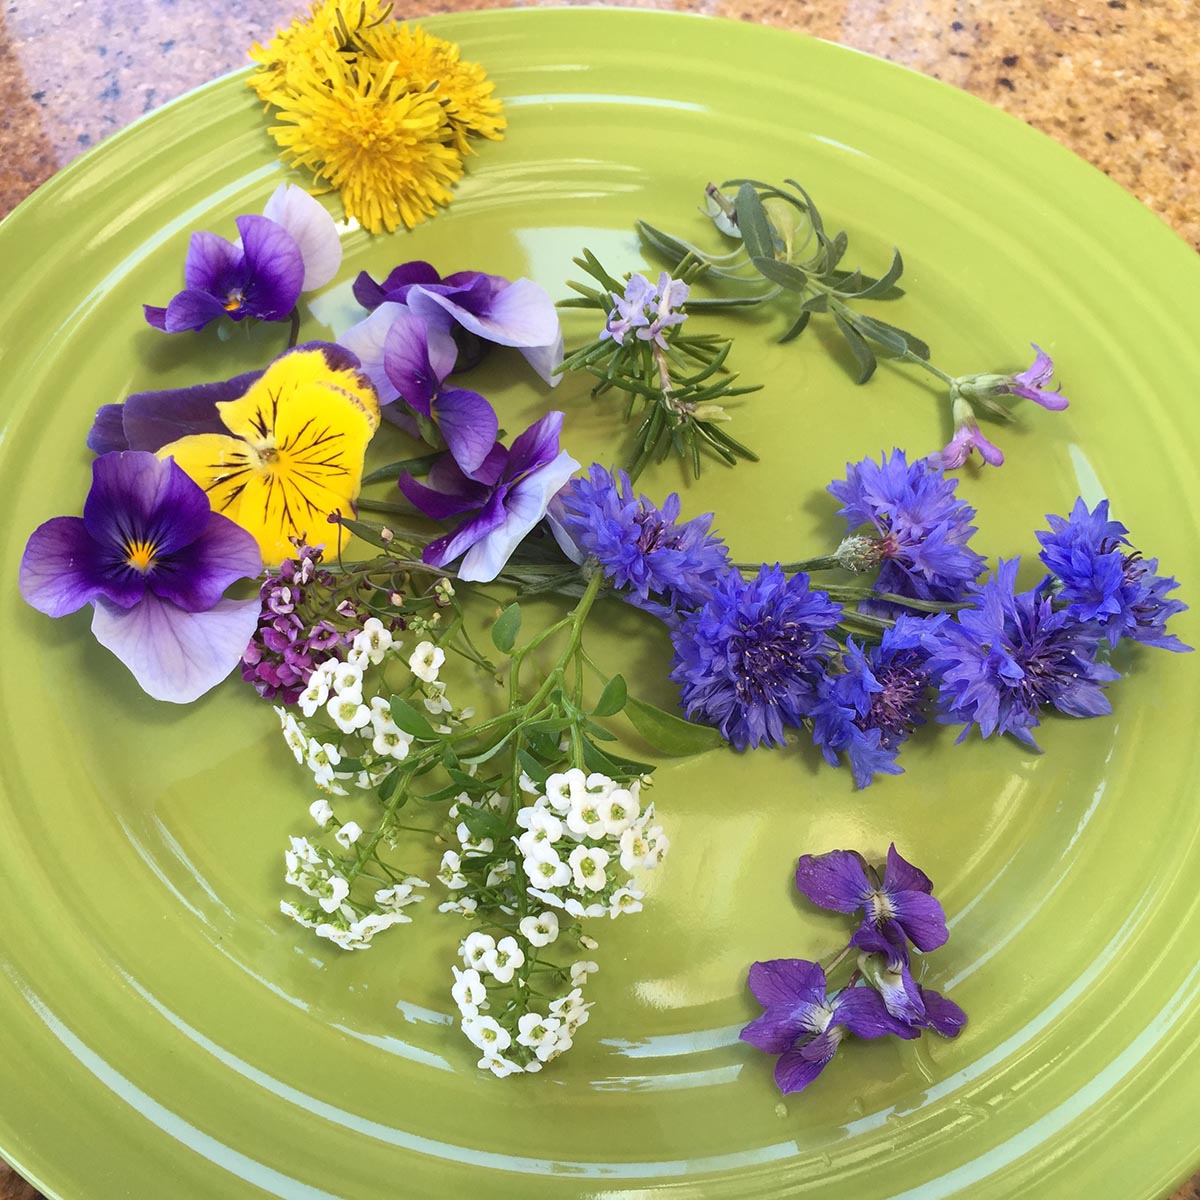
Today’s blue plate special: flavorful greens finished with blue flower petals.
1. A modern salad: greens + color
Gone are the days of a plain side salad on a white plate: today, even a tiny saladette is vibrant with color and flavors. Start with a blue (or green) plate. Add a piquant mix of salad greens (and reds), including baby chards and chois, and leafy herbs like parsley and cilantro. Then finish with flower petals: snip blue bachelor button petals to highlight that plate, dot white sweet alyssum among the greens, and trade the traditional sprig of parsley for blooming sage and rosemary.
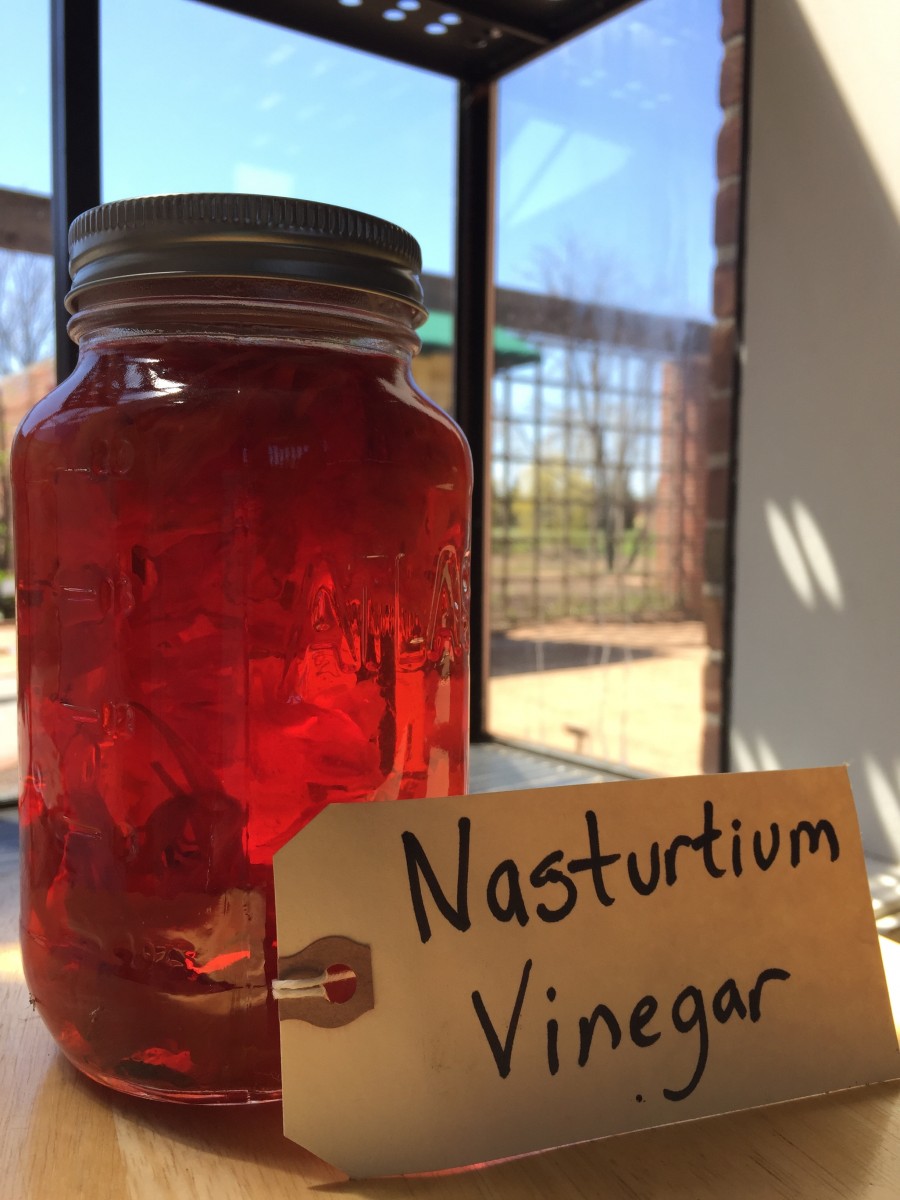
Nasturtium or chive flowers make a lovely pink vinegar. For a fruitier flavor, pour white vinegar over one cup of gently washed fresh raspberries.
2. Flowers are the new dressing
You’ll need a dressing for that salad above: Nancy’s flower-based vinegar recipe couldn’t be easier:
Wash one cup of nasturtium or chive flowers and let dry.
Gently add flowers to a sterile quart jar. Pour in plain white or white wine vinegar to cover.
Let steep for two weeks in a cool, dark spot.
Strain vinegar into a fresh jar to use. Note how flowers have lost their color to the vinegar.
Such beautiful pink color! Sprinkle as is onto leafy greens, or mix with oil and season to taste.
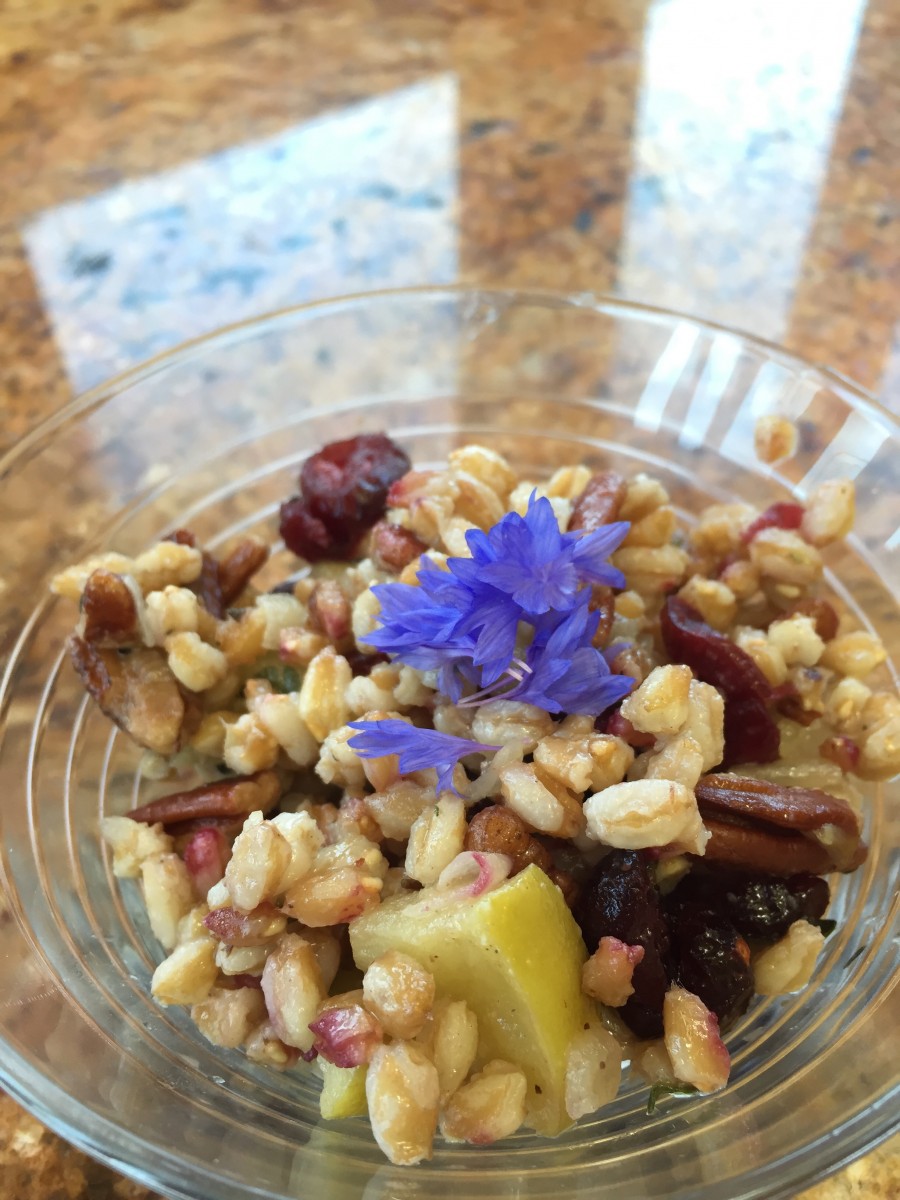
Blue bachelor buttons, red cranberries, and white apples: a red/white/blue salad for the Fourth of July!
3. Hello, Farro!
Also called wheatberry, farro makes a delicious base for a “superfood” salad chock full of fruits and nuts and topped with flowers. Nancy notes that all amounts can be adjusted to your preference.
To begin, cook one cup of farro according to directions (Nancy suggests substituting apple cider vinegar for part of the cooking liquid). While the farro is cooling (about 3 cups cooked), make the dressing:
Toast ½ cup pecans in an oven or fry pan until fragrant. Set aside to cool, then chop.
Sauté one small (or ½ large), chopped red or yellow onion in olive oil until translucent.
Add one medium, unpeeled, chopped Granny Smith or gala apple to pan. Continue to sauté for 3 to 4 minutes.
Remove from heat. Stir in fresh thyme (leaves of 2 sprigs) and ½ cup dried cranberries.
Dress with a mix of 3 tablespoons apple cider vinegar and 2 to 3 tablespoons olive oil, seasoned to taste.
Combine farro with the sautéed mix.
Snip bachelor button or calendula petals and sprinkle over the top.
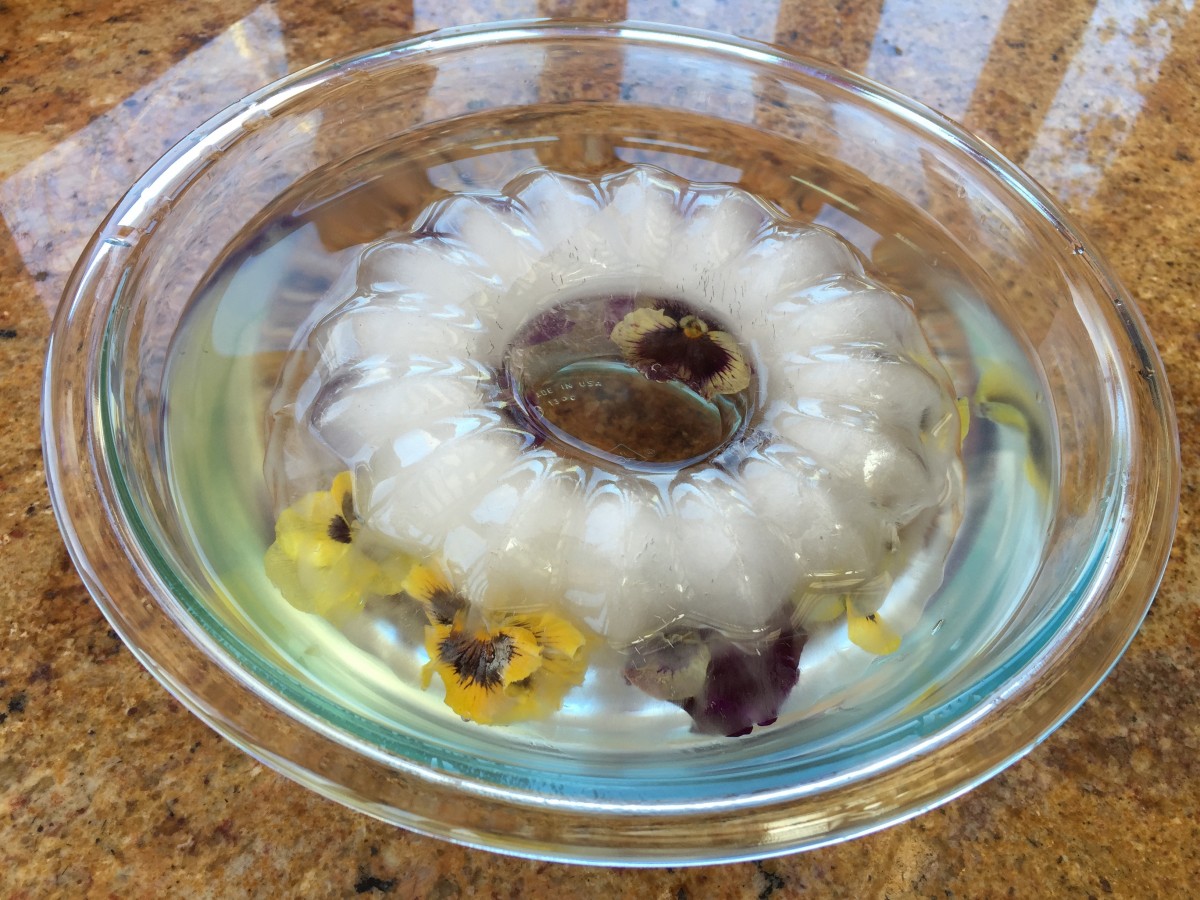
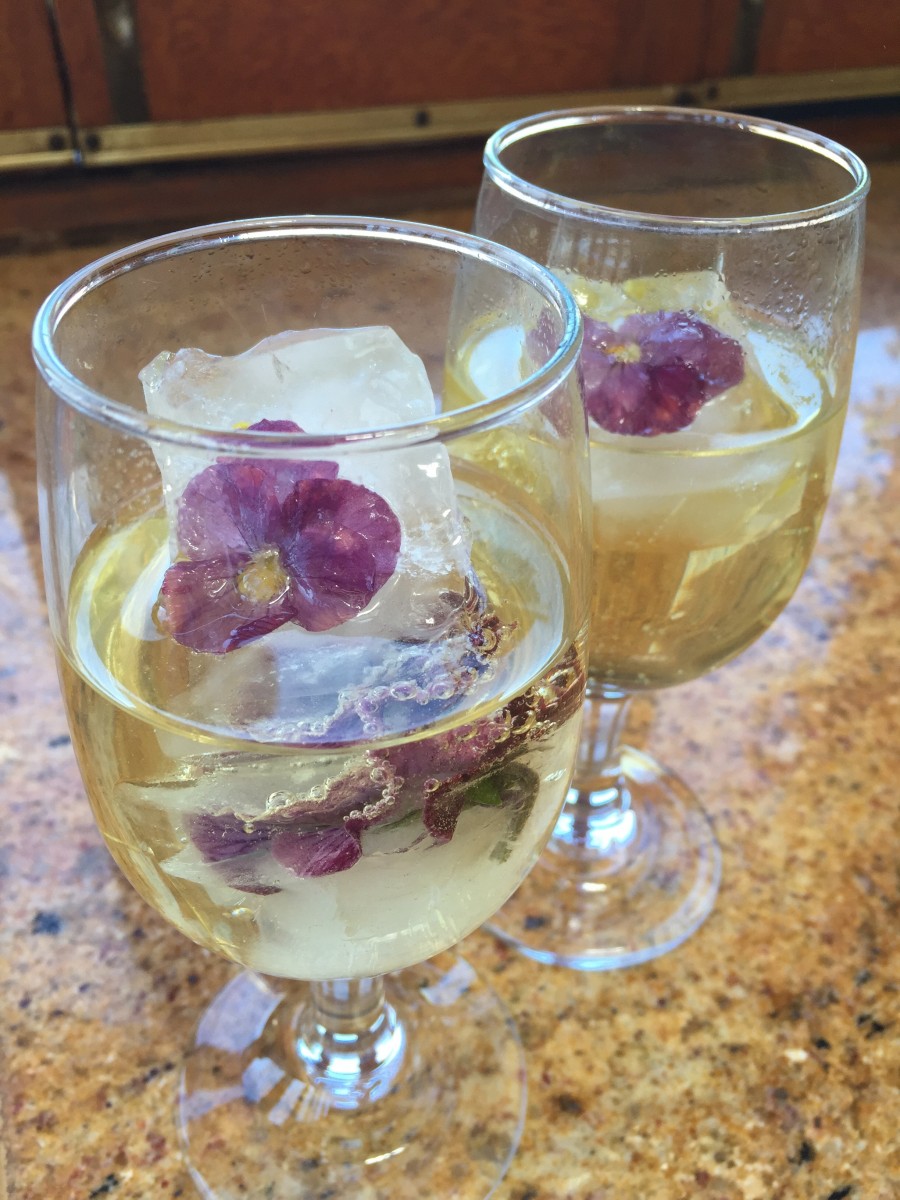
Summer weddings, showers, and graduations call for a flower-spiked punch.Nancy likes the look of fresh ginger ale studded with a flower that floats.
4. Flower floats
In the 1950s and ’60s, no punch bowl was presented without an ice ring. Nancy charmingly updates the idea for a homemade lemonade or champagne brunch punch, using fresh flowers. Try pansies or violets, or a mix of flowers and fruits, such as calendula petals with strawberries or bachelor buttons with blueberries.
A crazy good ice tip: to make clear ice cubes (rather than cloudy) or ice rings, use distilled water or filtered bottled water—or boil and cool the water twice before adding to ice mold or trays.
Line a bundt pan or jello mold ring with gently washed and dried pansies.
Gently fill with water. The pansies will float to the top.
Freeze.
When ready to use, dip the mold into a larger bowl holding an inch or two of hot water, which will loosen the ice ring.
Invert and set ice ring into punch bowl. (Right side up or upside down? Either works.) Pour in punch or beverage of choice.
Floral ice cubes are great for summer parties, too: adjust the above directions for your ice cube trays.
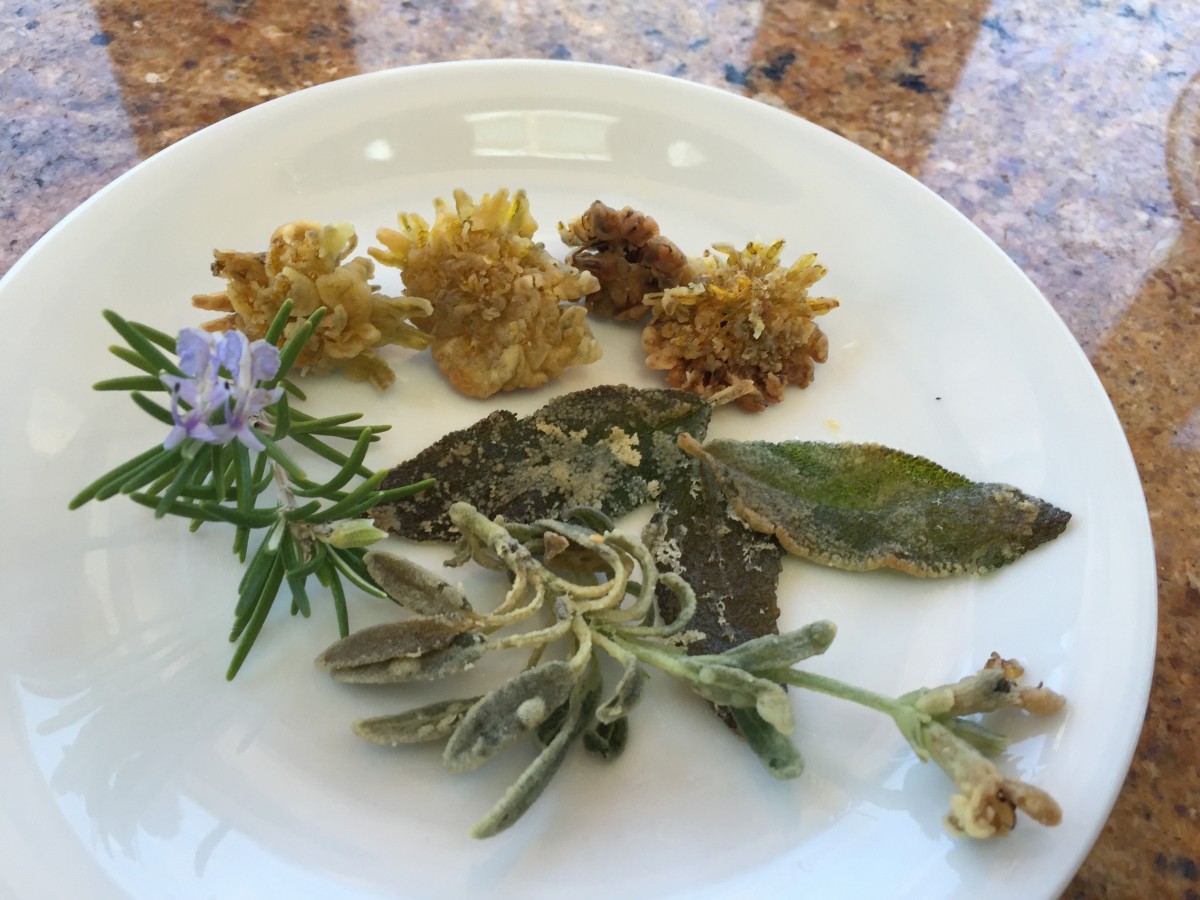
How do they taste? “Like mushrooms,” Nancy says. Dandelions are great as a conversation-sparking finger food!
5. Deep-fried dandelions
We didn’t believe it, either, but Nancy’s how-to-fry-a-dandelion demo changed our minds forever about everyone’s formerly least-favorite flower.
Pick freshly-bloomed dandelions (just the blossom, no stem) from a trusted, chemical-free site.
Gently wash the blossoms. While moist, lightly flour each flower (shake with ½ cup seasoned flour in a zip-lock bag).
Heat ¼-inch of olive oil in a small fry pan.
Gently fry flowers, turning delicately, until golden brown.
Drain on a paper towel. Sprinkle lightly with salt. Fry fresh sage leaves alongside dandelions, then crumble both on salads.
Next time you’re out at the Regenstein Fruit & Vegetable Garden, check out the spring edible flower bed in the Small Space area, where sweet alyssum, calendula, and dianthus are set off by towers of climbing peas for pea shoots—the new foodie rage!
Use common sense before eating flowers.
Know your flowers! Grow your own chemical-free flowers; don’t use unfamiliar flowers or those from non-organic sources. Our Plant Information staff has a good write-up about the difference between edible/inedible, plus a list of flower suggestions. More questions about what’s edible and what’s not? Call our Plant Information Service at (847) 835-0972.
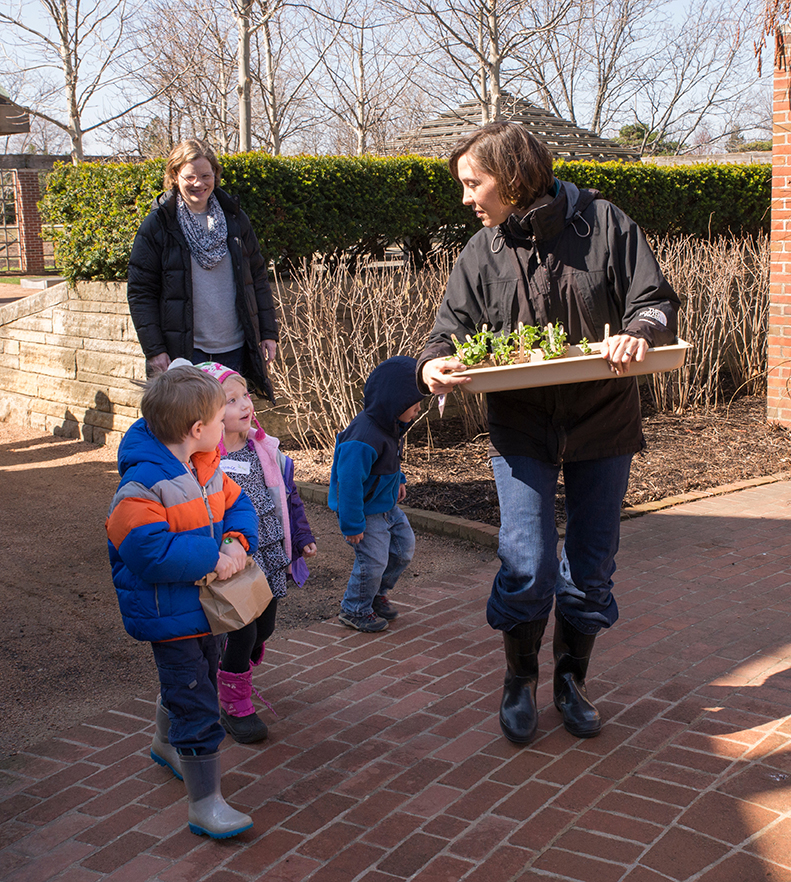
Plant, water, and grow! Whether you are a parent, teacher, or caregiver, teaching children to plant seeds is a simple and authentic way to help them engage with nature. It’s an activity that the littlest of sprouts can do “all by myself,” or at least with minimal help from you.
Growing future gardeners in the Regenstein Fruit & Vegetable Garden
Planting seeds leads to discussions about what seeds and plants need to grow and how food gets to our tables. Watering is a simple chore young children are capable of doing; it teaches them about responsibility and helps them feel they are making a contribution to the family or classroom.
Students from our Little Diggers class, ages 2 to 4, planted peas indoors in mid-March and transplanted them outside into the raised beds in the Regenstein Fruit & Vegetable Garden in mid-April. Come follow the steps we took to get there.
March: Planting the Pea Seeds Indoors
Supply List:
Seeds
Soilless potting mix or seed-starting potting mix in a wide-mouth container
Plant pots (plastic or biodegradable, roughly 2.5 inches in diameter)
Trowels, spray bottles, or watering cans
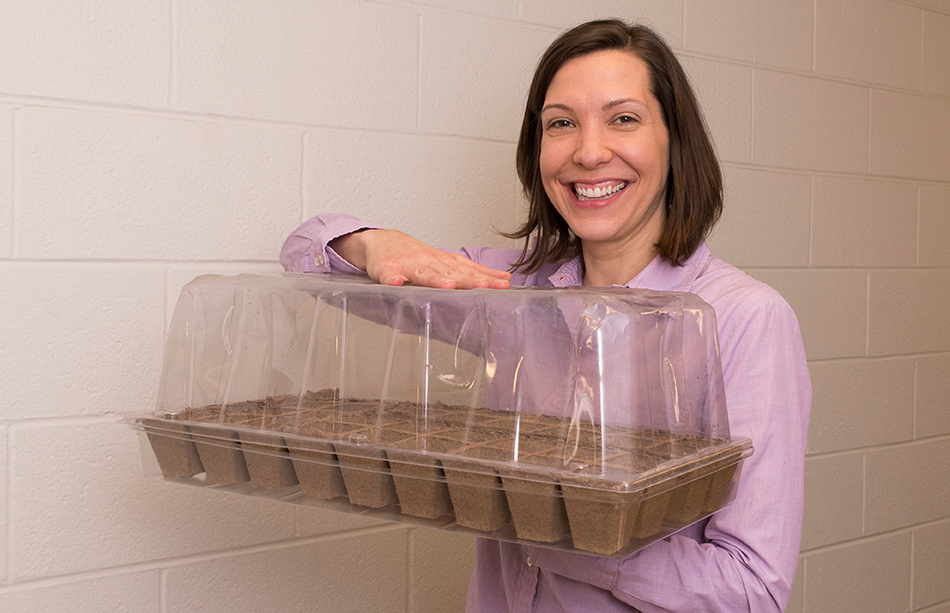
Plastic seedling tray with lid
Set-up Time: 10 minutes
Activity Time: 10–40 minutes of actual planting (depending on the size of the group)
Appropriate for Ages: 2 and up
Clean-up Time: 10–15 minutes
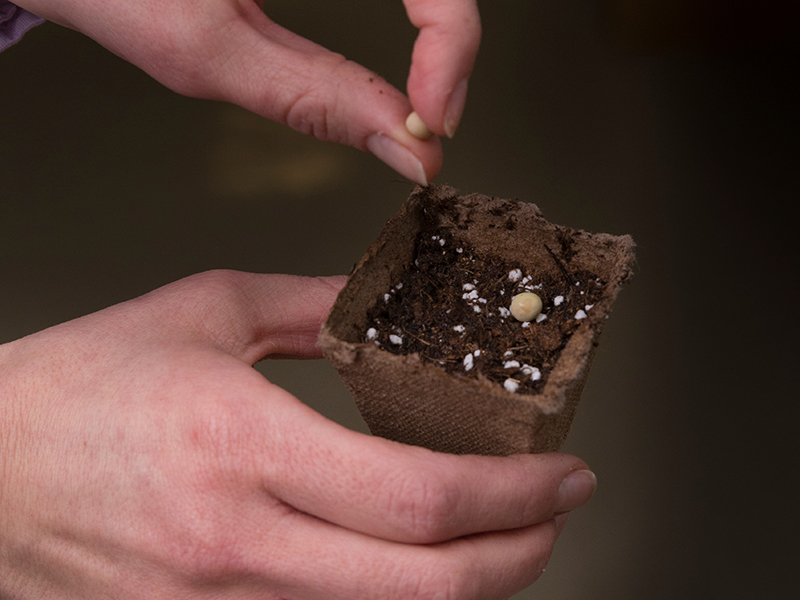
Large pea seeds are easy for small fingers to grasp.
Here I am modeling the latest in seedling trays. You can purchase these and our other supplies at your local garden center or home improvement store.
Select seeds that are big—the smaller the hands, the bigger the seed should be—and quick to sprout, or germinate. Also consider the amount of space the mature plants will occupy, and the time of year you are planting. Some seeds can be planted during the cool spring, while others should go in the ground once the threat of frost has passed.
We chose ‘Tom Thumb’ pea seeds because they are large enough for little hands to easily manipulate, they germinate in 7–14 days, they thrive in the cool spring weather, and they only grow to be 8 inches tall and 8 inches wide, making them great for small-space gardens and containers.
Tip: Some other large seeds suitable for little hands are sunflowers, beans, nasturtium (edible flower), pumpkin, and other squash. For more details about how and when to plant these seeds visit www.kidsgardening.org/node/101624.
A low, wide trug full of soil makes filling pots easy for younger gardeners.
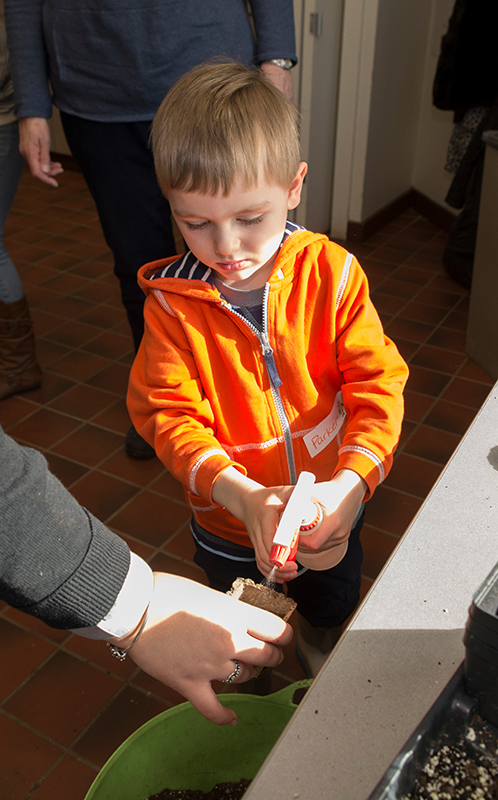
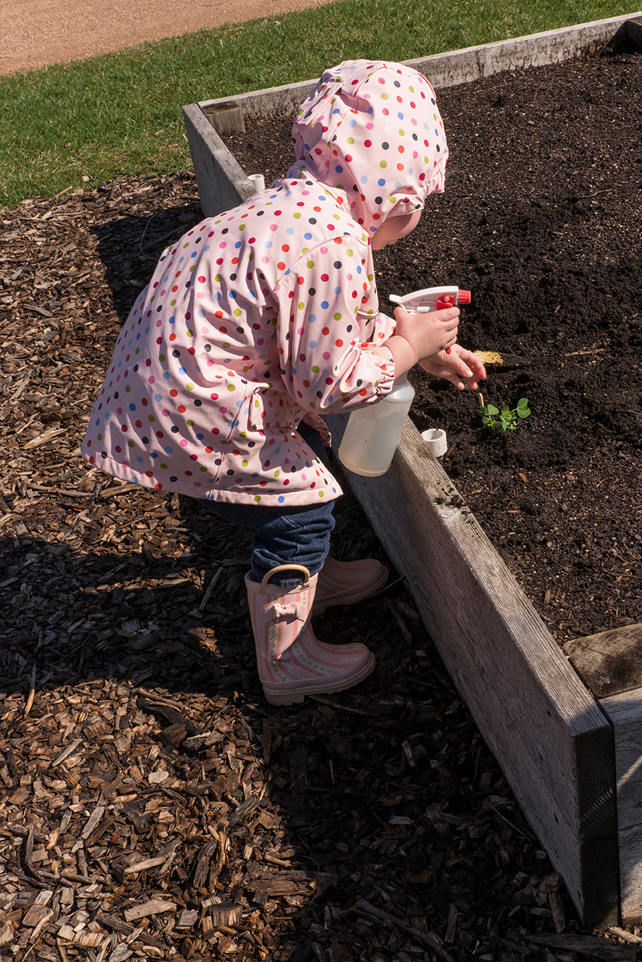
Watering in the seeds is the best part of planting.
Set out the potting mix in a wide-mouth container such as a flexible plastic tub, sand bucket, or cement mixing tray on the ground. Have trowels, pots, seeds, and spray bottles ready.
Tip: A soil container with a wide opening will lead to less soil on the ground. Also, more children will be able to plant at the same time.
Using a trowel, fill the pot with soil. Set two pea seeds on the soil and push them down ½- to 1-inch deep. Then cover the seeds with soil. Spray with a spray bottle until the soil is saturated.
Tip: Planting depth will depend on the type of seeds you are planting. Read the back of the seed packet for details.
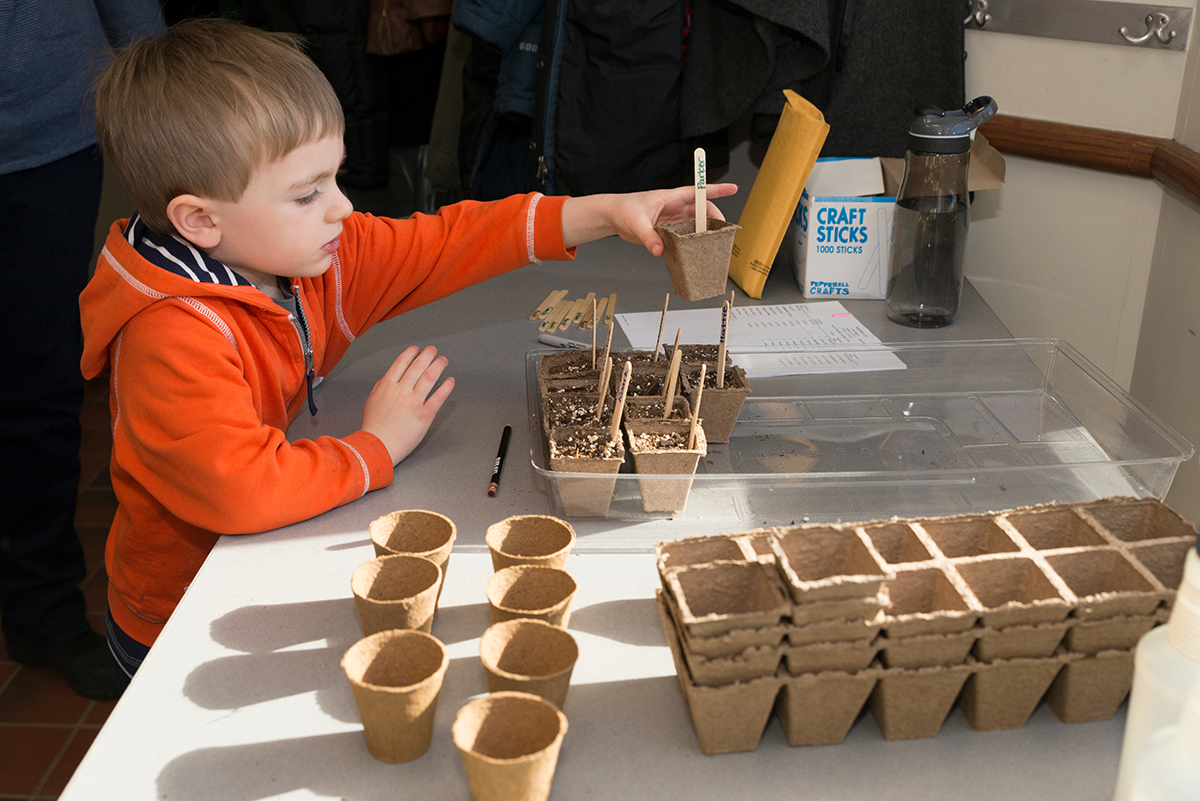
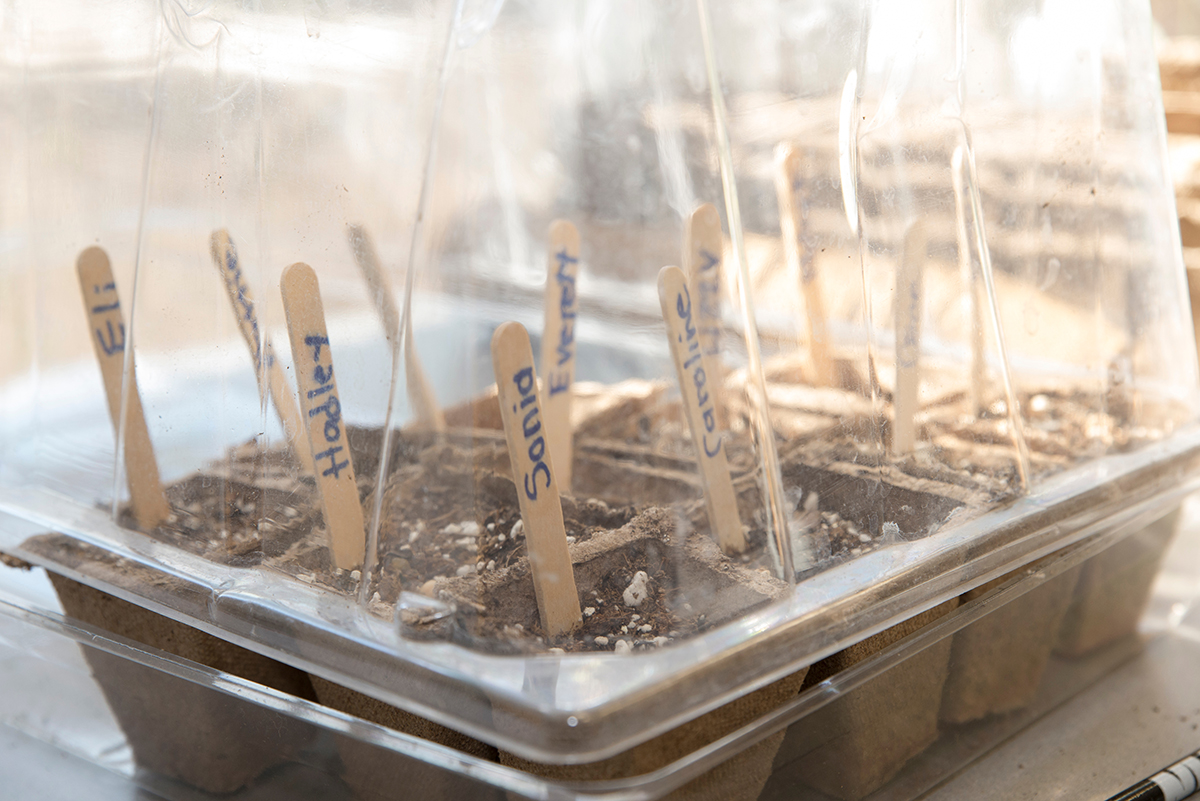
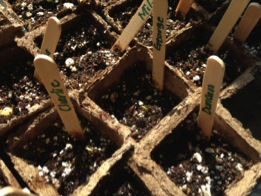
Finally, each child should label their pot. We used craft sticks to easily identify each child’s plant.
Tip: Pot up extra seeds in case some don’t germinate. I potted up 10–15 extras. Every child needs to feel successful and have peas to transplant when the time comes. Once kids have planted seeds a few times and are a little older, you won’t need to pot up extras. Having seeds fail is the next great gardening lesson for more experienced young gardeners.
Our young grower adds his pot to the tray. It’s a good idea to pot up extra seeds in case some don’t germinate.Craft sticks easily identify each child’s plant. Keeping the top lid on, but slightly open, helps air circulate around the plantings, so they don’t grow fungus.
Put the containers on the plastic tray and cover with a clear plastic lid. This will keep moisture in and will require less frequent watering. Allow the soil surface to dry out slightly between watering. Using the misting setting on the sprayer works well because it doesn’t create a hole in the soil and expose the seed like a watering can will.
Tip: Watch for white fungus growing on the soil surface. If this occurs, remove the plastic lid. This will kill the fungus and promote germination. If you will be away from the classroom or home for a few days, put the plastic lid on so the soil doesn’t dry out. Remove it when you return.
Tip: Peas don’t respond well to transplanting, so we planted the seeds in biodegradable pots to avoid this problem. These pots break down in the soil, allowing the roots to continue to grow undisturbed.
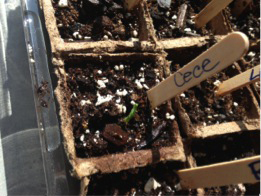
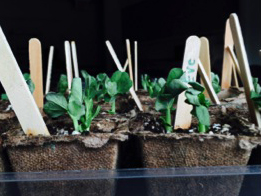
Week 1: Seeds are absorbing water.
Week 2: The roots and stems have started to grow.
Week 3: True leaves have appeared.
Week 4: Time to plant the pea seedlings in the raised beds!
April: Transplanting the Pea Plants into the Garden
Supply List:
Pea plants
Trowels
Spray bottles or watering cans
Set-up Time: 10 minutes
Activity Time: 20–30 minutes or more (depending of the size of the group and the number of helpers)
Appropriate for Ages: 2 and up
Clean-up Time: 10 minutes
Choose a sunny location that receives at least six hours of direct sunlight every day and has well-drained soil. We planted our peas in the raised beds at the Fruit & Vegetable Garden.
Bring all the supplies out to the site. Have each child choose where they would like to dig their hole. Pass out a trowel and plant to each child. Dig a hole as deep as the soil in the pot. Place the plant, pot and all, in the hole. Fill in the space around the plant with soil and water the plants.
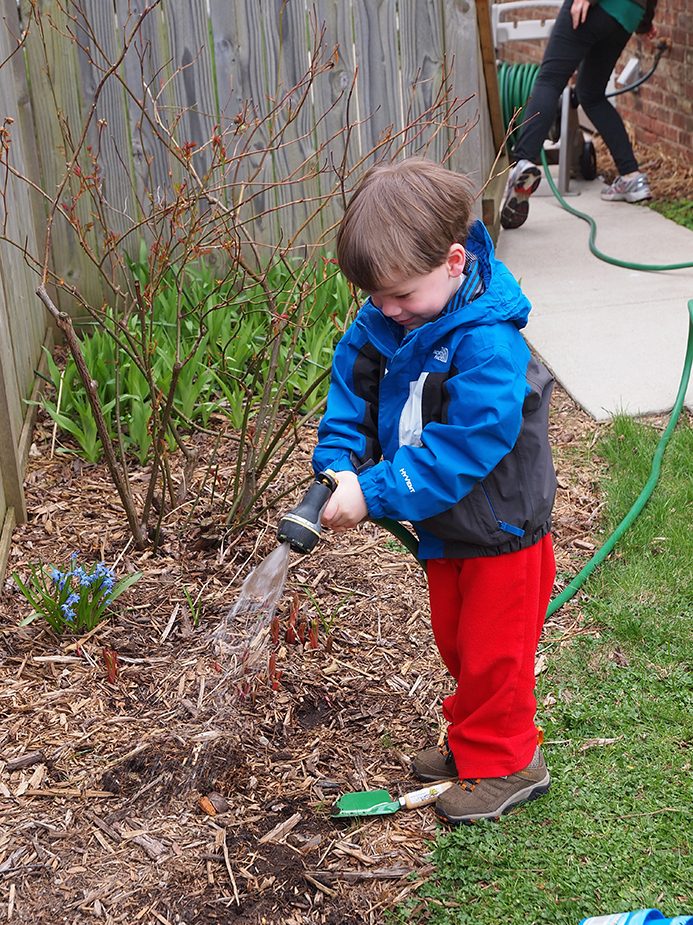
Check the peas daily and water them with a watering can or hose when the soil is slightly dry. About 50 – 55 days after planting, these shelling peas will be ready to harvest and eat! Come see the plants that the students of our Little Diggers class planted in the raised beds, just south of the orchard at the Fruit & Vegetable Garden!
Remember to water in your seedlings when you put them in the ground!
Sunshine and a good squirt of water will help this pea seedling grow!
Direct Sowing: Easy Peas-y Approach
Direct sowing is the easiest approach—and often the most successful with early spring vegetables. Not to mention: it’s fun.
As a working parent, I chose this approach with my almost three-year-old. All you really need is a sunny spot with well-drained soil, seeds (we used ‘Tom Thumb’ peas because we have a small garden), a small shovel (trowel) and water. Choose a sunny spot for planting (6–8 hours of direct sun).
First I showed him how to draw lines in the soil with his trowel (they should be ½– to 1-inch deep). Then he dropped seeds along the lines. I wasn’t concerned about spacing 2 inches apart as recommended on the seed packet because I can always thin them out once the seeds start to grow. He covered the seeds up and watered them with the hose. Every evening, we enjoy checking to make sure the soil is damp.
Tip: If you’re little one is getting impatient, these peas can be harvested early and eaten, pod and all, like snow peas!
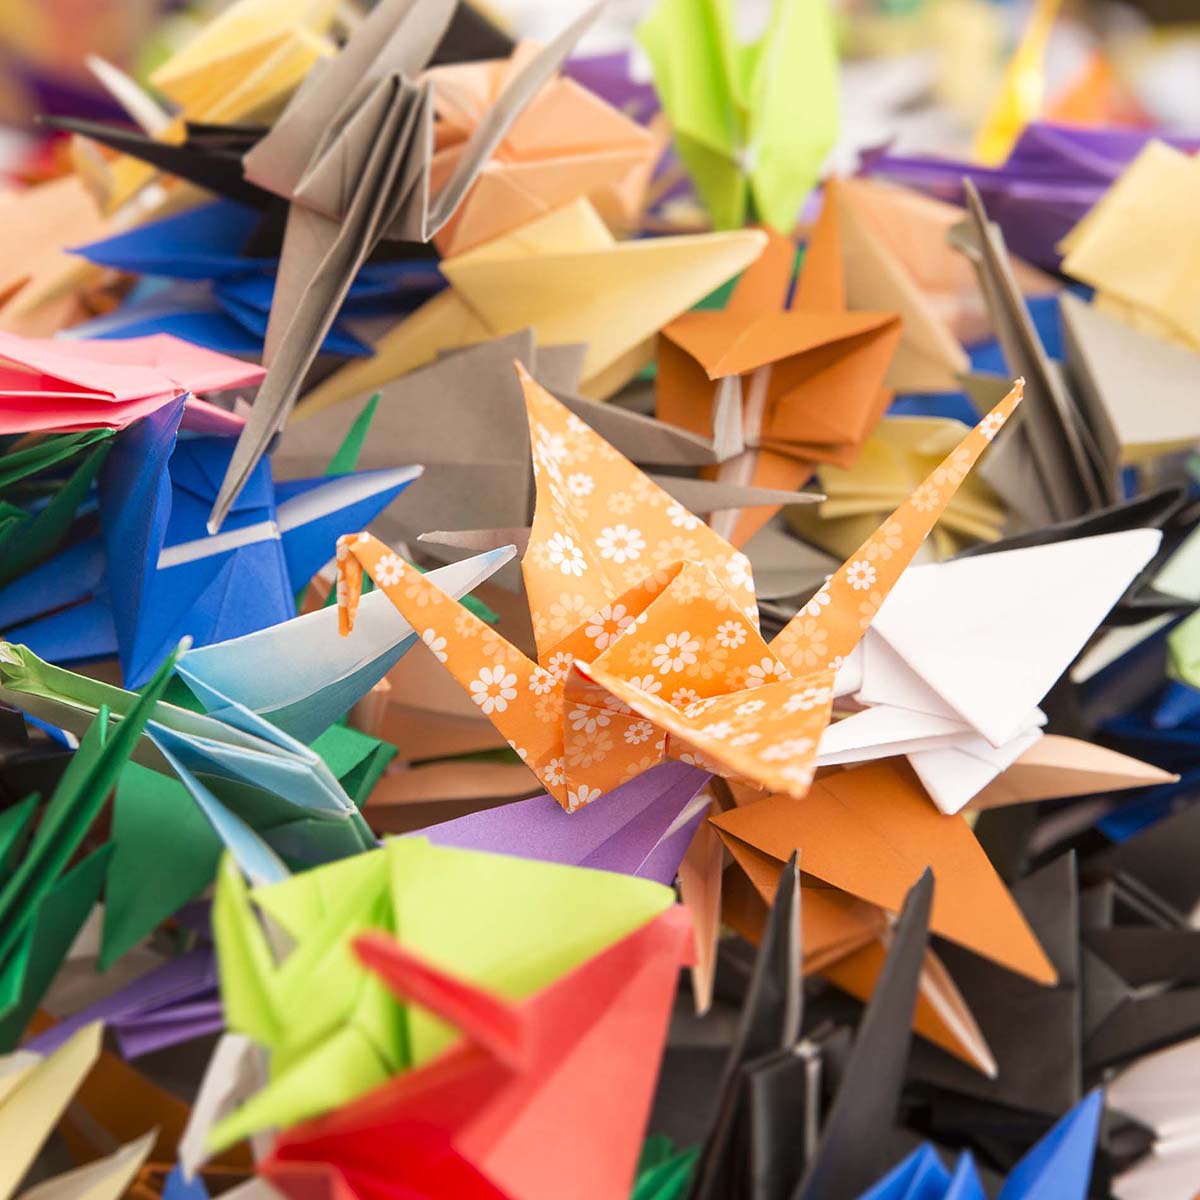
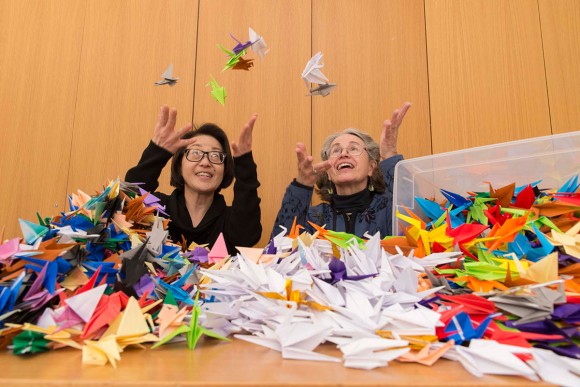
Long-ago legend says that cranes can live for 1,000 years…and that folding 1,000 paper cranes, one for each year, can make a wish come true.
So it is that the crane is the symbol of longevity and good fortune.
22 Folds From the first corner-to-corner fold to the last crook of beak and tail, it takes 22 folds to make this style of origami crane. Because pictures are worth 1,000 words, we offer this visual guide to crane-making.
Click on the image above for a larger version to print and save. Wishing you longevity and good fortune!
Fast forward to the turn of the twenty-first century, when Ray Wilke, a devoted volunteer in the Elizabeth Malott Japanese Garden, decided to make origami cranes as a take-away gift for children who visited the garden’s Shoin House. Each winter, Ray and wife Ginny folded cranes…and each spring/summer Ray handed them out, one by one, to the curious children.
Over the years, Ray and Ginny made 40,000 cranes.
Now there are 10 people who fold, bringing in bags of 20, 60, or 100 origami cranes throughout the winter.
And 3,000-plus cranes are ready to hand out.
Happiness is 1,000 paper cranes…and volunteers like Susan and Edie.
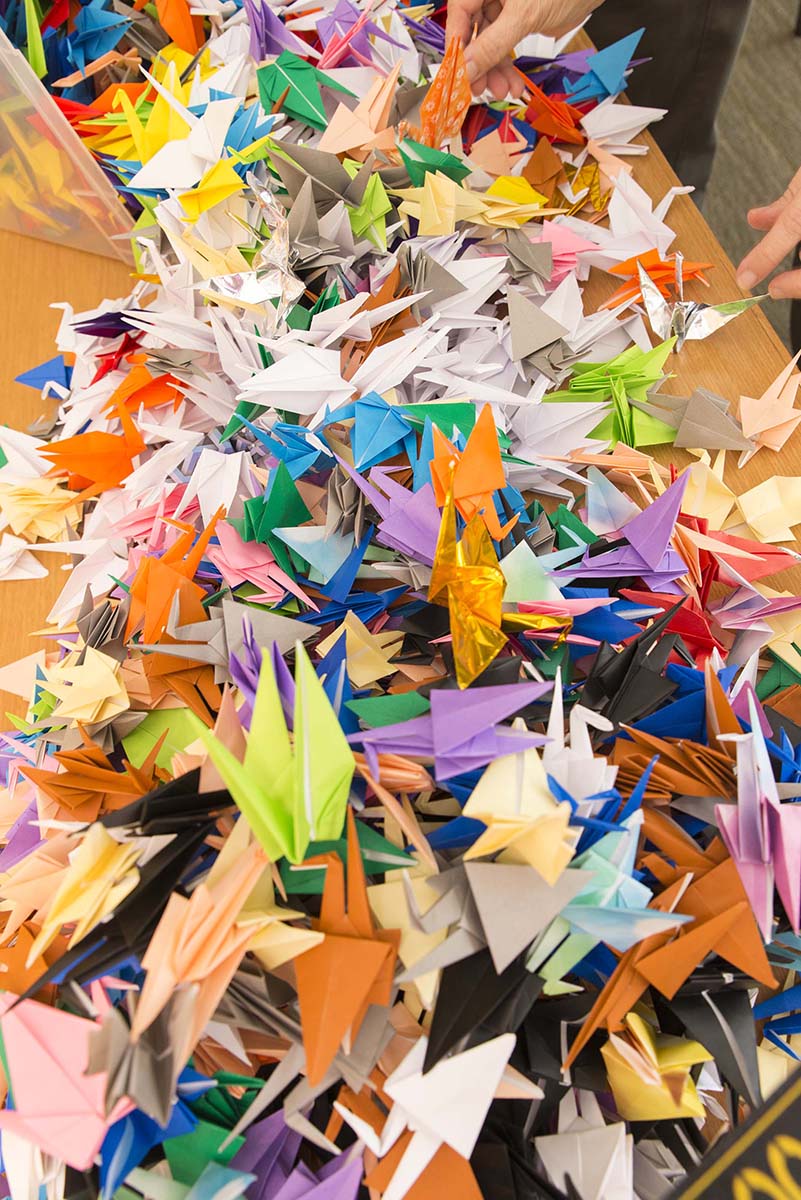
Origami paper cranes
From Ray’s original intent comes great good fortune: a community has sprung. And what do the kids think when they’re offered a crane? “They’re over the moon, they’re very gentle with them,” Mary says. “We say, ‘We’d like you to have one,’ and you’d think you were giving them gold when you explain why. It opens the door for conversations, especially with 7-, 8-, 9-year-olds.”
Cranes are offered, hand to hand, at the Shoin House whenever volunteers are present…for as long as the handmade supply lasts. (Although adults make wishes, too, cranes are for kids only.)
For many bonsai tree species, early spring is the best time for repotting.
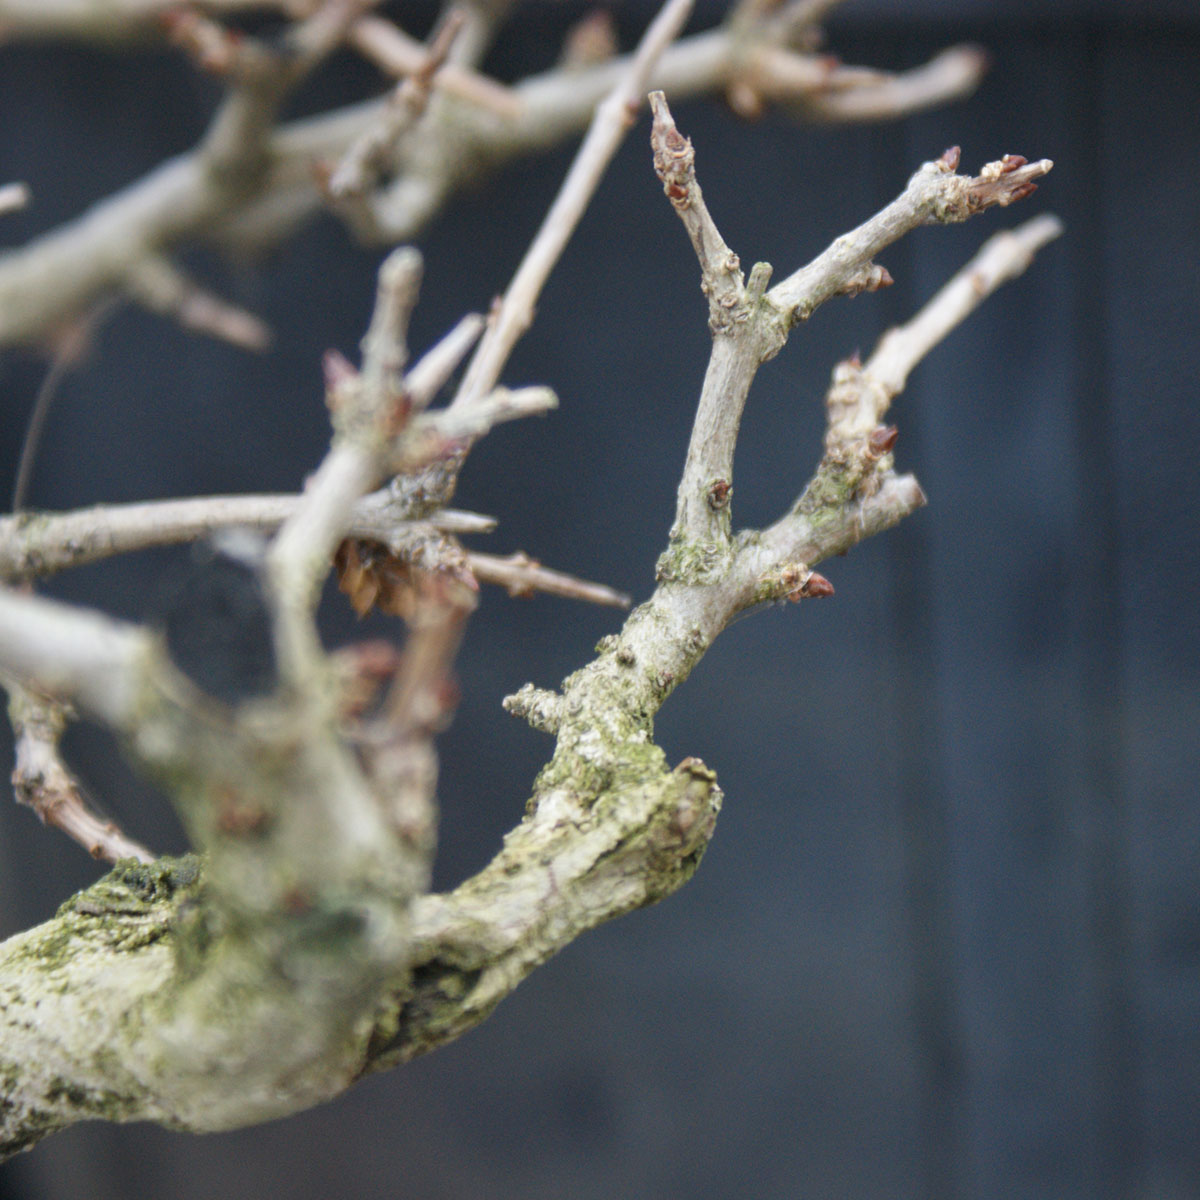
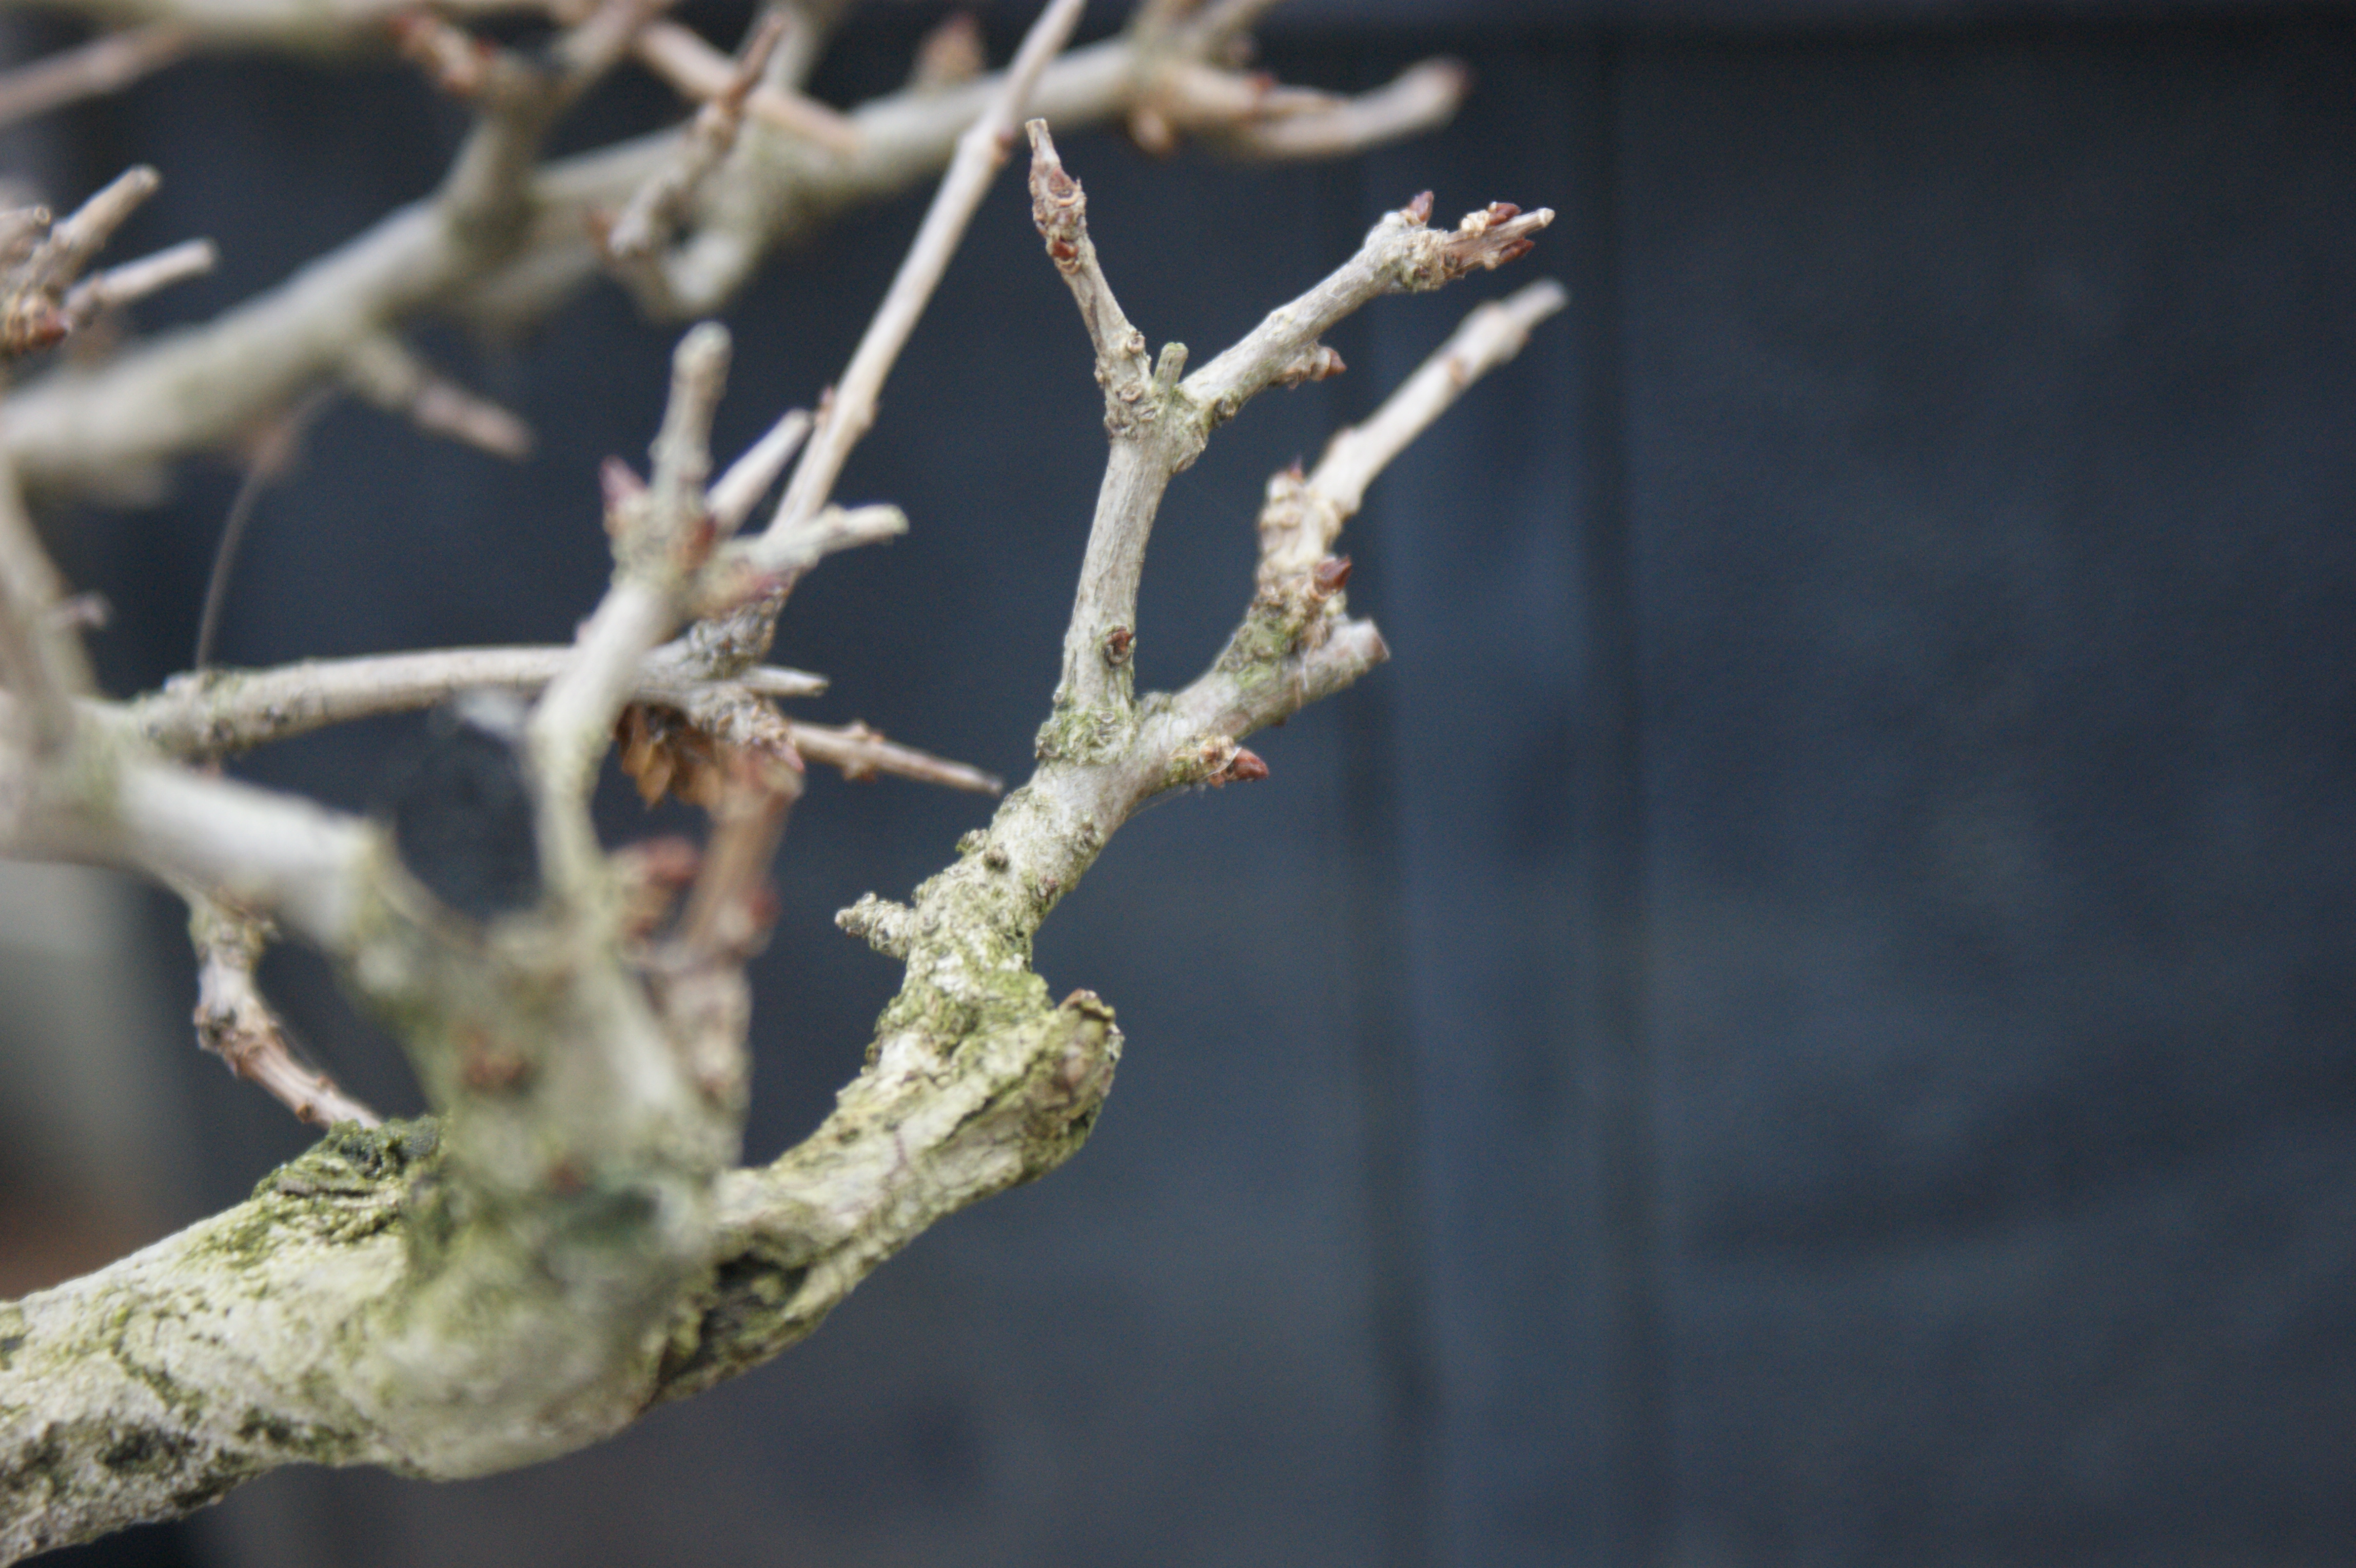
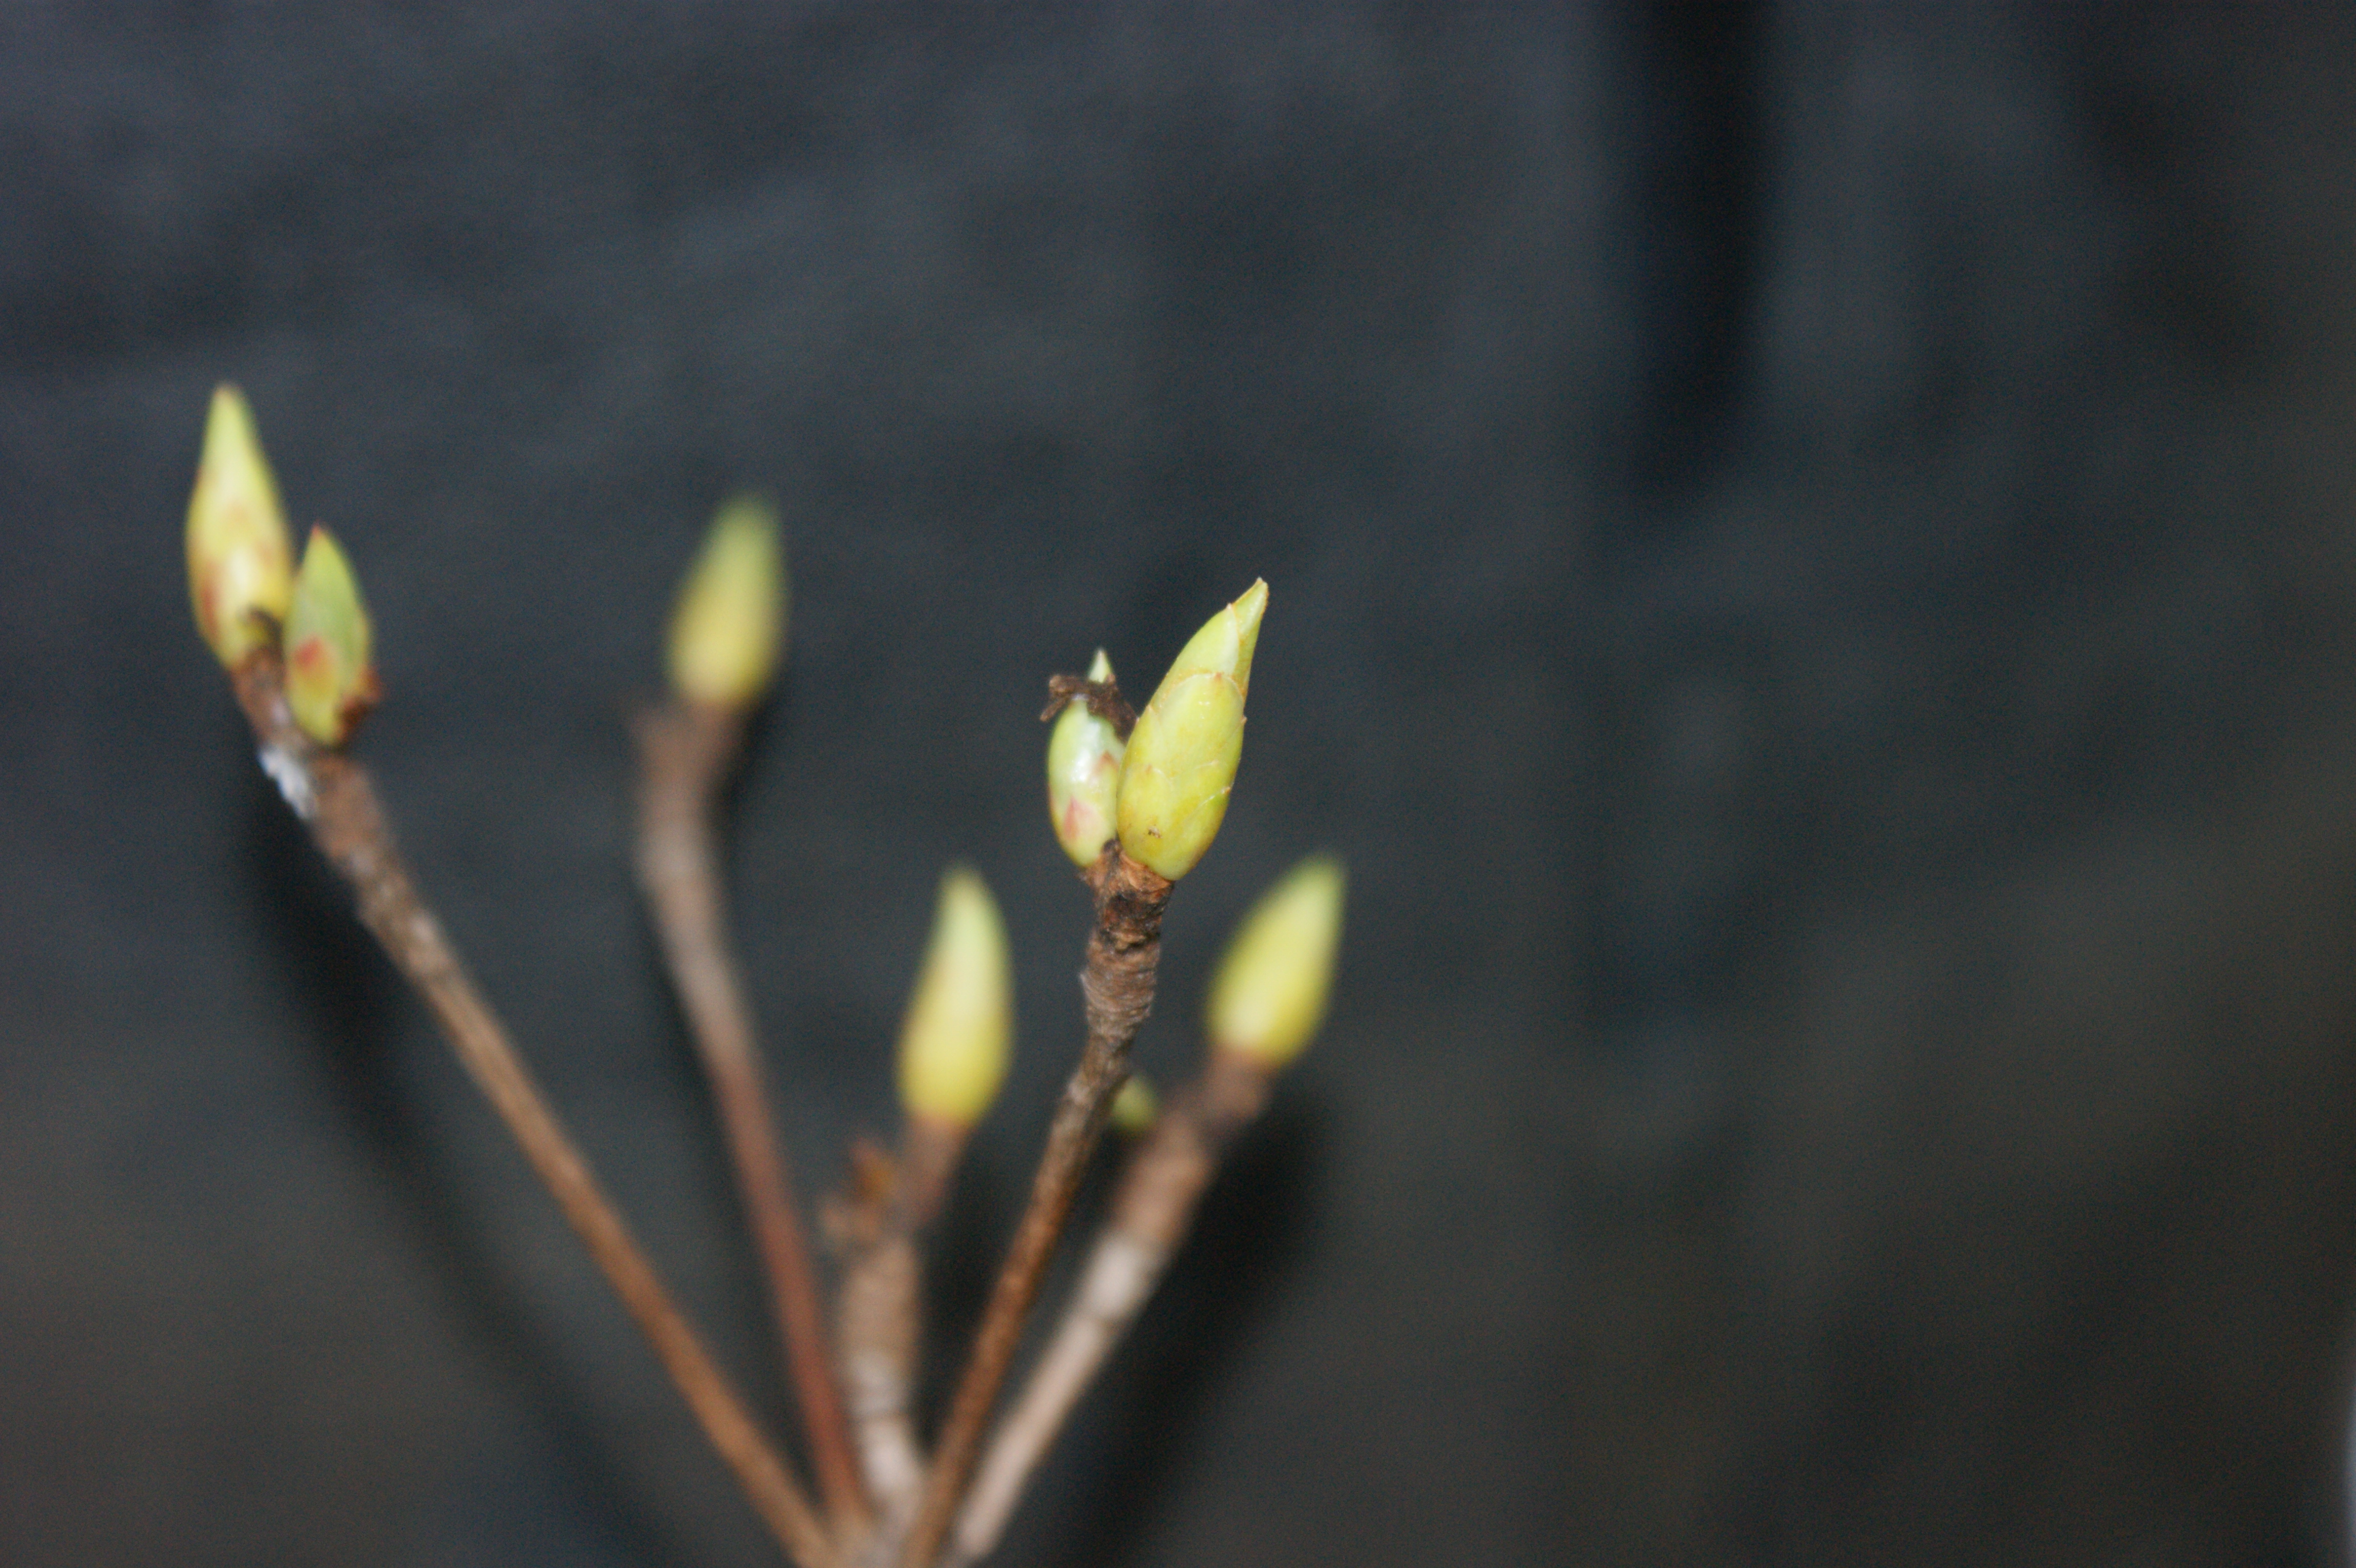
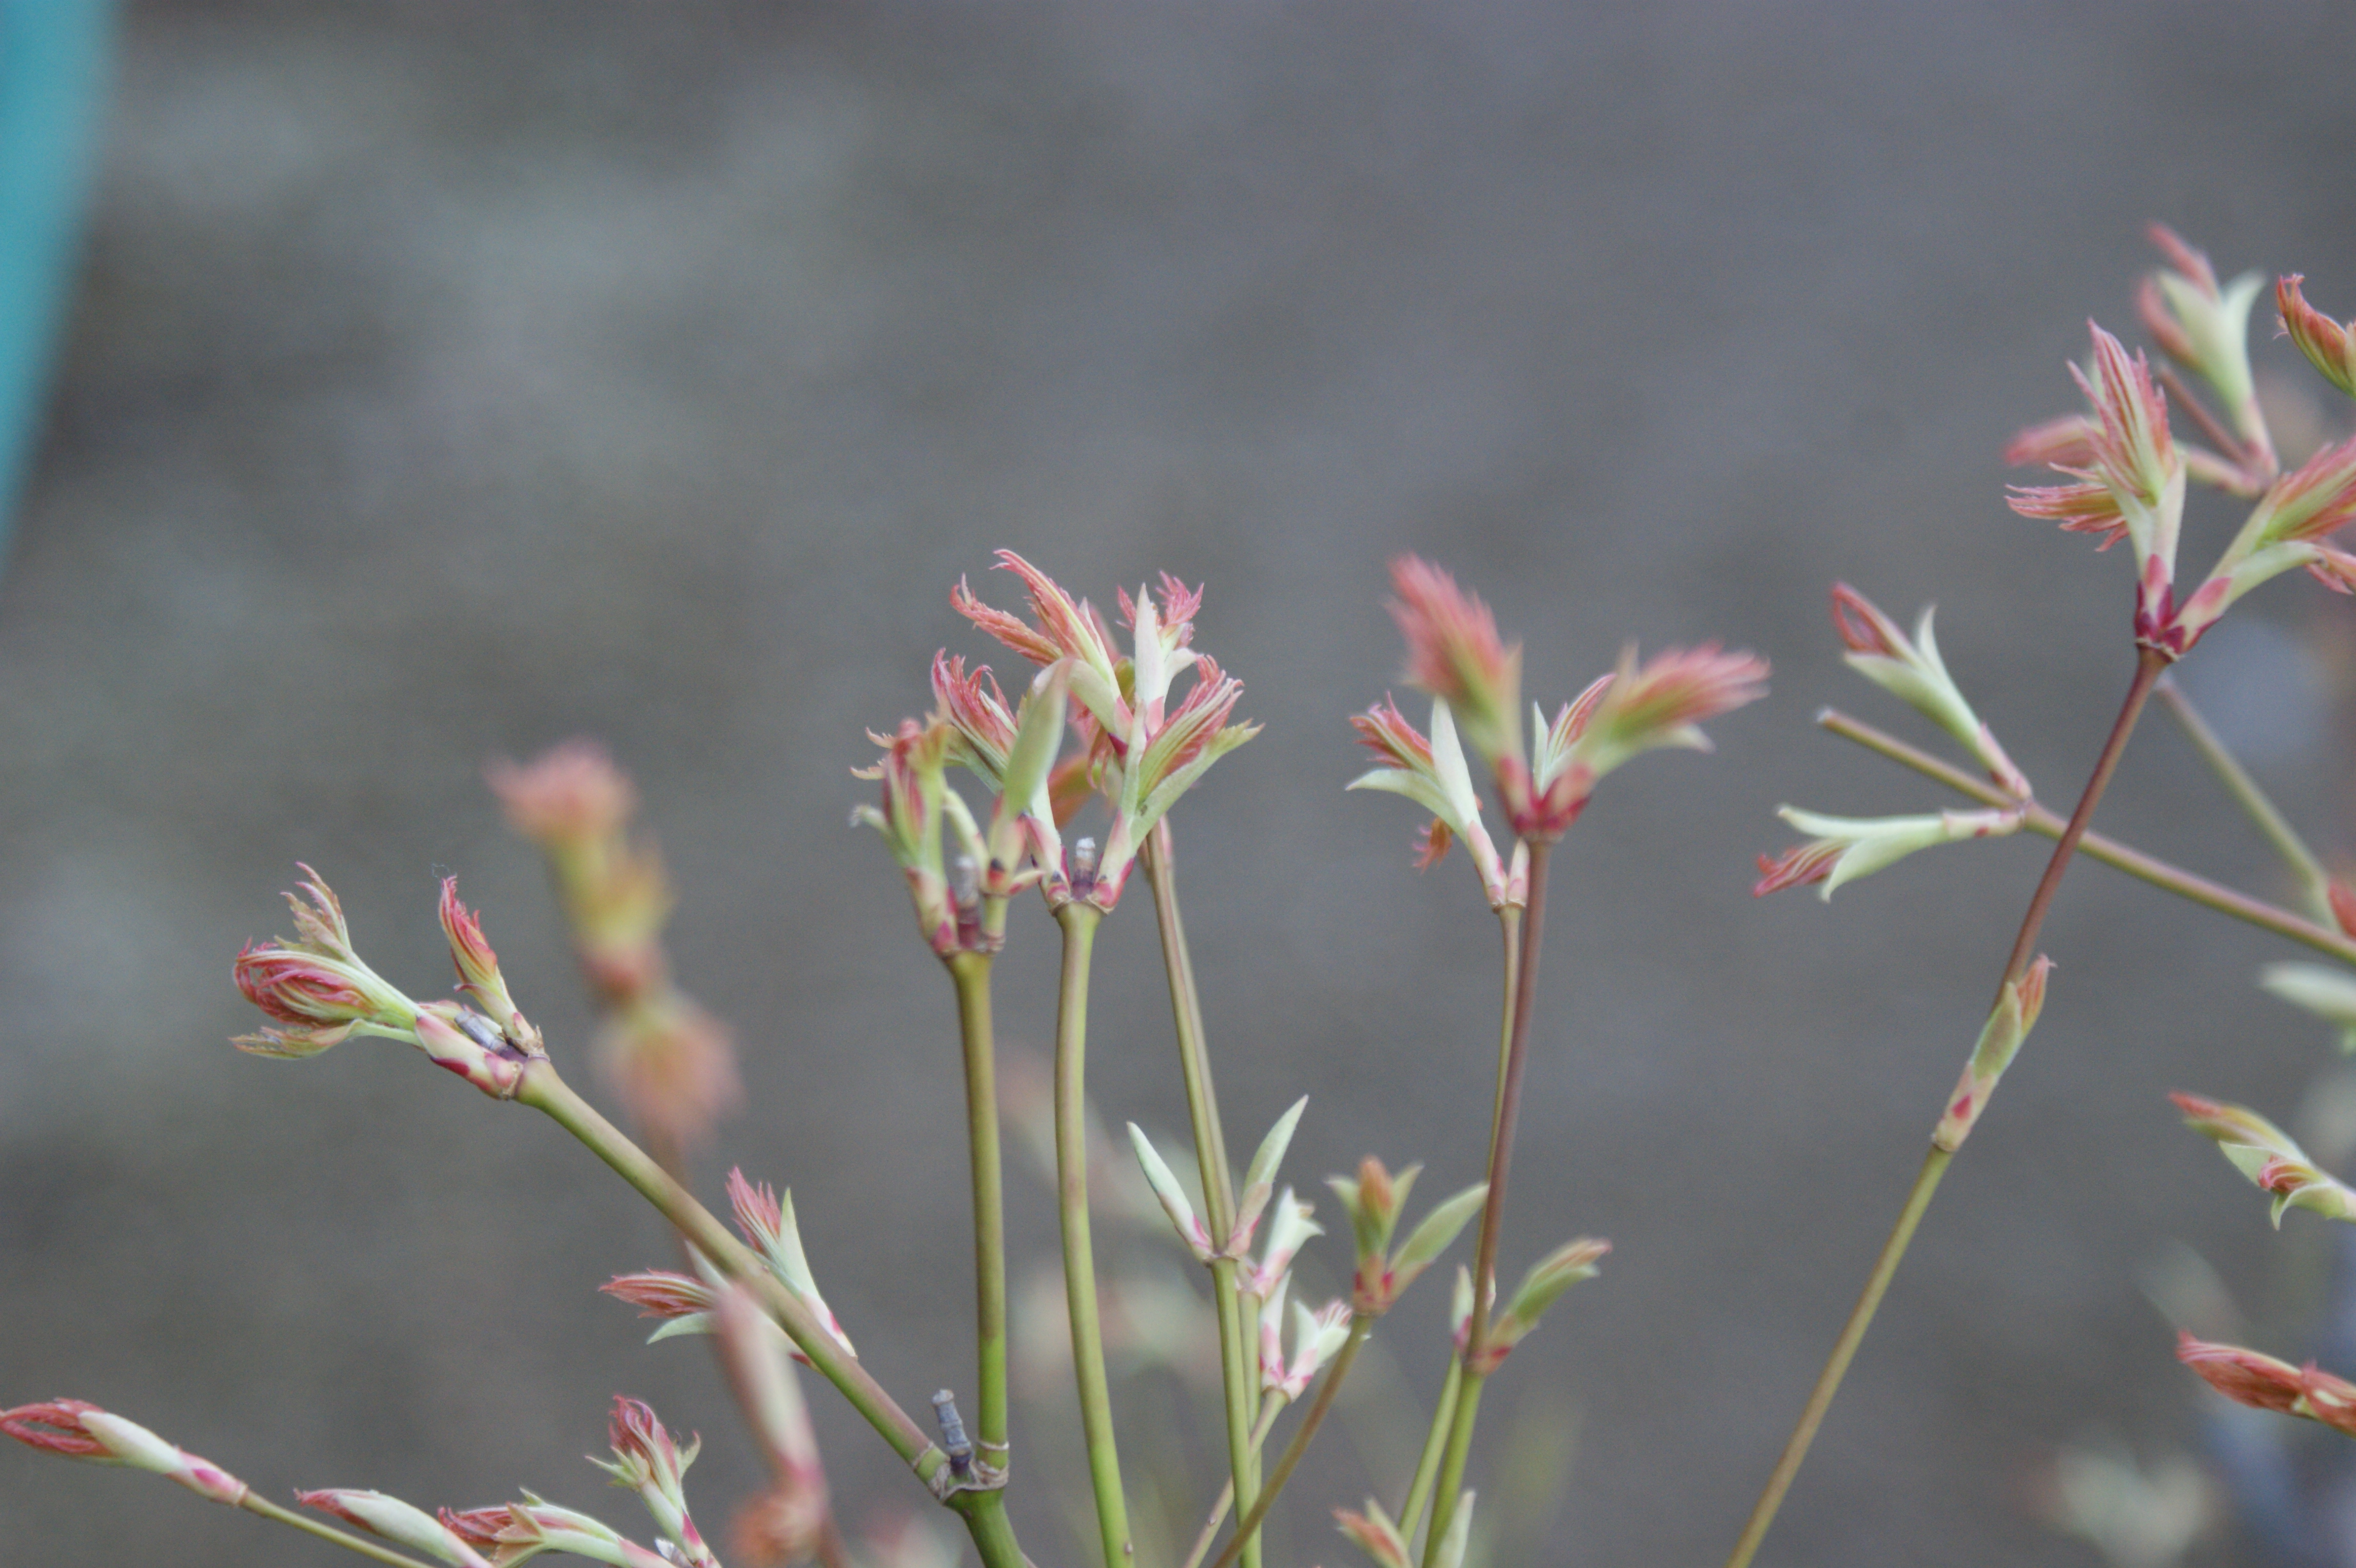
As the days get longer and the temperatures slowly increase, the roots of a bonsai gradually become active. During this time, the energy of the tree that was stored in the roots over the winter begins to move back up into the tree branches. As this happens, the dormant buds begin to swell. This swelling is the first sign that the tree is beginning to break dormancy. Over the next few weeks, the amount of energy from the roots to the branches increases, and the buds go through a transformation from dormant nub to a fully-opened leaf.
Dormant bud
Swelling bud
Extending bud
Opening bud
The best time to repot is generally in the middle of this process, when the roots are active, and the buds are in the swelling and extending stage. All repotting should be done by the time the trees are in the opening stage.
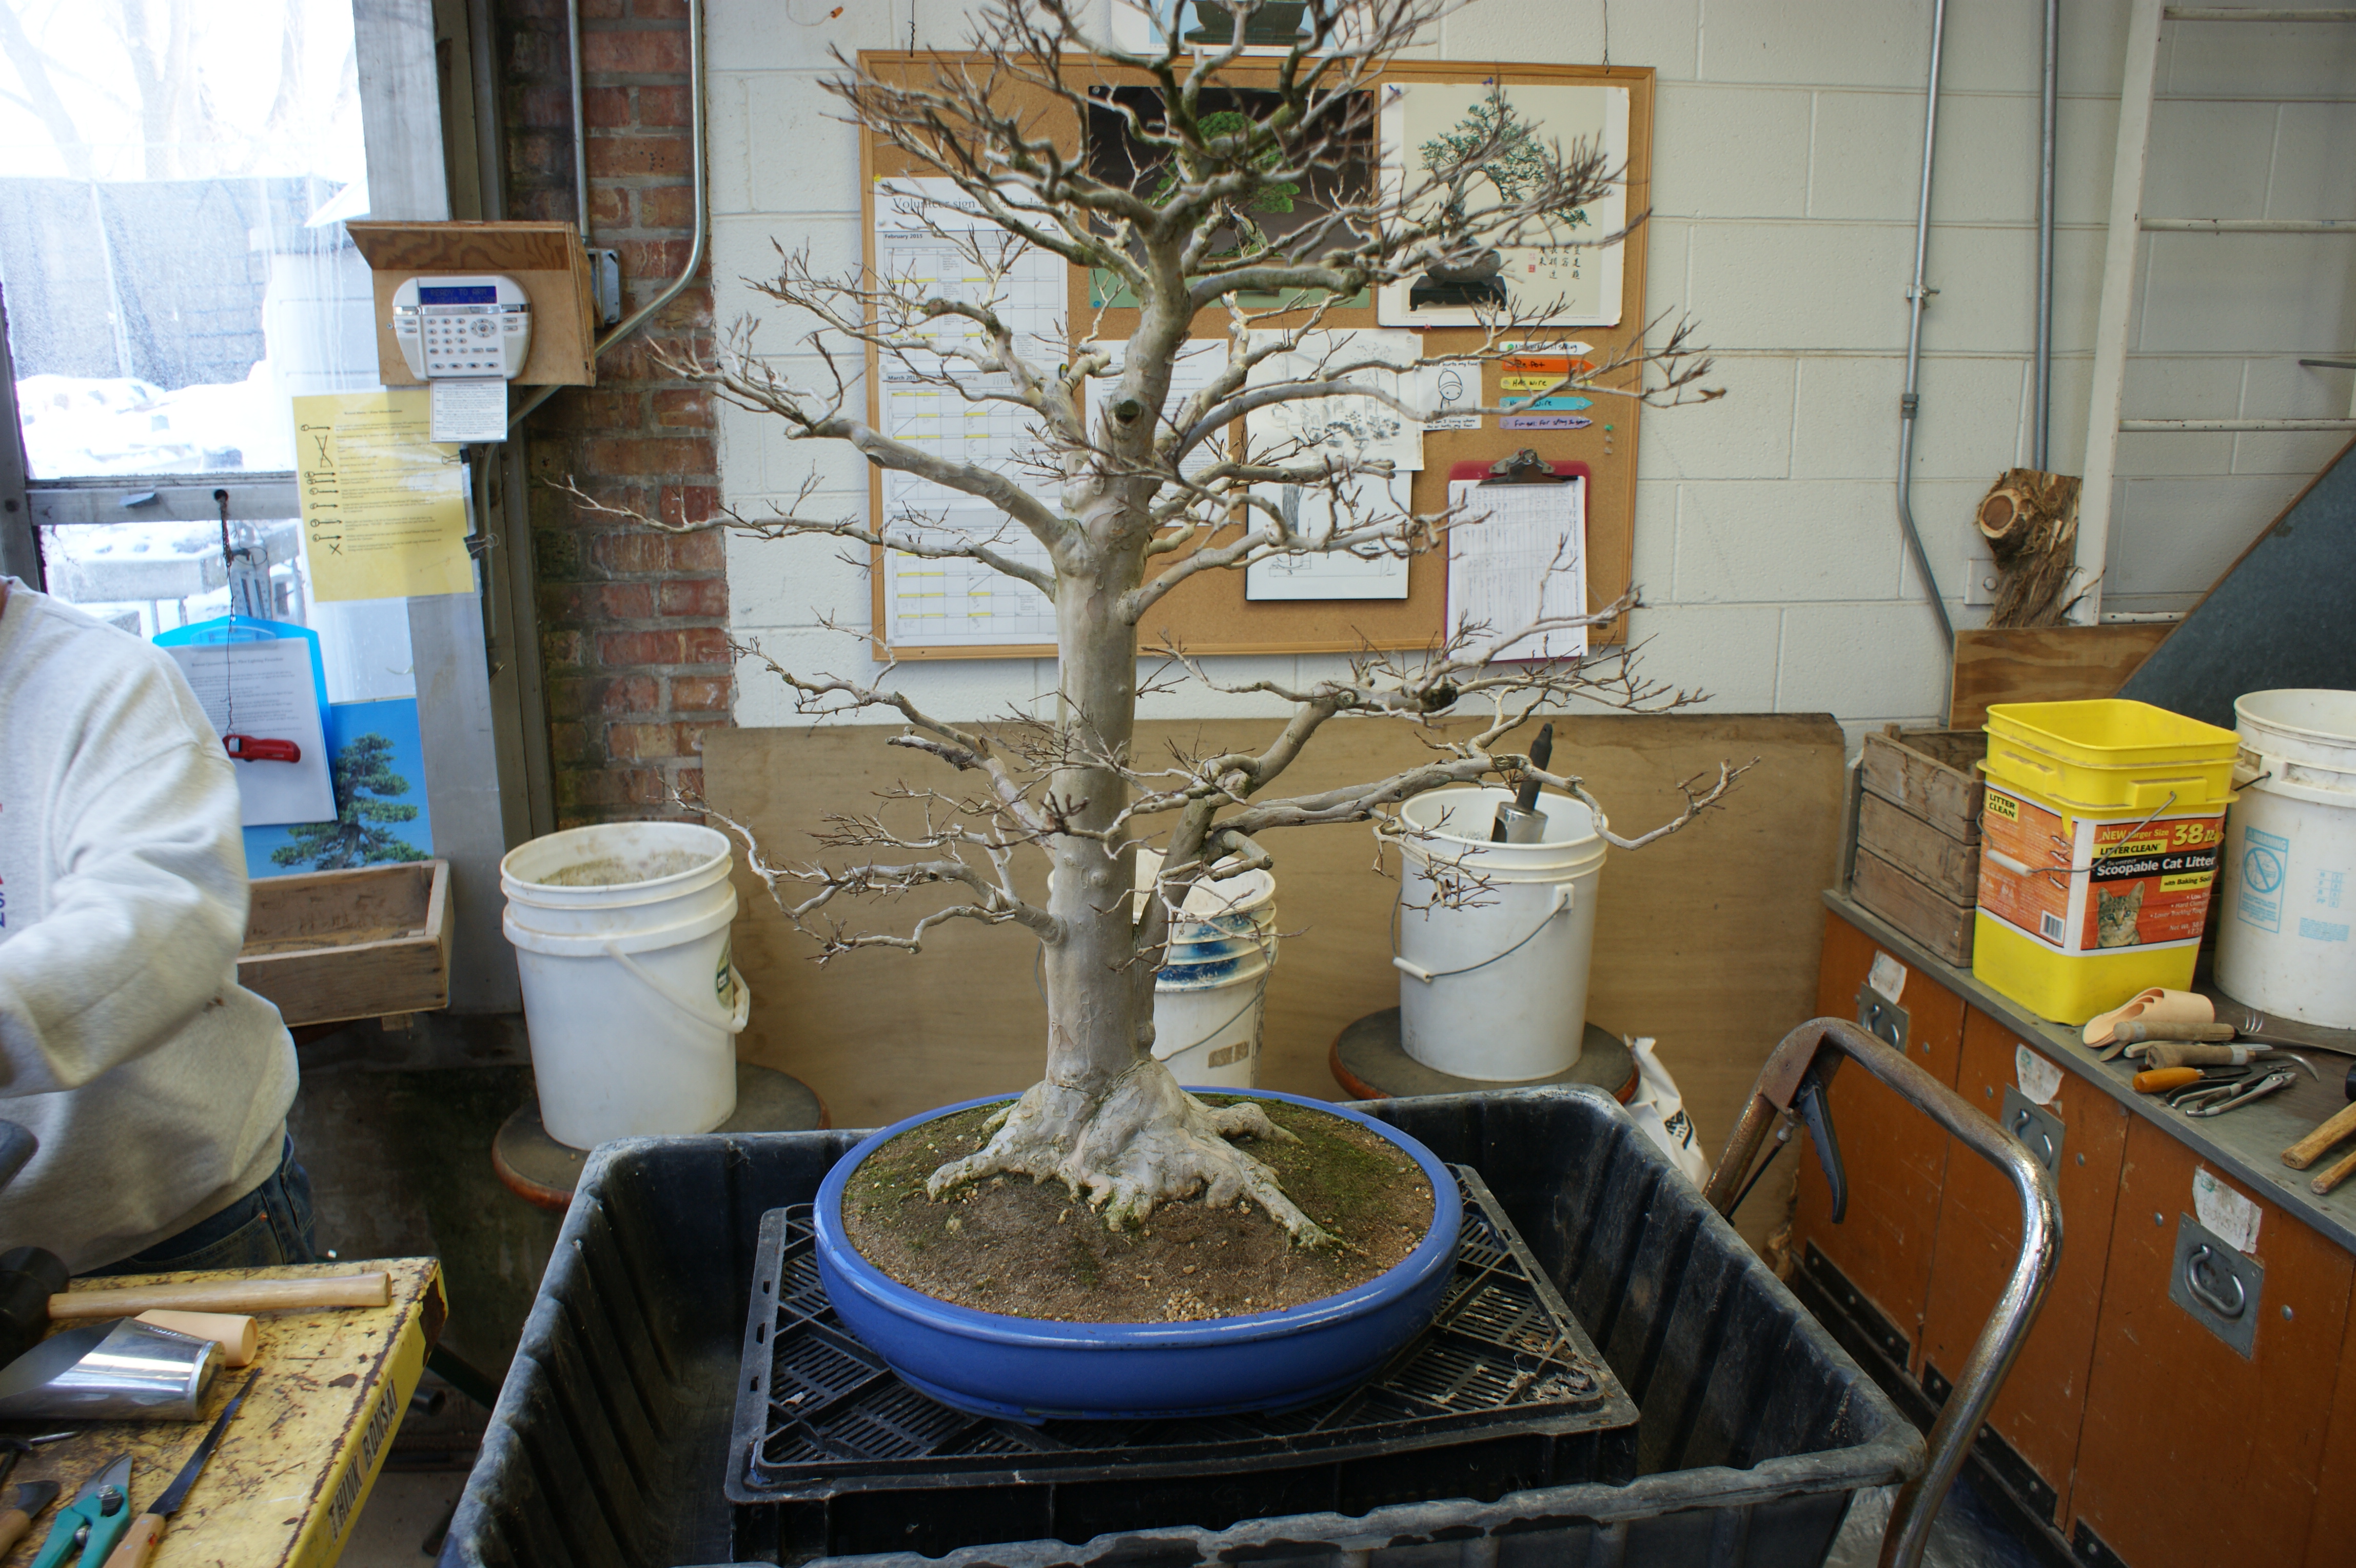
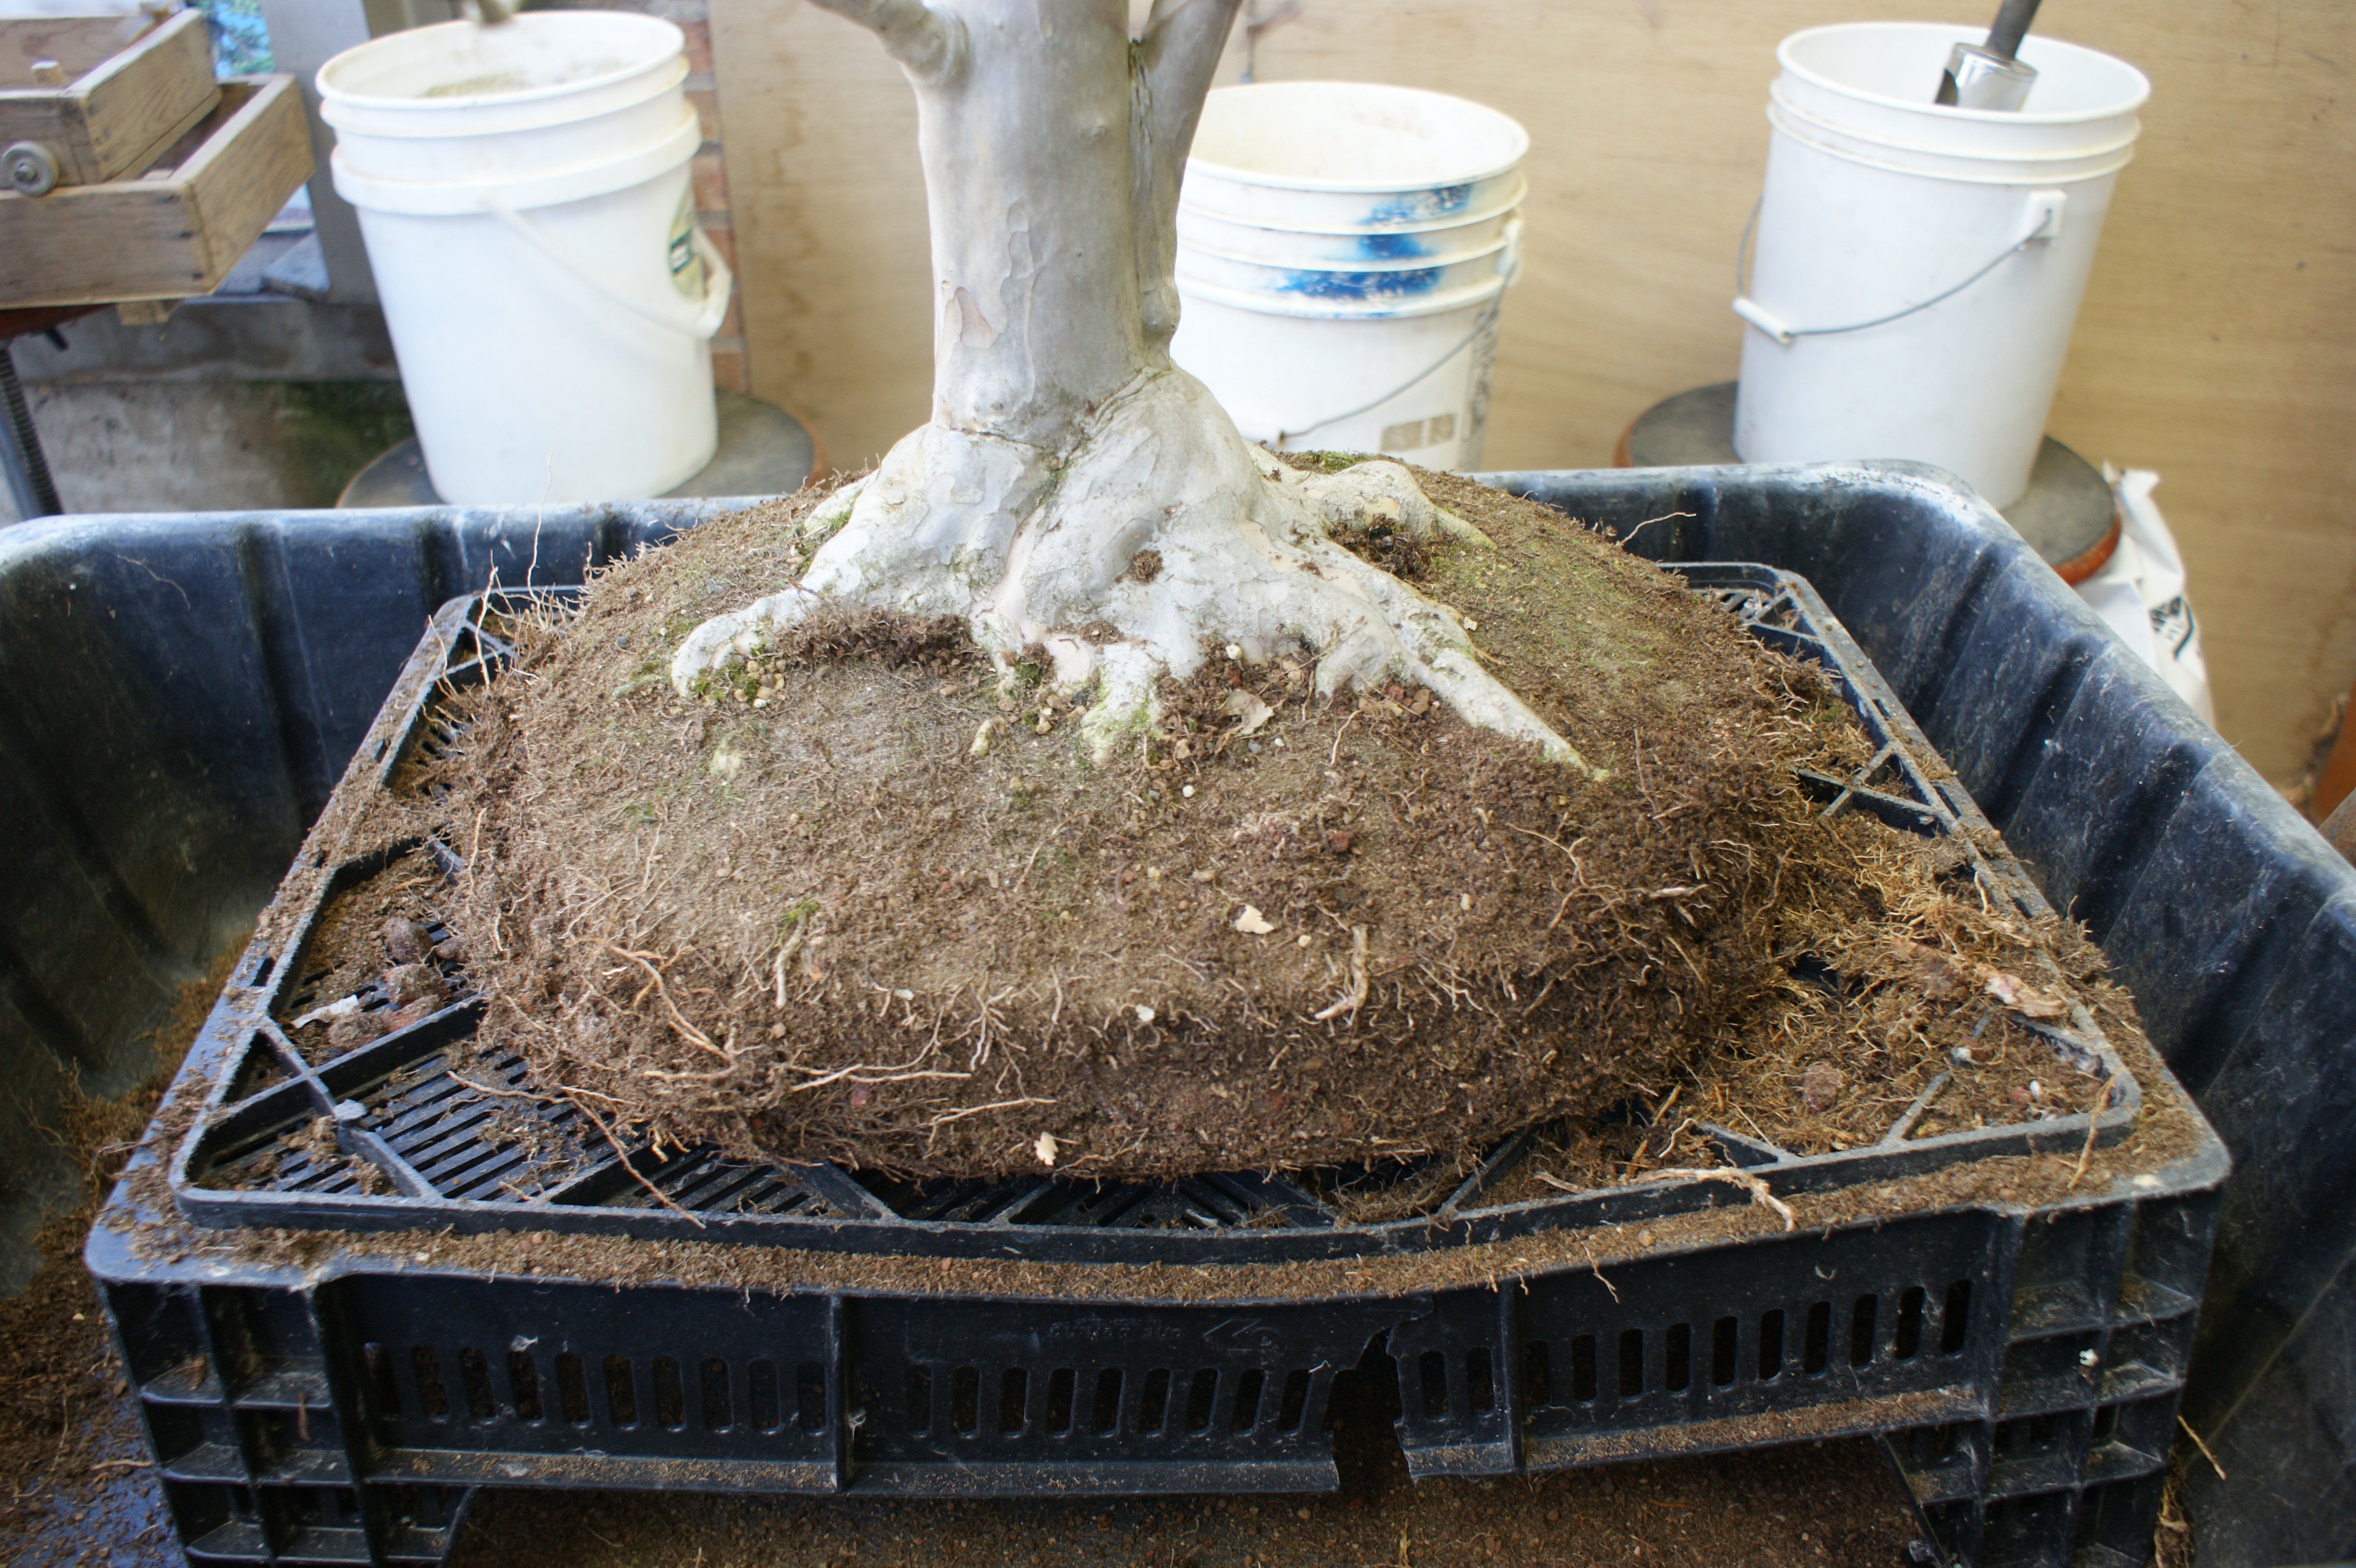
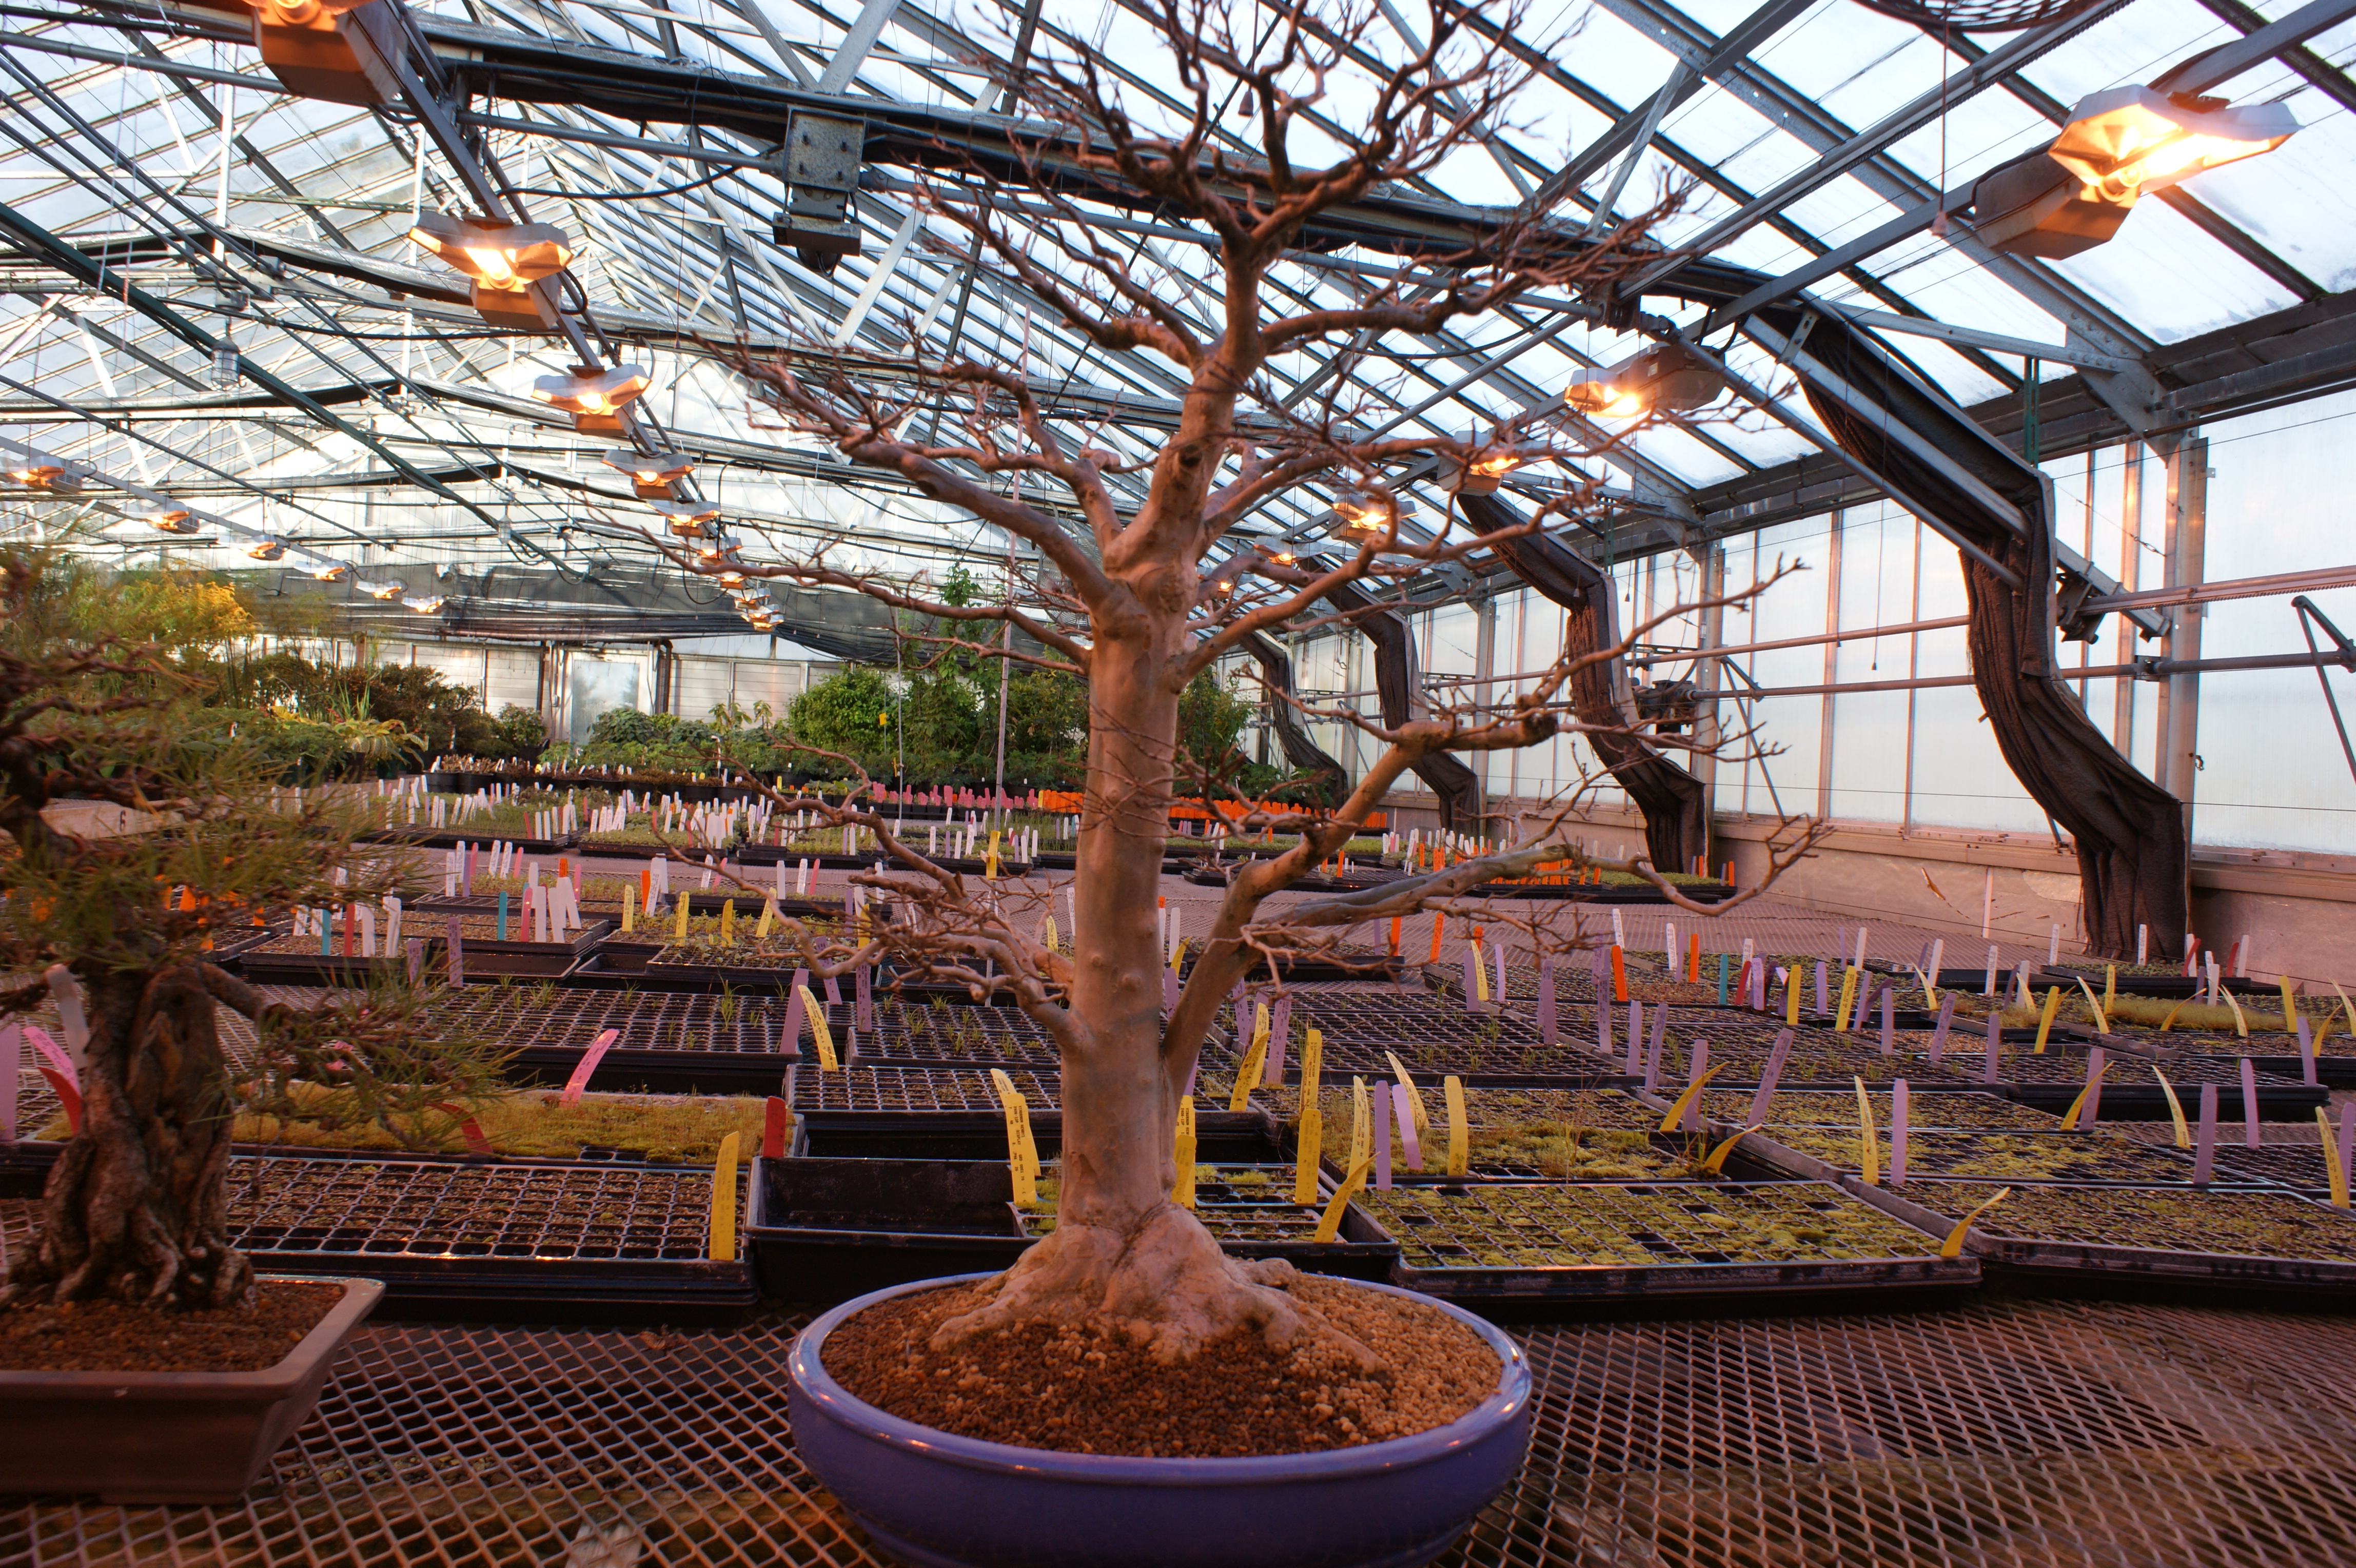
The tree set to be repotted today is this wonderful crape myrtle (Lagerstroemia indica). The first step is removing the tree from the pot.
Crape myrtle (Lagerstroemia indica)
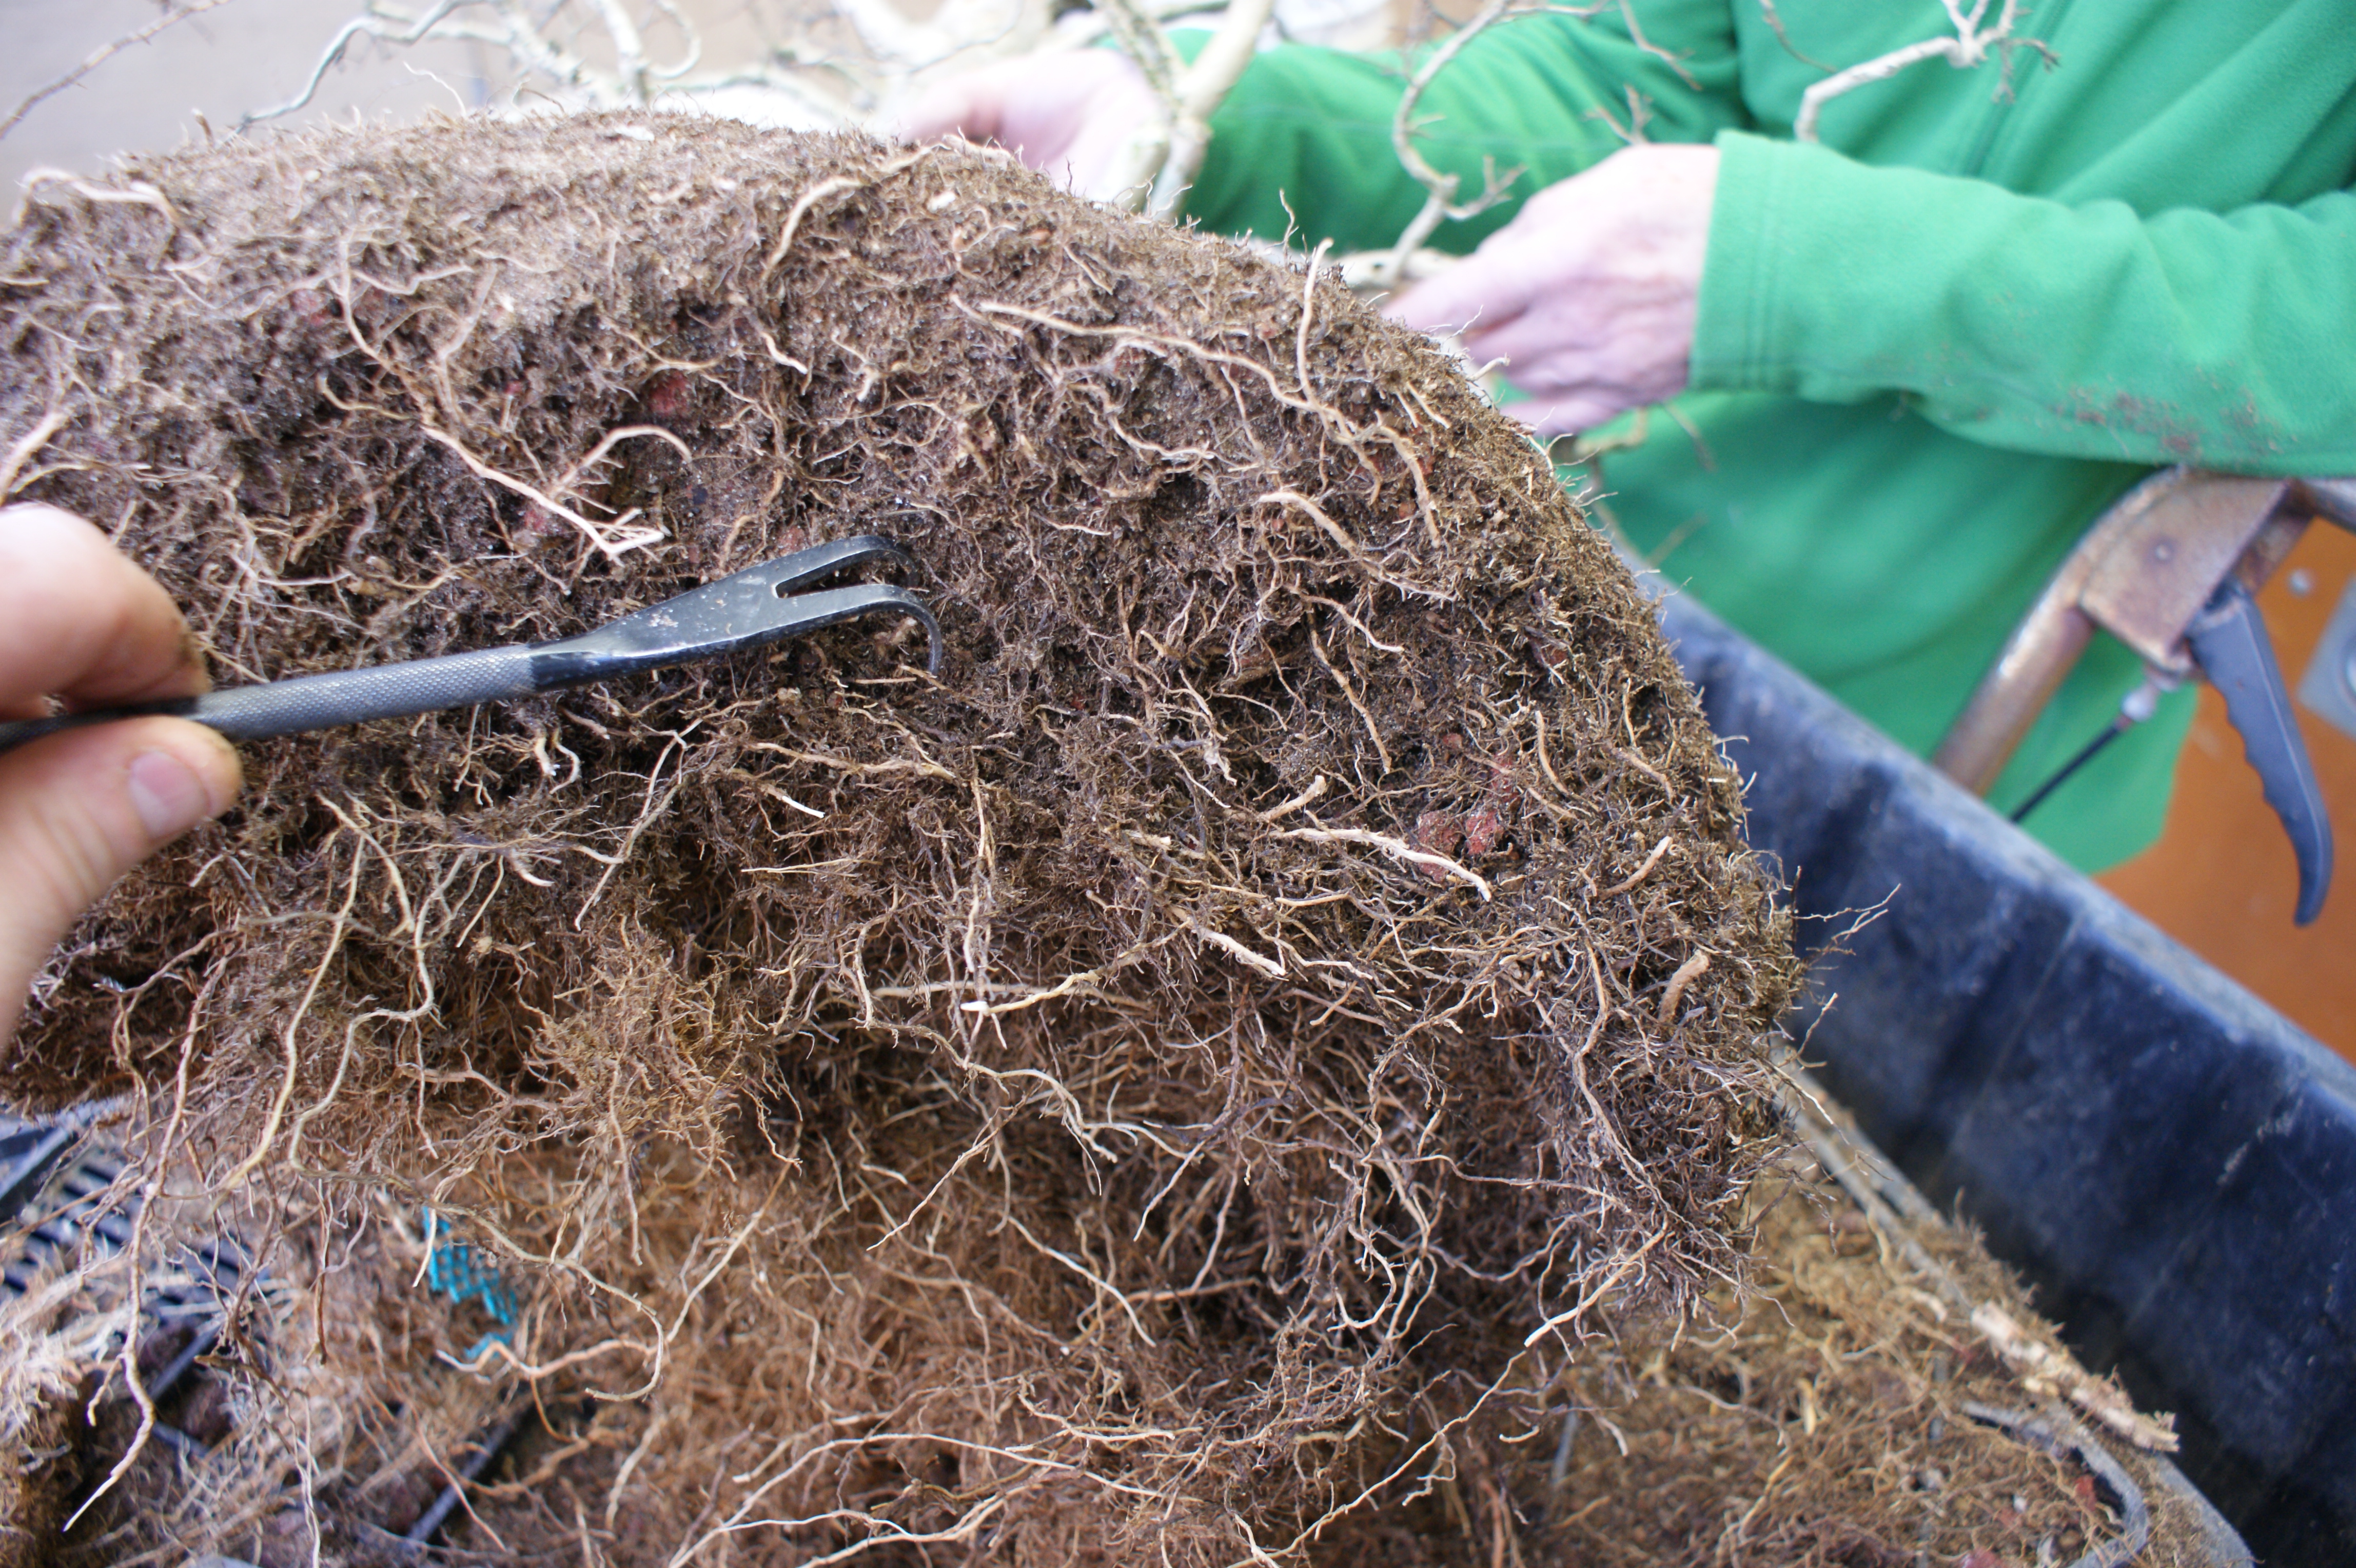
Using the root hook and saw, we slowly and carefully create a gap between the root ball and the sides of the pot. Creating this space will allow us to safely remove the tree from the pot.
Use the root hook to carefully loosen the plant from the pot.
Once a furrow has been created with the root hook, use the saw to free the bonsai from the pot.
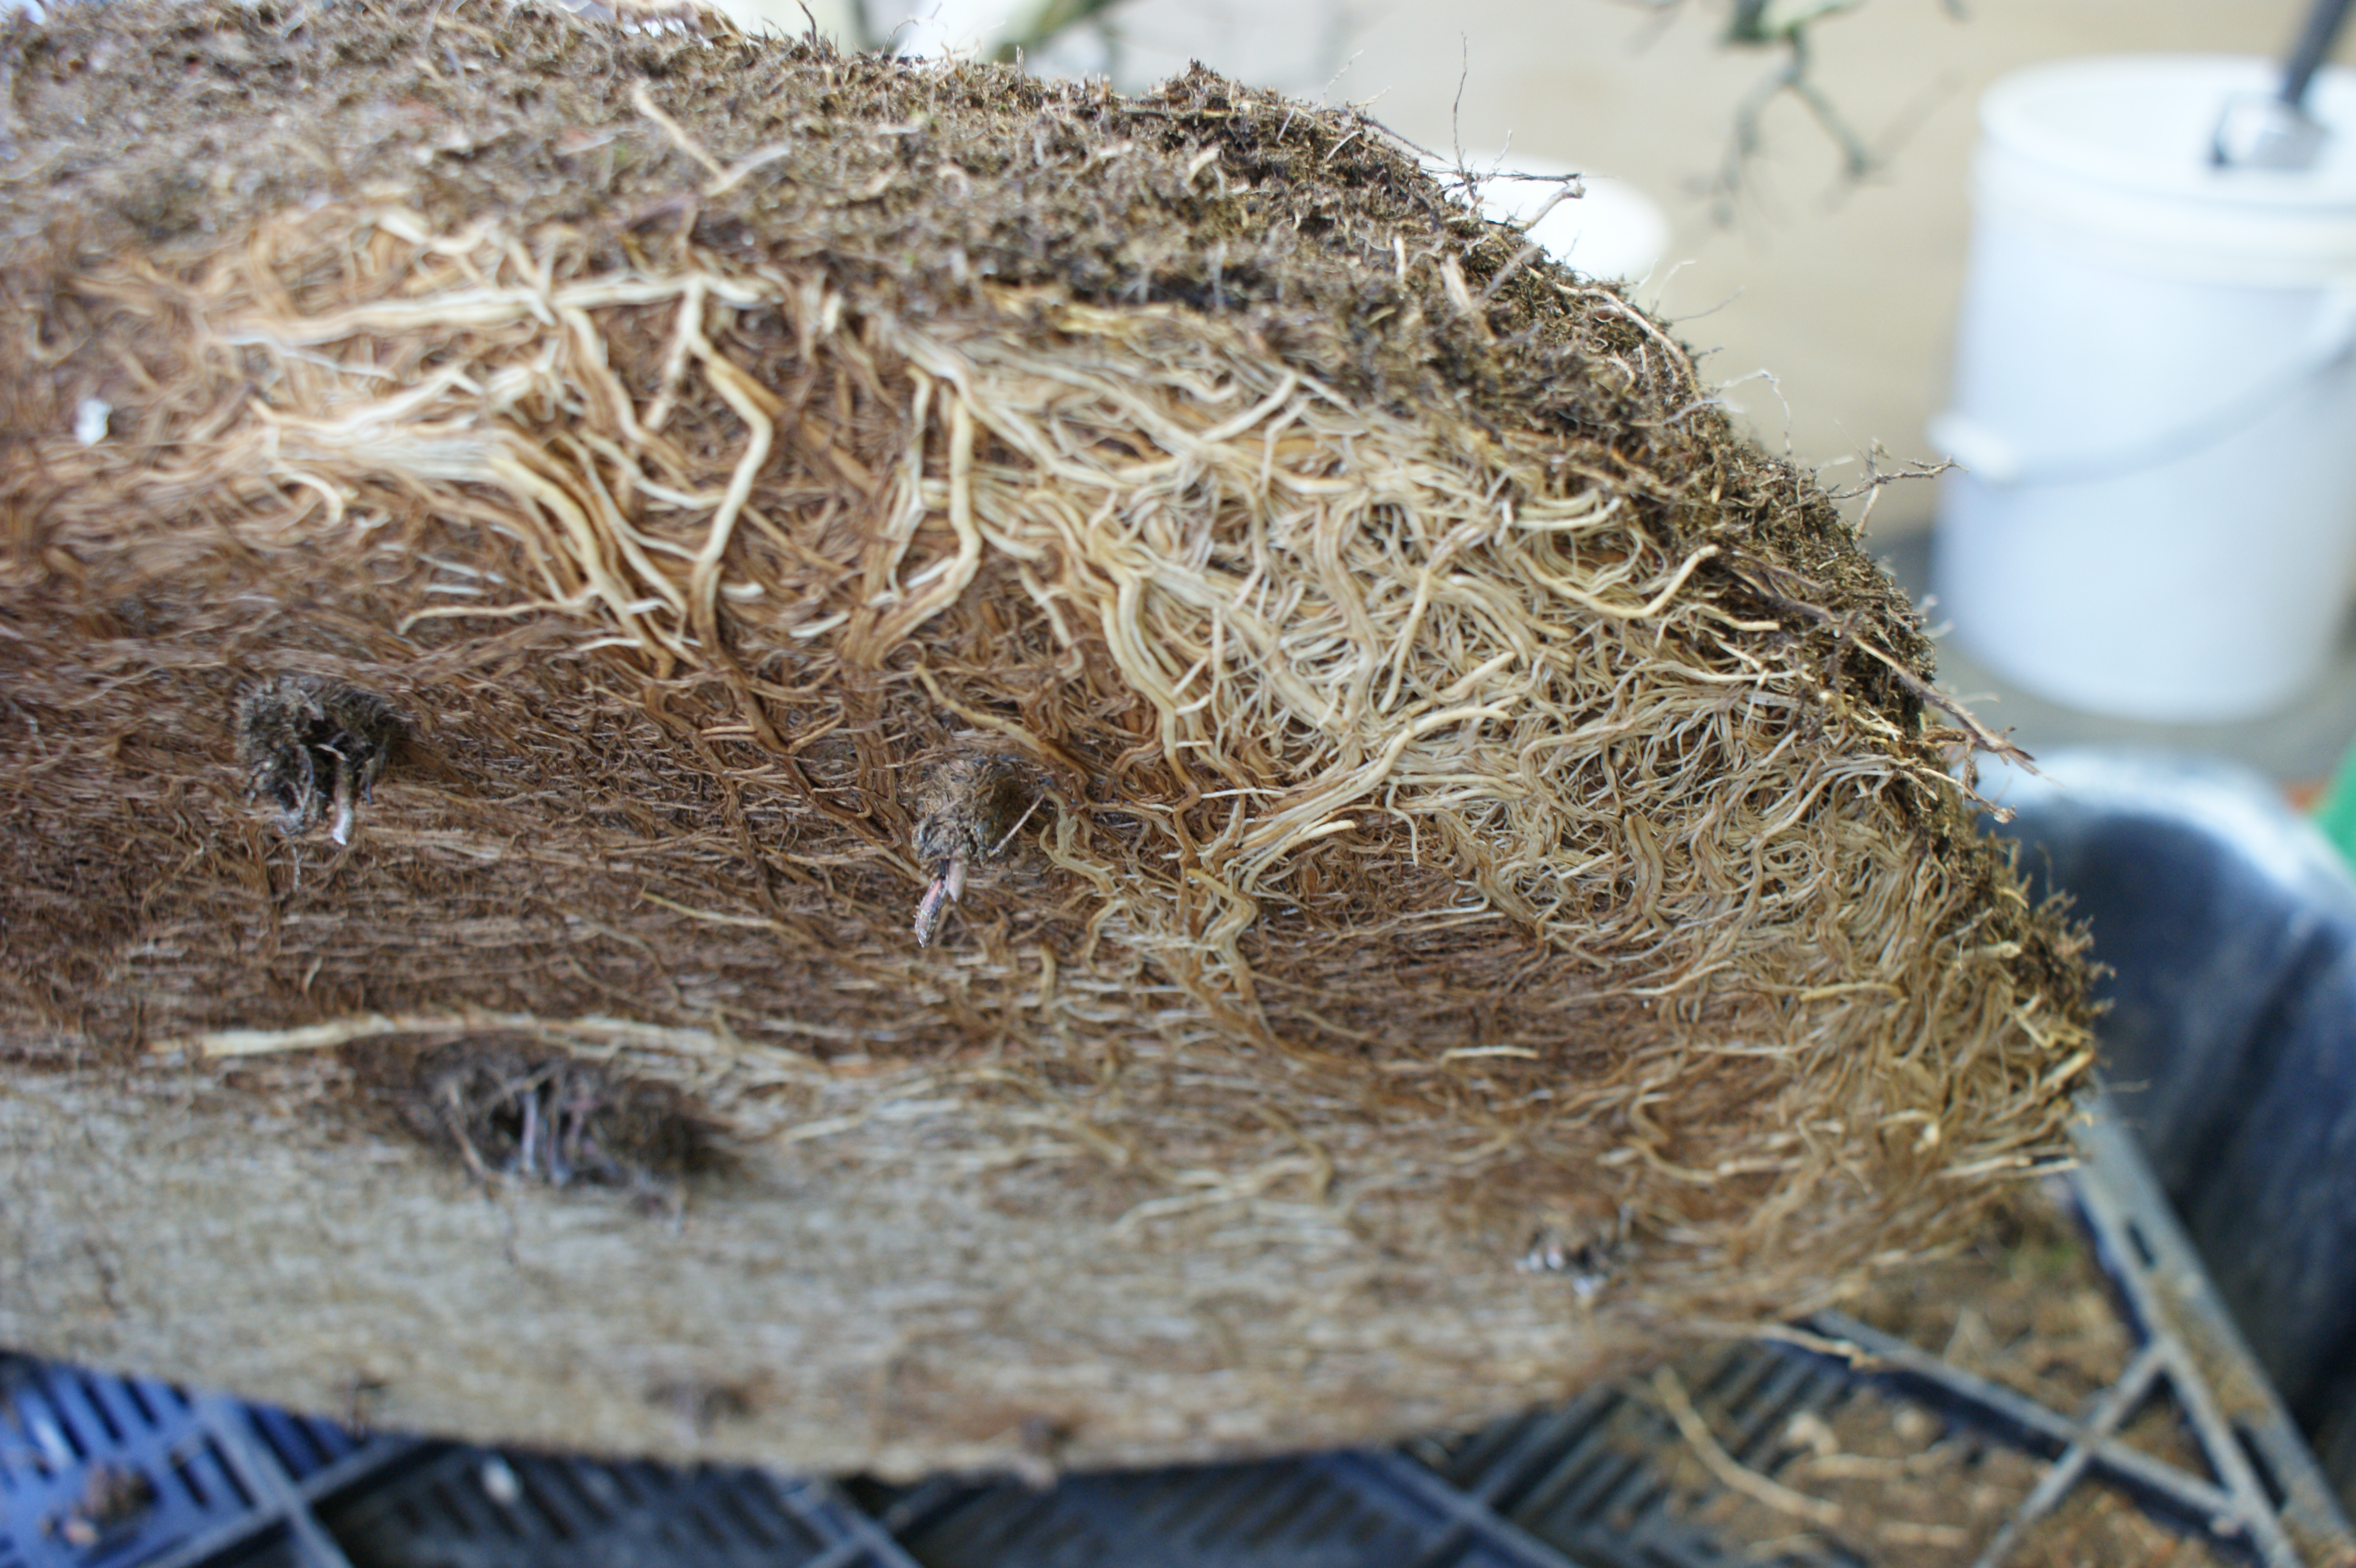
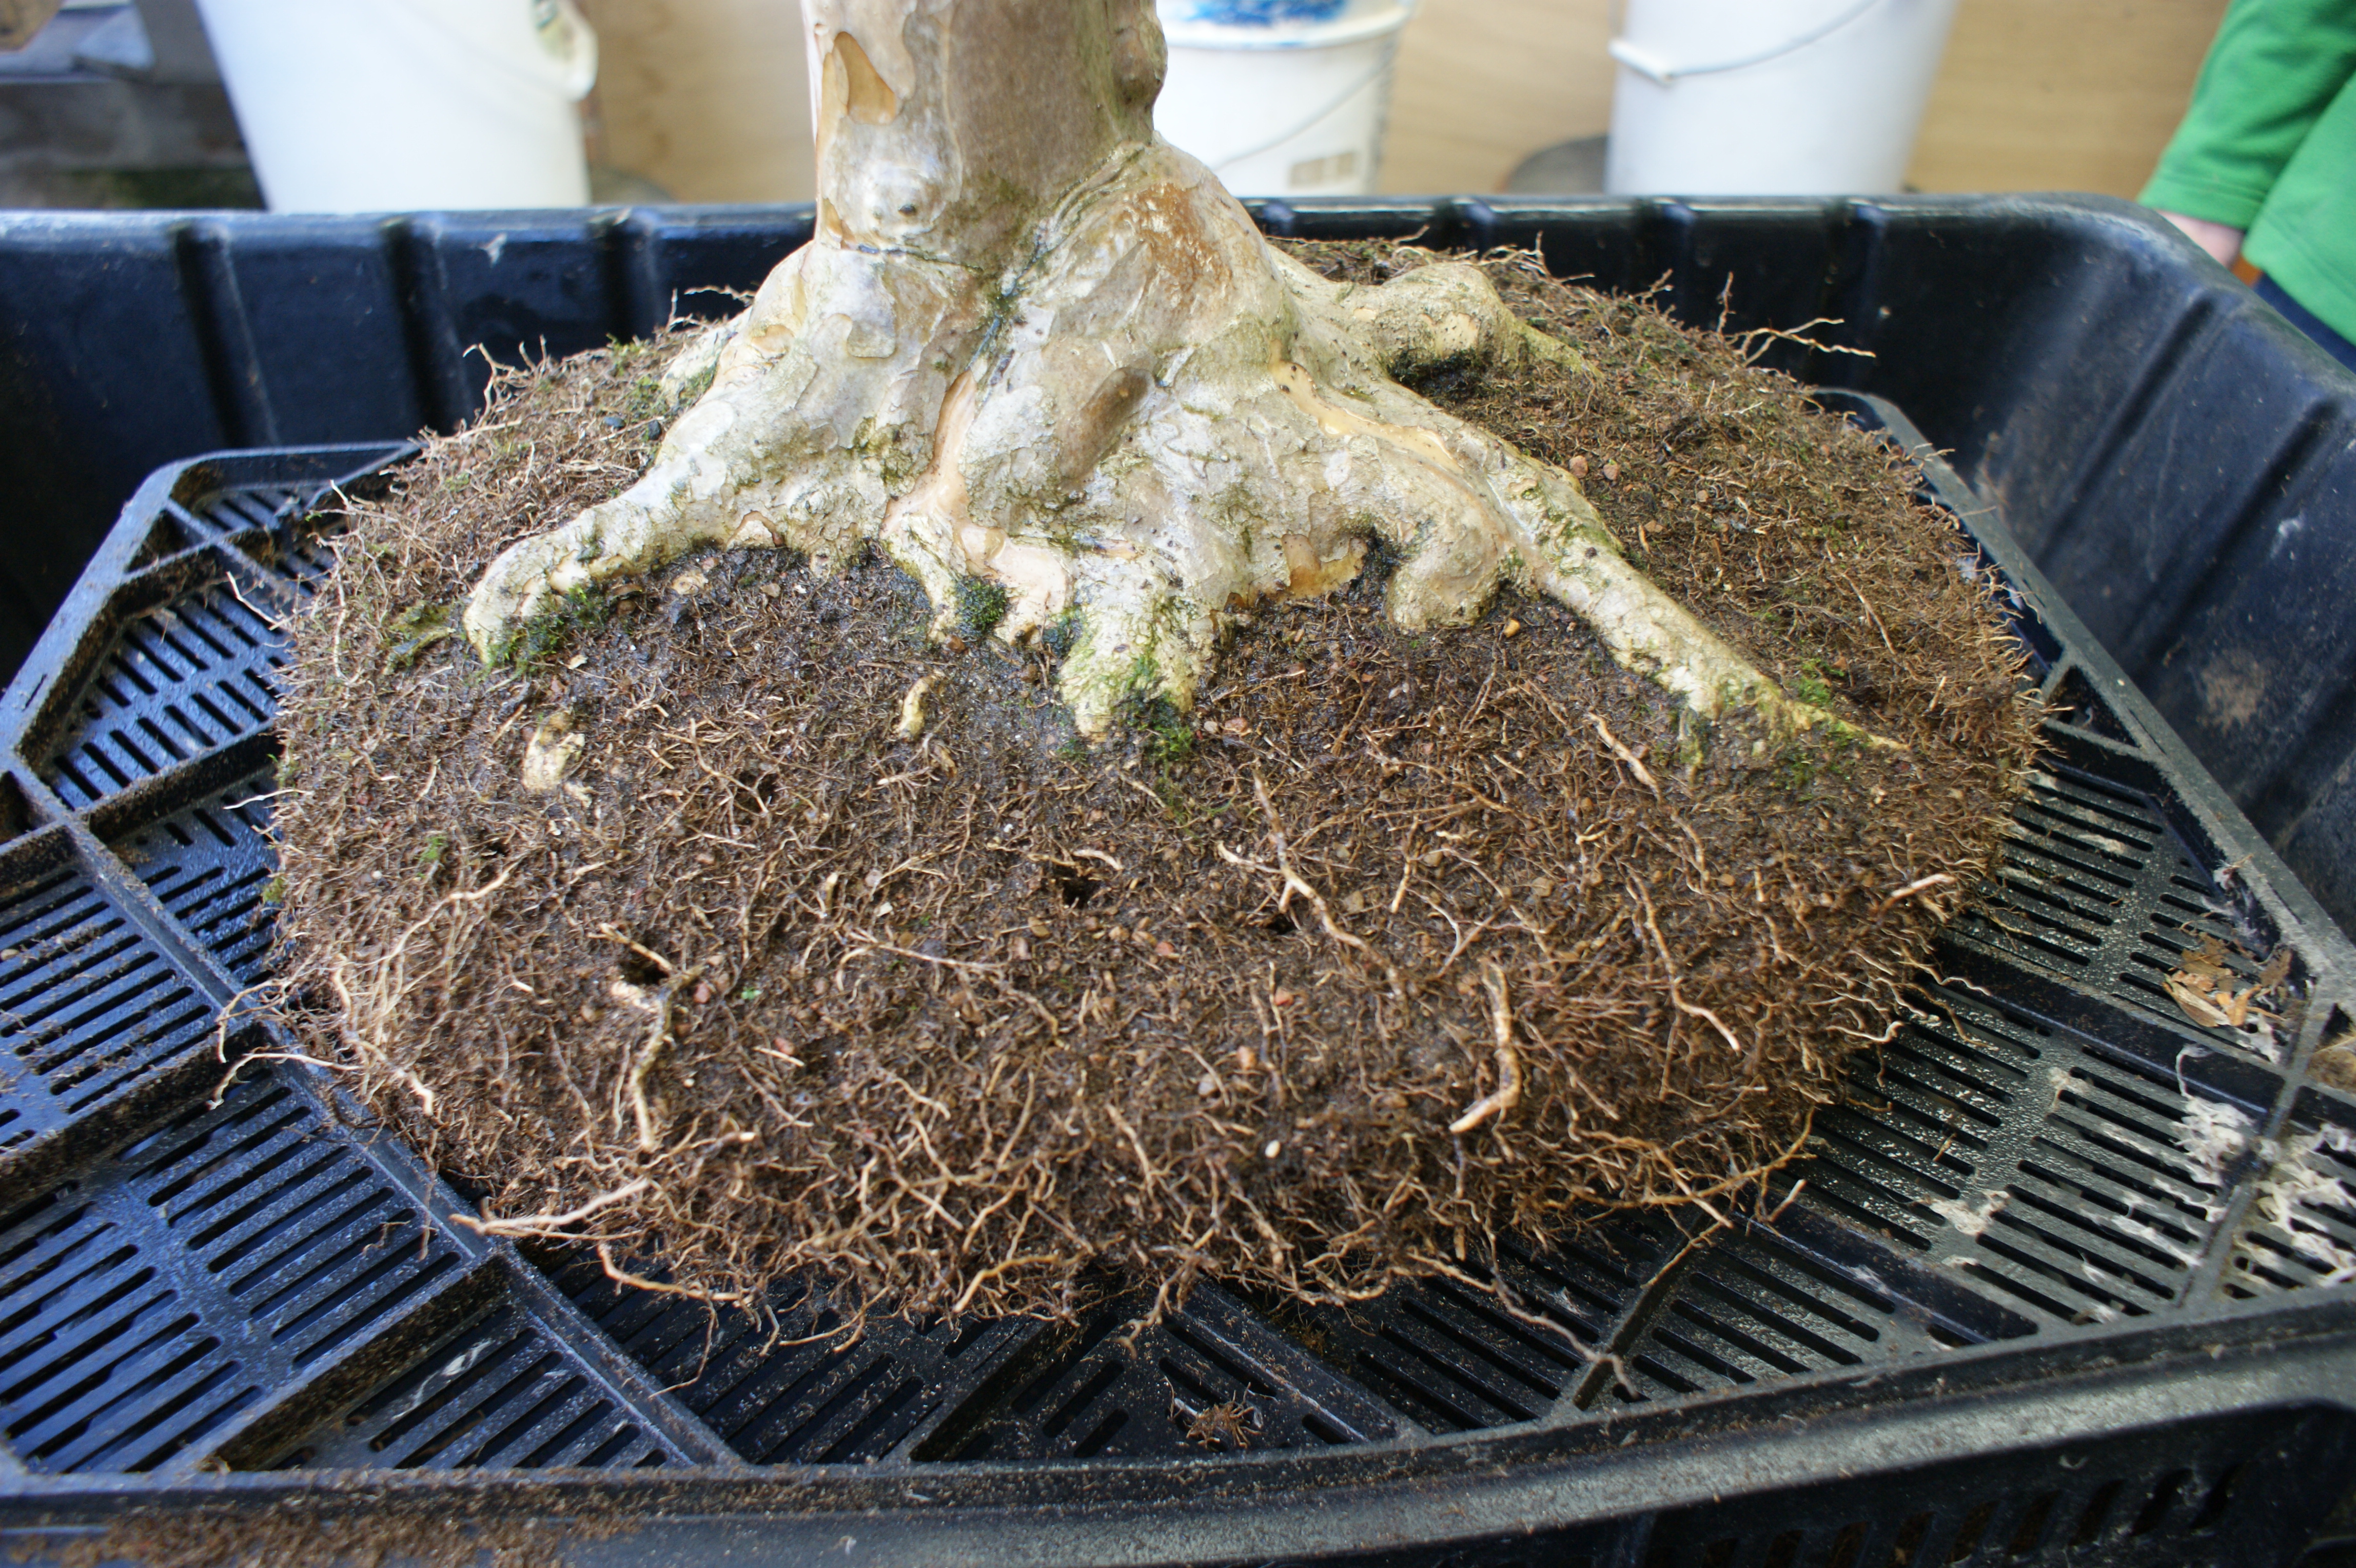
This tree was certainly in need of being repotted! You can see the abundance of roots on the sides and the bottom of the root ball (below). You can even see where the roots started to grow down through the drainage holes in the pot. These “root plugs” prevent proper drainage, which is very important for tree health.
Root plugs—where the roots started to grow down through the drainage holes in the pot—prevent proper drainage.
Drainage screen covered by root mat
The frequency of repotting is determined by a number of factors, including species, stage of development, and pot size. Vigorous root growers like maples need to be repotted and root pruned more frequently than pine trees of the same developmental stage (which grow roots more slowly). Though root pruning is important to bonsai health, it can be stressful to a tree if the roots are disturbed too frequently. Knowing the tree species you have and how it grows is important in making the decision of when to repot and root prune.
Volunteer Ester Bannier assists in root trimming.Use a root hook to work roots free.
Using root hooks, scissors, and chopsticks, the roots are teased out and pruned as needed. Cutting the roots back removes large woody roots, allowing more space for fine feeder roots to grow. The woody roots act only as transporters of energy. Woody roots do not absorb water, food, or oxygen; only the fine feeder roots do that. Having primarily fine feeder roots in our pots is what allows us to keep bonsai in such shallow containers. If the woody roots take up too much space, then the tree cannot absorb enough water, food, and oxygen to support the large amounts of foliage they have, and the trees’ health will suffer.
The bonsai, pre-trimming
The bonsai root ball after pruning
While the tree work is going on, the soil and pot are being prepared for its return.
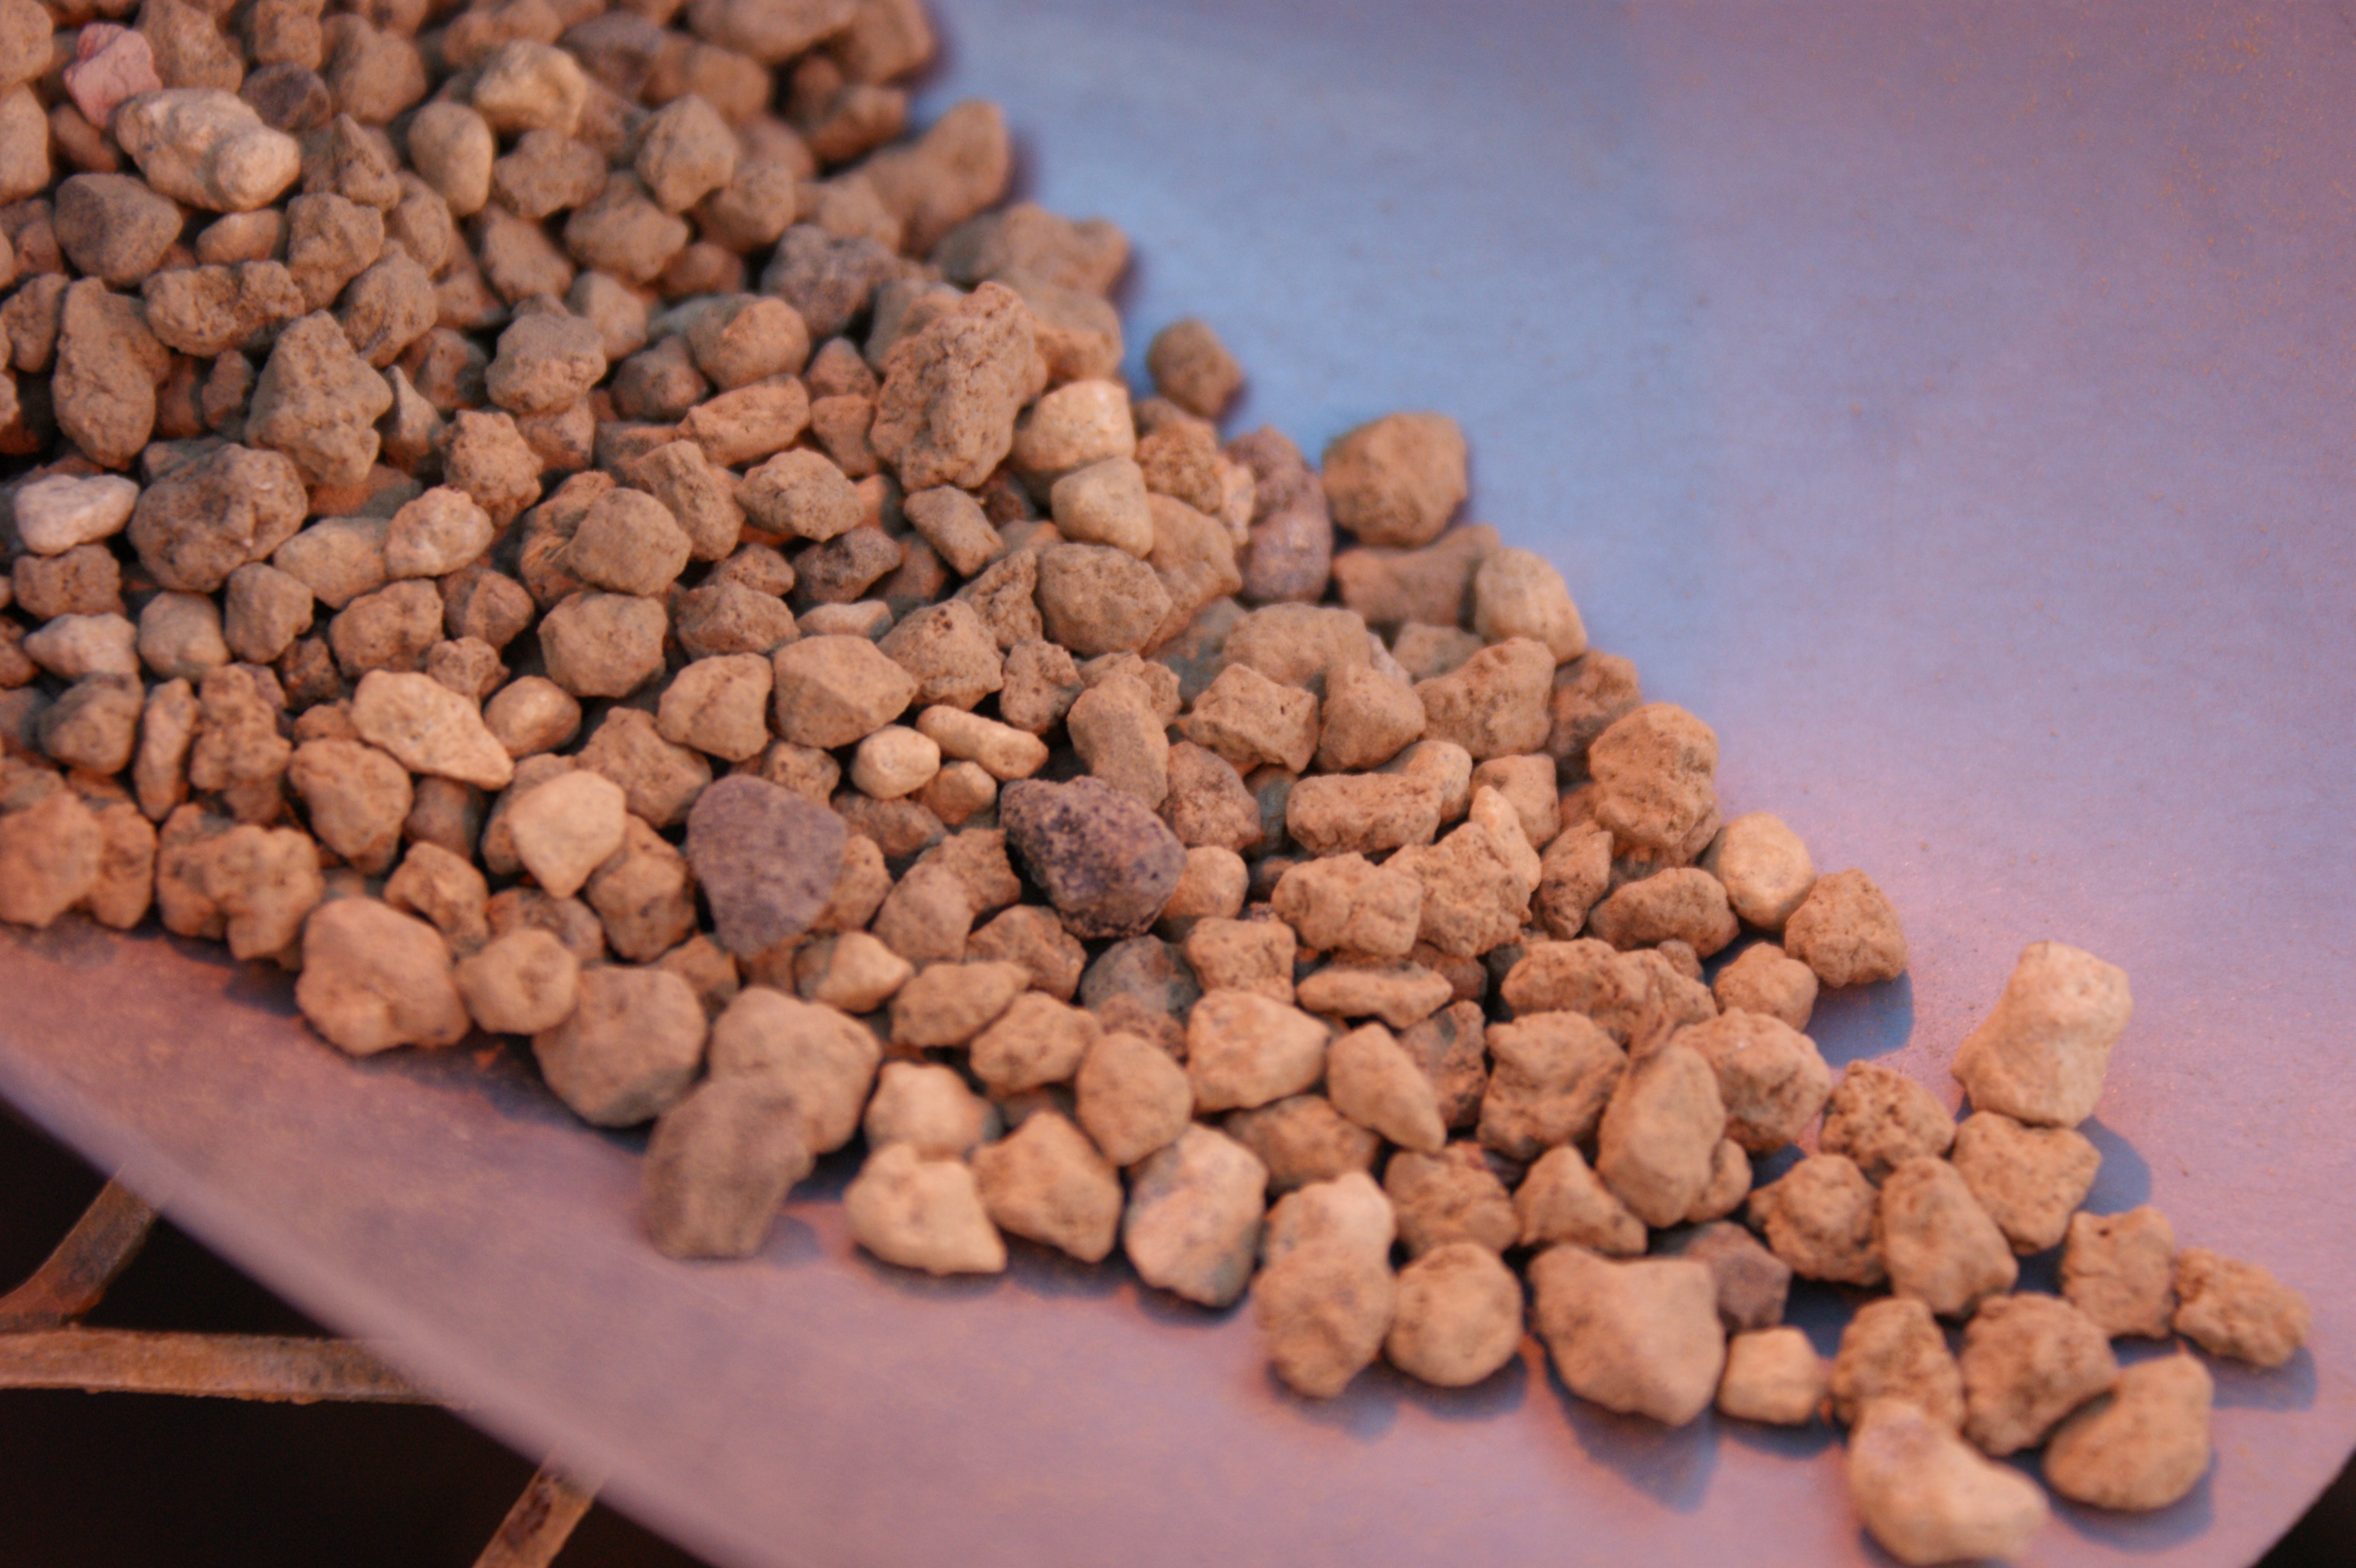
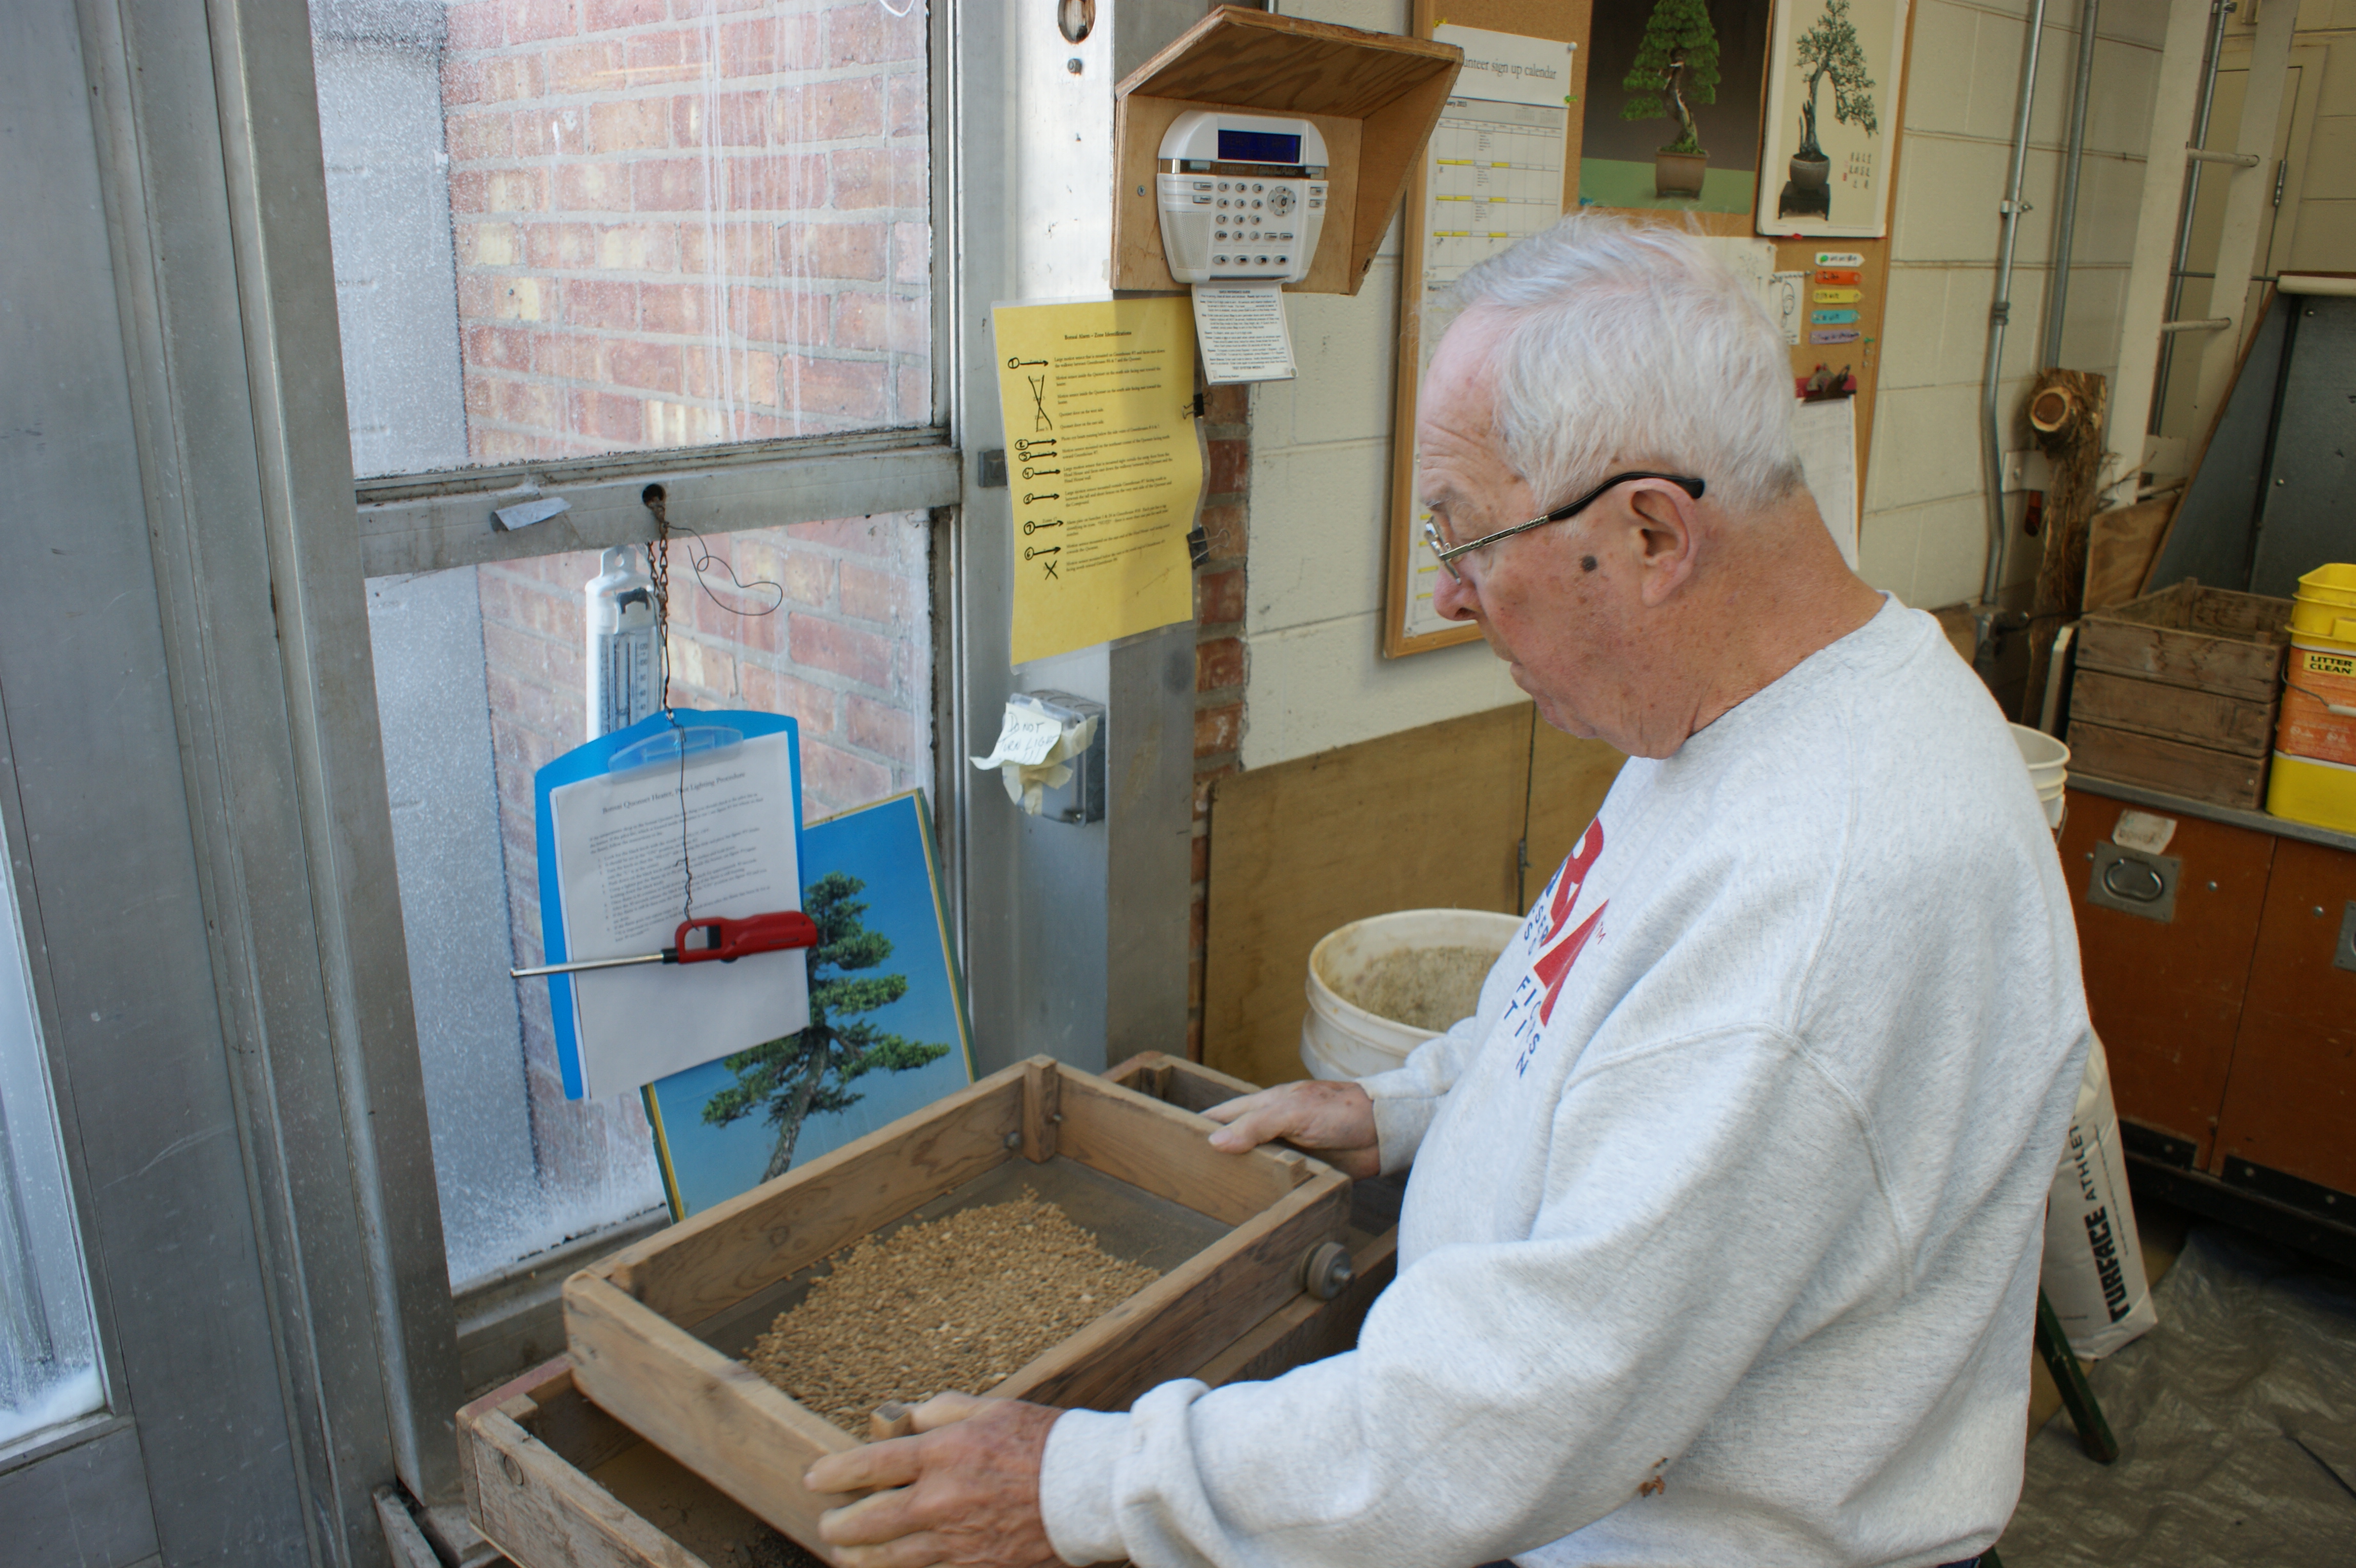
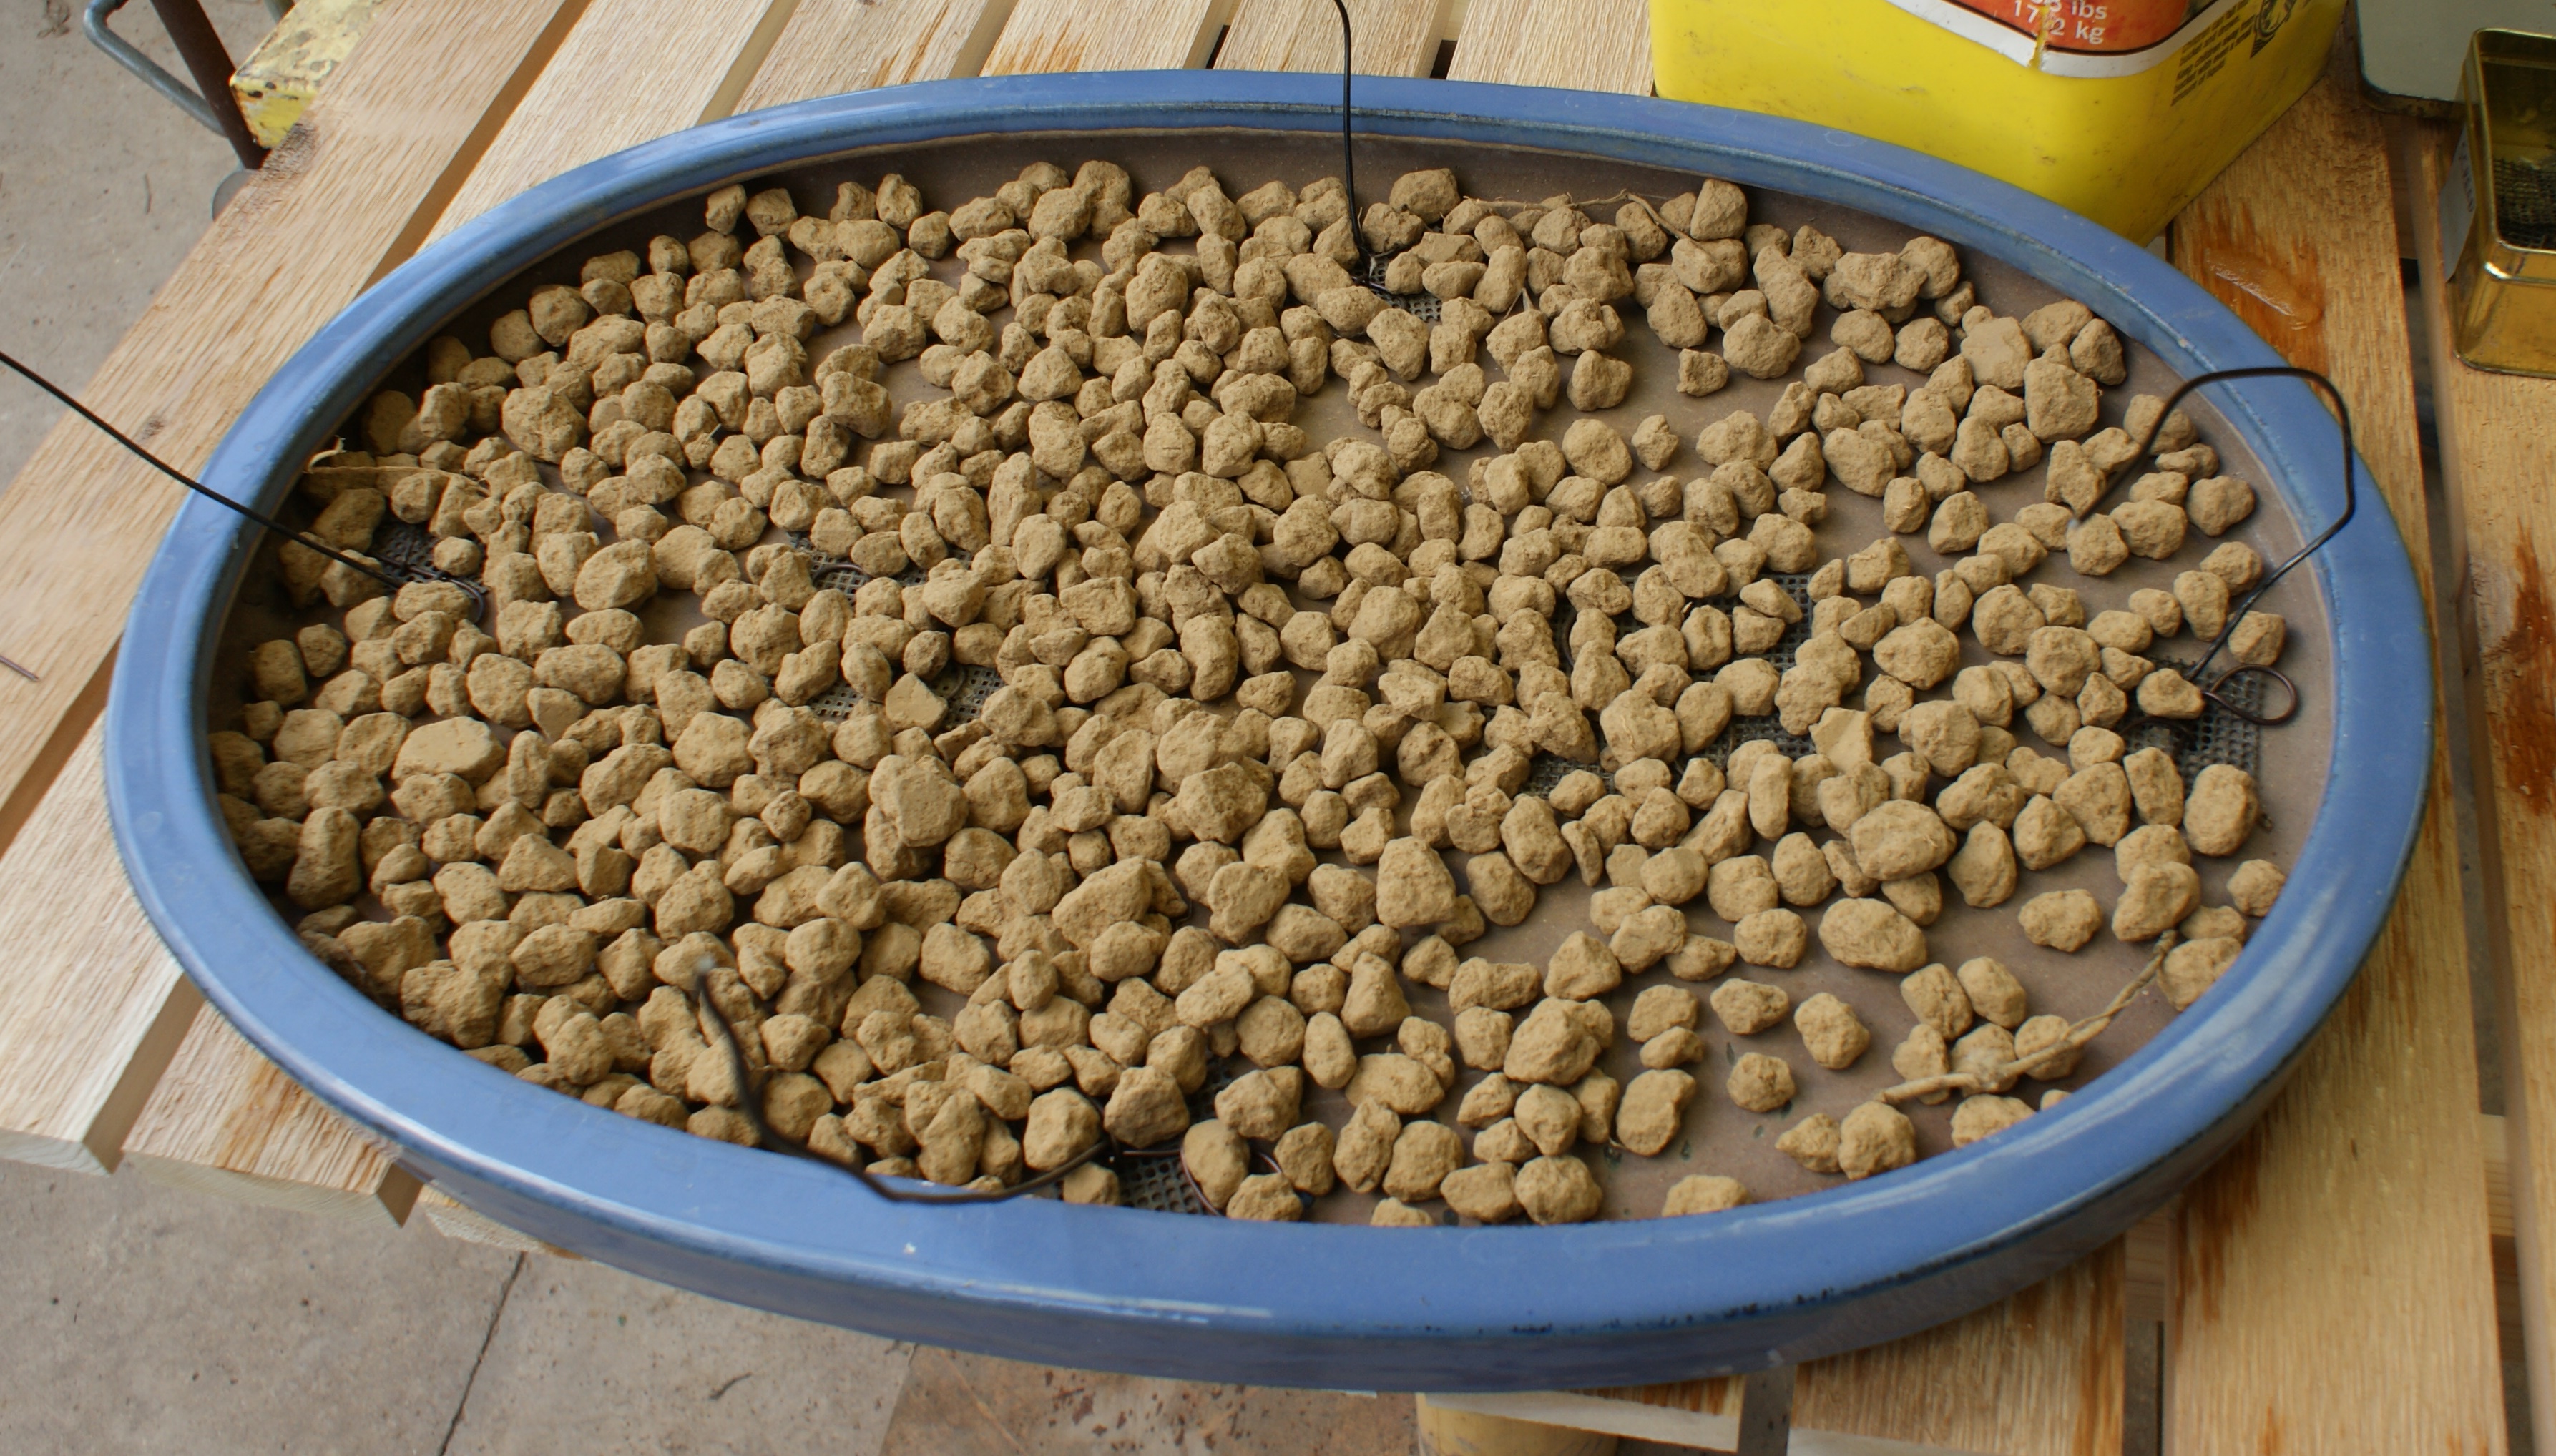
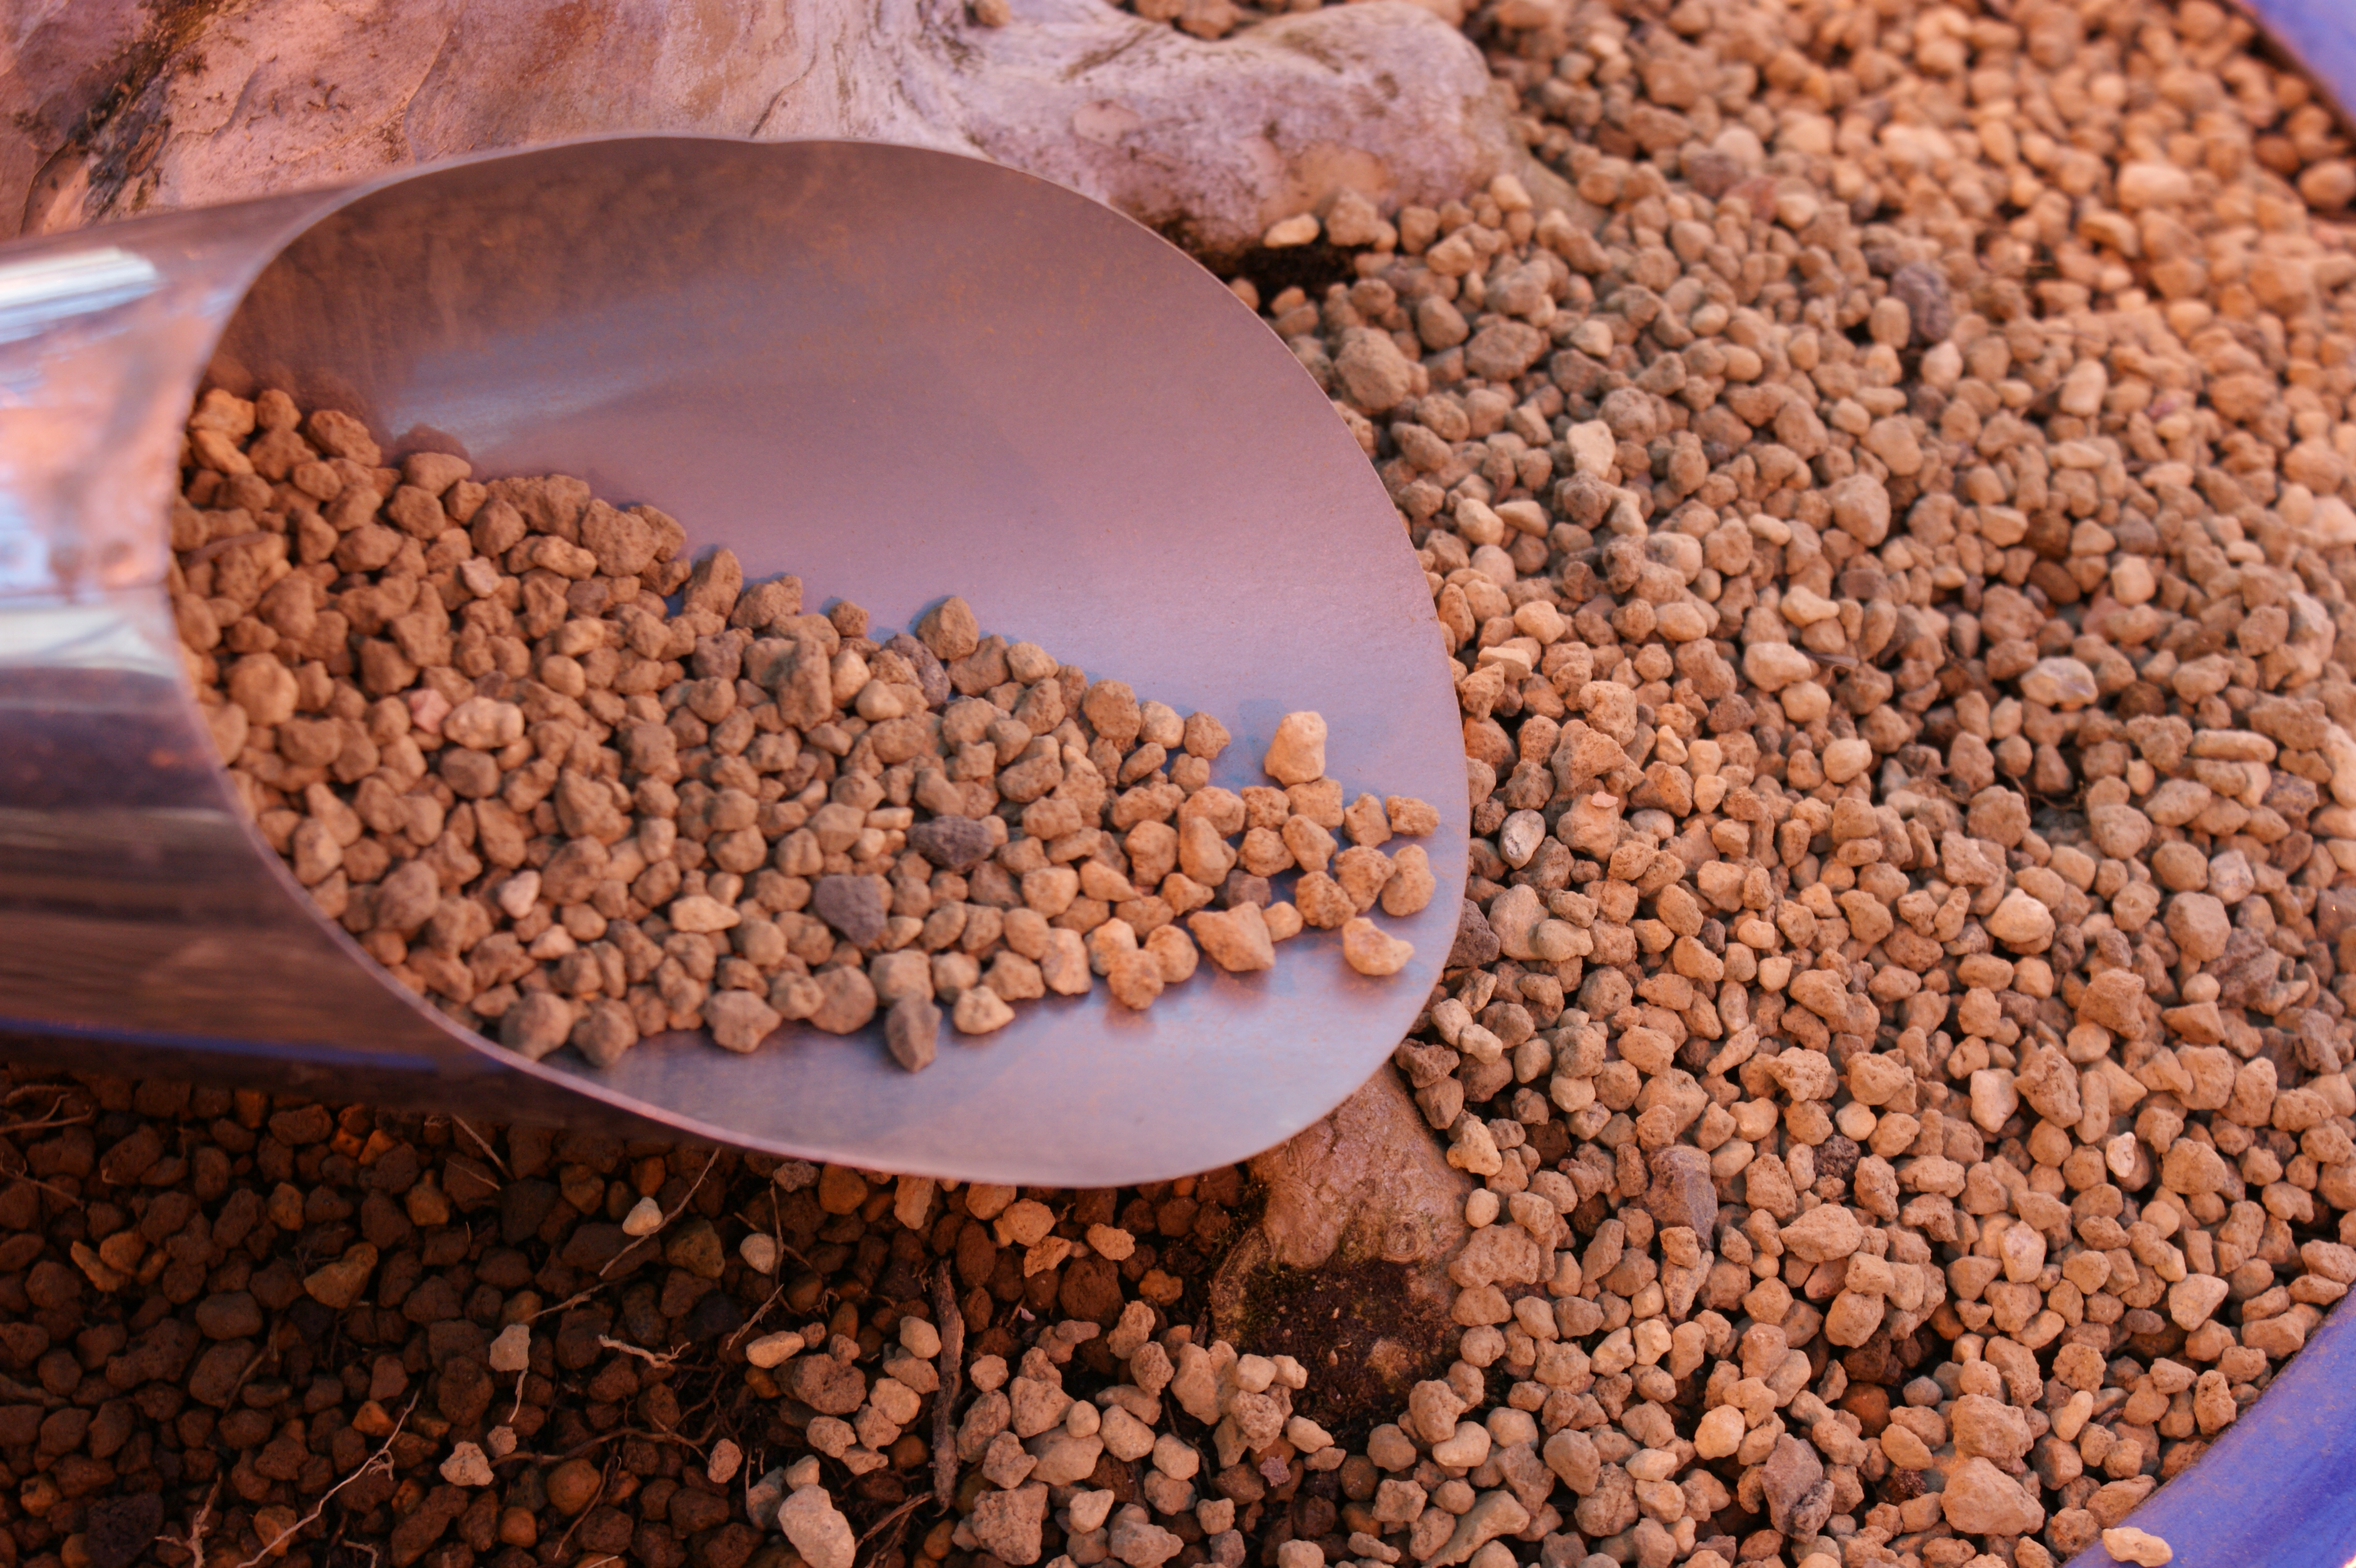
Bonsai soil is one of the most important aspects of growing bonsai trees. There are many different soil mixes and combinations that can be used based upon your tree species, the region in which you live, the amount of time you have to water, and many other factors. No matter what mix you choose, a good bonsai soil should support vigorous root growth, a healthy microbe balance, and have good drainage. Here at the Chicago Botanic Garden, we use a variety of mixes based on tree species and stage of development. For this tree, we will be using our base mix of akadama (a clay-like material mined in Japan), pumice, and lava rock. Our soil mix is sifted to remove any small particles and dust that could clog up the drainage holes, decreasing drainage.
A soil mix of akadama, pumice, and lava rock is used on this tree.
Volunteer Dick Anderson sifts soil for repotting the bonsai collection.
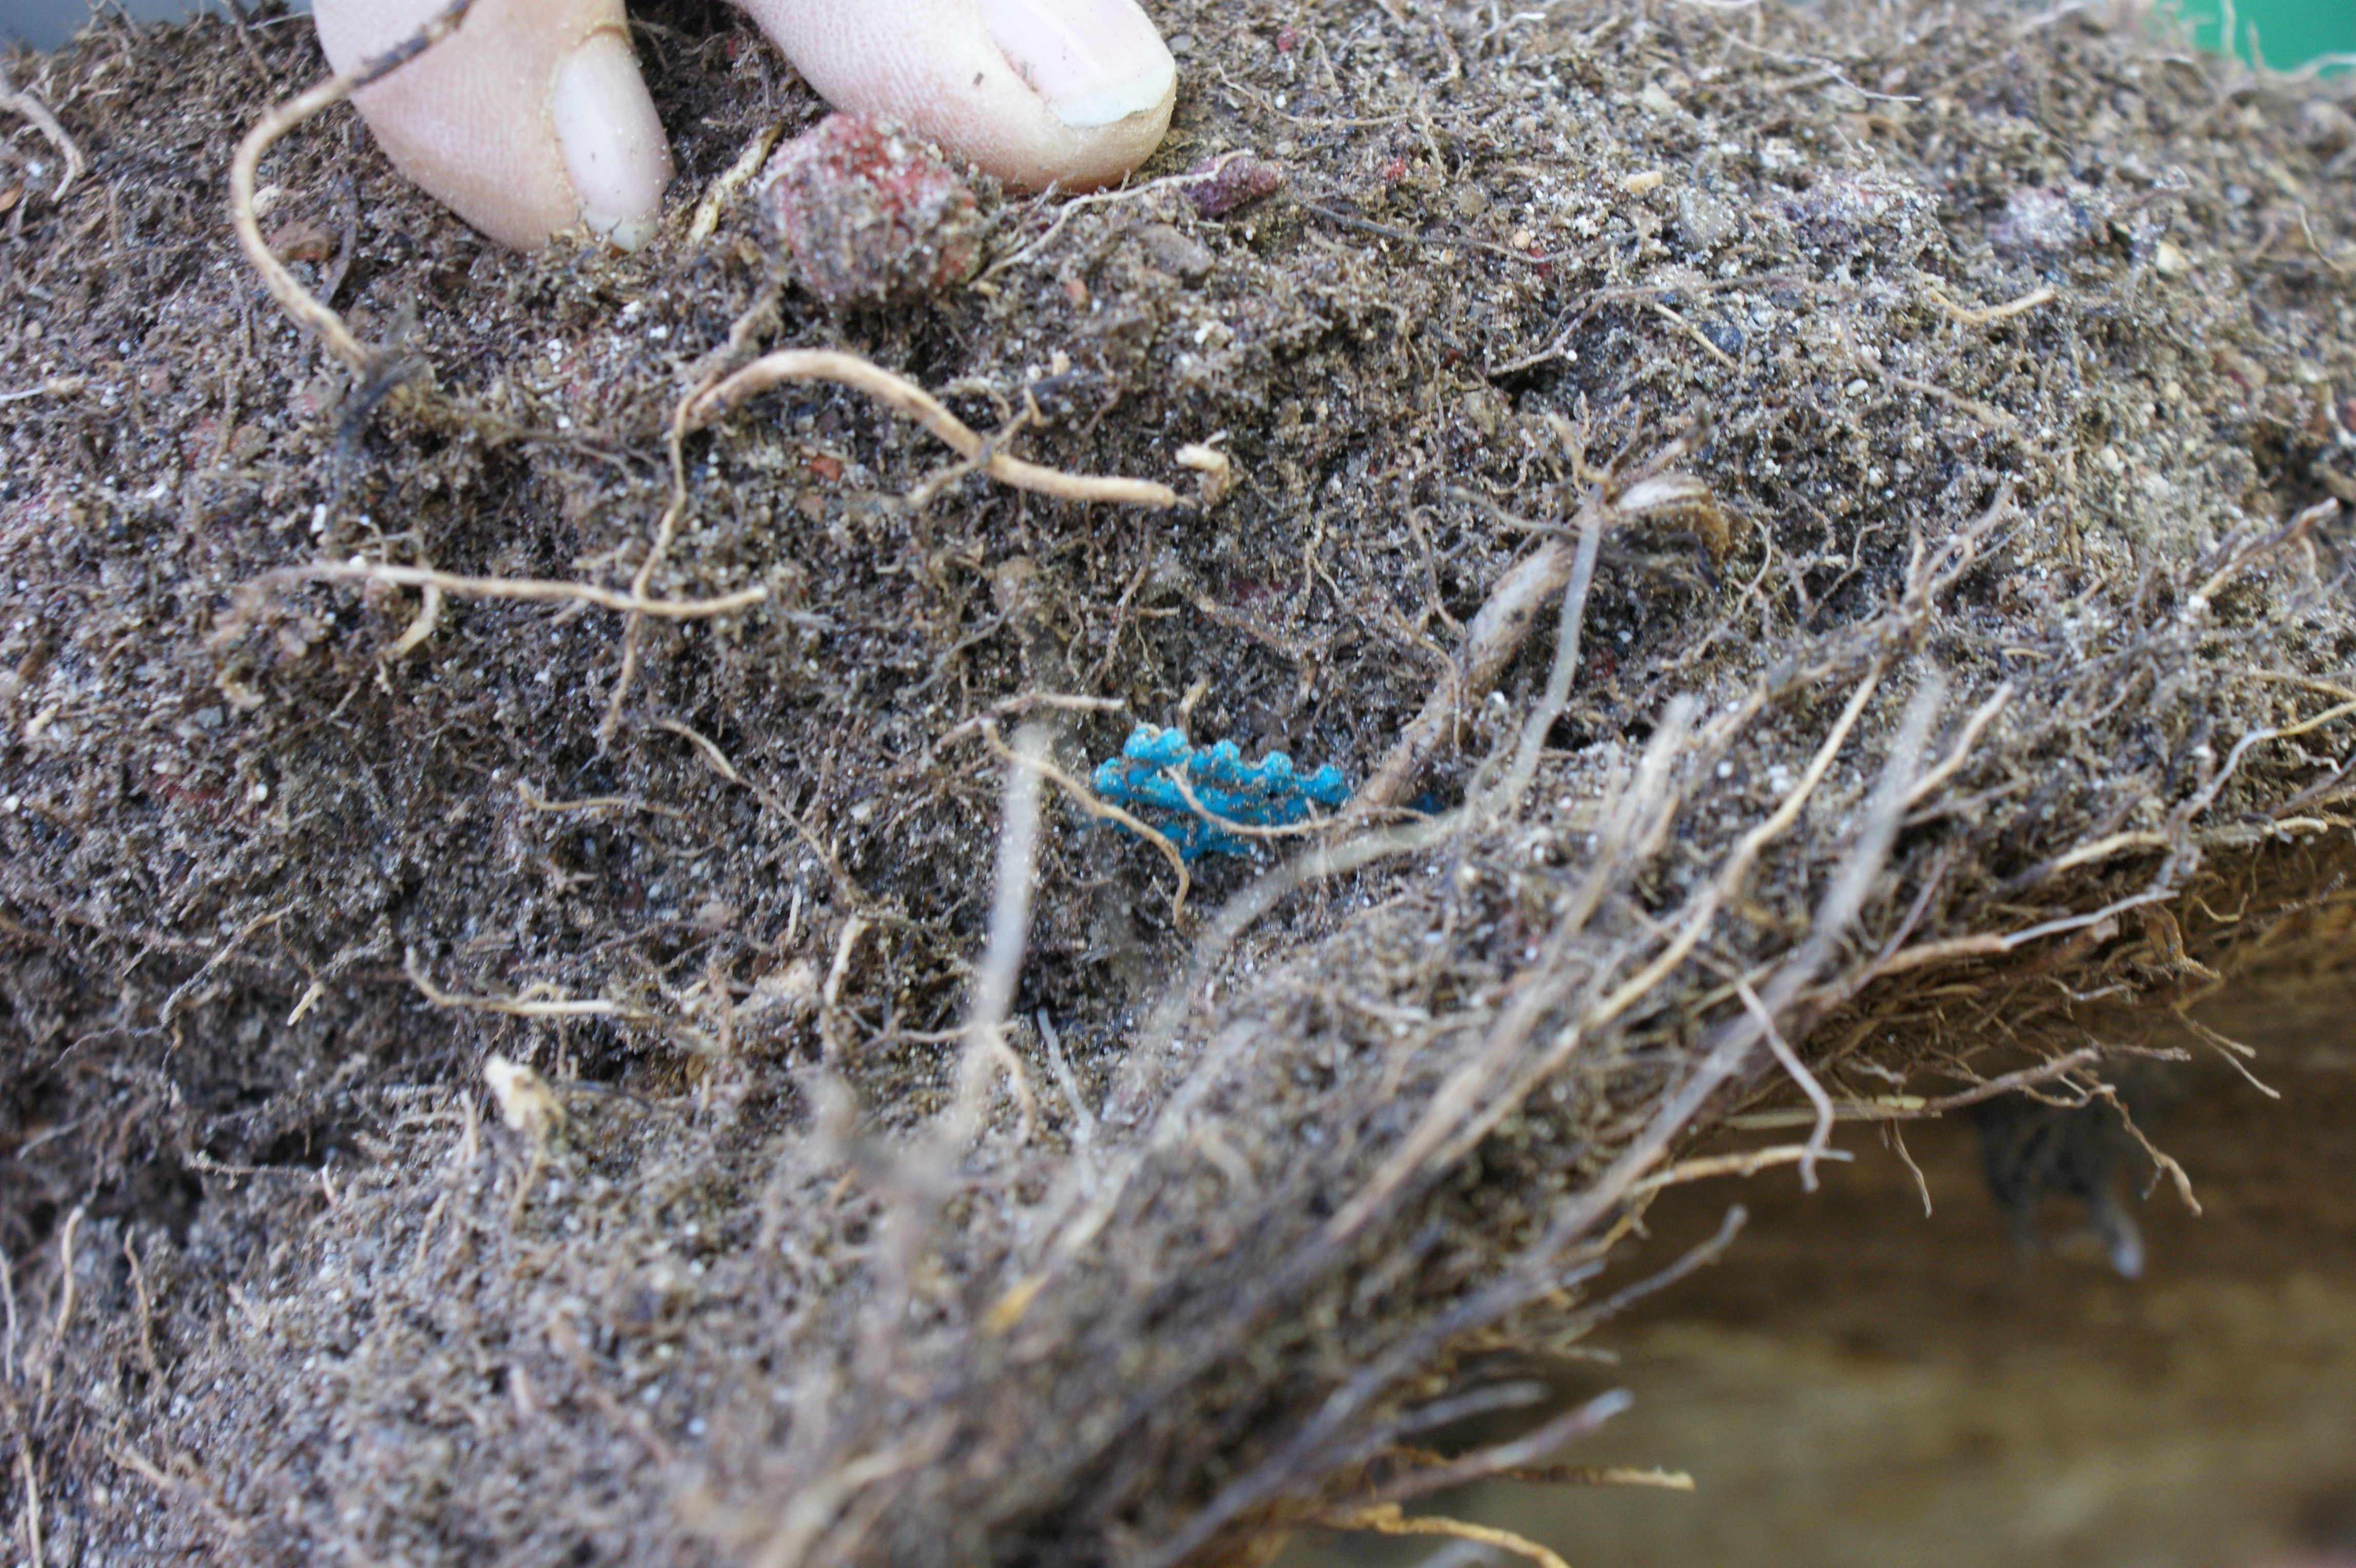
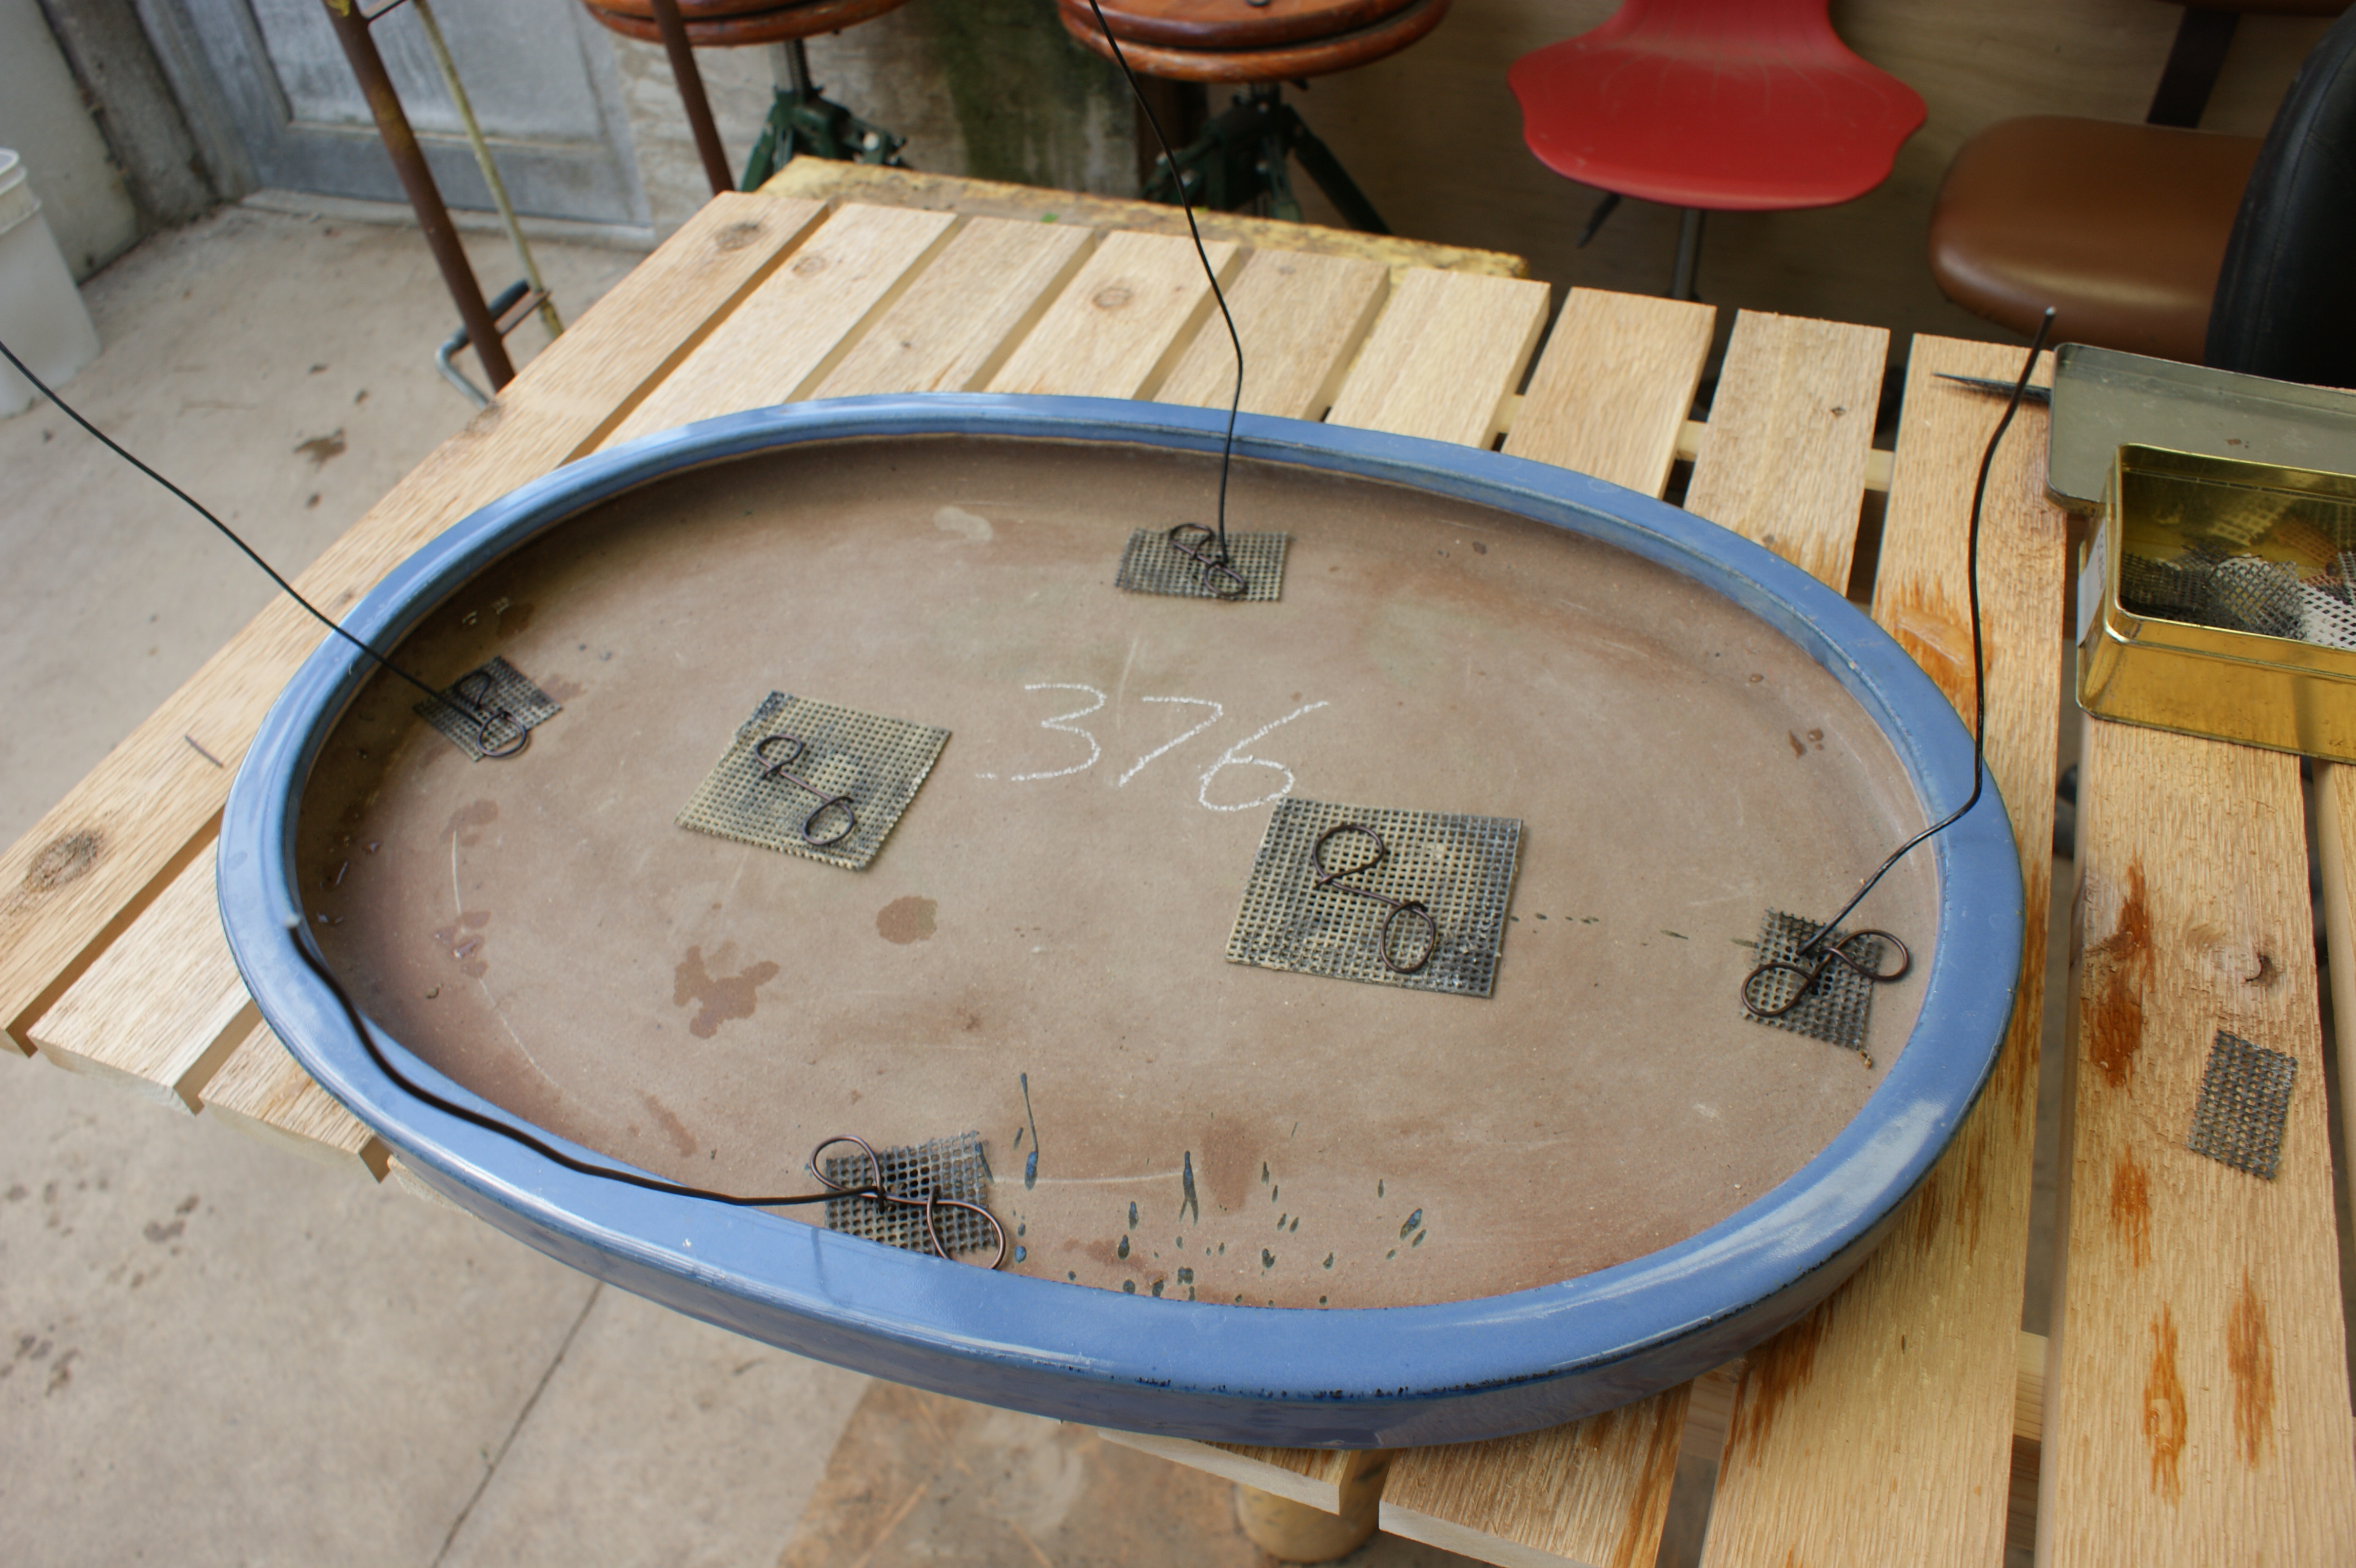
Once the pot has been cleaned, screens have been secured over drainage holes, and tie-down wires have been added, a layer of lava rock is placed to aid with drainage. After the drainage layer is placed, a small amount of soil is added to bring the tree up to grade and help position it in place.
Fresh mesh and tie-downs have been placed over drainage holes in the pot.
Drainage has been added in a single layer.
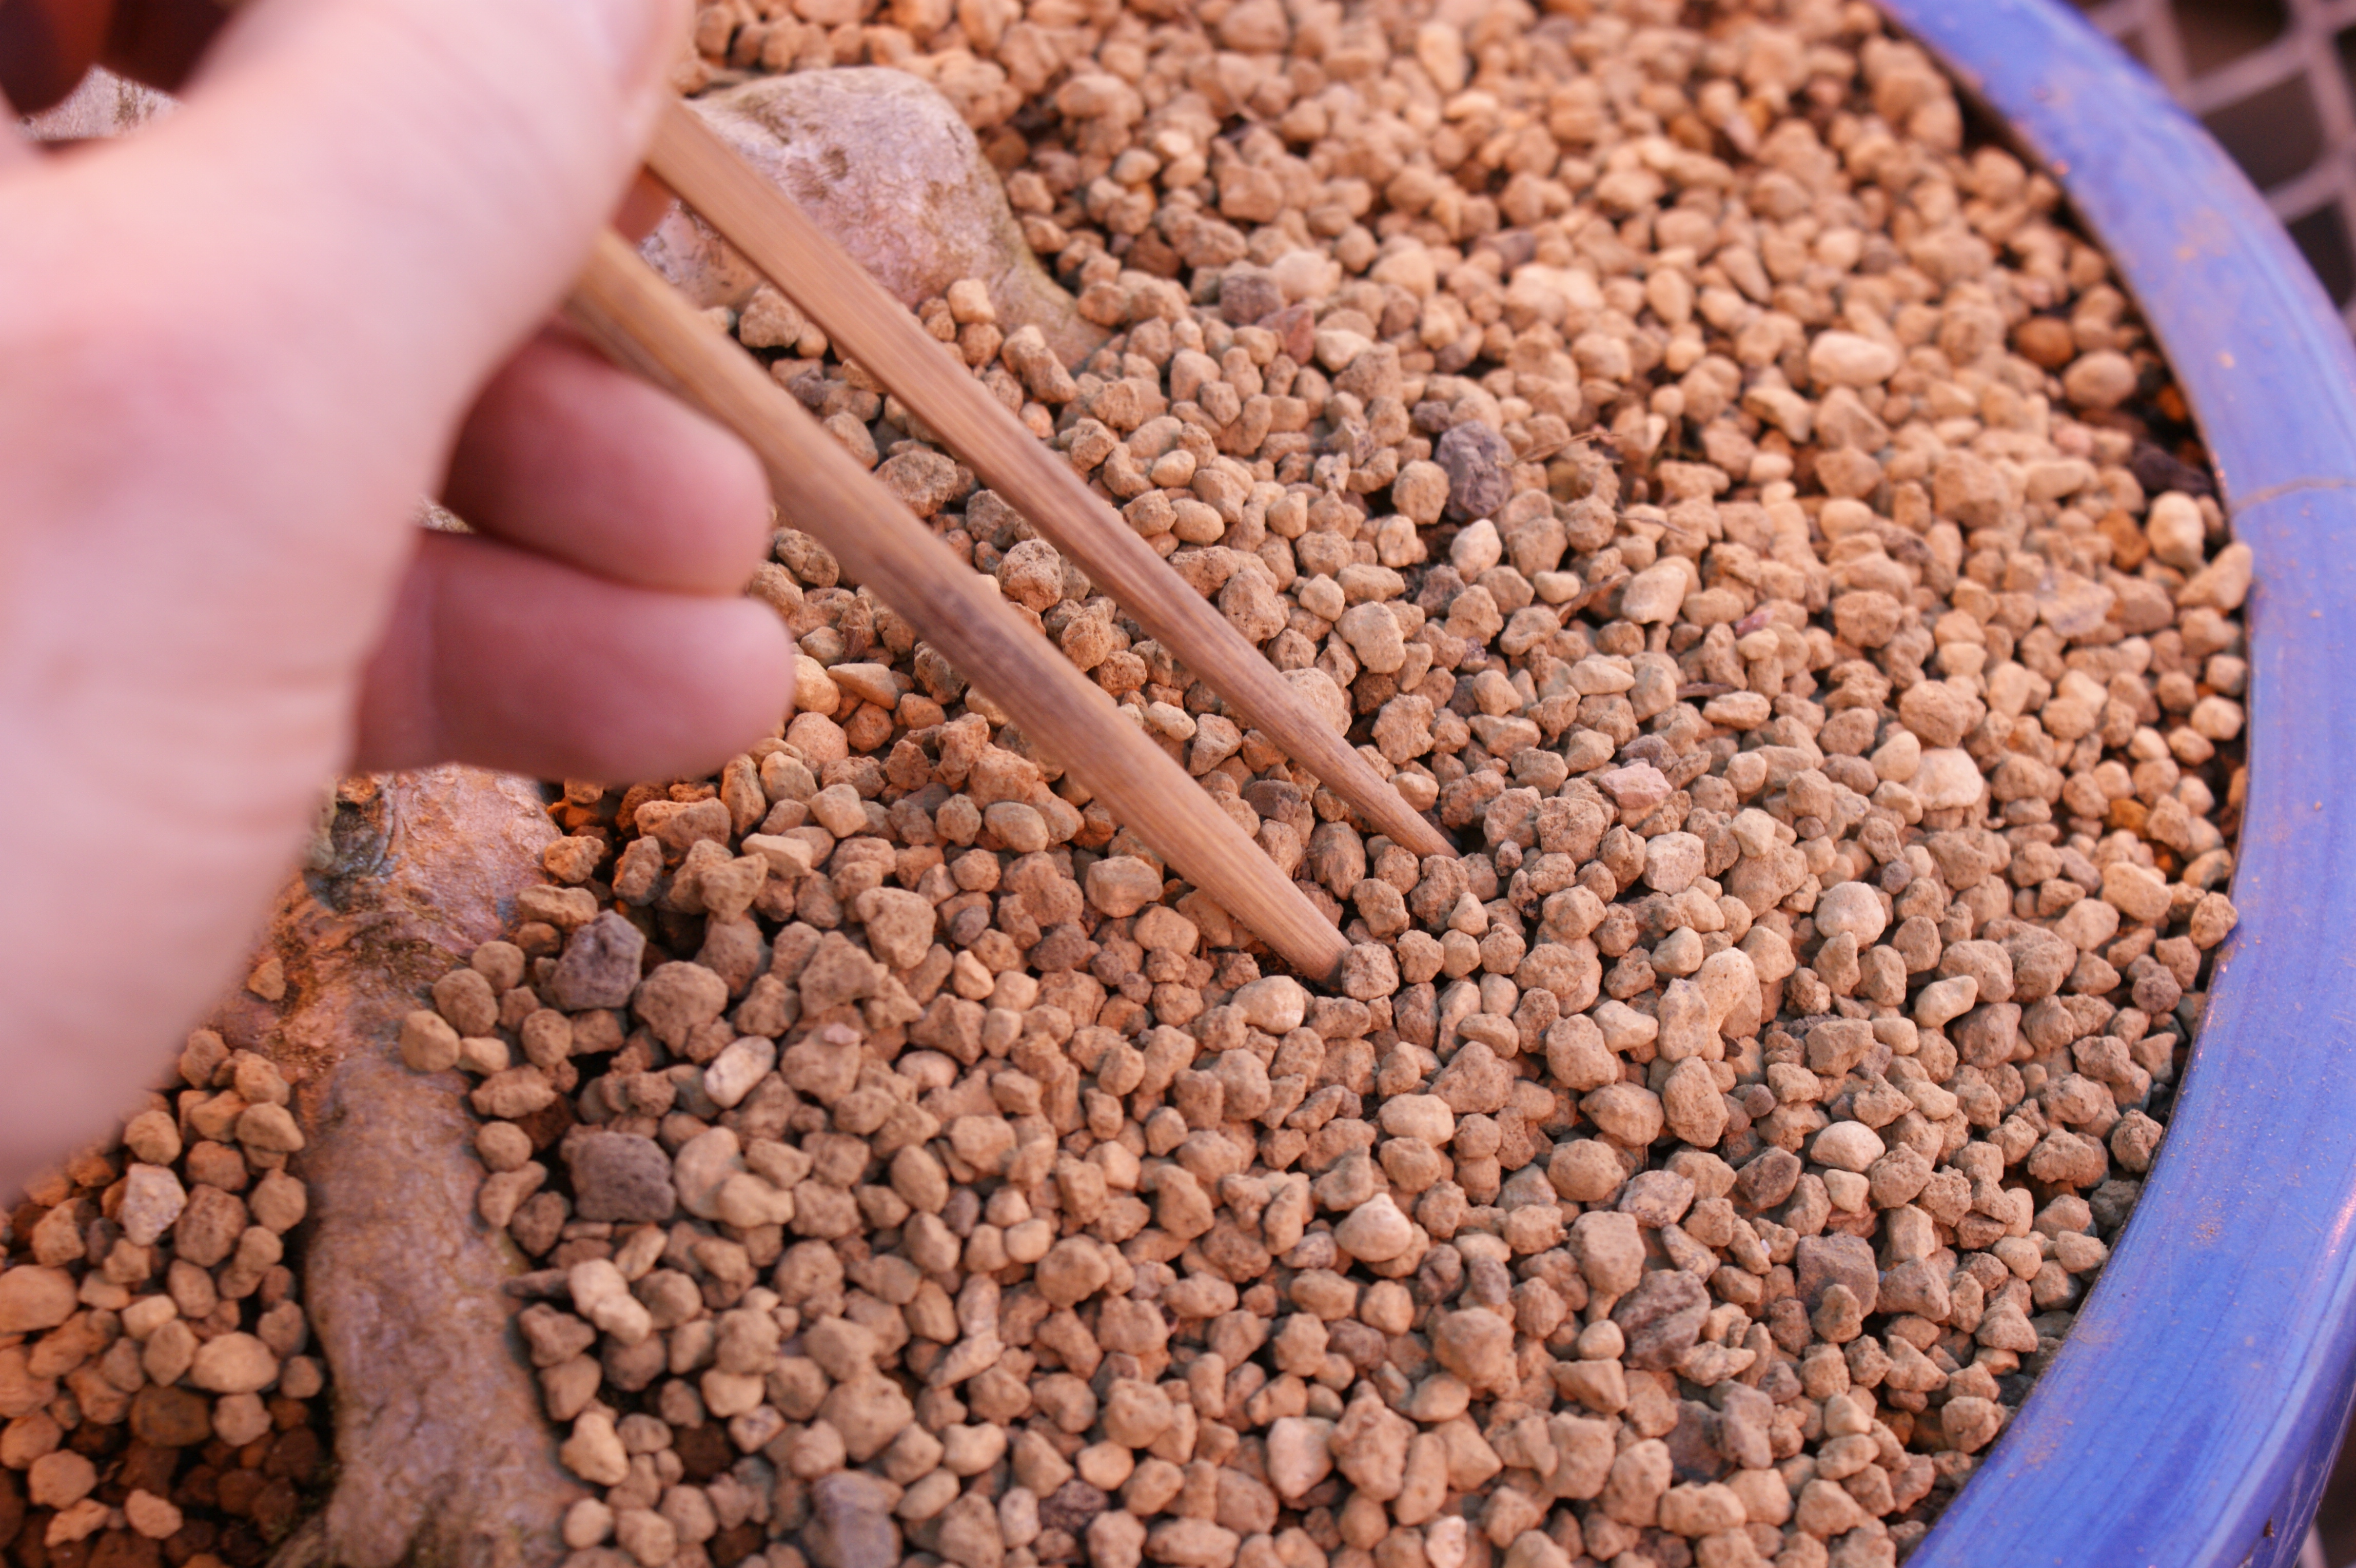
Once the tree is in place and secured, soil is added and chopsticks are used to push the soil into all the open spaces in and around the root system. Any open gaps left in the pot will result in dead space where roots will not grow. The soil should be firmly in place but not packed too tightly; otherwise, the drainage will be affected, and it will be difficult for roots to grow.
Adding soil to repotted bonsai
Chopsticks are used to push soil into open spaces around roots.
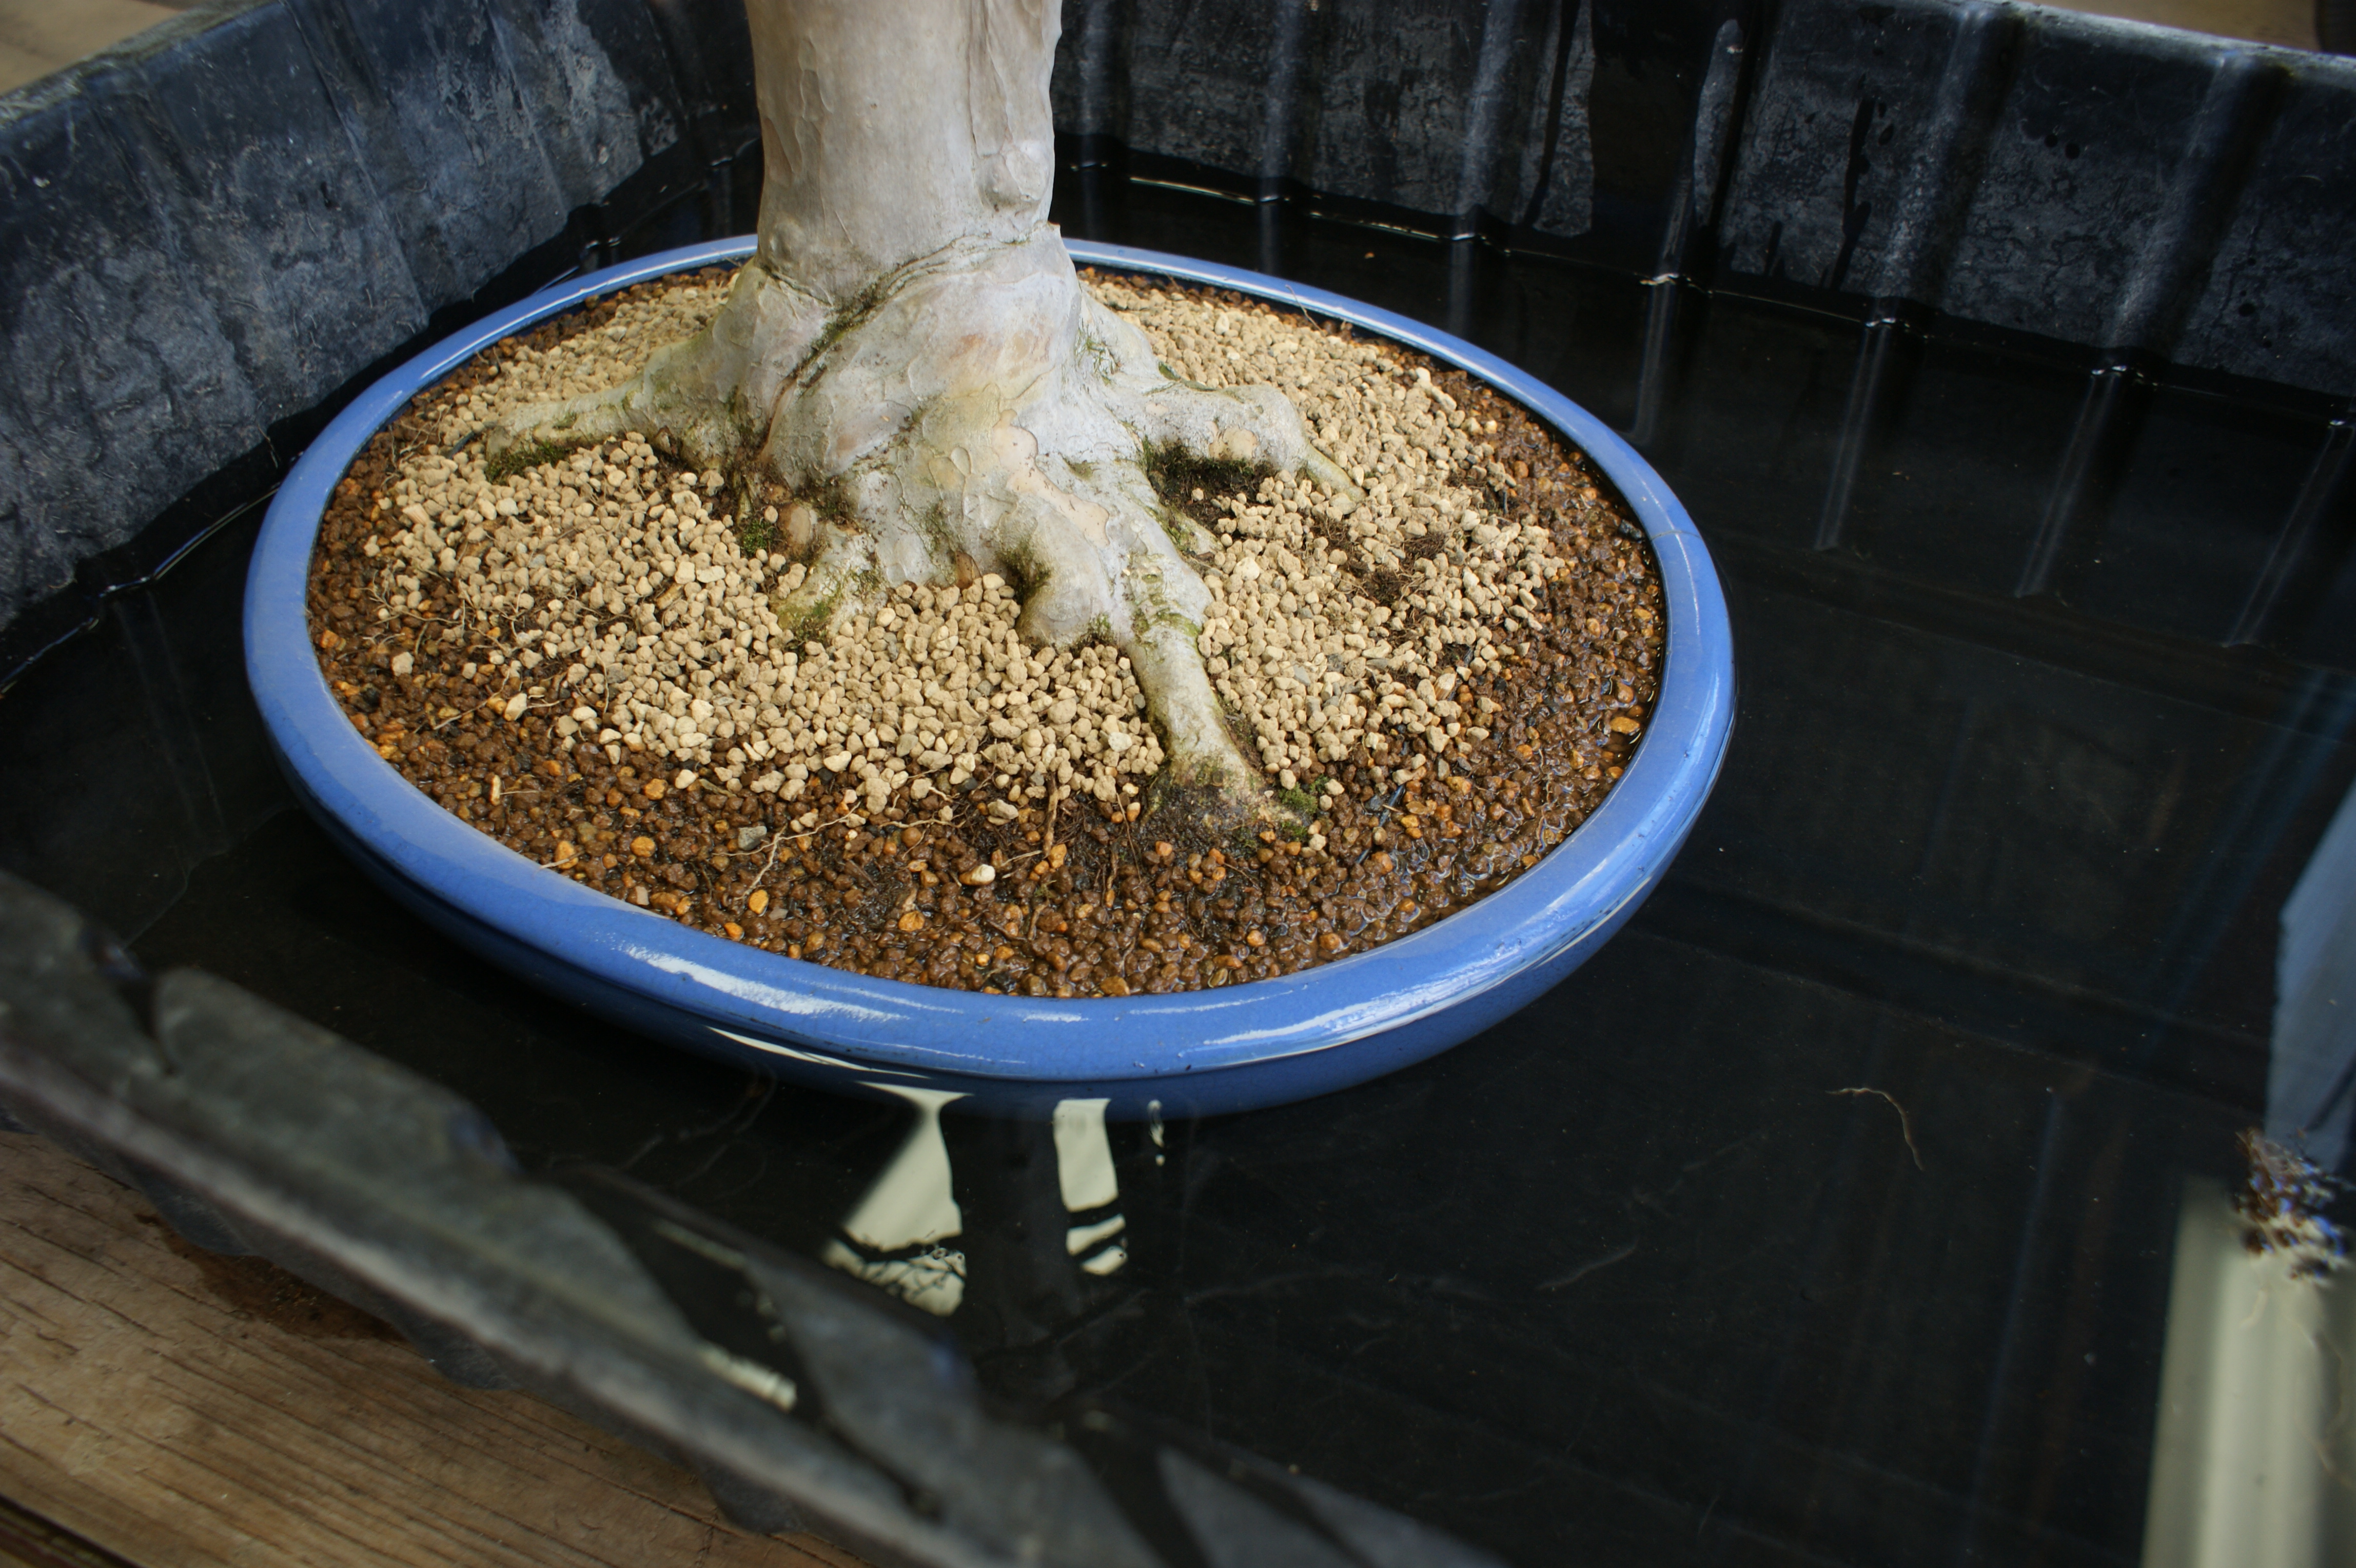
When the soil is set, the tree is soaked in a tub of water and a liquid product called K-L-N, which promotes root growth and reduces stress from the repotting process.
After a good soaking, the tree is removed and allowed to drain, then returned to its bench in the greenhouse. It will remain there until it is warm enough to go outside on the benches. Not all trees are moved to the greenhouse after repotting; most will return to the over-wintering storage. However, this tree was stressed at the end of the growing season, and I wanted to give it a jump-start on the year and give it more time to recover and gain back some of its vigor.
Soaking the repotted bonsai in water and K-L-N
Bonsai “benched” in the greenhouse until spring
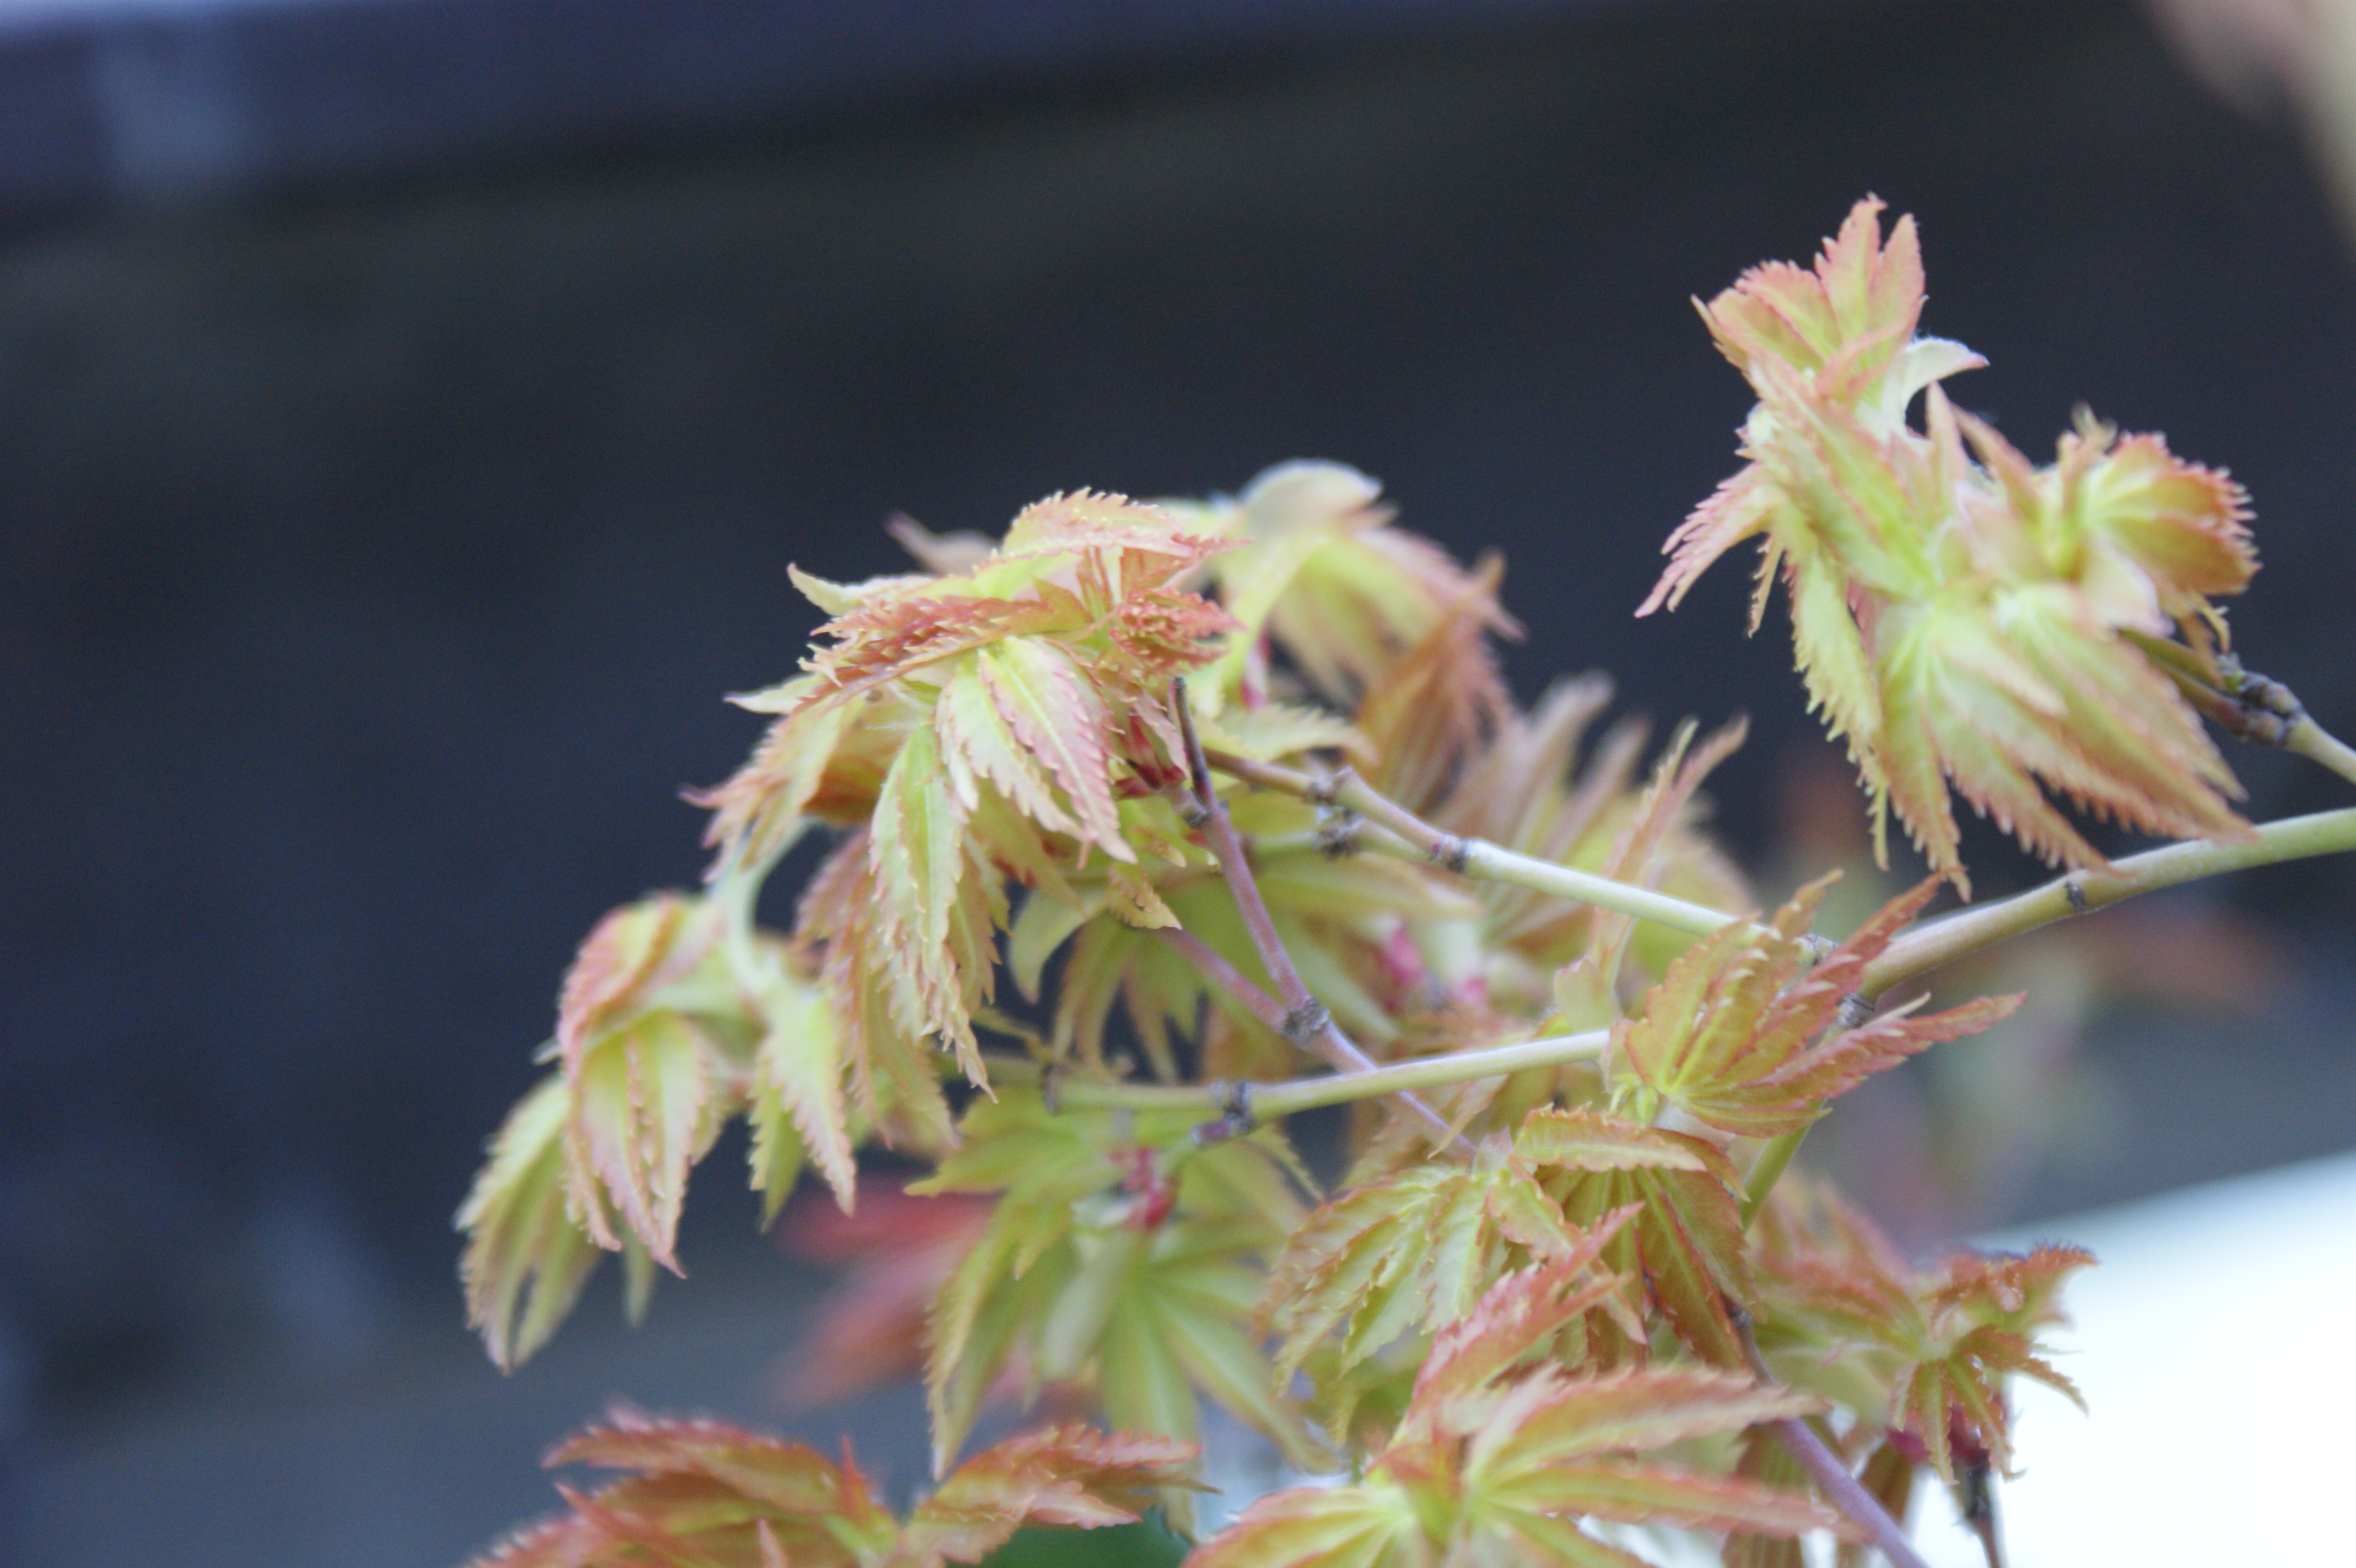
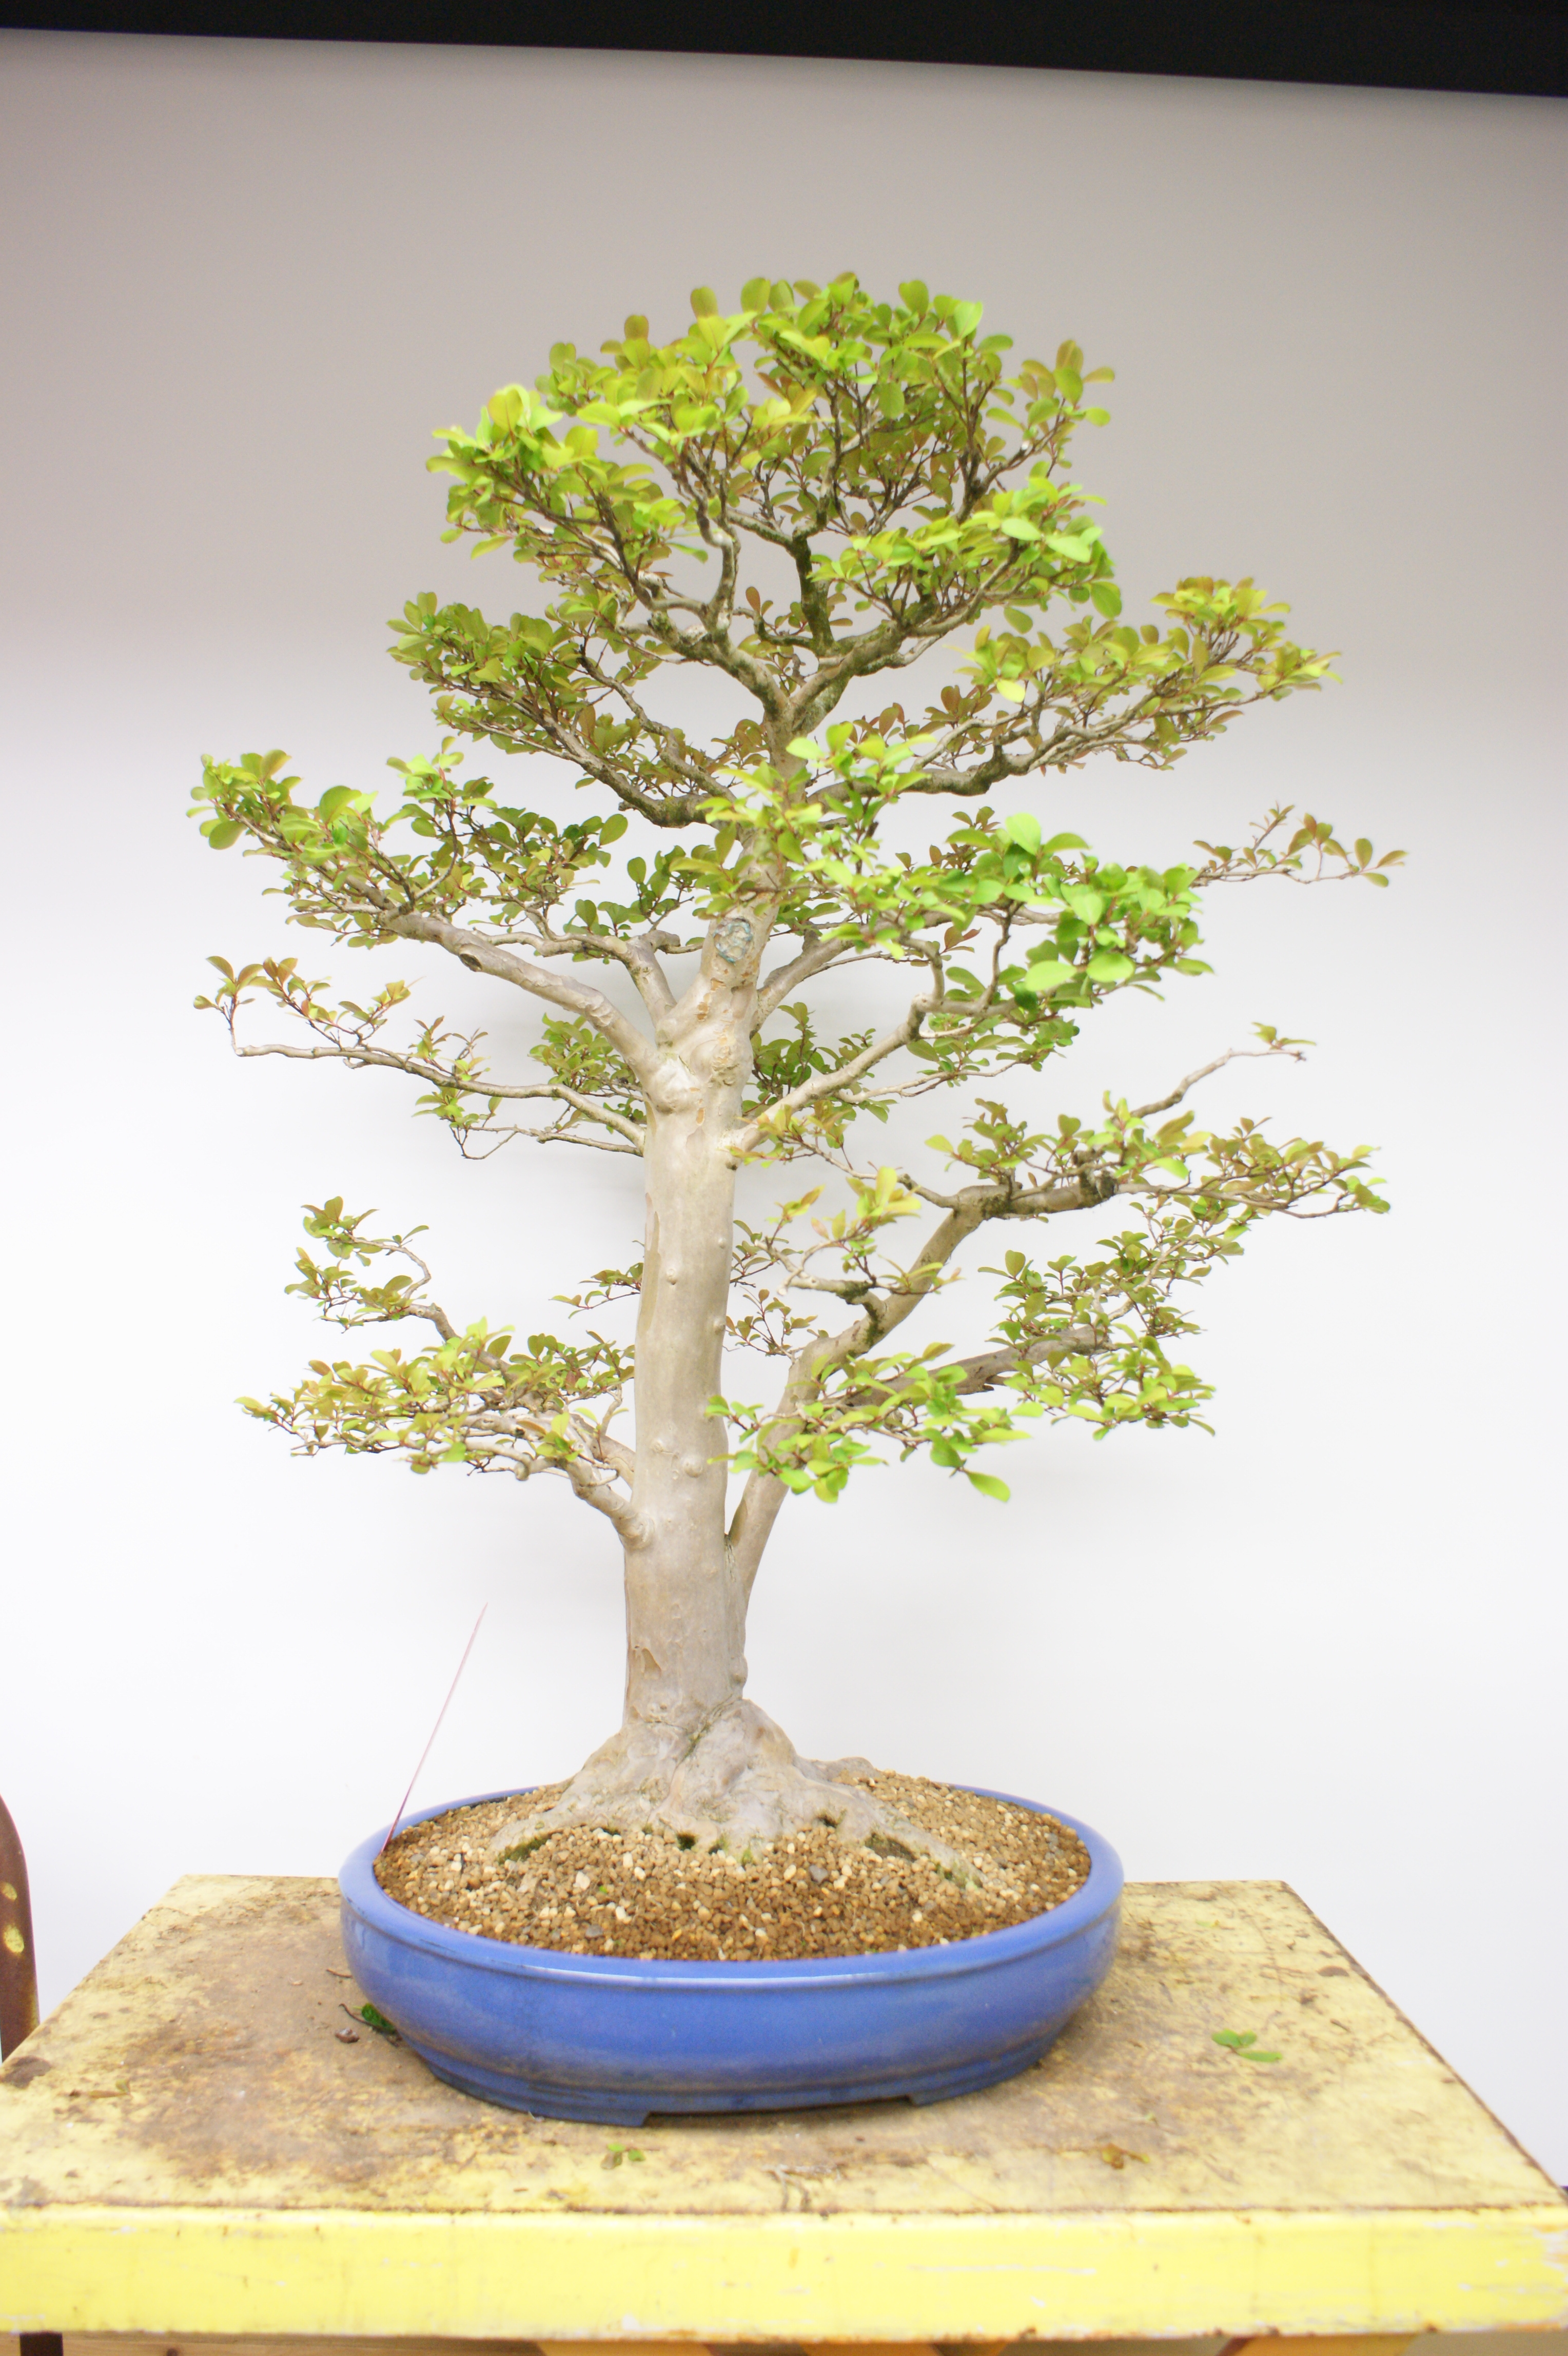
In just a couple of weeks, the tree is fully leafed out, and has had a slight pruning to help balance the new growth throughout all the branches.
This tree is just the beginning of a busy repotting season here at the Bonsai Collection. We will most likely be repotting nearly 100 trees this year—nearly half the collection! Thanks for reading, and be sure to look out for more bonsai blogs to come in the months ahead.
A leafed-out bonsai, ready to display for the season
Upcoming bonsai events:
Tropical bonsai are installed in the Subtropical Greenhouse: Tuesday, March 31.
Trees return to the Regenstein Center’s two courtyards for the season: Tuesday, April 22.
Join us May 9 for World Bonsai Day demonstrations, and a tour of the courtyards.