Make a Mini-Terrarium Holiday Ornament

For one December session of our Plant Explorers after school program at Chicago International Charter School—Irving Park, the students made living ornaments for the holidays.

This tiny terrarium project can have a calming influence on a potentially hectic holiday, because green and growing plants make us feel more relaxed. It requires you to find some live moss, but it makes an extra special decoration for kids—and adults—who love plants. 
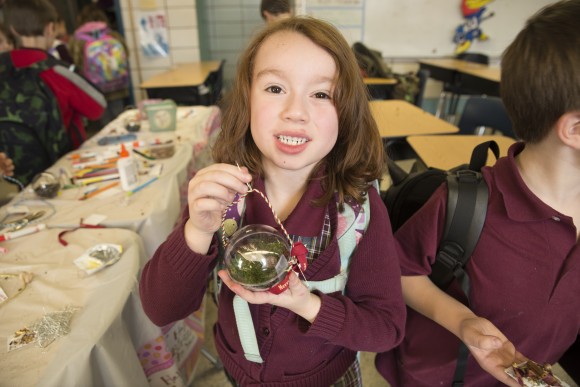
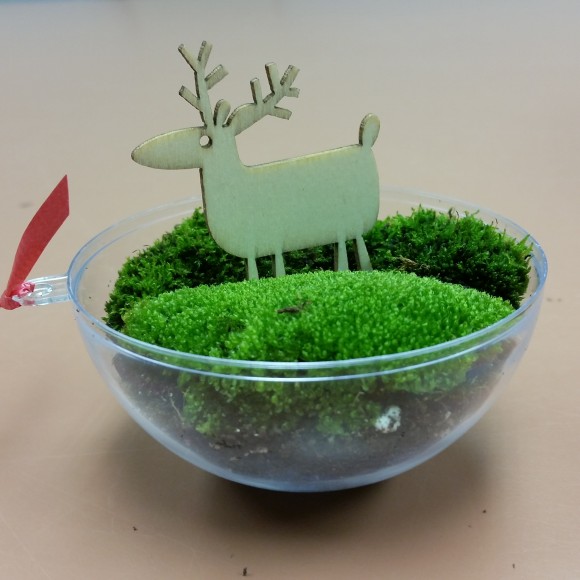
PHOTO: The finished moss terrarium ornament.
The finished moss terrarium ornament
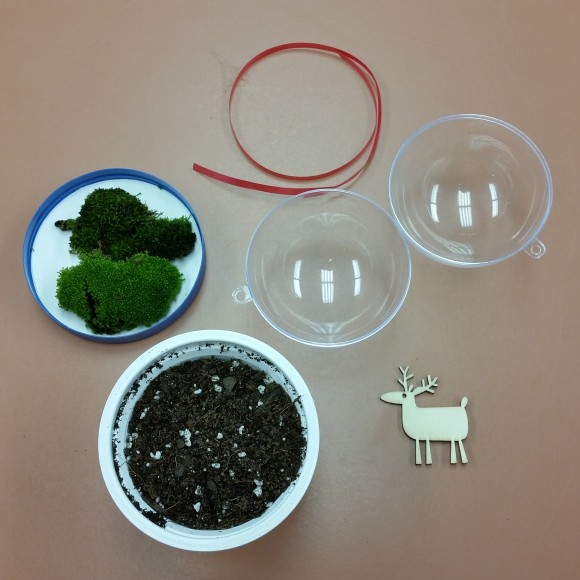
PHOTO: Moss globe ornament supplies.
A fillable plastic globe ornament, small amount of potting soil, live moss, ribbon, and little wooden reindeer are what we used to create our ornaments. (Charcoal is not shown.)

To make your own “moss-some” terrarium ornament you will need:

  • 3-inch or larger plastic sphere ornament that splits into two halves (available at craft stores)
  • Live moss that you find growing in a shady place in your yard (or you can buy it from a garden store that sells terrarium supplies)
  • Activated charcoal (sold in garden and aquarium stores)
  • Soil
  • About 12 inches of decorative ribbon
  • Any miniature item you want to add for whimsy (optional)

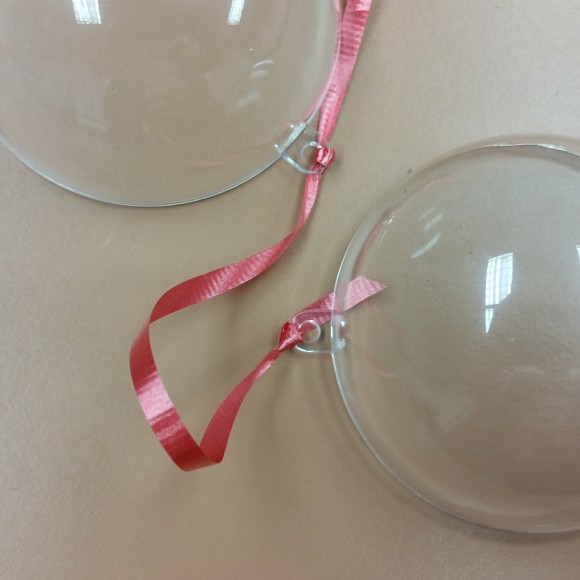
Separate the halves of the DIY ornament. If your ornament is like mine, it has little “loops” for attaching a hook at the top. Start by tying a 12-inch piece of ribbon to each half of the ornament through the loops.

In one half of the ornament, add about a teaspoon of activated charcoal. Fill the rest of that ornament half with very wet soil to about a half inch below the top.

PHOTO: Tying the ribbon a the globe ornament.
Use whatever decorative ribbon you like, but make sure it’s narrow enough to fit through the ornament loops and that it’s knotted securely.
PHOTO: The moss ornament is almost complete with charcoal, soil, moss, and reindeer!
The moss ornament is almost complete with charcoal, soil, moss, and reindeer!

Place the moss on top and gently press it into the soil. If you like, add a miniature object to add a little whimsy. Craft stores have lots of miniature objects that would look good in this ornament. We chose these woodcut reindeer to look like the animals were walking through a forest. And there were enough in the pack for all 15 students to get one. Use whatever you like!

If you have a spray bottle with water handy, it helps to give the moss leaves a gentle misting before closing the ornament.
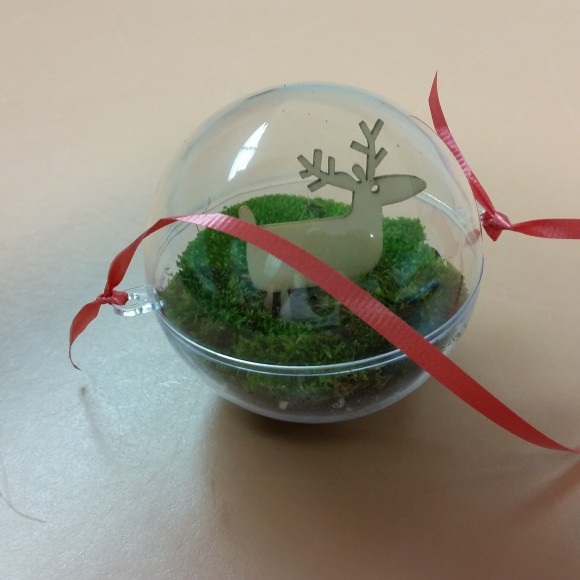
PHOTO: Moss globe terrarium ornament.
Seal the moss in a closed terrarium ornament. The moss can live inside this globe indefinitely.

Place the other half of the ornament on top, but instead of lining up the two loops, put them at opposite ends so that you can hang the ornament ball sideways and not disturb the arrangement. You can tape the two halves together with clear tape if you are concerned about them coming apart. I suggest only taping the sides near the loops rather than wrapping it all the way around so the tape is less obvious and you can open the ornament later if you want to.

The moss just needs light from your home to survive through the holidays. Moisture will evaporate from the soil and will collect on the insides of the ornament. It will roll back down to keep the moss watered indefinitely.

Now you’re wondering if (and how) the moss will survive. I have your answers: read on.

Some Facts About Moss

Mosses are simple plants that scientists classify as bryophytes.

What you see as a clump of velvety green carpet is actually hundreds of tiny individual moss plants clumped together. Botanists refer to these as gametophytes.

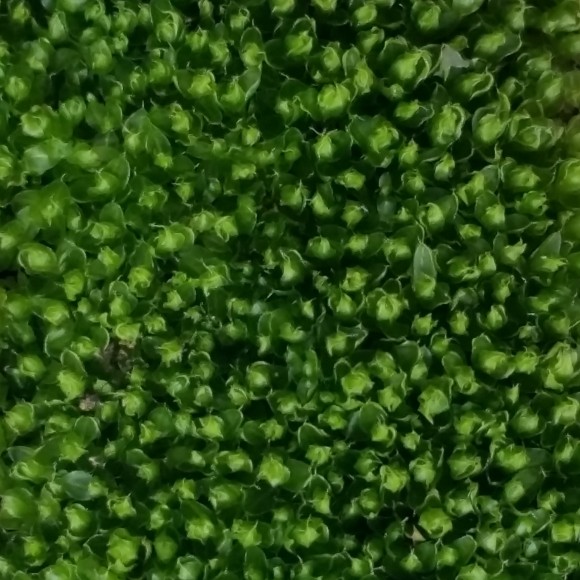
PHOTO: A close up of moss seen from above shows the tops of hundreds of individual plants clumped together.
A close-up of moss seen from above shows the tops of hundreds of individual plants clumped together.
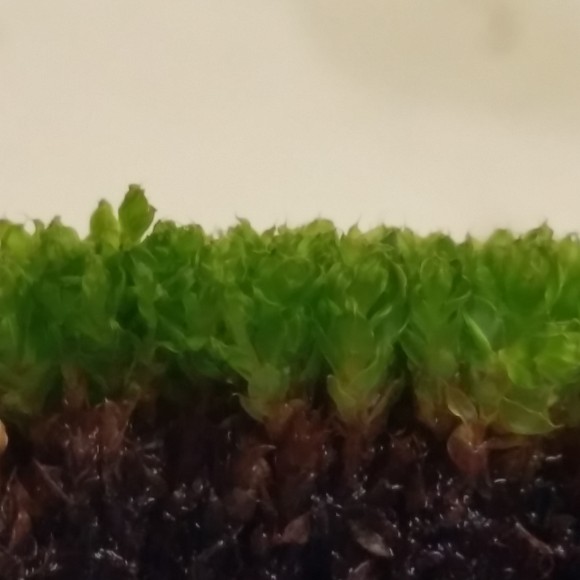
PHOTO: Seen from the side, the moss looks like a tiny, dense forest.
Seen from the side, the moss looks like a tiny, dense forest.

Mosses do not have true roots. They have rhizomes that anchor the plant to the soil and send up buds for new individual moss plants, but the rhizomes do not transport water like true roots. Mosses absorb water, nutrients, and carbon dioxide through their leaves. 

The rhizomes are fine and grow at the surface of wherever they are planted, so they do not require deep soil. As a result, moss can grow in any porous surface, like tree bark or a stone (but maybe not on a rolling stone!). So moss can thrive in the small amount of soil in your ornament. The moisture sealed inside the globe will keep the air humid and supply the leaves with water.

Mosses also do not flower or make seeds. They produce tiny spores that are difficult to see without magnification. The spores are carried by wind until they fall, and there they wait for the right conditions to grow into new moss plants.

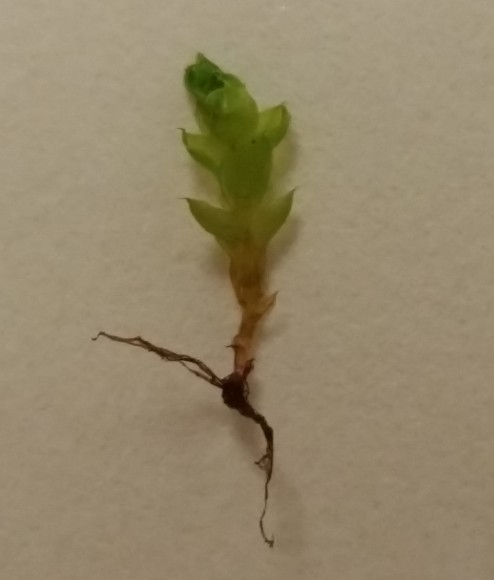
PHOTO: A single moss gametophyte grows from a root-like rhizome.
A single moss gametophyte grows from a root-like rhizome.
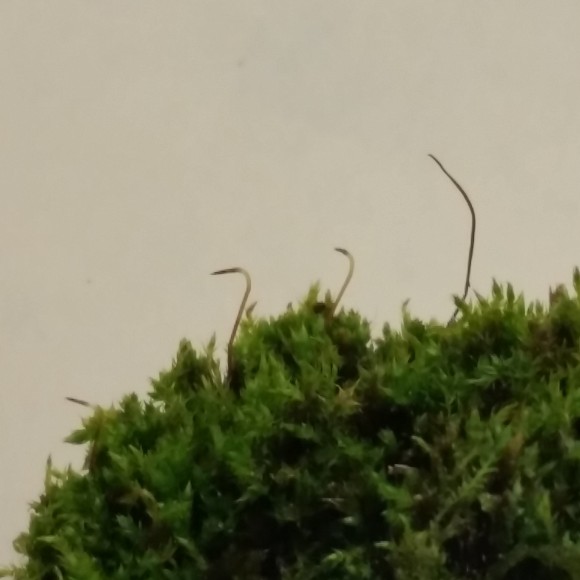
PHOTO: Moss reproductive structures.
The tips of the taller slender structures are sporophytes that will release spores and continue the life cycle of the moss.

If your moss dries up or becomes dormant, do not despair! You can bring it back to life by soaking the dry clump in water and keeping it moist. This will reinvigorate the dormant moss and activate spores that are lying hidden in the dry moss, enabling them to grow into new moss.

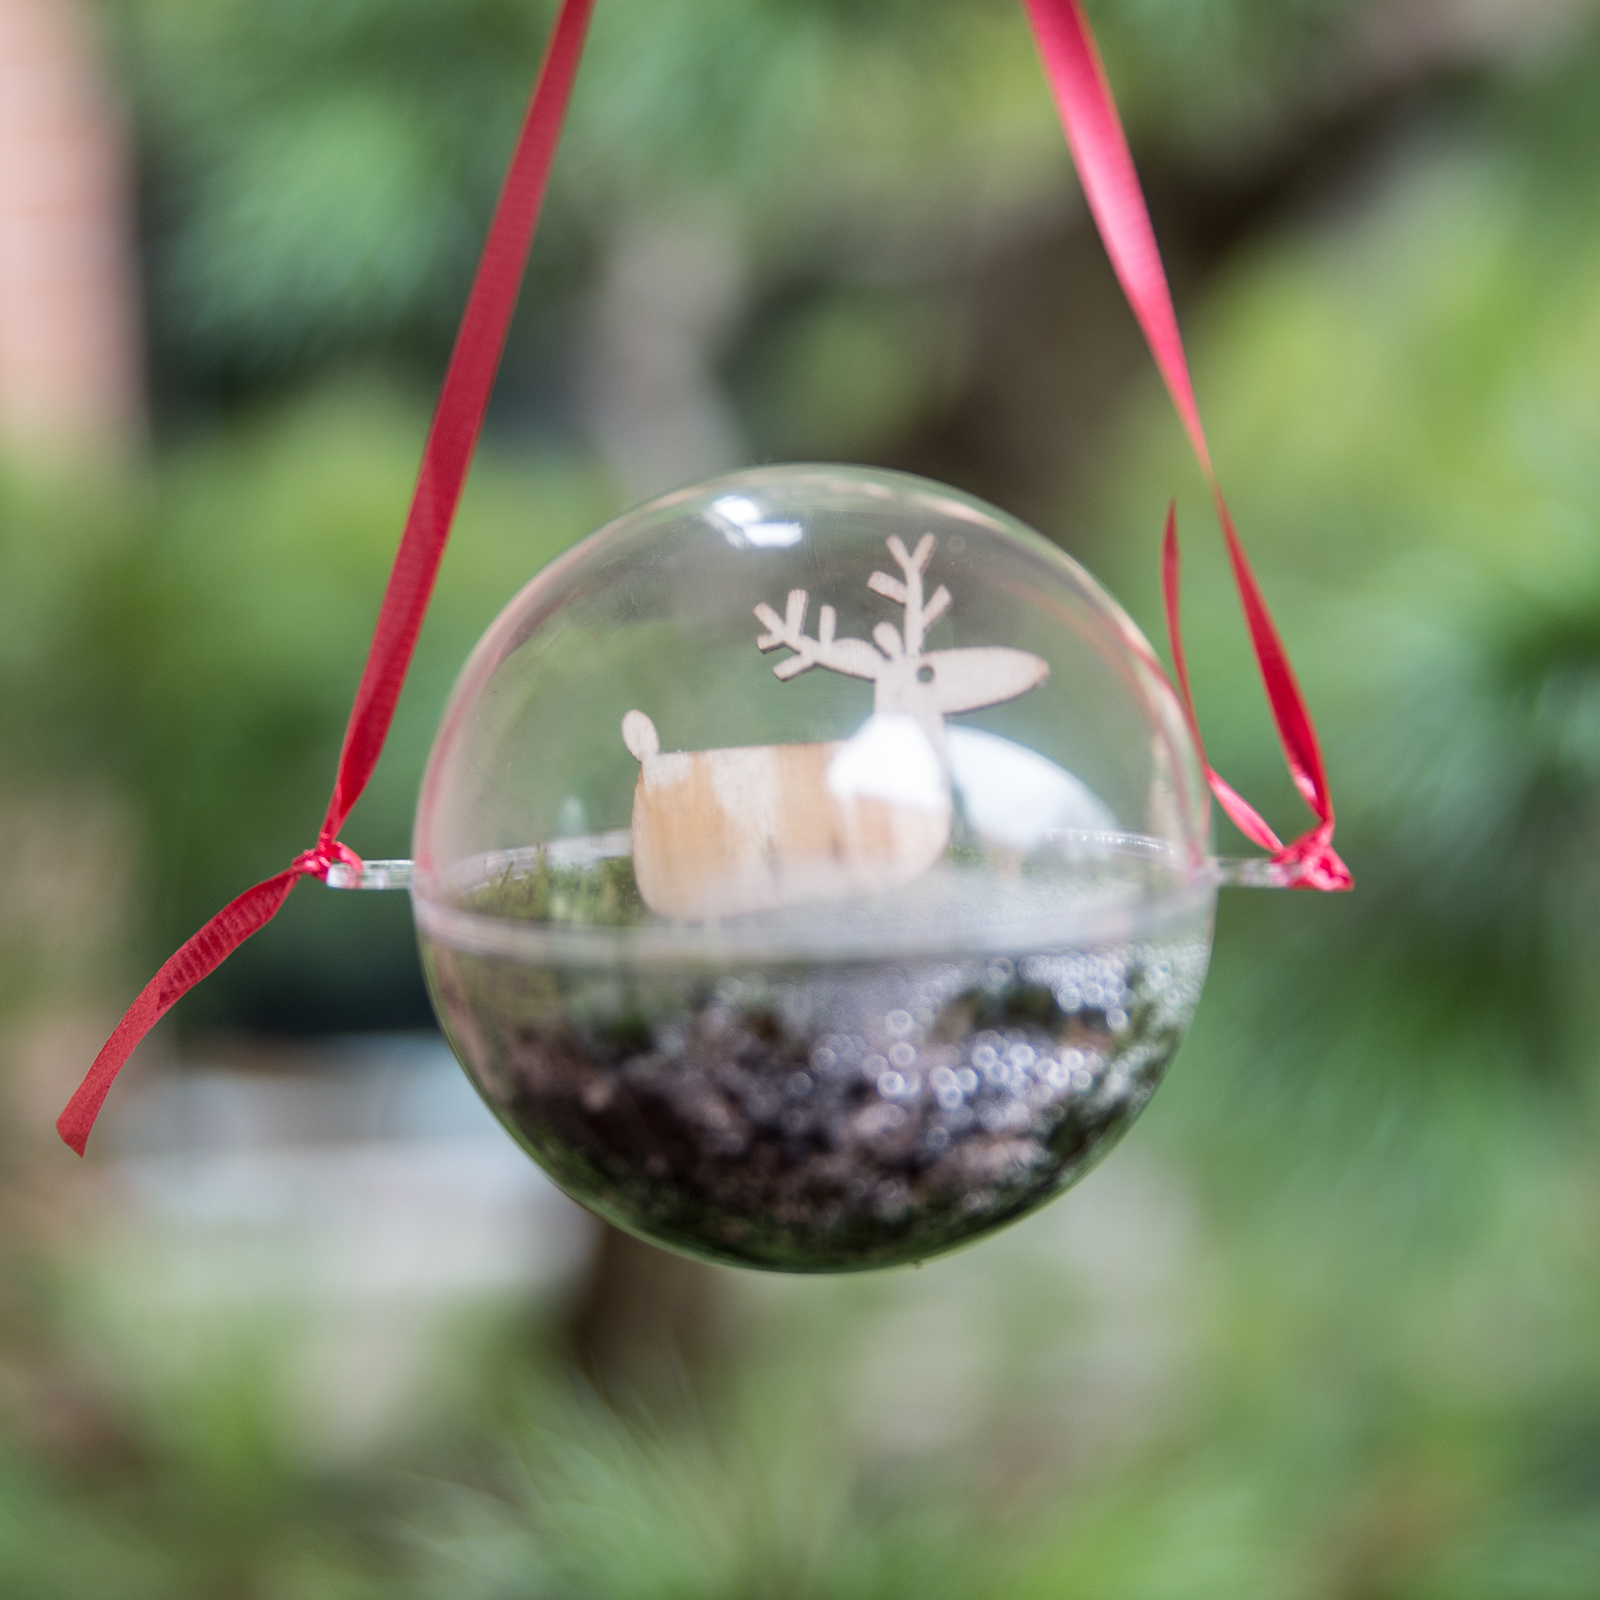
PHOTO: Moss terrarium ornament with deer.Find more fun projects for the holidays! Make Spicy Greeting Cards and Rock Candy, or a Grapefruit Bird Feeder. ‘Tis the season for a little Christmas tree taxonomy!


©2015 Chicago Botanic Garden and my.chicagobotanic.org

These Greeting Cards Will Spice Up the Holidays

Handmade greeting cards make people feel loved. Here is a fun and festive way to show friends and relatives that you care about them. It’s a great project for kids who need something to do during Thanksgiving break. (It’s also a way to use up some of those 20-year-old spices that are languishing in your kitchen cabinet!)

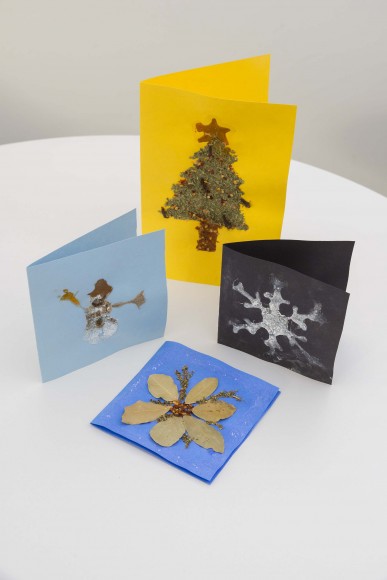
PHOTO: Spice holiday cards.
Finished spicy holiday cards smell absolutely fantastic.

MATERIALS

  • White glue in a squeeze bottle
  • Construction paper 
  • Dried herbs and spices, whole or ground 
  • Salt and water in a small dish, with a paint brush
  • Markers, crayons, or colored pencils

Work over a large paper towel or mat, because this project is messy!

Fold a piece of stiff paper (construction paper or card stock) in half. Draw a design with glue on the front of the card. Try to use glue sparingly, because the paper will warp if the glue is too thick or wet. Sprinkle the herbs or spices of your choice on the wet glue.

You can apply the spices by gently tapping them out of the jar onto the page, or take small pinches and apply them where you want them to go. If you want more control, fold a small piece of paper in half, put some spices in the crease, and gently tap the paper to slide the spices down the crease to apply them to your picture. 

It helps if you make the glue design for one spice at a time, and let each spice dry before putting a new one on. When each spice has dried, shake the card to remove excess, and apply glue for the next spice. This reduces blending.

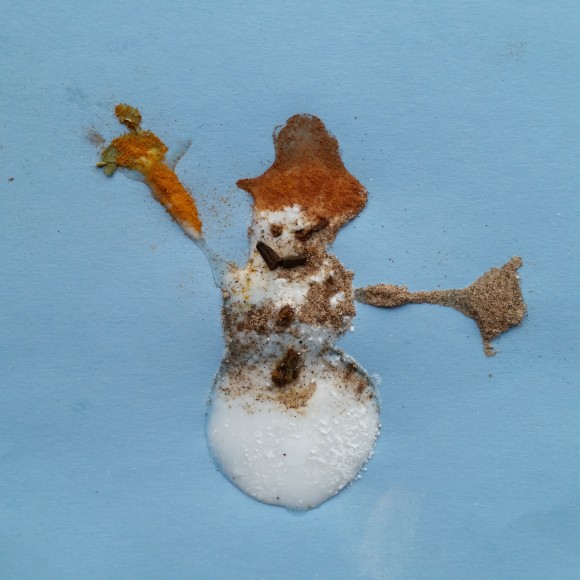
PHOTO: Spice holiday card: snowman.
Cream of tartar dries white to make this snowman. Other dried spices were used for hat and arms, and whole cloves make the face and buttons.
PHOTO: Spice holiday card: wreath.
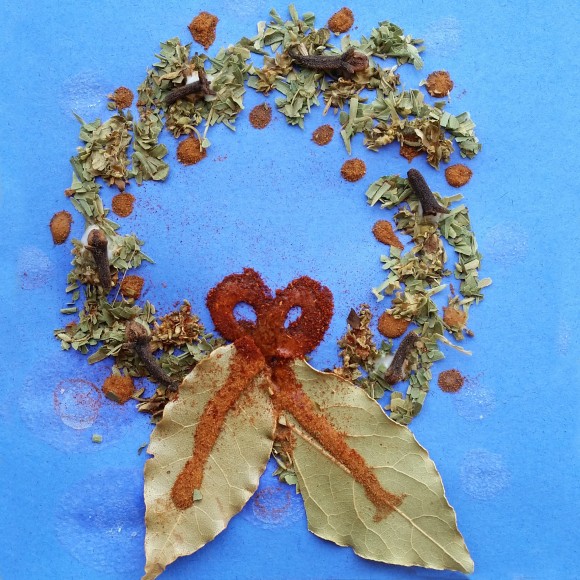
One of my daughters combined different herbs to make this wreath, and decorated it with dots of cinnamon, whole cloves, and a bay leaf and paprika bow.

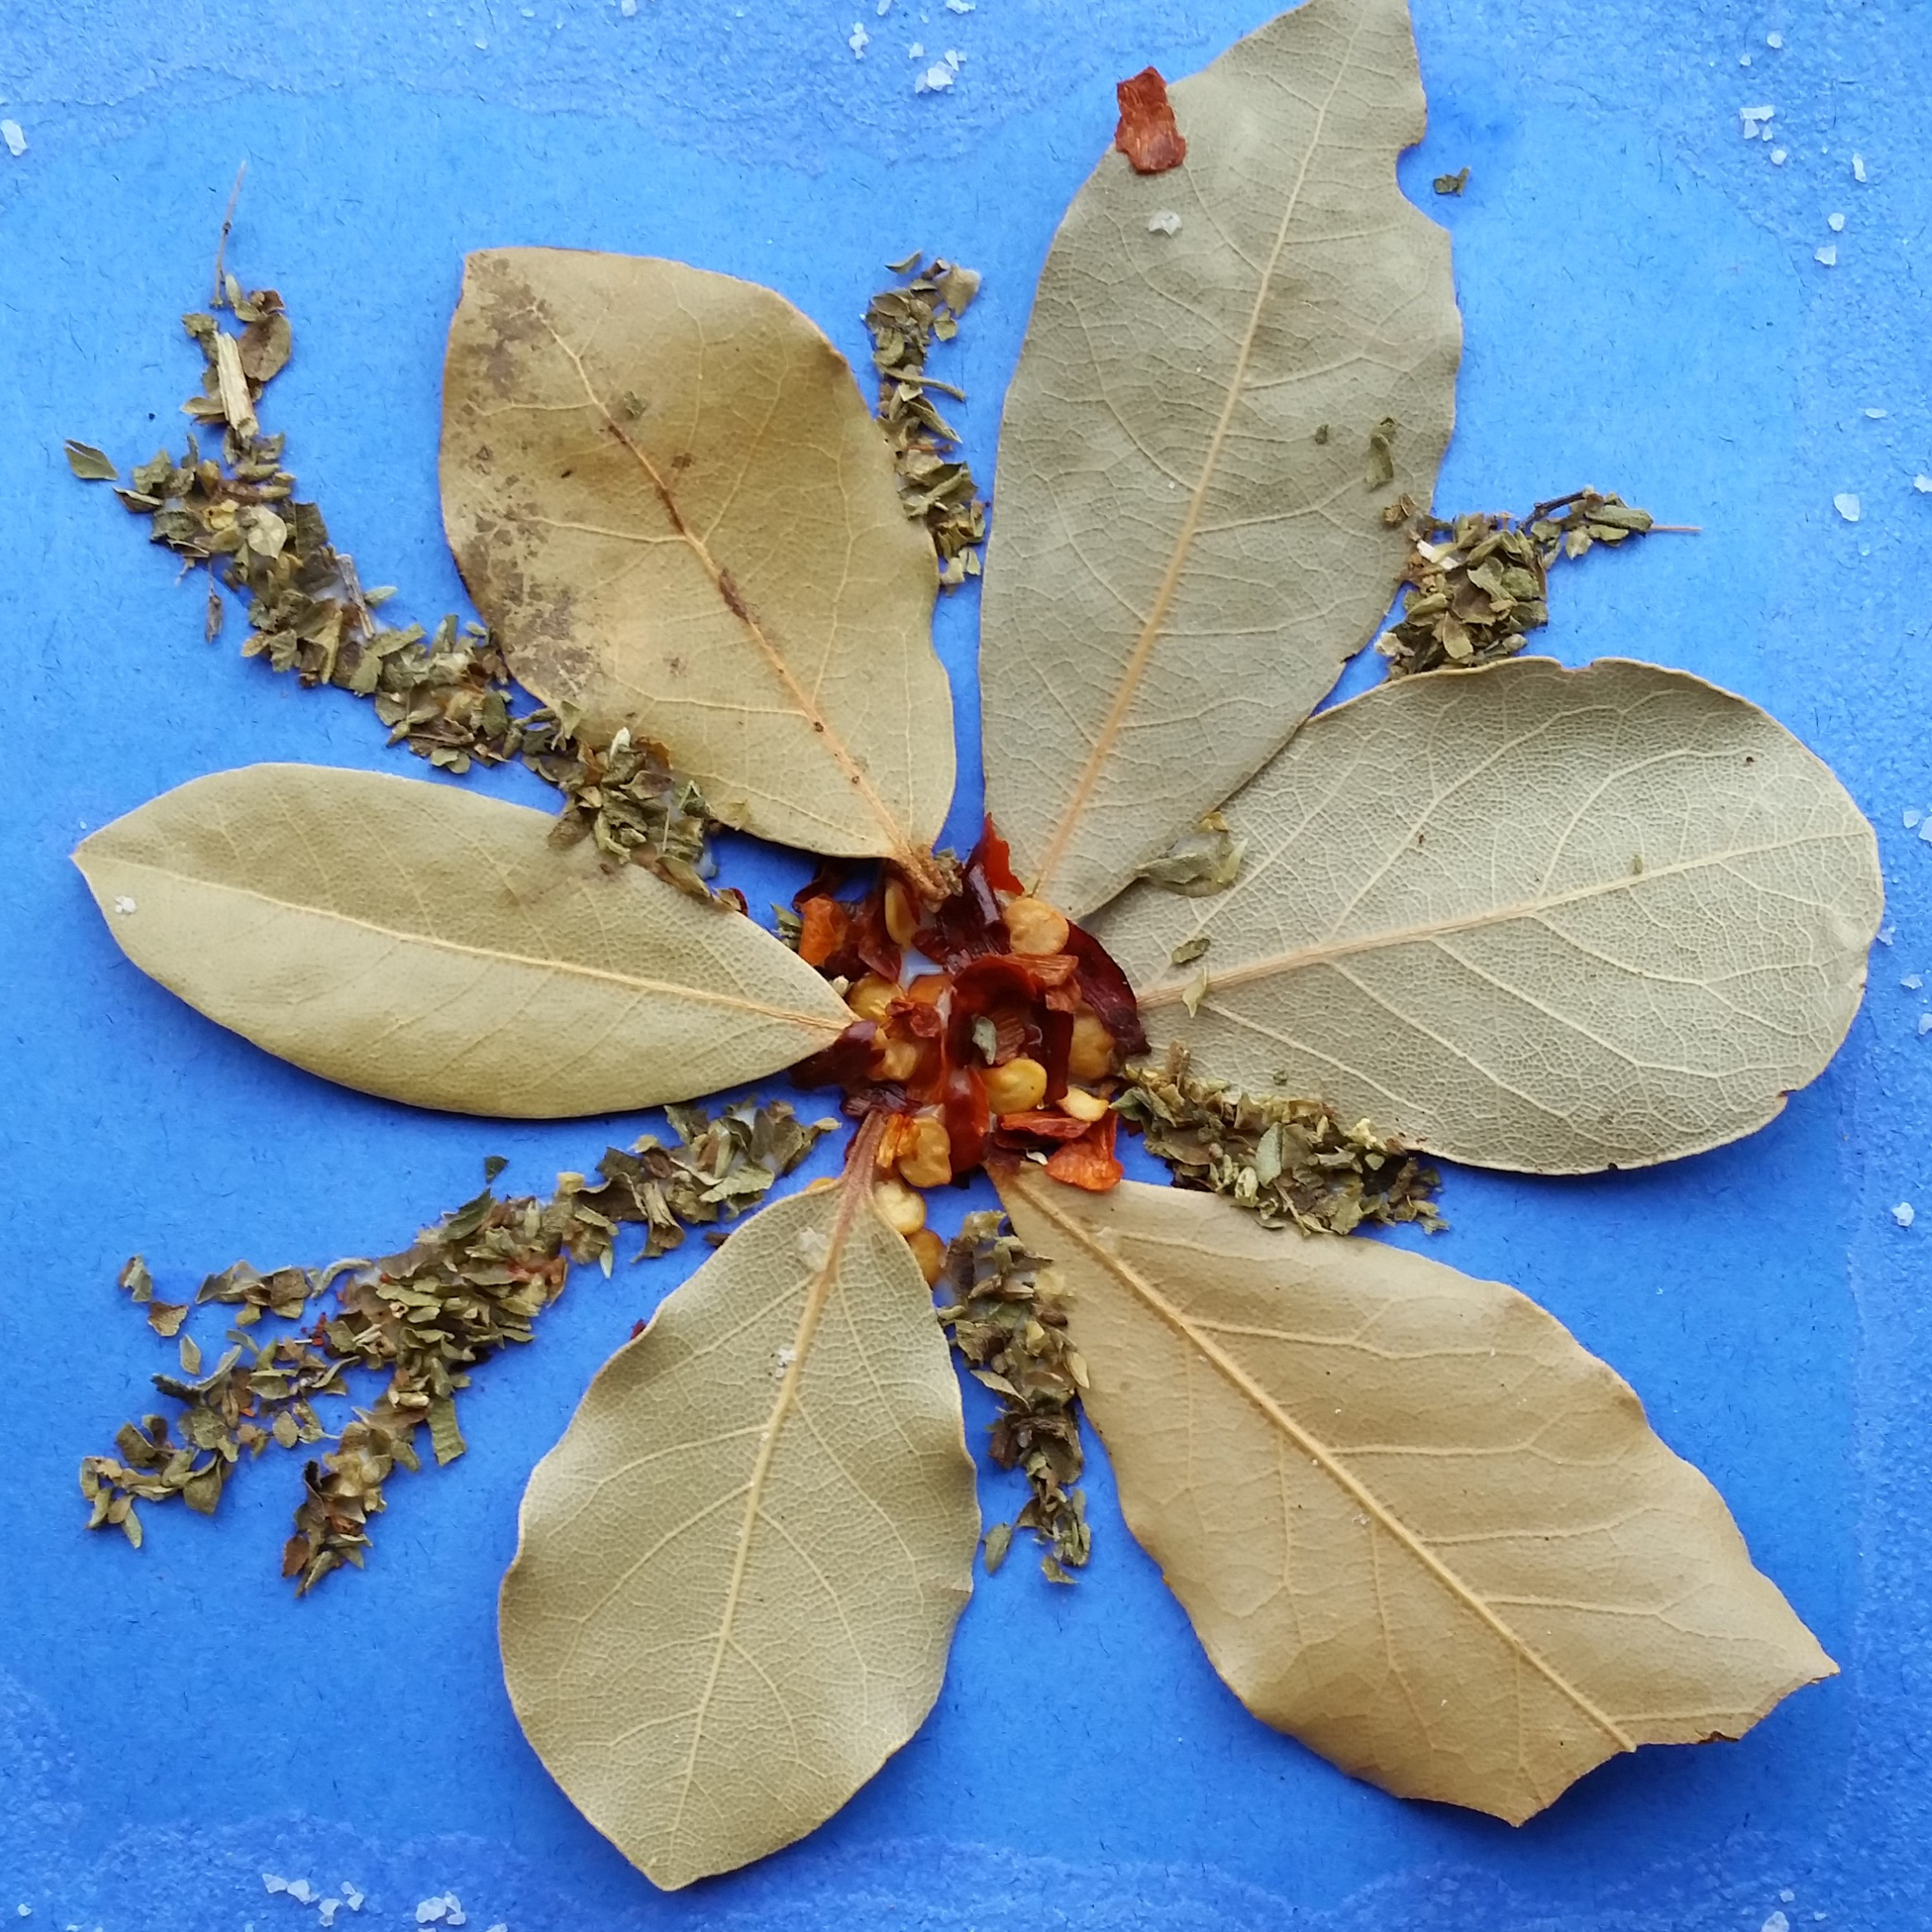
Dried herbs are all slightly different shades of green. Tarragon leaves are a lighter green, and a little brighter than oregano. For yellow, try ground turmeric or curry. Paprika, cinnamon, chili powder, and crushed red pepper flakes deliver warm reds. Pink and green peppercorns make nice accents. Cream of tartar and alum powder dry white, but require special handling or they will flake off. Everything sticks better if you gently press the herbs into the glue.

You can also glue whole spices such as bay leaves, cloves, fennel seed, or pieces of cinnamon bark to the card. Keep in mind that whole spices will make the card bulkier and may make it difficult to fit the card into the envelope. 

PHOTO: Spice holiday card: birds.
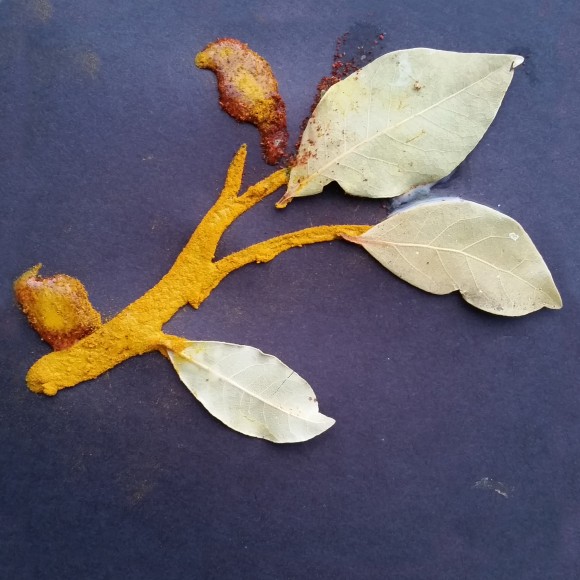
Turmeric, paprika, and bay leaves were used to create this scene of birds perched on a branch.
PHOTO: Spice holiday card: snowflakes.
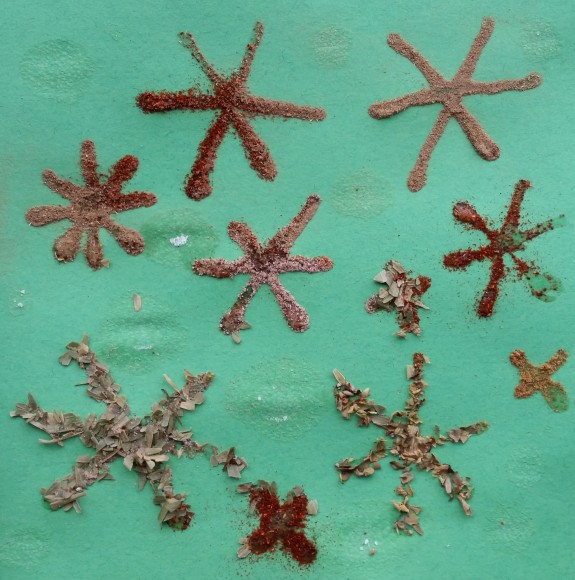
It’s too bad your screen is not “scratch and sniff,” because this card smells of cinnamon, cardamom, paprika, oregano, and tarragon.

Want to add some sparkle? Glue salt crystals in some areas or paint salt water on the paper with a fine paintbrush or cotton swab. Like glue, you’ll want to use a light touch so the paper does not become too wet and wrinkled.

My daughters are teenagers, so they made an effort to make a picture of something recognizable. If you have younger children, they will probably make a picture that resembles abstract art. It doesn’t matter, because it will still smell wonderful! What’s important is that they make it themselves and have fun doing it.

PHOTO: Spice holiday card: Christmas tree.
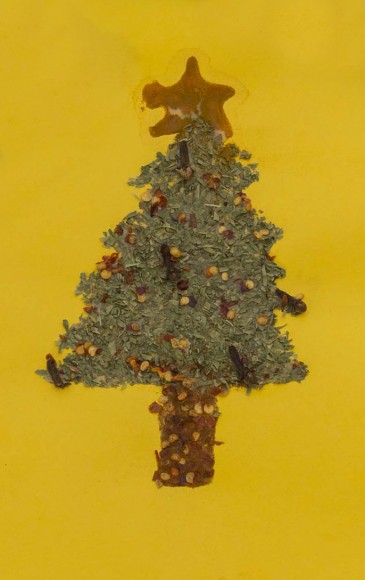
My daughter used tarragon for the tree, crushed red pepper for the trunk and garland, whole cloves for ornaments, and turmeric to make the star.

After the glue is completely dry, gently shake the card over a bowl one final time to remove the loose spices. When you are finished working on this project, you can place all of the leftover spices from your work area into a bowl and place them in a room to make the air fragrant. 

One final step: don’t forget to write your message on the inside! You might say something clever like, “Seasoning’s Greetings,” “Merry Christmas Thyme,” “Have a Scent-sational Hanukkah,” or “Wishing You a Spicy New Year.” Don’t forget to sign your name!

A card like this does not fit into an envelope easily and is best hand-delivered. If you must mail it, cover the front with a piece of paper to protect it. Carefully pack the card with a stiff piece of cardboard in a padded envelope to reduce bending and crushing while it’s in transit. If you are delivering a small bundle to the post office, ask them to hand-cancel your cards (they’ll appreciate the tip).

I hope your special creations brighten someone’s day and fill them with memories of good times with family and friends!

Want more fun, craft projects for kids over the holidays? Check out our blogs on making Fruit and Veggie Prints, Wearable Indian Corn necklaces, and Bottle Cap Bouquets.


©2015 Chicago Botanic Garden and my.chicagobotanic.org
Save the Earth, Watch Dandelions Grow

I am often asked, “What can kids do to help the Earth?”

There is a standard litany of “Reduce, Reuse, Recycle” suggestions that almost everyone can tell you: recycle your garbage, turn the lights off when you leave a room, turn the water off while brushing your teeth, and so forth. 

EarthWe’ve been saying these same things for decades. And while they’re great ideas, they’re things we should all be doing. It’s time to give kids a chance to do something bigger. During Climate Week this year, I am offering a different suggestion: Watch dandelions grow and participate in Project BudBurst.

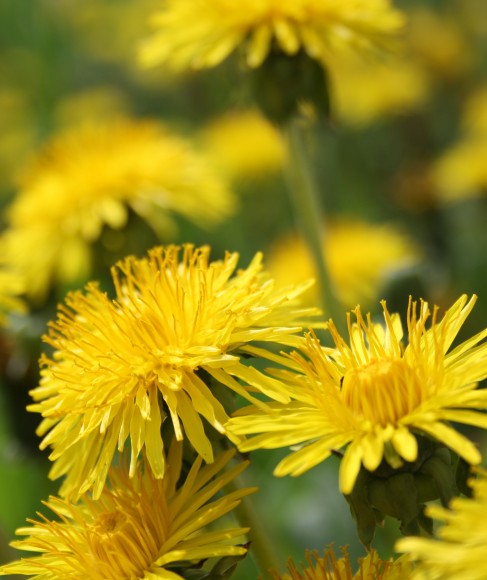
PHOTO: Dandelions.
These happy dandelions could contribute valuable information to the science of climate change.

Project BudBurst is a citizen science program in which ordinary people (including kids 10 years old and up) contribute information about plant bloom times to a national database online. The extensive list of plants that kids can watch includes the common dandelion, which any 10-year-old can find and watch over time.

Why is this an important action project?

Scientists are monitoring plants as a way to detect and measure changes in the climate. Recording bloom times of dandelions and other plants over time across the country enables them to compare how plants are growing in different places at different times and in different years. These scientists can’t be everywhere watching every plant all the time, so your observations may be critical in helping them understand the effects of climate change on plants.

What to Do:

1. Open the Project Budburst website at budburst.org and register as a member. It’s free and easy. Click around the website and read the information that interests you.

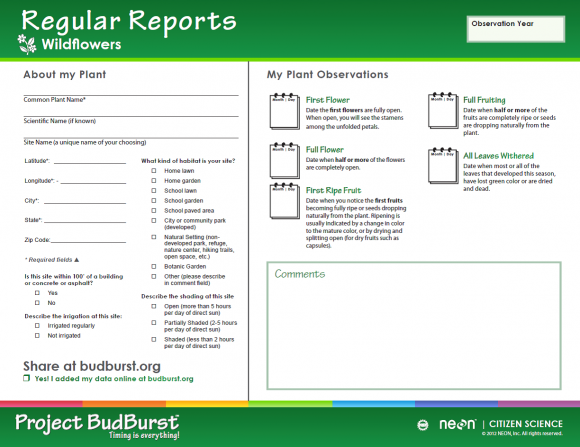
2. Go to the “Observing Plants” tab and print a Wildflower Regular Report form. Use this form to gather and record information about your dandelion. 

3. Find a dandelion in your neighborhood, preferably one growing in a protected area, not likely to be mowed down or treated with weed killers, because you will want to watch this plant all year. It’s also best if you can learn to recognize it without any flowers, and that you start with a plant that has not bloomed yet.

4. Fill in the Wildflower Regular Report with information about the dandelion and its habitat.

Common Plant Name: Common dandelion

Scientific Name: Taraxacum officinale

Site Name: Give the area a name like “Green Family Backyard” or “Smart Elementary School Playground”

Latitude and Longitude: Use a GPS device to find the exact location of your dandelion. (Smartphones have free apps that can do this. Ask an adult for help if you need it.) Record the letters, numbers, and symbols exactly as shown on the GPS device. This is important because it will enable the website database to put your plant on a national map.

Answer the questions about the area around your plant. If you don’t understand a question, ask an adult to help you.

PHOTO: This is a printout from the Project BudBurst Website, that asks about the location of the plant and provides places to record bloom times, as well as other comments.
The BudBurst Wildflower Regular Report is easy to use and will guide you through the process.
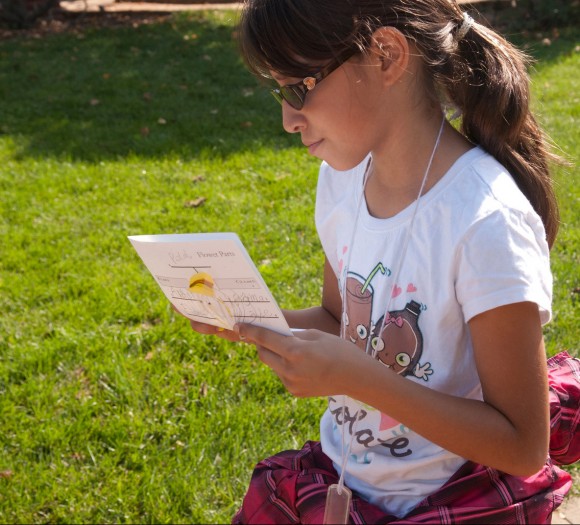
girl with data sheet
After you find a dandelion you want to watch, record information about the location of the plant.

5. Now you’re ready to watch your dandelion. Visit it every day that you can. On the right side of the form, record information as you observe it.

budburst notebook

  • In the “First Flower” box, write the date you see the very first, fully open yellow flower on your dandelion.
  • As the plant grows more flowers, record the date when it has three or more fully open flowers.
  • Where it says “First Ripe Fruit,” it means the first time a fluffy, white ball of seeds is open. Resist the temptation to pick it and blow it. Remember, you are doing science for the planet now!
  • For “Full Fruiting” record the date when there are three seedheads on this plant. It’s all right if the seeds have blown away. It may have new flowers at the same time.
  • In the space at the bottom, you can write comments about things you notice. For example, you may see an insect on the flower, or notice how many days the puffball of seeds lasts. This is optional.
  • Keep watching, and record the date that the plant looks like it is all finished for the year—no more flowers or puffballs, and the leaves look dead.
  • When your plant has completed its life cycle, or it is covered in snow, log onto the BudBurst website and follow directions to add your information to the database.


Other Plants to Watch

You don’t have to watch dandelions. You can watch any of the other plants on the list, such as sunflower (Helianthus annuus) or Virginia bluebell (Mertensia virginica). You can also watch a tree or grass—but you will need to use a different form to record the information. Apple (Malus pumila), red maple (Acer rubrum), and eastern white pine (Pinus strobus) trees are easy to identify and interesting to watch. If you are an over-achiever, you can observe the butterfly milkweed (Asclepias tuberosa) bloom times and do citizen science research for monarchs at the same time! (The USDA Forest Service website provides information about that; click here for more information.) 

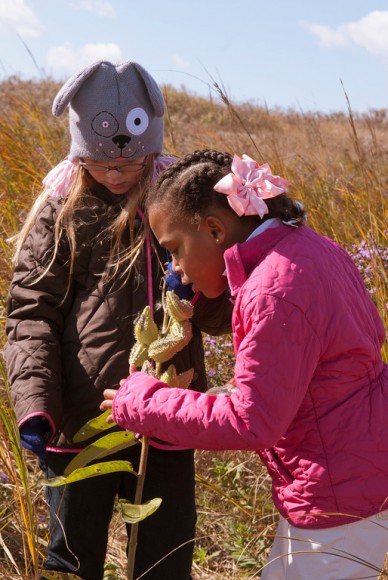
PHOTO: Two girls are looking closely at a milkweed plant that has about eight green seed pods.
These students are observing a milkweed that is in the “First Ripe Fruit” stage.

For the past two springs, educators at the Chicago Botanic Garden have taught the fifth graders at Highcrest Middle School in nearby Wilmette how to do Project BudBurst in their school’s Prairie Garden. The students are now watching spiderwort, red columbine, yellow coneflower, and other native plants grow at their school. Some of these prairie plants may be more difficult to identify, but they provide even more valuable information about climate.

So while you are spending less time in the shower and you’re riding your bike instead of asking mom for a ride to your friend’s house, go watch some plants and help save the planet even more!


©2015 Chicago Botanic Garden and my.chicagobotanic.org
Speaking Science: Bringing Plant-Based Research to All Ages

Do you ever feel like trying to understand plant science research can be as daunting as deciphering a passage written in a foreign language?

As a budding plant scientist in the joint Chicago Botanic Garden/Northwestern University Ph.D. program, I find it exciting to pick through dense scientific text. Uncovering the meaning of a new acronym and learning new vocabulary can be thrilling, especially when decoding something new.

PHOTO: Kelly Ksiazek speaking in Sydney, Australia.
This past fall I spoke to a group of green infrastructure professionals in Sydney about the importance of urban biodiversity.

But the commonly used styles in scientific writing and presentation packed with language used to convey big topics in small spaces can be really off-putting to an audience of non-scientists. Many of us can conjure up a memory of a professor or teacher who seemed to like their subject matter but couldn’t convey the material in an interesting way. All of a sudden, science became boring.

Rather than struggling to learn this “foreign language,” many folks stop paying attention. Lack of scientific literacy, especially as it applies to plants, is a pity. Plants are all around us! They are so valuable to the entire planet. The very applicable field of botany shouldn’t be something that’s only discussed and understood in laboratories or scientific conferences—it should be for everyone.

This idea inspires me to try and bring my current botany research to a wide variety of people.

PHOTO: Ksiazek takes her presentation on the road to Pittsburgh.
I’ve had the chance to speak with many visitors to the Chicago Botanic Garden about my research, and typically bring some of my research supplies, as seen here from a trip to Pittsburgh.
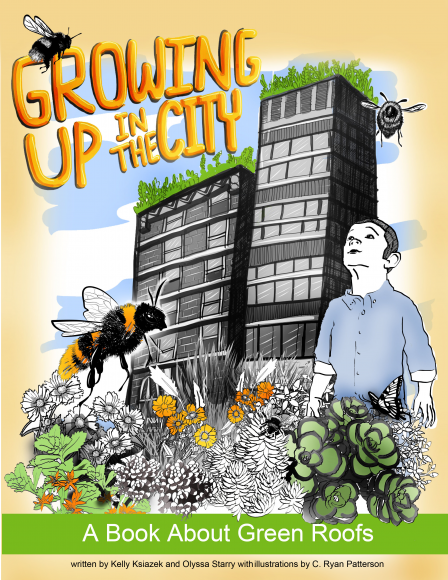
PHOTO: Growing UP in the City: A Book About Green Roofs.
Writing and publishing a children’s book helps bring my research findings to kids all over the world.

For example, I recently realized that there are very few resources available to teach young students about the habitat where I currently collect most of my data: green roofs. While some of the methods I use for data collection and analysis can be quite complex, the motivations behind my work and some of the findings can be broken down into some basic ideas, applicable to students of all ages. So a fellow botanist and I wrote and produced Growing Up in the City: A Book About Green Roofs.

Our children’s activity book teaches youngsters about some of our research findings. The book follows a pair of native bumblebees through a city, where they guide the reader through engaging activities about the structure, environmental benefits, and motivations for building green roofs. At the end, readers even have the opportunity to ask their own research question and carry out a green roof research project of their own.

Interested in your own copy of our book? More information and a free digital download of the book are available at greeningupthecity.com.

PHOTO: Ksiazek presents her work to a girls' middle school.
Talking to 100-plus middle school girls about why it’s cool to be a botanist was a great experience!

The activity book is just one example of ways that plant scientists can engage with a broader audience and make their research findings more accessible. Some of the other activities that my colleagues here at the Chicago Botanic Garden and I have participated in include mentoring undergraduate and high school students, speaking to community organizations, creating lessons for schools and school groups, volunteering for summer programs, and maintaining a presence on the Internet through online mentoring, blogging, websites, and Twitter.

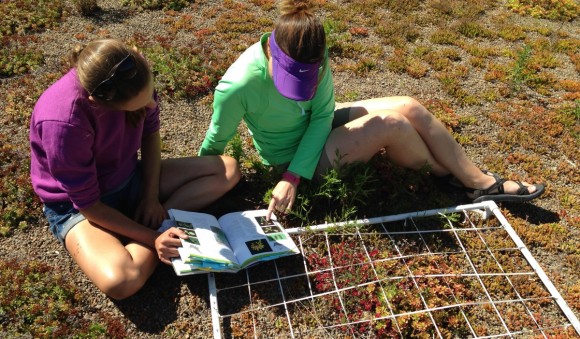
PHOTO: Ksiazek and an undergraduate student identify green roof plants.
Teaching undergraduate students how to identify plants on green roofs is one way of passing on my research knowledge.
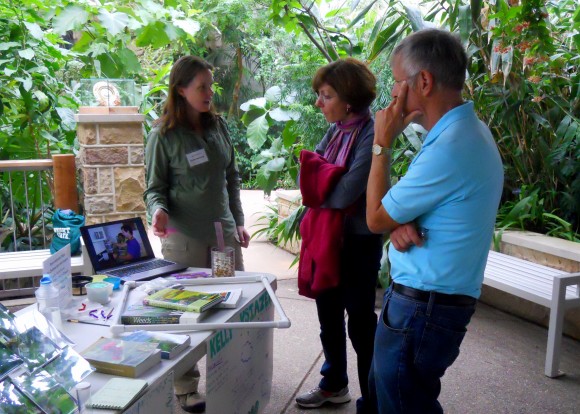
PHOTO: Ksiazek discusses her research with a visitor to the PCSC.
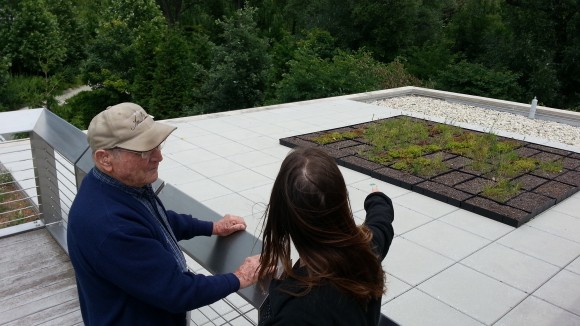
My experiments on the green roof at the Plant Science Center are visible to everyone. Come take a look!

Here at the Garden, we scientists also have a unique variety of opportunities to share our science with the thousands of visitors who come to the beautiful Daniel F. and Ada L. Rice Plant Conservation Science Center. If you’ve never been to the Plant Science Center, you should definitely stop by the next time you’re at the Garden. You can see inside the laboratories where the other scientists and I collect some of our data. There are also a lot of interactive displays that aim to demystify plant science research and decode some of the “foreign language” that science speak can be. For a really interactive experience, come visit us on World Environment Day, Saturday, June 6, and talk to scientists directly. Bring your kids, bring your neighbors, and ask a botanist all those burning plant questions you have! We promise to only speak as much “science” as you want.

For more information about my research and science communication efforts, please visit my research blog, Kelly Ksiazek’s Botany in Action, and follow me on Twitter @GreenCityGal.


©2015 Chicago Botanic Garden and my.chicagobotanic.org
Hand to Hand

Long-ago legend says that cranes can live for 1,000 years…and that folding 1,000 paper cranes, one for each year, can make a wish come true. 

So it is that the crane is the symbol of longevity and good fortune.

22 Folds
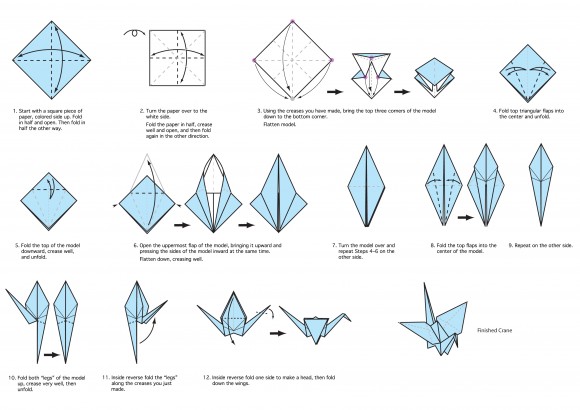
From the first corner-to-corner fold to the last crook of beak and tail, it takes 22 folds to make this style of origami crane. Because pictures are worth 1,000 words, we offer this visual guide to crane-making.

Download these instructions to create an origami crane.
Click on the image above for a larger version to print and save. Wishing you longevity and good fortune!

Fast forward to the turn of the twenty-first century, when Ray Wilke, a devoted volunteer in the Elizabeth Malott Japanese Garden, decided to make origami cranes as a take-away gift for children who visited the garden’s Shoin House. Each winter, Ray and wife Ginny folded cranes…and each spring/summer Ray handed them out, one by one, to the curious children.

Over the years, Ray and Ginny made 40,000 cranes.

Now there are 10 people who fold, bringing in bags of 20, 60, or 100 origami cranes throughout the winter.

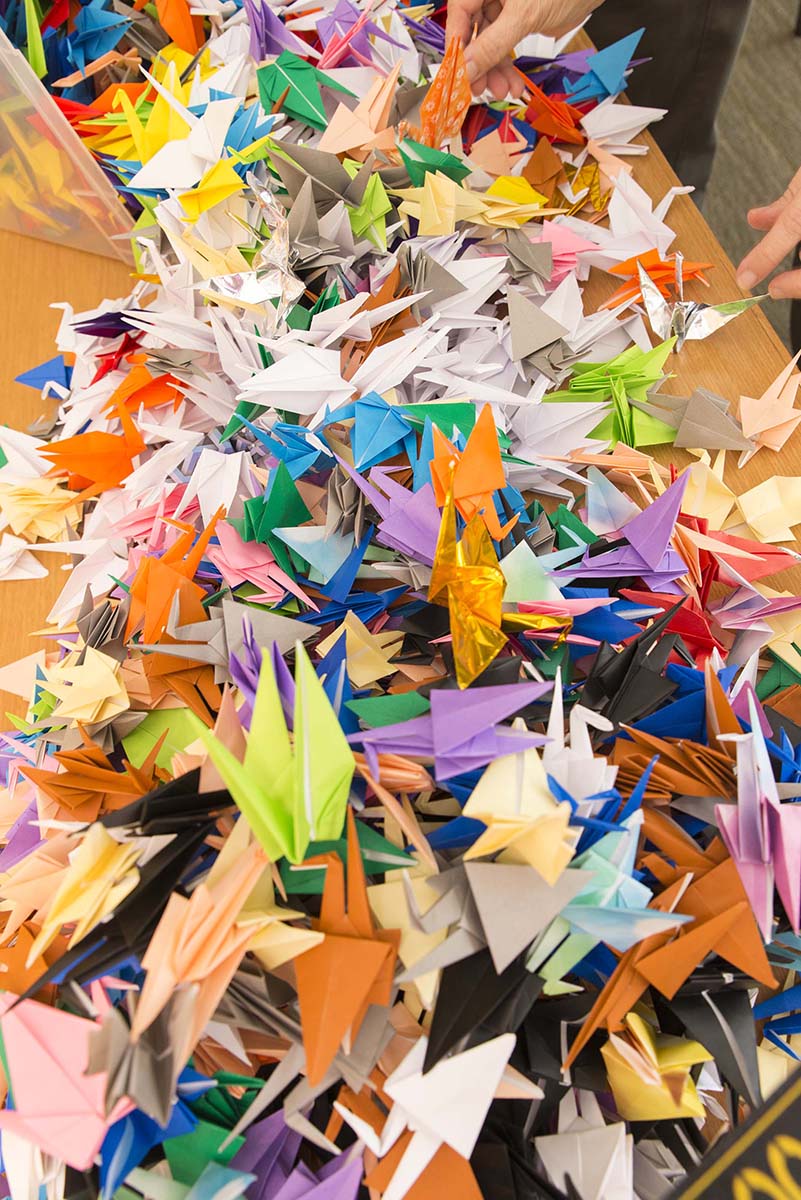
And 3,000-plus cranes are ready to hand out.

PHOTO: Volunteers Susan and Edie with their stash of origami cranes.
Happiness is 1,000 paper cranes…and volunteers like Susan and Edie.


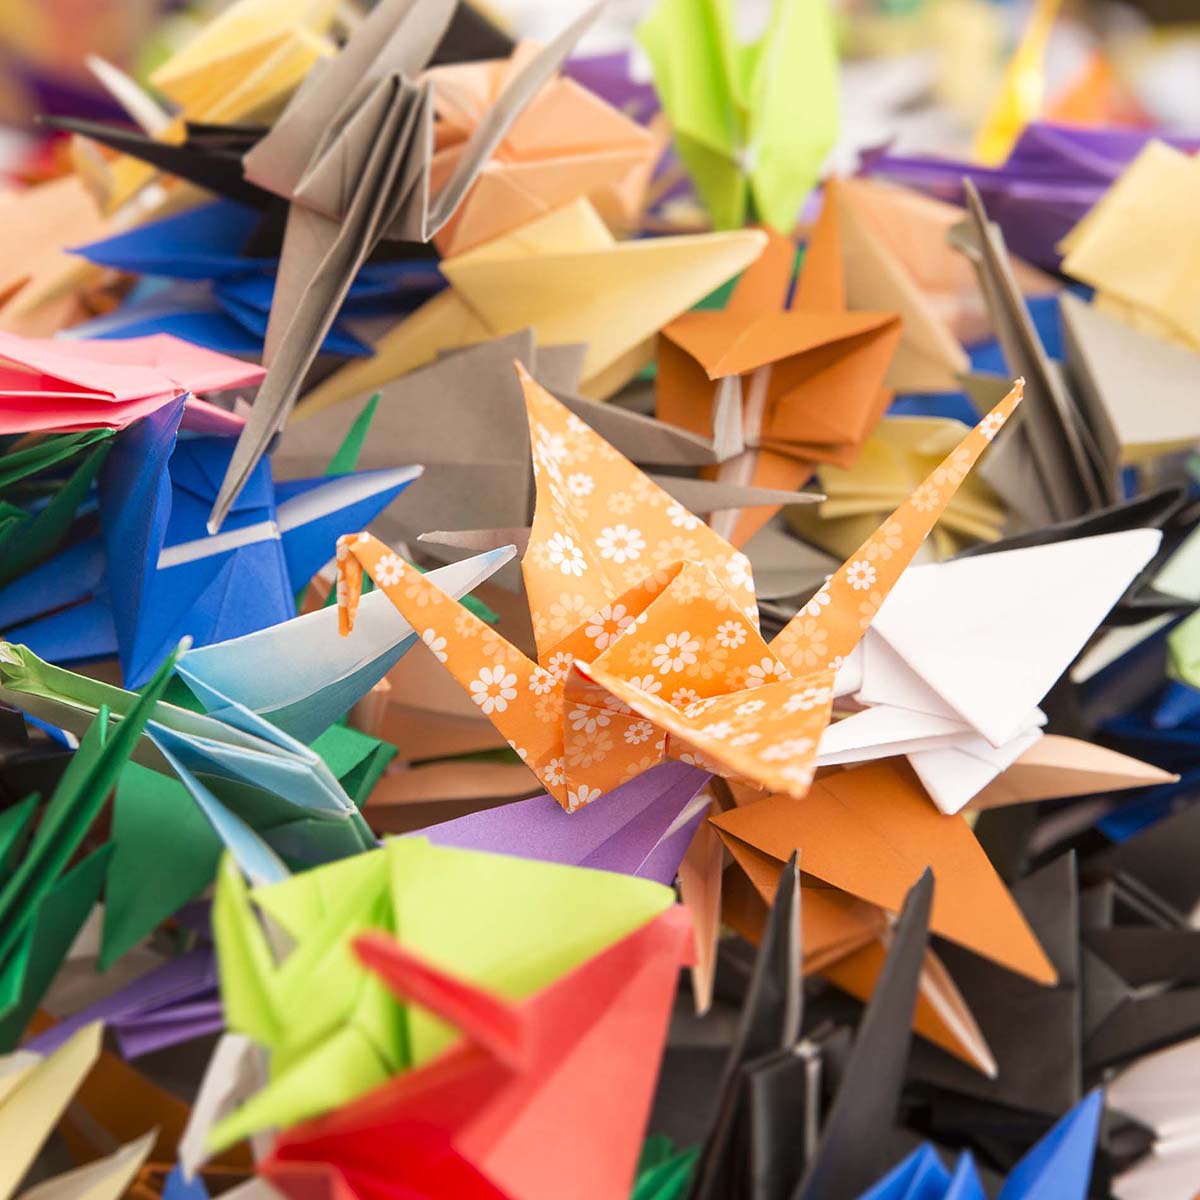
PHOTO: Origami paper cranes.
Origami paper cranes

From Ray’s original intent comes great good fortune: a community has sprung. And what do the kids think when they’re offered a crane? “They’re over the moon, they’re very gentle with them,” Mary says. “We say, ‘We’d like you to have one,’ and you’d think you were giving them gold when you explain why. It opens the door for conversations, especially with 7-, 8-, 9-year-olds.”

Cranes are offered, hand to hand, at the Shoin House whenever volunteers are present…for as long as the handmade supply lasts. (Although adults make wishes, too, cranes are for kids only.)


© Chicago Botanic Garden and my.chicagobotanic.org