Heritage Garden Viola Pyramids

My summer intern, Melanie Jensen (now a senior studying horticulture at Southern Illinois University), has always wondered how botanic gardens put together their impressive seasonal displays. In fact, she was so intrigued by them that she did her final presentation—a graduation requirement for the Garden’s horticulture internship program—on the complexities and challenges of preparing these displays.

To say the work is complex and challenging is almost an understatement. Sometimes our work here seems like magic. Overnight, the Garden can transform from spring to summer or summer to fall. Yesterday there were spring troughs, summer palm trees, or fall mum towers in the Garden. Today, there is something completely different. Yes, it does seem like it happens just like that, perhaps with the snap of a finger. But behind the scenes, for months or even years before most visitors get to see a display, a team is already hard at work making it happen.

The Viola Pyramids are currently on display in the Heritage Garden
The Viola pyramids are currently on display in the Heritage Garden.

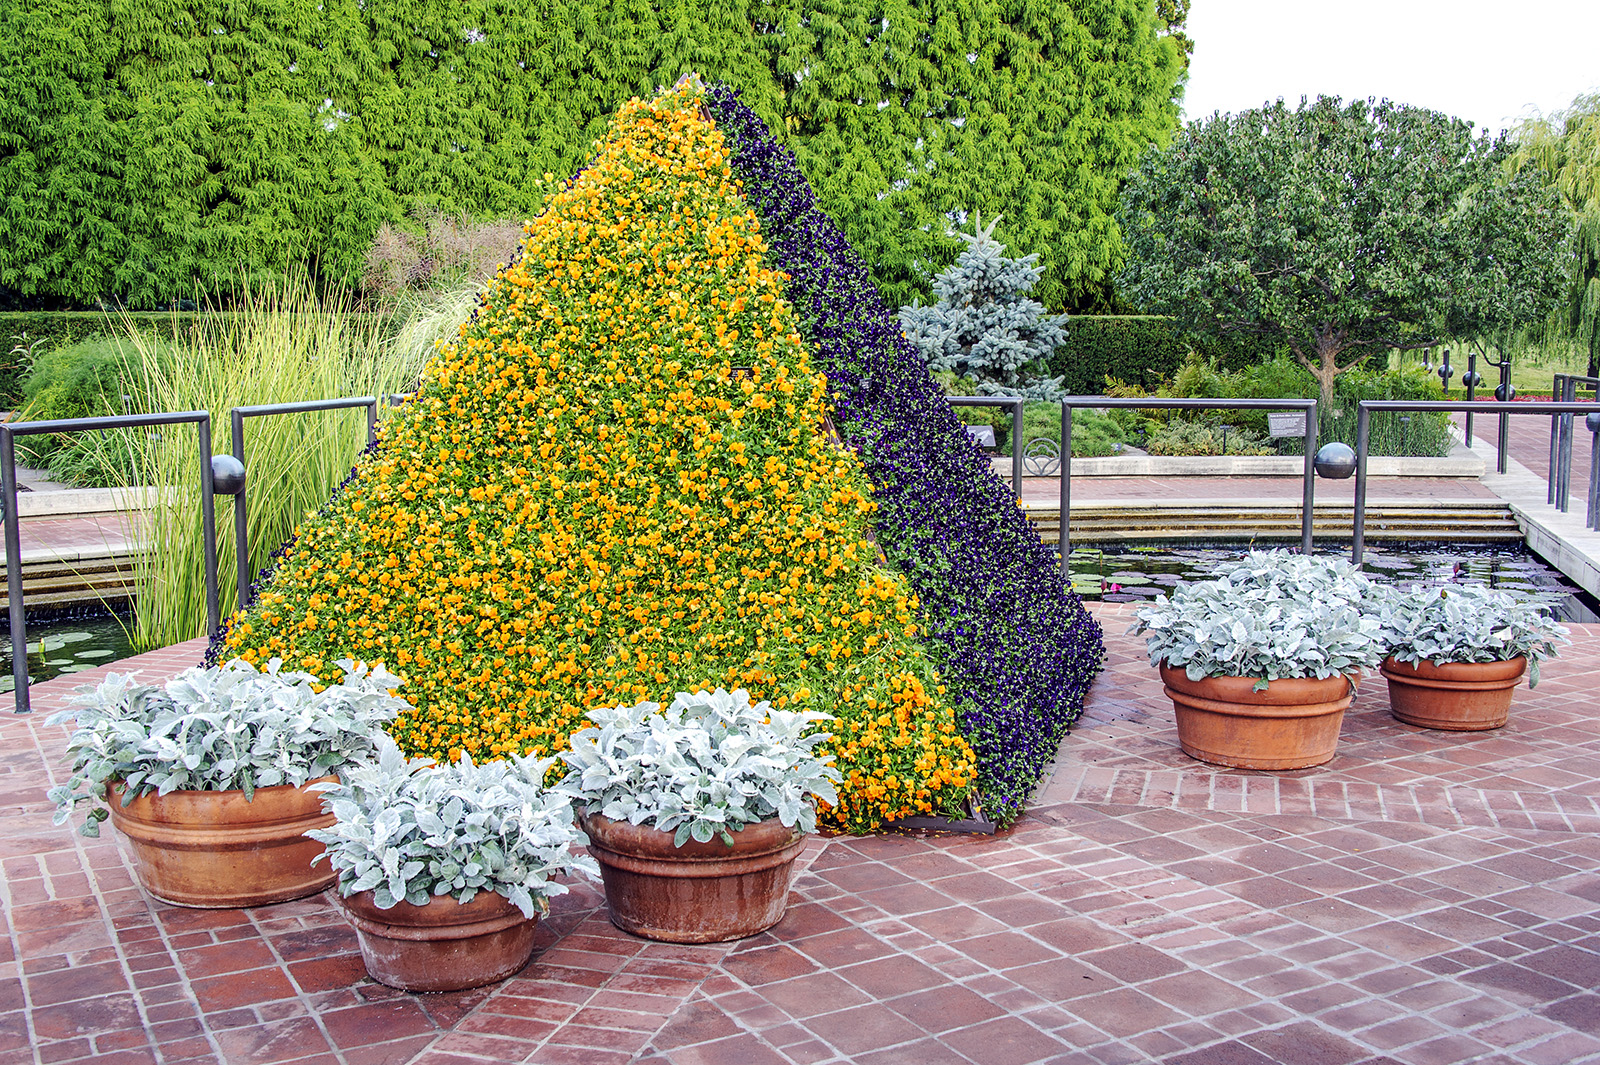
Melanie and more than 50 other staff and volunteers had a front row seat this summer to help me create this fall’s signature display in the Heritage Garden—the Viola pyramids, which are now on display. The pyramids themselves are really just a set of simple flowers presented in a very unique way. The story could end right there, but what I think makes this display fascinating to people like me and Melanie (and hopefully to you, too) is the astonishing amount of work it takes to get the pyramids from concept to finished product.

The Garden began working on this project more than a year ago, when outdoor floriculturist Tim Pollak and I were brainstorming on how we could use the pyramids in another display. Last used about five years ago, the pyramids have traditionally been used as a summer display component, planted with two cultivars of Alternanthera. Pressed to take a fresh approach to the pyramids, we settled on the idea that they would make a great fall display. We considered using mums (too fragile, and many growing challenges) and Verbena (not frost-tolerant enough for fall), and concluded that Viola were our best option. Others agreed.

Saying we are creating Viola pyramids is the easy part. Actually doing it is a completely different story, and it’s a testament to great project planning and teamwork at the Garden.

Here’s what it took:

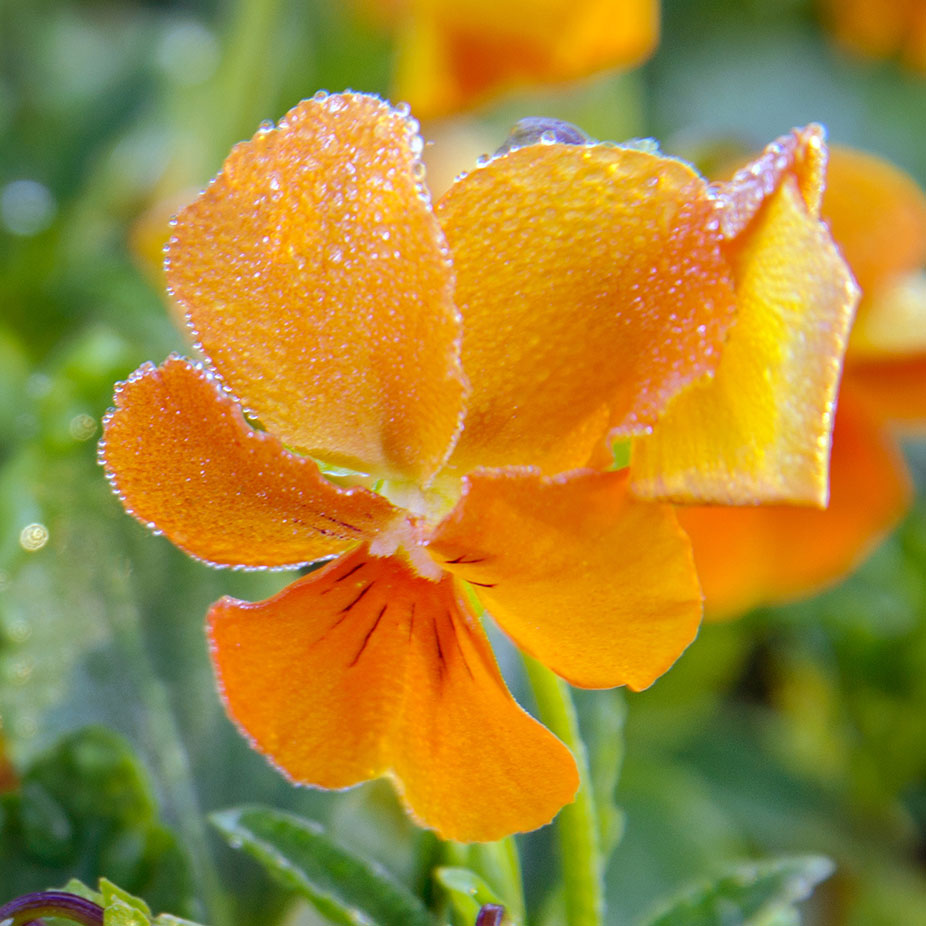
1. Our production team grew 6,400 Viola plants, half orange and half purple, so they were ready for planting into the pyramid structure by early August. The pyramids are 9 feet wide at the base, and 10 feet tall at the apex. 

Panels lined with landscape fabric

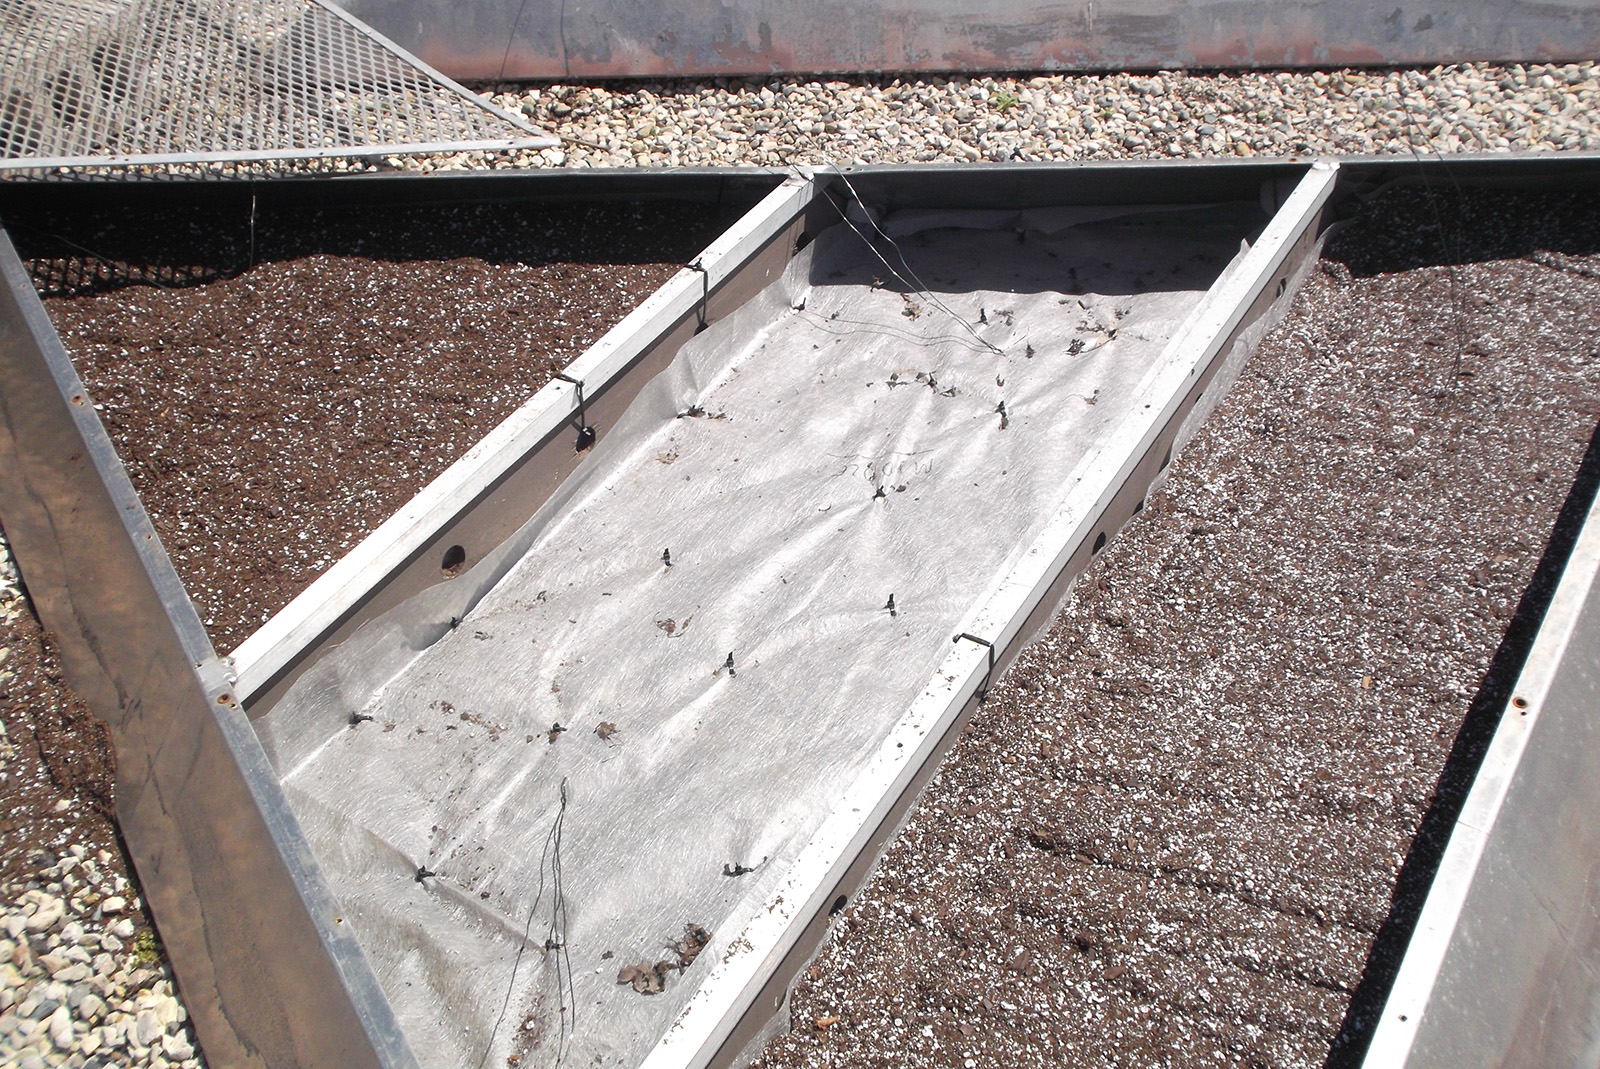
2. In the meantime, Melanie and I led the team to prepare the pyramid frames. Working in the nursery, our first step was to attach landscape fabric to the front face of the pyramids using hundreds of zip ties. Landscape fabric helps hold the soil and the plants in the frame. We had to be very careful that the fabric covered every nook and cranny of the frame. If not, soil would leak from the frame, and it would undermine the integrity of the entire planting space.

Filling the panels with custon blended planting media
Filling the panels with custom-blended planting media

3. Next we custom-blended special planting media, using lightweight potting soil and perlite. The pyramids retain water differently at their tops versus their bottoms, so we changed the composition of the media throughout the frame to accommodate this variance. Near the top of the pyramid we used a heavier, more water-retentive blend of about 70 percent soil and 30 percent perlite. At the bottom, where there is a risk that the pyramid could become waterlogged, we created a lightweight mix that was about 30 percent soil and 70 percent perlite. You can see in the picture how the soil/perlite composition changes from top to bottom.

panel with hose
Soaker hoses weave throughout the frame

4. Most of the time we will water the pyramids with a hose and water nozzle, but sometimes we need to give them a deeper soaking, especially on hot and sunny days. To help with that, we weaved soaker hoses throughout the frame so that we could water from the inside out.

Intern Melanie Jensen prepping the panels

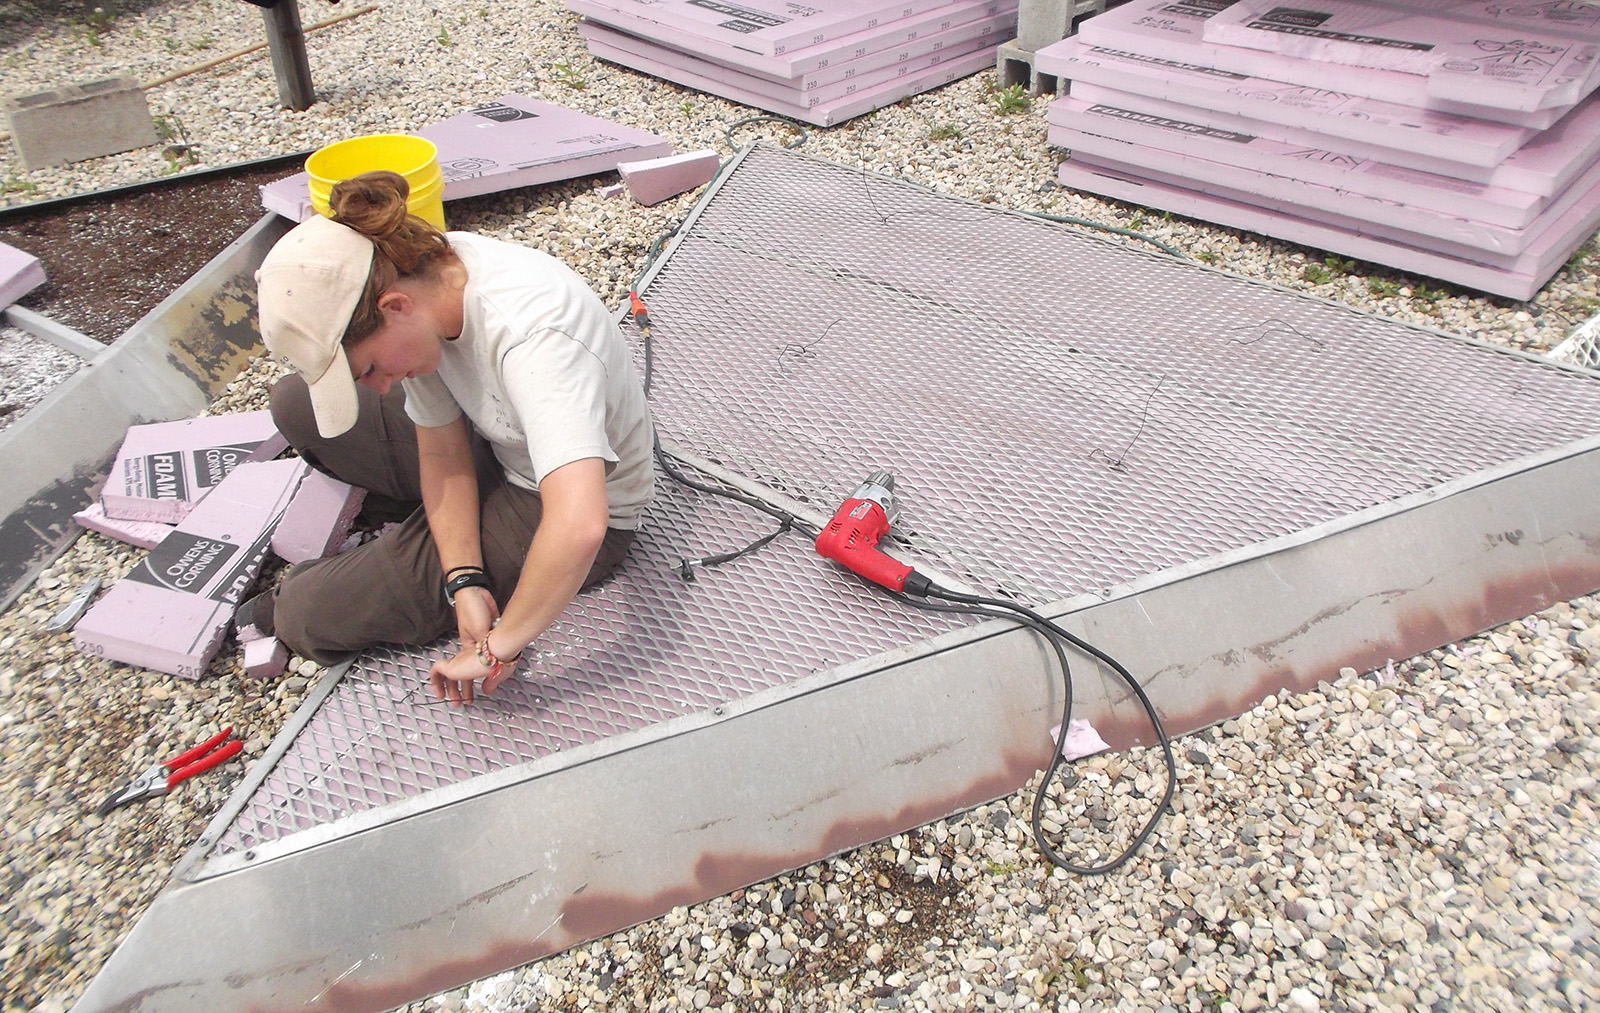
5. To make the pyramids lighter (each individual panel weighs about 500 pounds—meaning each pyramid weighs 2,000 pounds), and to reduce the amount of soil and perlite needed, we stuffed sheets of foam insulation into the bottom of the frame. A mesh screen secured all of these materials inside the frame.

Deadheading the viola panels
Deadheading the Viola panels

6. Time to plant! We cut tiny holes into the landscape fabric and inserted a Viola plant. As we planted, we also pinched and deadheaded each and every Viola. During the critical first few weeks of growing in the pyramids, the Viola plants need to spend their energy developing roots and spreading foliage to cover the entire frame, rather than producing flowers. Removing all of the flowers is a hard thing to swallow, but it’s really for the best long-term interest of the display.

(Incidentally, the cut flowers were put to good use, donated to our Roadside Flower Sale team. Pressed flowers are sold at their annual sale, with proceeds supporting Garden initiatives, including generous funding for the horticulture department.)

PHOTO: Giant planted triangles of blooming violas in the nursery.
The Violas doing what they do best: blooming again

7. The original plan was to leave the Viola plants simply to grow as-is under the care of our great production team until they were display-ready in mid-September. However, Mother Nature had other plans. The weather caused the Viola to grow faster than expected, and by late August it became clear that we would need to do another round of deadheading. Staff and volunteers again converged in the nursery for two days of meticulous work removing every flower head and seedpod from the display. It was a lot of work, and a little disconcerting to again make a beautifully colorful pyramid all green and flowerless, but it was an important task so the Viola could flower prolifically later into the season.

PHOTO: A team of 12 people (and a forklift driver) place a panel in the Heritage Garden.
Lifting a panel into place in the Heritage Garden

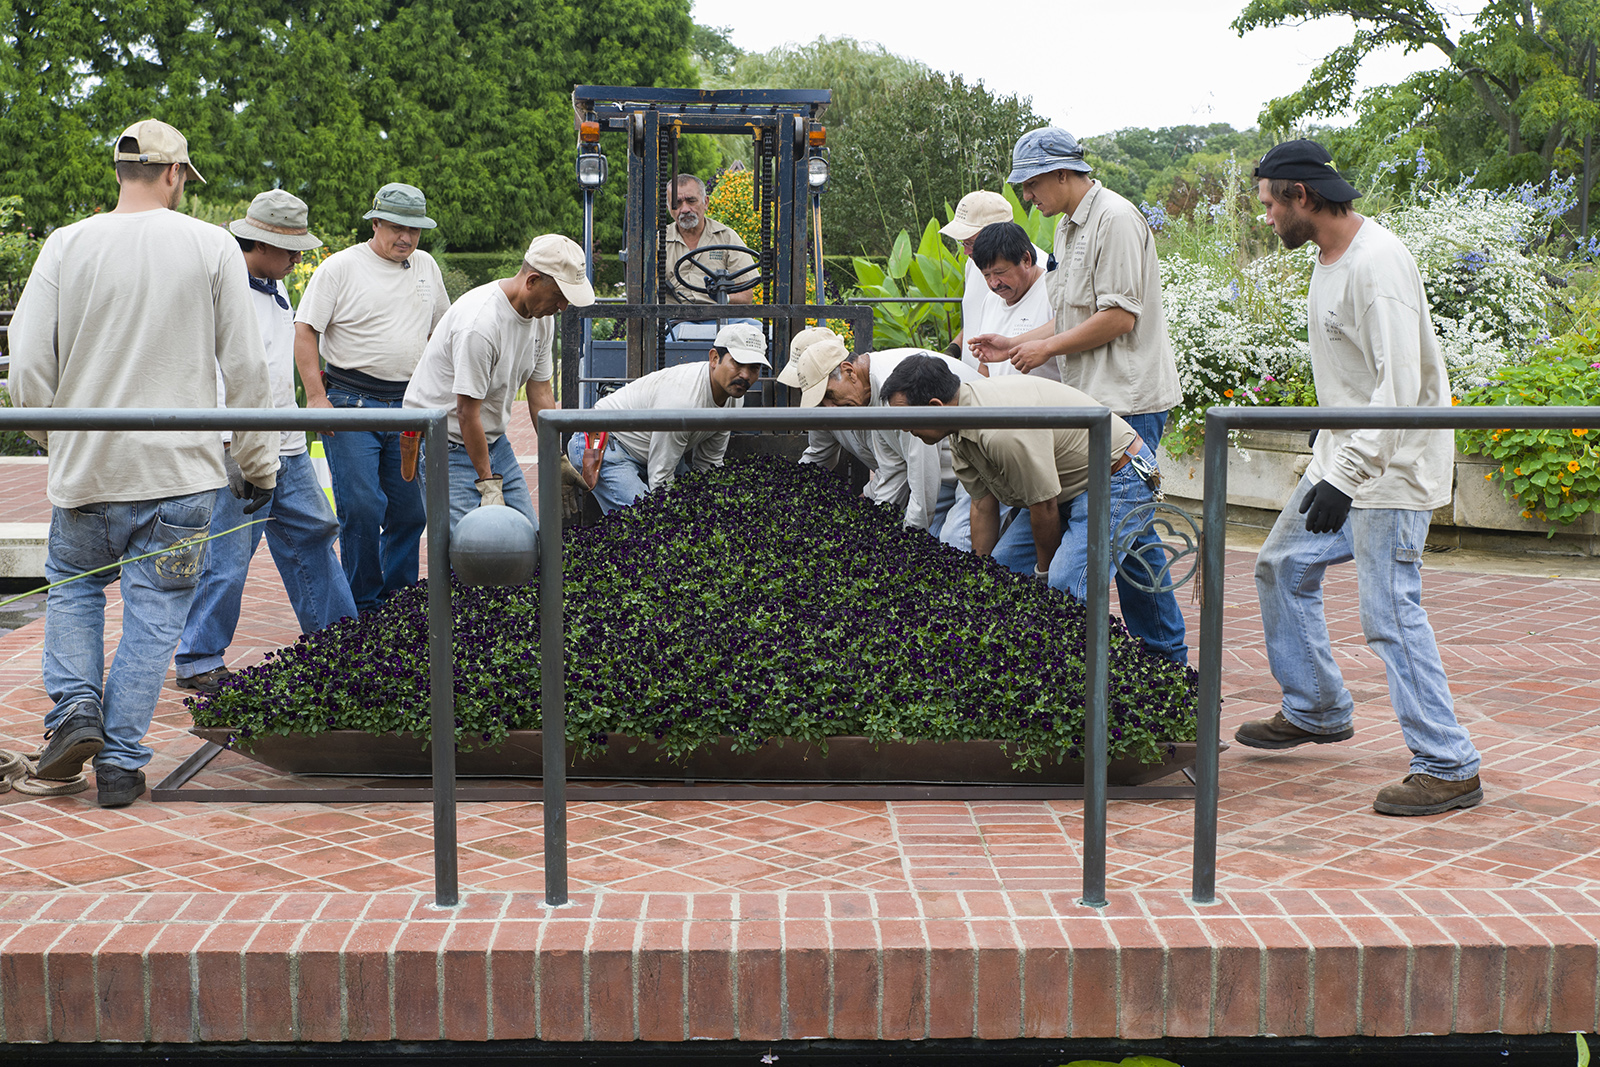
8. Time to move to the Heritage Garden! It took 15 strong groundskeepers, some extra machinery and ropes, a lot of creative thinking, and 1½ days of hard work to move the pyramids from the Nursery to the Heritage Garden. Come by and take a look!

I often like to break down the numbers for a project, because it articulates the scope of work in a way that words cannot. So, here are some numbers for this project: Over one year of planning, more than 50 people involved, 6,400 plants used, and more than 500 hours of labor to get the job done. Yes, 500 hours!

It seems like a lot of work—and it is—but I hope that everyone who sees the display takes away something uniquely personal to them. Perhaps it sparks your creativity on how to use simple plants in unique ways. Maybe seeing something new and special triggers your passion for plants and horticulture, either as a hobby or as a career. Sometimes the display will draw your attention to a part of the Garden that you never explored before now. Or maybe you like it just because it looks pretty cool. It’s even O.K. if this display just isn’t your thing: artistic choices are very personal. Whatever your take-away is, however, my hope is that we can use this display and others like it to engage you in a conversation about plants and to help you connect to the Garden in an exciting new way. That makes 500 hours of work worth it for me.

Enjoy!


©2013 Chicago Botanic Garden and my.chicagobotanic.org

Crazy for Colchicum

When most people think of bulbs, they think of spring-flowering plants such as tulips and Narcissus, or maybe summer ones such as Allium or lilies. One often-forgotten season is fall, even though fall is prime time for one of the most carefree and surprising bulbs of all, Colchicum.

PHOTO: Colchicum 'Waterlily'
Colchicum ‘Waterlily’

Commonly known as autumn crocus or meadow saffron (although it is important to note that they are neither saffron nor a crocus and are poisonous if ingested), these lovely ephemerals are jewels in the fall garden.

Get your own Colchicum bulbs (and more!) at the Fall Bulb Festival, October 4 – 6.

PHOTO: Colchicum cilicicum
Colchicum cilicicum

PHOTO: Colchicum autumnale 'Album'
Colchicum autumnale ‘Album’

Although they’re commonly referred to as a bulb, Colchicum are not a true bulb, but are corms, much like Gladiolus and Freesia. Colchicum have an unusual habit of growing their foliage in the spring (just like most plants), but then instead of flowering, they go dormant for several months. Then, seemingly out of nowhere, they send up dozens of purple, pink, white, or checkerboard flowers just as the rest of the garden is getting ready for fall.

Colchicum prefer a location with full sun until midspring and grow best in a location with well-drained soil that does not stay wet during the summer dormant period. This makes them ideal for planting under trees, where other plants might not compete as well with the roots. The bulbs should always be planted two to three times deeper than the bulb is tall to help ensure a long life.

To appreciate these intricate flowers, plant Colchicum in large groups near the front of a border. Because the foliage remains green until early summer, it is best to either plant them in an area with a groundcover, or to choose a low-growing annual to plant over them once the foliage has gone dormant for the season. This not only hides the bare ground, but also provides some support to help keep the flowers upright.

Look for Colchicum at the Chicago Botanic Garden beginning in mid-September and continuing through October. The Bulb and Home Landscape Gardens have the best displays of this fall beauty.

PHOTO: Colchicum 'Violet Queen'
Colchicum ‘Violet Queen’
PHOTO: The Home Landscape Garden, dotted with clusters of Colchicum 'Violet Queen'
A large planting of Colchicum ‘Violet Queen’ in the Home Landscape Garden

©2013 Chicago Botanic Garden and my.chicagobotanic.org

Cicadas by the Numbers

Cicadas have been out and singing for a while now. If you live around trees, you may be enjoying their late summer serenade. You also may be finding them on the ground. After they emerge from underground burrows, they molt and enter their adult stage. Then they mate, lay eggs, and die. When you find one, you can examine it to learn more about these big bugs.

Did you know that cicadas have five eyes?

In school we learn that insects have compound eyes, and we use toy bug eye viewers to get a sense of what dragonflies and bees see. But the real picture is a little more complicated. In addition to the pair of compound eyes, many insects, including cicadas, have three simple eyes. They are easy to see on a cicada if you look carefully.

PHOTO: Front "face" view of a cicada, showing 5 eyes.
This cicada’s three simple eyes show up as three spots reflecting the flash from the camera.

The simple eyes are called ocelli, and they are usually arranged in a triangle between the compound eyes, like those in picture of the cicada’s face. Grasshoppers, bees, and praying mantids also have them.

PHOTO: Side view of a cicada.
The Latin name for this cicada is Tibicen canicularis. “Canus” is the Latin word for dog. Why do you think he’s called the Dogday cicada?)

Let’s do some cicada math!
If you find a cicada on a tree or the ground, see if you can count:

1  mouth part to drink sap from trees

2  antennae that grow under the eyes and look like whiskers

3  body parts: head, thorax, and abdomen

4  wings, arranged in two pairs

5  eyes, 3 simple + 2 compound

6  legs

Want more cicada by the numbers? Click here to download a Color-by-Number Cicada.


©2013 Chicago Botanic Garden and my.chicagobotanic.org

Heptacodium Miconioides, the Seven-Son Flower

PHOTO: Image of bark
The gorgeous, exfoliating bark of Heptacodium miconioides looks stunning year-round.

Are you looking for a plant that offers some “wow” at the end of the season? That particular something that offers color, and maybe even more? Here’s something on steroids: Heptacodium miconioides.

This large shrub or small tree (15 to 20 feet tall on average), native and rare in the wild in China, was successfully reintroduced to western horticulture in the 1980s, and its popularity has come to span the globe for good reason: this is not just a brilliant autumn performer—it’s a year-round beauty! I suppose we can start the story when this ornamental shrub is dormant in the winter, with its striking exfoliating bark peeling off of nearly every branch in tan, cream, or light brown ribbons or patches, revealing the underlying tissue that has developed into a wash of many colors: vertical striations of creamy white, deep yellow, green, tan, bluish-green, olive green, brown, ochre, and even rust; more so as the plant ages. But that’s just the beginning of the show.

PHOTO: Heptacodium miconioides in flower
The Latin Heptacodium means “seven flowers,” hence its common name “seven-son flower”— though that’s just the average number of flowers on each shoot.

Heptacodium are among the first to sprout leaves in the spring, and their light green color is especially attractive. Should they break dormancy in an early thaw and the leaves succumb to a return of the cold, do not fret, because they’ll start over again. This plant likes to grow. Once the leaves fill in and the warm weather settles in, you’ll have a beautiful, irregularly umbrella-shaped, dense canopy of long, shiny, deep green leaves. And suckers. Be sure to catch them in late May and cut them off, as they can easily and rapidly form straight whip-like vertical branches that mess up the plan. You may even need to revisit the suckering scene in late summer, as it simmers down and readies to bloom.

Let your Heptacodium establish for a couple of seasons into a V-shaped, multistem plant, then select three to seven sturdy stems for the plant to stand on, and cut off the rest of the stems, including the suckers. (As we’ve mentioned, this plant likes to sucker. Profusely. Even if it gets run over by an off-road vehicle—and some of ours have—it will sucker back into a strong and proper plant in one or two seasons.) They really like to grow, and with few natural (nonautomotive) pests to disrupt their progress, they’re reliably hardy in the Chicago area’s Zone 5 climate.

PHOTO: Heptacodium miconioides in fruit
It looks like it’s blooming, but this is the fruiting stage. After pollination, the sepals elongate and change from green to dark pink, becoming part of the incredibly showy fruit.

In late summer the plants begin to set up for their flower display, developing whorls of buds at the tips of the branches; these structures form bracts of seven, hence its common name, “seven-son flower.” These open progressively, until the entire plant is covered in a cloud of tiny white blooms that smell somewhat like jasmine or alyssum—a sweet scent, to be sure. As amazing as this display can be, it changes even more. As the small dark fruits (or seeds, or berries) form, the white petals fade, and the corollas (flower petals) form sturdy calyces (a calyx is a specialized petal that wraps around the fruit) that color up into reds ranging from rose to nearly purple; some are even bluish in color, which can last as late as November, when the birds will find these treats and finish them off.

But wait—there’s even more! We’ve come full-circle back to the amazing winter display of that colorful, textural, exfoliating bark. With all of this to enjoy, seriously consider placing one (or more) of these beauties in a highly visible, year-round spot in your garden.


©2013 Chicago Botanic Garden and my.chicagobotanic.org

Eleven Experiments with Radish Seeds

It’s that time of year again—time for student science fair projects. Many students I know struggle to find a good idea, and sometimes wait until the last minute to do their experiments. We in the Education Department of the Chicago Botanic Garden are committed to helping make science fair a painless and even fun learning experience for students, parents, and teachers by offering some simple ideas for studying plants.

A no-brainer botany project is testing germination of radish seeds in different conditions. Radish seeds are easy to acquire, inexpensive, large enough to see and pick up with your fingers, and quick to germinate under normal conditions. Testing germination does not take weeks, doesn’t require a lot of room, and is easy to measure—just count the seeds that sprout!

PHOTO: Seed packets for White icicle radish and an organic red radish are shown, next to about a dozen scattered radish seeds from the open package.
Radishes come in different varieties—here are two very different kinds. They all work for germination experiments.

To set up a seed germination experiment, use this basic procedure:

  1. Gather three or more small plates, depending on how many ways you will be treating your seeds.
  2. Place a folded wet paper towel on the plate.
  3. Place ten seeds on the wet paper towel. You can use more seeds—the more you have, the more reliable your results will be—but using multiples of ten makes it easier to calculate percentages.
  4. Cover with a damp paper towel; label the plates.
  5. Treat the seeds the same way in every respect except for one thing: the condition you are testing. That condition is your “independent variable,” which may also be called the “experimental variable.” No matter what you are testing, one plate should be set up with the basic directions and no treatment. That plate is the “control” that all the other plates can be compared with.
  6. When the seeds sprout root and leaves, remove the top paper towel. Compare the number of seeds that germinate and the time it takes for seeds in each condition. You should be able to wrap this up in less than a week.
PHOTO: ten radish seeds are arranged in three rows, half inch apart, on a wet folded paper towel.
These seeds are ready to be covered with a damp paper towel and tested.

Now all you need are some ideas for conditions to test. Here are eleven questions you can investigate at home or school using the same basic proceedure:

1. Do seeds need light to germinate?

Place your plates of seeds in different light conditions: one in no light (maybe in a dark room or a under a box), one in indirect/medium light (in a bright room, not near the window), and one in direct light (by a south-facing window). Compare how well the seeds germinate in these conditions.

2. Do seeds sprout faster if they are presoaked?

Soak some seeds for an hour, a few hours, and overnight. Place ten of each on a germination plate, and and compare them with ten dry seeds on another plate.

3. Does the room temperature affect germination rate?

You’ll need a thermometer for this one. Place seed plates on a warming pad, in room temperature, and in a cool location. Monitor temperature as well as germination rate. Try to ensure that the seeds have the same amount of light so it’s a fair test of temperature and not light variation.

PHOTO: ten radish seeds on the wet paper towel overnight all show signs of germination, including swelling and the beginnings of tiny roots
Like magic, after just one day, these seeds are swollen and beginning to germinate. Notice the tiny white nubs on some seeds, which shows they are starting to grow.

4. Do microwaves affect germination?

Put seeds in the microwave before germinating and see if this affects them. Try short bursts, like one and two seconds as well as ten or 15 seconds, to see if you can determine the smallest amount of radiation that affects seed germination.

5. Does pH affect germination rate?

Wet the paper towels with different solutions. Use diluted vinegar for acidic water, a baking soda or mild bleach solution for alkaline conditions, and distilled water for neutral.

6. Does prefreezing affect the seed affect germination?

Some seeds perform better if they have been through a cold winter. Store some seed in the freezer and refrigerator for a week or more before germinating to find out if this is true for radishes or if it has an adverse affect.

PHOTO: Ten sprouting radish seeds, each with root and seed leaves.
After about three days, all ten seeds have grown roots and early leaves. That’s 100 percent germination!

7. Does exposure to heat affect germination rate?

Treat your seeds to heat by baking them in the oven briefly before germinating. See what happens with seeds exposed to different temperatures for the same amount of time, or different amounts of time at the same low temperature.

8. How is germination rate affected by age of the seeds?

You can acquire old seeds from a garden store (they will be happy to get rid of them), or maybe a gardener in your family has some old seeds hanging around. Find out if the seeds are any good after a year or more by germinating some of them. Compare their germination rate to a fresher package of the same kind of seed.

9. Do seeds germinate better in fertilized soil?

Instead of using the paper-towel method, sprout seeds in soils that contain different amounts of Miracle-Gro or another soil nutrient booster.

CIMG0951
Speaking of seeds, this sprout is about a half-centimeter long, complete with testa, radicle, and first leaves. Now go look up those terms for your report! While you’re at it, look up hypocotyl, cotyledon, and plumule.

10. Does scarification improve germination rate?

Some seeds need to be scratched in order to sprout—that’s called “scarification.” Place seeds in a small bag with a spoon of sand and shake for a few minutes and see if roughing them up a bit improves or inhibits their germination.

11. Does talking to seeds improve their germination rate?

Some people claim that talking to plants increases carbon dioxide and improves growth. Are you the scientist who will show the world that seeds sprout better if you read stories to them? Stranger discoveries have been made in the plant world.

That eleventh idea may seem silly, but sometimes science discoveries are made when scientists think outside the seed packet, so to speak. Students should design an experiment around whatever question interests them—from this list or their own ideas—to make the research personal and fun. As long as students follow the scientific method, set up a controlled experiment, and use the results of the experiment to draw reasoned conclusions, they will be doing real science. The possibilities for botanical discovery are endless, so get growing!


©2013 Chicago Botanic Garden and my.chicagobotanic.org