Students Learn that Science Can Be Beautiful

The Garden has a bright and cheery answer for overcoming classroom winter doldrums: take a field trip to see the Orchid Show

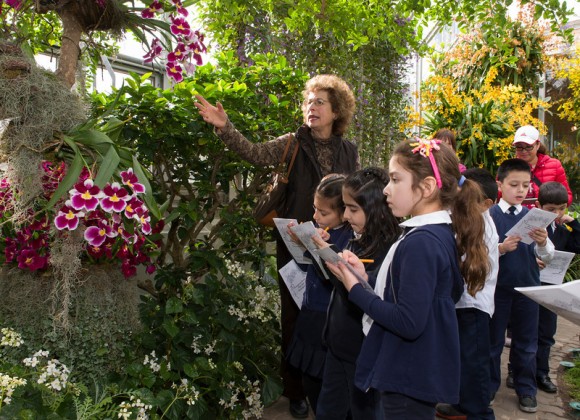
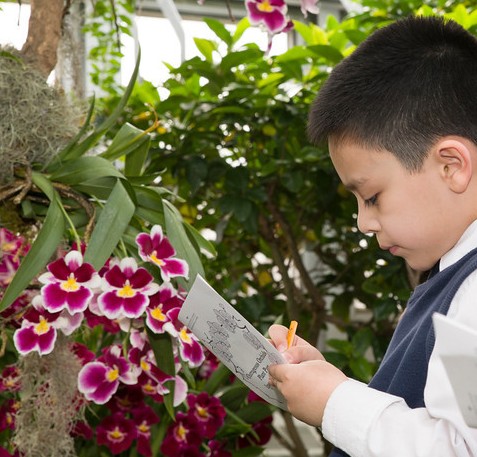
PHOTO: Students observe how orchids are adapted to the wet environment -- they grow aerial roots that can absorb water from the humid air.
Students observe how orchids are adapted to the wet environment—they grow aerial roots that can absorb water from the humid air.

At a time when schools are tightening budgets and limiting field trips, you might think that an Outrageous Orchids experience is a frivolous excursion—but, in fact, this is a luxurious way to learn life science principles. Our programs are grounded in fundamental science concepts outlined in the Next Generation Science Standards. From Valentine’s Day to St. Patrick’s Day, students get meaningful science lessons as they enjoy the sensational display of colors and aromas in our Greenhouses. 

Field trips are tailored to suit different grade levels. Younger students study the variety of color and shapes found in the exhibition to identify patterns. Early elementary level students examine the structures of orchids to understand their functions. Upper elementary students recognize how tropical orchids have adaptations for survival in a rainforest. These core ideas about orchids apply to all plants and are essential for understanding ecosystems. There isn’t a more beautiful way to study plant science anywhere else in the Chicago region.
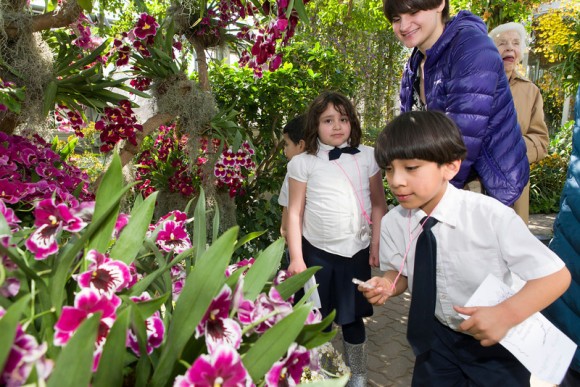
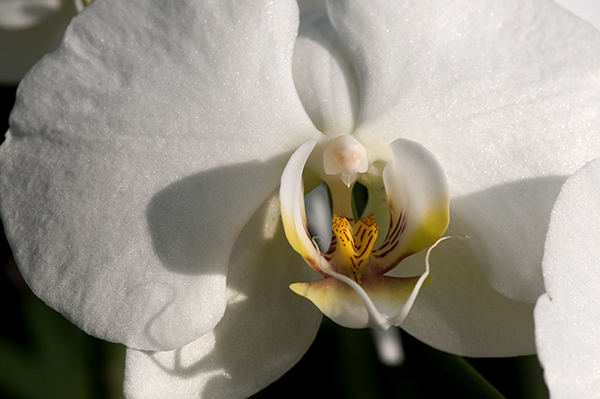
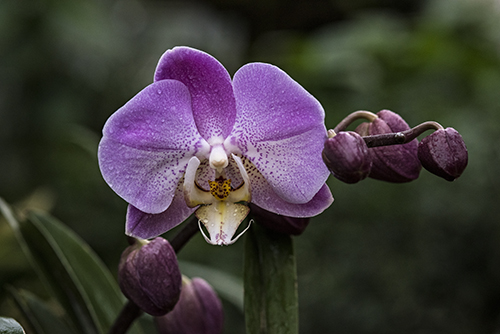
PHOTO: It is easy for students to see how this flashy orchid attracts pollinators as well as people.
It is easy for students to see how this flashy orchid attracts pollinators as well as people.

As if being surrounded by gorgeous flowers in the dead of winter weren’t enough to engage a person’s brain, each student also gets to transplant and take a tropical plant to continue the learning after the visit. 

The Baggie Terrarium is a mini-ecosystem that reminds students of the water cycle and enables them to observe plant growth. 

Make a Baggie Terrarium
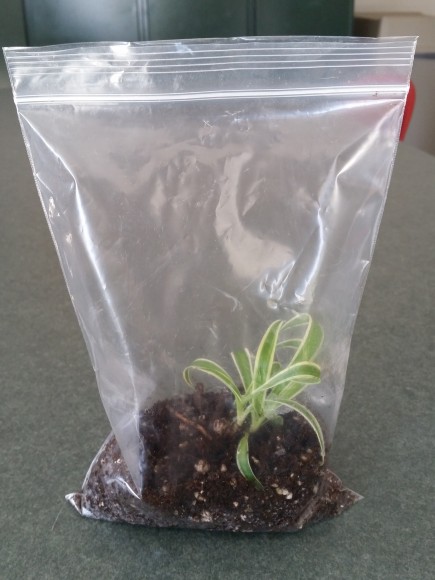
PHOTO: Baggie terrarium.
We call this a “baggie terrarium.”

Supplies:

  • 1 zip-top bag (quart-size or larger)
  • Potting soil, moistened
  • A small plant or plant cutting (during Outrageous Orchids classes, we let students take a spider plant “pup” from a very large spider plant)
  1. Pour soil into the bag to fill about 2-3 inches deep. Use a finger to create a hole in the soil for the plant.
  2. Bury the roots of the plant in the hole and gently tap the soil around the base of the plant. If you are planting a stem cutting, place the stem in the soil and tamp around the base. If you have a larger bag, you can add more than one plant. Three different plants in a gallon size bag can make an attractive terrarium.
  3. Seal the bag, leaving about a 1-inch opening. Blow into the bag to inflate it and quickly seal the last inch tight so the air doesn’t all escape. The carbon dioxide in your breath is good for the plant, and will give the bag enough substance to stand up.
  4. Place the terrarium in a bright location, but not in direct sunlight. Remember that most tropical plants grow under the canopy of taller trees and do not need full sun. In fact, too much direct sun makes their leaves fade!
  5. Watch for tiny water droplets forming on the sides of the bag. These will gradually roll down the sides of the bag and re-water the soil. As long as the bag is completely sealed, it will stay moist and you will never have to open the bag or add more water. But if it dries out, you will need to water the plants.

You can leave your terrarium alone for a long time and not do anything but watch the plants grow. Eventually, they will outgrow the bag. Then you can transplant them to a pot if you like, or take cuttings and start another baggie terrarium.

Like all of our programs, Orchid Show field trips inspire young people to learn more about plants! Visit our website at chicagobotanic.org/fieldtrips for more information about these programs. 


©2015 Chicago Botanic Garden and my.chicagobotanic.org

Helping the “Blind” to See

Guest blogger and Bucknell University professor Chris Martine, Ph.D., talks about guiding students away from their electronic devices and into the plant world.


It is a pretty spring day. The sun shines through my office window, illuminating the old and worn photo on my desk. With the image is a handwritten note: “1912 photo of Bucknell botany class field trip.” Twenty-nine formally dressed students are shown sitting near a river, a specimen and an open floristic manual in each of their laps.

Inspired, I stand up to look out my window at the plants in bloom in my campus view. I wonder if the present-day students walking past have seen them, too, and are just as impressed as I am by the chromatic exhibition.

But then I notice something: nearly every one of them—instead of looking up—is looking down. Their attention is on the smartphones in their hands; they appear to be unaware that there is anything around them at all. This reminds me, once again, of the mission I have defined for myself as a professor of botany:

In order to help them understand and appreciate the nature of life on Earth, today’s students must first be taught how to see.

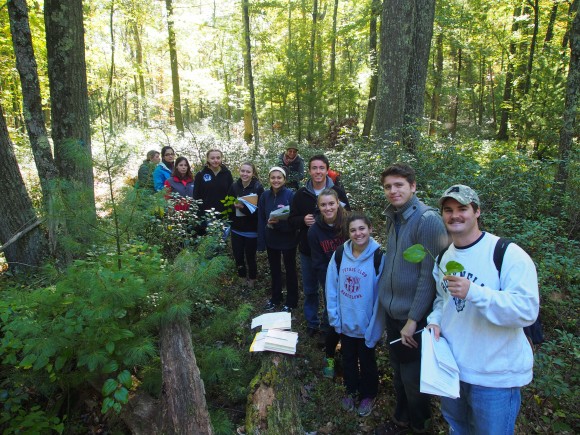
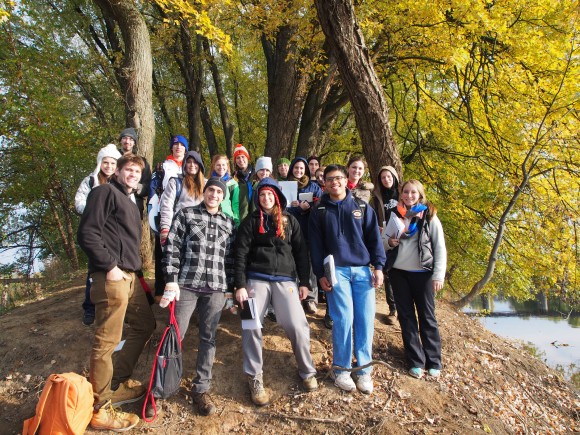
PHOTO: Dr. Martine's class poses for a group shot on a hike.
Chris Martine, Ph.D., brings his college students into the forest to learn to identify plants. They are learning to see plants a new way, through methods Martine encourages everyone to adapt: putting down electronic devices and experiencing nature firsthand.

“Plant blindness” (an incapacity for many people to recognize the green world around them) has been bemoaned by modern botanists for some time. The students beyond my windowpane, however, are suffering from an ailment of a different nature, something I have begun to refer to as the “Mantid Syndrome.” 

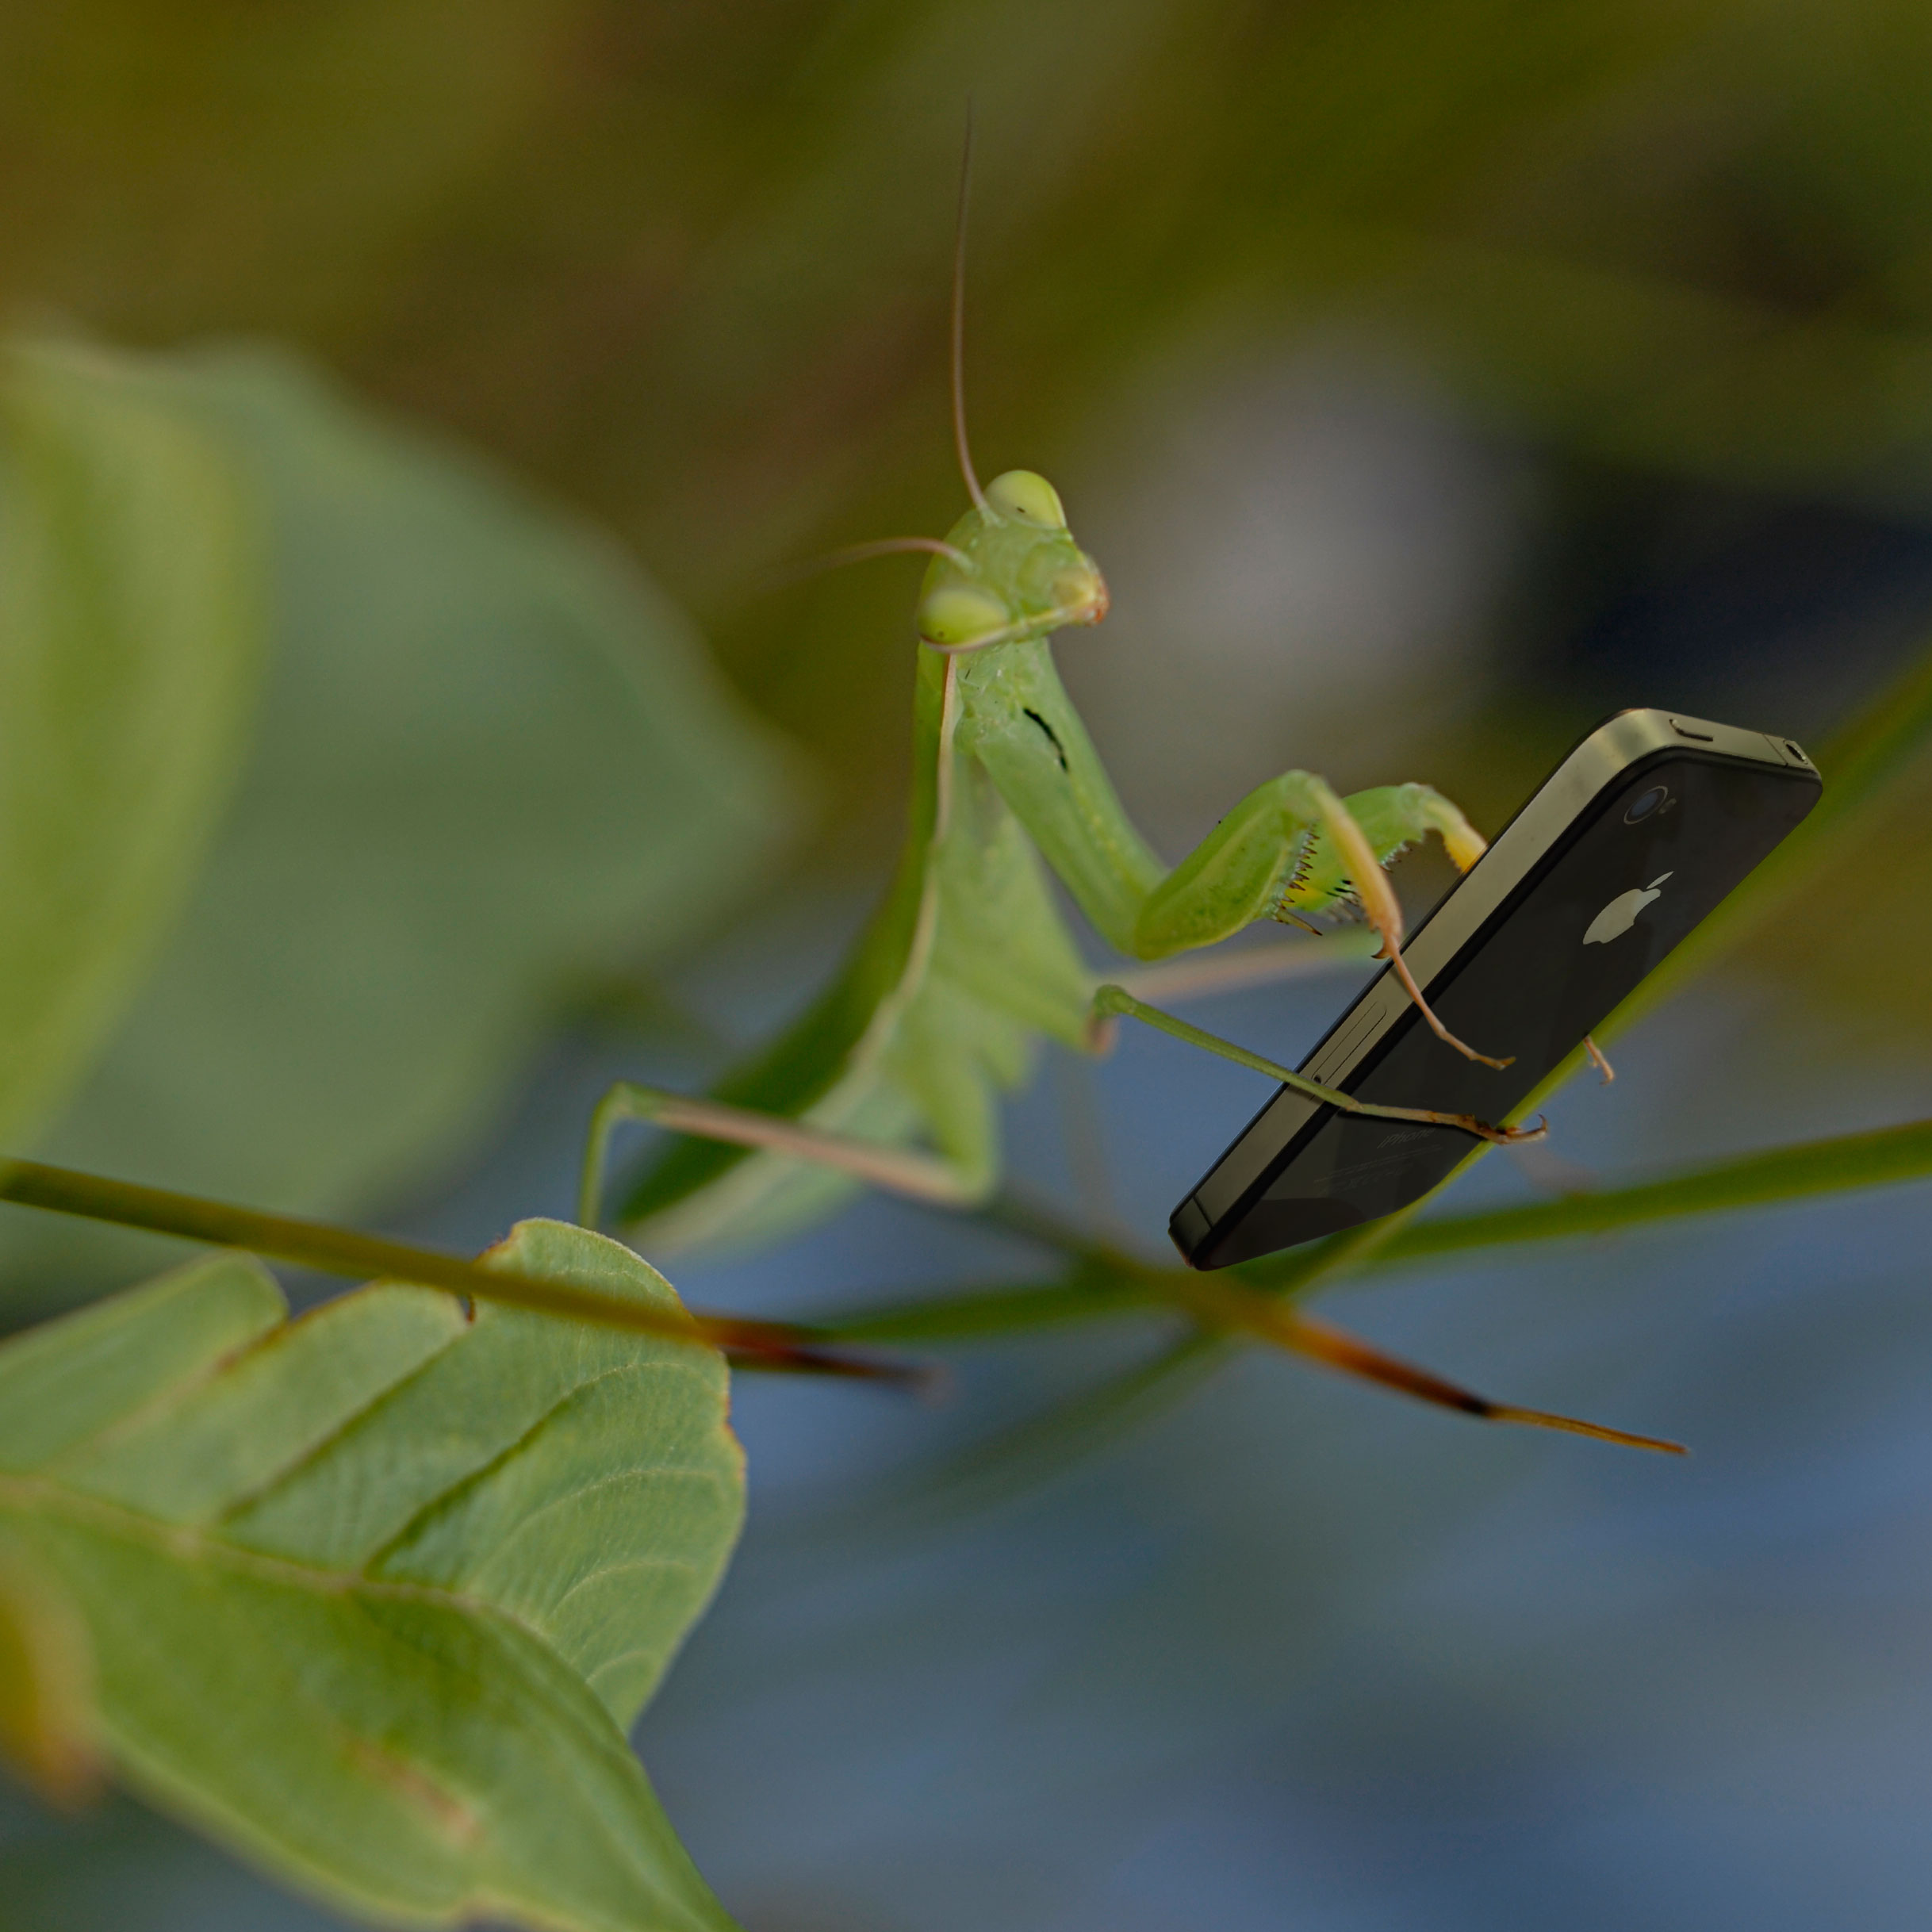
The Mantid Syndrome describes the positioning of one’s hands and forelimbs when staring at and thumb-typing on a smartphone: hands in front of face, elbows bent in a posture not unlike a praying mantid as it prowls along a stem.

Unlike the mantid, students exhibiting this syndrome are not scanning the world around them. Rather, they see nothing beyond the reach of the bouncing thumbs and swiping forefingers working their small glass touchscreens. The issue is not an unwillingness to discern the details of the nature in their world—it’s a fundamental inability to tear their eyes from their screens long enough to know that nature is even there.

PHOTO: Chris Martine, Ph.D.
Guest blogger Chris Martine, Ph.D., brings botany to his students’ screens, but prefers bringing students to botany.

This is dangerous, of course, and not just because “smartphone mantids” often walk in front of cars or into stationary objects. These tech portals may take a user almost anywhere and show them almost anything. Yet, at the same time, one also becomes all the more disconnected from a real experience in this world—especially an experience that includes a sense of connection to nature itself.

Thankfully, there are potential treatments. One is to develop electronic education and outreach tools that meet people where they are—in virtual spaces. I have personally taken the plunge and joined this effort in a number of ways, including developing and hosting the YouTube series “Plants are Cool, Too!”, blogging for the Huffington Post, and peppering social media outlets with posts/shares/tweets about plants and biodiversity.

Efforts like these can engender greater awareness, I think, but they are not enough. Unsurprisingly, the best way to connect people with the real world is still to get them outside, unplugged and in position to see real things in real places—just like my predecessor had done with his botany class a century before me. Plants, with their ubiquity, stationary habits, and approachable demeanors, are ideal subjects for teaching students to see. Experience has shown me that if you can see the plants in your world, all the rest starts to come unblurred.

On a recent morning with my field botany class, I asked the students to look around the forest we were standing in. Six weeks into the course, I knew they would have a hard time finding a species in this spot that they couldn’t recognize and assign a name to. A short time ago this was not the case for any of them—and yet here they were, having learned to see in a new way, feeling perhaps more at home in a forest than they had in their entire lives.

PHOTO: Martine's field botany class on a research trip in the woods.
Not a “mantid” in the group—Martine’s field botany class gets a feel for the forest around them.

These students are lucky to have access to that forest—and lots of other wild places in our region—where they can develop and realize their new vision. But many young people are not as fortunate. For the more than 50 percent of the global human population in cities, finding places to become acquainted with plant diversity might be perceived as a challenge.

Luckily for all of us, there are institutions like the Chicago Botanic Garden in cities around the world where people can visit, learn about, and come to love real plants. Botanic gardens are thus critical players in helping so many more of us learn to see. Even one special encounter with a plant can be enough to open a person’s eyes for good.

With that last point in mind, I turn away from my office window and walk out of my building. In a moment I recognize a student coming my way, her face buried in her phone. I decide to intervene, and I keep it simple.

“Hey, come have a look at these plants over here.”


©2015 Chicago Botanic Garden and my.chicagobotanic.org
Orchid mania. Orchid fever. Orchidelirium!

The Victorians had it, and so do we, right here at the Lenhardt Library! A new rare book library exhibition has just opened as part of the Chicago Botanic Garden’s 2015 Orchid Show: Orchidelirium: Illustrated Orchidaceae.

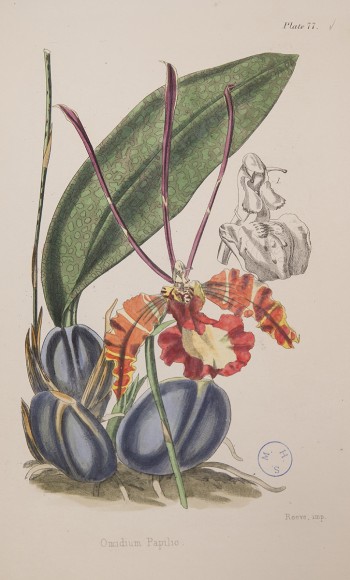
ILLUSTRATION: Oncidium papilio
Oncidium papilio from A Century of Orchidaceous Plants Selected from Curtis’s Botanical Magazine: Consisting of a Hundred of the Most Worthy of Cultivations by William Jackson Hooker (1785–1865). London: Reeve and Benthem, 1851

No matter what you call it, the Victorians were mad for the sensational new plants arriving in England from every exotic location on Earth. The race was on, as botanical explorations took orchid collectors from one end of the globe to another in search of the most beautiful, rare, vibrantly colored, sensuously shaped orchids to be found. Orchid fever flared again and again, from the first time the Victorians saw a Cattleya labiata from South America (it bloomed after arriving as packing material in 1818), to the orchid display of the 1851 Great Exhibition at the Crystal Palace, designed by gardener, architect, and member of Parliament Sir Joseph Paxton (1803–65).

And if that wasn’t enough, books, articles, and botanical journals were also devoted to the orchid.

No photography? No Internet? No matter! Botanical illustrators captured orchids in all their thought-provoking beauty, one engraving and lithograph at a time. These trained illustrators caught the clinical and technical aspects of the plants with sheer precision. After Cattleya labiata, the next Victorian orchid-on-demand was Oncidium papilio, the butterfly orchid, which is one of the most dazzling illustrations in Orchidelirium: Illustrated Orchidaceae.

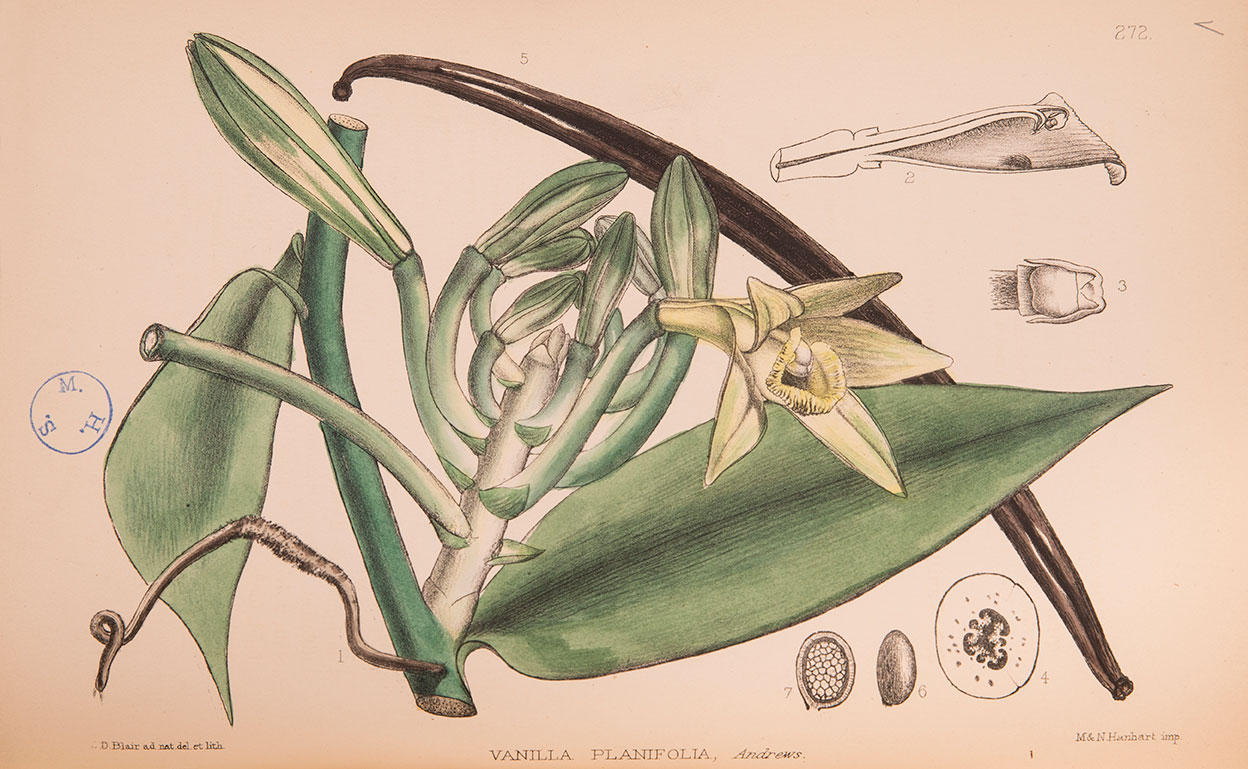
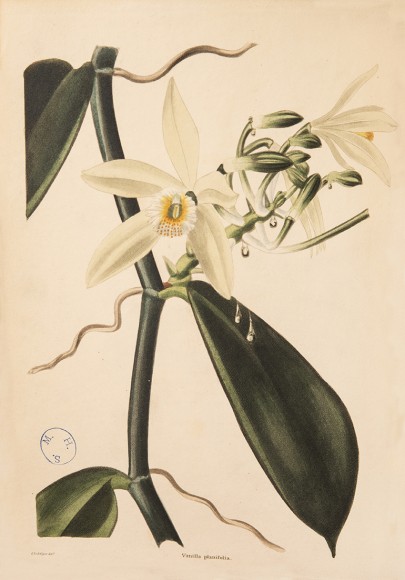
ILLUSTRATION: Vanilla planifolia.
Vanilla planifolia from Curtis’s Botanical Magazine: Comprising the Plants of the Royal Gardens of Kew by Joseph Dalton Hooker (1785–1865). London: L. Reeve & Co., 1891

This year we celebrate Vanilla planifolia, an edible orchid that produces the second most expensive spice in the world, next to saffron. An entire case is devoted to the vanilla orchid—look for Sir Joseph Dalton Hooker’s Curtis’s Botanical Magazine: Comprising the Plants of the Royal Gardens of Kew, London: L. Reeve & Co., 1891.

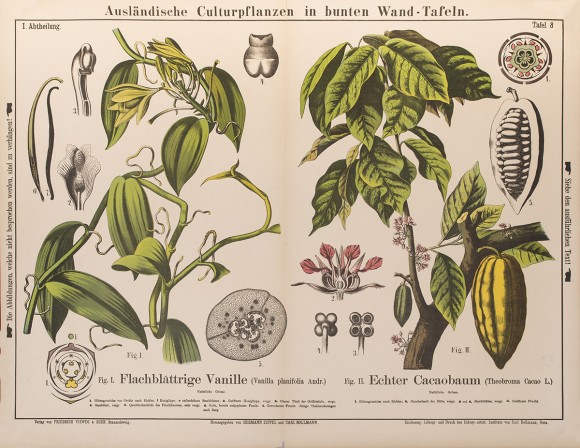
Chocolate and vanilla lovers: don’t miss the rare plate from Zippel and Bollmann’s Ausländische Culturpflanzen in Bunten Wand-Tafeln  (Foreign Cultivated Plants in Colored Wall Panels with Explanatory Text) that was used as a tool for teaching plant anatomy. Like many of our rare orchid books and journals, this fragile plate was in much need of conservation. It was conserved through a grant by the National Endowment for Humanities; the digitized plate can be accessed online at the Illinois Digitized Archives.

ILLUSTRATION: A match made in Heaven—vanilla and chocolate together!
A match made in Heaven! Vanilla and chocolate illustrated together in this plate from Ausländische Culturpflanzen in Bunten Wand-Tafeln by Hermann Zippel and Karl Bollmann. Braunschweig: Druck und Verlag von Fredrich und Sohn, 1880–81

Orchidelirium: Illustrated Orchidaceae is open daily until April 19, 2015, with extended weekend hours (10 a.m. to 4 p.m.) during The Orchid Show


©2015 Chicago Botanic Garden and my.chicagobotanic.org
The Legacy of Johnny Appleseed

Guest blogger Dan Bussey is Orchard Manager at Seed Savers Exchange’s Heritage Farm, where he maintains the nearly 900 different varieties of apple trees in their Historic Orchard.


John Chapman, a.k.a. Johnny Appleseed—the legendary character of somewhat skewed Disney lore—was a real figure whose story has captivated generations.

Learn more about apple varieties from 2 to 3 p.m. Sunday at our Seed Swap lecture, “Forgotten Tastes: Our Apple Heritage.” The seed swap follows from 3 to 5 p.m.

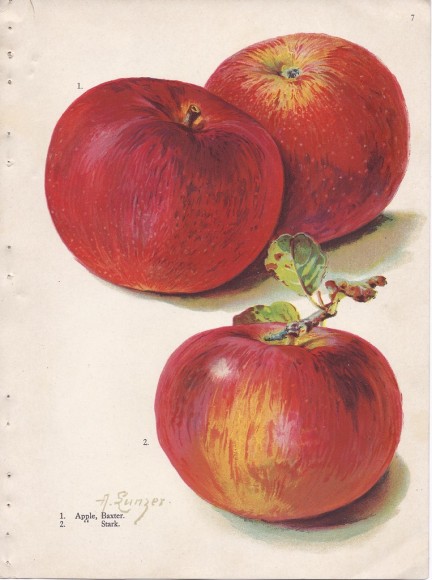
PHOTO: Illustrations by Alois Lunzer depict apple cultivars Baxter and Stark (1909).
Illustrations of apple cultivars. Photo by Alois Lunzer (Brown Brothers Continental Nurseries Catalog 1909) [Public domain], via Wikimedia Commons

Chapman was a complicated man who was driven to be at the edge of the frontier as settlers moved westward. His passion was a deep appreciation of nature, which prompted him to raise apple trees for settlers to buy in order to stake their homestead claims. He collected apple seeds from cider mills back east, then spread these seeds in nursery plots up and down the land along the Ohio River. Chapman was not concerned about what varieties these seedlings became, as they always had a use—whether for eating, cooking, or making hard cider if the apples  were unpalatable. But his methods of propagation were important for those who ended up with his trees. 

Grafting keeps apples true to the original plant.

While Chapman may not have been concerned with flavor, it is a concern for orchardists growing apples for public consumption. Seedling apples are the product of the hybridization of the parent tree and whatever apple variety pollinated it. The old adage “every apple plants an orchard” is quite true. Take the seeds of any apple you find today and plant them; when they grow and finally bear fruit, you will occasionally find apples similar to the apple you took seeds from, but more than likely, you’ll find very different fruit, with different colors, different flavors, and smaller or larger sizes. Most will be of poorer quality than the parent, but for the thousands of seedlings grown, every once in a while, a really special apple tree comes along. In order to keep this variety true and to produce more trees of it, the tree has to be vegatatively propagated—in other words, grafted.

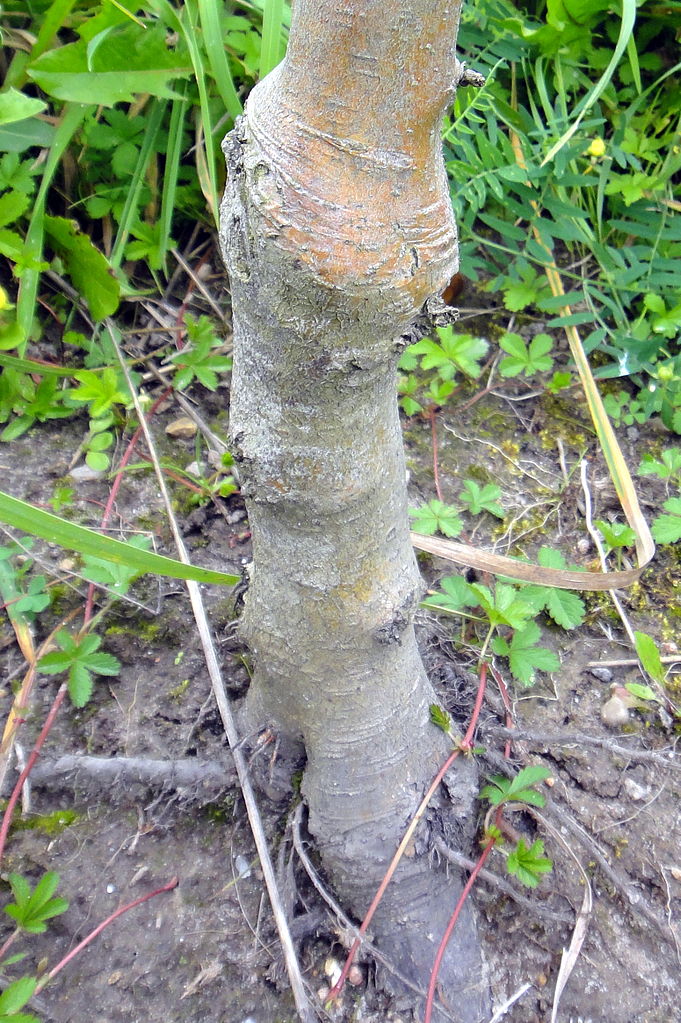
PHOTO: Apple tree trunk, showing long-healed graft of cultivar on to rootstock.
Alkemene apple tree grafted on to rootstock. Photo by Dirk Ingo Franke (Own work) [CC BY 3.0], via Wikimedia Commons

Grafting has been known for centuries, and was a common skill for farmers and orchardists until modern times. Today, many fruit growers have never grafted a single tree and instead buy them from nurseries. However, grafting is making a comeback, and it is satisfying for home orchardists to know they have a choice of what fruit they can grow for their family using this traditional method of propagation.

Cider apples have a diverse heritage.

Cider (and what we’re talking about here is hard cider or cyder) has made an epic comeback in the past ten years in the beverage industry. Cideries (as opposed to breweries) are springing up in nearly every state and are all the rage. What has happened to bring this quaint, nearly forgotten beverage of colonial America to a point where conventions across the country celebrate the amazing diversity of cider styles? In truth, cider has never disappeared from our culture completely, and the rebirth of its popularity was long overdue.

In colonial America, the tradition of cidermaking arrived from Europe, as did the apple that could make cider. Cider was popular in early America as it could be made by almost anyone—it didn’t require lots of land to grow grain, as beer did. Find a tree to harvest apples from and you could make your own cider. Any apple variety would work—including those homesteaded, seedling-grown apples that weren’t good for eating. (Thank you, Johnny Appleseed!)

PHOTO: An old-fashioned hammer mill chopped apples for cidermaking in home presses.
An old-fashioned hammer mill chopped apples for cidermaking in home presses. By Red58bill (Own work) [CC BY 3.0], via Wikimedia Commons

Do you need special apples to make hard cider? Yes and no. Traditional cider varieties from Europe are those that have good flavor, but more importantly, have tannins that give cider character and body when fermented. Tannins, part of the chemical group known as phenolics, are commonly found in red wines, and cause that feeling of dryness in the mouth, a pleasant sensation to many. Tannins can be added to the juice of fresh cider when fermented, and improve the flavor.

Cider styles vary greatly from sweet to dry and sparkling to still, and many now have added flavors such as oak, hops, maple sugar, fruit of all kinds, yeasts of all kinds, and a wide variety of fermentation styles—each distinctly different. Whatever your preference, true artisanal cider is a natural product made from only apple juice and natural or added yeast to ferment it. Mass-marketed cider is generally made from juice concentrates, added sweeteners, and forced carbonation (to make it sparkle). Both forms of cider have fewer carbohydrates (and calories) than beer and lower alcohol content than wine. Cider was a refreshing drink for colonial settlers and remains so for today’s connoisseurs.

Regardless of your preferred apple tastes, Johnny Appleseed’s 200-year-old legacy is alive and well, from Albemarle Pippin to Zill. You can even find some heritage varieties at Seed Savers Exchange.

Mr. Bussey will return in 2016 to teach a cider-making workshop. Don’t miss him at Harvest Weekend, September 19–20, 2015. 


©2015 Chicago Botanic Garden and my.chicagobotanic.org
Photographing Orchids

Compared to photographing flowers outside, photographing in the Greenhouses will be much more challenging and darker than you think.

Photograph the Orchid Show through March 13, 2016.
 
Tripods and monopods are allowed in the Orchid Show on Wednesdays during public exhibition hours. Enter your photos in our digital photo contest here.

It may be bright outside, but the light in the greenhouses is being filtered through glass and other plant material; be aware that it will be even darker on overcast days. Most people will be hand-holding cameras, so getting shots that are sharp will take some adjustments. Here are a few things you can try:

Use a shorter lens.

This will be a bit of a compromise, as many of the orchids are up high or hard to reach. It would be nice to use a longer lens to get photographic access to more of the flowers in the Greenhouses. However, a shorter lens—100mm or less—is easier to hand-hold, and has a better chance of capturing sharp images at a slower shutter speed. (Typically, you want to have at least 1/400th of a second for a 400mm lens, or 1/100th of a second for a 100mm lens, etc., so the shorter lens will gain you two stops in this example—a significant benefit when taking hand-held shots.)

PHOTO: Orchid.
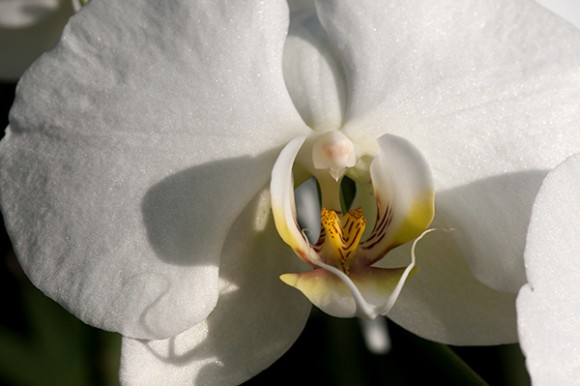
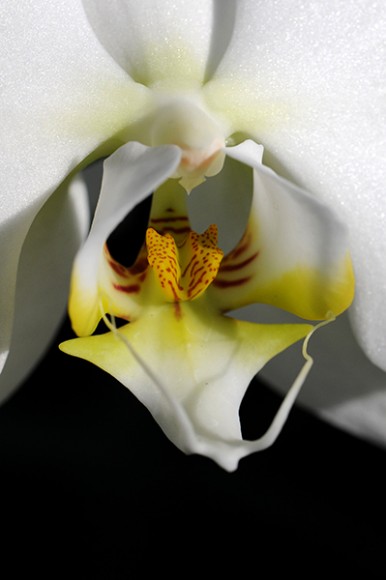
With a limited depth of field, I chose to focus on the “face” I saw in this orchid. Photo ©Carol Freeman

Watch for what is in the background.

It is easy to be distracted by the beauty of the orchids and then get home and realize there are many unwanted elements in your photos. One easy option is to move in closer. When you get closer to the flower, you will get less background around the flower. Find flowers that are near the edge of an aisle—you will then be able to move your camera slightly up or down, or left to right, to get a pleasing background. Sometimes just an inch of movement can make all the difference.

PHOTO: Orchid.
Note the distracting window in the background. Photo ©Carol Freeman
PHOTO: Orchid.
By moving just a few inches to my left, I was able to get a more pleasing background for this orchid. Photo ©Carol Freeman

Increase your ISO.

Many of the newer cameras have improved sensors that let you increase the ISO and still get clean images with little noise. I like to do an ISO test before going out to shoot to see just how far I can push the ISO and still get images I find pleasing. It’s best to do this before you are on site so you will be able to review the images on a large screen and know what will be acceptable to you on the day of your visit. Every camera is different, and what may work for me may be too grainy for you. Most cameras will provide nice images in the 400 to 800 ISO range, and some can go much higher.

PHOTO: Orchids.
I was able to get a nice shot of these orchids—in a dark area—by upping my ISO to 1000. Photo ©Carol Freeman

Use your flash.

I much prefer natural lighting, but in the Greenhouses on a cloudy day, there may be no other option for getting that shot of “the most beautiful orchid you have ever seen” that is hiding in the shadows.

PHOTO: Orchids.
When using my flash, I can add some extra depth of field. Here I was able to get most of the flower sharp. Photo ©Carol Freeman
PHOTO: Orchids.
Sometimes using a flash is the only way to get a shot. Here I found orchids that were away from other elements, limiting the distracting effects of the flash. Photo ©Carol Freeman

Increase your depth of field.

Orchids are tricky to photograph, even in ideal conditions. Many of them are deep flowers and require a large depth of field to get a pleasing amount of the flower in focus. Increasing the depth of field, however, comes with a price, as the increased depth will often allow much of the background to be in focus as well. And in the greenhouses, you may not want what is in the background to be in focus, especially windows, people, or other parts of the building. Hand-in-hand with depth of field is plane of focus. Many orchids have very interesting centers, almost like faces. Be sure to get those features in focus to make the whole photo look sharper.

PHOTO: Orchids.
By moving closer, you can eliminate the distracting elements from your shot. Photo ©Carol Freeman
PHOTO: Orchids.
Here I moved in even closer. I love capturing the intricate details of the orchids. Photo ©Carol Freeman

Have fun, experiment with different apertures, and get creative with composition! There is no right or wrong way to photograph these amazing flowers. They are here for your enjoyment and all that is needed is your appreciation.


©2015 Chicago Botanic Garden and my.chicagobotanic.org