Repotting Season for the Bonsai Collection

For many bonsai tree species, early spring is the best time for repotting.

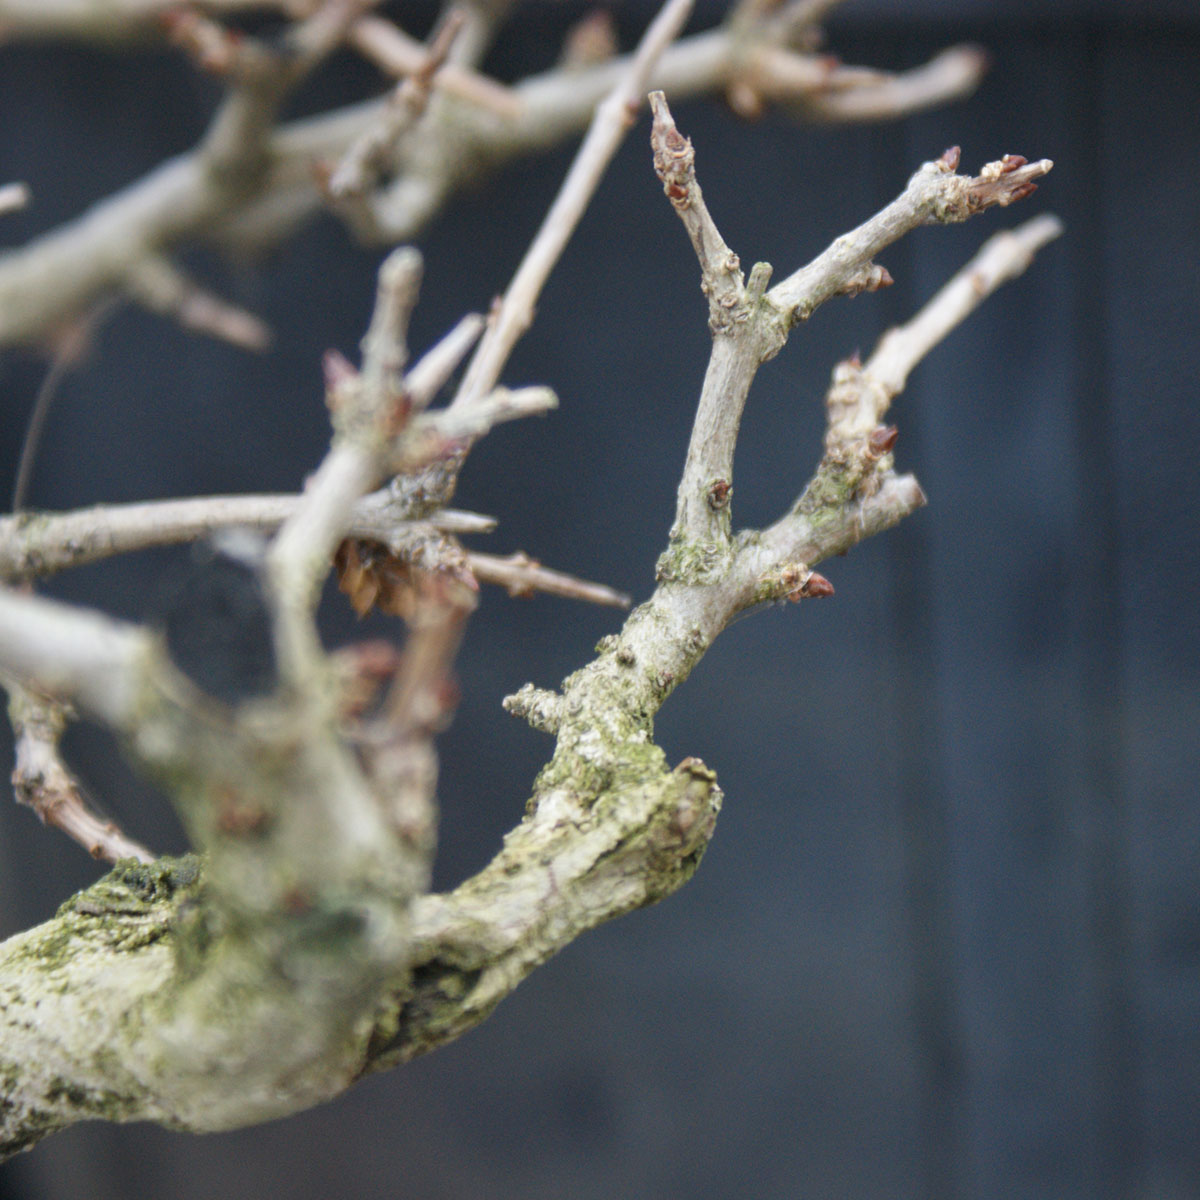
As the days get longer and the temperatures slowly increase, the roots of a bonsai gradually become active. During this time, the energy of the tree that was stored in the roots over the winter begins to move back up into the tree branches. As this happens, the dormant buds begin to swell. This swelling is the first sign that the tree is beginning to break dormancy. Over the next few weeks, the amount of energy from the roots to the branches increases, and the buds go through a transformation from dormant nub to a fully-opened leaf.

PHOTO: Dormant bud on bonsai.
Dormant bud
PHOTO: Swelling bud on bonsai.
Swelling bud
PHOTO: Extending bud on bonsai.
Extending bud
PHOTO: Opening bud on bonsai.
Opening bud

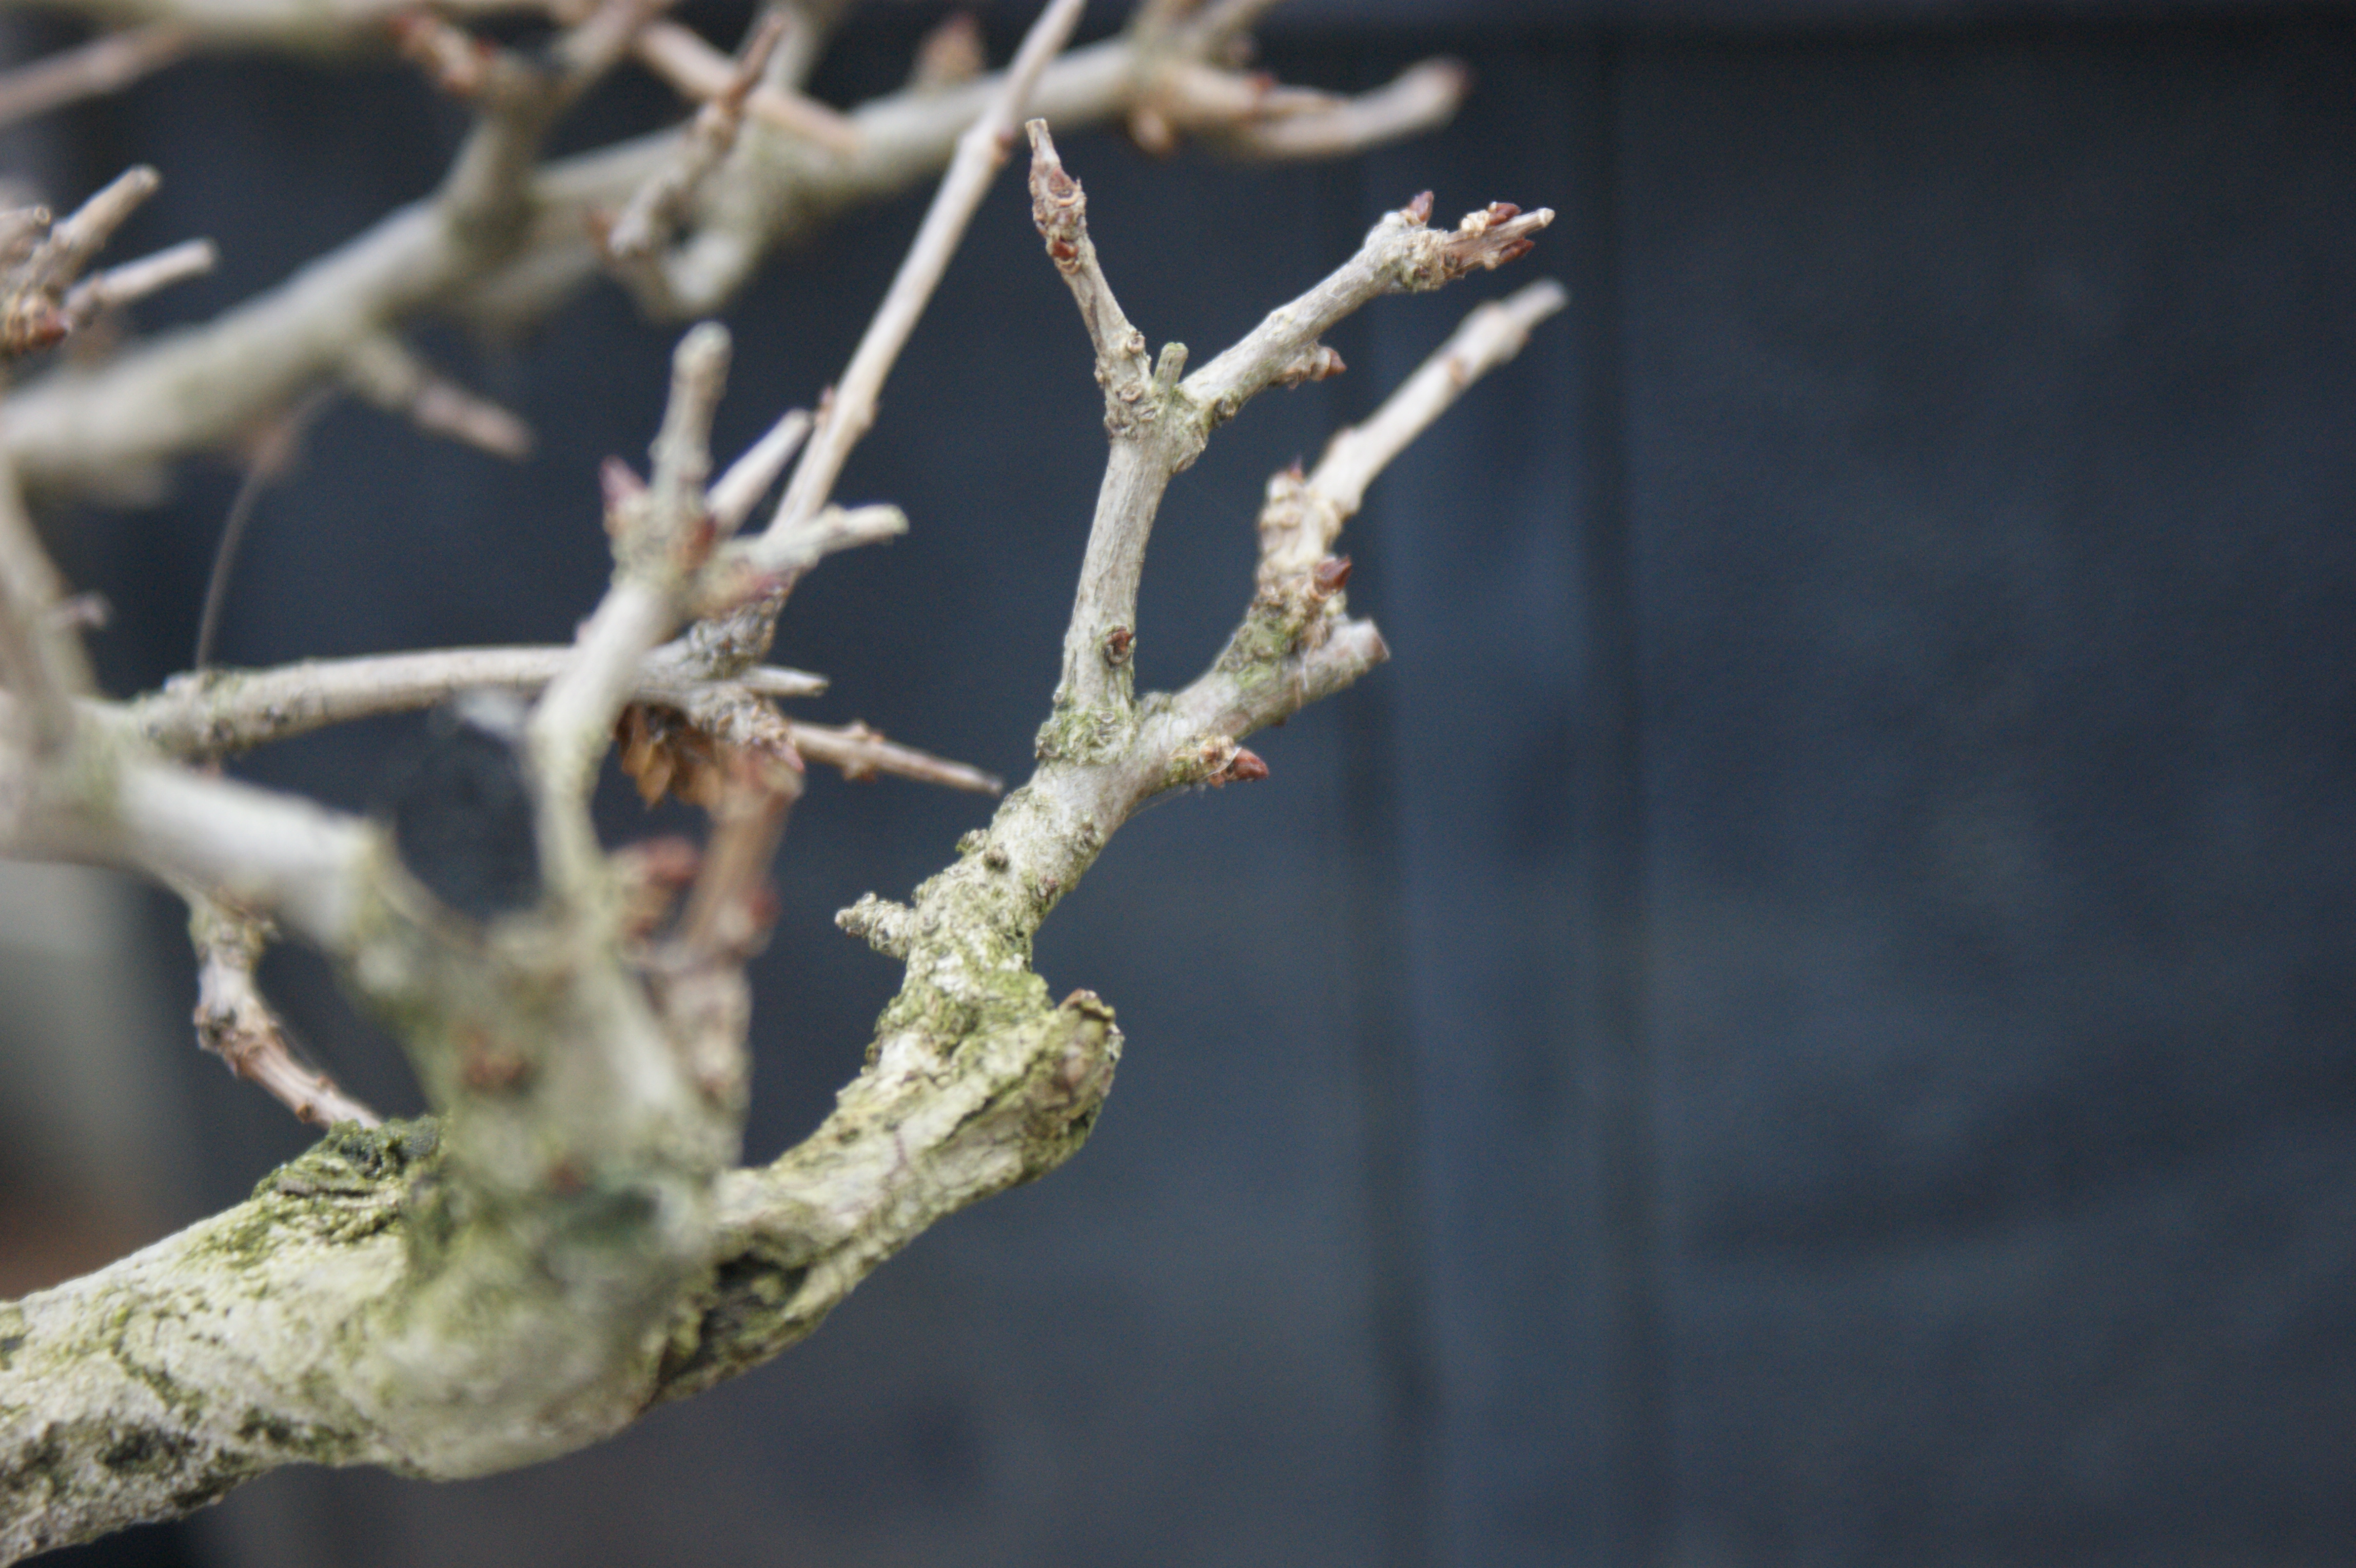
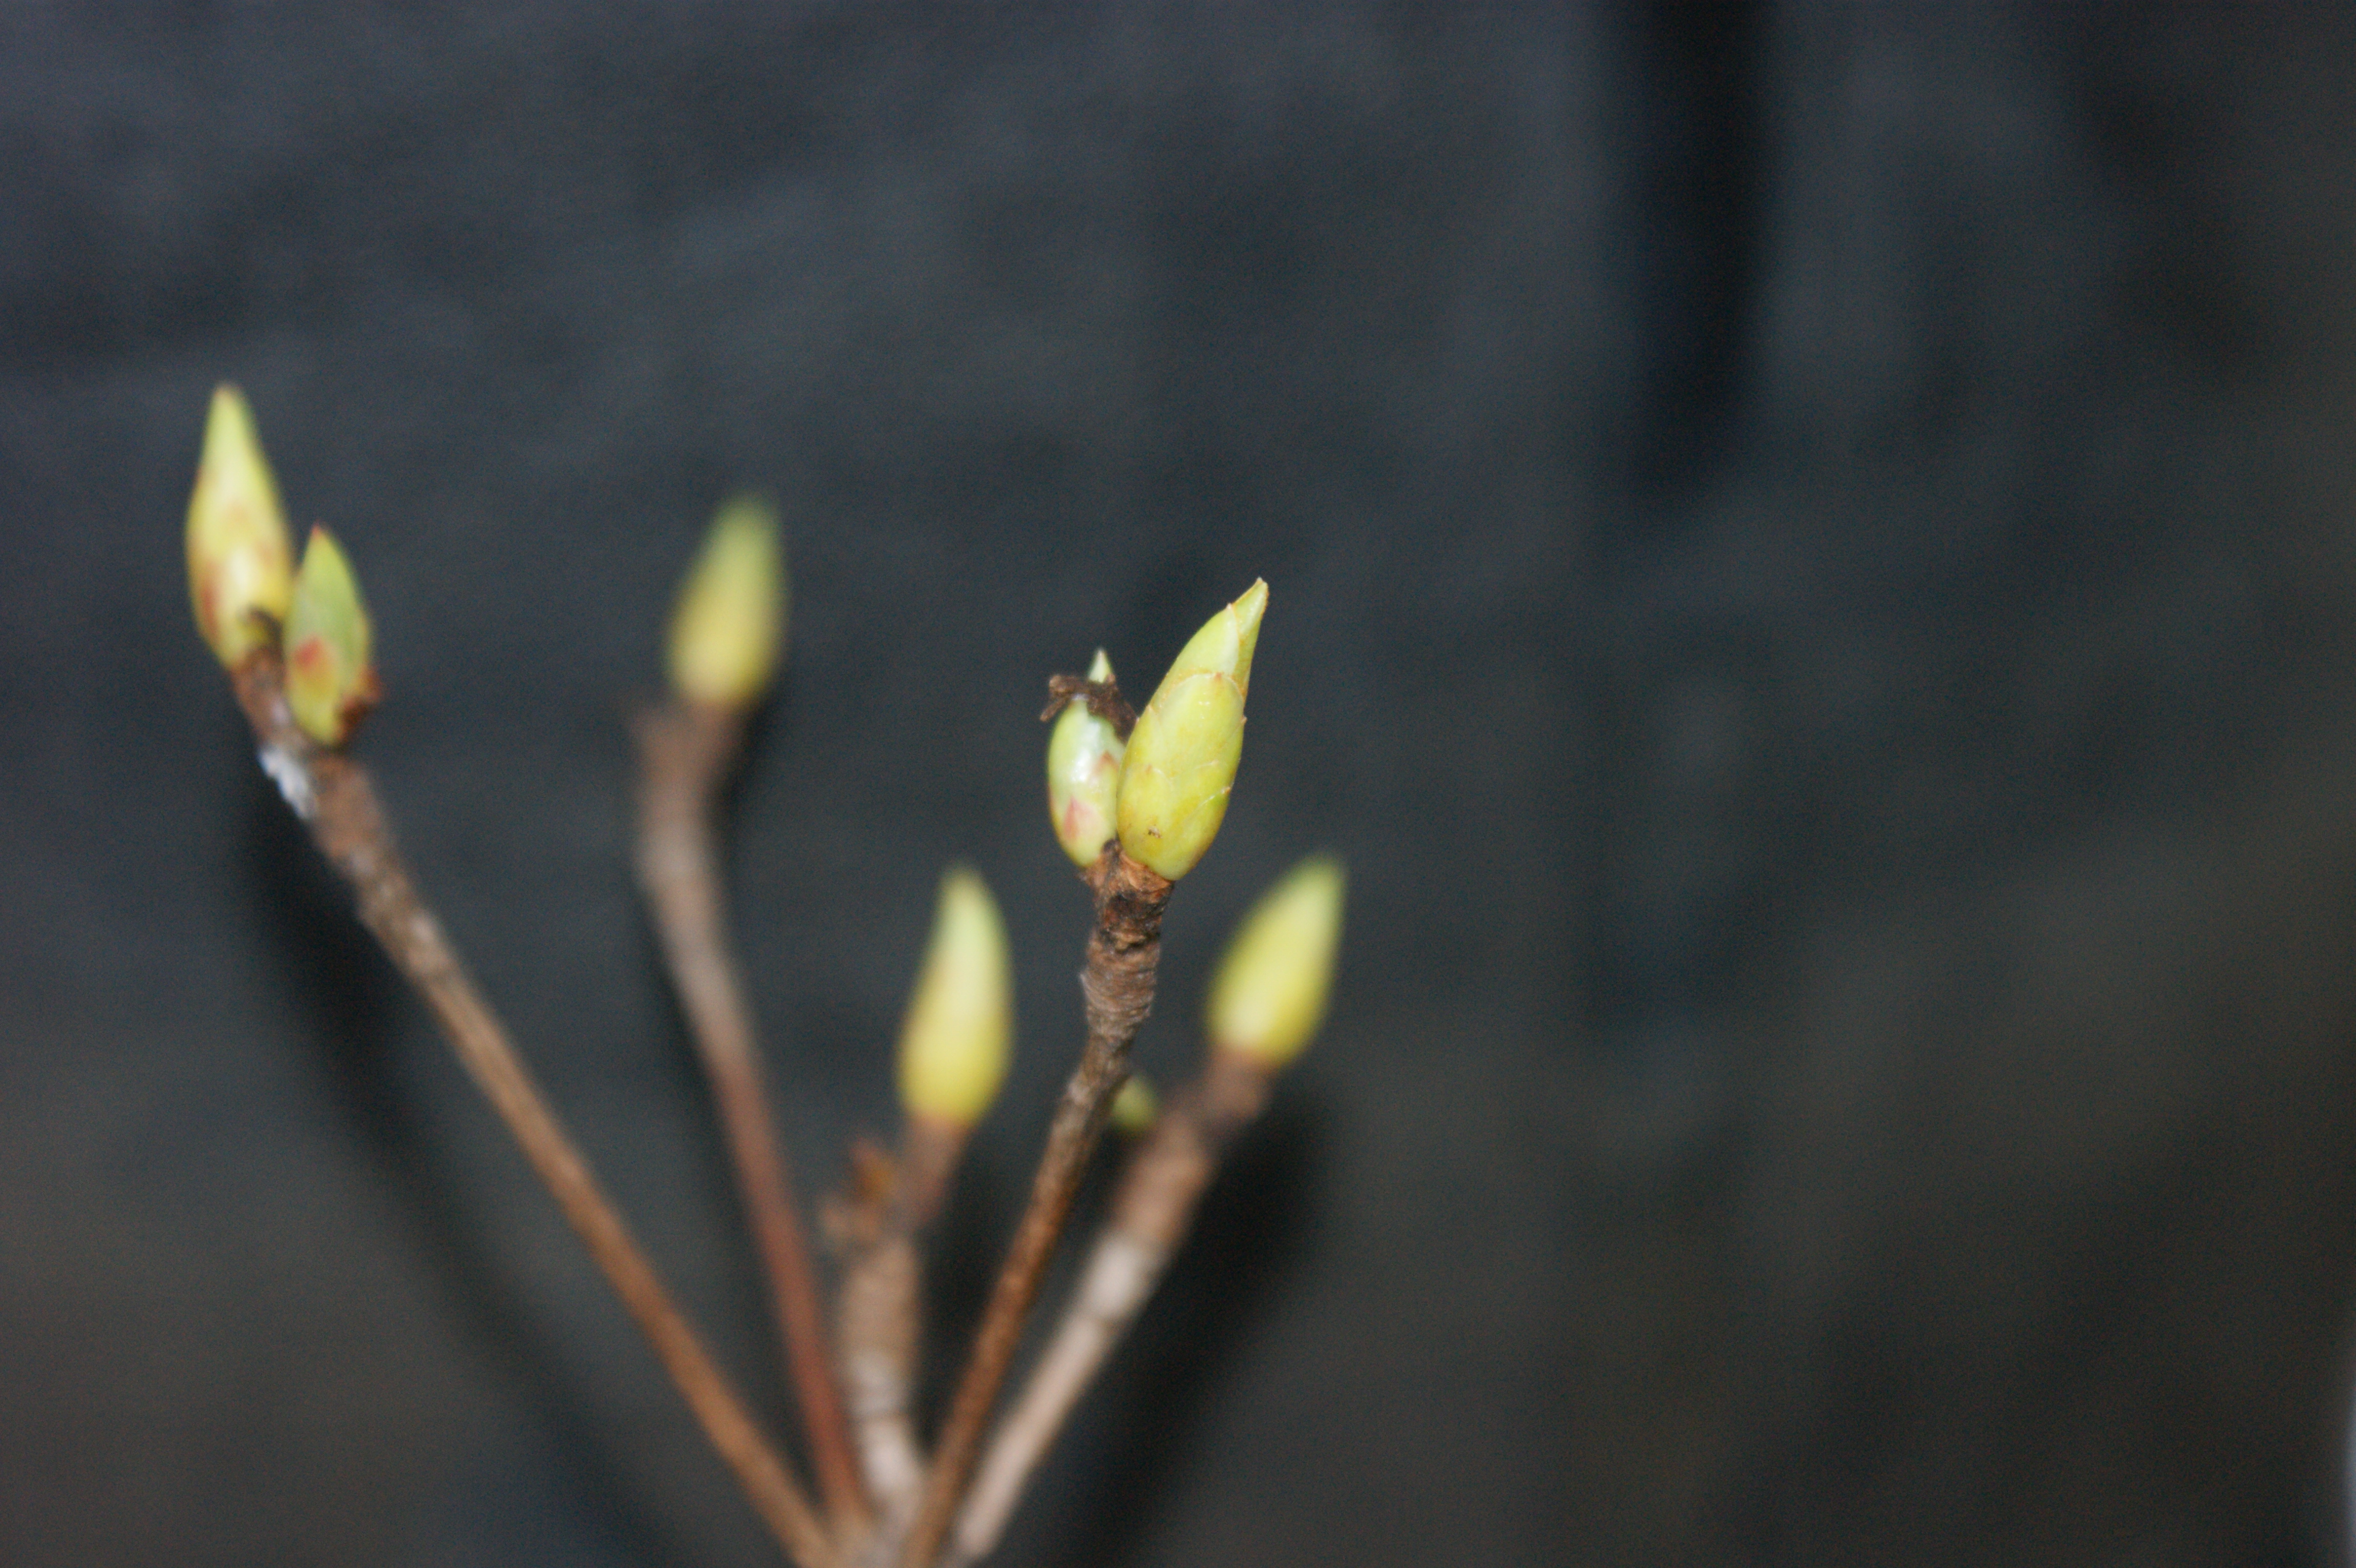
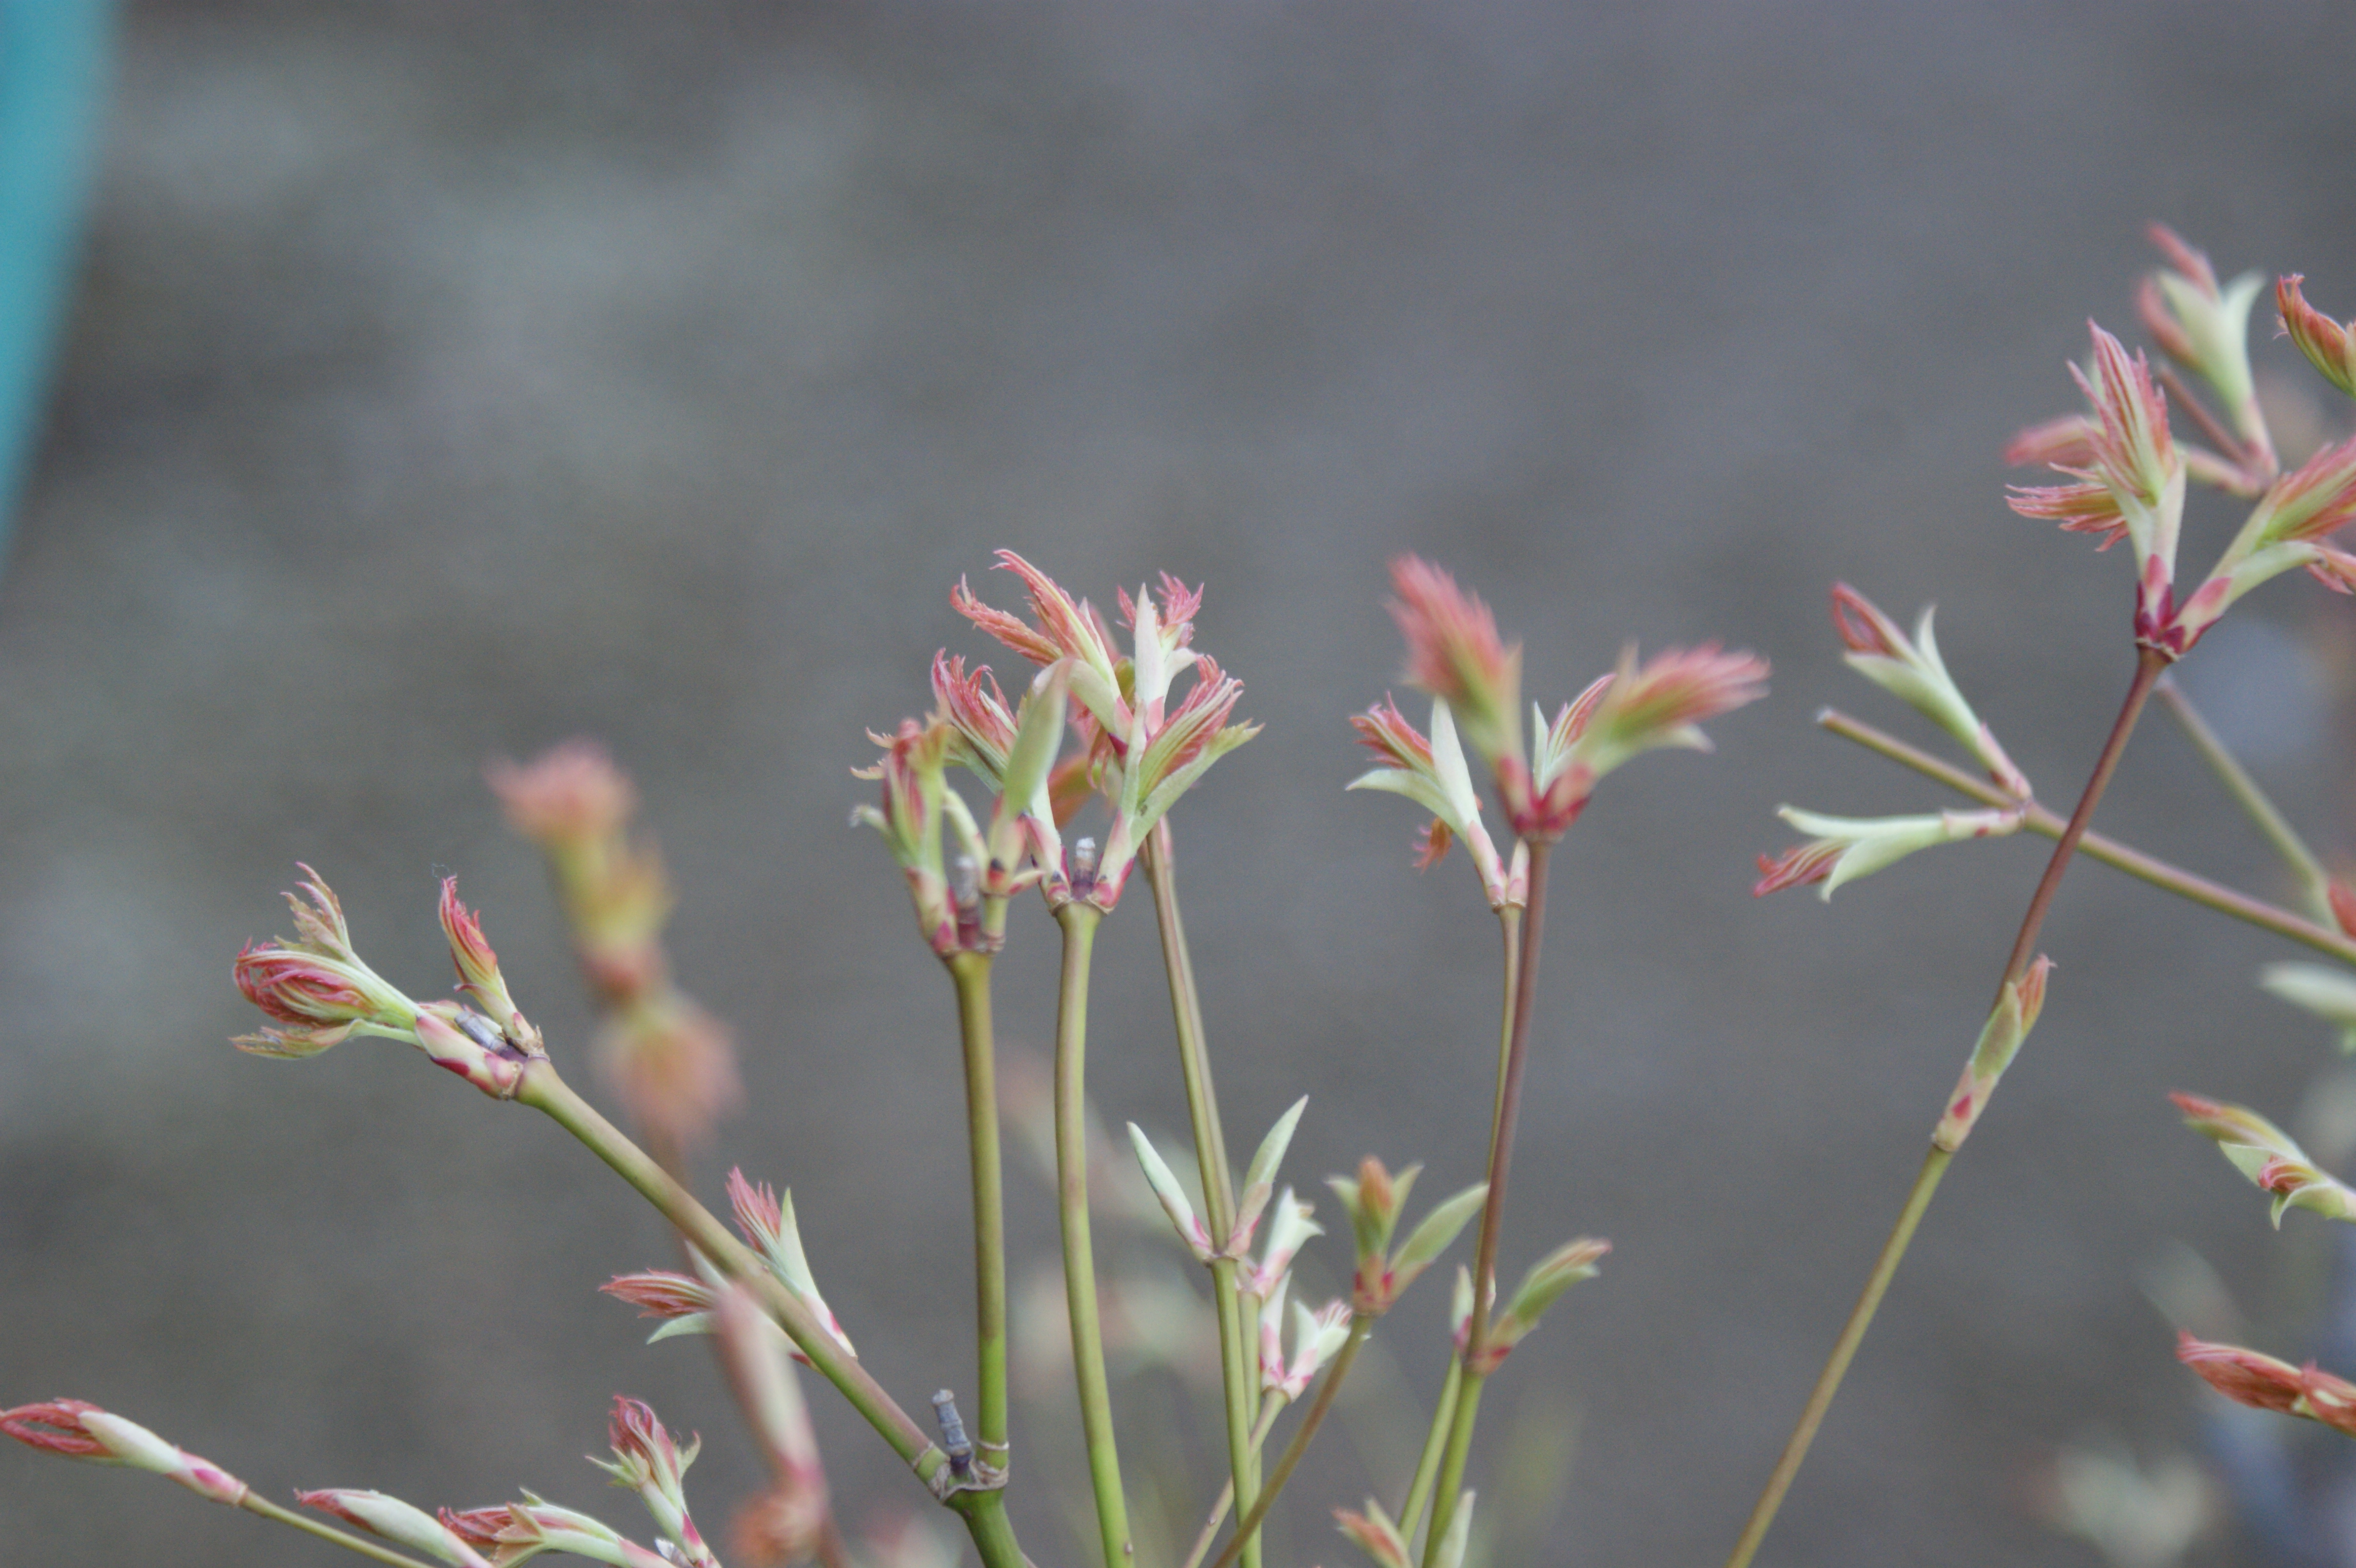
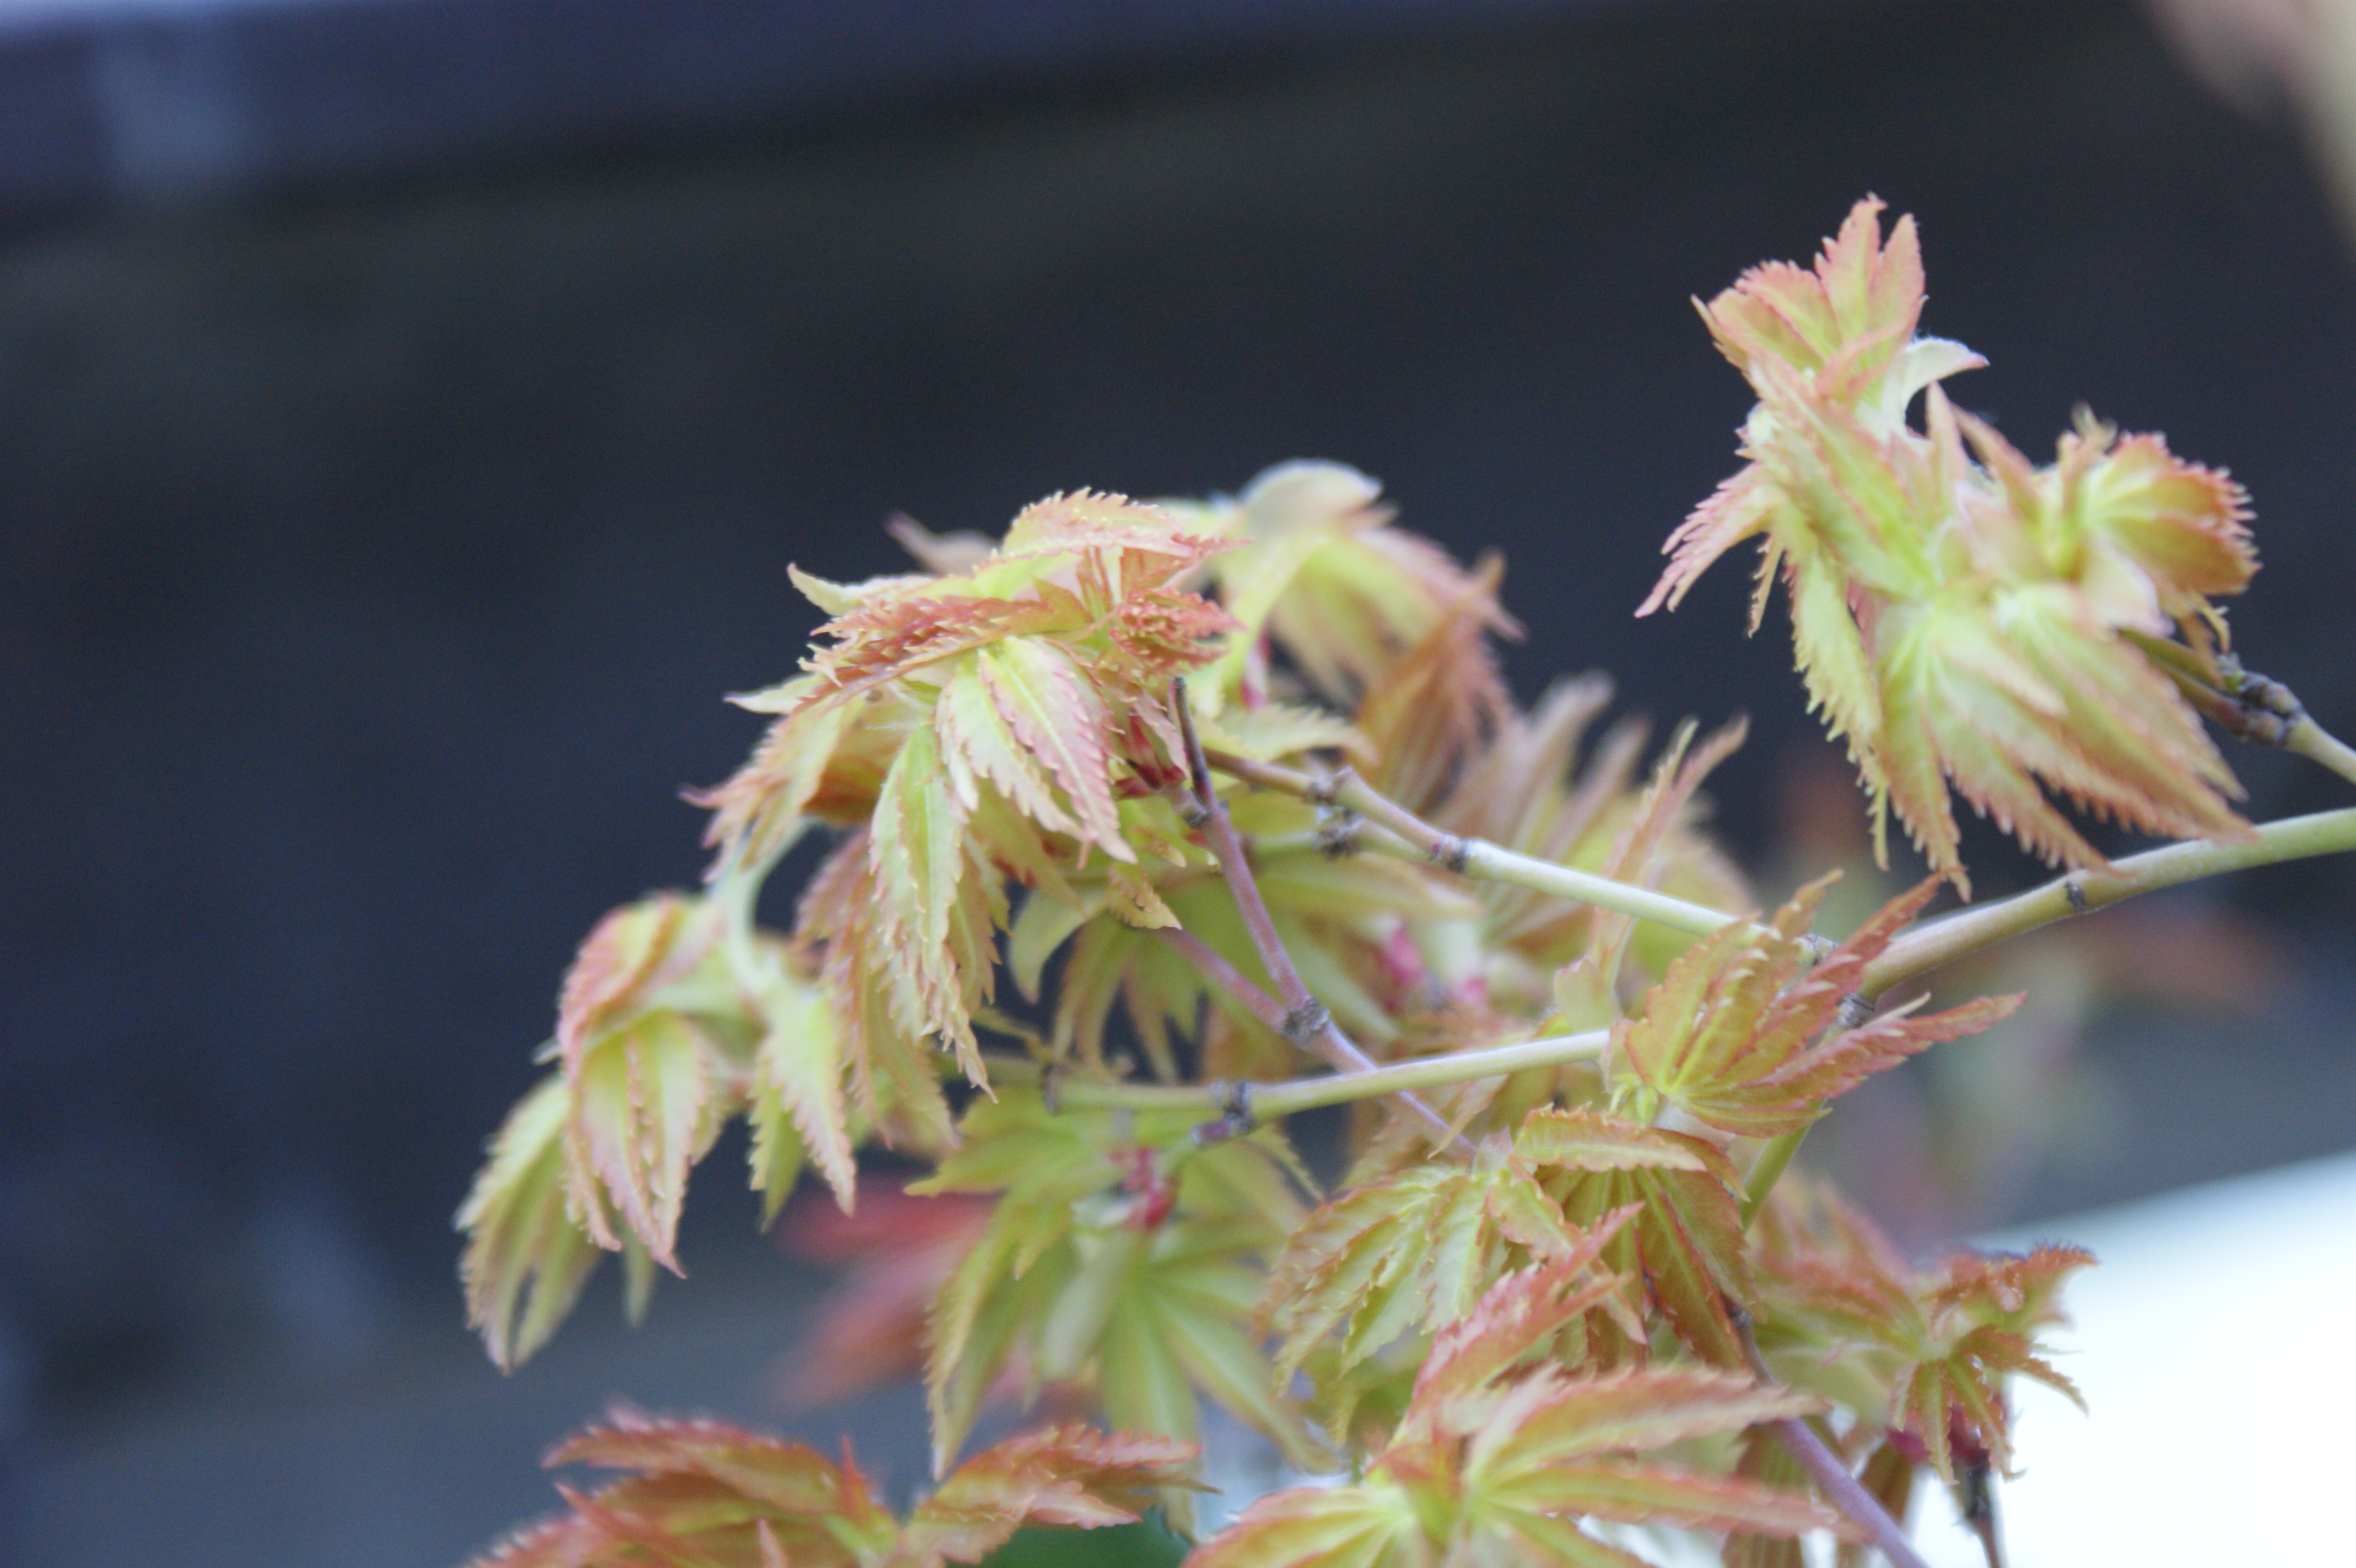
The best time to repot is generally in the middle of this process, when the roots are active, and the buds are in the swelling and extending stage. All repotting should be done by the time the trees are in the opening stage.

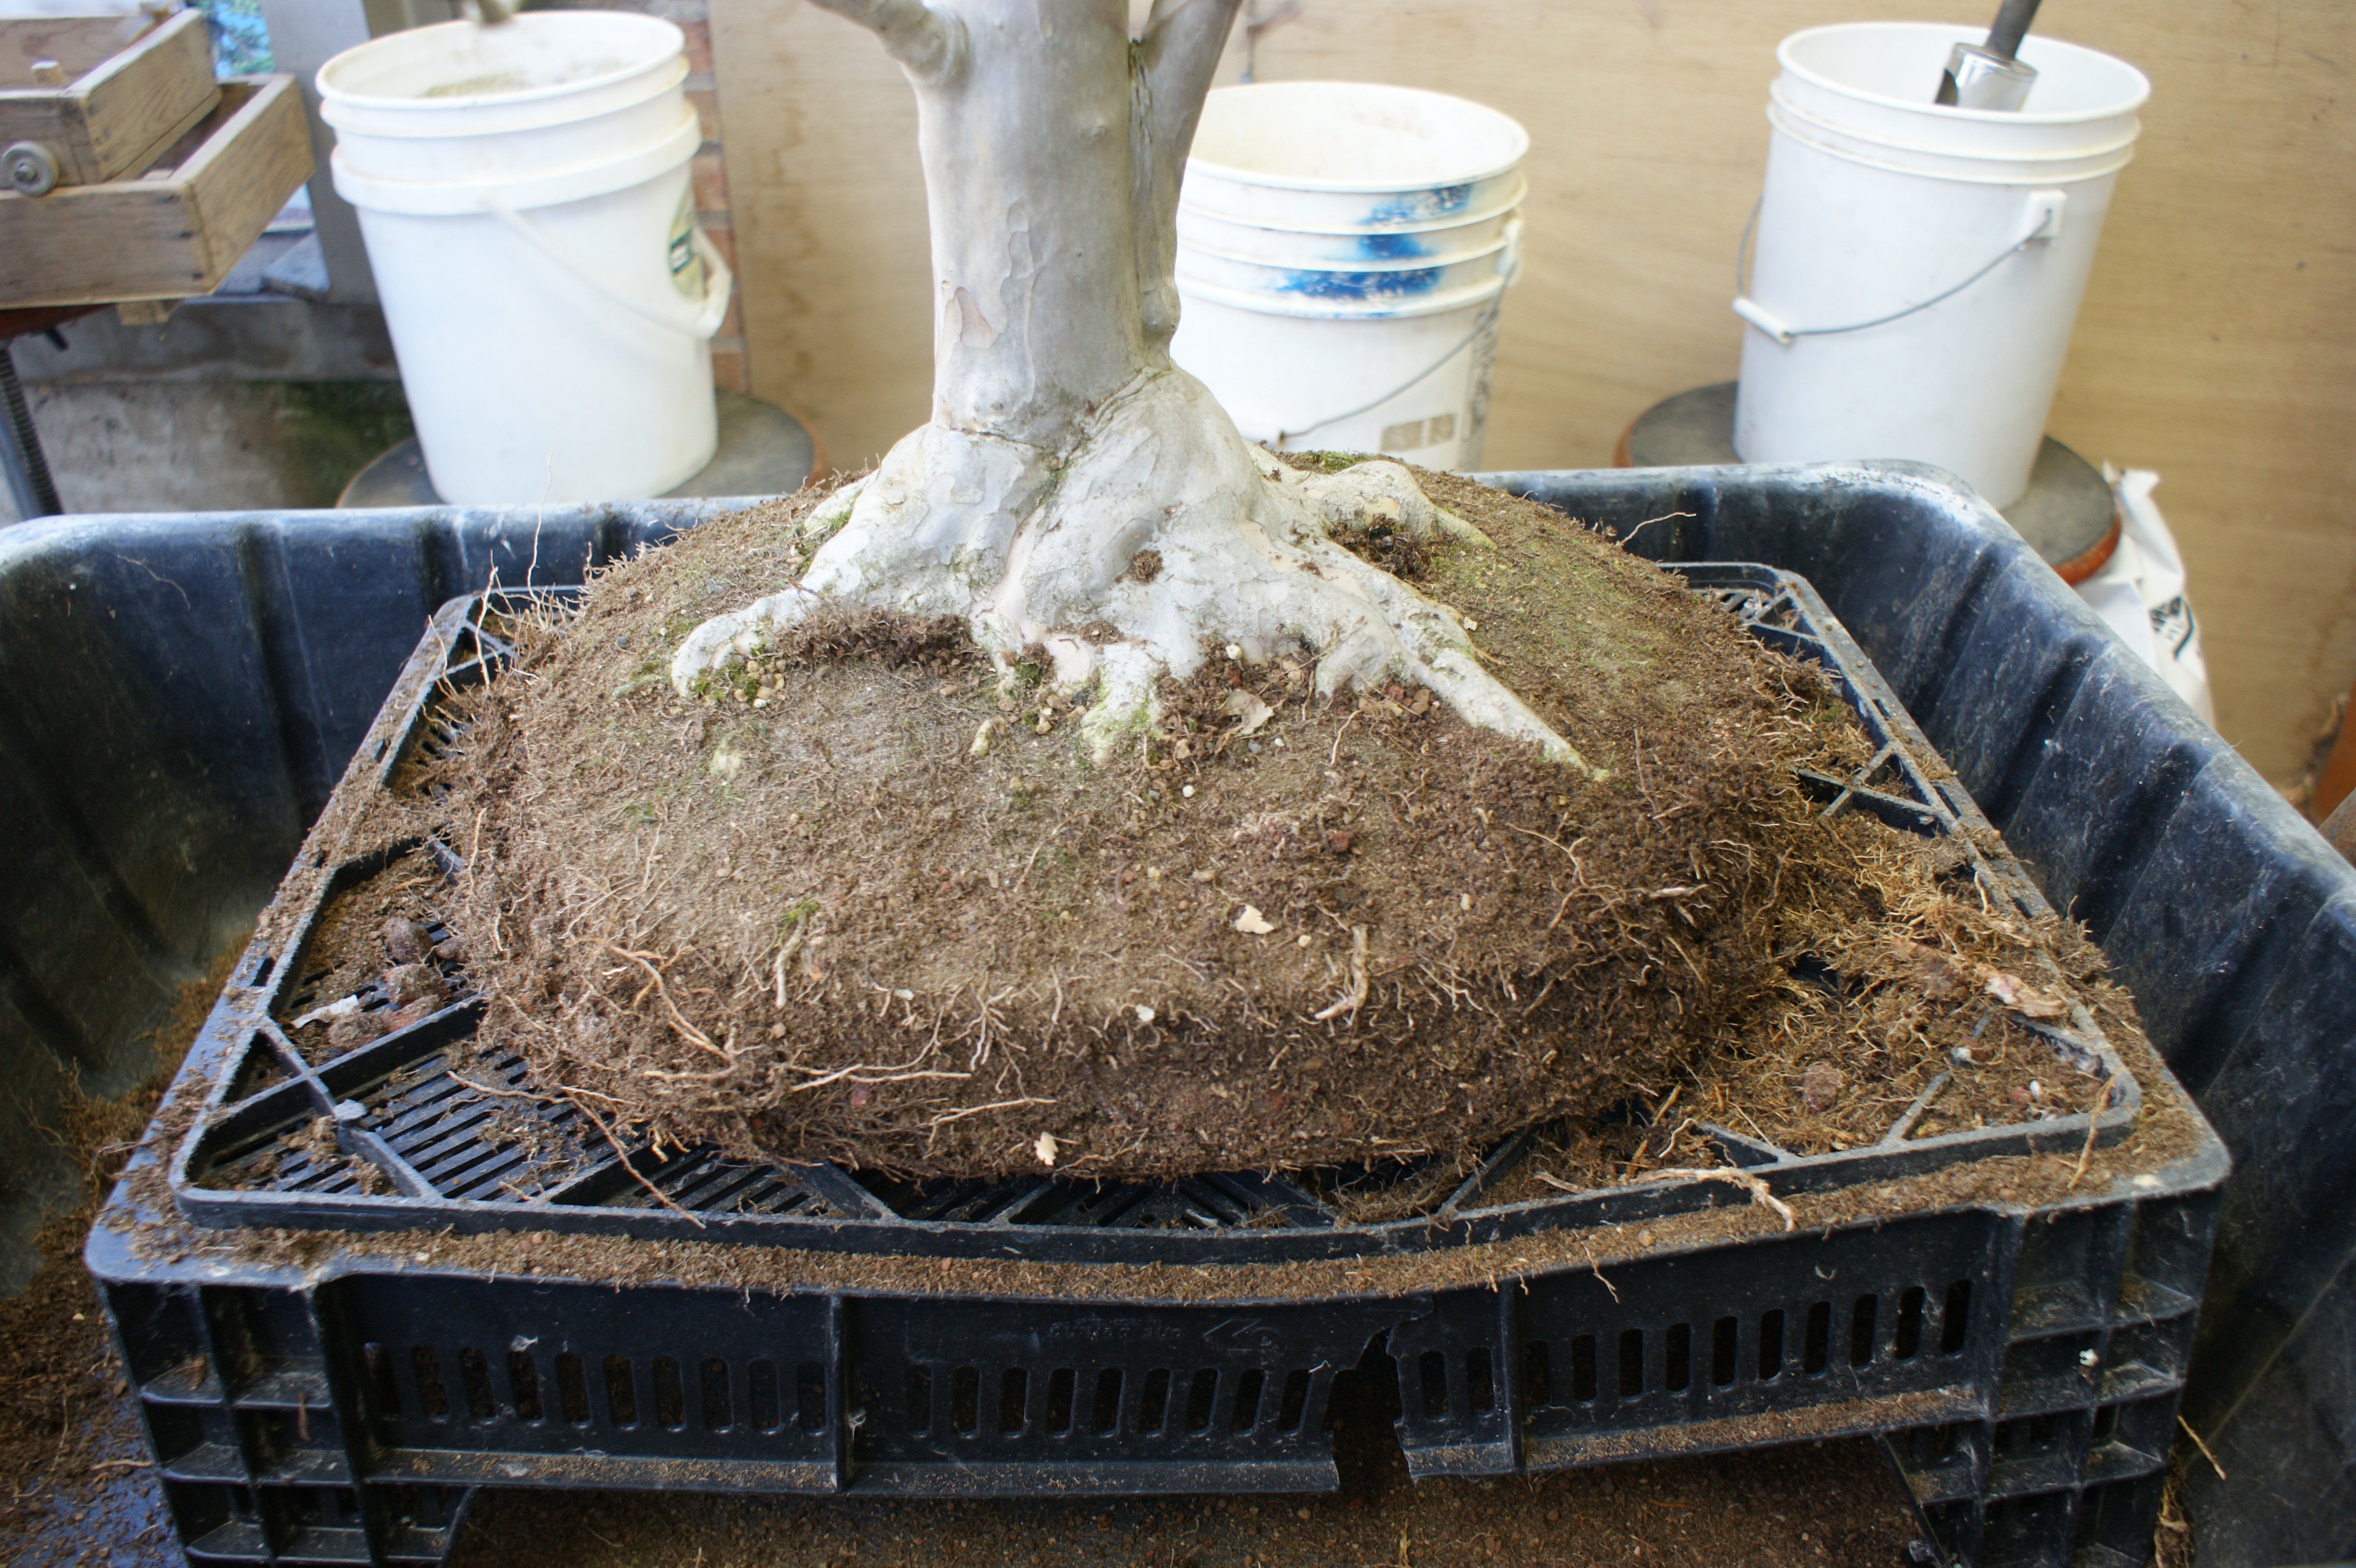
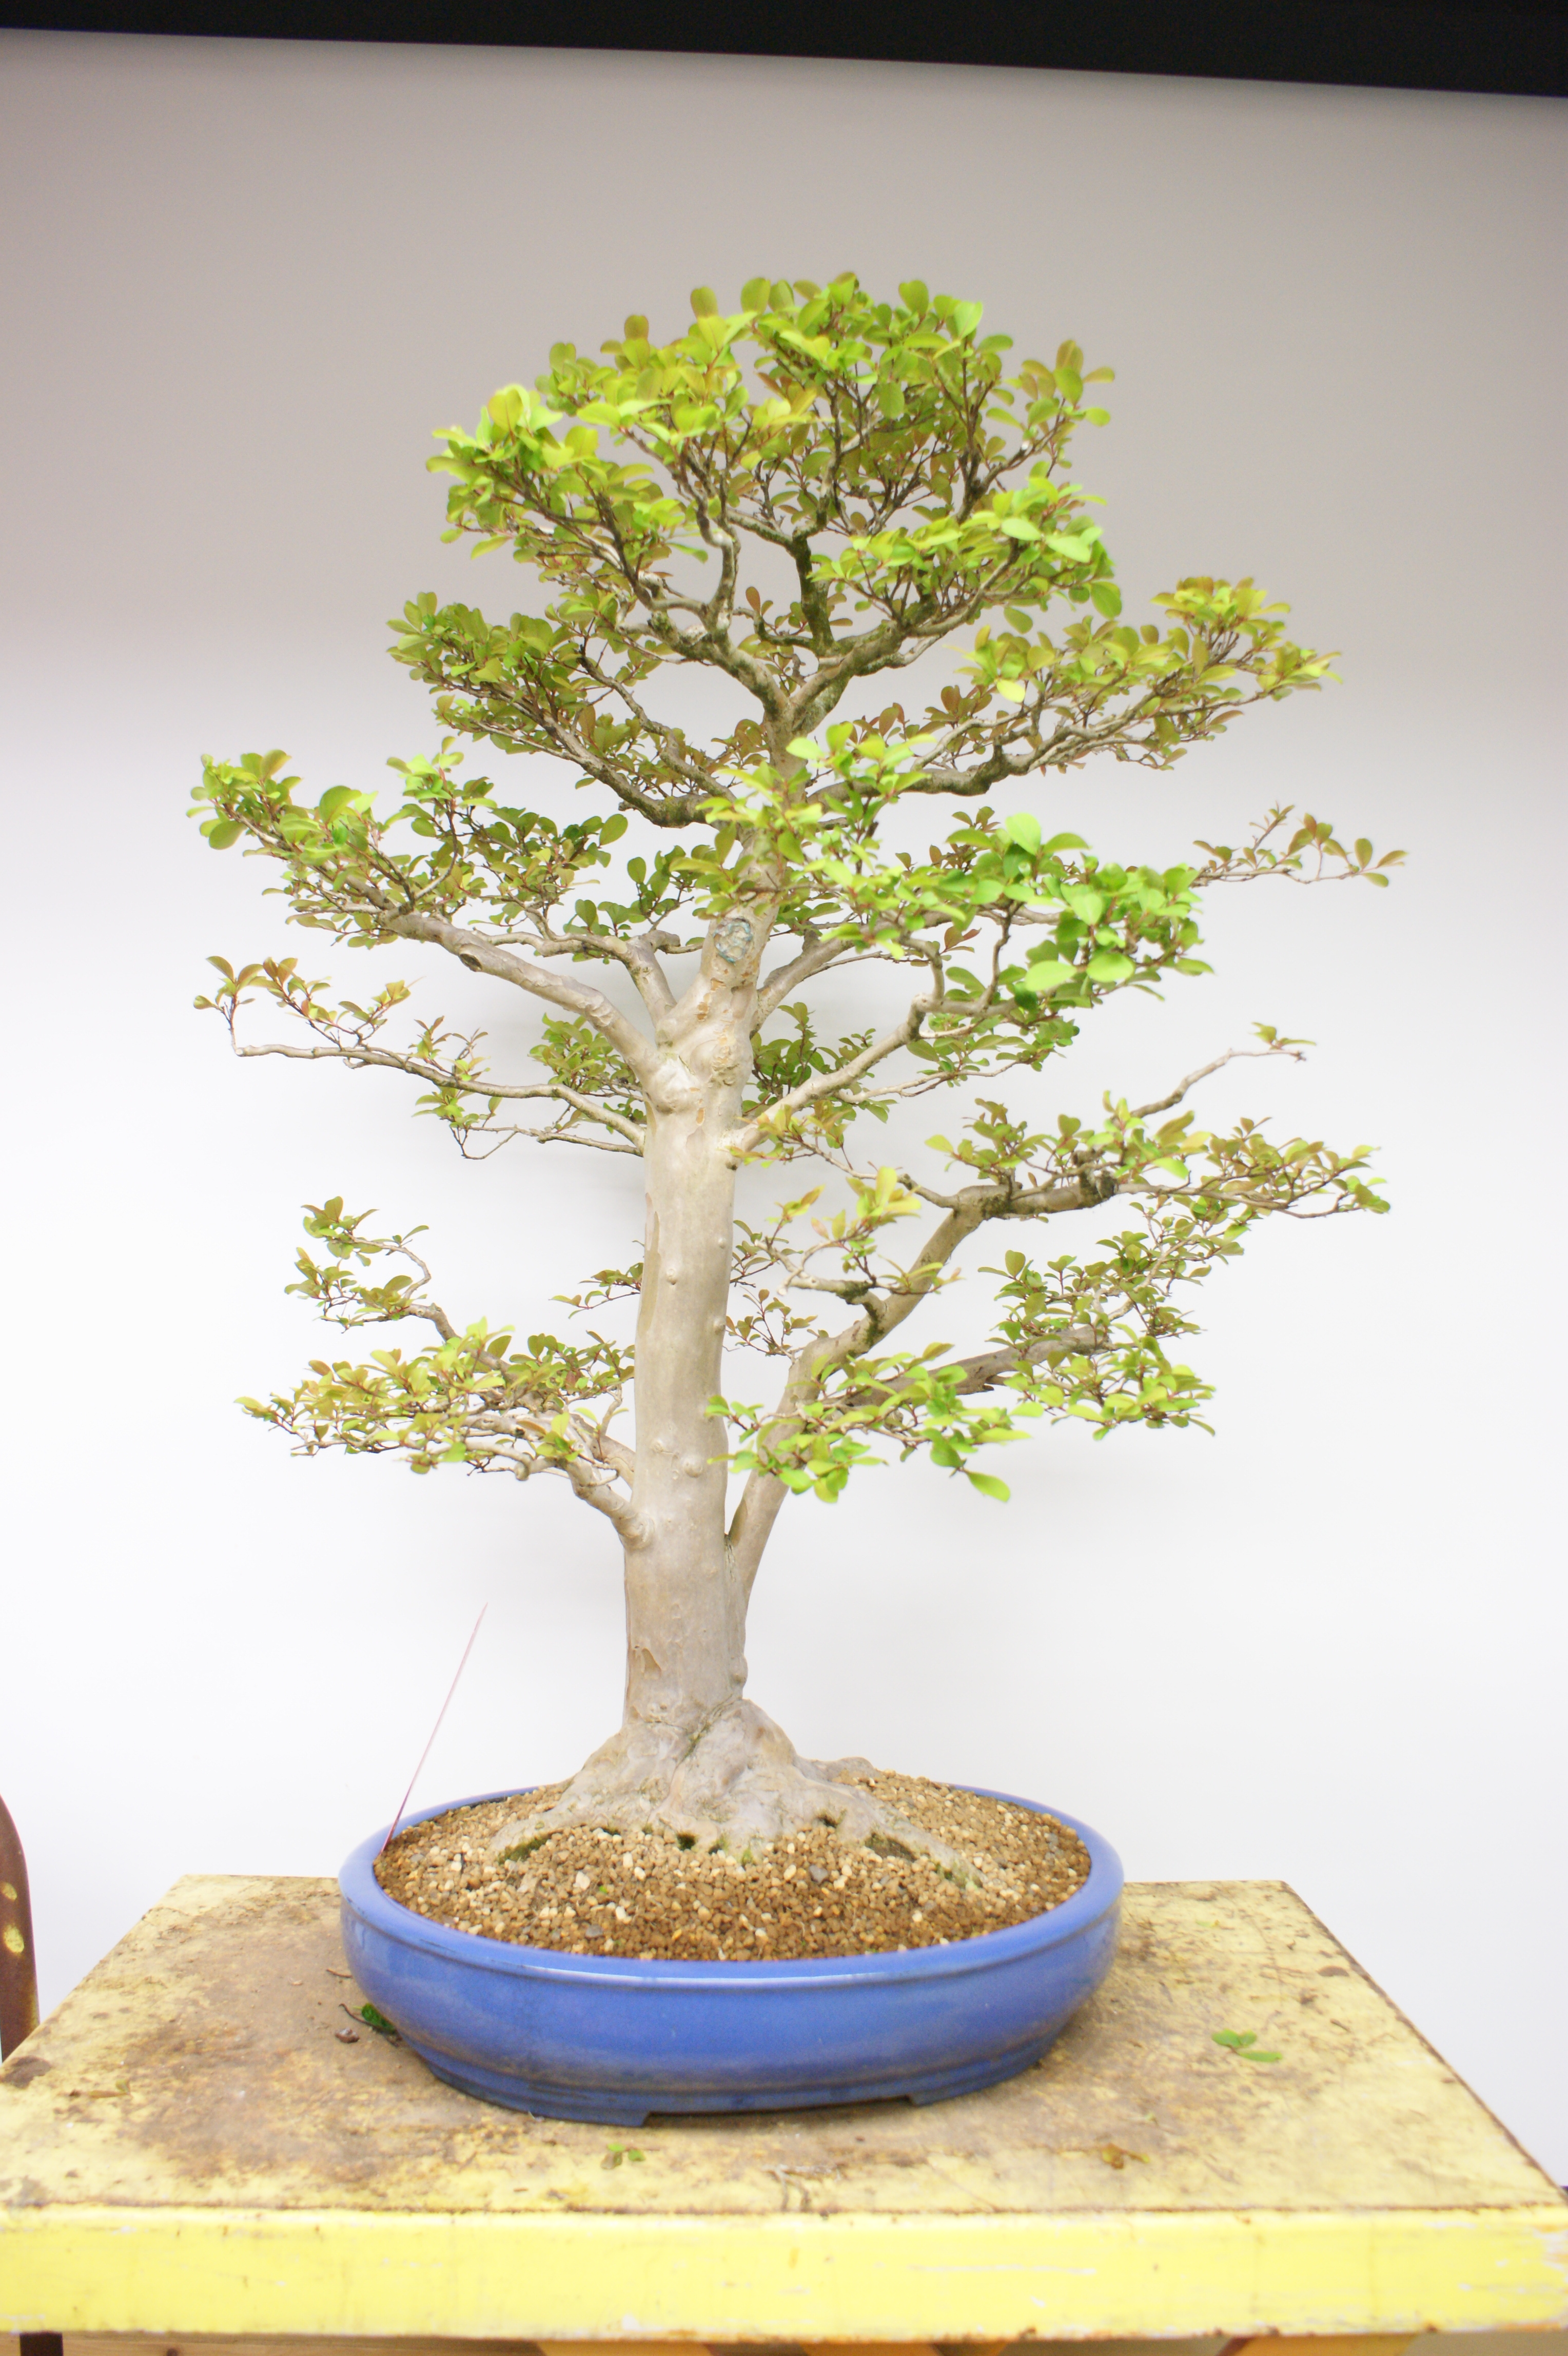
The tree set to be repotted today is this wonderful crape myrtle (Lagerstroemia indica). The first step is removing the tree from the pot.

PHOTO: Bonsai ready to be repotted.
Crape myrtle (Lagerstroemia indica)

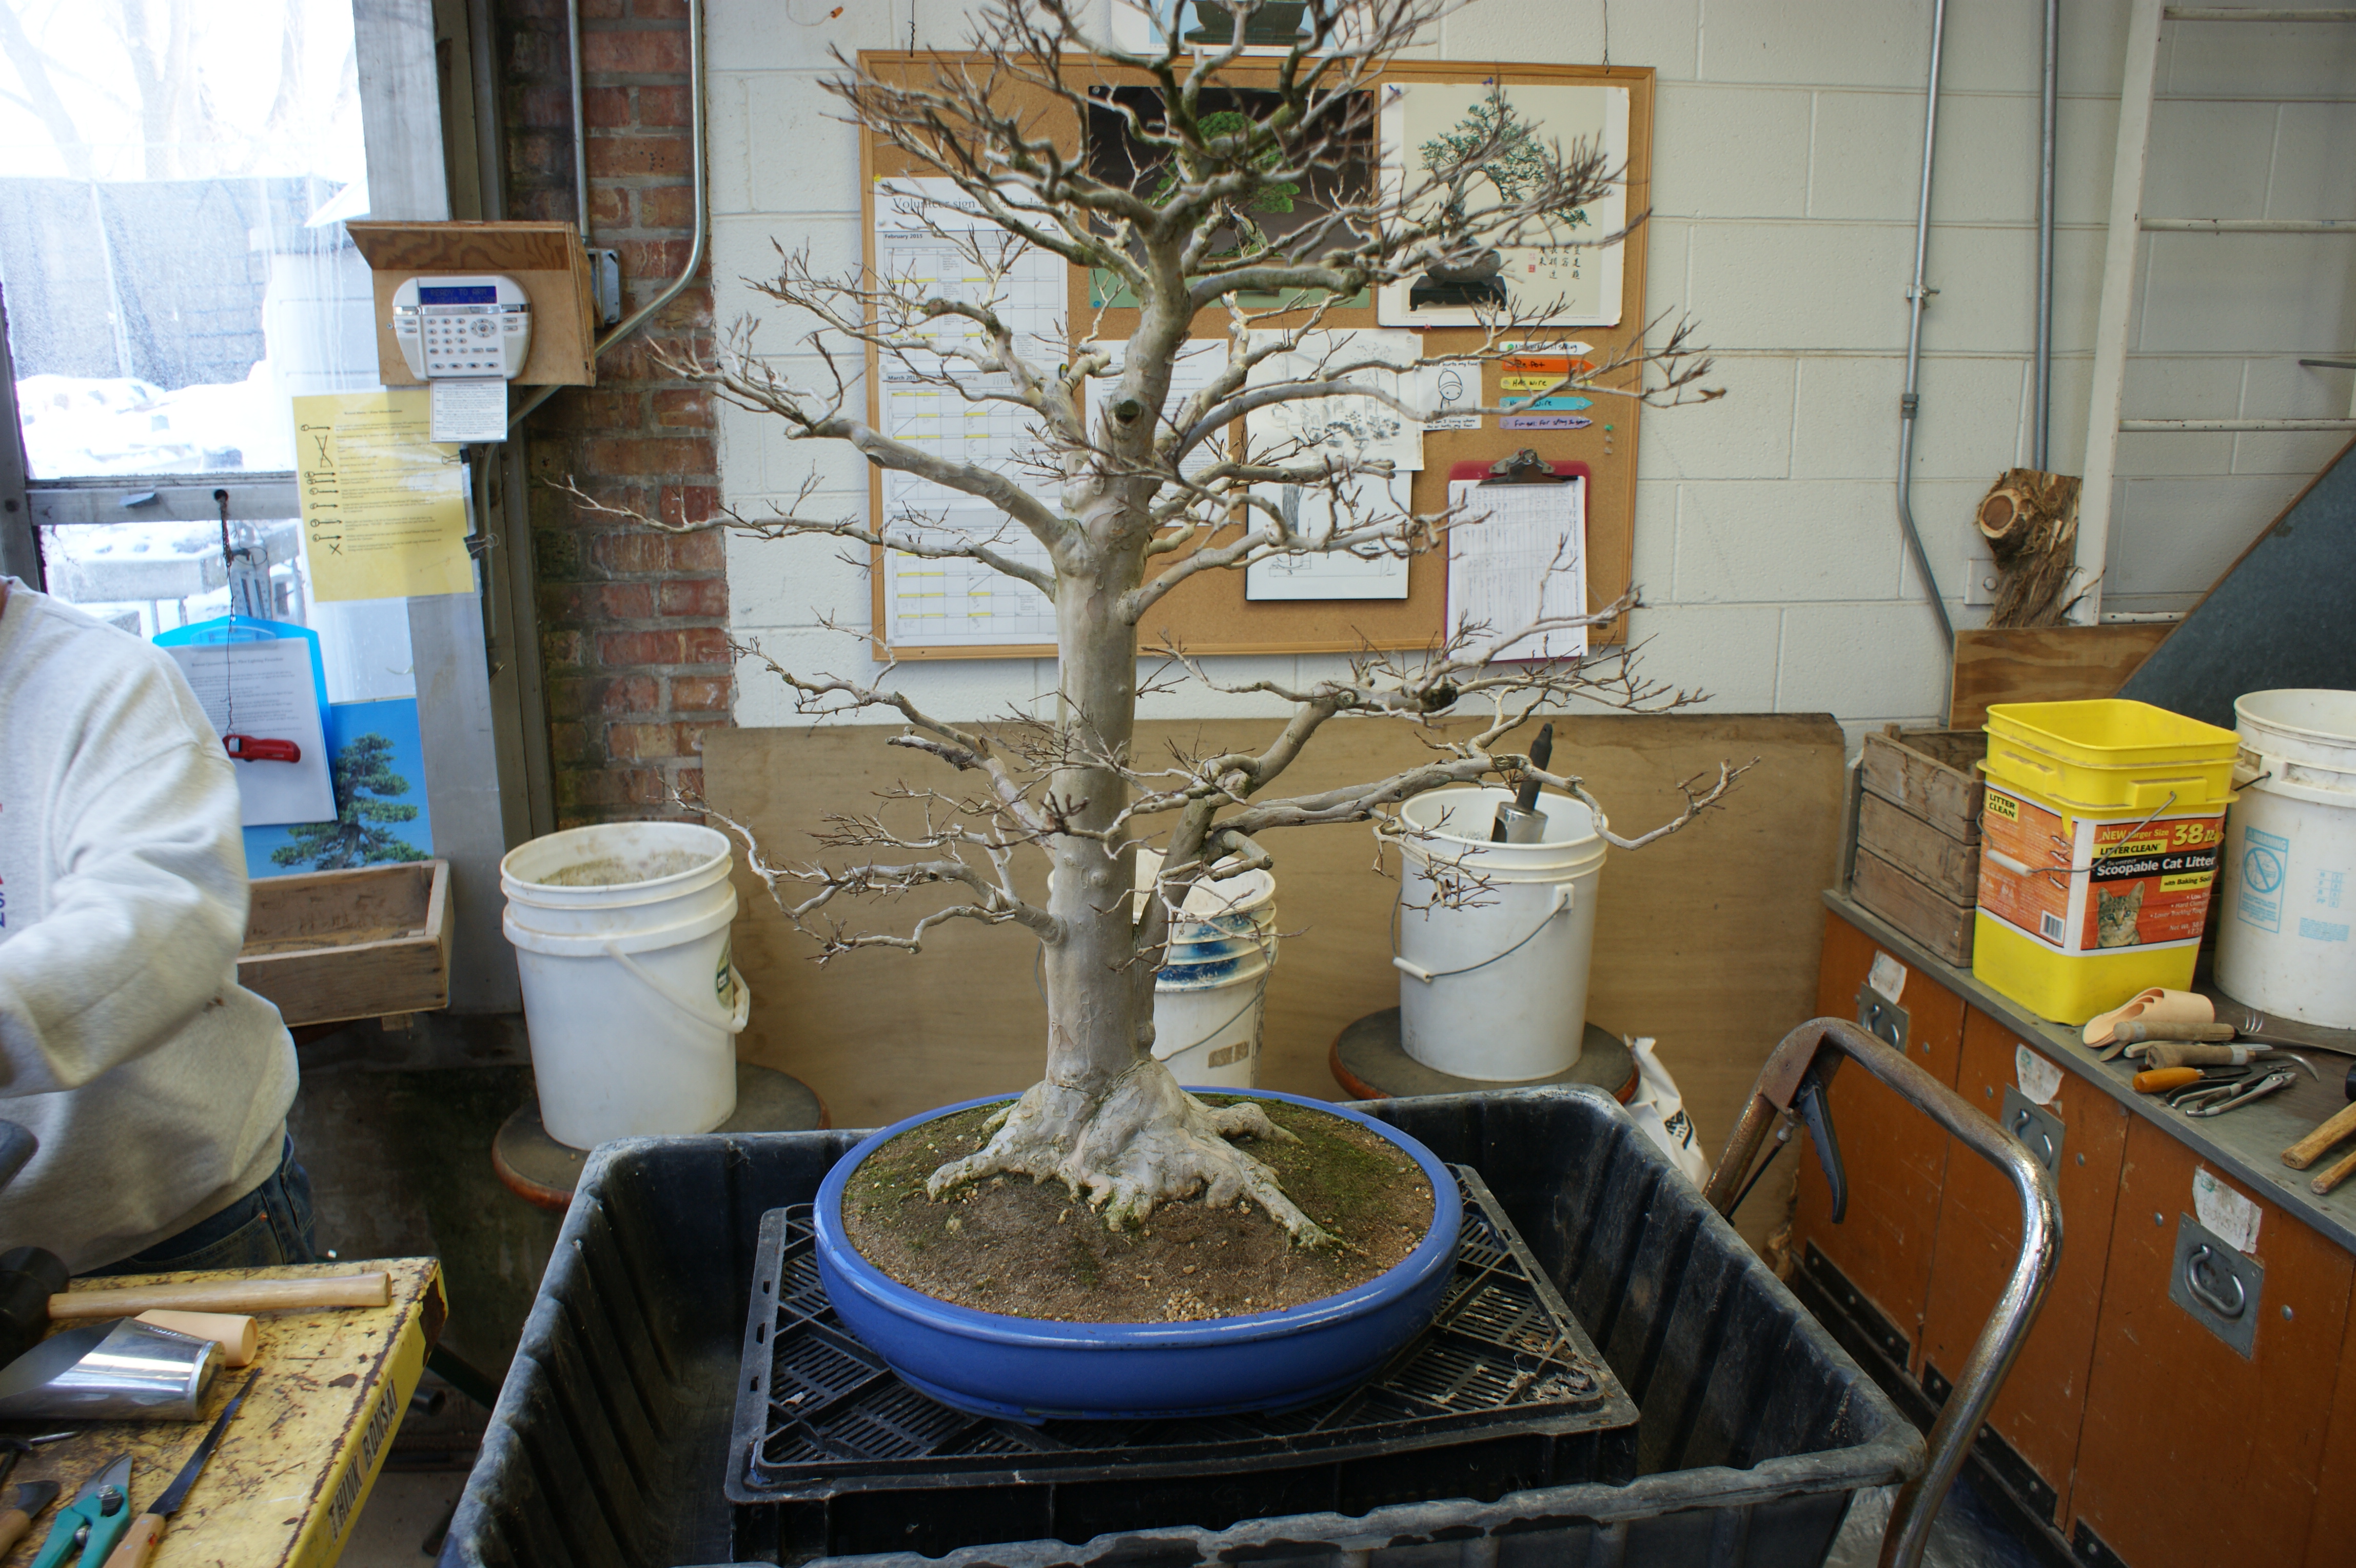
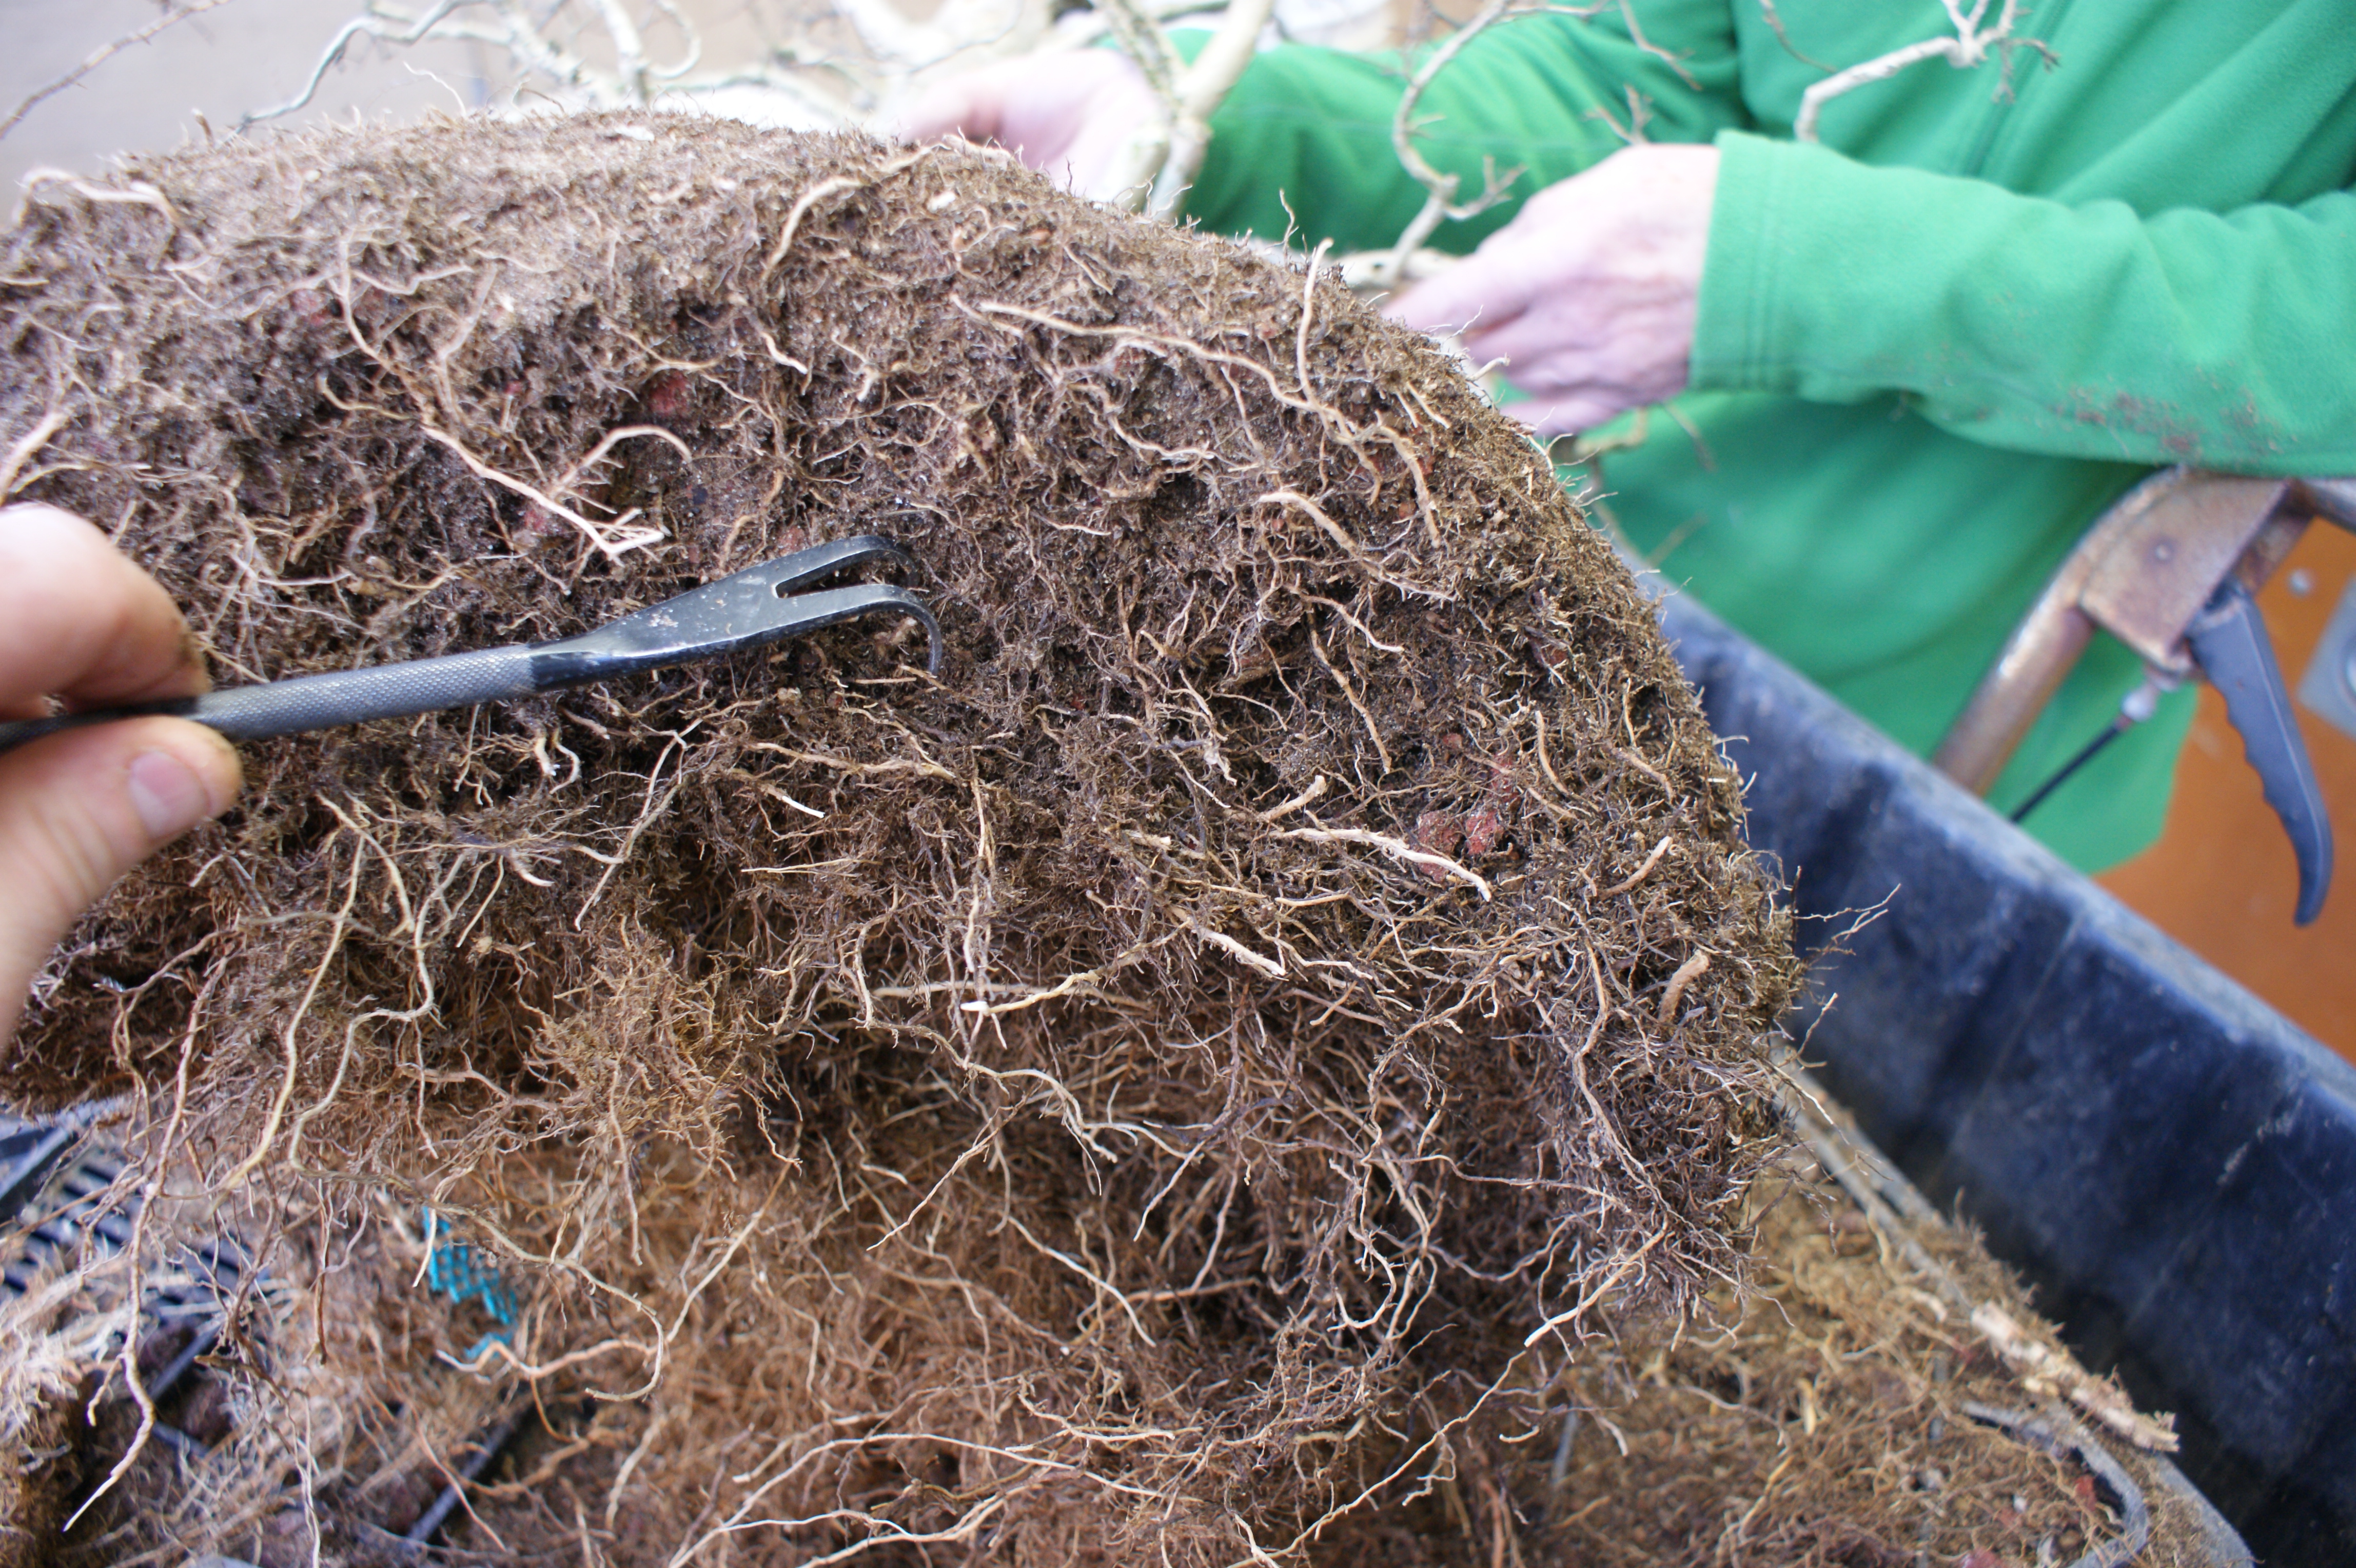
Using the root hook and saw, we slowly and carefully create a gap between the root ball and the sides of the pot. Creating this space will allow us to safely remove the tree from the pot.

PHOTO: Loosening a bonsai from its pot with a root hook before repotting.
Use the root hook to carefully loosen the plant from the pot.
PHOTO: Use a root saw to carefully remove the bonsai from its pot.
Once a furrow has been created with the root hook, use the saw to free the bonsai from the pot.

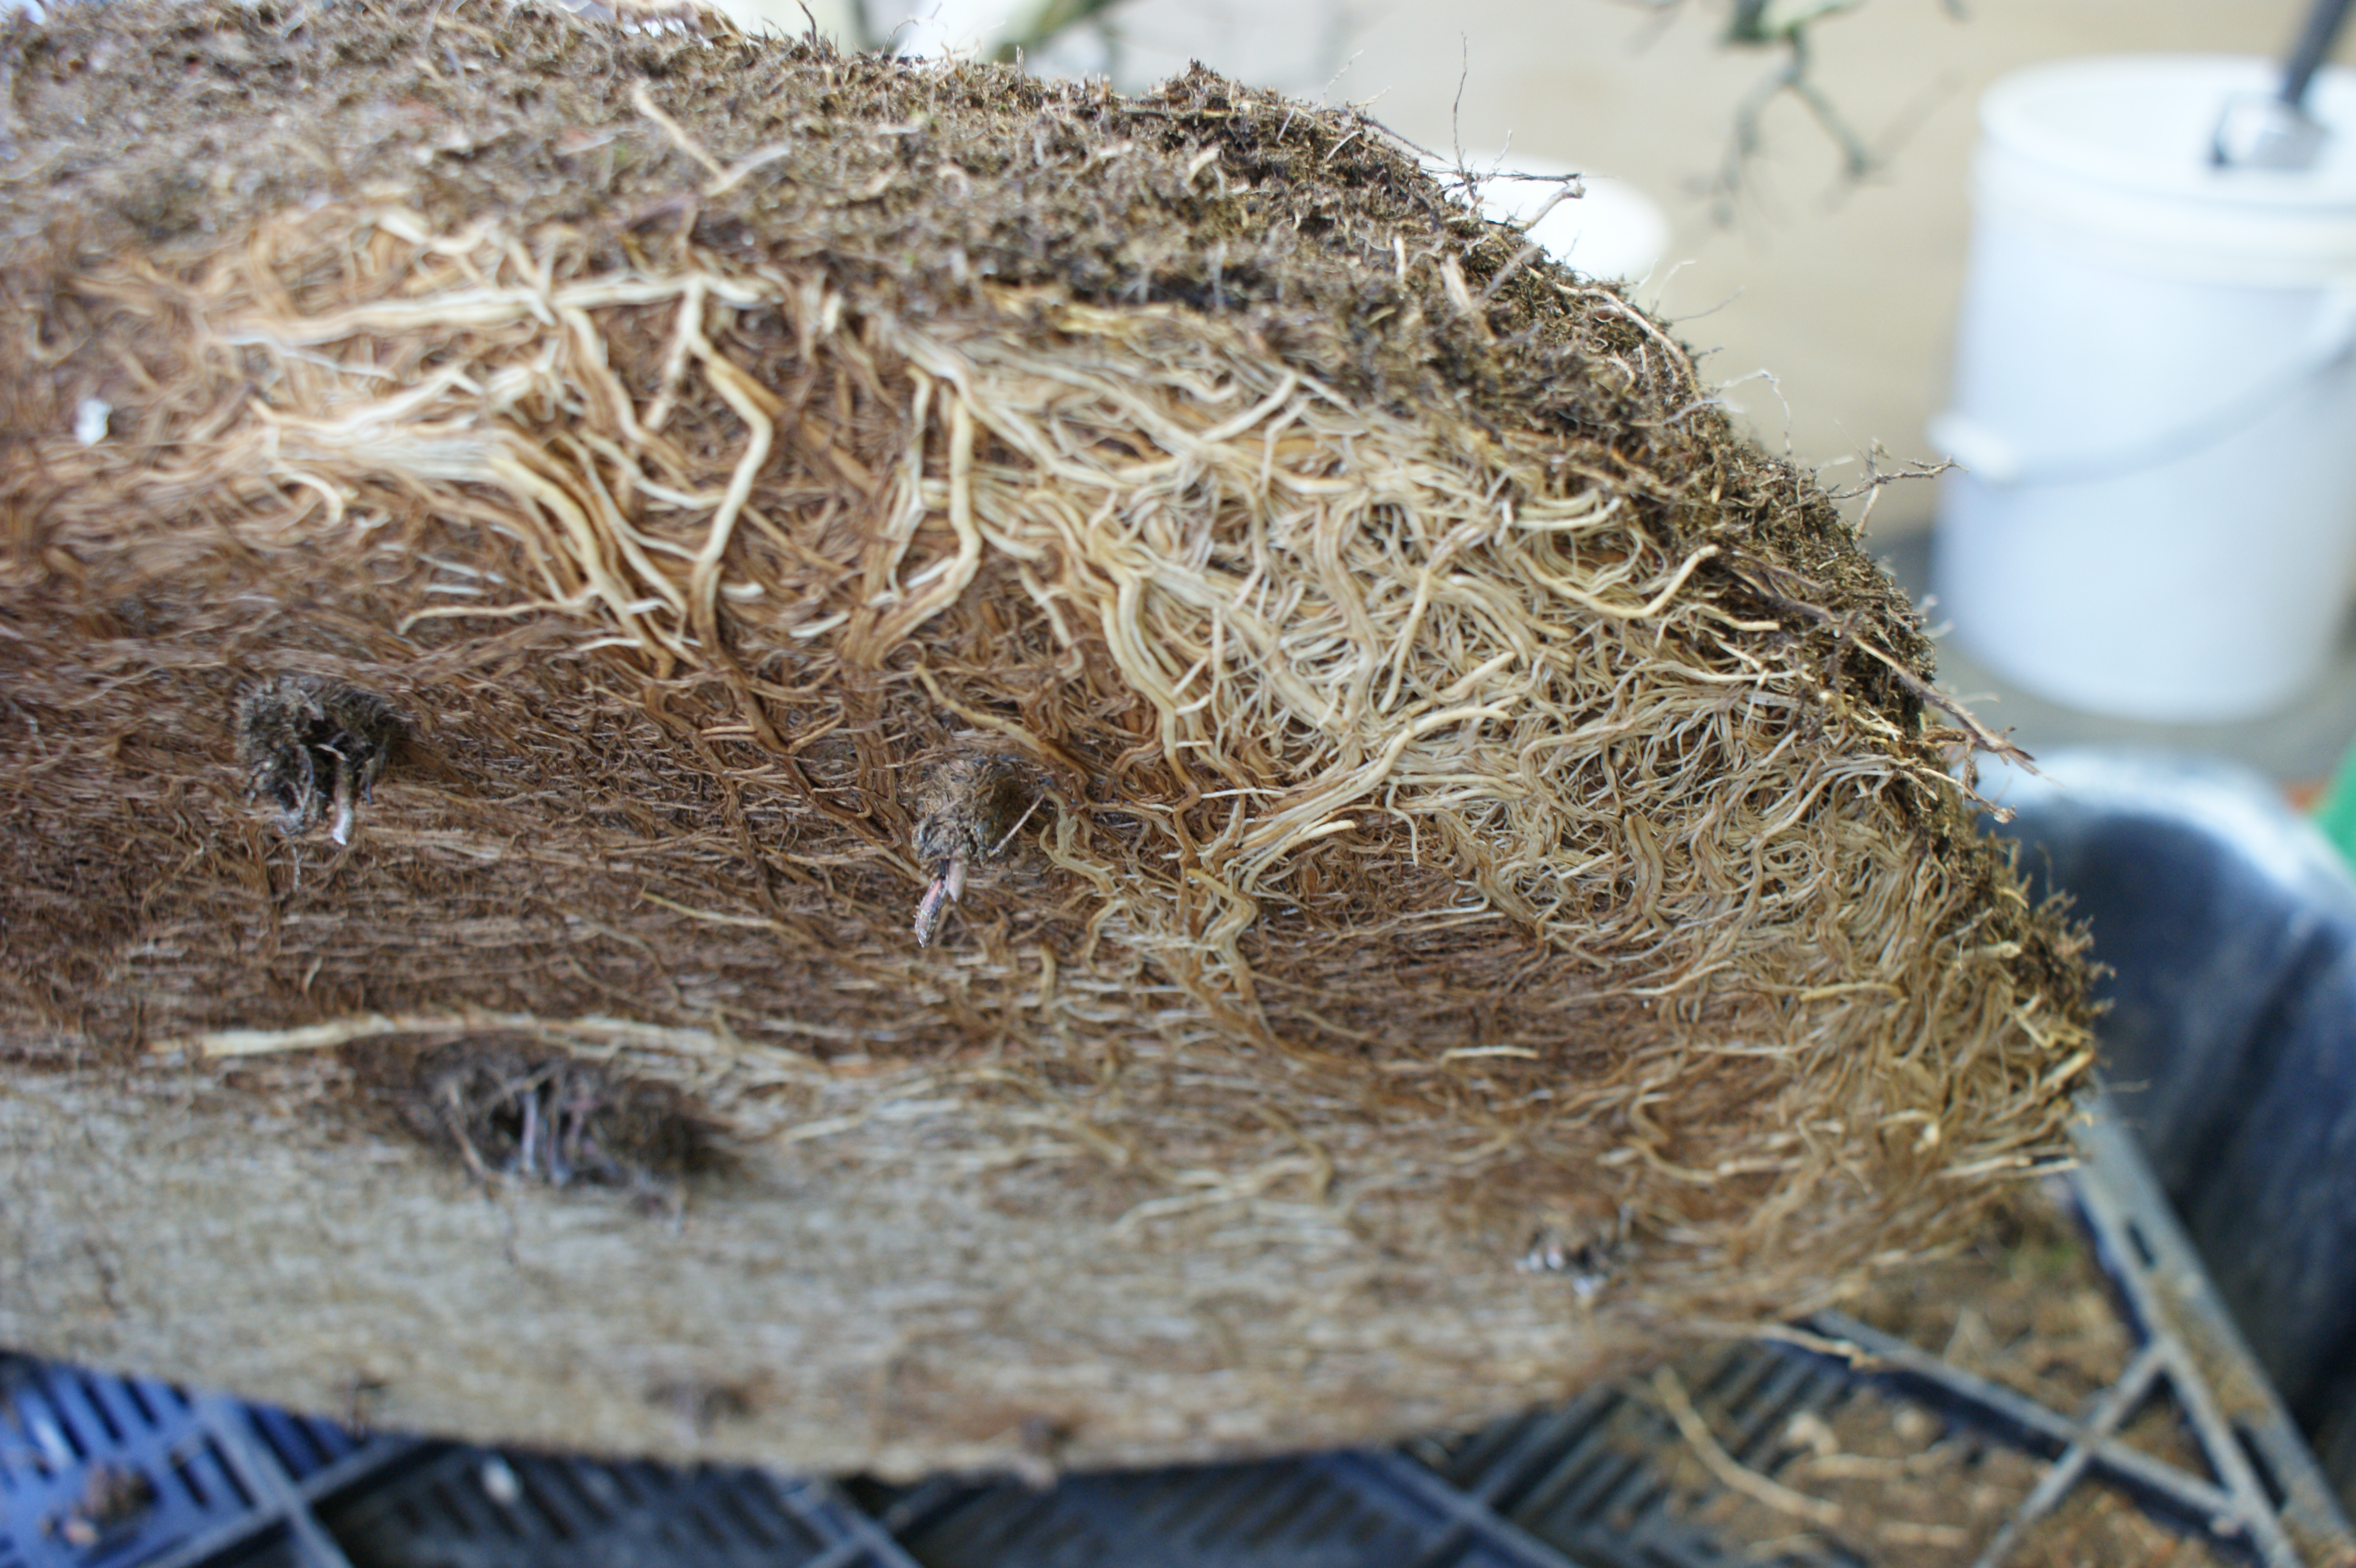
This tree was certainly in need of being repotted! You can see the abundance of roots on the sides and the bottom of the root ball (below). You can even see where the roots started to grow down through the drainage holes in the pot. These “root plugs” prevent proper drainage, which is very important for tree health.

PHOTO: Root plugs—where the roots started to grow down through the drainage holes in the pot—prevent proper drainage.
Root plugs—where the roots started to grow down through the drainage holes in the pot—prevent proper drainage.
PHOTO: Bonsai drainage screen covered by root mat.
Drainage screen covered by root mat

The frequency of repotting is determined by a number of factors, including species, stage of development, and pot size. Vigorous root growers like maples need to be repotted and root pruned more frequently than pine trees of the same developmental stage (which grow roots more slowly). Though root pruning is important to bonsai health, it can be stressful to a tree if the roots are disturbed too frequently. Knowing the tree species you have and how it grows is important in making the decision of when to repot and root prune. 

PHOTO: Bonsai volunteer Ester Bannier assists in root trimming.
Volunteer Ester Bannier assists in root trimming.
PHOTO: Root hook working bonsai roots free.
Use a root hook to work roots free.

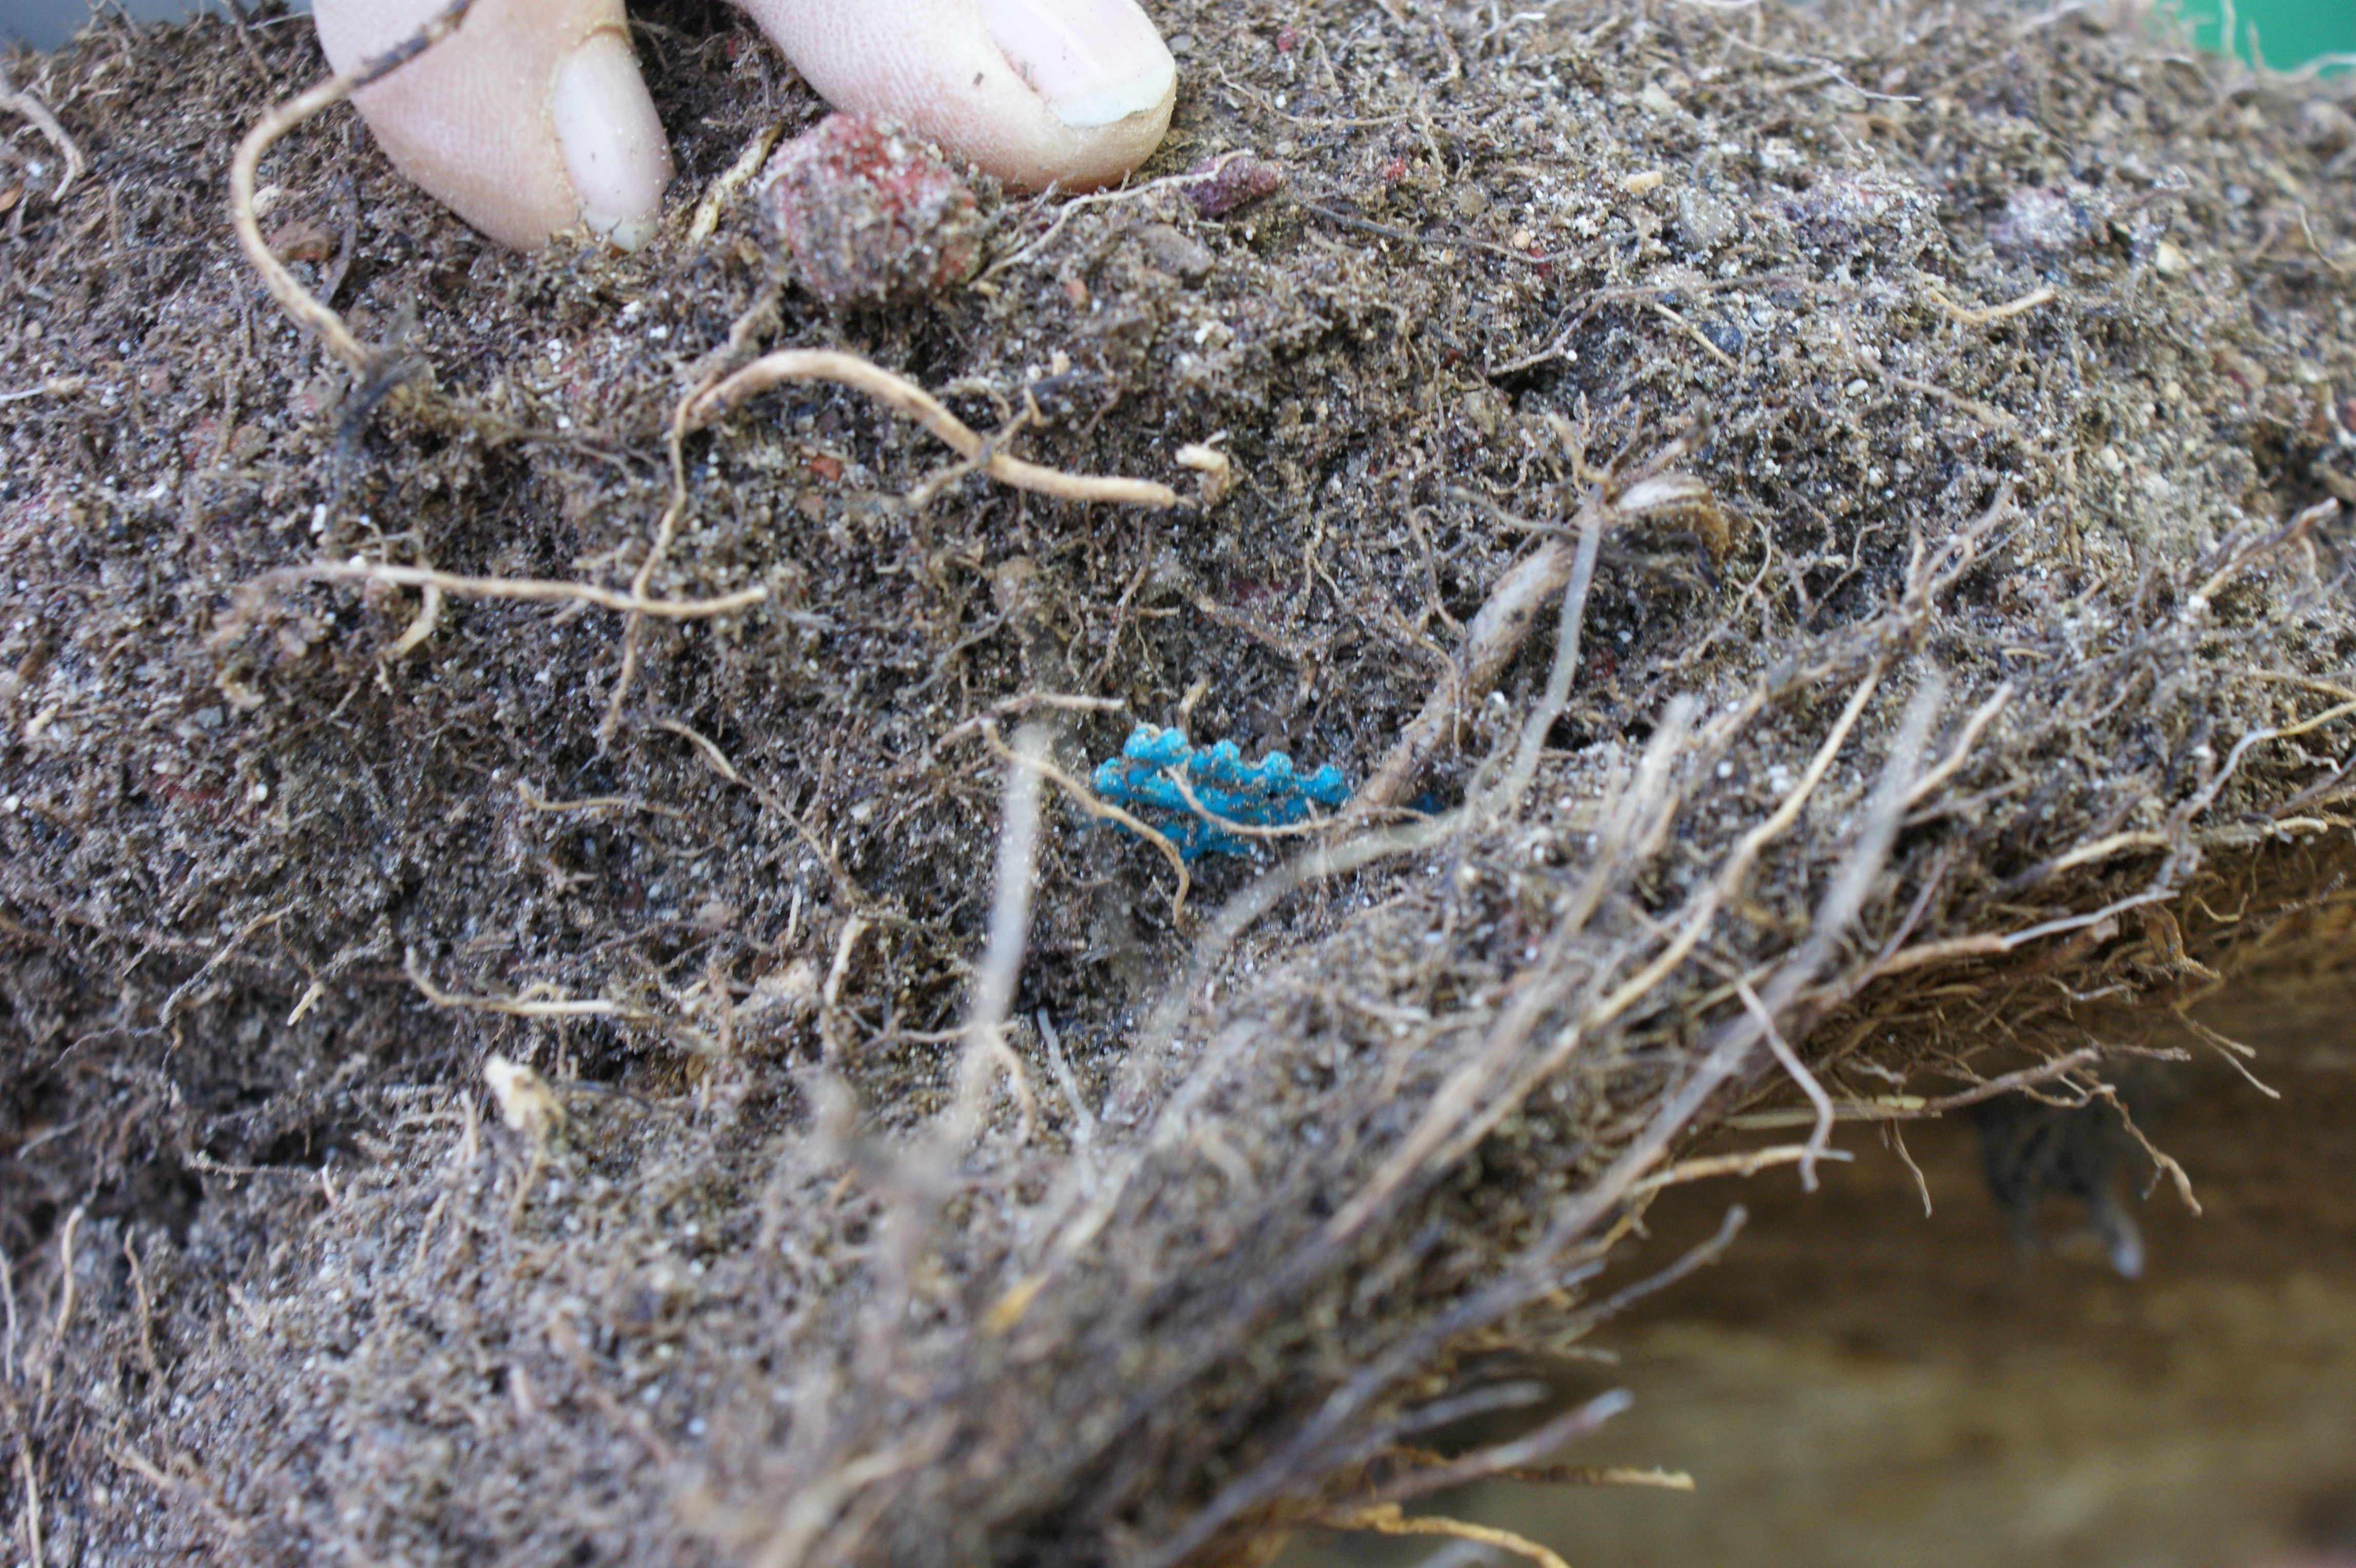
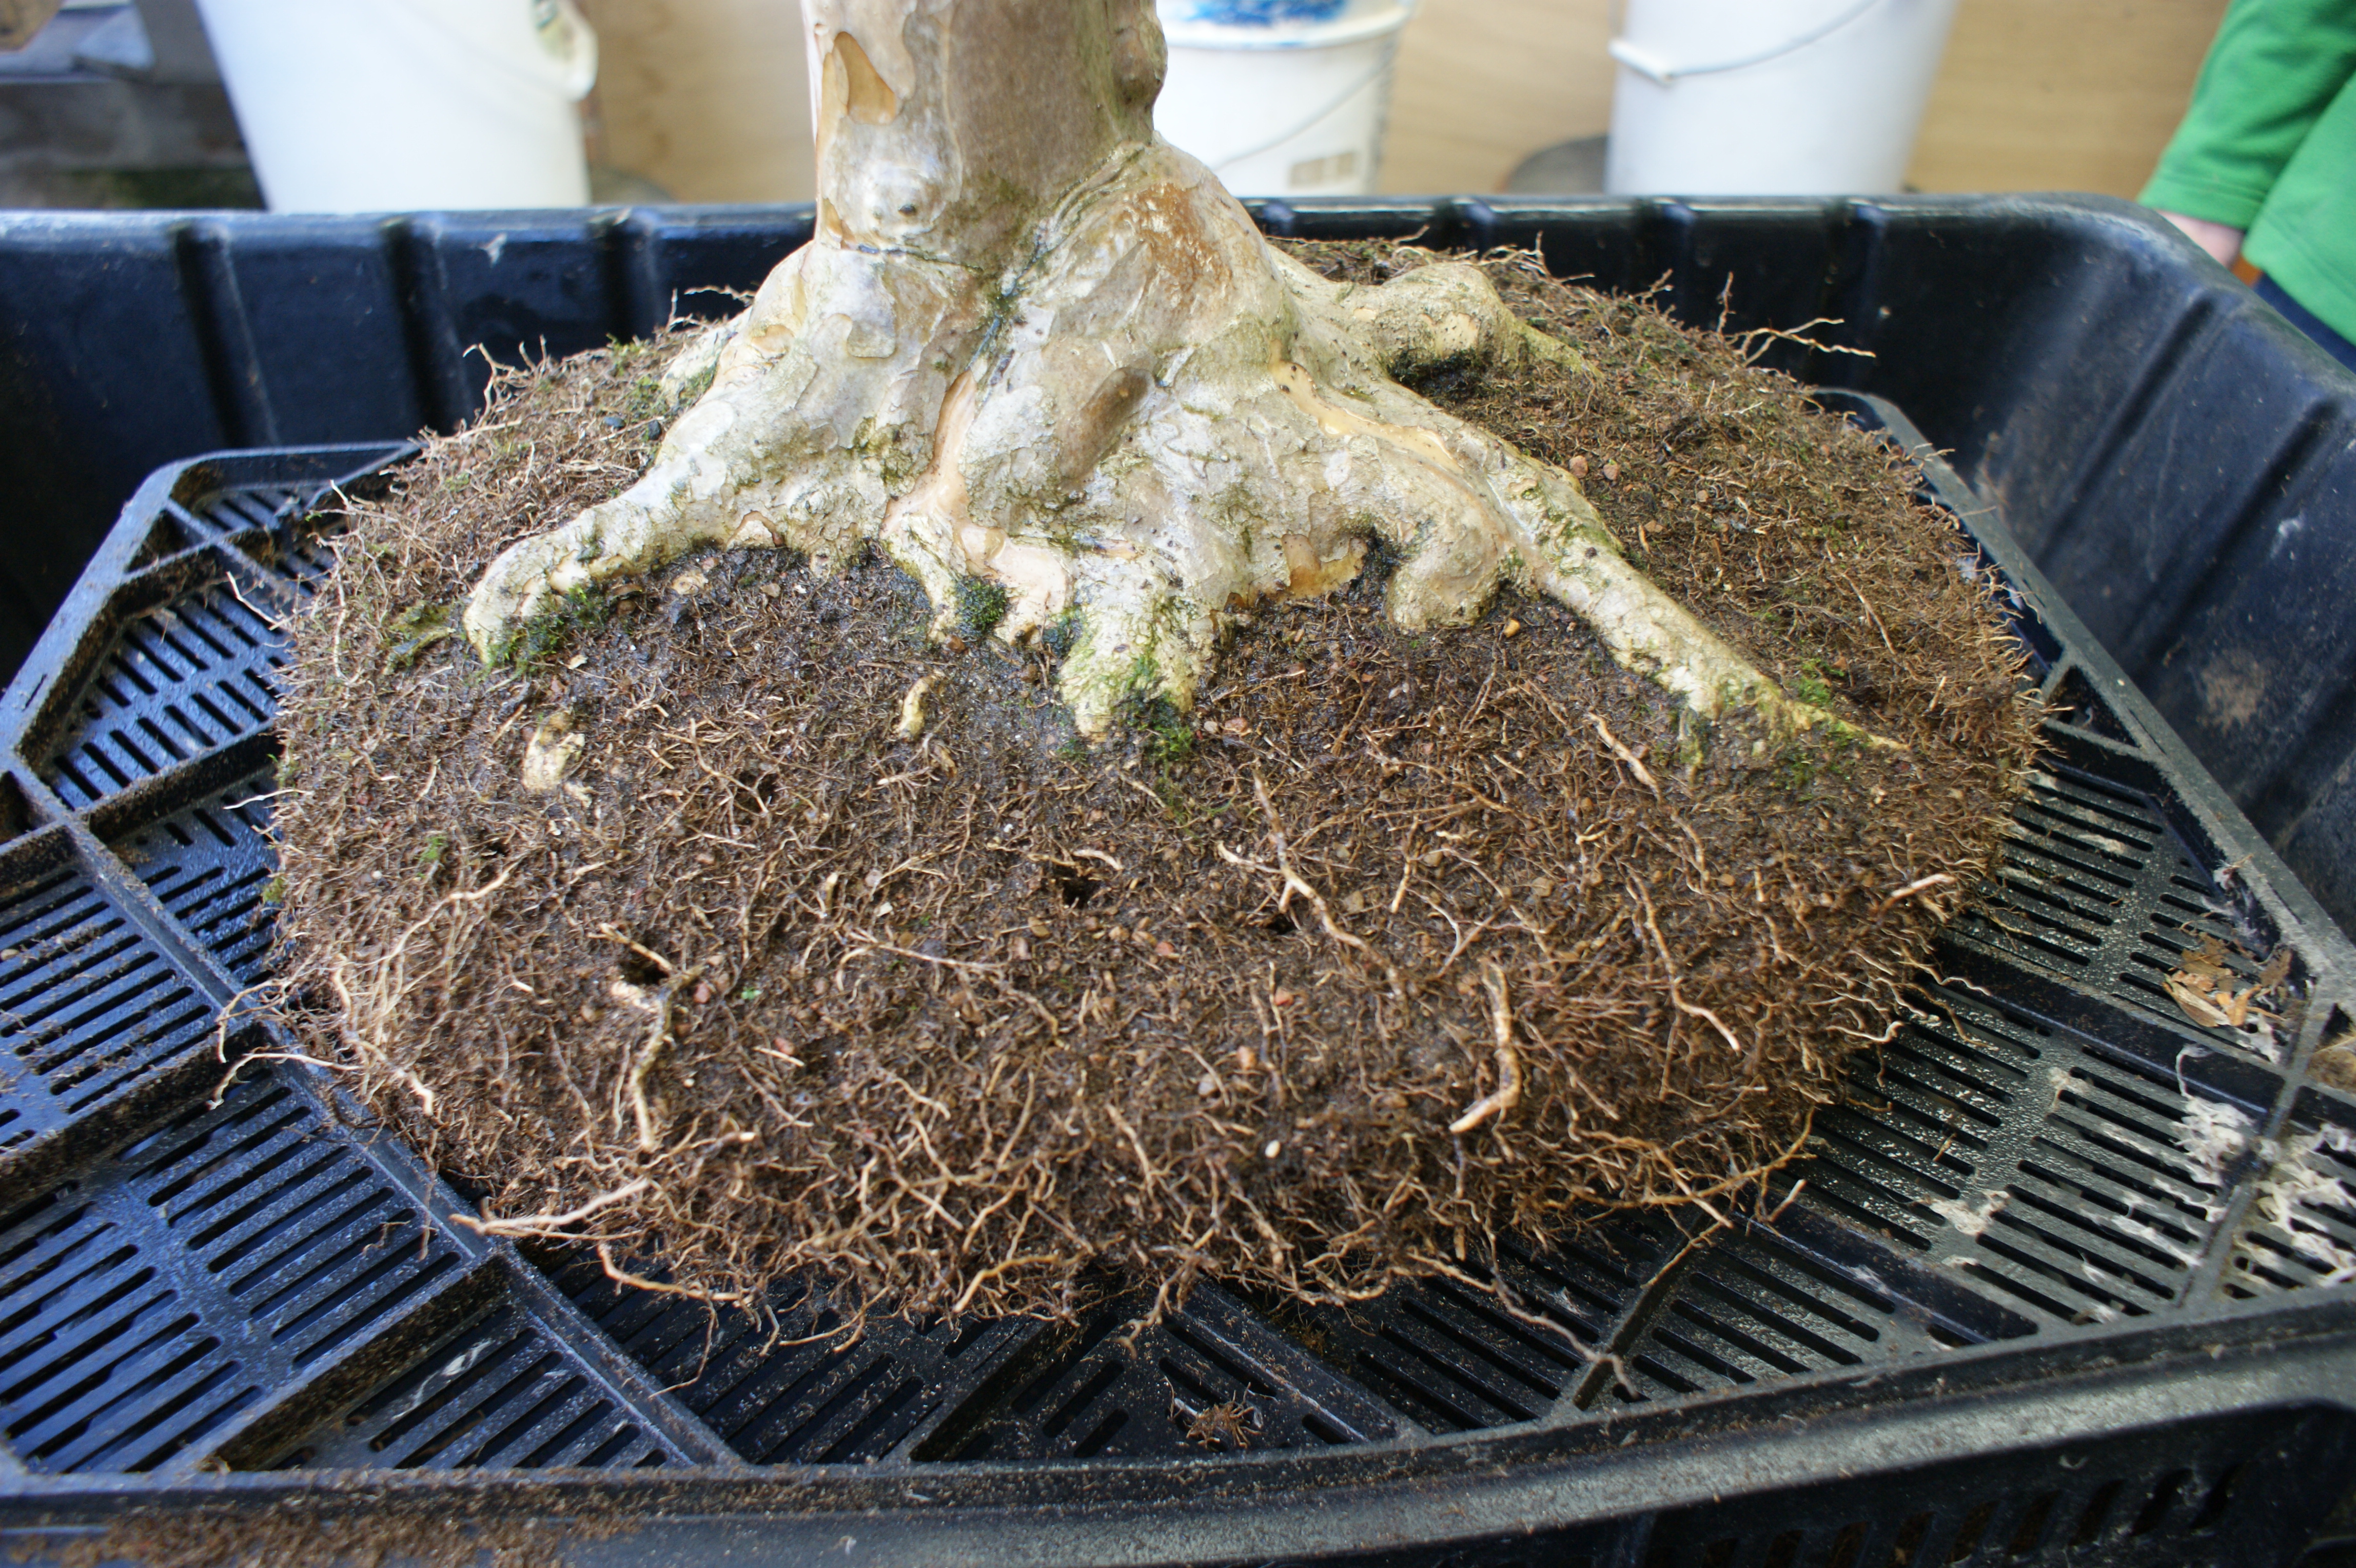
Using root hooks, scissors, and chopsticks, the roots are teased out and pruned as needed. Cutting the roots back removes large woody roots, allowing more space for fine feeder roots to grow. The woody roots act only as transporters of energy. Woody roots do not absorb water, food, or oxygen; only the fine feeder roots do that. Having primarily fine feeder roots in our pots is what allows us to keep bonsai in such shallow containers. If the woody roots take up too much space, then the tree cannot absorb enough water, food, and oxygen to support the large amounts of foliage they have, and the trees’ health will suffer.

PHOTO: The bonsai, carefully removed from its pot.
The bonsai, pre-trimming
PHOTO: The bonsai rootball after pruning.
The bonsai root ball after pruning

While the tree work is going on, the soil and pot are being prepared for its return.

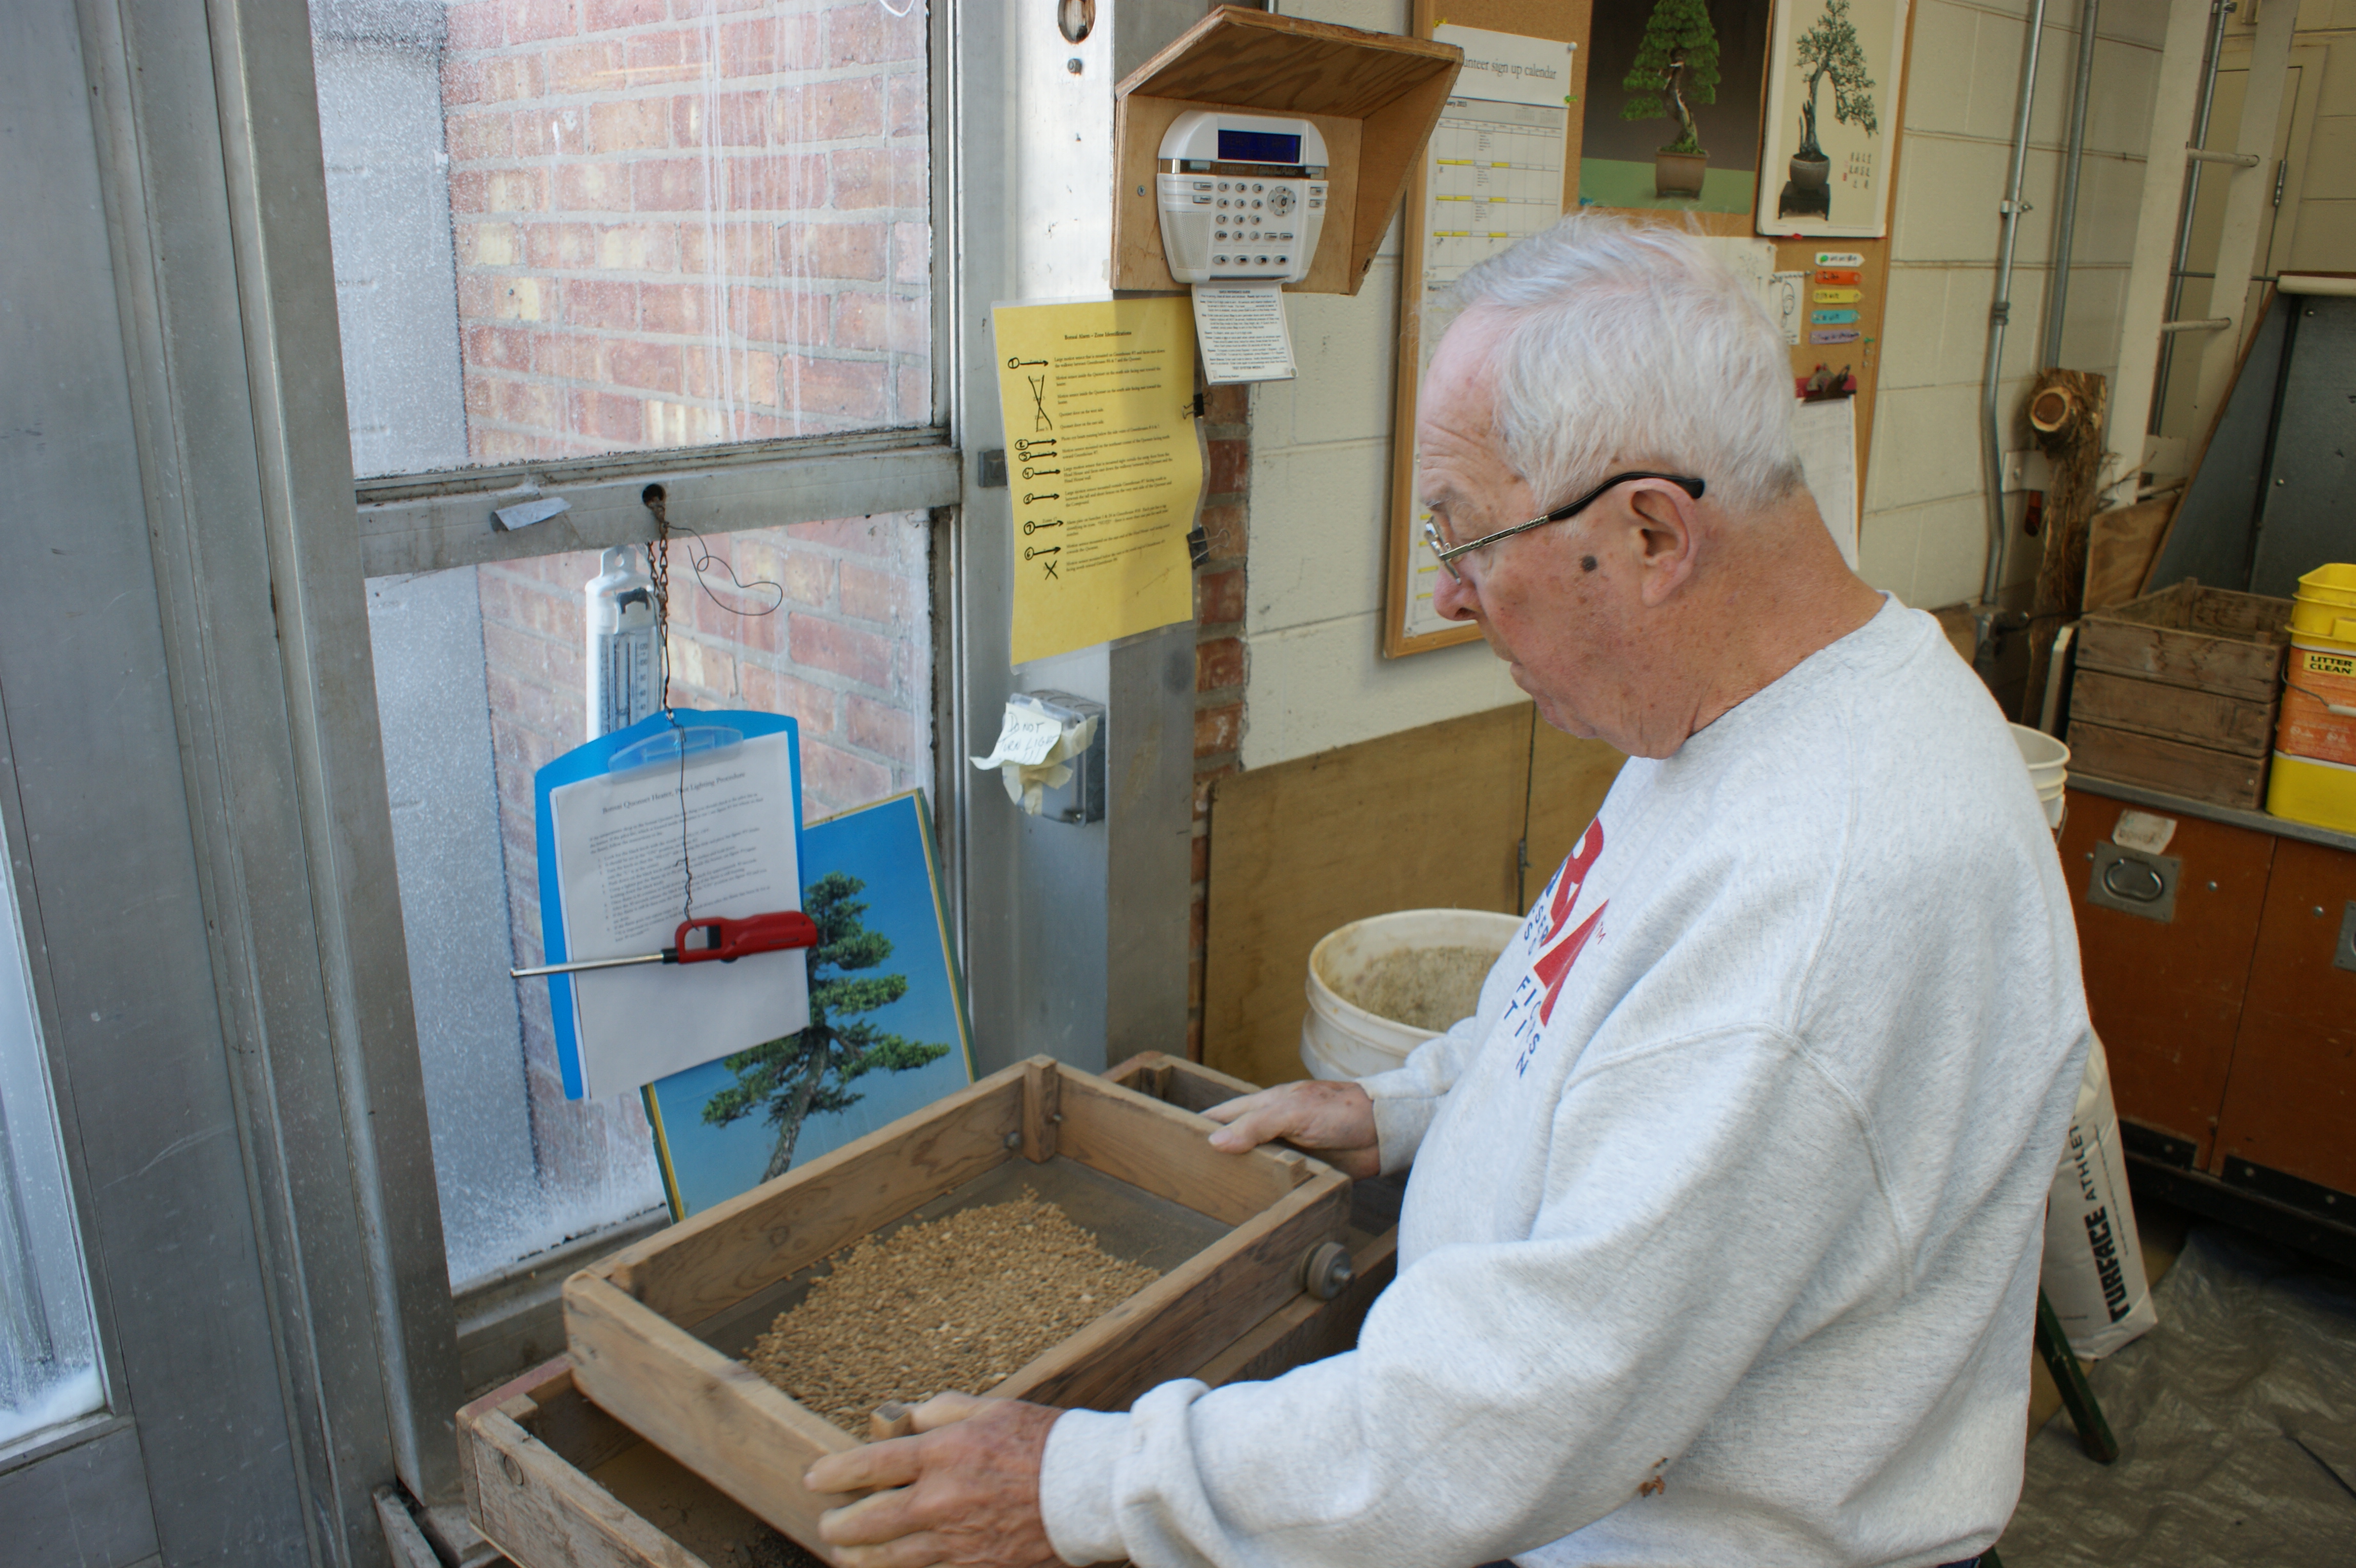
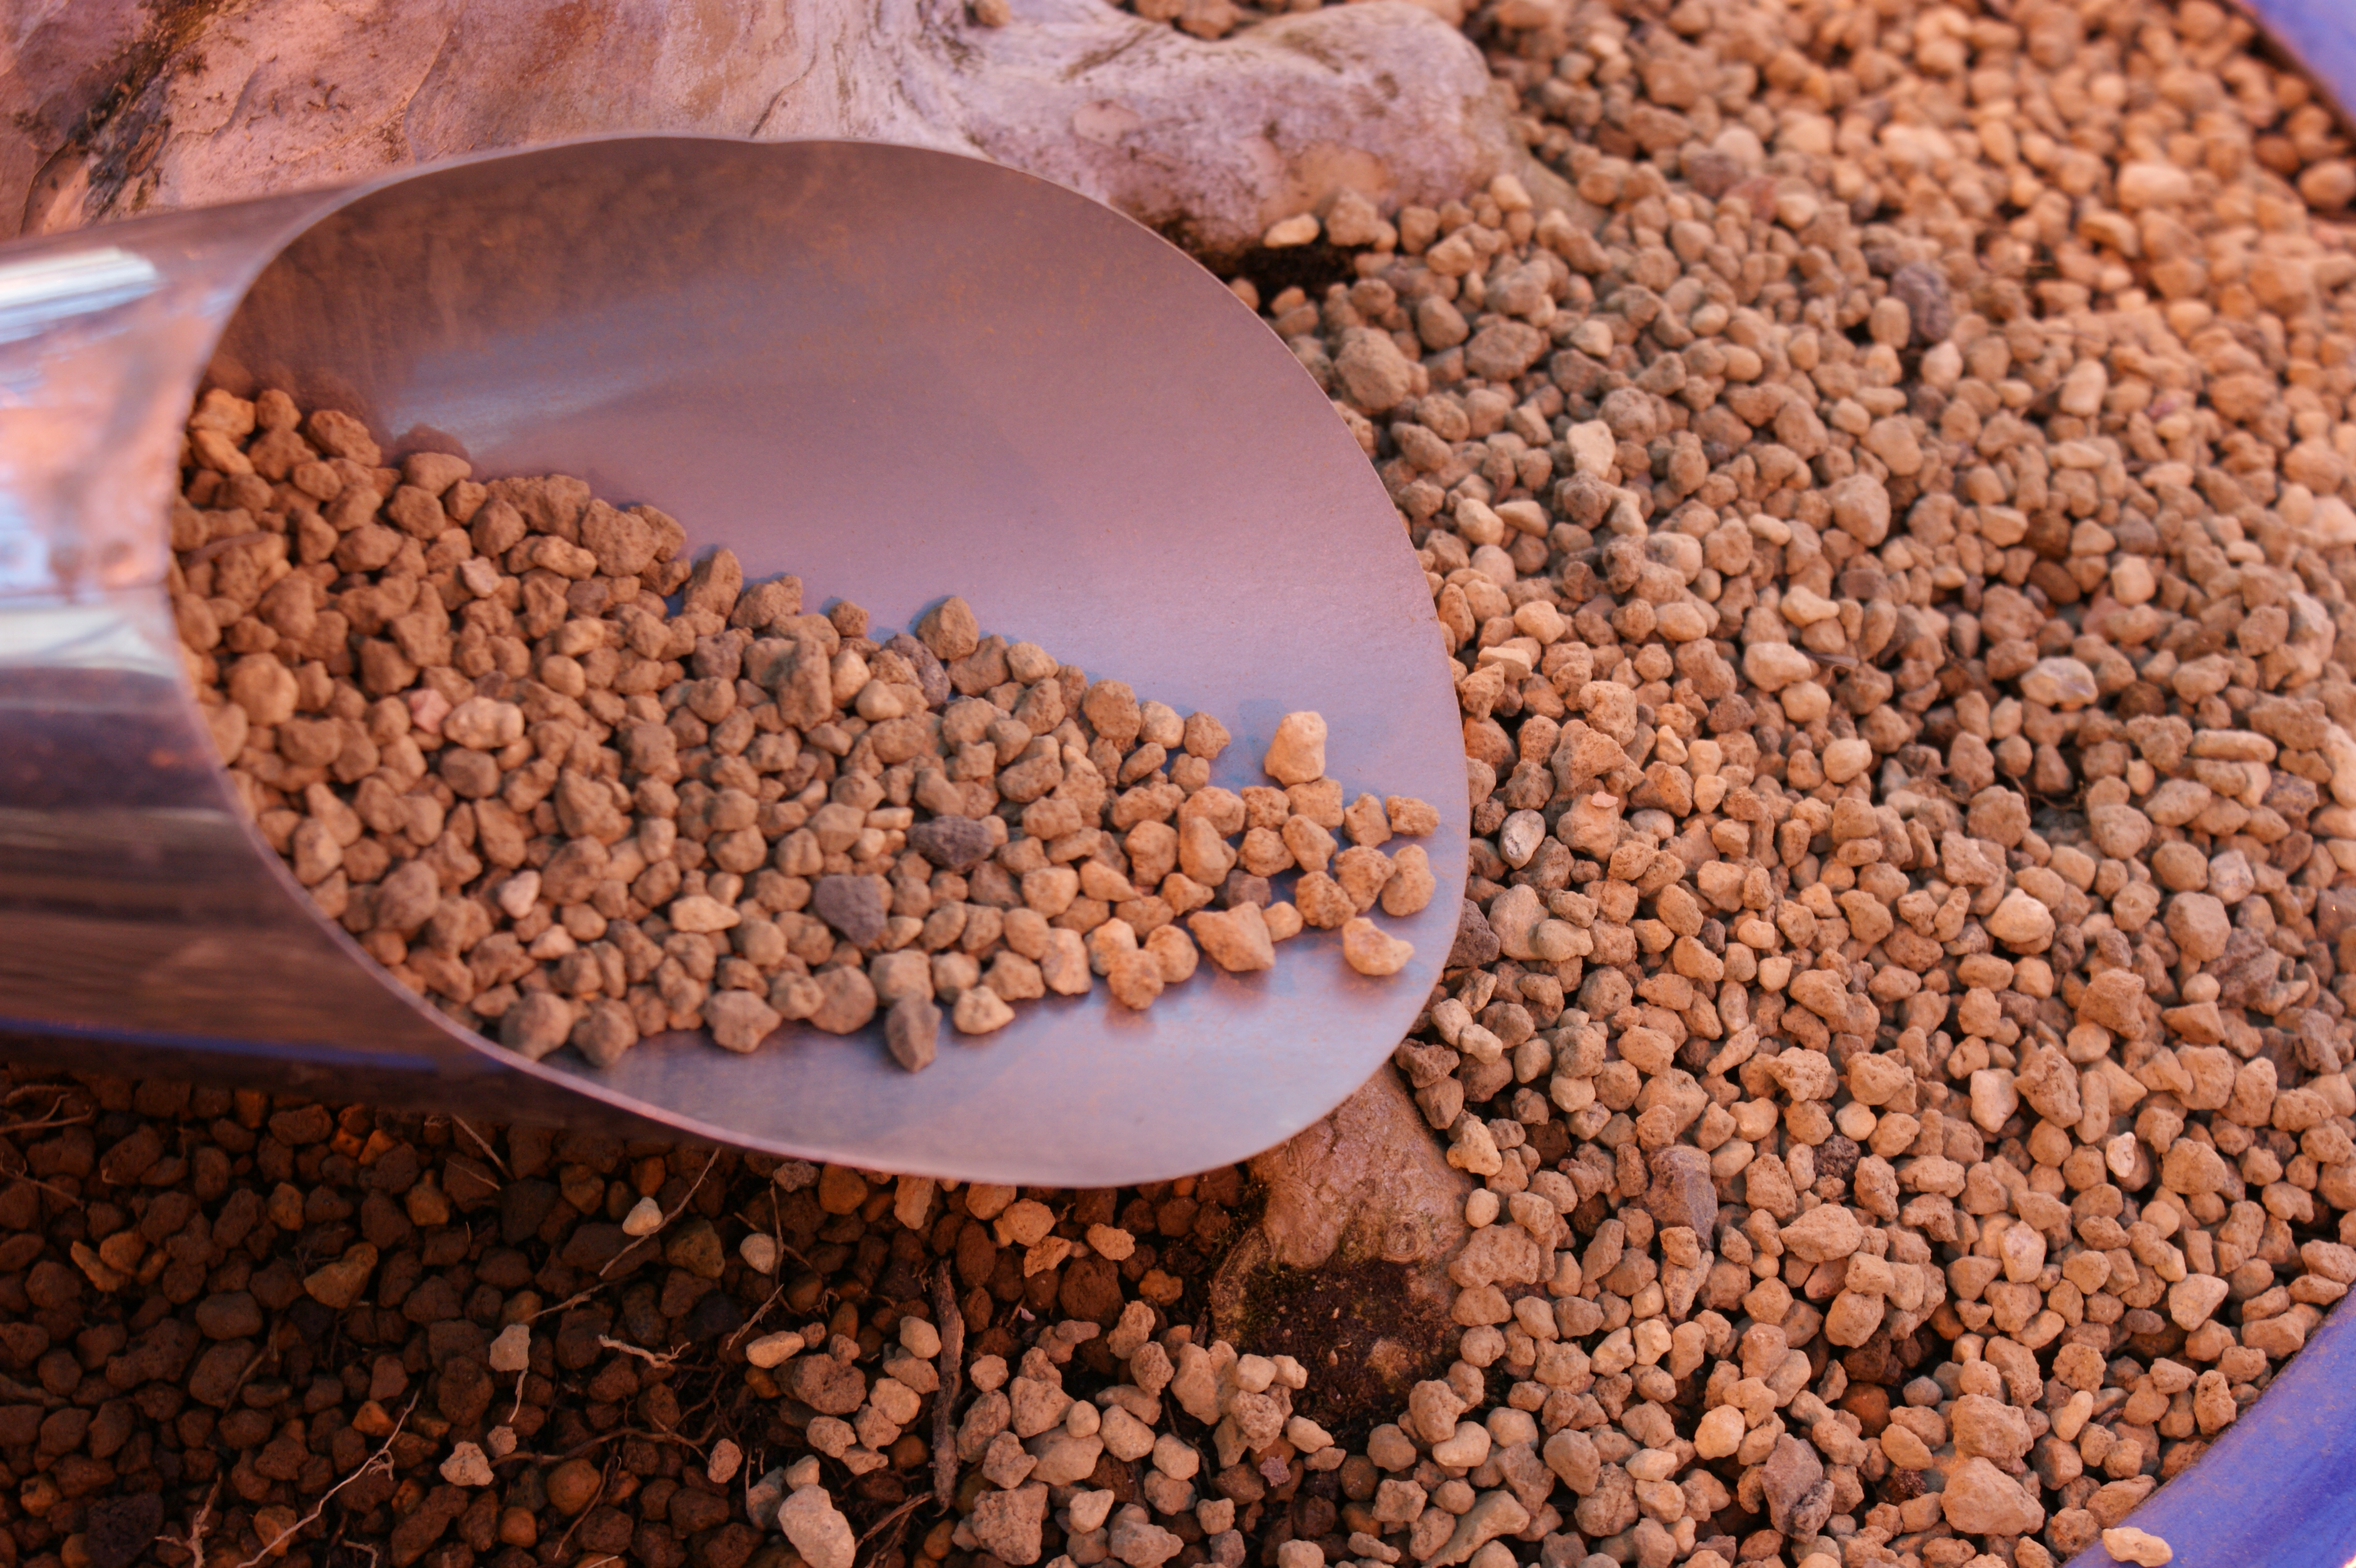
Bonsai soil is one of the most important aspects of growing bonsai trees. There are many different soil mixes and combinations that can be used based upon your tree species, the region in which you live, the amount of time you have to water, and many other factors. No matter what mix you choose, a good bonsai soil should support vigorous root growth, a healthy microbe balance, and have good drainage. Here at the Chicago Botanic Garden, we use a variety of mixes based on tree species and stage of development. For this tree, we will be using our base mix of akadama (a clay-like material mined in Japan), pumice, and lava rock. Our soil mix is sifted to remove any small particles and dust that could clog up the drainage holes, decreasing drainage.

PHOTO: Soil mix of akadama, pumice and lava rock is used on this tree.
A soil mix of akadama, pumice, and lava rock is used on this tree.
PHOTO: Volunteer Dick Anderson sifts soil for repotting the bonsai collection.
Volunteer Dick Anderson sifts soil for repotting the bonsai collection.

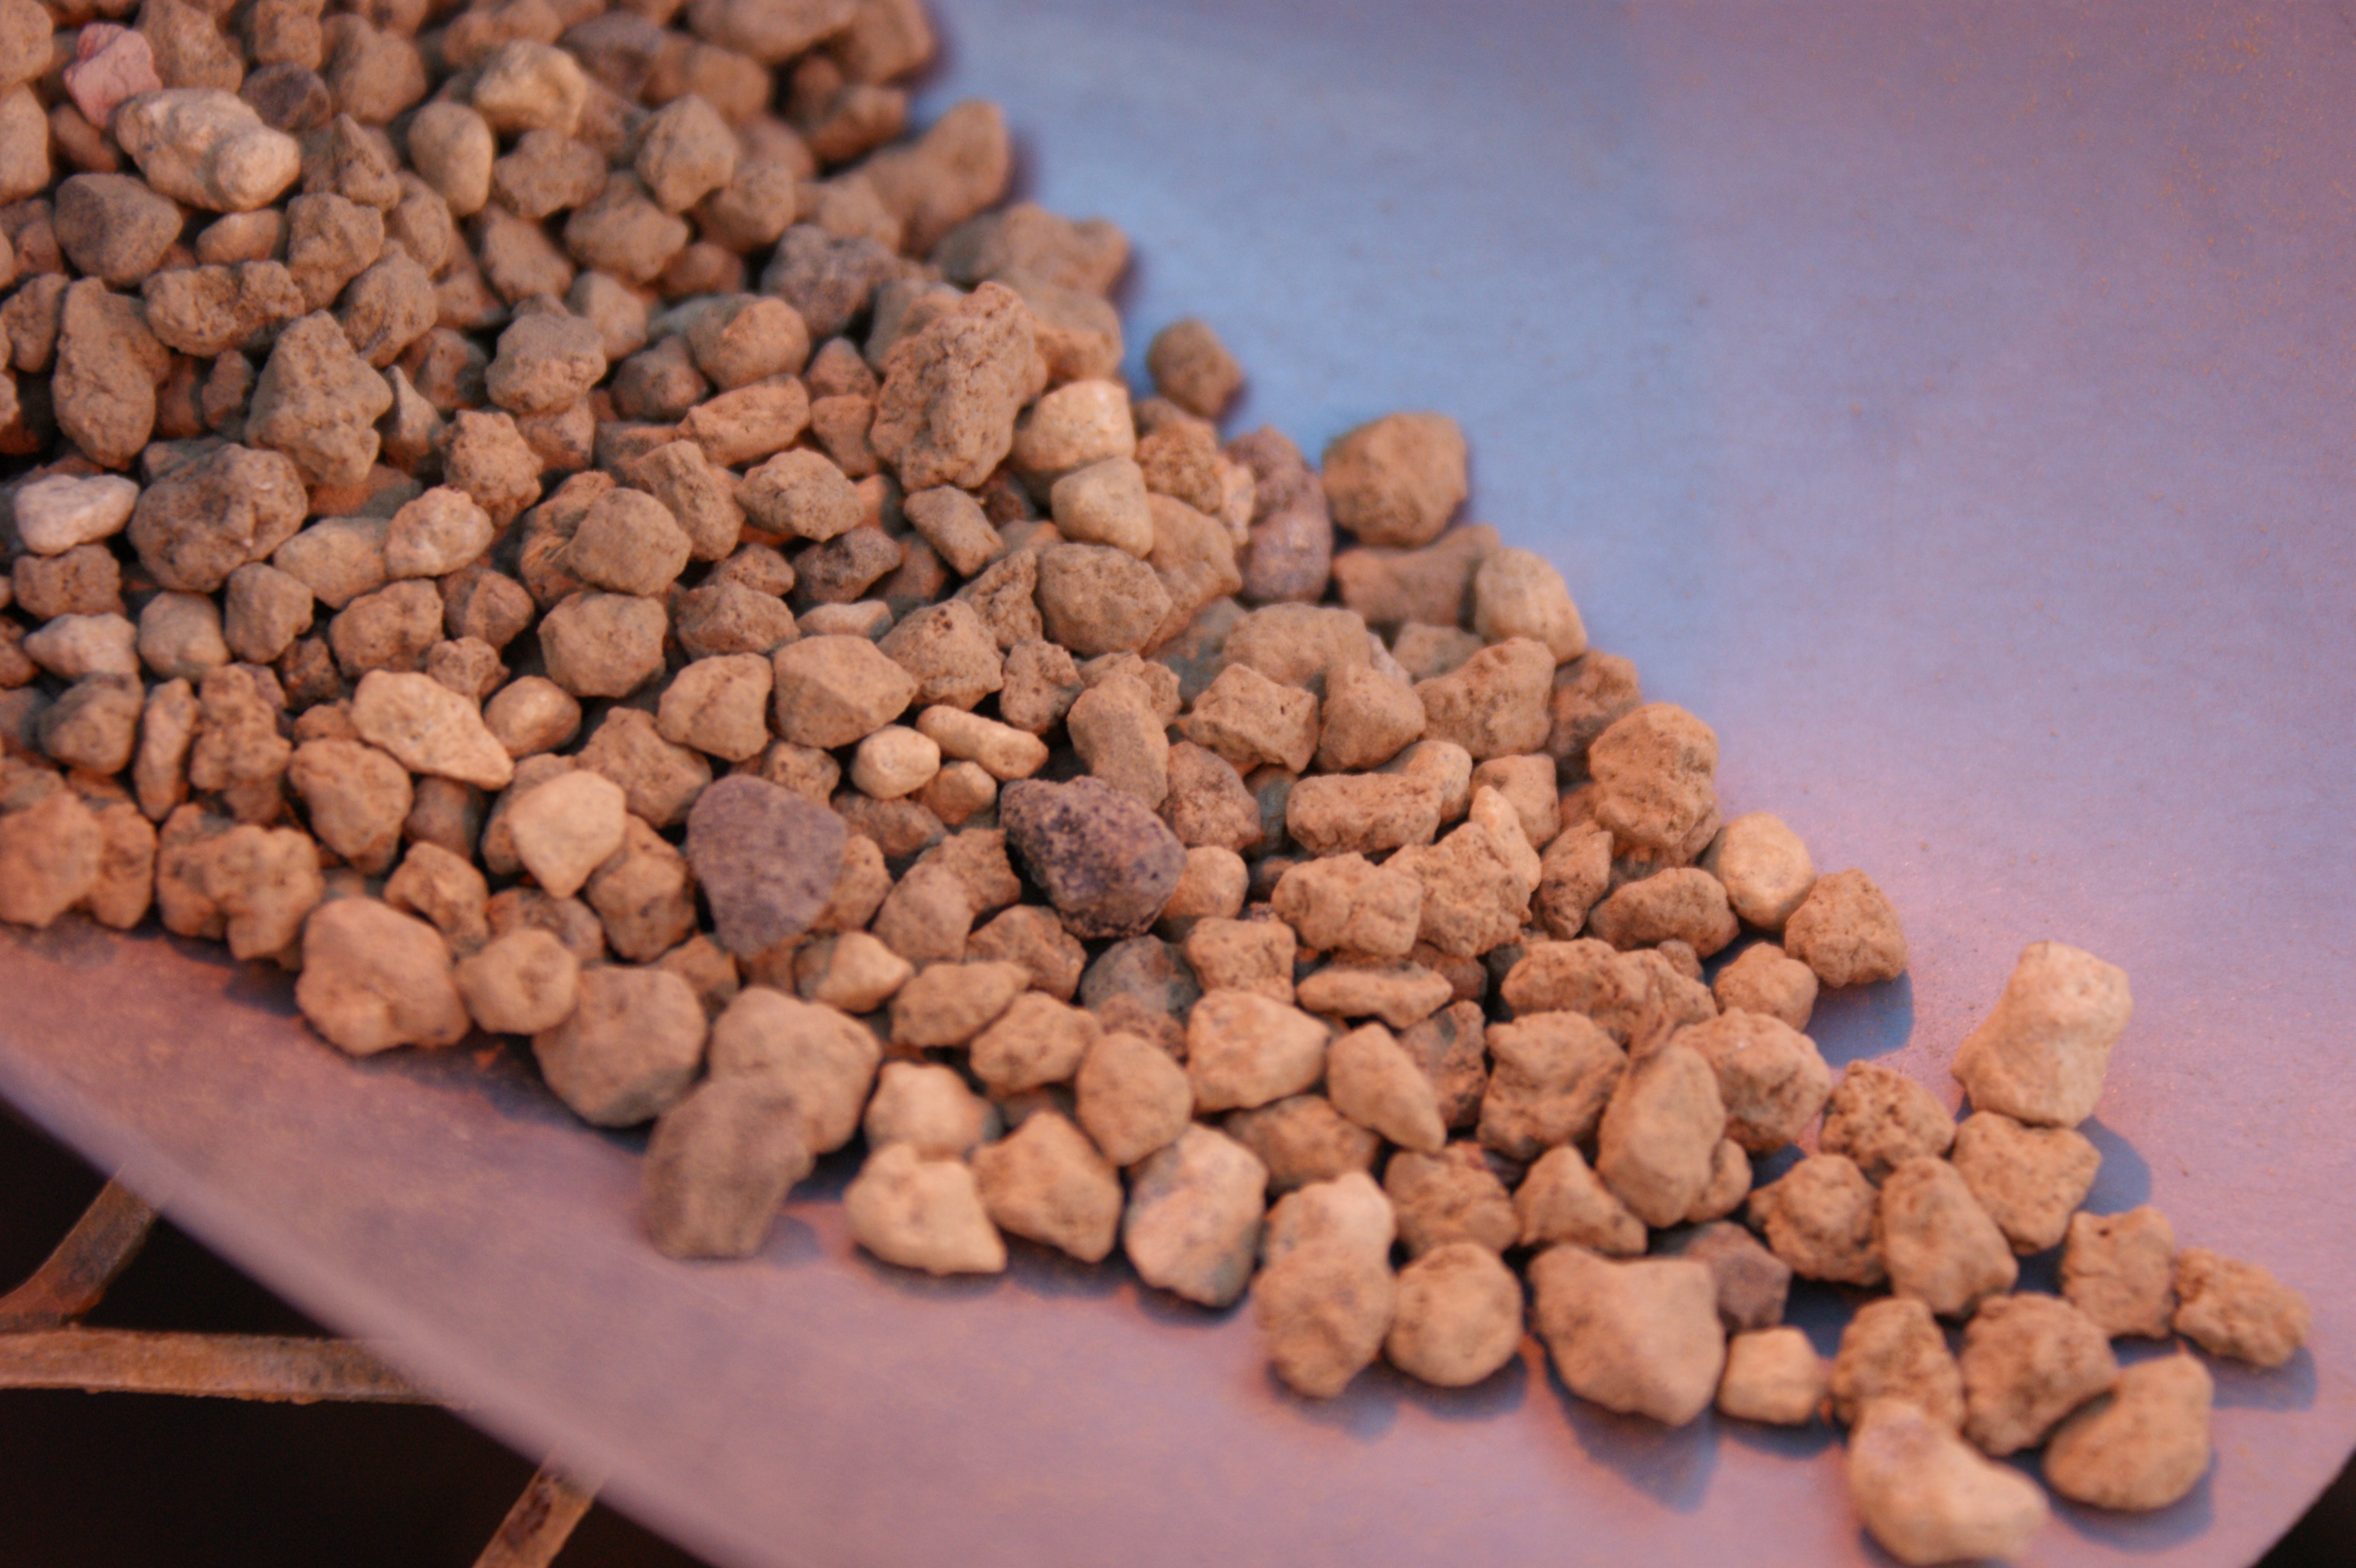
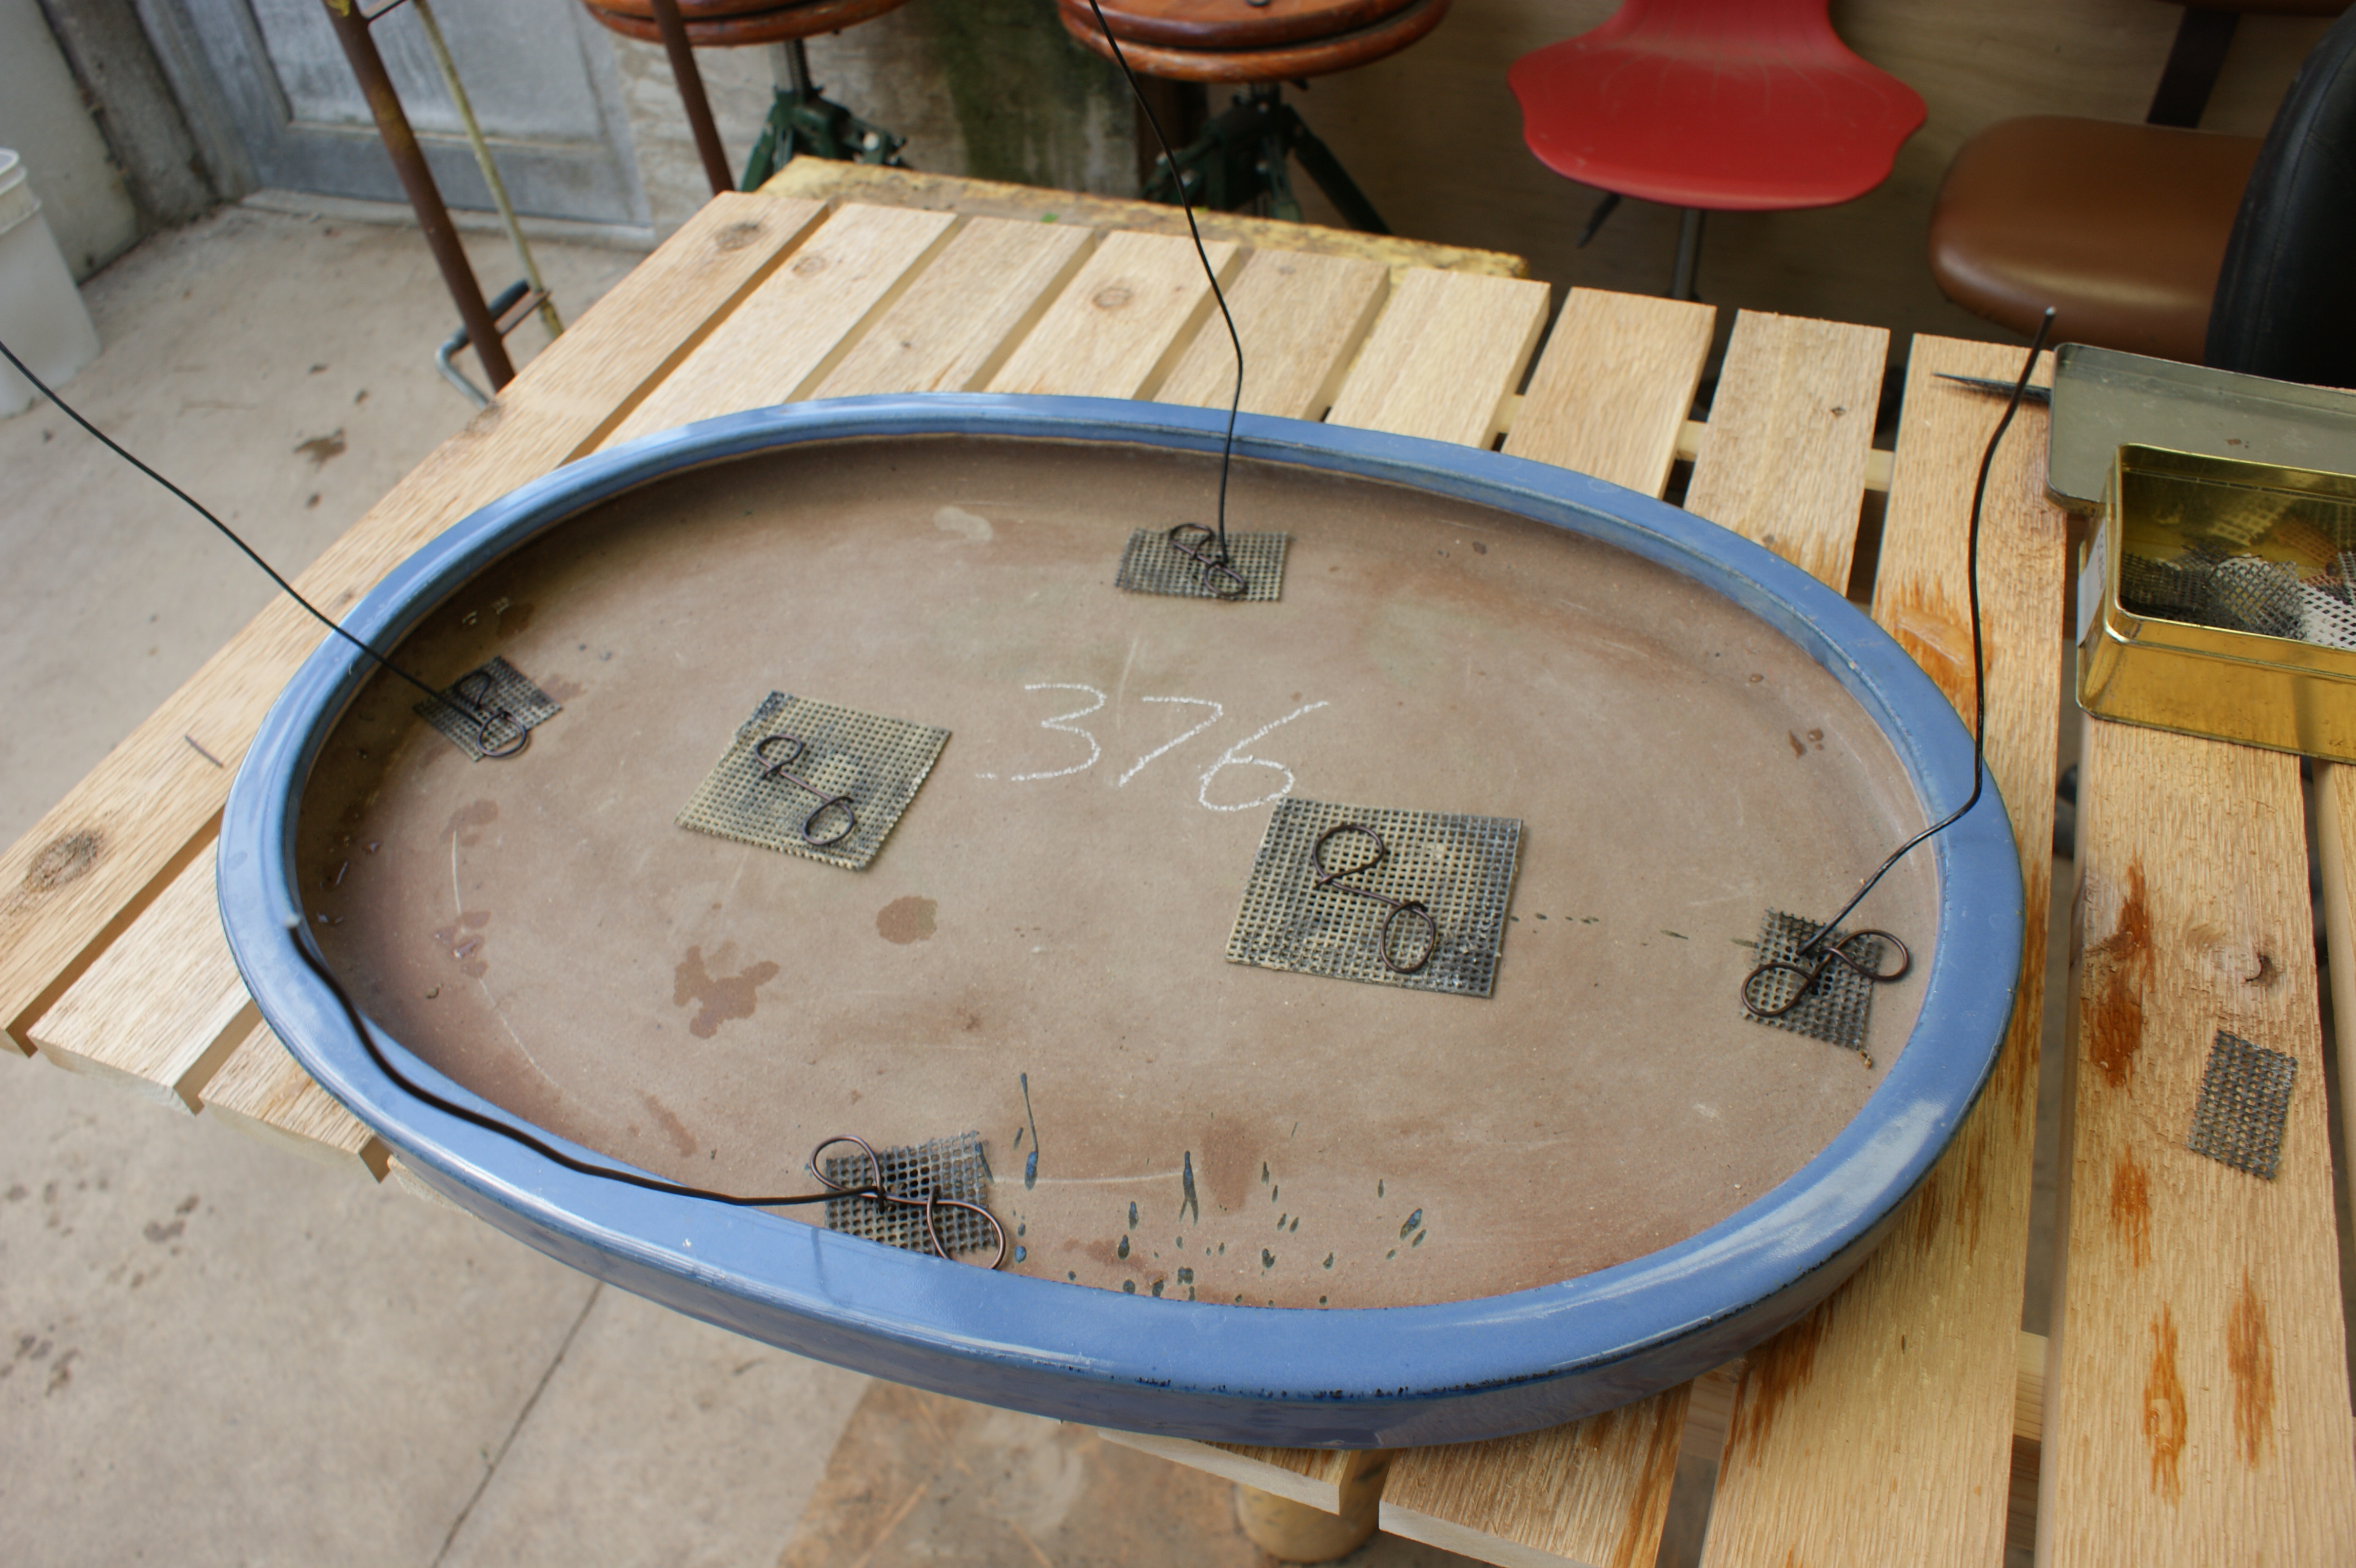
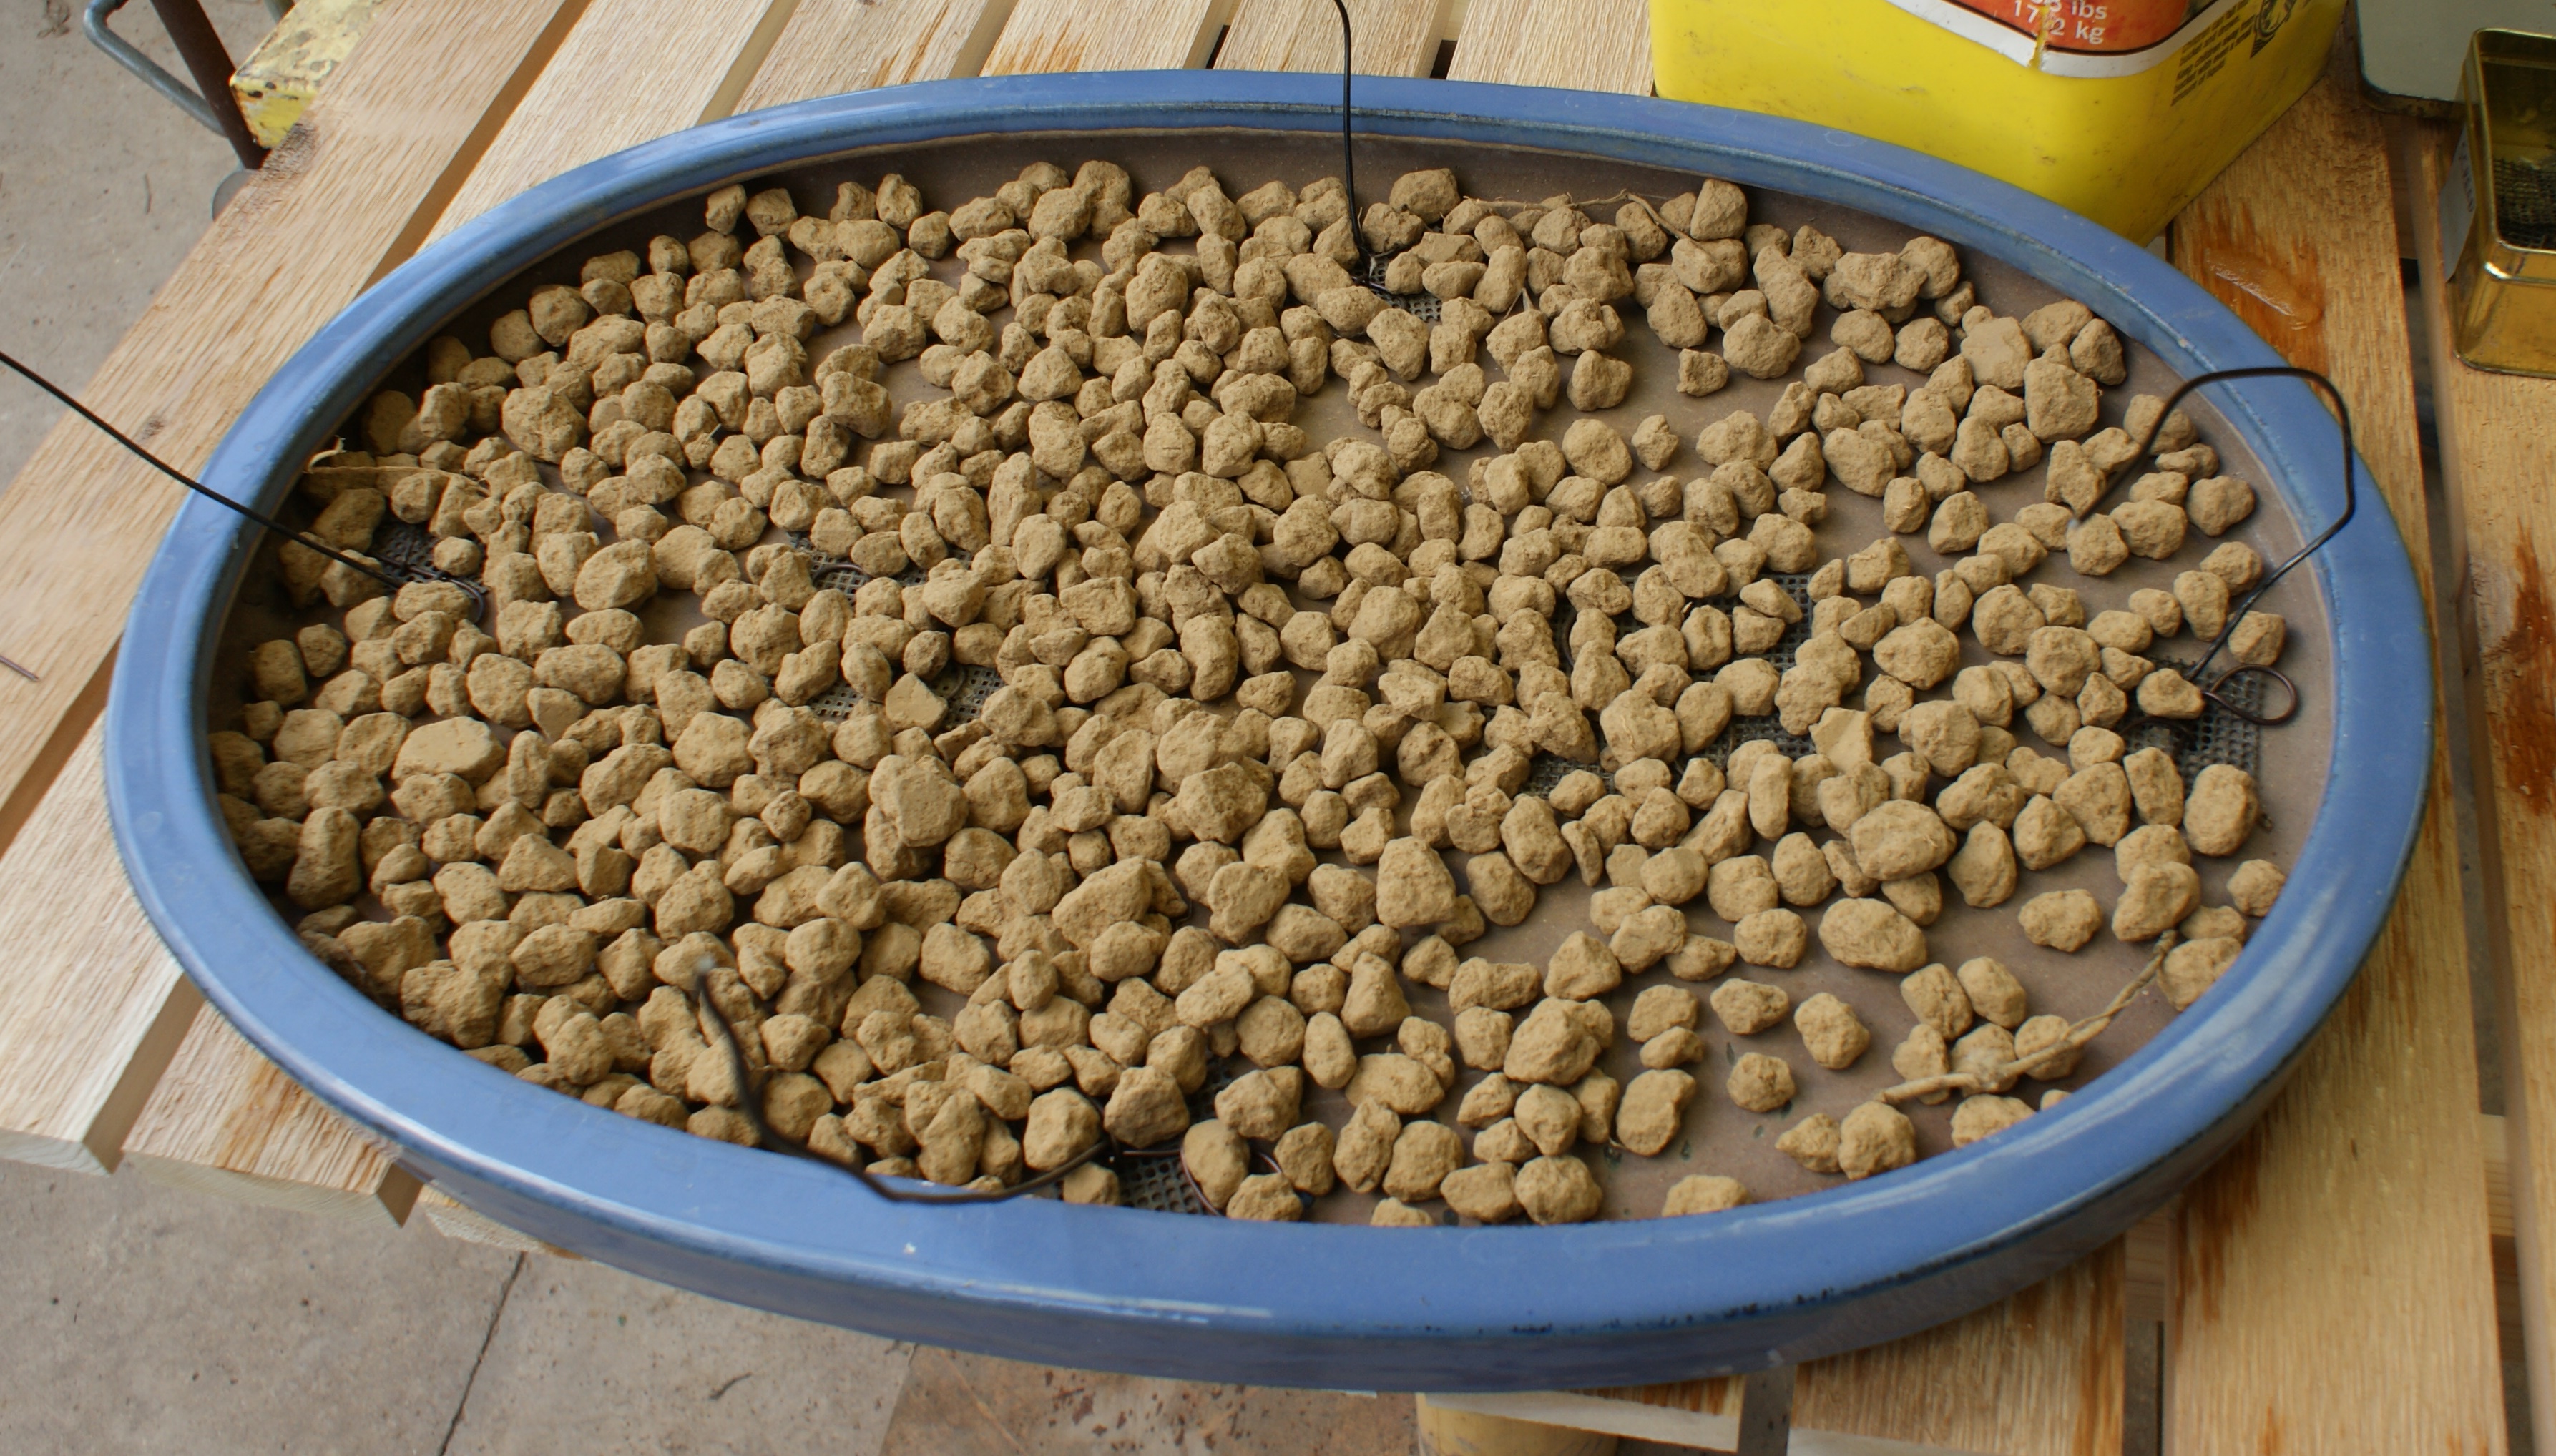
Once the pot has been cleaned, screens have been secured over drainage holes, and tie-down wires have been added, a layer of lava rock is placed to aid with drainage. After the drainage layer is placed, a small amount of soil is added to bring the tree up to grade and help position it in place.

PHOTO: Bonsai pot prepped and ready for drainage.
Fresh mesh and tie-downs have been placed over drainage holes in the pot.
PHOTO: Bonsai pot with drainage layer.
Drainage has been added in a single layer.

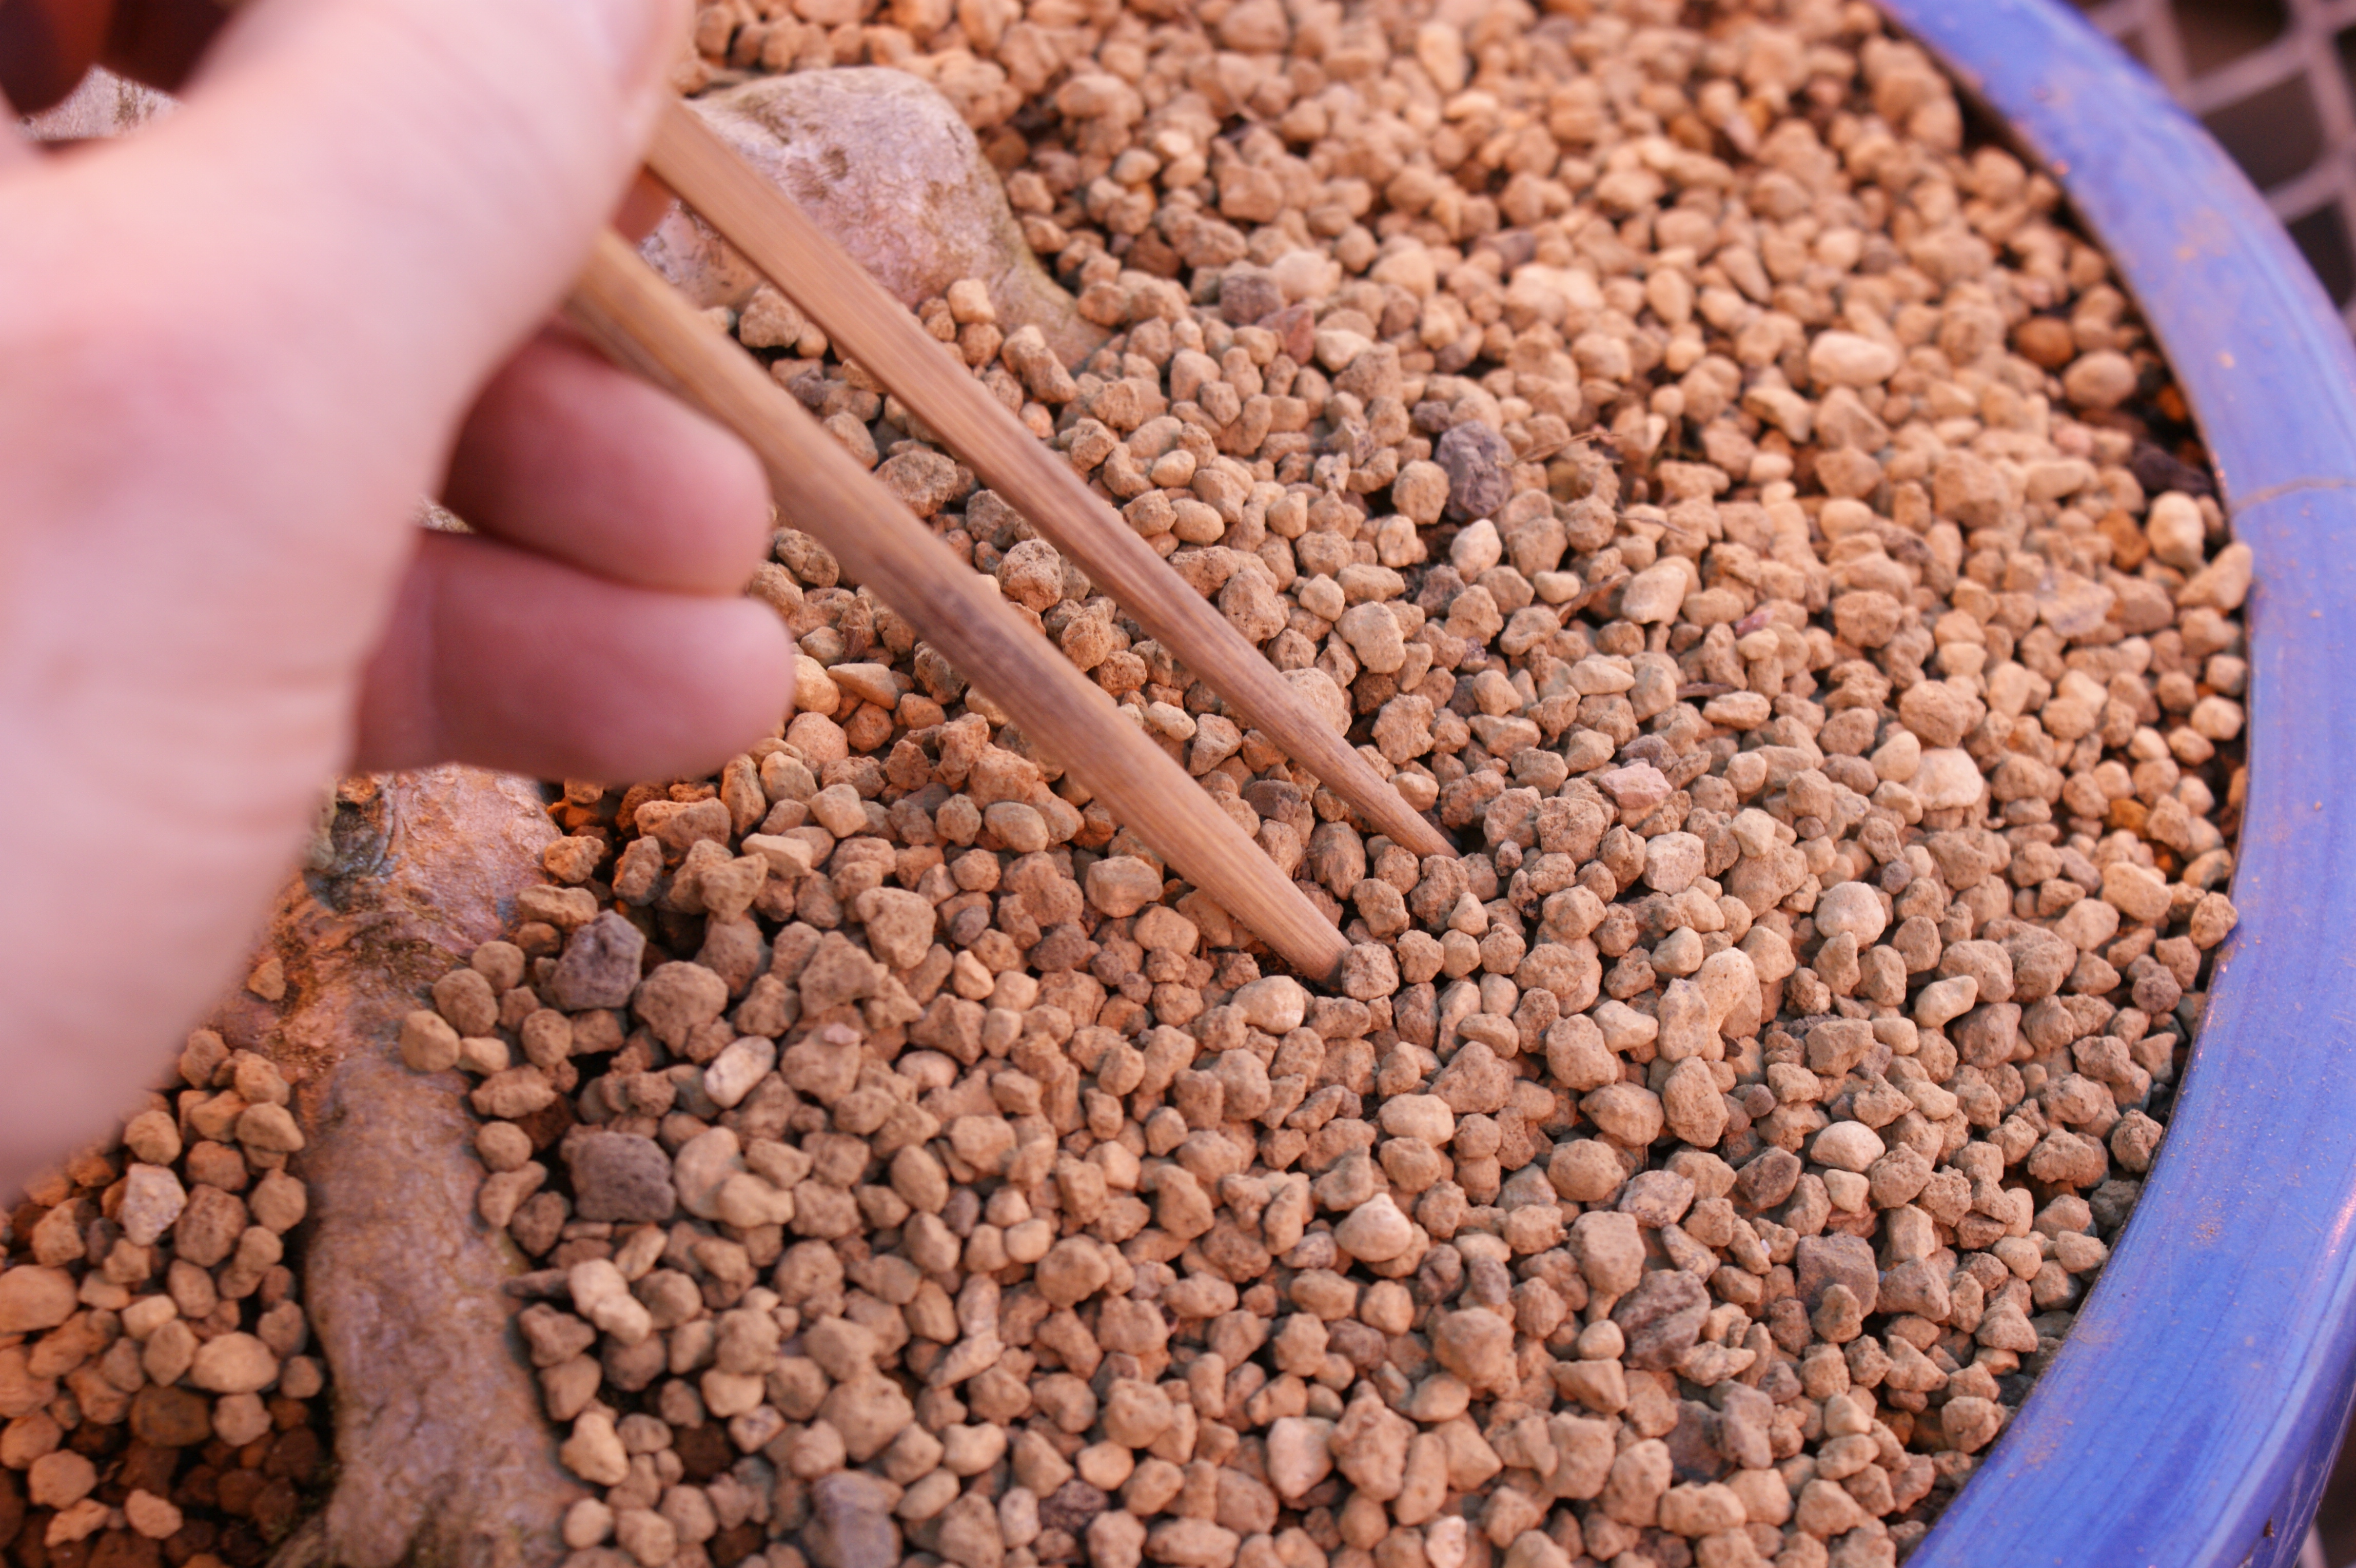
 Once the tree is in place and secured, soil is added and chopsticks are used to push the soil into all the open spaces in and around the root system. Any open gaps left in the pot will result in dead space where roots will not grow. The soil should be firmly in place but not packed too tightly; otherwise, the drainage will be affected, and it will be difficult for roots to grow.

PHOTO: Adding soil to repotted bonsai.
Adding soil to repotted bonsai
PHOTO: Chopsticks are used to push soil into open spaces around roots.
Chopsticks are used to push soil into open spaces around roots.

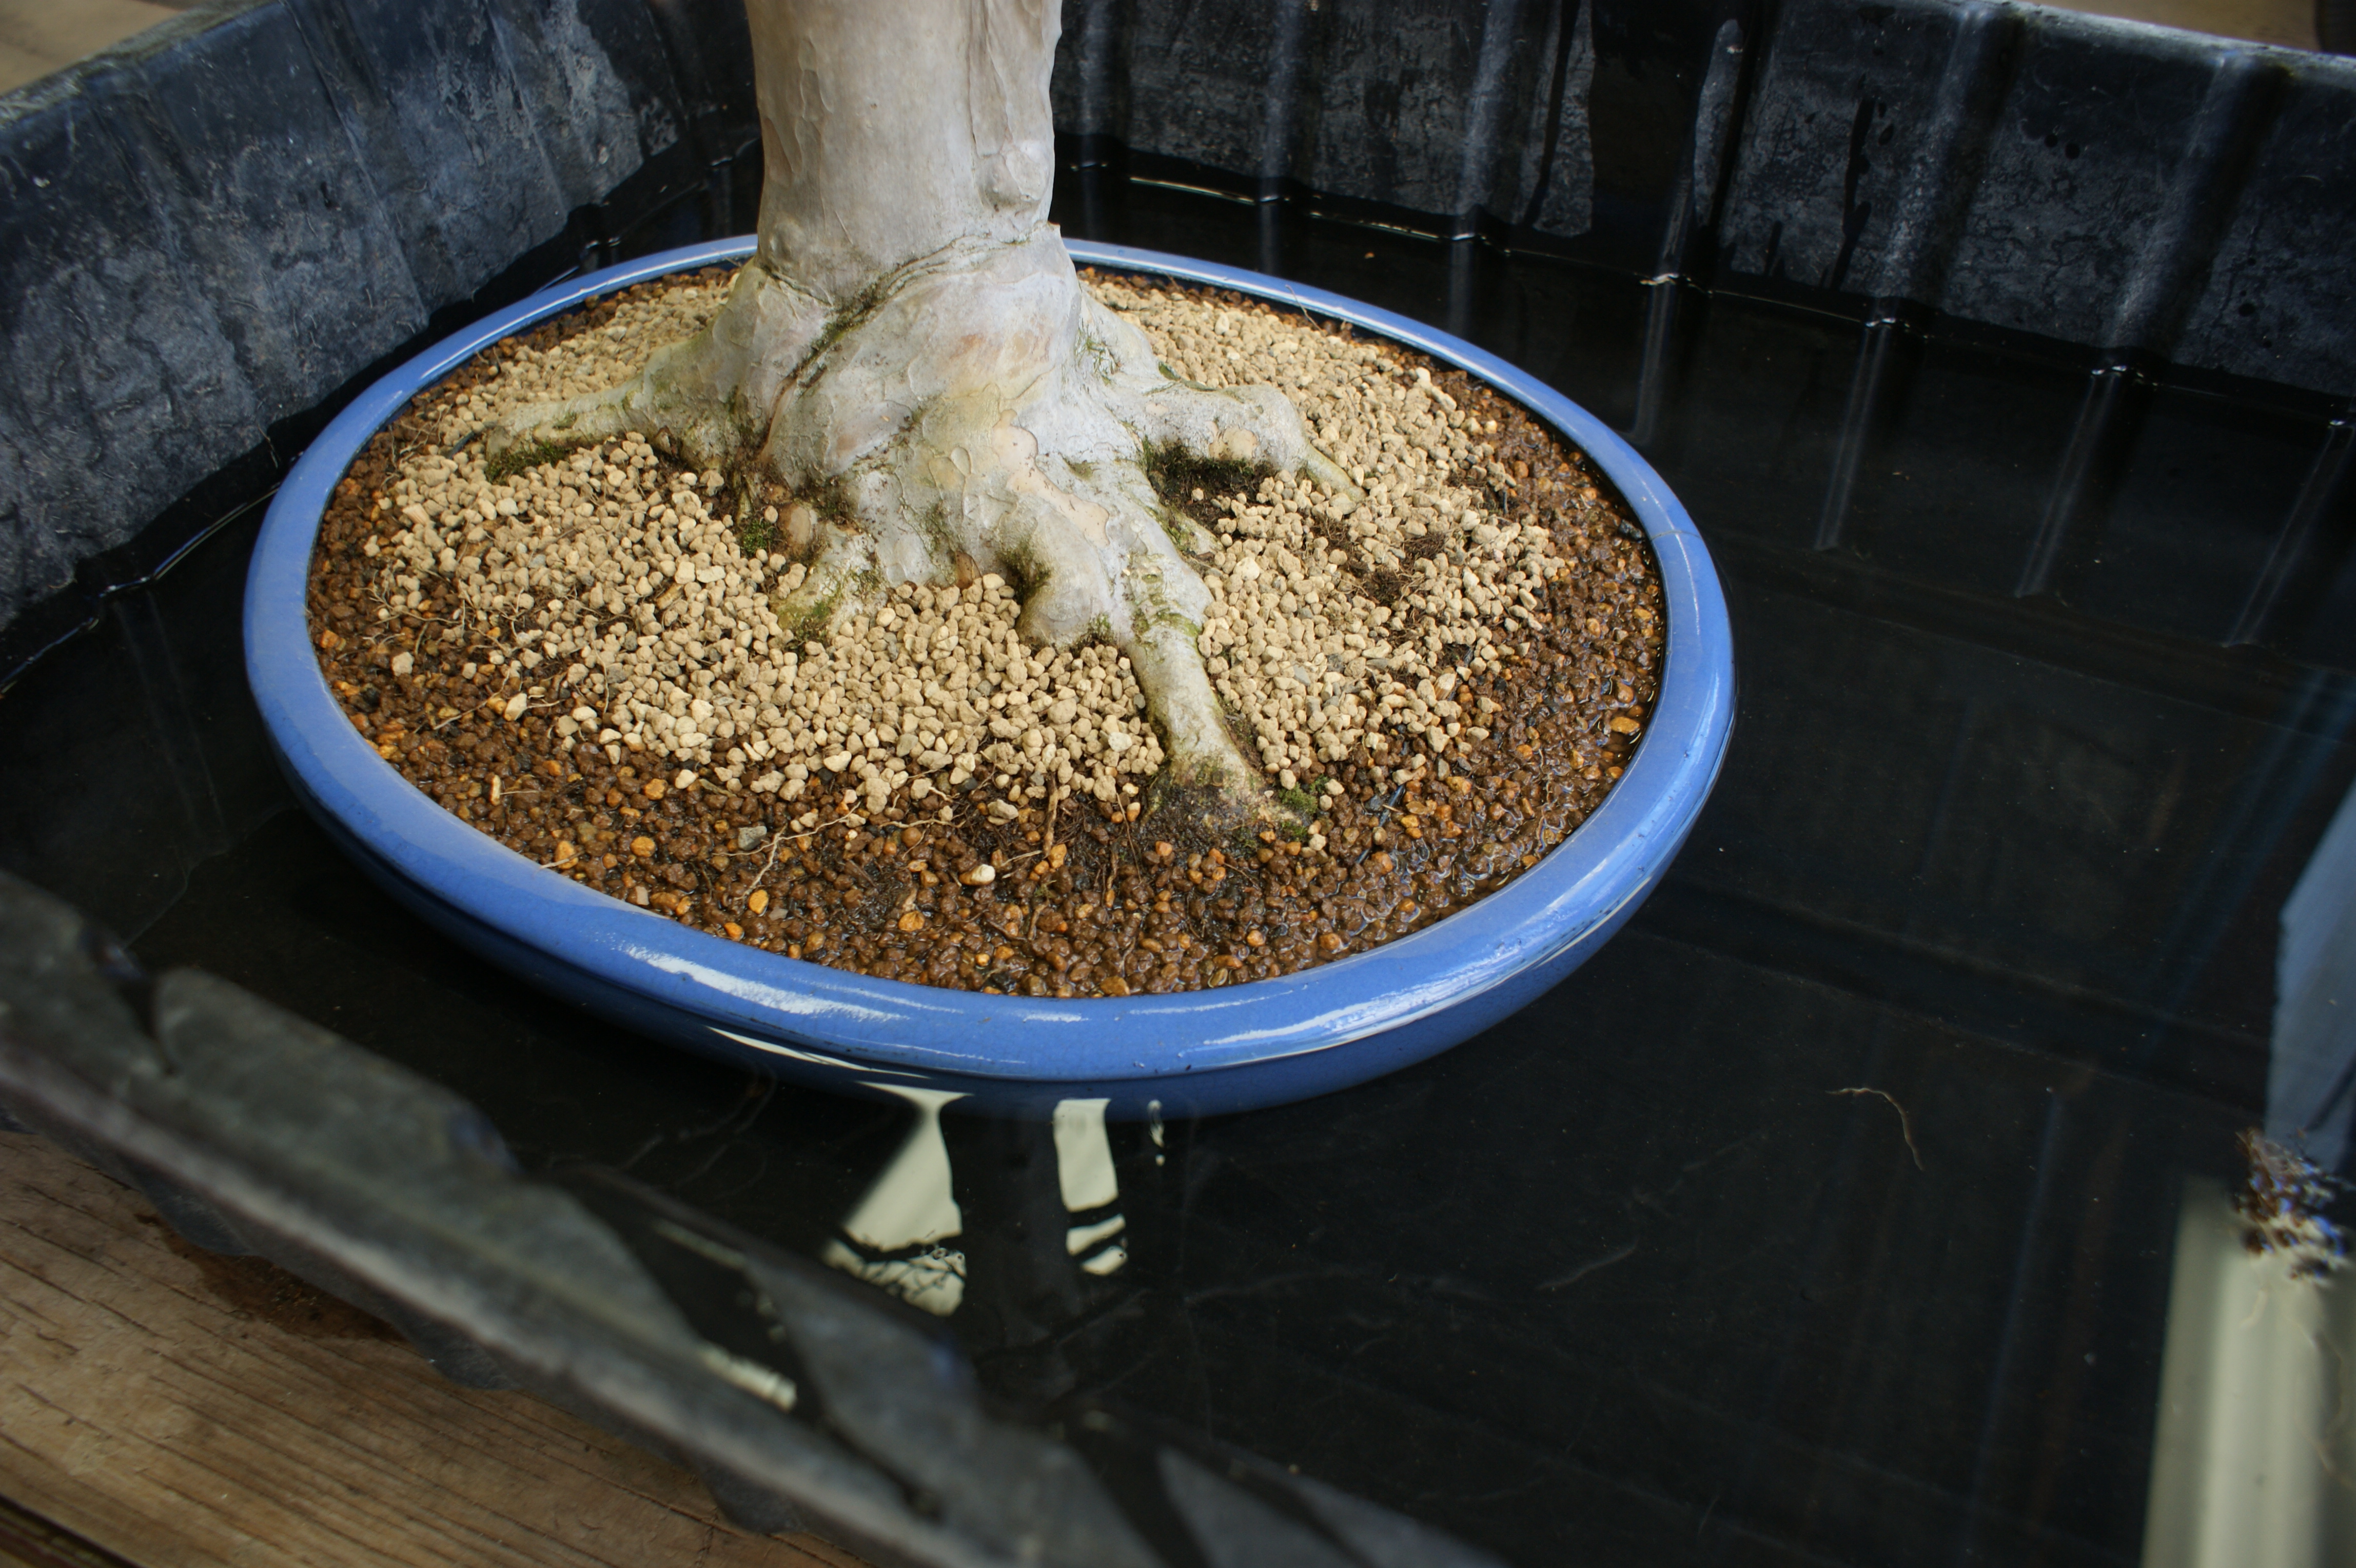
When the soil is set, the tree is soaked in a tub of water and a liquid product called K-L-N, which promotes root growth and reduces stress from the repotting process.

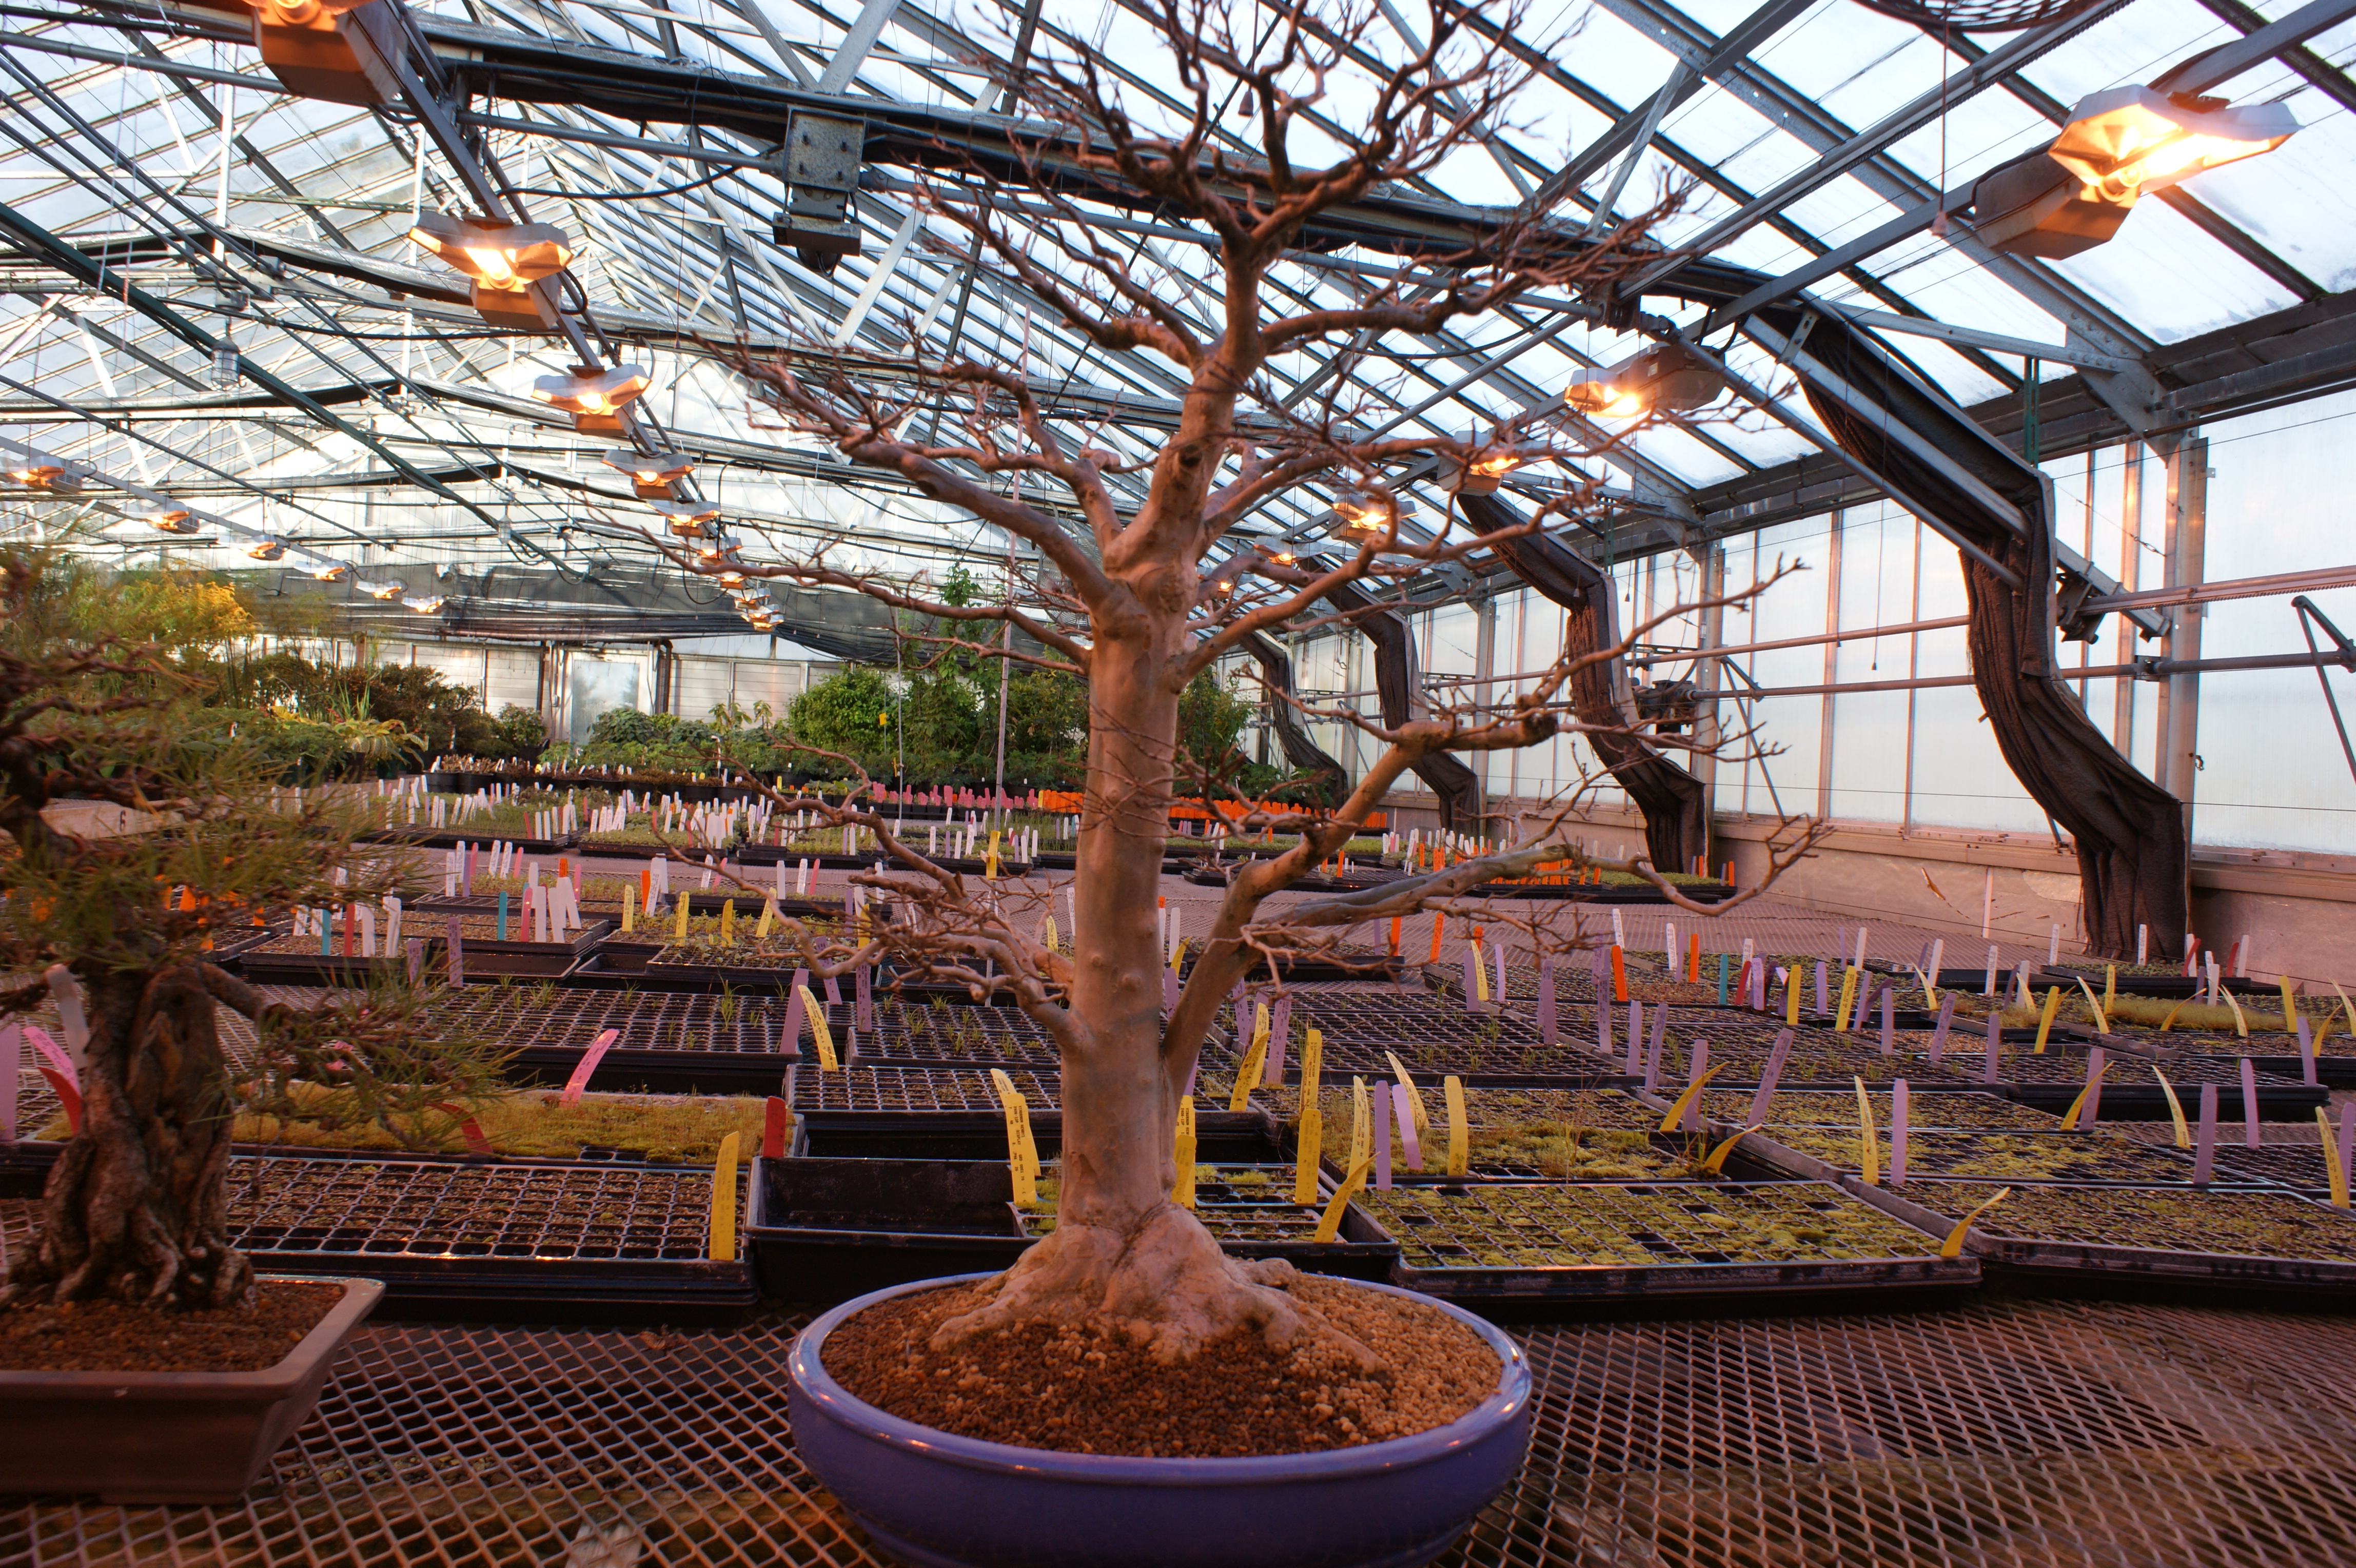
After a good soaking, the tree is removed and allowed to drain, then returned to its bench in the greenhouse. It will remain there until it is warm enough to go outside on the benches. Not all trees are moved to the greenhouse after repotting; most will return to the over-wintering storage. However, this tree was stressed at the end of the growing season, and I wanted to give it a jump-start on the year and give it more time to recover and gain back some of its vigor.

PHOTO: Soaking the repotted bonsai in water and K-L-N.
Soaking the repotted bonsai in water and K-L-N
PHOTO: Bonsai "benched" in the greenhouse until spring.
Bonsai “benched” in the greenhouse until spring

In just a couple of weeks, the tree is fully leafed out, and has had a slight pruning to help balance the new growth throughout all the branches.

This tree is just the beginning of a busy repotting season here at the Bonsai Collection. We will most likely be repotting nearly 100 trees this year—nearly half the collection! Thanks for reading, and be sure to look out for more bonsai blogs to come in the months ahead.

PHOTO: A leafed-out bonsai, ready to display for the season.
A leafed-out bonsai, ready to display for the season

Upcoming bonsai events:

Tropical bonsai are installed in the Subtropical Greenhouse: Tuesday, March 31.

Trees return to the Regenstein Center’s two courtyards for the season: Tuesday, April 22.

Join us May 9 for World Bonsai Day demonstrations, and a tour of the courtyards.


©2015 Chicago Botanic Garden and my.chicagobotanic.org

Unfolding the Mysteries of the Ravines

Standing guard along the western shore of Lake Michigan, the ravines are a naturally engineered filtration system from land to water.

Curving up from the flat lands of Illinois and arching alongside the coast into Wisconsin, their hills and valleys are filled with an abundance of foliage, plants, and animal life unlike any other ecosystem in the Chicago Wilderness region. Among other benefits, they help to filter rainwater. Rare plants, migratory birds, remnant woodlands, and fish are a part of this shadowed world that has long been entrenched in mystery for local residents and scientists alike.

As urbanization, erosion, increasingly intense weather events, and invasive plants begin to peel away at the perimeter of the ravines, it has become increasingly urgent for us to unwrap those mysteries and help protect the system that has long protected us.

New volunteers are welcome to dig in this spring and summer. Register to begin by attending a new volunteer workshop.

Volunteers and staff sample vegetation along a bluff transect at Openlands Lakeshore Preserve.

“The ravines are one of Illinois’s last natural drainage systems to the lake,” said Rachel Goad, manager of the Chicago Botanic Garden’s Plants of Concern program. “They are delicate landscapes. It can be challenging to get in to them. It can be challenging to move around on the steep slopes.” Those challenges have not deterred Goad and a team of citizen scientists from digging in to look for solutions.

For 15 years, the many contributors to Plants of Concern have been collecting data in the ravines, with a particular focus on the rare plant species that can be found there. The data, now quite valuable due to its longevity, is a treasure chest for land managers and others who are trying to better understand the system and how to save it.

Goad and her team are now in the final stages of testing a vegetation assessment connected to a virtual field guide for the ravines. She hopes it will be completed by the end of this year. Its purpose is to serve as a resource for ravine restoration and management long term. The plant-focused sampling method, called a rapid assessment, is the third piece of a larger ravine-management toolkit that includes a way to evaluate erosion and stream invertebrates considered to be indicator species. The toolkit has been assembled by Plants of Concern and partner organizations in recent years.

“The idea is that a land manager or landowner could pull these tools off of the Internet—there would be data sheets and an explanation for how to use them, and these resources would provide a practical, tangible way for people to better understand the ravines,” explained Goad. She and her volunteers will test the protocol this summer, as they meander through the ravines with their notebooks, cameras, and GPS mapping equipment in hand. What they learn could benefit managers trying to determine whether to focus on vegetation management or restoring the stability of a ravine, for example. The toolkit, according to Goad, “is complementary to restoration and understanding these plant communities.”

The data, however, is only one piece of the solution. Goad believes the connections people make when monitoring the ravines are what will impress upon them the significance and urgency of the issue. Her goals are to create connections between people and their local natural communities, and to engage a more diverse representation of volunteers in the program.

“What Plants of Concern is doing is engaging local citizens, introducing them to ravines, and getting them interested in what’s happening in these mysterious V-shaped valleys around them,” said Goad.

In all, Plants of Concern monitors 288 species across 1170 populations in 15 counties, covering 13 habitat types.

Rachel Goad monitors rare plants in a ravine.

Goad hopes that by growing connections between these ravines and those who live nearby, she can increase the chances that this system will continue to protect rare plant species and one of the largest sources of drinking water in the world. As a recent recipient of a Toyota TogetherGreen Fellowship, administered by Audubon, Goad is intent on better understanding how to build such connections.

“We are working to make connections between monitoring and stewardship,” she said. “Monitoring can be a transformative experience.” Once a volunteer is in the field, navigating the terrain and gaining familiarity, they learn to see existing threats, such as encroachment by invasive species. Documenting these threats is important, but can feel disempowering if they’re not being addressed. Goad wants to show volunteers that there is something that can be done about the problems they encounter, and build a proactive understanding of conservation. “I believe in citizen science, which is the idea that anybody can do science and get involved in research,” she said.

Goad stepped in as manager of Plants of Concern just last year, after earning her master’s degree. It was like returning home in some ways, as she had previously helped to manage natural areas at the Garden.

In part because of that initial experience, “I knew I wanted to work in plant conservation,” she said. “It felt pretty perfect to get to come back and work with Plants of Concern. It’s an amazing experience to live in Chicago and to be able to work in some of the most beautiful natural areas in the region.”

Early spring ephemerals in bloom on a ravine bluff.
Early spring ephemerals bloom on a ravine bluff.

Plants of Concern has been a mainstay at the Garden for 15 years, dispatching committed volunteers to the ravines and other key locations across the Chicago Wilderness region to monitor and collect data on endangered, threatened, and rare species. The mounting data collected by the program is often used as baseline information for shifting or struggling species, and is shared with land managers. Through special projects, such as with one of the Garden’s recent REU interns, they have also contributed to habitat suitability modeling for rare species.


©  Chicago Botanic Garden and my.chicagobotanic.org

Hail to the Queen of Flowers

As the first day of summer approaches, the Krasberg Rose Garden begins a show of flowers like none other.

More than 5,000 roses begin to unfurl countless buds in myriad colors that gradually fill the air with delicate, sweet scents. Dedicated in 1985, the Rose Garden is home to 200 varieties of roses that include old garden roses (also called antique or heirloom roses), hybrid tea roses, floribundas, miniatures, grandifloras, climbers, shrubs, and several other types.

PHOTO: Singin' in the Rain floribunda rose (Rosa 'MACivy')
Singin’ in the Rain™ floribunda rose (Rosa ‘MACivy’)

A focal point among the roses is an impressive fountain designed in the shape of a Tudor rose (see lore, below). Amble along the curving path through the three-acre garden and you’ll discover some of the more than 34,000 other plants—trees, shrubs, and perennials—that enhance the Rose Garden’s overall design. Nearby (technically outside the parameters of the Rose Garden) is the History of Roses Bed, boasting a rose collection that spans antique varieties, from the earliest wild rose to modern hybrids. Newer All-America Rose Selections winners are also on display.

“I hope visitors view the garden for the aesthetic experience it is—the way it looks and smells,” said Tom Soulsby, the senior horticulturist who oversees the Rose Garden. “There’s probably a rose for everybody and every place.”

PHOTO: Walking on Sunshine floribunda rose (Rosa 'JACmcady')
Walking on Sunshine™ floribunda rose (Rosa ‘JACmcady’)

Besides their incredible beauty and an abundance of blossoms, many of the roses on display were chosen for their hardiness, disease and insect resistance, long period of bloom, and low maintenance requirements. “There’s not a lot to fear when it comes to growing roses,” said Soulsby. He aims to educate gardeners and demystify rose care.

Rose maintenance—pruning, removing spent blooms, mulching, and monitoring for disease and insects—is a collaboration among Soulsby, other garden staff, and volunteers. “We take the most environmentally friendly means of dealing with insects and disease, and sometimes that means doing nothing,” Soulsby said. “One of our objectives is to minimize the use of chemicals. The volunteers are trained to look for things that might need to be addressed. Sometimes it involves handpicking Japanese beetles to get rid of them or handpicking leaves with black spot if the problem is small. If fungus is prevalent, we’re careful about sanitizing our tools with disinfectants so it doesn’t spread from one plant to another.”

The roses receive a water-soluble fertilizer in summer, which is important because each plant spends a lot of energy creating blooms. Deadheading—removing the spent flowers—is also done during summer. “That encourages roses to repeat bloom. If you don’t deadhead them, they form hips,” Soulsby said. Hips are the rose fruits that contain seeds and they may be shades of red, orange, purple, or black. The colorful hips provide winter interest and are often enjoyed by wildlife.

Most of the roses are pruned after Thanksgiving, and the crowns of the plants are covered with 2 to 3 feet of composted horse manure (preferred over Styrofoam rose cones) for winter protection. The compost is removed in spring and used as mulch. “It’s a great soil amendment and we spread as much as we can,” Soulsby said.

PHOTO: Black Baccara hybrid tea (Rosa 'MEIdebenne')
Black Baccara hybrid tea (Rosa ‘MEIdebenne’)

Rose Scents
Although their fragrance is sometimes indescribable, many roses, especially old garden varieties grown before 1867, fill the air on warm summer mornings with a variety of scents.

Pop your nose into a rose blossom and you may discover a hint of cloves, anise, citrus, honey, or pears. Or, perhaps one flower reminds you of apricots, while another exudes a trace of lemon. When the tea roses are blooming, you might detect a trace of sweet orange pekoe tea in the air. Like fine wines, roses often feature a fascinating, complex collection of sweet smells.

Rose breeder William Radler is a consulting rosarian for the Krasberg Rose Garden. He developed the wildly popular KnockOut® series of shrub roses, which are also on display. “Will has been breeding roses for our area, along with other breeders, for a long time,” said Soulsby. The rosarian meets annually with Soulsby and other Garden staff to review the rose collection. This year, Radler will receive the 2015 Hutchinson Medal, which recognizes “outstanding leadership or professional accomplishment that has been significant in furthering horticulture, plant science, or conservation.”

Some of the roses have celebrated a 30-year reign since the Rose Garden opened, but others have been replaced over the years. “We constantly evaluate the rose garden; a plant may not perform to its full potential here. However, the need to change out roses is pretty minimal overall,” Soulsby said. 

Although it’s difficult for him to name favorites, the Mr. Lincoln rose (Rosa ‘Mr. Lincoln’) tops Soulsby’s list. “I tend to favor hybrid tea roses,” he admitted. “There’s also ‘Olympiad’ and ‘Peace’ [see lore, below], but my favorites? It depends on the day.”

Soulsby calls June and September the “rock star” months for the Krasberg Rose Garden. “The best viewing time is around Father’s Day for the first flush of major blooms, and then again in mid-September through early October.” But there’s almost always something interesting to see. Flowering can begin as early as April, and there are even a few blooms in November. Come winter, according to Soulsby, there’s a lot of structural interest with the conifers and shrub roses silhouetted against—or accented with—fallen snow.

Long may the queen of flowers reign!

PHOTO: The Krasberg Rose Garden in summer.
The Krasberg Rose Garden in summer

The Lore of the Roses

In ancient Greek mythology, the goddess Chloris (Roman counterpart: Flora) came upon the body of a lovely wood nymph one day, and asked other gods to help her change it into a flower. Aphrodite donated some of her beauty; the Three Graces bestowed qualities of brilliance, joy, and allure; and Dionysus provided fragrant nectar. When the nymph’s transformation into a flower was complete, Chloris proclaimed it the rose, queen of all flowers.

The rose was said to have bloomed without thorns in the Garden of Eden, but grew them after Adam and Eve were driven out of paradise as a reminder to man of his sinful nature. Inside and outside a religious sphere, roses have represented virginity and purity (white) and passion and martyrdom (red).

During the Middle Ages, the color of roses stood for different heraldic houses, such as the House of Lancaster (red) and the house of York (white), who fought in the War of the Roses (1455–85). At war’s end, after the houses were blended in marriage, a red-and-white striped Tudor rose became the national symbol of England and, eventually, its national flower.

The rose has long featured in literature, from Dante’s Inferno to the sonnets and plays of William Shakespeare, from William Faulkner’s short story A Rose for Emily to Umberto Eco’s novel The Name of the Rose, and many more.

Empress Josephine Bonaparte, wife of Napoleon, in the late eighteenth century sponsored the development of rose breeding at her gardens outside of Paris, where she reigned over more than 250 types of roses.

In World War II, while Americans grew victory gardens, the Peace rose (Rosa ‘Madame A. Meilland’) almost became a casualty when Nazis invaded the Lyon, France, home of breeder Francis Meilland. He smuggled the ivory-yellow hybrid tea rose out of Europe in 1940 to the protection of his business partner, Robert Pyle, of West Grove, Pennsylvania. Pyle continued its propagation, introducing the rose to the public at war’s end. The enduringly popular Peace rose is arguably the most popular in the world today.


This post was adapted from an article by Nina Koziol that appeared in the spring 2015 edition of Keep Growing, the member magazine of the Chicago Botanic Garden.

©2014 Chicago Botanic Garden and my.chicagobotanic.org

Our Scientist Takes on Thomas Jefferson

Hear “vanilla” and what’s the first thing that comes to mind?

Ice cream, right?

While we were researching vanilla for our annual Orchid Show, we kept discovering new scoops on vanilla ice cream.

PHOTO: Plain vanilla ice cream cone.First we learned that one-third of all the ice cream that Americans eat is vanilla.

Next, we learned about vanilla beans’ different flavors—at a tour of the Nielsen-Massey Vanillas facility in nearby Waukegan. (Who knew that vanilla extract was produced right here in Chicago?)

And then we came across Thomas Jefferson’s handwritten recipe for vanilla ice cream at the Library of Congress—such a beautiful document that we included a copy of it in the Orchid Show. (The knowledgeable staff at the Library of Congress pointed out that there’s a second recipe on the back of Thomas Jefferson’s vanilla ice cream notes—for the Savoy cookies to accompany it.)

All those moments dovetailed nicely when our own orchid expert, Pati Vitt, Ph.D., got inspired to make her own homemade vanilla ice cream. Naturally, as a scientist, she set herself a bigger challenge: to tackle Jefferson’s thorough (albeit old-fashioned) recipe, using three different types of vanilla beans kindly provided by Nielsen-Massey.

We had to document Dr. Vitt’s ice cream-making adventure: see how she interpreted Jefferson’s recipe—and what three guest chefs/tasters had to say about the flavor—in our video (view on YouTube).

PHOTO: Jefferson's vanilla ice cream recipe: Holograph, 1780s. Manuscript Division, Library of Congress.
Holograph recipe, 1780s. Manuscript Division, Library of Congress Bookmark this item

Thomas Jefferson’s Ice Cream

(Jefferson’s lovely script can be hard to decipher, so here’s the recipe’s text in full.)

2 bottles of good cream
6 yolks of eggs
½ pound sugar

  • mix the yolks & sugar
  • put the cream on a fire in a casserole, first putting in a stick of vanilla.
  • when near boiling take it off & pour it gently into the mixture of eggs & sugar.
  • stir it well.
  • put it on the fire again stirring it thoroughly with a spoon to prevent it’s [sic] sticking to the casserole.
  • when near boiling take it off and strain it thro’ a towel.
  • put it in the sabottiere*
  • then set it in ice an hour before it is to be served. put into the ice a handful of salt.
  • put salt on the coverlid of the Sabottiere & cover the whole with ice.
  • leave it still half a quarter of an hour.
  • then turn the Sabottiere in the ice 10 minutes
  • open it to loosen with a spatula the ice from the inner sides of the Sabottiere.
  • shut it & replace it in the ice
  • open it from time to time to detach the ice from the sides
  • when well taken (prise) stir it well with the Spatula.
  • put it in moulds, justling it well down on the knee.
  • then put the mould into the same bucket of ice.
  • leave it there to the moment of serving it.
  • to withdraw it, immerse the mould in warm water, turning it well till it will come out & turn it into a plate.

*Footnote from the Library of Congress: A “sabottiere” is an ice cream mold (“sorbetière” in modern French).

Vitt’s notes:

  • You can use the recipe without modification, just cooling the mixture in an ice bath and then in the refrigerator overnight.
  • Freeze according to your ice cream maker’s instructions.
  • One tablespoon of vanilla extract may substitute for the vanilla bean.
  • The recipe makes about 4 pints (2 quarts, or one ½ gallon).

BONUS RECIPE!

Ice cream wasn’t the only vanilla treat on Vitt’s mind: she also canned a batch of vanilla spice apple butter (we shared it in a meeting—delicious!) and made her own vanilla sugar. Vitt agreed to share her recipe—and presented it all so charmingly, with handcrafted labels, trims, and tags, that we had to include a photo, too. 

Vanilla Spice Apple Butter

PHOTO: Pati Vitt's vanilla apple butter.
Vitt not only agreed to share her recipe for vanilla apple butter with us—but presented it all so charmingly, with handcrafted labels, trims, and tags.

Wash, core, and slice 8 to 12 apples (Granny Smiths, or a mix of varieties) to fill a 6-quart crockpot to about 1½ inches from the top; add ½ cup of apple cider. Cook until completely soft—about the consistency of apple sauce.

Using a food processor, sieve, or Foley mill, puree the sauce. Put the mixture back into the crockpot, along with half of a fresh vanilla bean. Cook several hours on the “low” setting of your crockpot until the extra liquid cooks off and the mixture begins to thicken. (Place the lid of your crockpot slightly off kilter to allow steam to escape. This will speed up the evaporation and thickening of the mixture.)

After the apple butter begins to thicken, add ½ cup sugar and the juice of one lemon. Cook an additional 30 minutes. Stir in cinnamon to taste, plus a pinch each of ground cardamom and cloves. 

Pour into hot, sterilized jars and place in a canning bath according to your canner’s recommendations for applesauce—usually about 10 minutes.

For more ideas—sweet and savory—for cooking with vanilla, check out our February issue of the Smart Gardener.


©2015 Chicago Botanic Garden and my.chicagobotanic.org