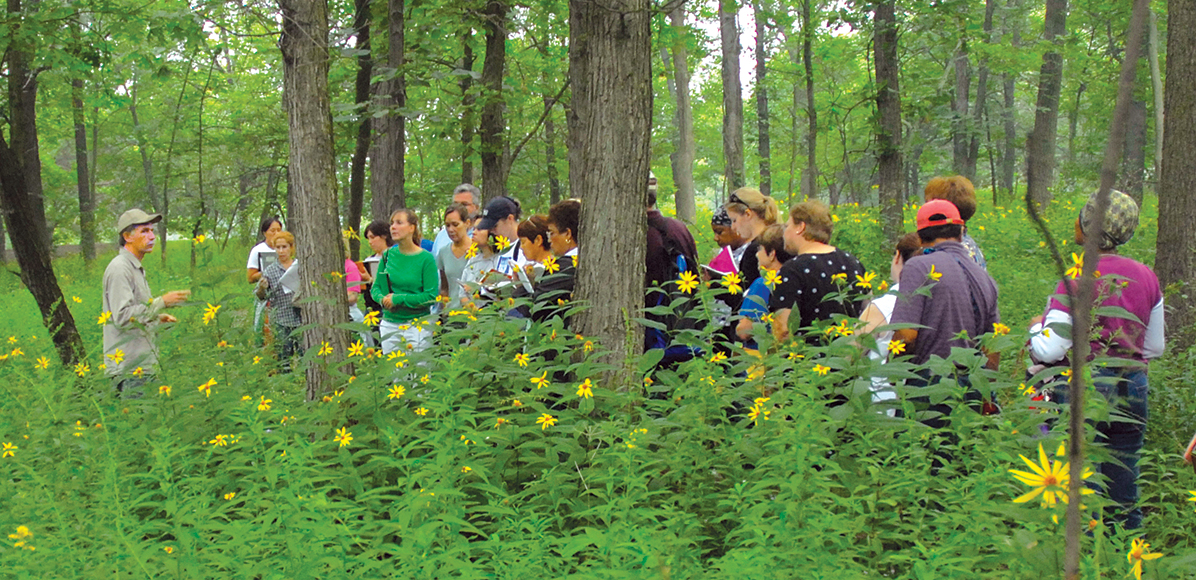
Let me start by expressing how pleased I am to represent the Regenstein School’s Adult Education department at the groundbreaking ceremony for your new Regenstein Foundation Learning Campus.
Six years ago, in the great recession of 2008–09, I found myself in a big predicament: I was suddenly downsized from my longtime career managing finances and employees for a large retailer. What I had was a home with a landscape plan inspired by countless visits to the Chicago Botanic Garden, a growing enthusiasm for garden design based on a few classes I had taken at the Garden, and years of experience in business. I didn’t know it at the time, but I was on the brink of a new career path that would combine my business skills with my passion for plants and people, and lead me to my dream job.
Kerry Stonacek in his garden
So I made a full commitment to building my plant knowledge and garden design skills through the Regenstein School’s certificate programs. Going back to school after 35 years in the business world? Scary? Yes, but what fun! I took a total of 37 in-depth courses in less than four years covering four separate certificate programs—Professional Gardener Level 1 & Level 2, Ornamental Plant Materials, and the Garden Design Certificate. What I experienced here at the Garden were great class selections, professional instructors who were just downright nice, stellar facilities, and a beautiful outdoor living classroom that doesn’t get any better. As someone who knows the value of money, I understood that my education at the Garden was a really sound investment on many levels.
That dream job? I am general manager of retail operations at Chalet Nursery and Garden Center in Wilmette. The Regenstein School classes I attended highlighted practical application, and my passion came back full circle to focus on employee development. At Chalet, we are improving the experiences of both our customers and employees at work through training, and we encourage our associates to enhance their knowledge base by taking programs at the Garden. I get the opportunity to engage with new Regenstein School students, and even offer them employment opportunities at Chalet. Meanwhile, I am still friends with many fellow certificate graduates and instructors.
Students make amazing discoveries about plants and nature in a host of certificate programs offered at the Garden.
I believe that passion ultimately can win. It has brought me career satisfaction, friendships, and the opportunity to help others make a difference in their lives. In closing, and on behalf of present and future students, I’d like to thank the Chicago Botanic Garden and everyone who made this new campus possible. The future is full of possibilities!
Plant, water, and grow! Whether you are a parent, teacher, or caregiver, teaching children to plant seeds is a simple and authentic way to help them engage with nature. It’s an activity that the littlest of sprouts can do “all by myself,” or at least with minimal help from you.
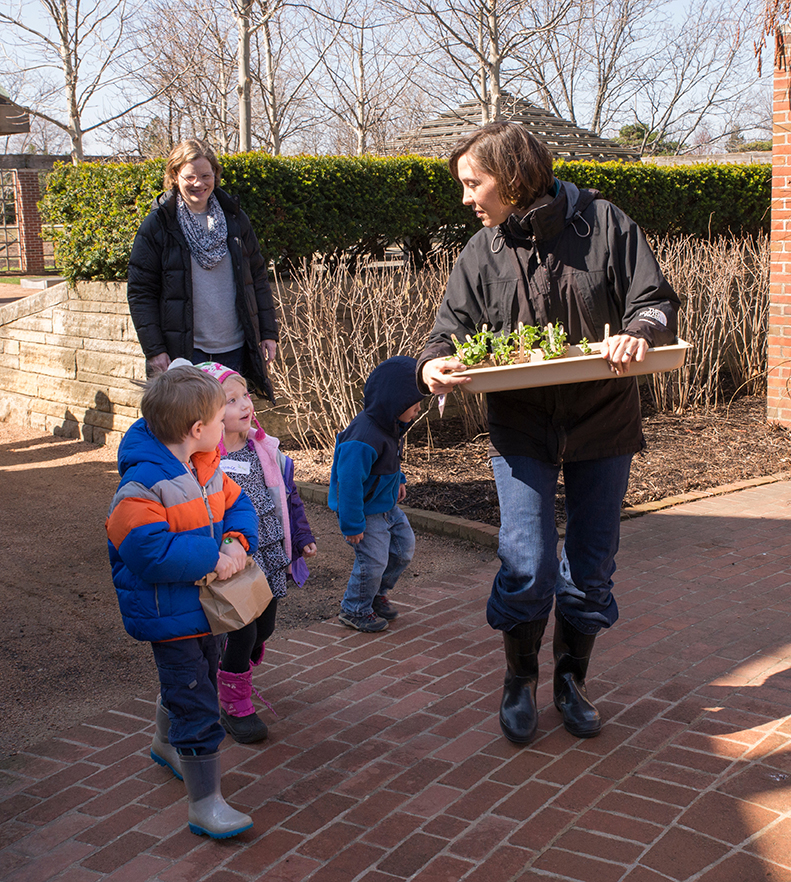
Growing future gardeners in the Regenstein Fruit & Vegetable Garden
Planting seeds leads to discussions about what seeds and plants need to grow and how food gets to our tables. Watering is a simple chore young children are capable of doing; it teaches them about responsibility and helps them feel they are making a contribution to the family or classroom.
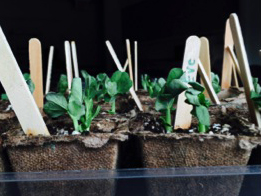
Students from our Little Diggers class, ages 2 to 4, planted peas indoors in mid-March and transplanted them outside into the raised beds in the Regenstein Fruit & Vegetable Garden in mid-April. Come follow the steps we took to get there.
March: Planting the Pea Seeds Indoors
Supply List:
Seeds
Soilless potting mix or seed-starting potting mix in a wide-mouth container
Plant pots (plastic or biodegradable, roughly 2.5 inches in diameter)
Trowels, spray bottles, or watering cans
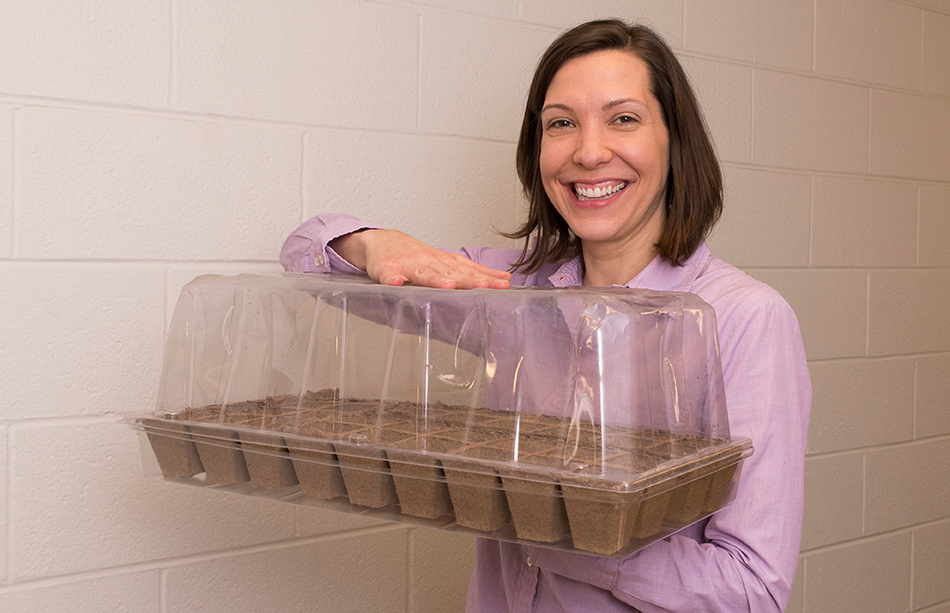
Plastic seedling tray with lid
Set-up Time: 10 minutes
Activity Time: 10–40 minutes of actual planting (depending on the size of the group)
Appropriate for Ages: 2 and up
Clean-up Time: 10–15 minutes
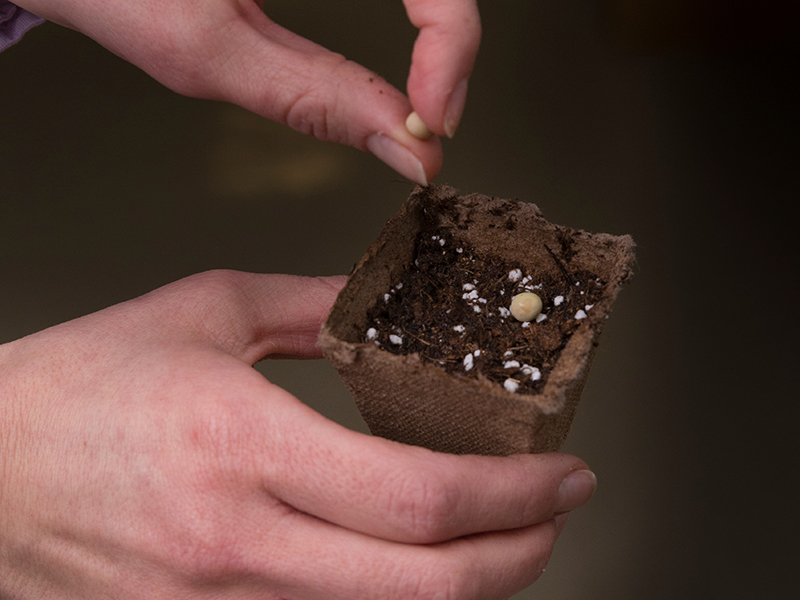
Large pea seeds are easy for small fingers to grasp.
Here I am modeling the latest in seedling trays. You can purchase these and our other supplies at your local garden center or home improvement store.
Select seeds that are big—the smaller the hands, the bigger the seed should be—and quick to sprout, or germinate. Also consider the amount of space the mature plants will occupy, and the time of year you are planting. Some seeds can be planted during the cool spring, while others should go in the ground once the threat of frost has passed.
We chose ‘Tom Thumb’ pea seeds because they are large enough for little hands to easily manipulate, they germinate in 7–14 days, they thrive in the cool spring weather, and they only grow to be 8 inches tall and 8 inches wide, making them great for small-space gardens and containers.
Tip: Some other large seeds suitable for little hands are sunflowers, beans, nasturtium (edible flower), pumpkin, and other squash. For more details about how and when to plant these seeds visit www.kidsgardening.org/node/101624.
A low, wide trug full of soil makes filling pots easy for younger gardeners.
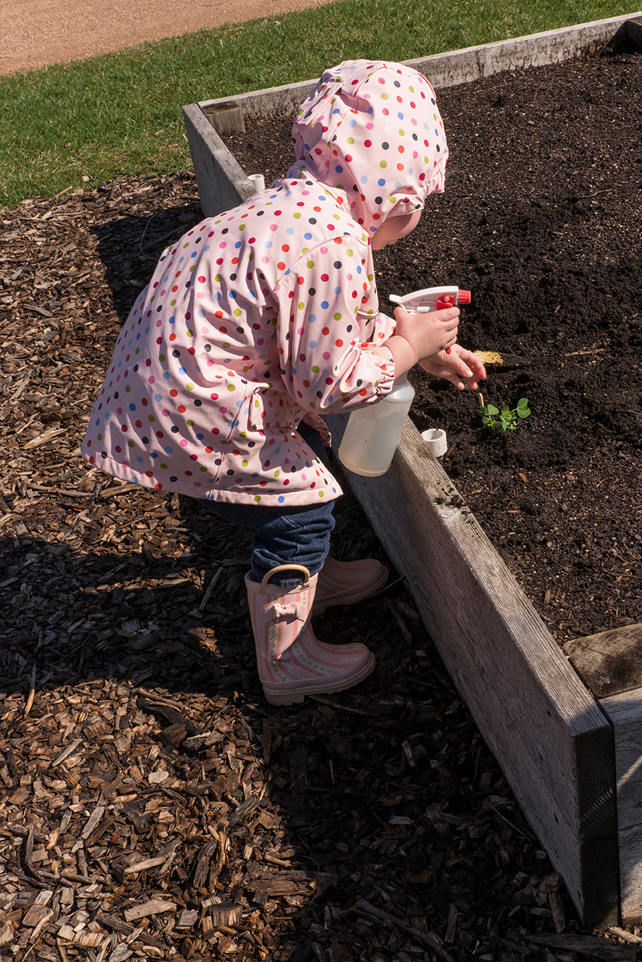
Watering in the seeds is the best part of planting.
Set out the potting mix in a wide-mouth container such as a flexible plastic tub, sand bucket, or cement mixing tray on the ground. Have trowels, pots, seeds, and spray bottles ready.
Tip: A soil container with a wide opening will lead to less soil on the ground. Also, more children will be able to plant at the same time.
Using a trowel, fill the pot with soil. Set two pea seeds on the soil and push them down ½- to 1-inch deep. Then cover the seeds with soil. Spray with a spray bottle until the soil is saturated.
Tip: Planting depth will depend on the type of seeds you are planting. Read the back of the seed packet for details.
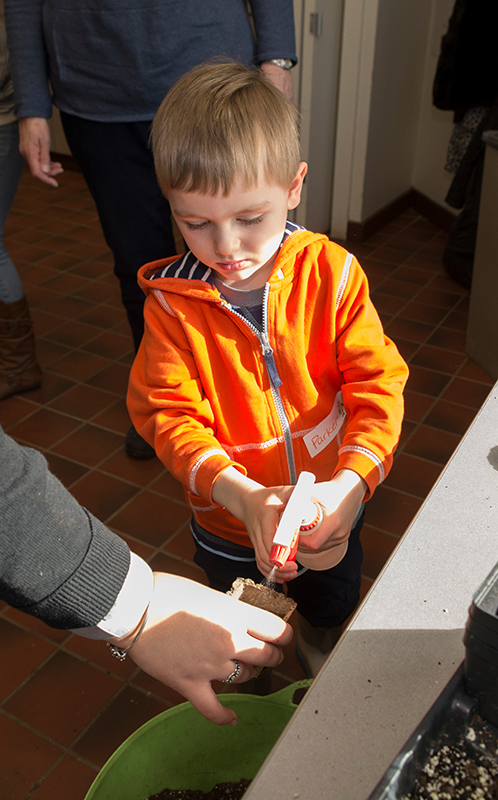
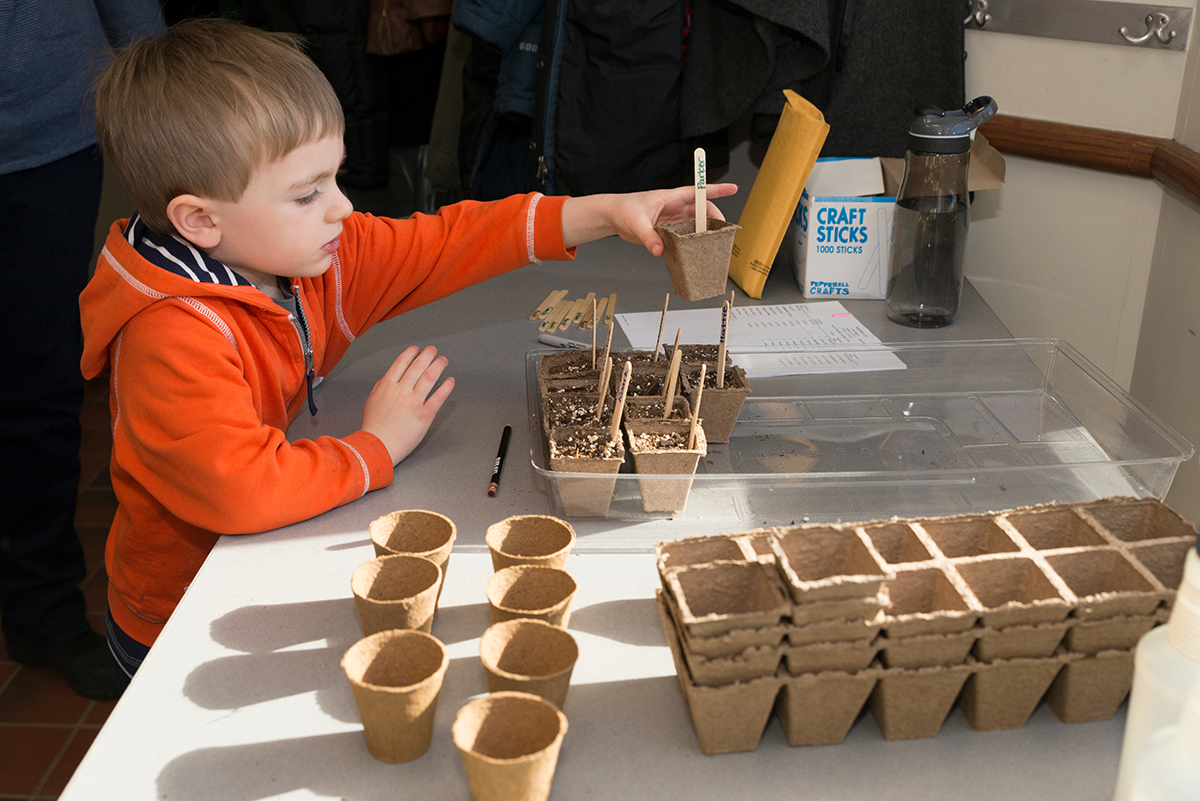
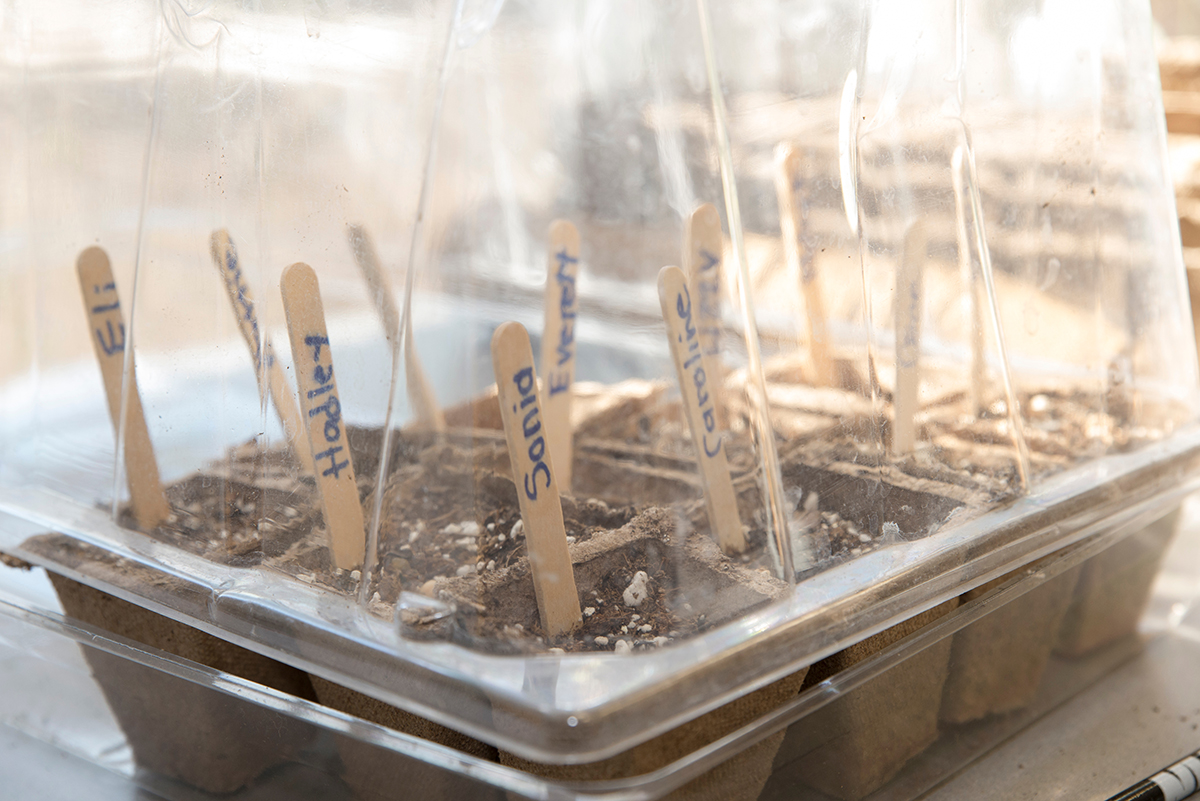
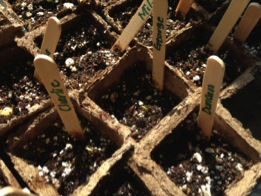
Finally, each child should label their pot. We used craft sticks to easily identify each child’s plant.
Tip: Pot up extra seeds in case some don’t germinate. I potted up 10–15 extras. Every child needs to feel successful and have peas to transplant when the time comes. Once kids have planted seeds a few times and are a little older, you won’t need to pot up extras. Having seeds fail is the next great gardening lesson for more experienced young gardeners.
Our young grower adds his pot to the tray. It’s a good idea to pot up extra seeds in case some don’t germinate.Craft sticks easily identify each child’s plant. Keeping the top lid on, but slightly open, helps air circulate around the plantings, so they don’t grow fungus.
Put the containers on the plastic tray and cover with a clear plastic lid. This will keep moisture in and will require less frequent watering. Allow the soil surface to dry out slightly between watering. Using the misting setting on the sprayer works well because it doesn’t create a hole in the soil and expose the seed like a watering can will.
Tip: Watch for white fungus growing on the soil surface. If this occurs, remove the plastic lid. This will kill the fungus and promote germination. If you will be away from the classroom or home for a few days, put the plastic lid on so the soil doesn’t dry out. Remove it when you return.
Tip: Peas don’t respond well to transplanting, so we planted the seeds in biodegradable pots to avoid this problem. These pots break down in the soil, allowing the roots to continue to grow undisturbed.
Week 1: Seeds are absorbing water.
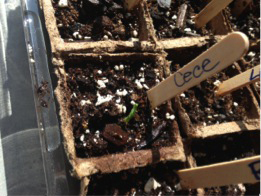
Week 2: The roots and stems have started to grow.
Week 3: True leaves have appeared.
Week 4: Time to plant the pea seedlings in the raised beds!
April: Transplanting the Pea Plants into the Garden
Supply List:
Pea plants
Trowels
Spray bottles or watering cans
Set-up Time: 10 minutes
Activity Time: 20–30 minutes or more (depending of the size of the group and the number of helpers)
Appropriate for Ages: 2 and up
Clean-up Time: 10 minutes
Choose a sunny location that receives at least six hours of direct sunlight every day and has well-drained soil. We planted our peas in the raised beds at the Fruit & Vegetable Garden.
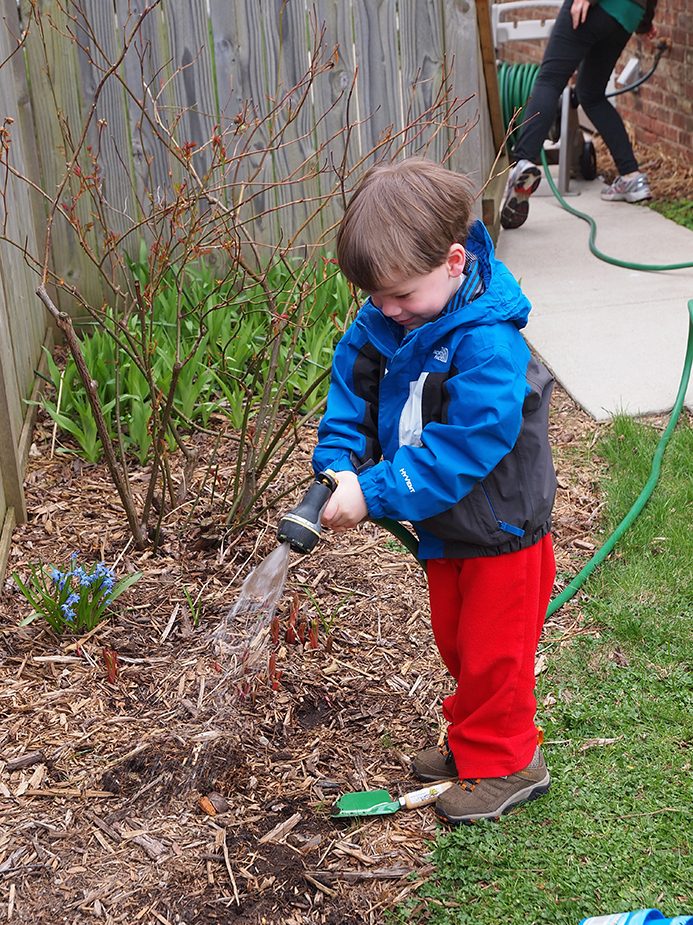
Bring all the supplies out to the site. Have each child choose where they would like to dig their hole. Pass out a trowel and plant to each child. Dig a hole as deep as the soil in the pot. Place the plant, pot and all, in the hole. Fill in the space around the plant with soil and water the plants.
Check the peas daily and water them with a watering can or hose when the soil is slightly dry. About 50 – 55 days after planting, these shelling peas will be ready to harvest and eat! Come see the plants that the students of our Little Diggers class planted in the raised beds, just south of the orchard at the Fruit & Vegetable Garden!
Remember to water in your seedlings when you put them in the ground!
Sunshine and a good squirt of water will help this pea seedling grow!
Direct Sowing: Easy Peas-y Approach
Direct sowing is the easiest approach—and often the most successful with early spring vegetables. Not to mention: it’s fun.
As a working parent, I chose this approach with my almost three-year-old. All you really need is a sunny spot with well-drained soil, seeds (we used ‘Tom Thumb’ peas because we have a small garden), a small shovel (trowel) and water. Choose a sunny spot for planting (6–8 hours of direct sun).
First I showed him how to draw lines in the soil with his trowel (they should be ½– to 1-inch deep). Then he dropped seeds along the lines. I wasn’t concerned about spacing 2 inches apart as recommended on the seed packet because I can always thin them out once the seeds start to grow. He covered the seeds up and watered them with the hose. Every evening, we enjoy checking to make sure the soil is damp.
Tip: If you’re little one is getting impatient, these peas can be harvested early and eaten, pod and all, like snow peas!
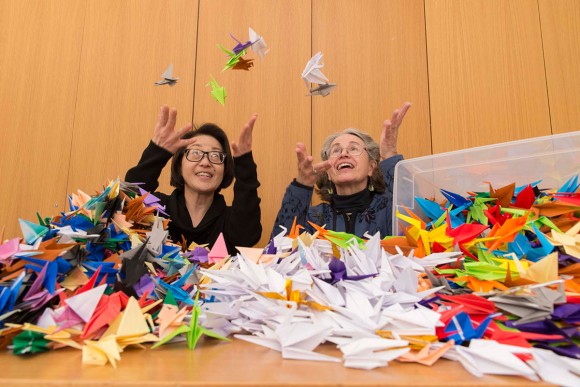
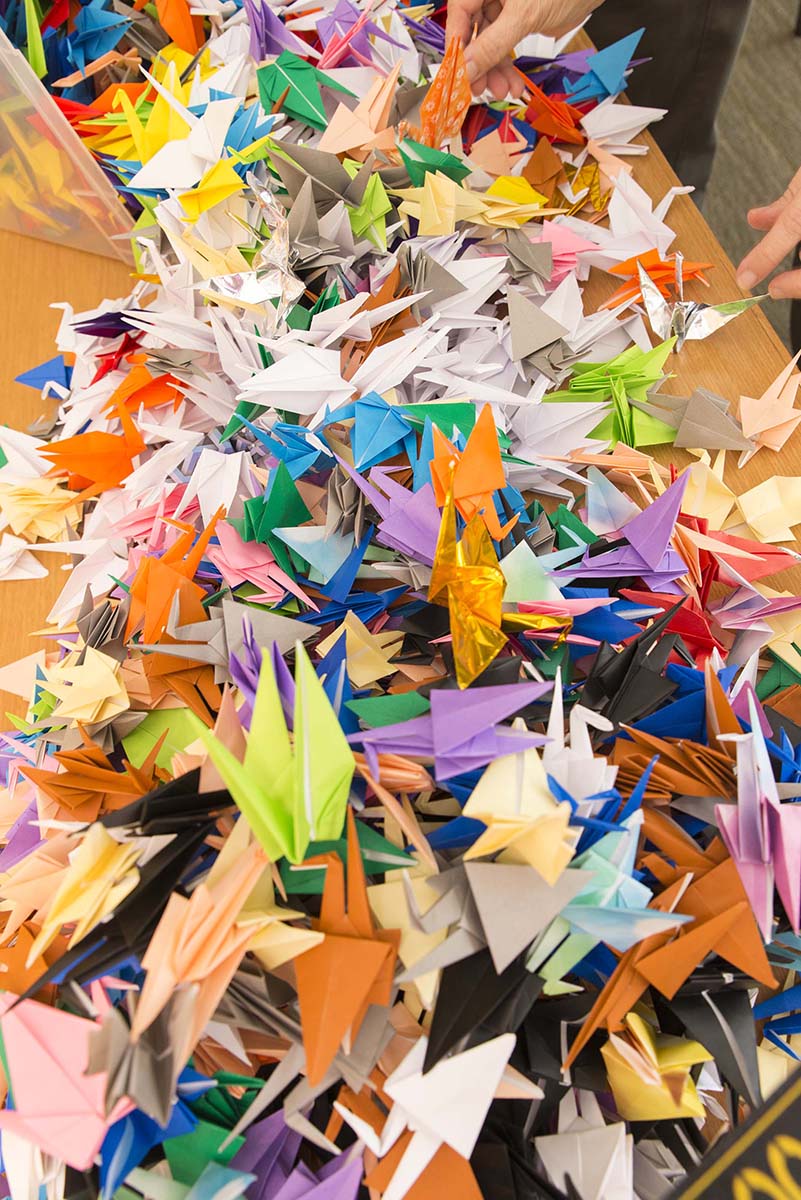
Long-ago legend says that cranes can live for 1,000 years…and that folding 1,000 paper cranes, one for each year, can make a wish come true.
So it is that the crane is the symbol of longevity and good fortune.
22 Folds From the first corner-to-corner fold to the last crook of beak and tail, it takes 22 folds to make this style of origami crane. Because pictures are worth 1,000 words, we offer this visual guide to crane-making.
Click on the image above for a larger version to print and save. Wishing you longevity and good fortune!
Fast forward to the turn of the twenty-first century, when Ray Wilke, a devoted volunteer in the Elizabeth Malott Japanese Garden, decided to make origami cranes as a take-away gift for children who visited the garden’s Shoin House. Each winter, Ray and wife Ginny folded cranes…and each spring/summer Ray handed them out, one by one, to the curious children.
Over the years, Ray and Ginny made 40,000 cranes.
Now there are 10 people who fold, bringing in bags of 20, 60, or 100 origami cranes throughout the winter.
And 3,000-plus cranes are ready to hand out.
Happiness is 1,000 paper cranes…and volunteers like Susan and Edie.
Origami paper cranes
From Ray’s original intent comes great good fortune: a community has sprung. And what do the kids think when they’re offered a crane? “They’re over the moon, they’re very gentle with them,” Mary says. “We say, ‘We’d like you to have one,’ and you’d think you were giving them gold when you explain why. It opens the door for conversations, especially with 7-, 8-, 9-year-olds.”
Cranes are offered, hand to hand, at the Shoin House whenever volunteers are present…for as long as the handmade supply lasts. (Although adults make wishes, too, cranes are for kids only.)
Sometimes spring just doesn’t want to arrive. Sometimes it can’t wait to burst forth with flowers and foliage and make everything look fresh and new. This year definitely falls into the first category, but this isn’t a bad thing. It gives us time to appreciate some things that might otherwise be overlooked by the flashier signs of spring.
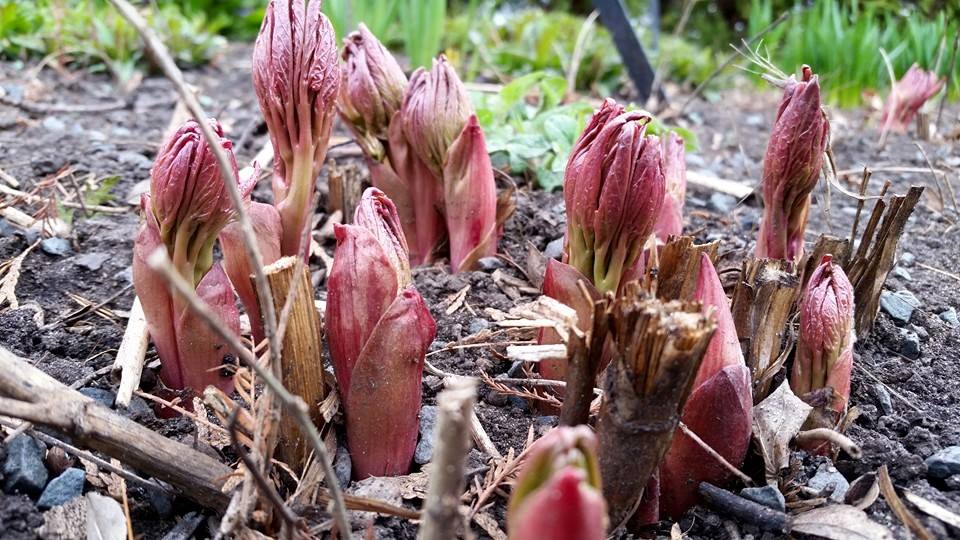
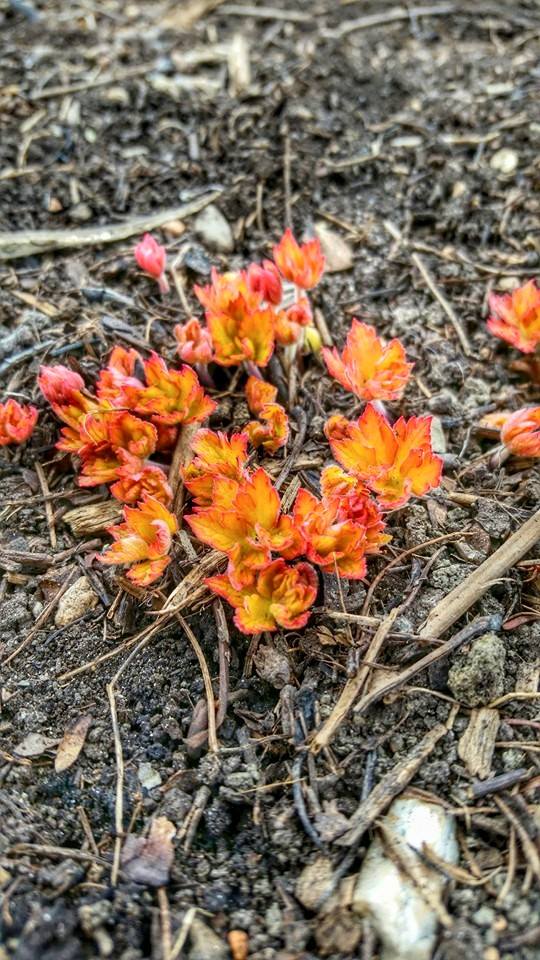
Red Charm peony buds (Paeonia ‘Red Charm’) look like alien asparagus pushing their way out of the ground in the Farwell Landscape Garden.
The cooler temperatures are slowing growth for most plants but also allowing for richer colors to develop. These peony stems have a rich burgundy color that is highly ornamental in an otherwise empty bed. Eventually these will grow out into large bushy plants with showy red flowers, but for now we can enjoy the unique form of the new growth.
Many geranium varieties also feature beautiful new growth in the spring. Geranium ‘Blue Sunrise’ in the Dwarf Conifer Garden has gorgeous bright green foliage in the summer, but in the spring it has stunning orange and red new growth that almost looks like flames coming out of the ground. Having plants with vibrant new growth can give your garden a whole new dimension. Imagine how bright blue Scilla siberica would stand out against the geranium, or how lush a planting of soft pink Chionodoxa lucillae ‘Pink Giant’ would look among the hellebores. It’s almost as though you’re getting two different plants for the price of one when you have such distinctive spring growth.
New growth doesn’t have to be dull! These Geranium ‘Blue Sunrise’ have new growth that looks like flames coming out of the ground.
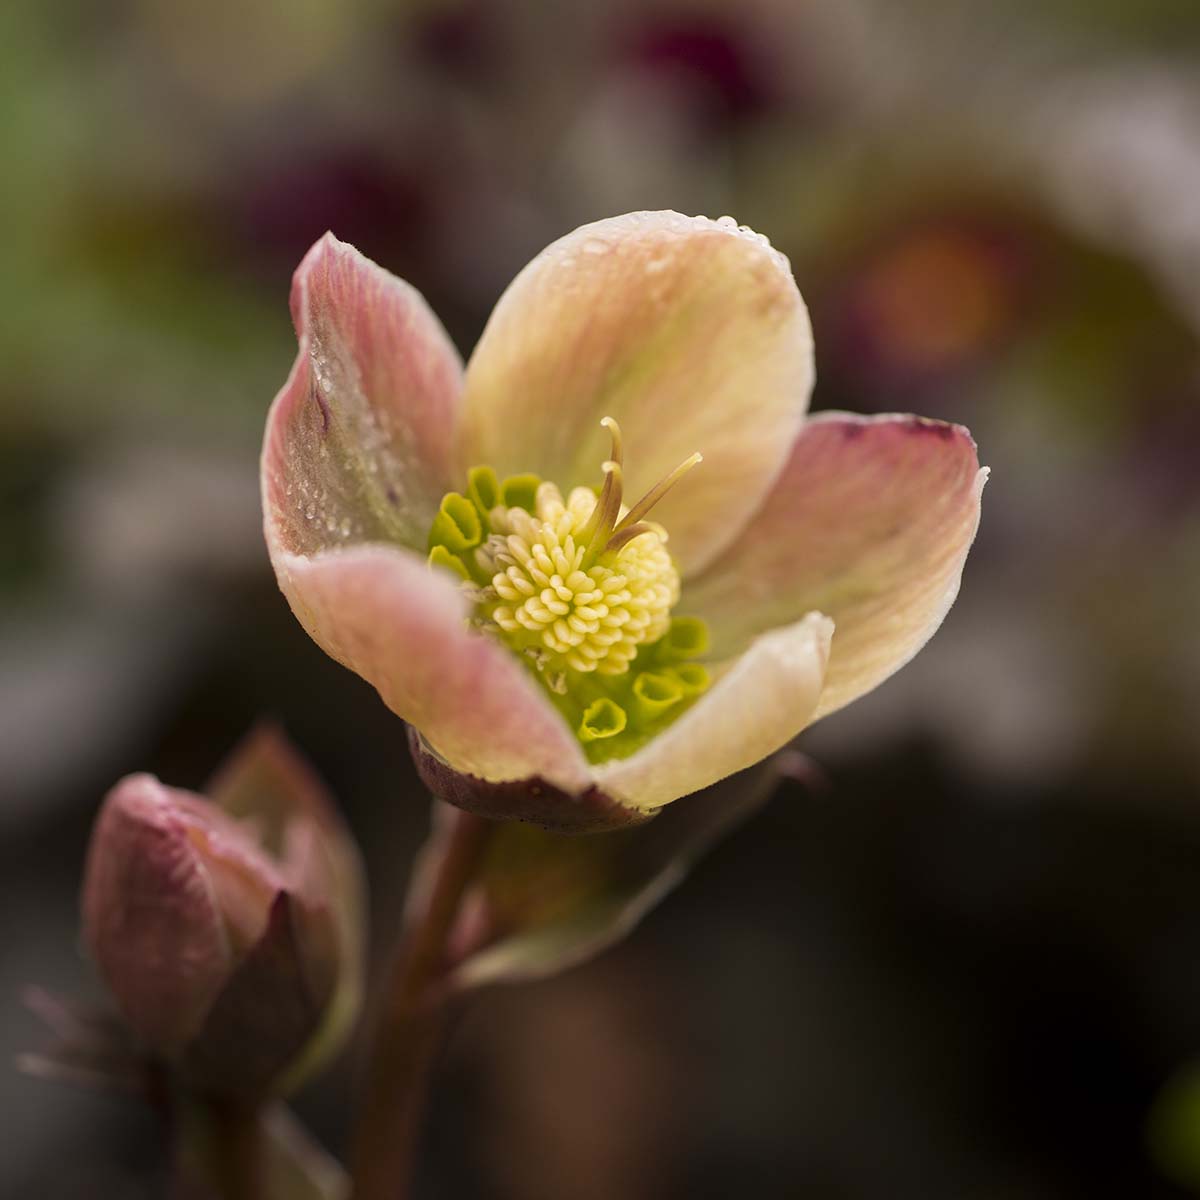
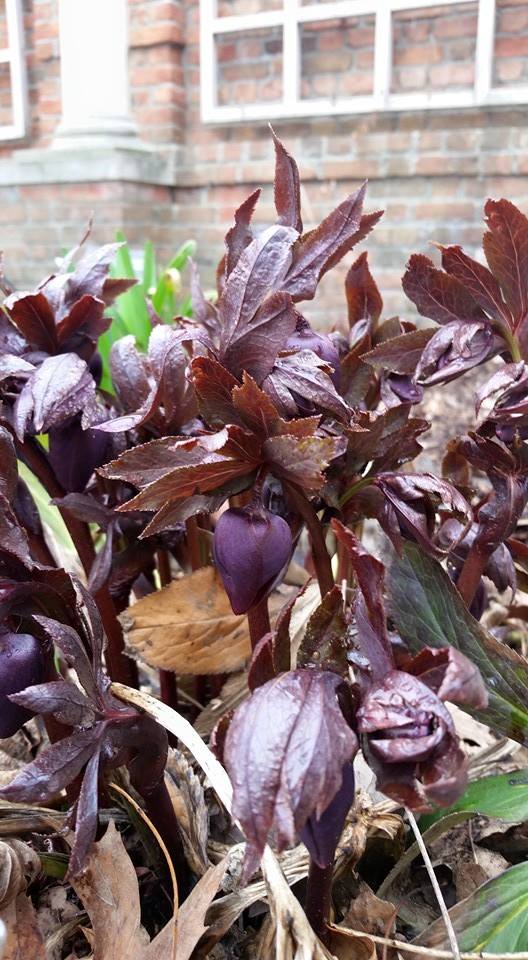
A Helleborus x hybridus ‘Blue Metallic Lady’ in the English Walled Garden sports new growth that is almost showier than its flowers.
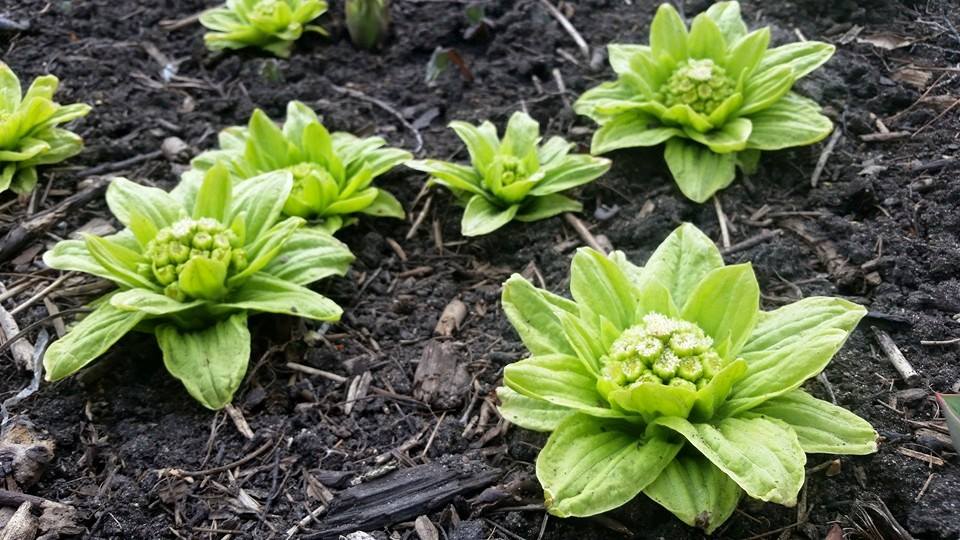
Of course, since it is spring, there are plenty of flowers to see. Many people associate spring with bulbs, but there are some other unusual plants blooming now too. Petasites japonicus spends the summer looking like a rhubarb that has aspirations to take over the world. However, in the spring it graces us with patches of inflorescences that look like bright green cabbages. Nestled inside of the “cabbages” are clusters of lime green flowers that will gradually elongate into a short spike of tufty white flowers. They’re not the showiest flowers ever, but they have a clean, bright color that really makes them pop against the dark soil of the hillside in the Waterfall Garden.
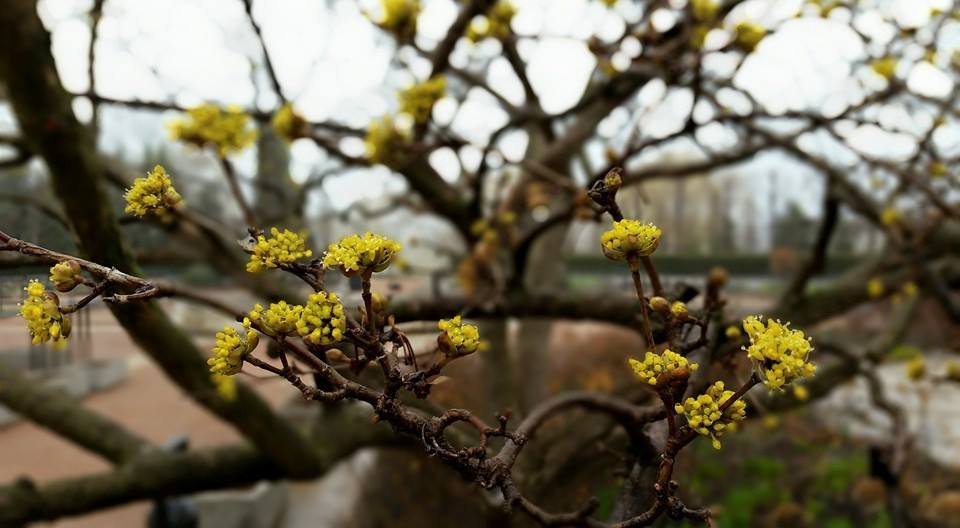
Petasites japonicus has rather unusual spring blooms.Cornelian cherry (Cornus mas) provides a gentle pop of spring color during a sometimes dreary time of the year.
And finally, the cornelian cherry trees (Cornus mas) in the Heritage Garden provide a soft glowing yellow that is a much gentler burst of color than the more common forsythia that can sometimes be almost gaudy with the intensity of its colors. During a time of year when so much is happening, it’s sometimes nice to have plants that allow your eyes to rest and regroup before moving on to the next batch of vibrant, eye-catching color.
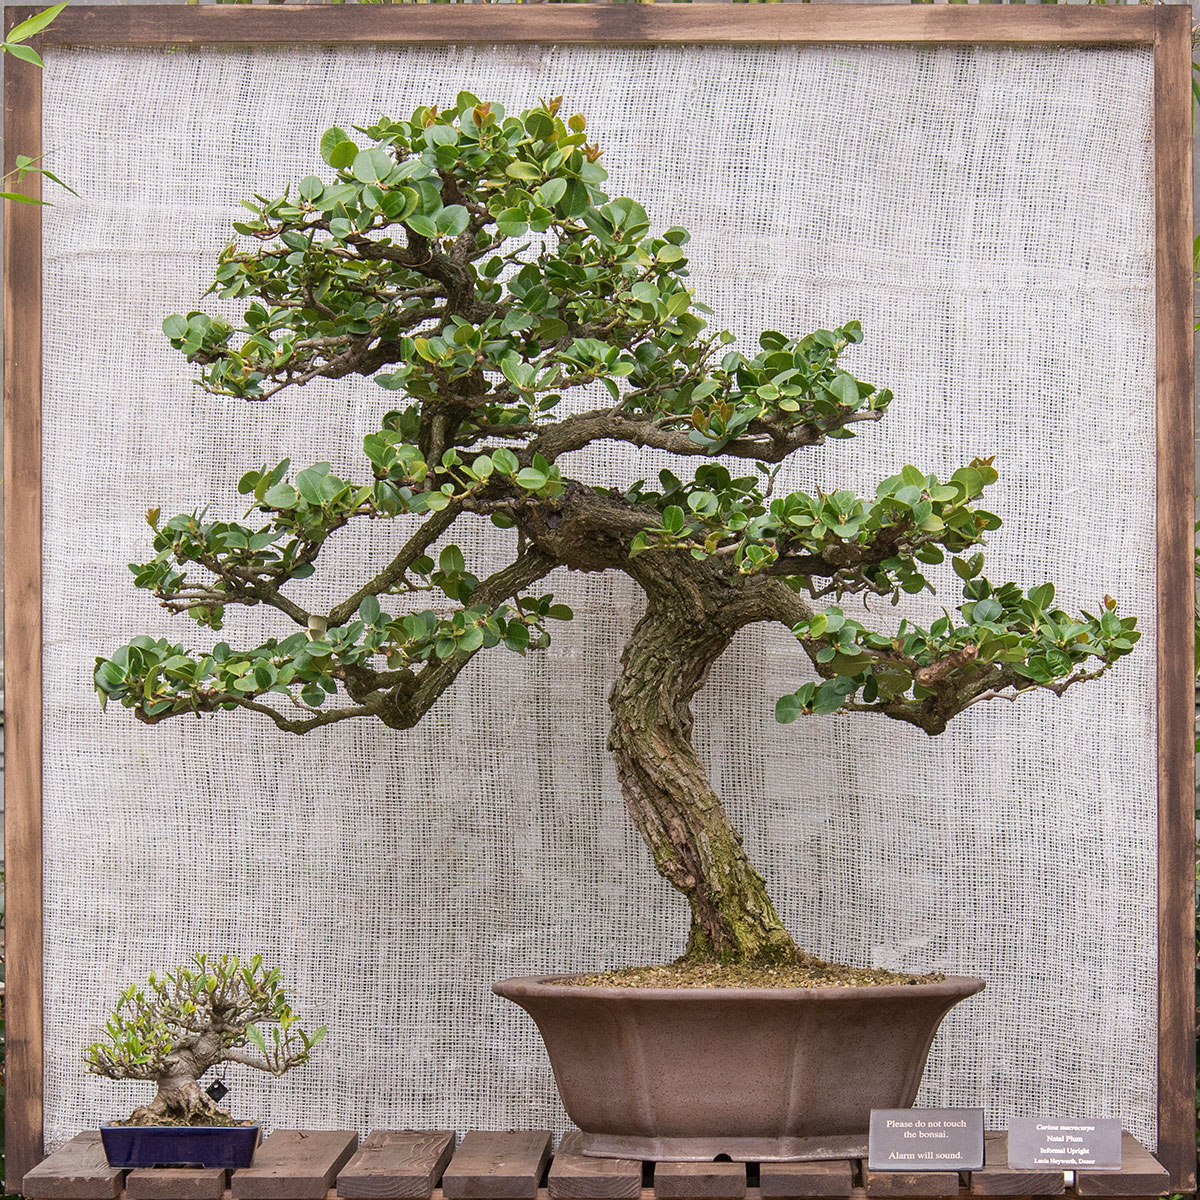
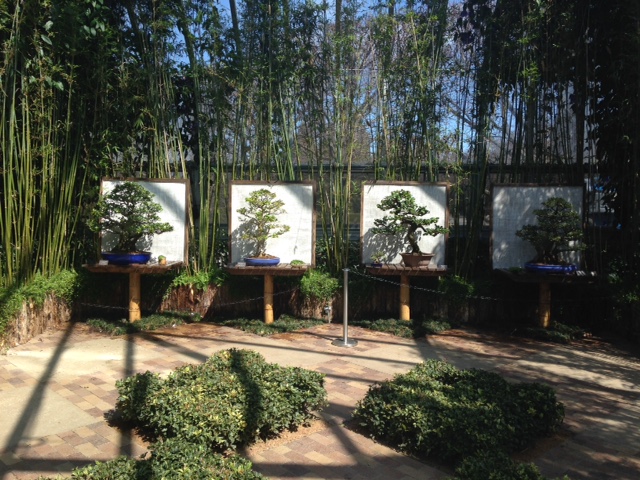
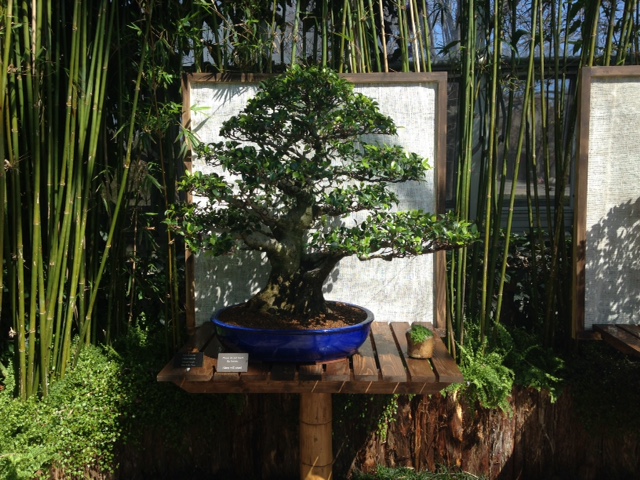
I am happy to announce the addition of four bonsai trees on display in the Semitropical Greenhouse in the Regenstein Center.
Bonsai on display in the Semitropical Greenhouse
The crape myrtle, two ficus species, and natal plum trees were placed on display on March 28. The display will be up through the end of May with a change of tree species the last week of April. It’s the first time these trees are being displayed in this fashion here at the Garden, giving visitors the opportunity to see tropical and subtropical trees that otherwise would not be able to be shown in our courtyards until late May, due to temperature requirements.
The courtyards will open on Tuesday April 21, 2015, with our cold-hardy evergreen and deciduous trees.
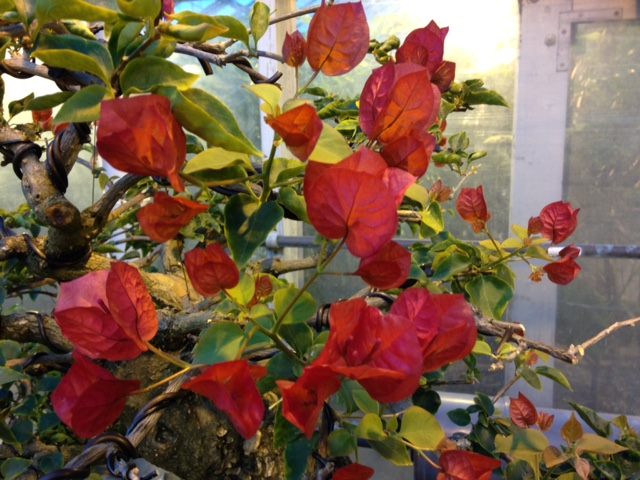
This crape myrtle (Lagerstroemia) is continuing to respond very favorably to the root work we did.
This crape myrtle (Lagerstroemia) was the focus of my previous post on repotting. It is continuing to respond very favorably to the root work we did.
Crape myrtles are a genus of about fifty species of trees and shrubs native to South Asia, Northern Australia, and some Pacific islands. Some varieties can grow as tall as 100 feet, but most species grow as either small trees or large shrubs. Some varieties are deciduous, and some are broadleaf evergreens—this is a deciduous variety.
Crape myrtles are most famous for their flowers, which grow as clusters of small blooms. Flowering typically takes place between June and August. This tree has never flowered while here at the Garden. I am hoping that with the addition of a more appropriate soil mix, fertilizer changes, and a longer growing season we can can encourage this tree to bloom in the years to come.
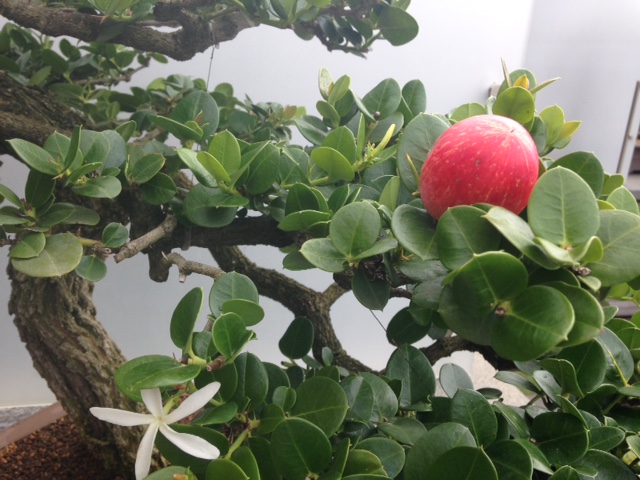
The natal plum (Carissa grandiflora) is a dense evergreen tree with sharp spines. It’s native to tropical and subtropical regions of Africa, Australia, and Asia.
Our natal plum in fruit and flower at the same time!
Our natal plum produces beautiful flowers throughout the year. These can occur either as individual blooms or in clusters. The flowers have a powerful fragrance reminiscent of gardenia. The fruit is plum-shaped and can be red to dark purple-black in color. The fruit of the natal plum is edible and tastes like a giant cranberry—but please don’t eat ours! :)
Willow-leaf fig (Ficus salicifolia)
Chinese banyan (Ficus microcarpa)
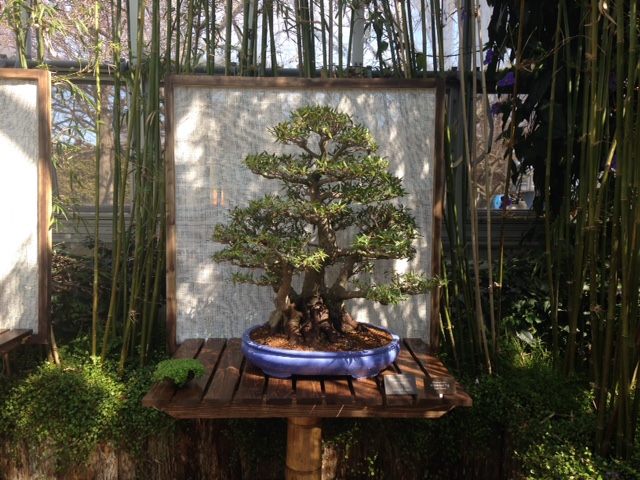
Our two ficus trees on display are monsters! The Nabari (base of the tree) on these trees are huge, and they have a great presence. Ficus are tropical and subtropical trees native to southern Asia and India. However, they are also commonly found in South American countries and the southern United States. There are hundreds of species in the ficus genus in the world, but there are only about a half dozen that are commonly used for bonsai. Ficus benjamina, Ficus microcarpa, Ficus retusa (or Green Island fig), and Ficus salicifolia are among the most frequently used. These are great examples of tropical bonsai that will love their new temporary home in the Greenhouse.
Be sure to come down and see these amazing trees while they are on display! And keep a lookout for the new additions coming later this month. Here is a sneak peek at one of the trees you might see…can you tell what species it is?
This mystery tree might be blooming soon in the Regenstein Center—can you guess what it is?
Thanks for reading, and be sure to follow me on instagram @Windy_City_Bonsai for updates and pictures of the collection!