Keep holiday plants beautiful beyond the season

Holiday plants and flowers make great gifts for everyone on your shopping lists. They are perfect gifts for family members, the host and hostess of the holiday parties you attend, and of course, are beautiful for decorating your own home. Plus, they can be enjoyed long after the holiday season is over, adding color and life to your home on chilly winter days.

But getting your plants to last longer will require a little special care. Here’s how to take care of the most popular gift plants, both during the holiday season and long after.

Jubilee Red poinsettia
Euphorbia pulcherrima ‘Jubilee Red’

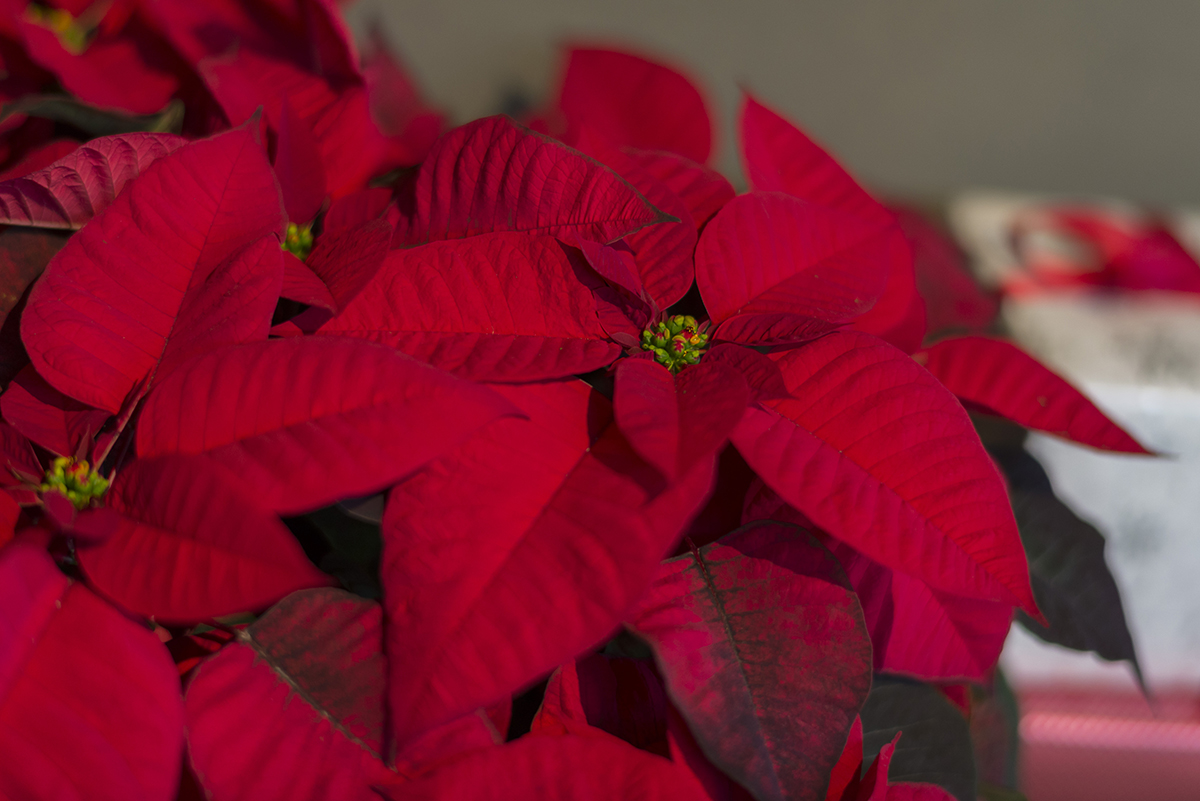
Poinsettias (Euphorbia pulcherrima) appreciate bright light away from heating vents, fireplaces, and drafty windows or doors. Maintain even moisture (but avoid soggy soil); plants will wilt dramatically if allowed to dry out. The plants should never be allowed to stand in water for more than 20 minutes if possible.

Poinsettia plants can be a challenge to keep year-round, and most gardeners discard the plant after the holidays. However, those trying to force a rebloom the following season can follow these guidelines:

  • As long as the plant looks healthy, continue to provide it with even moisture and warm temperatures in a bright location, out of direct sun. In six to eight weeks, it will begin to lose its leaves and turn slightly off-color. At that point, cut the entire plant back to 6 inches and repot in a larger pot, adding enough extra soilless mix or potting soil to fill the pot. Water thoroughly and place the plant in a south-facing window.
  • Begin to fertilize the plant twice a month with a dilute 20-20-20 or 10-10-10 mix. New growth should begin. Begin pinching new stems back once a month to encourage bushy growth. Continue this pinching until the end of summer.
  • In mid-May, after all danger of frost has passed, gradually introduce the plant to the outdoors, bringing it back in at night until the nighttime temperature remains above 60 degrees Fahrenheit. Then place the pot in a sunny spot where it is protected from strong afternoon summer sun. Water and fertilize regularly.
  • When night temperatures approach 60 degrees, it’s time to bring the poinsettia back inside to a sunny windowsill. By the end of September, the plant must be placed in a completely dark closet or covered with a box every night from 5 p.m. to 7 a.m.—with no exceptions. After 7 a.m., it can be placed back in a sunny window but returned to the closet at 5 p.m. This dark treatment is necessary for the plant to set its flower buds. Provide normal water during the day and fertilize monthly.
  • Poinsettia plants thrive in warm rooms with bright light and will suffer if exposed to drafts, sudden temperature changes, or excess dryness from heating vents. Continue this treatment until the middle of December, when the plant should be fully colored up for display again for the holidays.
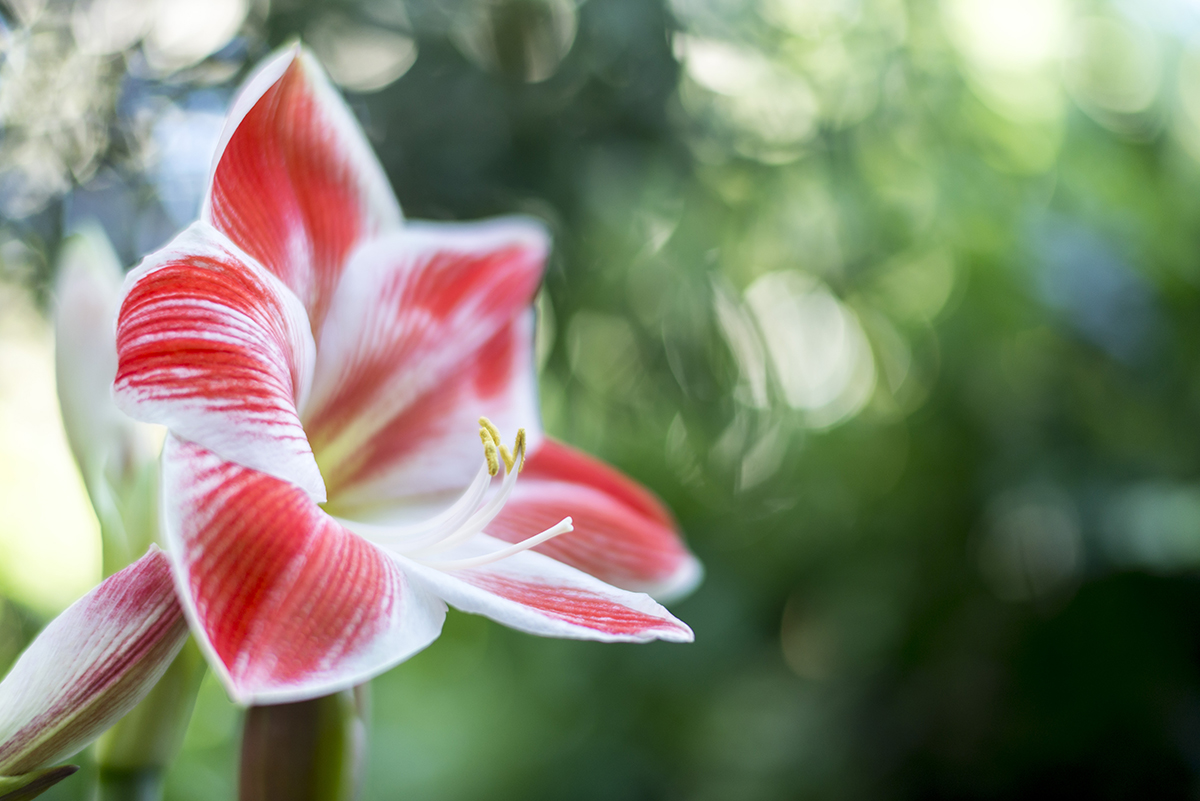
Cocktail amaryllis
Hippeastrum ‘Cocktail’

Amaryllis (Hippeastrumbulbs should be potted up in wide, squat containers using a soilless mix. Allow the “shoulders” of the bulb to remain above soil level; water well once and then allow soil to dry out before watering again. Keep the pot away from direct sunlight, drafts, and heating vents.

  • Most amaryllis plants will send up stalks and flower first (leaves will emerge after a bloom cycle). As the stalk grows, rotate the pot for even growth. After flowering, allow the stalks to yellow and wither before removing them from the bulb.
  • Continue to water the plant after leaves emerge. After May 15, take the plant outside and place it in a location where it receives morning sunlight. Fertilize regularly with a dilute 10-10-10 or 15-15-15 mix.
  • Around October 15, bring the plant inside for its resting period. If the leaves have yellowed, remove them from the bulb. If they are still green, allow them to yellow before removing them from the bulb. Take the bulb out of its container; shake off the dirt and place it in a cool, dark room (40 to 50 degrees). At that time, cut off any dried roots from the bulb and re-pot. Signs of new green growth can occur from six to 10 weeks later.

Cyclamen 'Salmon with Eye'
Cyclamen ‘Salmon with Eye’

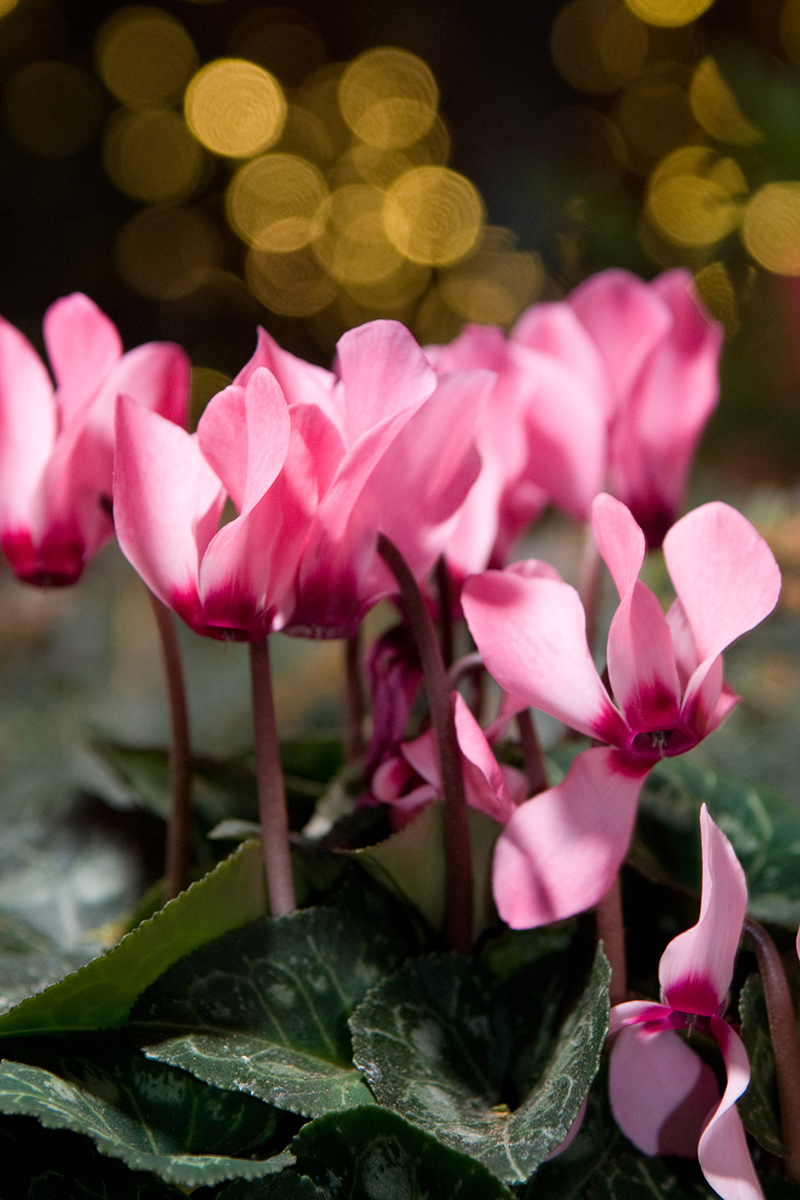
Cyclamen plants prefer quite cool indoor conditions. Water only when the soil dries out, and avoid splashing water on foliage.

  • Water these plants below the foliage, or set them in a shallow saucer to soak up water. Discard any unused water after 20 to 30 minutes. (To prevent root rot, make sure the plants don’t sit in water for long periods of time.)
  • Cyclamen will continue to bloom for a few weeks if they are kept in a north- or east-facing window. Remove the faded flowers and their stems at the base of the plant as soon as possible to keep the plants blooming in a tidy fashion. Most gardeners find it too difficult to force the plant to bloom again the following season.
Azalea 'Big Joe'
Azalea ‘Big Joe’

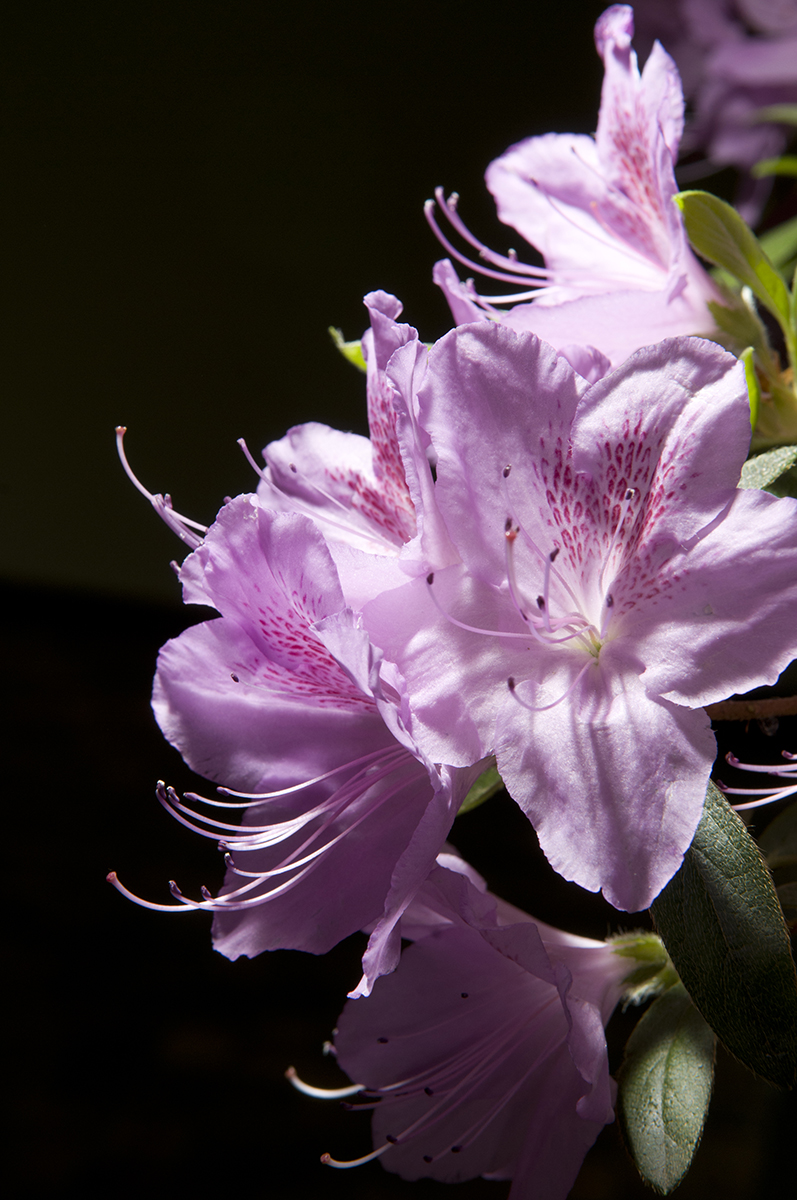
Azaleas require moist soil, bright light, and occasional misting. They perform best if kept in cool locations. Flowers will remain for months if old blossoms are quickly removed, the plant receives adequate moisture, and it is kept in cool conditions.

  • In May, once all danger of frost has passed, the plant can be taken outside to a shaded or partially shaded spot where it only receives morning light in the garden. At that time, begin to fertilize twice a month with a dilute liquid fertilizer formulated especially for acid-loving plants.
  • Bring the plant back indoors before October 15.

Phalaenopsis orchid
Phalaenopsis orchid

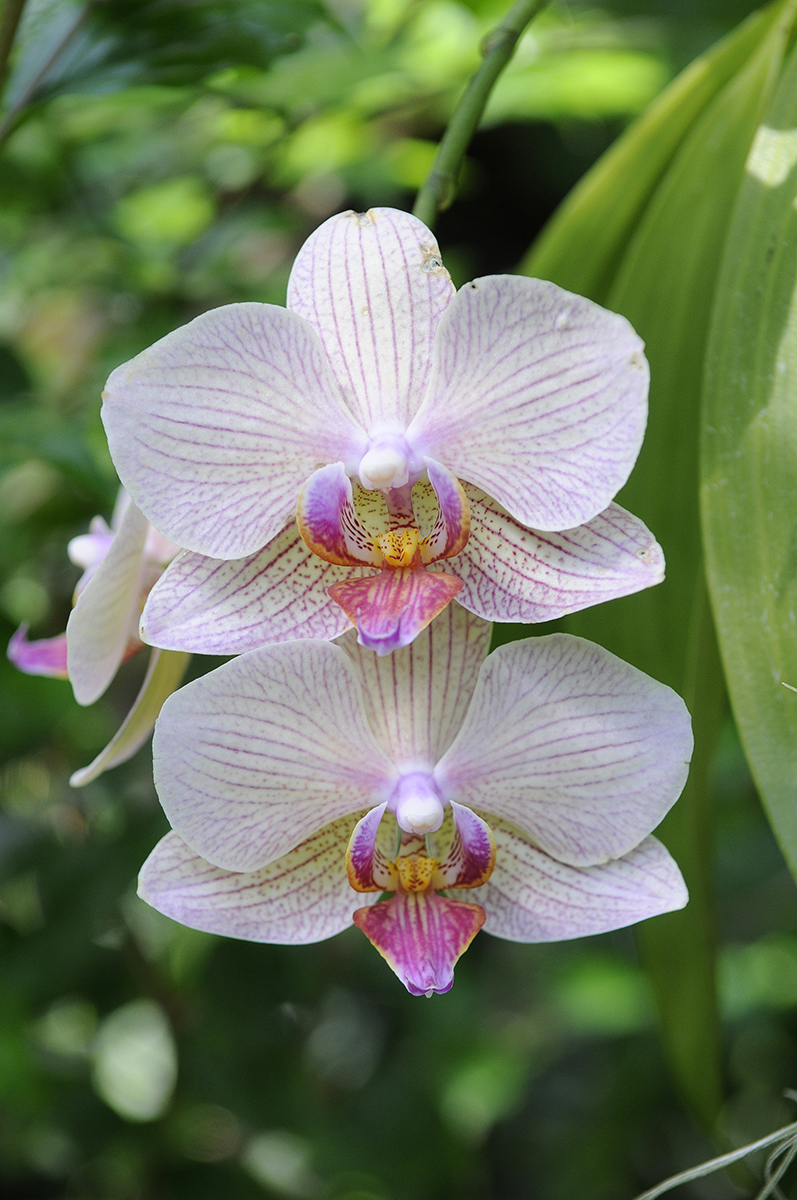
Phalaenopsis or moth orchids prefer warm rooms in bright, but not direct sun. Moth orchids will bloom for months, but sudden temperature changes can cause the plant to drop buds. Remove drying buds to maintain the beauty of the plant. Orchids potted in fir bark generally require once-a-week watering. Those in potting soil can be watered less often.

  • After flowering, allow the stem to yellow before cutting it off at the base of the plant. Begin fertilizing plant twice a month with a dilute orchid fertilizer. This will encourage the growth of a new stem and more flowers the following year.
  • Wash the foliage monthly. It’s not necessary to take this plant outdoors for the summer; but it will tolerate being moved outside if kept in shady location, and not allowed to dry out.
  • Continue normal watering and fertilizing until a new stem appears, approximately 10 to 12 months later. When the plant initiates flower buds, discontinue fertilizing.
  • Continue to provide bright light—but keep out of direct sunlight—in a warm room. During winter, try to provide extra humidity from pebble trays, or by misting daily if possible. 


Ivy topiary
Ivy topiary

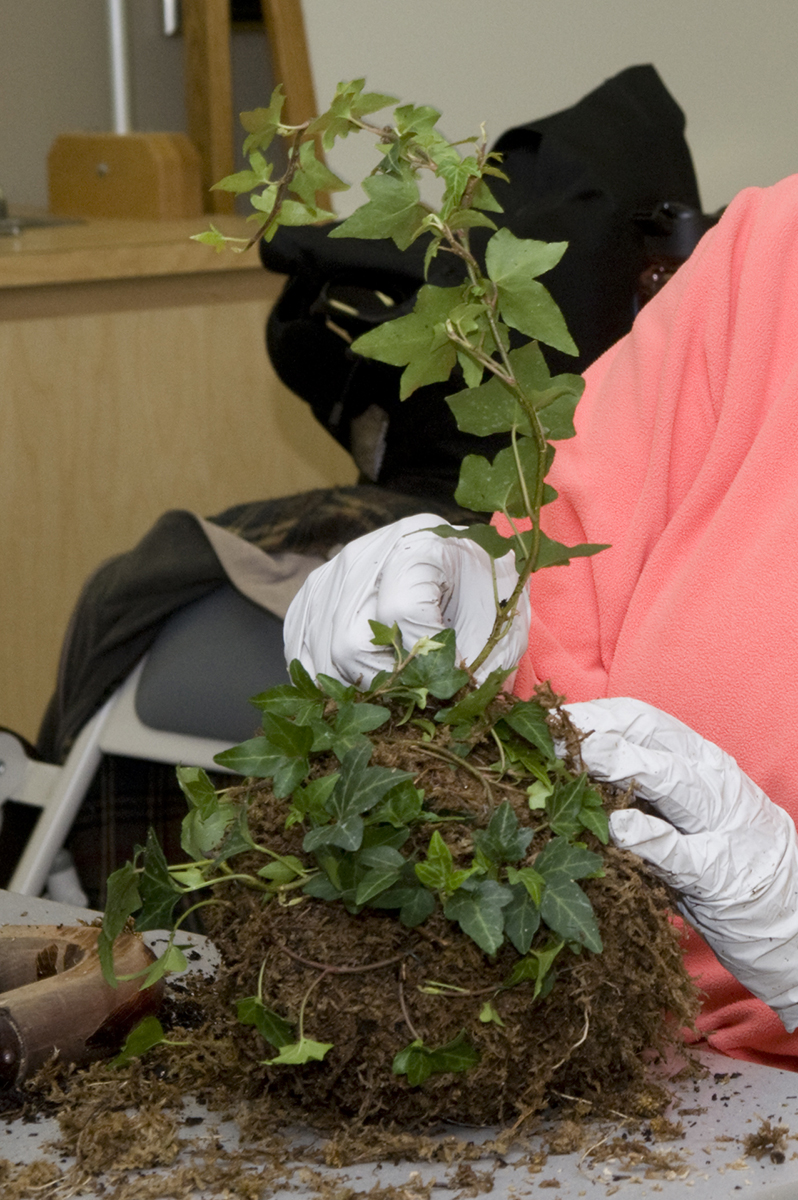
Ivy topiaries are popular holiday plants that can last for years if given proper care.

  • Like cyclamen and azaleas, ivy also prefers quite cool conditions and bright light far away from heating vents or fireplaces.
  • Mist the plant regularly, or rinse the plants in a sink to keep the foliage clean and free of spider mites. As new growth emerges, train the new growth to the desired form.
  • Take the plants outside after May 15. Maintain growth during the summer by keeping the plants watered often, and fertilize them at least once a month, keeping the plants in a semi-shaded location. Continue training and pruning the plants periodically to keep their desired form.
Paperwhites
Narcissus papyraceus

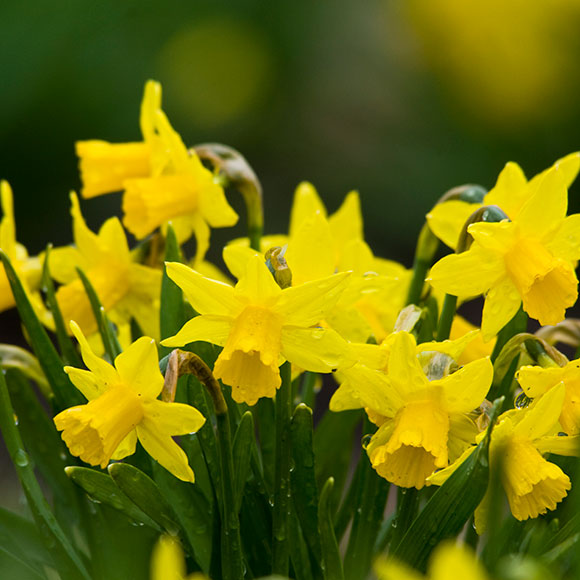
Paperwhites (Narcissus papyraceus) may require a cage or a ring of raffia tied around them to keep them from flopping as they grow. If purchased as bulbs, grow them in a shallow dish filled with pebbles rather than soil. Arrange the bulbs close together and cover them with pebbles, with just their tips exposed. (The weight of the pebbles helps to keep them from falling to the side as they grow.) Water just enough to encourage root growth, not soaking the bulbs.

Paperwhites can be discarded after blooming, as they are not hardy to be planted outside in your garden.


©2016 Chicago Botanic Garden and my.chicagobotanic.org

So You Want To Buy A Christmas Tree

Christmas tree lots carry a dazzling array of trees ranging from fragrant balsam firs (Abies balsamea) to shimmering Colorado blue spruces (Picea pungens). With so many choices, how does one choose?

The three most commonly encountered groups of Christmas trees are firs, pines, and spruces.

PHOTO: Siberian fir tree (Abies sibirica).
Siberian fir

(Abies sibirica)

Fir (Abies sp.)

The most common firs available are Canaan fir, noble fir, and balsam fir. All make terrific trees with a classic piney fragrance. They feature dark green needles (often with silver undersides) and are known for their rounded needles, which minimize injuries. They’re among the longest-lived Christmas trees and most resistant to needle drop. The main downside is that some varieties can be very expensive.

PHOTO: Colorado blue spruce (Picea pugens 'Procumbens')
Colorado blue spruce

(Picea pungens ‘Procumbens’)

Spruce (Picea sp.)

Spruces come in colors ranging from dark green to icy blue, but they all share one thing in common; incredibly sharp needles. While they make terrific trees for outdoor decorating, they do not hold up very well to the dry air indoors. If you select a spruce, it is critical that it is kept away from any sources of heat that might dry it out. The branches are strong and can support ornaments well, and their color range is quite appealing. When used properly, spruce can be an excellent plant for holiday decorating.

PHOTO: Pinus cembra 'Blue Mound'.
Pinus cembra ‘Blue Mound’ showcases its long, soft needles.

Pine (Pinus sp.)

Pines are another popular Christmas tree. The most commonly available pines are white pine and Scots pine. Pines feature long needles and tend to have a more clumpy look on the branches so the overall effect is less formal than the firs and spruce. The branches are generally more stiff than other evergreens, which makes them great for hanging ornaments. The biggest downside to pines is that they often turn a duller green for the winter. Many tree lots dye them a darker green to make them more attractive.

As you can see, every type has its pluses and minuses, but a few things hold true no matter which type of tree you select:

  1. Ask to unbag the tree before purchasing it. Many tree lots have the trees in netted bags, which makes it hard to see if the tree has a flat side or a bald spot. If this is a concern, just ask.
  2. Give the tree a good shake. If you find lots of needles falling off, that means the tree is dried out and will not last long.
  3. Look for trees with healthy, firm needles. Dull, brittle needles are a sign of a dried-out tree.
  4. Always give the trunk a fresh cut before placing it in water. If you have the ability to do this at home, that’s best, but your tree will be fine if you have it done at the lot just before bringing it home.
  5. Get your tree into water as soon as possible. Once the cut end scabs over, the tree will have a hard time taking up water and will lose needles rapidly.
  6. Never allow the water dish to dry out. It’s not uncommon to refill the dish every day, especially for the first week.
  7. Christmas tree food (a liquid food similar to the packets of cut flower food you receive in bouquets) helps extend the life of your tree.
  8. Avoid placing your tree near radiators or heating vents. This will cause needles to dry out very rapidly and can quickly become a fire hazard.
  9. At the end of the season, trees can be “planted” in the snow and used as seasonal decor and shelter for birds, or composted.

©2016 Chicago Botanic Garden and my.chicagobotanic.org

Give thanks for pollinators on Thanksgiving

Thanksgiving is here again, and we at the Chicago Botanic Garden are thankful for all the pollinators who make our food possible, every day, around the world. Bats, bees, butterflies, birds, and more pollinate plants that create one-third of the food we eat.

PHOTO: Thanksgiving placemat to color and match pollinators to the food they produce.
Click here to download the PDF (11″x17″) of this placemat.

As you enjoy a meal with friends and family, take a moment to say thanks for the little things that make such a big difference—pollinators!

Draw and color the foods you are eating at your feast in the center of your plate on our placemat. Check the answer key to see who pollinated them.Instructions: Click on the image above to download our placemat to enjoy with your feast.

The ideal printing size is tabloid (11 x 17 inches). Letter size paper (8.5 x 11 inches) will also work if you choose “fit to page” when printing.

Draw and color the foods you are eating on our placemat. Check the answer key to see who pollinated them. Then, fill the Thanksgiving plate by drawing and coloring the foods—fruits, vegetables, and spices—that were brought to you by pollinators.


©2016 Chicago Botanic Garden and my.chicagobotanic.org

Postcards from Japan with horticulturist Ayse Pogue

Recently I had the amazing opportunity to spend two weeks in Kyoto, Japan, attending the Japanese Garden Intensive Seminar offered by the Research Center for Japanese Garden Art & Historical Heritage.

PHOTO: tea and a small treat.
A small treat prepares the palette for the sweet and astringent taste of sencha. The idea is to savor the flavor of the tea from the few drops served in these tiny cups.

The seminar began full force the day after I arrived in Kyoto after a 16-hour flight and a 14-hour time change. A sencha tea ceremony was very cleverly scheduled for our first day to combat the heavy jet lag we all felt. Ogawa Kashin founded the Ogawa school of sencha tea ceremony in Kyoto about 200 years ago. Kashin devised his own tea-brewing rituals and became celebrated as an original-minded tea master with modern ideals.

In the following days, we visited many gardens and temples and attended lectures. It’d be hard to mention every one of them in the space of this blog so I picked a few I found particularly impressive and transformative.

Kinkaku-ji Temple or Temple of the Golden Pavilion

PHOTO: The Golden Pavilion and its reflection.
The Golden Pavilion and its reflection
PHOTO: The Golden Pavilion surrounded by beautiful pines and the immaculate moss.
The Golden Pavilion surrounded by beautiful pines and the immaculate moss
PHOTO: The ancient pine at Kinkaku-Ji with branch supports.
The ancient pine at Kinkaku-ji with branch supports
PHOTO: The ancient pine at Kinkaku-Ji with branch supports.
Never sprayed, it only gets fed a little bit of mycorrhizae
PHOTO: Mr. Tamane sitting by the dry garden around the building where he offered us tea.
Tokushirou Tamane sitting by the dry garden around the building where he offered us tea

Registered as a World Cultural Heritage Site, the pavilion takes your breath away. Tokushirou Tamane, the 82-year-old head gardener, is equally extraordinary. He allowed us into paths closed to the general public to take in the views of the pavilion and the surrounding gardens from the best angles possible. The garden and the buildings, centered on the Golden Pavilion, represent the “pure land” of Buddha in this world.

Gonaitei Garden, Kyoto Imperial Palace

This garden is located at the living quarters of the emperor, the Otsunegoten, inside the Kyoto Imperial Palace. The building houses the imperial sleeping chamber and the room with the sacred sword and the seal. As the emperor’s private garden, it feels very intimate, with a meandering stream spanned by earthen and wooden bridges. Beautifully pruned pines and shrubs and charming accents carefully placed throughout the garden create a space where one can spend hours gazing at each detail.

PHOTO: Earthen and wood bridges in Gonaitei Garden.
Earthen and wooden bridges in Gonaitei Garden
PHOTO: A majestic Japanese white pine (Pinus parviflora).
A majestic Japanese white pine (Pinus parviflora)
PHOTO: A view into the stream is framed by plantings.
A view into the stream is framed by plantings
PHOTO: Japanese lantern.
Many types of lanterns adorn the garden…
PHOTO: Japanese lantern.
some in plain view…
PHOTO: Japanese lantern.
some hidden, to be discovered.

Ginkaku-ji Temple or The Silver Pavilion

Located in the foothills of the east side of Kyoto, this temple was established in 1482 by Ashikaga Yoshimasa. He intended to cover the pavilion in silver leaf. Although it was never plated with silver, the pavilion, an unpainted brown, looks over the flawlessly raked sand, Ginsyadan; and the white sand, Mt. Fuji-shaped Kongetsudai. 

PHOTO: The Silver Pavilion with a beautiful reflection.
The Silver Pavilion with a beautiful reflection
PHOTO: Ginsyadan and Kongetsudai are truly enchanting. The gardener in blue uniform in the center of the photo is sweeping the moss, a common sight at all the gardens I visited.
Ginsyadan and Kongetsudai are truly enchanting. The gardener in blue uniform in the center of the photo is sweeping the moss, a common sight at all the gardens I visited.
PHOTO: Mossy path up the hill at Ginkakuji.
The mossy path up the hill leads to…
PHOTO: A view of the city surrounding Ginkakuji.
magnificent views of Ginkaku-ji and the surrounding area.

Tofuku-ji Temple Hojo Garden

The Hojo (Abbot’s Hall) at Tofuku-ji Temple was rebuilt in 1890 and Shigemori Mirei, a famous garden designer, laid out the four gardens that surround the building. He combined tradition and abstractionism to create these contemporary Zen gardens.

PHOTO: The eastern garden of Tofuku-ji's Hojo, with the temple’s foundation pillars, and the western garden with square azalea shrubs which reflect an ancient Chinese way of land division
The eastern garden of Tofuku-ji’s Hojo, with the temple’s foundation pillars, and the western garden with square azalea shrubs, reflect an ancient Chinese way of land division.
PHOTO: The southern garden showcases a cluster of forceful rock groupings and moss covered mounds.
The southern garden showcases a cluster of forceful rock groupings and moss-covered mounds.
PHOTO: Visitors sitting quietly and gazing at the dry garden at Tofuku-ji.
Visitors sit quietly gazing out at the dry garden.
PHOTO: The northern garden uses foundation rocks and moss in an irregular checkered pattern.
My most favorite—the northern garden—uses foundation rocks and moss in an irregular checkered pattern.
PHOTO: The design, very minimalistic and modern, captures you as much as the southern dry garden with its giant rocks and mossy hills.
The design, very minimalistic and modern, captures visitors as much as the southern dry garden with its giant rocks and mossy hills.

The seminar also included a visit to a cloisonné museum, a stone cutter’s studio, and a trip to Ashu forest for an all-day garden-making workshop.

PHOTO: Kinzo Nishimura, a 4th generation stone lantern maker, designed the famous lantern at Kenroku-en.
Kinzo Nishimura, a fourth-generation stone lantern maker, designed the famous lantern at Kenroku-en.
PHOTO: Kinzo Nishimura in his workshop.
All lanterns at his workshop are chiseled by hand.

Seeing these world-famous gardens in person, attending lectures, and being immersed in a fascinating culture will make me a better and a more well-rounded Japanese gardener. I have a much better grasp now on certain features of my garden and why they became a part of the original design. I also loved Kyoto as a town, with its lush mountains always in view and ever-present water in the form of rivers, streams, and canals. I already have a list of gardens I will visit next time I’m in town.

PHOTO: Finished lanterns dwell between the forest and unworked stone in the foreground.
Finished lanterns dwell between the forest and unworked stone in the foreground.

©2016 Chicago Botanic Garden and my.chicagobotanic.org

Planting Fall Bulbs on the Green Roof

Walking around the Garden, you may see lots of holes being dug and bulbs being planted for a colorful display in the spring. But one place you may not expect to see this is the Green Roof Garden at the Daniel F. and Ada L. Rice Plant Conservation Science Center.

Green roofs are known for having lots of sedum and other drought-tolerant plants, but rarely do you see bulbs. We decided to give it a try several years ago and found that it works! So every year we plant thousands of bulbs on the north roof and hope for a showy spring display.

PHOTO: Daffodils sprinkle the Green Roof Garden in early spring.
Daffodils sprinkle the Green Roof Garden in early spring.

Planting these bulbs is not as easy as just throwing them in a hole and walking away; there are a few factors to take into consideration.

One major factor is soil depth. There are three different categories of green roofs: extensive, semi-intensive, and intensive, with a different growing medium depth for each. An extensive green roof has a depth of 6 inches or less, semi-intensive needs 25 percent of the green roof area above or below 6 inches, and intensive has a depth of more than 6 inches.

The Plant Science Center’s Green Roof Garden is semi-intensive, with depths of 4 inches, 6 inches, and 8 inches. When planting bulbs, the rule of thumb is to plant them two to three times deeper than the size of the actual bulb. This means larger bulbs like daffodils or tulips will be planted about 6 inches deep while smaller bulbs like scilla or crocus will be planted 2 to 3 inches deep.

PHOTO: Narcissus 'Little Gem'.
Miniature daffodils like Narcissus ‘Little Gem’ are a great pick for green roof gardens. Find some great mini daffodil cultivars in our Smart Gardener articles.
PHOTO: Scilla (squill).
Tiny squill (Scilla) work well in shallow planting depths.
PHOTO: Tulipa turkestanica.
Turkestan tulip (Tulipa turkestanica) is a small species tulip that is a stunning addition to any spring bulb display.
PHOTO: Tiny species tulips nestle between sedums in the shallow beds on the green roof.
Tiny species tulips nestle between sedums in the shallow beds in the Green Roof Garden.

So when deciding which bulbs we would like to see in the spring display, we must take into account how large the bulb is, and where in the Garden it can be planted. Luckily, we are able to plant bulbs in all three depths (with 4 inches being the shallowest). In the 4-inch display there are crocus and smaller species tulips; in the 6-inch area you will see daffodils, Siberian squill, and more tulips, and in the 8-inch area we have planted more daffodils and larger tulips.

PHOTO: Tulipa biflora, also known as Tulipa polychroma, is a great species tulip for the green roof.
A great species tulip (Tulipa biflora) or (Tulipa polychroma)) is a star on the green roof. Photo by Ulf Eliasson [CC BY-SA 2.5], via Wikimedia Commons

When designing where each bulb will go, we also chose how many of each we need to plant. Further back in the 8-inch area, we order larger numbers of each bulb in order to create a large sweep of color that you can see from the viewing deck. Up front in the 4-inch area, we plant several little groupings of bulbs with much smaller blooms, creating a display with a range of color.

So this spring, when you are strolling through the Garden admiring all the gorgeous bulbs in bloom, just remember: not all of them are on the ground. Make sure to come visit the Green Roof Garden at the Plant Science Center and see which bulbs decided to pop up and put on a show for us.


©2016 Chicago Botanic Garden and my.chicagobotanic.org