Plant, water, and grow! Whether you are a parent, teacher, or caregiver, teaching children to plant seeds is a simple and authentic way to help them engage with nature. It’s an activity that the littlest of sprouts can do “all by myself,” or at least with minimal help from you.

Planting seeds leads to discussions about what seeds and plants need to grow and how food gets to our tables. Watering is a simple chore young children are capable of doing; it teaches them about responsibility and helps them feel they are making a contribution to the family or classroom.
Students from our Little Diggers class, ages 2 to 4, planted peas indoors in mid-March and transplanted them outside into the raised beds in the Regenstein Fruit & Vegetable Garden in mid-April. Come follow the steps we took to get there.
March: Planting the Pea Seeds Indoors
Supply List:
- Seeds
- Soilless potting mix or seed-starting potting mix in a wide-mouth container
- Plant pots (plastic or biodegradable, roughly 2.5 inches in diameter)
- Trowels, spray bottles, or watering cans
- Plastic seedling tray with lid
Set-up Time: 10 minutes
Activity Time: 10–40 minutes of actual planting (depending on the size of the group)
Appropriate for Ages: 2 and up
Clean-up Time: 10–15 minutes
Select seeds that are big—the smaller the hands, the bigger the seed should be—and quick to sprout, or germinate. Also consider the amount of space the mature plants will occupy, and the time of year you are planting. Some seeds can be planted during the cool spring, while others should go in the ground once the threat of frost has passed.
We chose ‘Tom Thumb’ pea seeds because they are large enough for little hands to easily manipulate, they germinate in 7–14 days, they thrive in the cool spring weather, and they only grow to be 8 inches tall and 8 inches wide, making them great for small-space gardens and containers.
Tip: Some other large seeds suitable for little hands are sunflowers, beans, nasturtium (edible flower), pumpkin, and other squash. For more details about how and when to plant these seeds visit www.kidsgardening.org/node/101624.

Set out the potting mix in a wide-mouth container such as a flexible plastic tub, sand bucket, or cement mixing tray on the ground. Have trowels, pots, seeds, and spray bottles ready.
Tip: A soil container with a wide opening will lead to less soil on the ground. Also, more children will be able to plant at the same time.
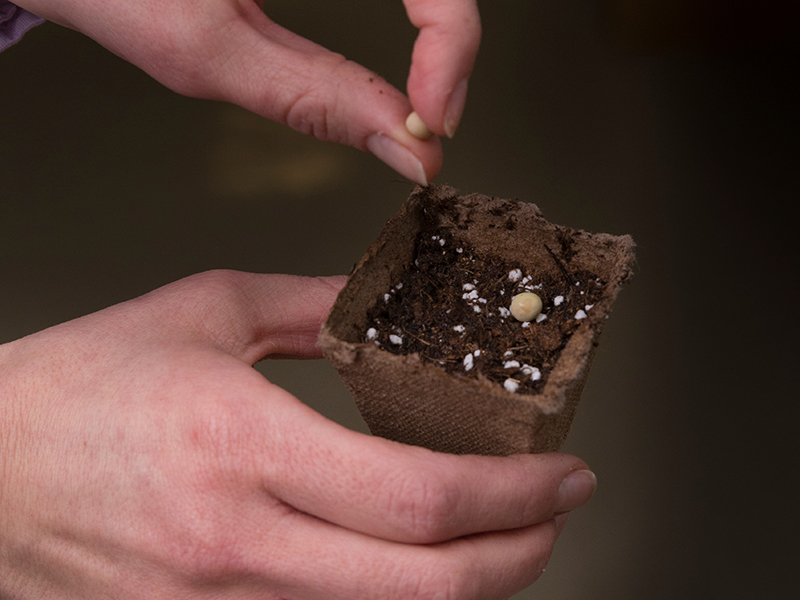
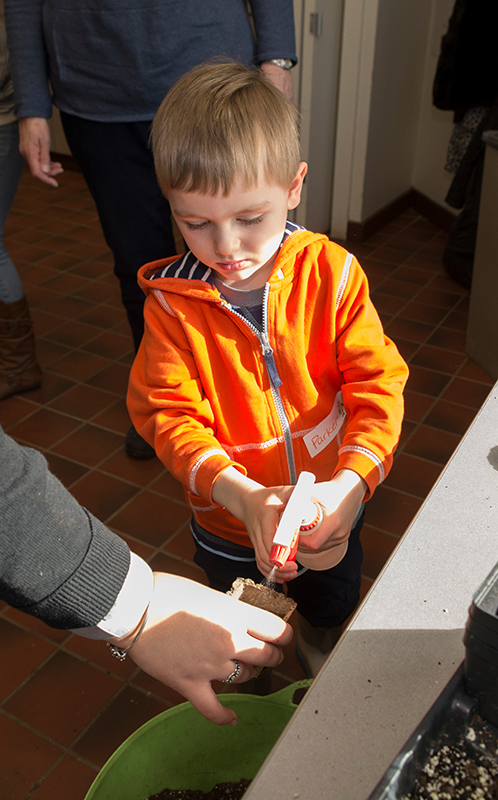
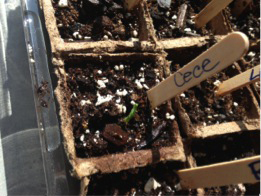
Using a trowel, fill the pot with soil. Set two pea seeds on the soil and push them down ½- to 1-inch deep. Then cover the seeds with soil. Spray with a spray bottle until the soil is saturated.
Tip: Planting depth will depend on the type of seeds you are planting. Read the back of the seed packet for details.
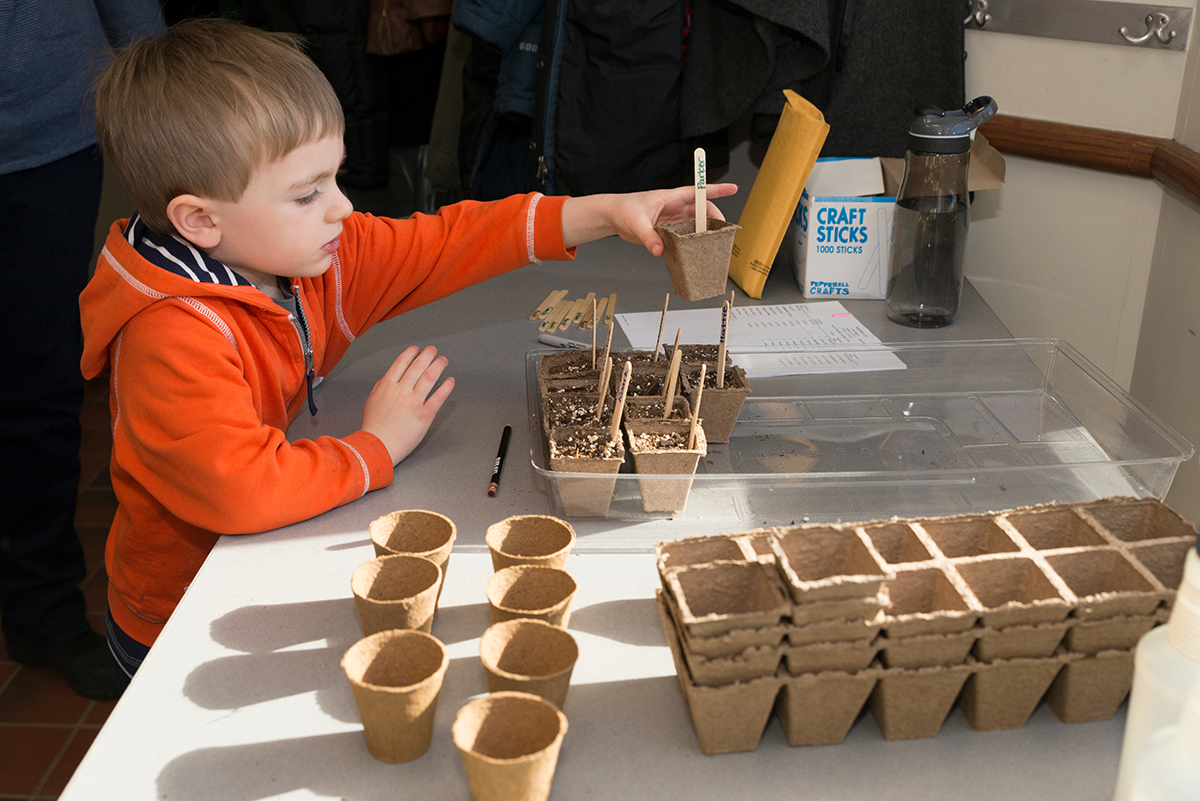
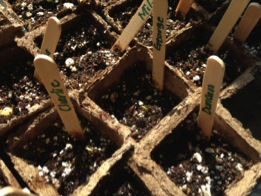
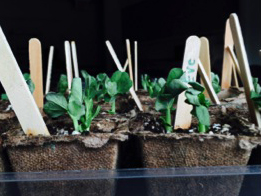
Finally, each child should label their pot. We used craft sticks to easily identify each child’s plant.
Tip: Pot up extra seeds in case some don’t germinate. I potted up 10–15 extras. Every child needs to feel successful and have peas to transplant when the time comes. Once kids have planted seeds a few times and are a little older, you won’t need to pot up extras. Having seeds fail is the next great gardening lesson for more experienced young gardeners.
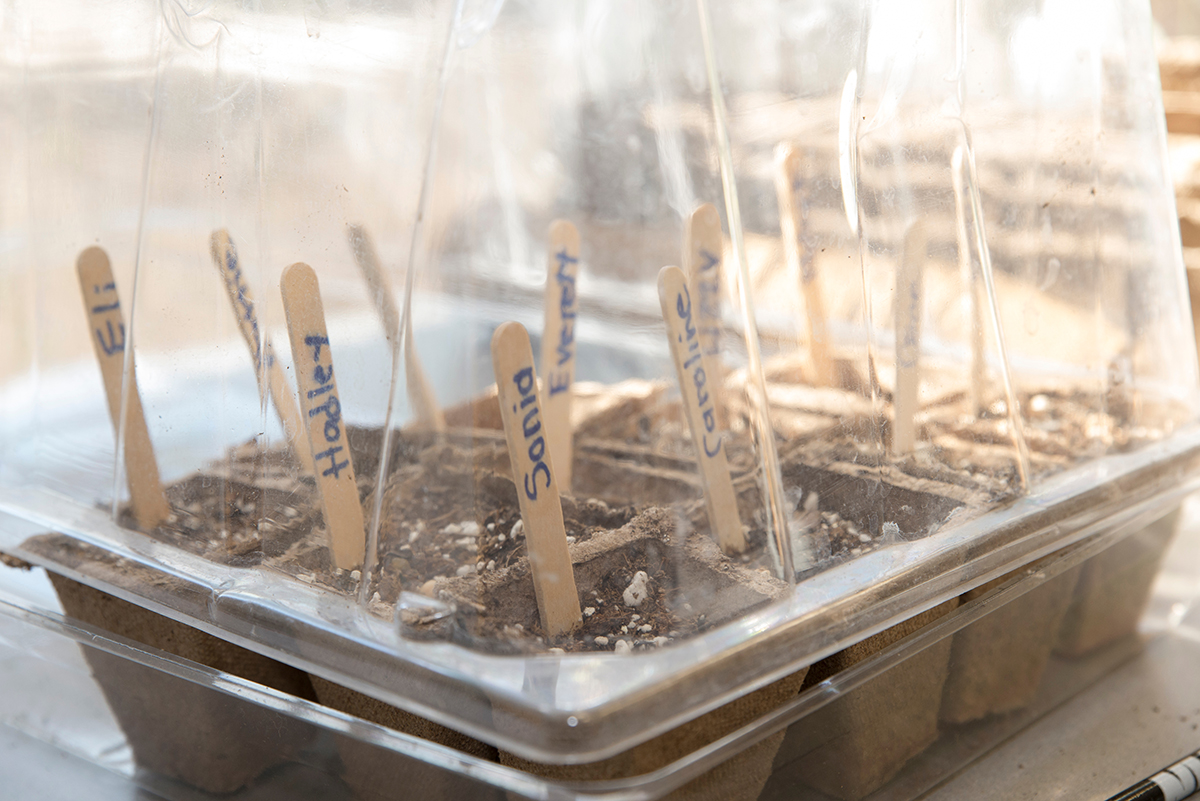
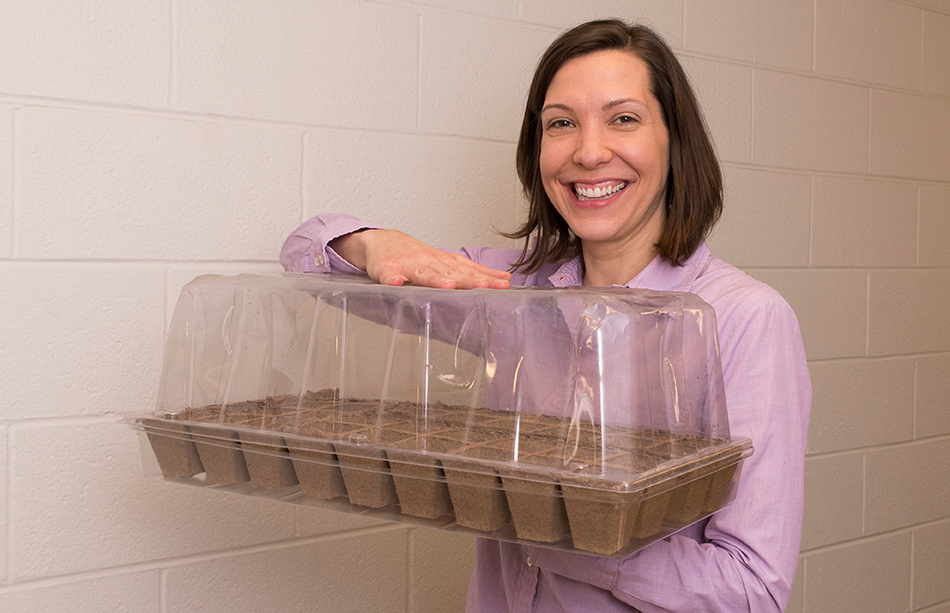
Put the containers on the plastic tray and cover with a clear plastic lid. This will keep moisture in and will require less frequent watering. Allow the soil surface to dry out slightly between watering. Using the misting setting on the sprayer works well because it doesn’t create a hole in the soil and expose the seed like a watering can will.
Tip: Watch for white fungus growing on the soil surface. If this occurs, remove the plastic lid. This will kill the fungus and promote germination. If you will be away from the classroom or home for a few days, put the plastic lid on so the soil doesn’t dry out. Remove it when you return.
Tip: Peas don’t respond well to transplanting, so we planted the seeds in biodegradable pots to avoid this problem. These pots break down in the soil, allowing the roots to continue to grow undisturbed.
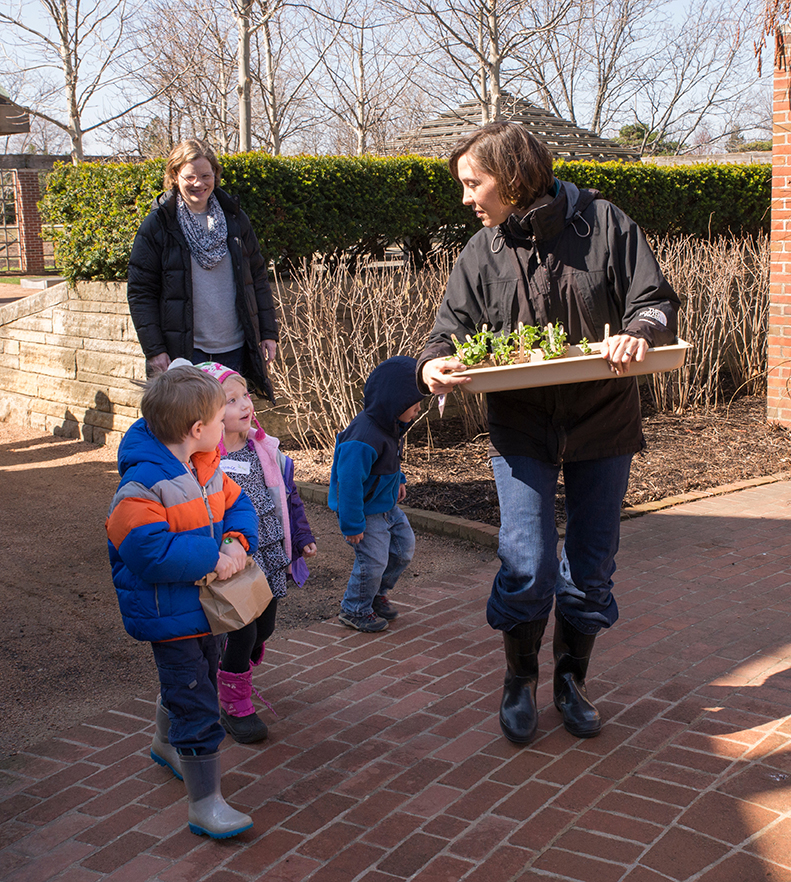
April: Transplanting the Pea Plants into the Garden
Supply List:
- Pea plants
- Trowels
- Spray bottles or watering cans
Set-up Time: 10 minutes
Activity Time: 20–30 minutes or more (depending of the size of the group and the number of helpers)
Appropriate for Ages: 2 and up
Clean-up Time: 10 minutes
Choose a sunny location that receives at least six hours of direct sunlight every day and has well-drained soil. We planted our peas in the raised beds at the Fruit & Vegetable Garden.
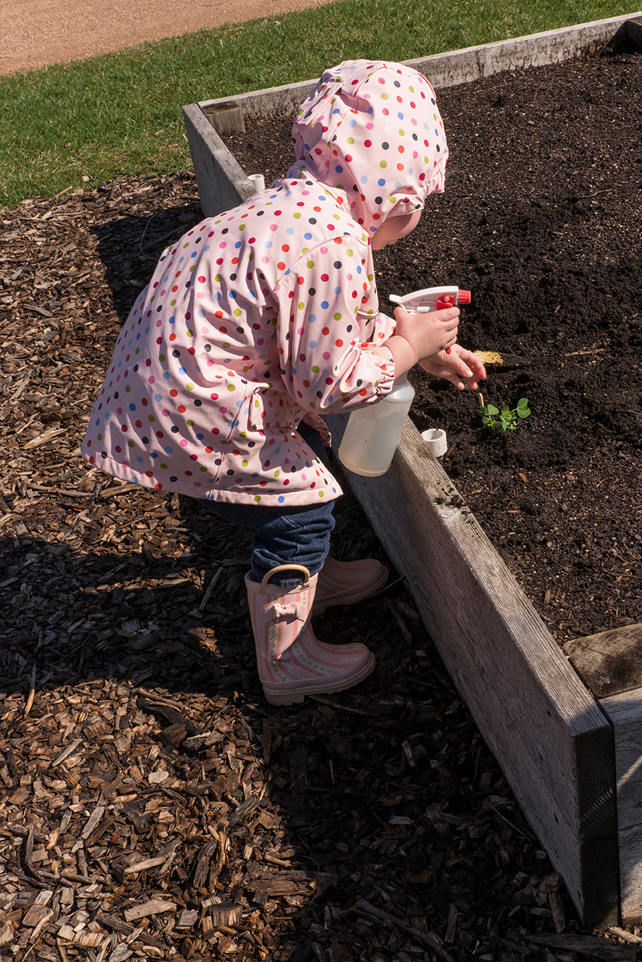
Bring all the supplies out to the site. Have each child choose where they would like to dig their hole. Pass out a trowel and plant to each child. Dig a hole as deep as the soil in the pot. Place the plant, pot and all, in the hole. Fill in the space around the plant with soil and water the plants.
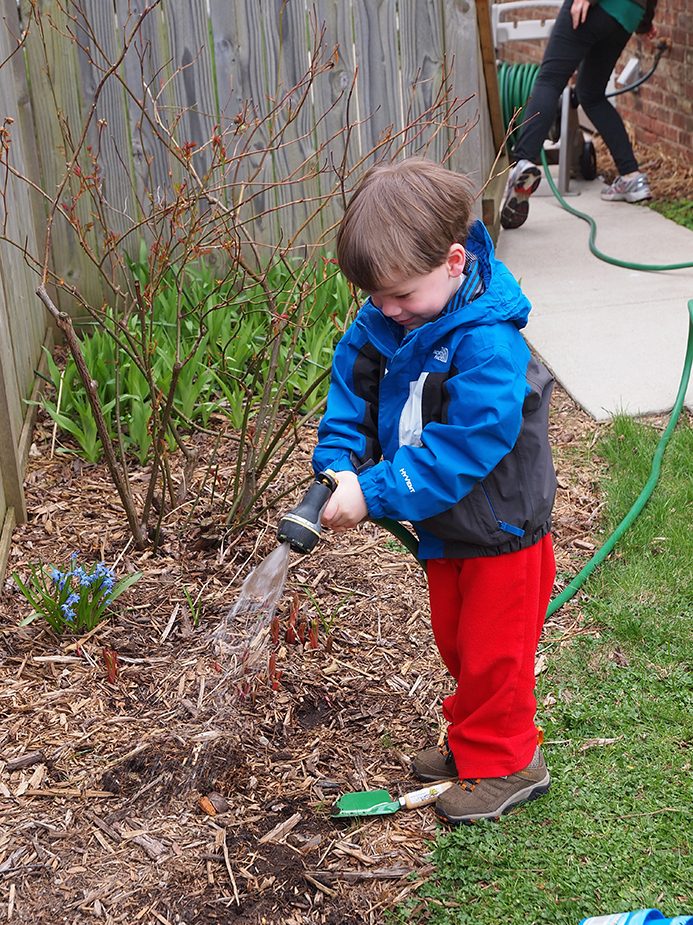
Check the peas daily and water them with a watering can or hose when the soil is slightly dry. About 50 – 55 days after planting, these shelling peas will be ready to harvest and eat! Come see the plants that the students of our Little Diggers class planted in the raised beds, just south of the orchard at the Fruit & Vegetable Garden!

Direct Sowing: Easy Peas-y Approach
As a working parent, I chose this approach with my almost three-year-old. All you really need is a sunny spot with well-drained soil, seeds (we used ‘Tom Thumb’ peas because we have a small garden), a small shovel (trowel) and water. Choose a sunny spot for planting (6–8 hours of direct sun).
First I showed him how to draw lines in the soil with his trowel (they should be ½– to 1-inch deep). Then he dropped seeds along the lines. I wasn’t concerned about spacing 2 inches apart as recommended on the seed packet because I can always thin them out once the seeds start to grow. He covered the seeds up and watered them with the hose. Every evening, we enjoy checking to make sure the soil is damp.
Tip: If you’re little one is getting impatient, these peas can be harvested early and eaten, pod and all, like snow peas!
©2015 Chicago Botanic Garden and my.chicagobotanic.org