Play with Your Pine Cones

I was walking under some pine trees near the Learning Campus and I took a picture of the cones I found.

PHOTO: The ground under the pine tree is covered in dry, brown pine needles and cones that are open, closed and in between.
I found two different kinds of cones on the ground under the pine tree.

When I was young, I noticed there were two different kinds of cones — some solid cones like the three in the lower left corner of the picture, and others are more like the open, branched cones at the top. I thought the pine tree made two different kinds of cones. Actually, they are different forms of the same kind of cone. I will show you how this happens.

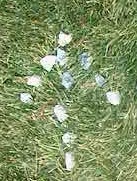
I took three cones that were the same size and shape. Then I soaked one cone in a bowl of water. 

PHOTO: Pictured here are three pine cones of similar size, shape, and color.
I started with three pine cones of the same kind, shape, and size.


PHOTO: One pine cone is floating in a white bowl full of water while the other two are resting on the right side of the bowl.
I placed one cone in a bowl of water. It slowly began to change.


PHOTO: One pine cone is in the white bowl, now almost fully closed after ten minutes, while the other two are dry and unchanged at the side.
After about ten minutes, the wet pine cone is almost completely closed, while the dry cones are still open.


PHOTO: A wet, closed cone is shown next to a dry open cone.
Wet cones are closed, dry cones are open, and that is why cones from the same tree come in different shapes.

Then I let the wet and dry cones sit on my desk overnight. Guess what happened. Try it yourself to get the answer! Go outside and find a pine, spruce, or other conifer tree. Bring pine cones from those trees inside and watch them over time as they adjust to the warm, dry conditions in your home. Put one in bowl of water and see what happens. Let it dry and see if it changes again. 

What is going on here?

Pine, spruce, Douglas-fir and other conifers are so named because they produce cones that bear their seed. When conditions are favorable for the seeds to fall and grow, the cones open and release them. The seeds have the best chance to survive when the air is dry and windy, so they can blow to a nice fertile spot away from the shade of the mother tree. When conditions are wet and not so good for a traveling seed, the cones close to protect them.

Though the cones I found under the tree had released their seeds a long time ago, they still responded to the moisture levels of the ground and air. These cones were in between being damp from the rain over the weekend and drying in the sun.

Pine cone history

By the way, all conifers belong to a group of plants called gymnosperms. This means they produce “naked seeds” — seeds that are not contained within a fruit. Conifers do not grow flowers. Before there were dinosaurs on the planet, all plants reproduced by either spores or naked seeds. The seeds of some conifers can take up to three years to mature. Flowering plants (angiosperms) have a much more rapid reproductive cycle. Some angiosperms flower and produce mature seed in just one week. Understanding how cones and flowers have evolved is what Dr. Pat Herendeen is trying to figure out from plant fossils.


©2013 Chicago Botanic Garden and my.chicagobotanic.org

Snacker, Flapper, Sleeper, Napper

All animals that inhabit this area, including humans, have to cope with the changing of the seasons. There are four basic responses to the cooler temperature and shorter daylight. Which is your favorite strategy for surviving the winter?

Do you eat more food during this time of year, loading up on high calorie goodies? You may be a Snacker. It is a natural instinct. You are like the squirrels, rabbits, and some birds that fatten up and keep going all winter long.  


PHOTO: a gray squirrel poses as it feeds on bird seed dropped from a bird feeder.
Squirrels fatten up on seeds and stay active all winter long.

Do you travel to warmer climates during the winter? Wings are not required to be a Flapper. Count yourself in the company of warblers, monarch butterflies, and herons if you leave the area in winter. You may be migrating to escape the cold, but these animals are generally traveling to find more plentiful supplies of food.

Do you become sleepy and hibernate for four or five months every year? Then you are a Sleeper, like a bear, turtle, or frog. These animals undergo physical changes that shut down their respiratory systems and metabolism during the winter. You are probably not a true sleeper, even if it sounds appealing.

PHOTO: This bronze model of a painted turtle on a rock can be seen a Kleinman Family Cove yearround.
This bronze turtle can be seen all year at the Kleinman Family Cove, while the real turtles are hibernating in the mud at the bottom of the lake in winter.

If you are prone to feeling tired and sleeping more in the winter, then it’s more likely that you are a Napper. Animals like skunks and opossum cozy up in burrows or under deep piles of leaves and sleep. Occasionally they emerge, find something to eat, and then go back to bed.

PHOTO: A small skunk is feeding on squirrel corn on a dark winter evening.
A skunk wakes up from its nap and feeds on some seeds during a winter evening.


PHOTO: A baby opossum is seen in the snow surrounded by dormant plant stalks.
Like the skunk, this baby opossum emerged from its nap and is looking for something to eat before it returns to its shelter.

Snacker, Flapper, Sleeper, Napper — try to say that three times fast as you prepare for another midwestern winter!


©2012 Chicago Botanic Garden and my.chicagobotanic.org

Squirrel Drey Query

Most people recognize a squirrel nest, called a drey, when they see one. The eastern gray squirrels in our region build dreys in trees for shelter and protection from the elements. What you see as a messy clump of leaves is actually a structure formed from sticks and then lined with leaves and other materials to make it a dry and cozy home.

This month I was walking around my neighborhood in Chicago, and I noticed that three out of four squirrel dreys on my street were located on branches that reach over the street. I had to ask myself why squirrels would build their homes in such a dangerous place.  If the squirrel or its babies fell out, they would not only land on hard concrete but also risk being hit by a car!  Are my neighborhood squirrels somehow related to the Three Little Pigs?

Since I know that is not the case, I started to speculate:

Perhaps squirrels are attracted to that particular view. Maybe thermal currents rising from the asphalt make that spot warmer than a branch over a lawn. Could it be that this spot also puts their predators at risk and therefore is actually a safer place to live? I don’t know!

So, I started looking around to see if there was a pattern in locations of squirrel dreys. To date, my findings are inconclusive. While searching for squirrel dreys, I did notice two other interesting things I would like to share.

PHOTO: This close up of a squirrel drey has an arrow pointing to the green plastic sticking out of the bottom of the drey.
Look carefully to see the bit of green plasting in this photo of a drey.

First, there are fewer squirrel dreys on the Learning Campus than there are in my neighborhood. I suspect that is because the Garden is home to our friend the red-tailed hawk (from a previous blog post) and other predators that are more scarce around my home.

Second, I found a squirrel drey at the Garden that was built with something unusual. If you look carefully in the picture, you will see a green material, possibly shredded plastic like Easter basket grass, sticking out of the bottom. Now, I wonder where it found that! This drey is located on the Garden’s entrance road, near the entrance to the Barbara Carr Administrative Center, before you reach the Gatehouse. You will only notice it if you are looking at squirrel dreys as carefully as I am.

PHOTO: The same drey seen from another angle shows the green plastic.
The green plastic is circled in this view of the squirrel drey.

Take a look at the squirrel dreys around your home, nearby parks, and at the Garden. Are the the squirrels building over the road in your area? Have you seen a squirrel enter or leave a drey? What is the strangest material they have used to build it? If you notice any patterns, post a comment in this blog.


©2012 Chicago Botanic Garden and my.chicagobotanic.org

This Bark is Rough: Hackberry

PHOTO: A tall hackberry stands at the south entrance of a wooden bridge that crosses a seasonal stream in McDonald Woods. All the trees in the wood are leafless.

PHOTO: This shows a close up of the bumpy, scraggly bark of a hackberry tree.
Hackberry bark, south view

Now that most of the trees have dropped their leaves, the scenery appears brown and boring UNLESS you know what to look for. I’m talking about tree bark. Learning to identify trees by their bark can be a fun winter challenge.

For starters, I’d like to share one of my favorites: the hackberry, Celtis occidentalis. Hackberry may not be in the top ten trees you think of, but maybe it should be.

Take a look at the interesting texture of this bark. If you use your imagination, it’s like a miniature Grand Canyon on its side, with layers of material exposed on the edges of steep plateaus.

I find the texture on this north-facing side of the trunk to look like bicycle chains. What do you see?

PHOTO: The bark on the north side is also bumpy and scraggly, but the texture is more like a bike chain.
Hackberry bark, north side

Hackberry trees are related to elms and they grow all over North America. We have a few of them on the east side of Parking Lot 4. Scroll back up—do you recognize the large picture above? This was taken in McDonald Woods, along the trail near Parking Lot 4. The large tree to the left of the bridge is a hackberry.

One reason for the popularity of this tree is that the fruits—hackberries—feed birds, squirrels, and other woodland creatures. In the summer, caterpillars of mourning cloak, question mark, and hackberry emperor butterflies feed on the leaves. If you came to see Butterflies & Blooms in late summer, you may have seen the many mourning cloaks fluttering around the Learning Campus thanks to our hackberry trees.

PHOTO: Hackberry emperor butterfly shown with its characteristic pattern of black and white stripes against brownish orange background.
Hackberry emperor butterfly, shown with its characteristic pattern of black and white stripes against brownish orange background.

Open your eyes to tree bark this winter. You’ll find a range of interesting patterns and textures and maybe even learn something new about the trees around you.


©2012 Chicago Botanic Garden and my.chicagobotanic.org

Autumn Trailblazing

Did you know that “blazing a trail” is the act of painting white marks, or “blazes,” on trees to guide others through the woods? People who make these paths are called “trailblazers” but the term has also come to mean “pioneer.”

PHOTO: This sign tells visitors which way to drive to get to parking lots, visitor center, or learning campus.Instead of using white paint on trees, the Chicago Botanic Garden uses a system of white arrows on brown signs. In this sign, which is located just past the Gatehouse, the arrow pointing up in this sign tells you to go straight forward to get to the Visitor Center, while arrows pointing left and right direct you to turn in order to reach the parking lot or Learning Campus.

You can be a trailblazer in the original sense of the word. You don’t need brown signs or white paint to be a trailblazer. Autumn is a great time to find natural objects such as sticks, acorn caps, and other things fallen from the trees, to make trail markers on the ground.

PHOTO: Pictured here are four diffent ways to make arrows using stones, sticks, and red berries.The picture here shows you four different ways to direct a person to the right. 1. Line up small stones in the shape of an arrow. 2. Use larger stones to make a traditional trail marker by placing a small stone on top of a larger stone and adding a third stone next the pile in the direction you want to send your hikers. 3. Bright red serviceberries contrast against the green grass and make a colorful marker. 4. Arrange sticks in an arrow to point the way.


PHOTO: four sticks are arranged to form a square with eight stones inside the square; three sticks form an arrow over the square to tell what direction the hiker should take.Want to get fancy? Try this: form a square with sticks and tell the hiker how many steps to take by placing that number of stones in the middle. Make an arrow with small sticks to indicate direction. The trail marker in the picture tells us to take eight steps to get to the next marker. (This marker idea comes from an old Girl Scout Handbook.)


IM000504Mark the end of your trail with an X or a circle of rocks to let people know they’ve reached the intended destination. You can even place a treasure at the end of the path to reward your trail followers.

So don’t be put off by the cool fall weather—get outside and show your pioneering spirit by blazing a trail for your family and friends to follow around your home.


©2012 Chicago Botanic Garden and my.chicagobotanic.org