Homegrown Fruit: Tips for Strawberries and Raspberries

Historically, fruit trees, shrubs, and berries were grown at home out of necessity. Colonialists were entirely dependent on what they could produce themselves, and in time, a fruitful garden became a common symbol of independence from foreign imports—highlighting a new American pride in agriculture.

The farm-to-table movement of today epitomizes the fruit-growing traditions of the past by “growing as close to the plate as possible.” Sweet, juicy fruit can be easily grown in gardens of all sizes: on small urban lots, in containers on terraces, or in large suburban gardens. Harvesting homegrown fruit continues to be a gardener’s most satisfying pleasure, and with a bit of advance planning, choosing suitable varieties to plant this spring is possible. Here are a few ideas to get you started creating, and/or caring for, your edible landscape.

PHOTO: A hanging basket growing a mix of strawberry cultivars and lettuces.
Day neutral strawberries are grown in our vertical wall and hanging baskets in the Regenstein Fruit &  Vegetable Garden.

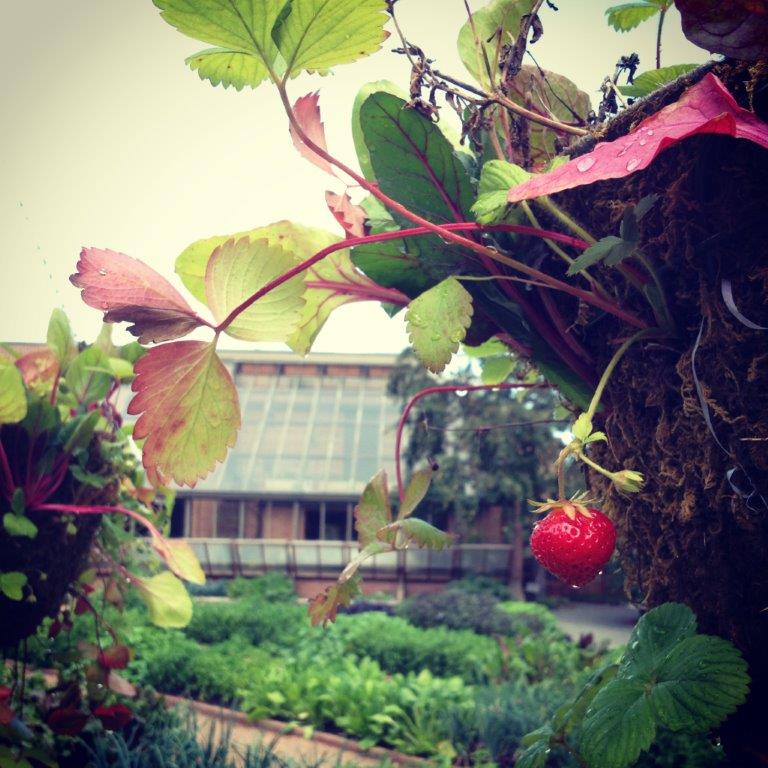
Plan to plant strawberries

No grocery store strawberry ever tastes as good as one grown in your own yard. An easy starter crop, strawberries are self-fertile, so you can start small if you like—plant just one variety or only one plant—and still reap a reward. Choose strawberry varieties carefully, however—they vary greatly in flavor, disease-resistance, tolerance of different climates, and harvest time.

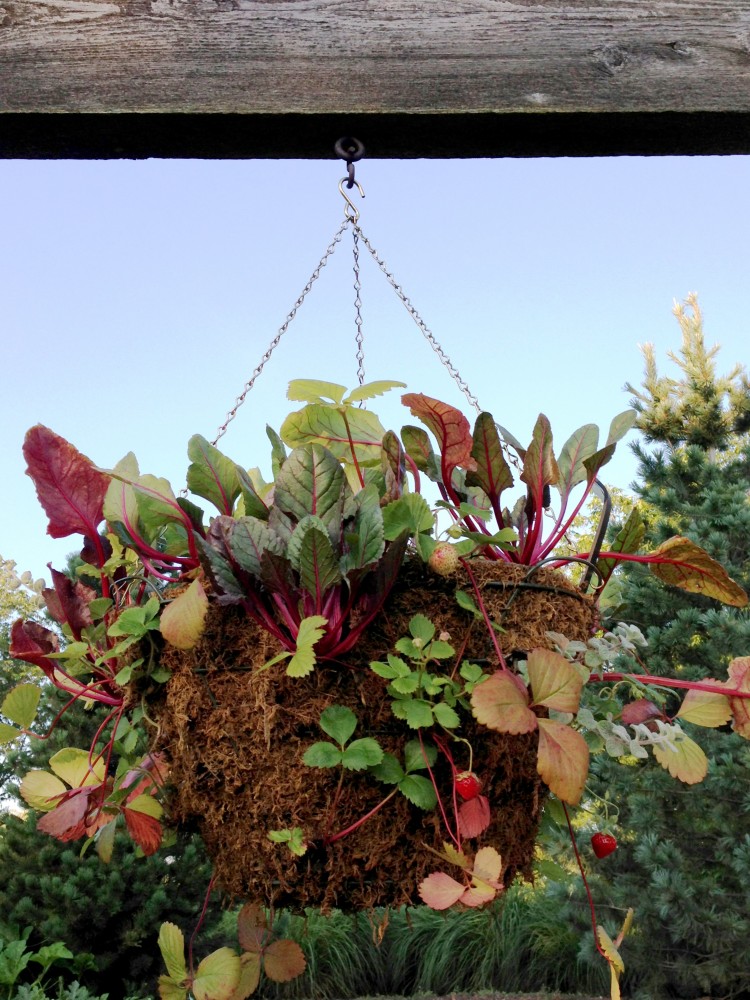
Good choices for Illinois gardens are larger June-bearing strawberries such as ‘Earliglow’ and ‘Allstar’. Day-neutral or everbearing strawberries were developed to produce flowers and fruit continuously throughout summer and fall, ignoring the seasonal effects of day length on fruit production. Of the many day-neutral and everbearing varieties to choose from, ‘Tristar’ is a reliable berry for our zone. At the Garden, we grow everbearing strawberries ‘Mara de Bois’ and ‘Seascape’ in hanging baskets and vertical plantings, because they are among the first to fruit in the spring, but also produce a June crop followed by a final fall crop.

Planting several varieties together in your garden extends your harvest time, ensuring there are plenty of strawberries for eating out of hand and enough fresh berries left over to make strawberry jam.  

Choose healthy plants for a healthy harvest

Start with quality, virus-free, and disease-resistant plants. Mail order nurseries and garden centers have bundles of bare-root plants available. Lesser quality plants are prone to fruit rot, mold, and fungal diseases like Verticillium wilt.

PHOTO: Glass cloche cover strawberry plants in a garden plot in early spring.
Strawberry flowers are susceptible to frost. Here, a transparent plant cover called a cloche (from the French word for bell) is used to protect plants if frost is expected.

Select a planting location in full sun; avoid low-lying spots or crop beds that have grown tomatoes, potatoes, or cane fruit in prior years. These crops can harbor soil pathogens like Verticillium and Phytophthora which can affect new plantings. While strawberries prefer to grow in soil with a bit of acidity, a pH of 6.2 is ideal; the varieties mentioned above perform well in Chicago.

Aim for early spring planting, as soon as the soil can be worked, and its temperature is above 40 degrees Fahrenheit. Mid-April to mid-May is ideal. Space plants 12 inches apart, leaving 3 feet between rows. Fifty plants produce enough fresh home-grown fruit for four people all summer long.

Plant with midpoint of crown at soil level. Roots should be planted straight down. Strawberries are shallow-rooted, and mother plants spread by runners—which can be removed if desired, to develop stronger plants and to promote bigger fruit.

Water your plants well, particularly when they are fruiting. Mulching with straw helps keep fruit clean and dry, and up off the soil.

Spring tasks: Prune Raspberries

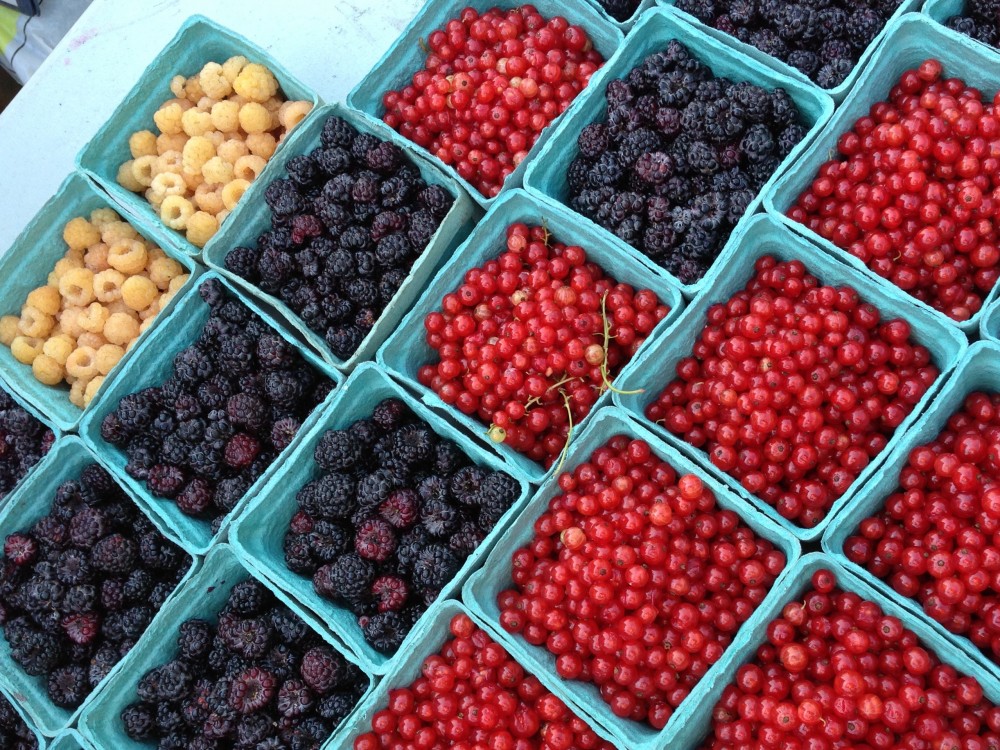
Red, yellow, black, or purple raspberries are easy to grow in hedgerows as natural barriers along lot lines or on post-and-wire trellises. Cane fruit is best managed with proper spring pruning, which prevents a tangled mess and makes your late-summer harvest far easier. Regular pruning keeps brambles in line while allowing air flow through the plant—lessening the risk of fungal diseases like Botrytis and rust, and increasing both yield and berry quality. Both types of raspberries—summer-bearing and everbearing (or fall raspberry)—benefit from a good March pruning.

PHOTO: Different kinds of berries in baskets, lined up in a grid.
A bountiful berry harvest on its way to our Farmers’ Market? A bountiful home harvest is also possible with vigilant pruning.

Summer-bearing raspberries produce a single crop in the summer on canes which have overwintered. It is important to confine them to a 1- to 2-foot-wide hedgerow to encourage air flow and sunlight. Begin your pruning by removing dead, diseased, or damaged canes first. Then, head back (prune) the spindly top 6 inches of cane tips. Removing the thinnest wood which produces the smallest berries forces the growth into the more vigorous lower part of the plant.  Finally, remove less vigorous canes—in an established plant, those canes with less than a pencil’s diameter thickness—leaving 6 inches between canes (enough room to easily pass your hand between canes).

Fall-bearing red and yellow raspberries can produce fruit on both the current season canes (called primocanes) and second-season growth (floricanes). Thus, they can be pruned to bear one or two crops with a method called, “double cropping.” (We demonstrated both methods last year on our brambles in the Regenstein Fruit &  Vegetable Garden.)

  1. To produce one heavy fall crop, cut all autumn raspberry canes back to ground level in the spring. Canes should be cut as close to the ground as possible to encourage new buds to break just below the surface. All new canes will grow from this radical pruning and produce a single crop of berries.
  2. A second method of pruning produces a small crop on the previous year’s growth and later, a second crop on the current season’s canes. When a double crop is desired, remove dead, diseased, or damaged canes in March, leaving the vigorous canes to fruit. Tip-prune those back by one-third of the total length of the cane, or to trellis height. The new shoots or primacies will produce the second larger crop. After the second fruiting, the canes will die and should be removed.

Pruning for blackberries is similar to raspberries. They are also pruned in March by heading back the “leaders”—the main canes—by one-third (or about 36 inches). This tip-pruning helps to stimulate the growth of lateral branches, which is where blackberry sets fruit. The lateral branches should be pruned back to 12 inches, or where the branches’ thickness is about the diameter of a pencil. 

Want to learn more about cultivating berries? Join us for Growing Fruit Trees and Berries, May 29 to July 10, or check out other fruit cultivation classes at the Garden this spring.

©2014 Chicago Botanic Garden and my.chicagobotanic.org

Orbs of October

Color theory states that orange radiates warmth and happiness by combining the energy and stimulation of red with the cheerfulness of yellow. This is a fit description for the harbingers of autumn’s harvest, the seasonally evocative winter squash and pumpkins.

PHOTO: Atlantic Giant pumpkins.
Unbelievable, yet real: Atlantic Giant pumpkins (Cucurbita maxima ‘Atlantic Giant’) adorn beds of parsley, chard, and heirloom root vegetables.

So visually compelling is the color-saturated rind of the world’s largest fruit, and so heavy. All of this certainly explains what your fruit and vegetable team has witnessed in the Garden. There is pure joy as our visitors first glimpse the great pumpkins—ooohs and ahhhhs and squeals of delight, as folks of all ages decide how best to connect with the fruit: Is it real? Should I touch it? Should I sit on it? Hug it? Photograph it? People even talk to our anthropomorphic fruit.

But the giant pumpkins are just one part of the diverse Cucurbita garden art growing in the Fruit & Vegetable Garden this season. While they seem to be called “squash,” “pumpkin,” and “gourd” interchangeably, there is actually a science to identifying these cultivars, and pretty much everything called “pumpkin” is really a squash—although “pumpkin” is most commonly used to describe those distinctive orange orbs.

Cucurbita maxima are squash with softer rinds and flesh, growing on long vines with large, hairy leaves. Harder-skinned “winter squash” are typically Cucurbita moschata, including butternuts and acorn squash. They also have trailing vines and hairy leaves, but tougher flesh and rinds, and a ridged but still soft stem. Only Cucurbita pepo are considered true pumpkins, with tougher flesh and rinds, leaves that are downright prickly (not just hairy), and a woody five-sided stem.

PHOTO: Warted hubbard squash.
Warted hubbard squash (Cucurbita maxima ‘Chicago’s Warted’) is delicious now, and delicious later.

Cucurbita maxima ‘Chicago’s Warted’ is an heirloom developed by Budlong Gardens of Chicago. It was introduced by Vaughan’s Seed Store of Chicago in 1894. The 13-pound fruit are dusky olive green, and deeply wrinkled and warted with a classic hubbard squash teardrop shape. These gems have a fine-grained, sweet orange flesh. We planted ours way back at the end of May—perfect timing for this 110-day crop. The hubbards are versatile winter squash that can be eaten right after harvest, or stored until the flesh sweetens around the new year.

PHOTO: Australian blue squash.
Australian blue squash (Cucurbita maxima ‘Queensland Blue’ ) can be stored for an incredibly long time.

A member of the avant-garde Australian blue group of squash, Cucurbita maxima ‘Queensland Blue’ is not often seen growing in the field. While they hail from South America, the blue squash varietals grow equally as well in Australia (for which they are named) because of similar temperatures and length of growing season. We found the seed at Seed Saver’s Exchange in Iowa. This is a bottle-green keeper that, if properly harvested and well-cured with a 4-inch “handle,” will store for more than a year—maybe two. It is a fantastic eating-quality squash with smooth, rich, brilliant orange flesh.

PHOTO: Waltham butternut squash.
Waltham butternut squash (Cucurbita moschata ‘Waltham’) looks like a buff-colored peanut.

Cucurbita moschata ‘Waltham’ looks like a blocky, buff-colored peanut. We planted it in the warm soil of mid-June, which squash of this species prefer. Waltham butternut is a uniform producer that must be harvested before the slightest touch of frost.

PHOTO: Growers and staff positioning a mammoth pumpkin on a forklift.
Moving this Atlantic Giant to its current location took a full day of careful handling…and more than one forklift.

Make sure you have a forklift available before you think of growing Cucurbita maxima ‘Atlantic Giant’, which can easily grow in excess of 1,000 pounds. This squash that looks like a pumpkin surprisingly does not need much more room than the average pumpkin patch to grow, but organic compost can help boost its final size.

PHOTO: Winter Luxury pumpkin.
The champion of pie pumpkins: Cucurbita pepo ‘Winter Luxury’

Cucurbita pepo ‘Winter Luxury’ is diminutive in stature but mighty in taste. The fine, rough netting around the shell is a distinguishing feature of this 1896 heirloom. This is the gold-standard pie pumpkin that can be eaten right out of the garden. It won’t store as long as the other species.

PHOTO: Jarrahdale Australian blue pumpkin.
Stunning when sliced: Jarrahdale Australian Blue (Cucurbita maxima ‘Jarrahdale’)

Cucurbita maxima ‘Jarrahdale’—our second unusual Australian blue—is a deeply-grooved, slate-gray squash with dense, sweet, deep orange flesh and a thin skin.

PHOTO: Pink Porcelain Doll pumpkin.
Purchase Porcelain Doll (Cucurbita moschata ‘Porcelain Doll’) seed from Pink Pumpkin Patch Foundation.

Cucurbita moschata ‘Porcelain Doll’ is a pink cheese pumpkin that has become the symbol of breast cancer awareness among pumpkin growers across America. Growing this decorative hybrid will ensure a donation to research is made.

PHOTO: Small Mixed gourds.
Grown for display, these Cucurbita pepo ‘Small Mixed’ gourds are generally better food for squirrels and raccoons.

There are three basic types of gourds in the Cucurbitaceae, or squash family: Cucurbita (ornamental squash), Lagenaria (utilitarian gourds used for things like containers or birdhouses) and Luffa (vegetable sponge). These Cucurbita pepo ‘Small Mixed’ ornamental gourds are just pumpkin varieties with poor flesh quality—either too fibrous or too watery for eating—but with beautiful color and texture for use in fall arrangements. We grew these up on a trellis. They store better in a cool environment but can easily last indoors for seasonal holiday decorating.


Choosing a pumpkin this weekend?
Use these tips and know what you’re selecting when you shop:

PumpkinHandle pumpkins carefully, by using two hands to lift them. Although it is tempting to pick pumpkins up by the “handle,” a pumpkin’s decomposition accelerates once the stem has broken off.

Well-grown pumpkins should be heavy for their size, with telltale ripeness indicators like deep, saturated color, and brown stems. The rind should be hard—impenetrable when lightly pressed by a fingernail—and have a glaucous, dull sheen.

Once you get your pumpkin home, wash the rind with a mild bleach solution to remove bacteria and extend the life of the pumpkin.


I just cannot resist asking: Orange you glad you visited the Regenstein Fruit & Vegetable Garden? Learn more about pumpkins in Plant Information and The Smart Gardener.


©2013 Chicago Botanic Garden and my.chicagobotanic.org

Fireworks for the Grill: Herb Brushes

It’s the season for grilling—time to share a simple, herb-related trick with the grill master at your house.

PHOTO: rosemary sprigs tied to a wooden spoon make an herb brush
Wooden spoon + rosemary + garden twine = herb brush

Fashion an herb brush out of a wooden spoon, a bit of kitchen twine, and freshly-snipped twigs of rosemary. Use the aromatic brush to flavor roasting meats like lamb, chicken, or pork—just dip it into marinade or olive oil and apply liberally.

Another rosemary trick: Try threading chunks of meat onto rosemary skewers for a delicious infused kabob. Genius!

PHOTO: homemade sage grill brush.
A beautiful plant in the garden, sage is most familiar as the flavoring in stuffing—but it makes a great grill brush, too!

A sage brush is perfect for sweeping marinades onto grilled chicken. After the meat is cooked, snip the herb into softened butter to create sage butter to serve along with it at the table.

The genus Salvia comes from the Latin word salvere, “to save or to heal,” hence this herb’s connection to long life and good health. A wonderful wish, indeed!

PHOTO: snipping tarragon for a garnish.
After using your tarragon brush on grilled fish, snip the herbs over vegetables as a garnish.

French tarragon easily becomes a grill brush for basting butter or marinades onto grilled fish. Just before serving, snip the “brush bristles” atop steamed new potatoes for a flavorful finishing garnish.


©2013 Chicago Botanic Garden and my.chicagobotanic.org

Fruit Trees Chill Factor

Looking for a reason to be glad for the cold weather in winter’s stretch? Consider the needs of fruit trees. Fruit trees need to spend a certain amount of time during their dormant winter period at cool temperatures in order to satisfy their chill requirement.

PHOTO: The apple archway in winter (in the Fruit and Vegetable Garden).

Simply defined, the accumulation of chill units (CU) is a cumulative measure of the number of hours trees spend between 32 and 45 degrees Fahrenheit. Liken this process to a reset of the tree’s biological clock. This clock counts down the time needed to change the nutrients stored in the roots into a form that can flow up the trunk as the weather warms and support flowering and growth. Time spent at winter temperatures above 60 degrees and below 32 degrees counts against the number of accumulated chill units.

PHOTO: the apple archway in full bloom.

Getting enough optimum chill time ensures the tree will successfully break dormancy, flower, and set fruit. The wild weather fluctuations of 2012 brought the warmest March on record (there were 9 days above 80 degrees), which signaled to the trees that it was time to start growing. April’s subsequent sharp drops to freezing temperatures caused tissue injury and poor flowering, leading to a significant loss of 2012’s fruit crop.

Trees are able to withstand cold temperatures when they are dormant as they are now. Chill requirements vary between different pome fruits. Apple, pear, and quince varieties each have their own climate-specific needs. Low-chill apples, while productive in California, won’t produce well in our colder northern climate because they bloom too early.  

PHOTO: Autumn brings apples to fruition!

The Regenstein Fruit & Vegetable Garden’s 34 apple varieties have chill requirements ranging from 600 to 1200 CUs. Chicago’s weather historically can meet those requirements, barring extreme fluctuation like last year. Our current cool weather is right on track and looking positive for growers.

Knowing a fruit tree’s chill requirement is a tool for choosing the right plants for your garden. Come to the garden for a quiet early spring walk through the orchards, perhaps finding inspiration to plant fruit trees in your own garden this spring. In the meantime, please be reassured that the trees and fruit growers are happy with this consistent wintry weather.

The Garden’s Plant Information Service can help you select the right fruit trees for this area. Contact them today!


©2013 Chicago Botanic Garden and my.chicagobotanic.org

Simple Seed Saving Method for Tomatoes

As farmers’ markets wind down, many of us want to preserve the bounty of this year for the next. Why not save save seeds from your last tomatoes so you can grow them yourself next year?

1)    Make sure to save the seeds from an open-pollinated or heirloom tomato. These seeds will reliably reproduce the “parent plant.”

2)    Choose a ripe, disease-free tomato; one past being edible is best.

Heirloom Tomato Weekend_RJC8698

3)    Cut the tomato ‘around the equator’ and squeeze out the seeds and ‘goo’ in to a strainer over the kitchen sink. Run cold water over and use your fingers to try and separate the ‘goo’ from the seed.

Heirloom Tomato Weekend_RJC8715

4)    Knock the strainer on a paper plate lined with a coffee filter, dislodging the seeds from the strainer.

5)    Label the filter with the tomato variety and let dry which could take up to three weeks. The top of the refrigerator is a great place for this.

tomato seeds in envelope_RJC6138at

6)    When dry, scrape the seed in to an envelope labeled with the variety and the date for storage. If the seeds stick to the coffee filter, simply fold the whole thing up and store in the envelope. The filter itself can be planted; it will disintegrate.

7)    Store your heirloom tomato seeds in a cool dry place indoors. I like to put them in my top desk drawer.

8)    Seeds have varied life expectancies. Tomato seed is viable for 4-10 years.

Mark your calendars for the Second Annual Seed Swap on February 23, 2013. For more information on seed saving visit our web site.