
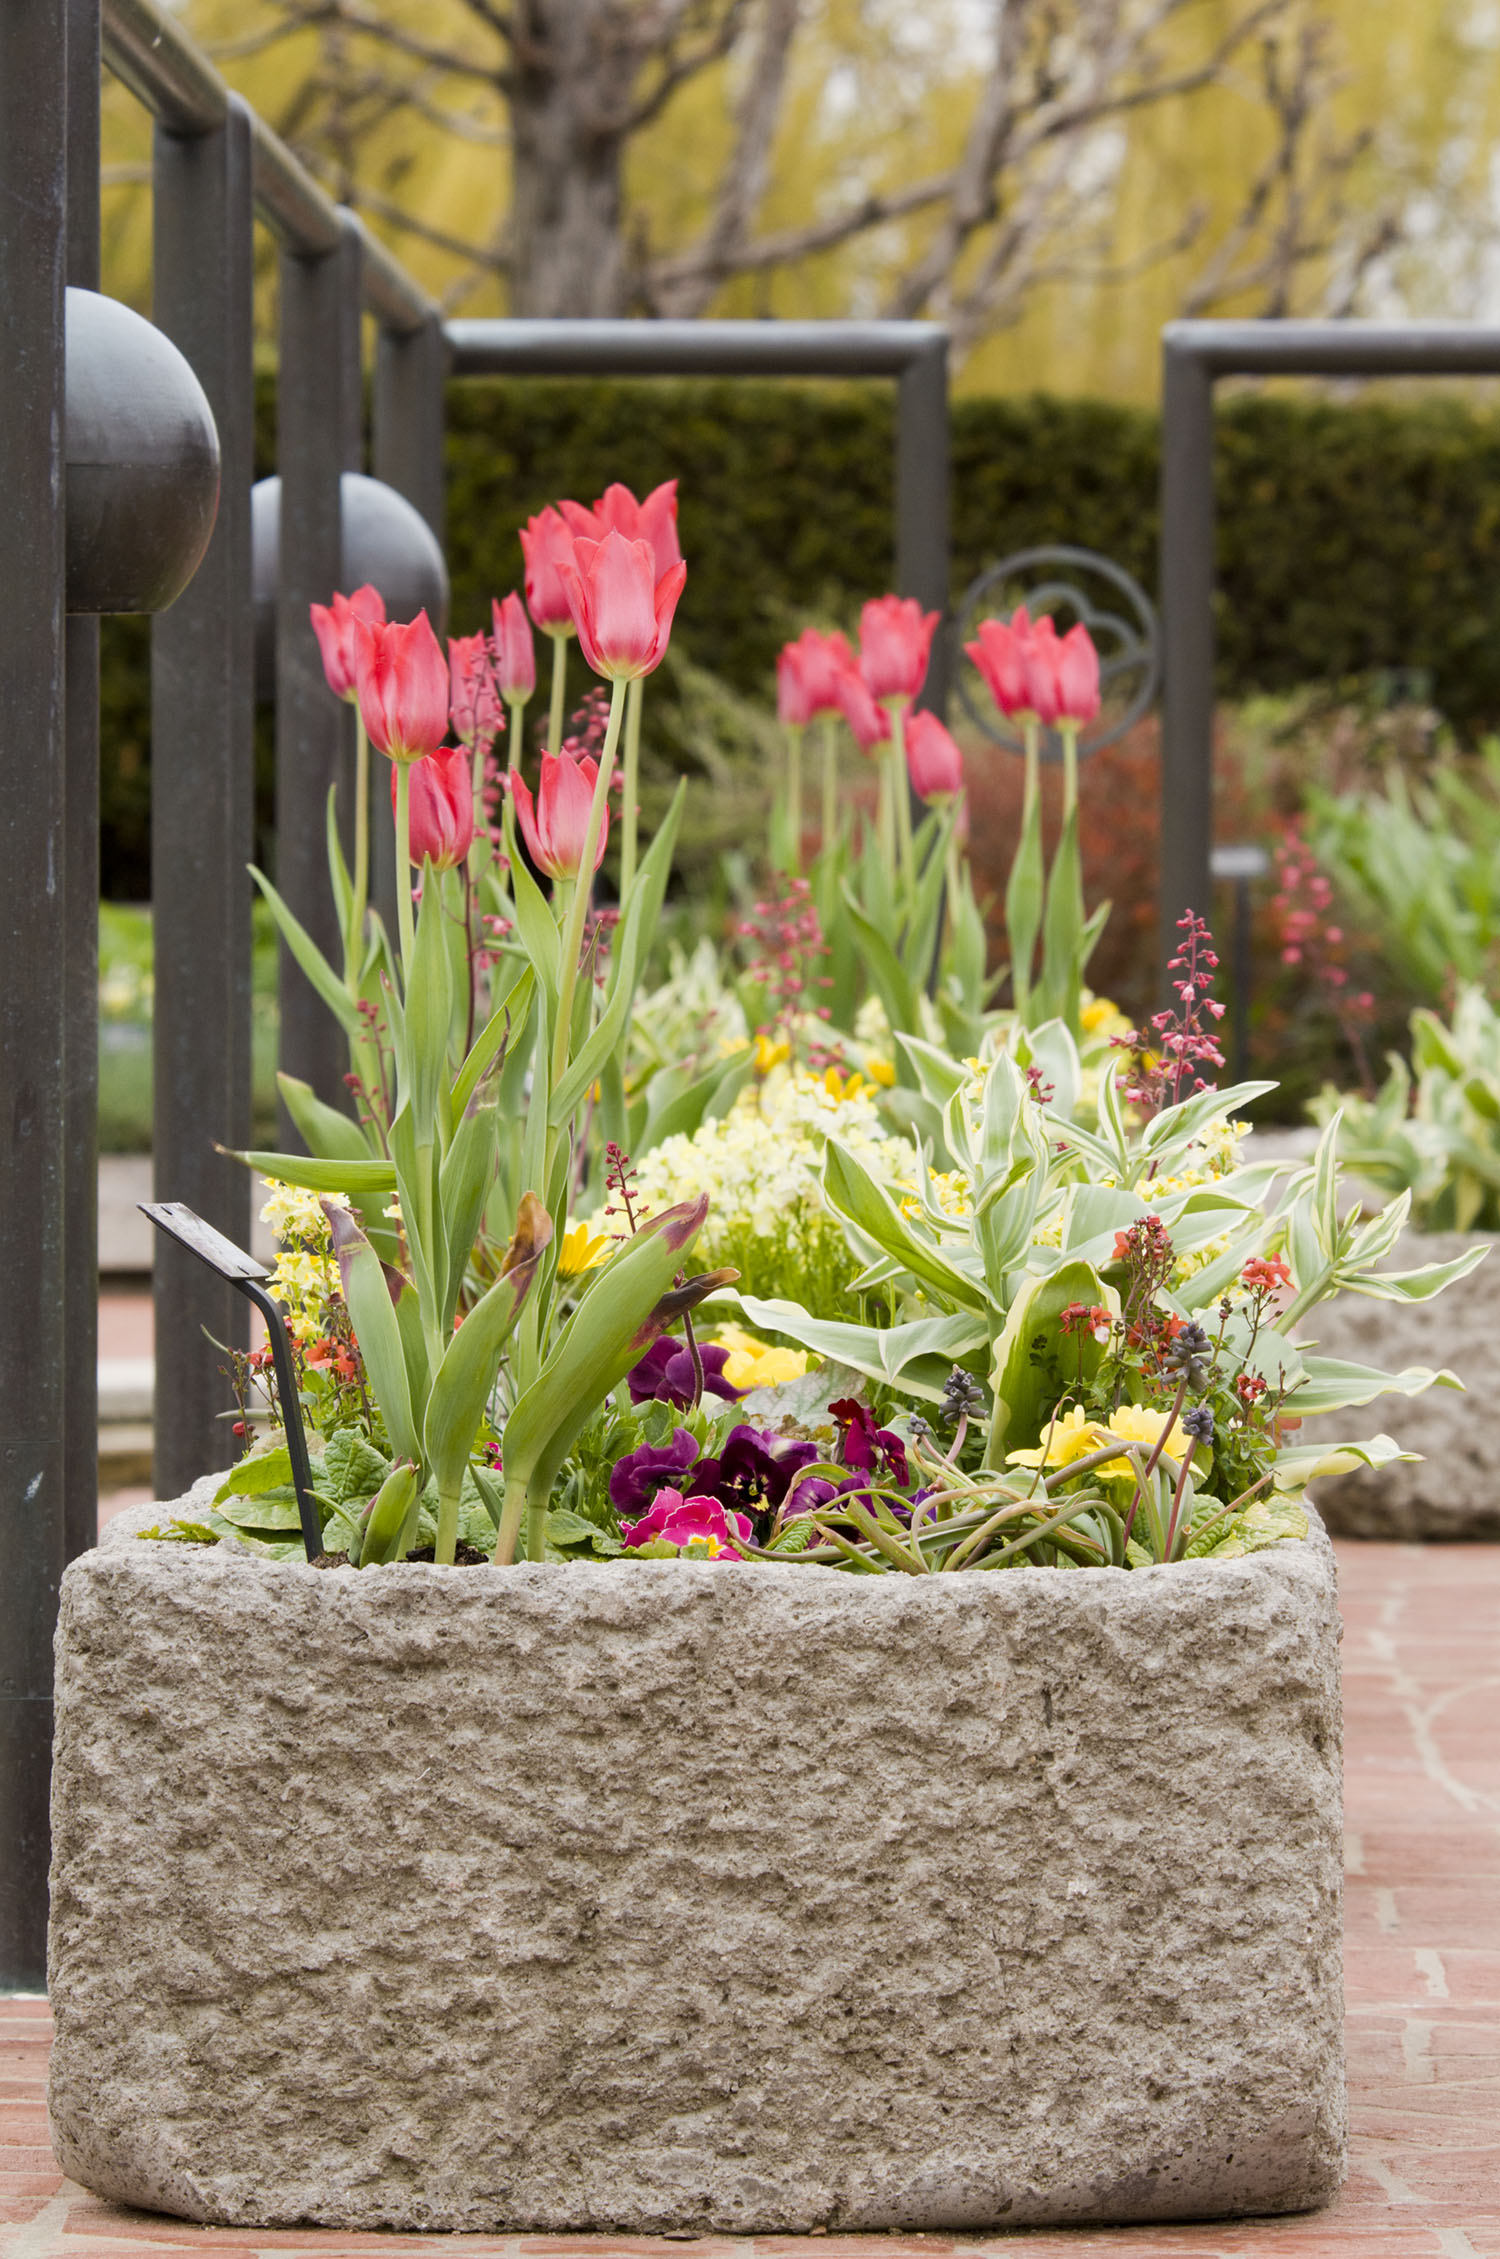
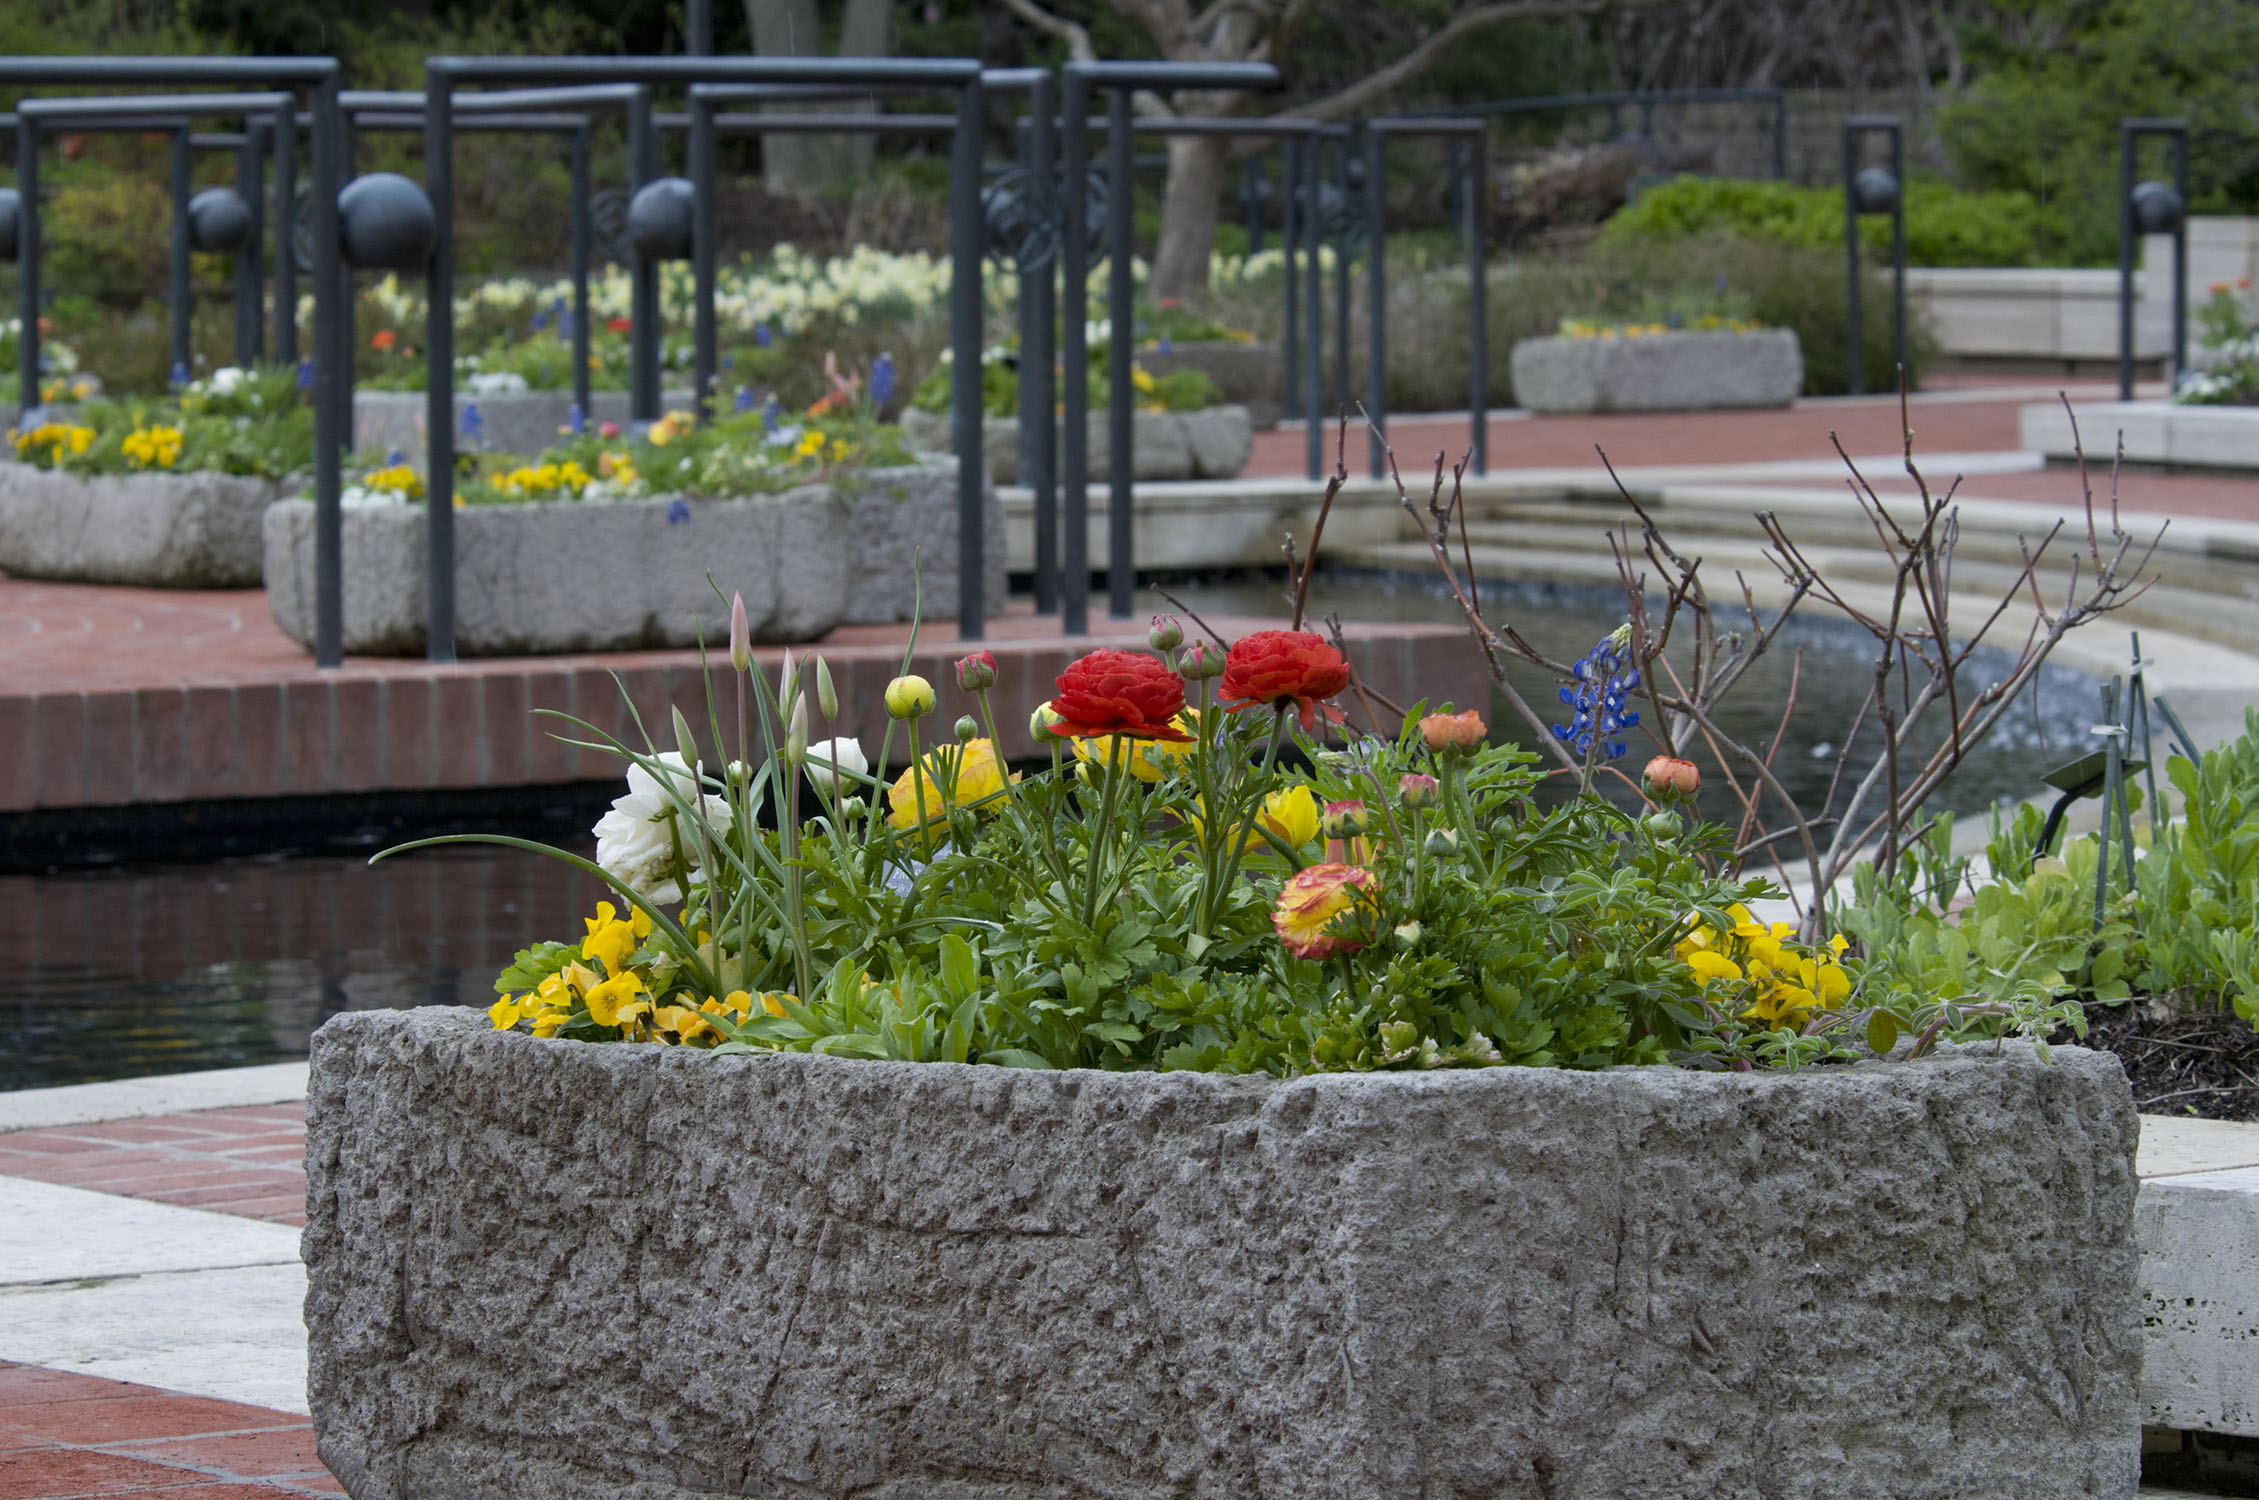
One of my signature projects at the Chicago Botanic Garden is designing and building the hypertufa troughs for the Heritage Garden spring display. While our greenhouse staff spends their winters growing the unique and beautiful plants that we feature in the troughs, another team is hard at work making the troughs.
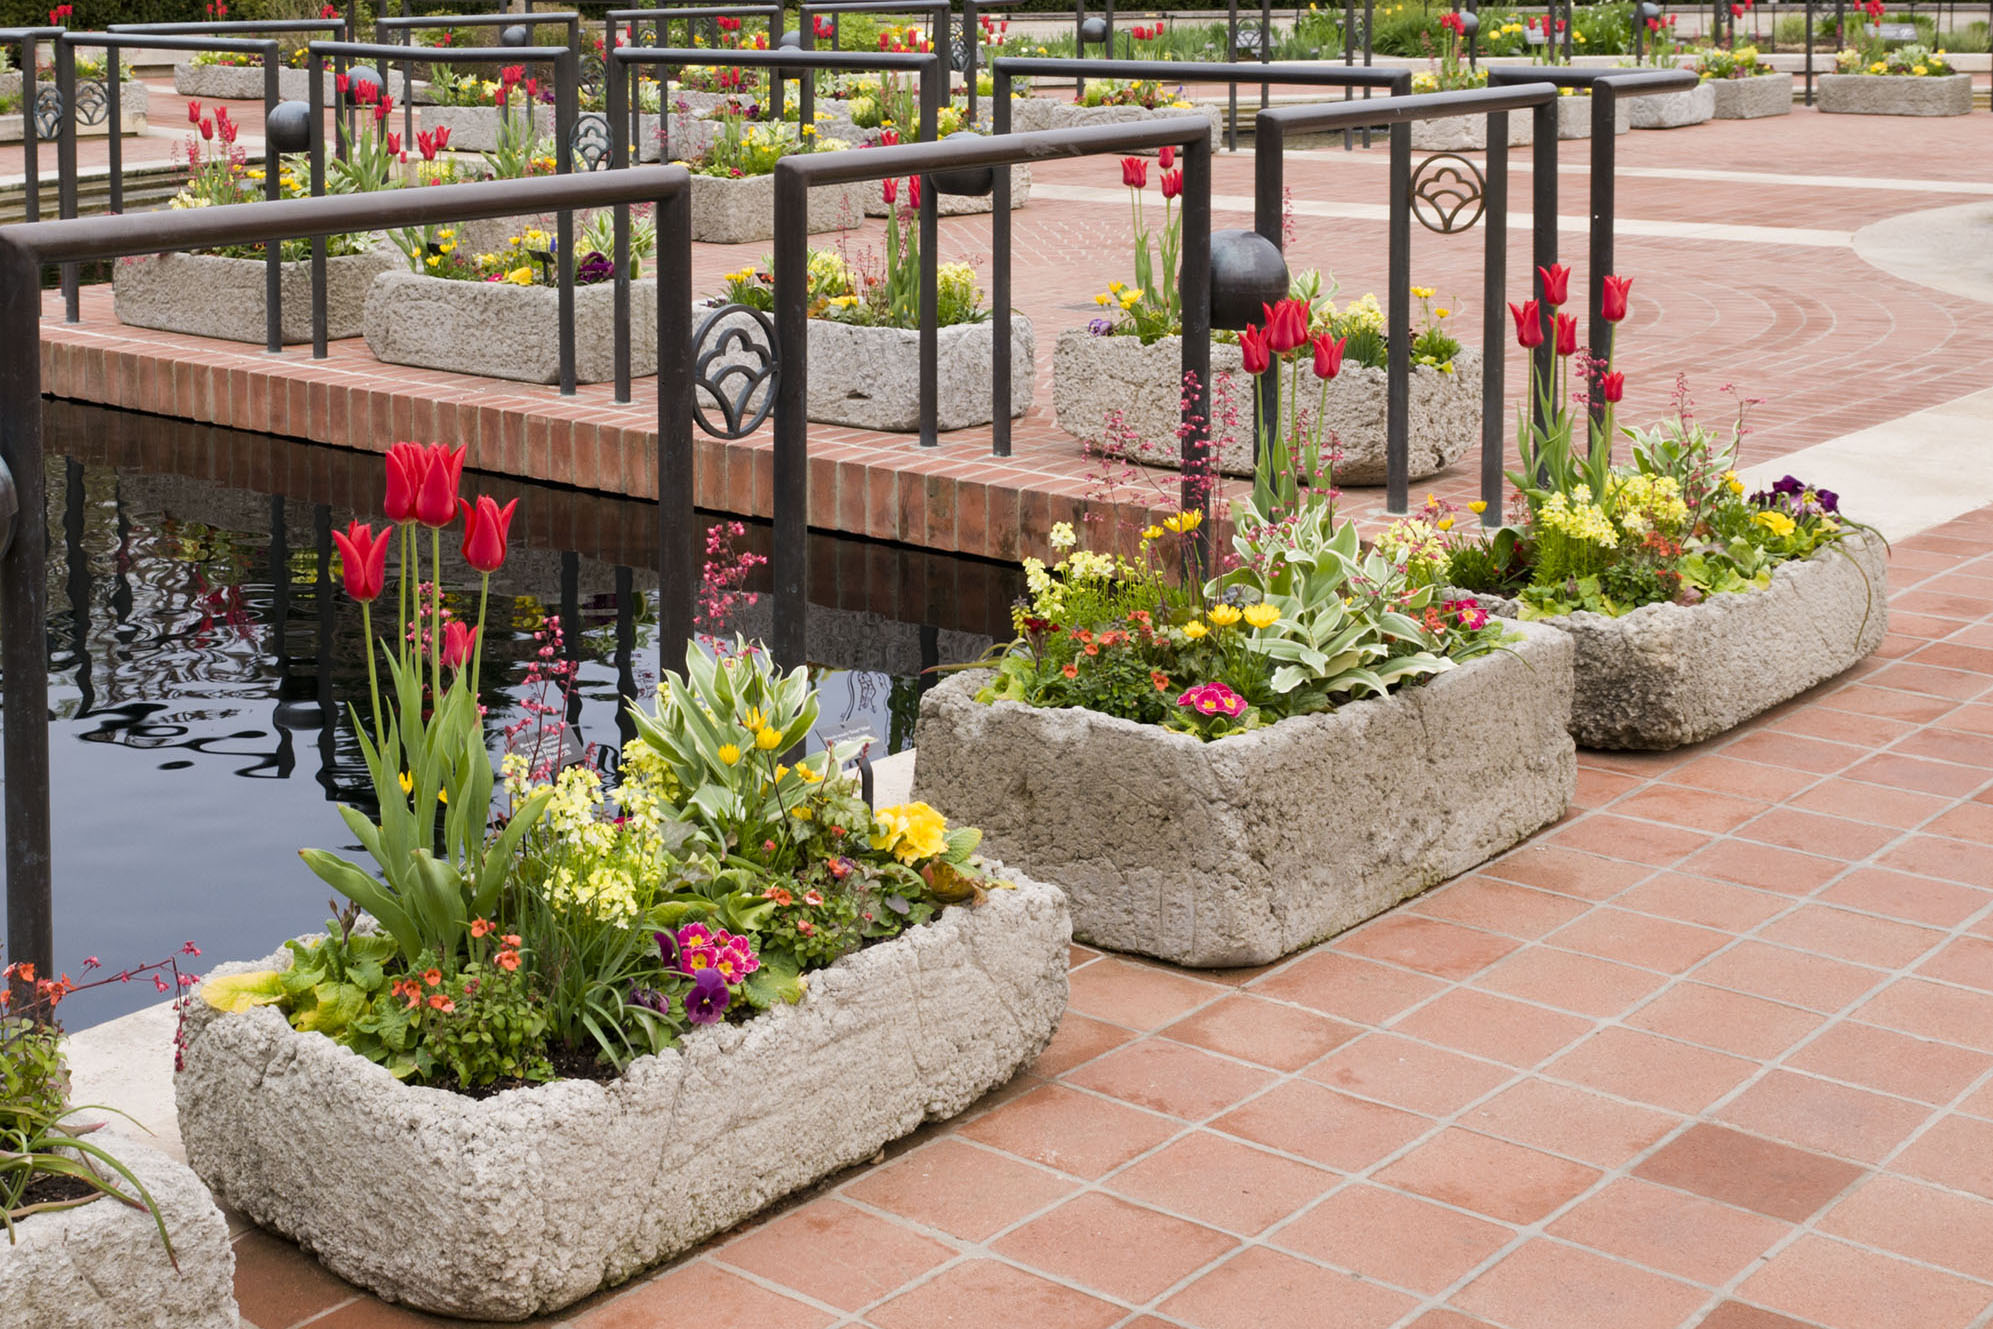
Hypertufa is a simulated stone container that is durable in all weather conditions, but lighter-weight than solid stone or concrete. Our trough style, which is rectangular with a distressed finish, is designed to look like vintage livestock feeders that you might imagine aging for generations in the English countryside.
Making troughs is a heavy and dusty job, but the result is a unique and lasting piece of garden artistry. Here is how we make them at the Garden:
Step 1
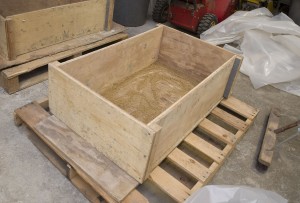
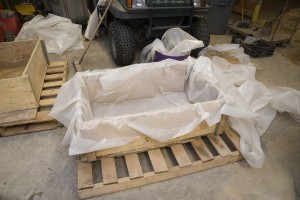
Create a wooden frame with an open top and bottom. We build it so we can easily take it apart in Step 6. Line the interior of the frame with heavy-duty plastic sheeting so the concrete does not stick to the frame.
Step 2
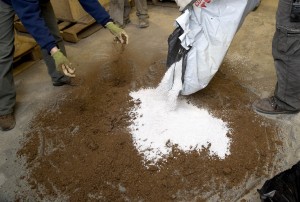

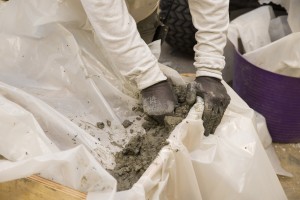
Mix 1 part Portland cement, 1/3 part peat moss, and 1/4 part coarse perlite. We add water until the wet concrete slowly falls off our shovel.
Step 3
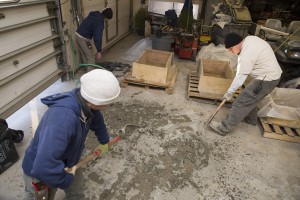
We pour about 2 inches of concrete into the bottom of the frame.
Step 4
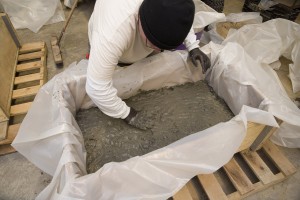
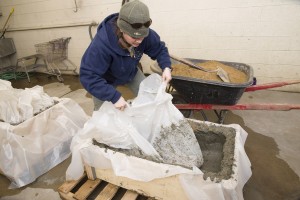
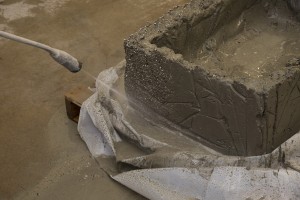
Place another large sheet of plastic on the inside of the frame. Add a 4-inch layer of sand on top of this sheet of plastic.
Step 5
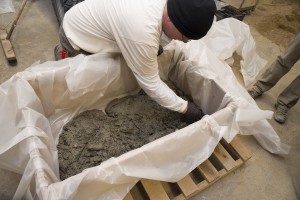
Between the two sheets of plastic, start pouring in more concrete to form the side walls. We try to make the walls about 2 inches thick, making sure they are as even as possible and have no air pockets. As the walls get taller, we keep adding sand on top of the second sheet of plastic. The sand supports the walls until the concrete hardens. Fill concrete to the top of the frame, making sure the support sand is also at the same height.
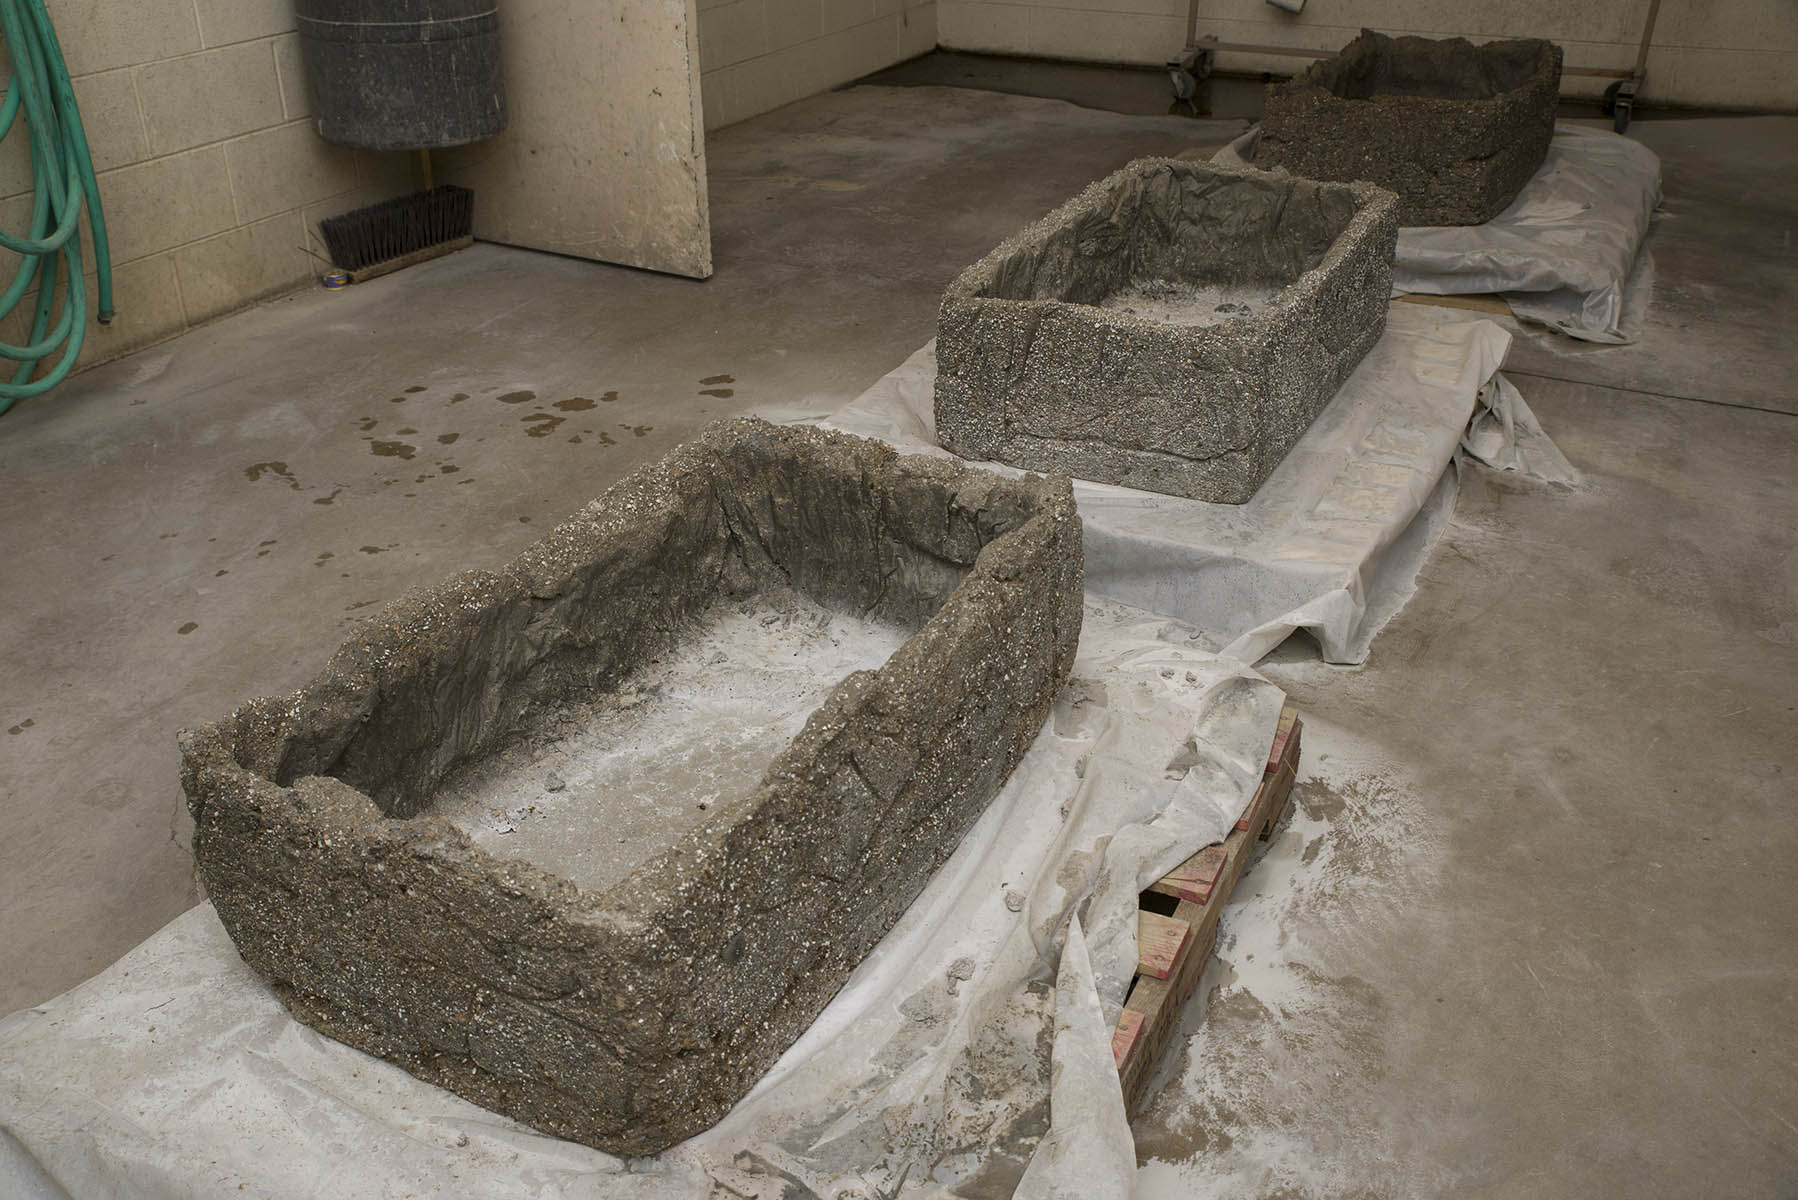
Step 6
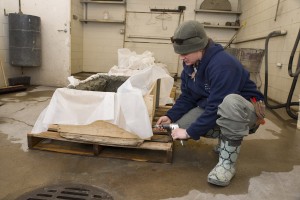
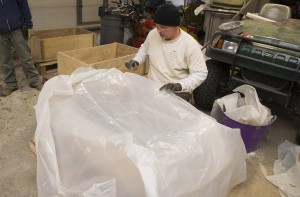
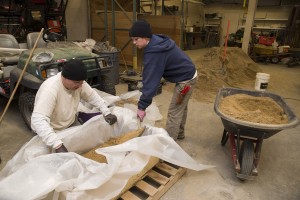
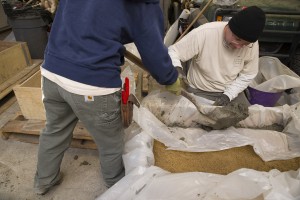
After the concrete sets but is not completely dry (6-18 hours, depending on its consistency in Step 2), we remove the wooden frame and plastic.
Step 7
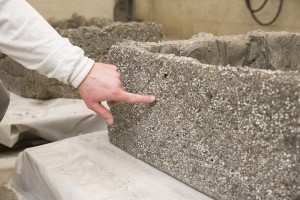
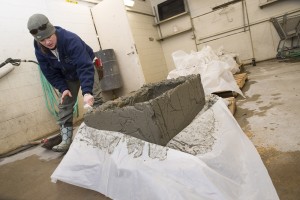
We then distress the trough to give it a weathered appearance. We use a variety of tools to do this, including hammers, chisels, and wire brushes. This year we even used a power washer. Once the trough is distressed, we drill drain holes and let the concrete completely cure for several weeks. Once cured, it is ready for our spring display!
You can buy pre-made hypertufa containers, but this is definitely a project you can do at home for a lot less money and in a design style that is uniquely your own. Be creative. Add pebbles, shells, or beads to give your trough a little extra flair. Pigment in the mix can give it a color that better matches your décor. Adding more perlite or peat moss will make your trough lighter and give it a slightly different texture (but also makes them a little more fragile, in our experience). Leave the exterior of the trough smooth, rather than distressed, for a more formal or modern look. Lining the mold or frame with leaves (especially those with prominent veins or patterns) is another fun look for the troughs.
When we have a little bit of hypertufa mix left over at the end of our projects, we also like to make unique containers from simple molds that we find around the workshop. An upside down garbage can lid makes a nice birdbath mold. An old plastic bowl can be the perfect shape for a windowsill herb garden. I have even used an old box to make a hypertufa boot tray—who doesn’t need one of those?! Silly or serious, there is no limit to your hypertufa container options.
©2013 Chicago Botanic Garden and my.chicagobotanic.org
Your proportions are not clear. You state your proportions as 1, 1/3 and 1/4. Would you clarify please? Thanks!
Hi Sarah, you can look at the proportions in 2 different ways. For example, you could do 1 cup cement, 1/3 cup peat moss, and 1/4 cup perlite. Another way to look at it is a lot of cement, a lot less peat moss, and even less perlite.
With that said, everyone seems to have a different “recipe” so I encourage you to adjust the proportions until you get a texture, color, design and weight that works for your project. Exact measurements for hypertufa are less important than the proportions, in my opinion. That’s part of the artistry of using hypertufa.
Tom
Good morning and thank you for the excellent photos and directions. Could you please share the dimensions of your box and the amount of materials we would need to make that same size? How immune to climatic freeze/thaws are hypertufa troughs?
Marzette
Ketchikan, AK
Hi Marzette, thanks for reading my post. The troughs as depicted are 22”W x 38”L x 12”H (outside dimensions). We do not leave these particular troughs planted year-round, but we do store them outside with good success. If you were to leave them outside and planted year-round, I suggest slightly reducing the amount of perlite in the mix. We use perlite to reduce some of the weight, which is beneficial to us since we move the troughs on-and-off display every spring. Good luck with your own hypertufa projects!
THANKS for a great instructive and share. I especially love the use of sand and plastic, which really allows for a lot more creative options. I made hypertufa pots that are about 7 years old. They are left outdoors year round, mostly in a sunny spot potted and are really doing well…spilling out their sedums,, hens and chicks and some that I can’t remember what I planted in them….Every year they are a pleasant surprise with whatever plants have endured and established themselves! I will say that when I made them I always used some chicken wire in the hypertufa mud. Maybe that is why my pots endure the winter without a crack or break! Can’t wait to see how your sand/plastic technique works for me. I’ve started a japanese water bowl as my first experiment! I’ll try to share it if it comes out nice!