How to Train Your Plant II

Blog followers will remember that in the first “How to Train Your Plant” post, we demonstrated how plants respond to the gravitational pull of the earth. Geotropism is difficult to overcome, but that didn’t stop me from trying to make a plant grow sideways through a maze. You can try this activity at home.

You will need these items:

  • a shoebox (or any kind of box)
  • cardboard to make dividers
  • duct tape (or any opaque tape)
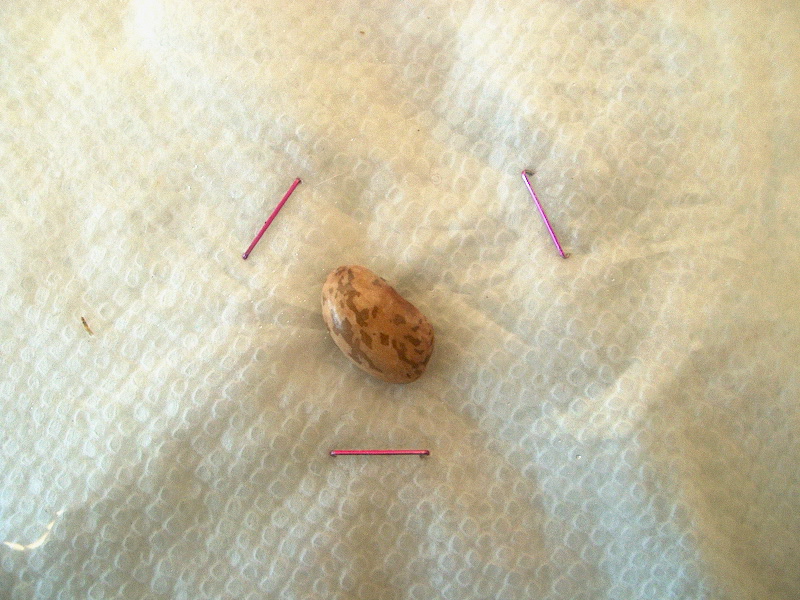
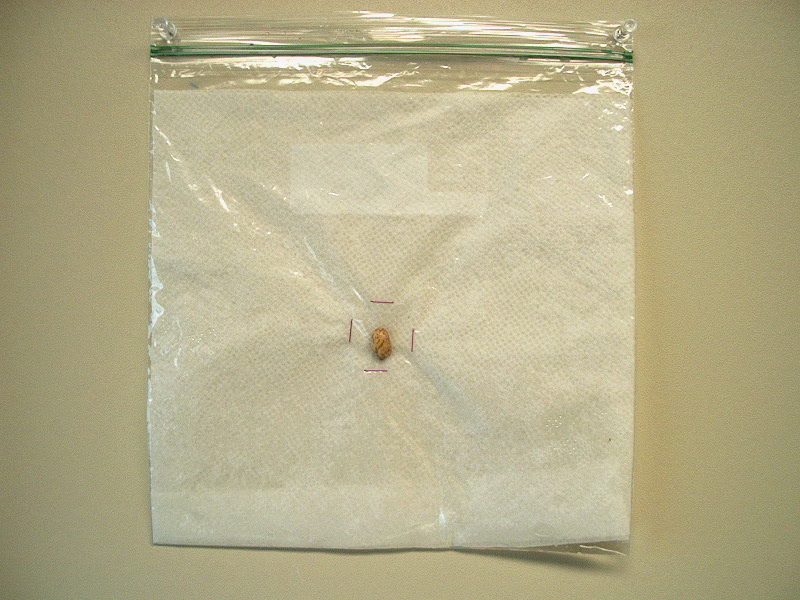
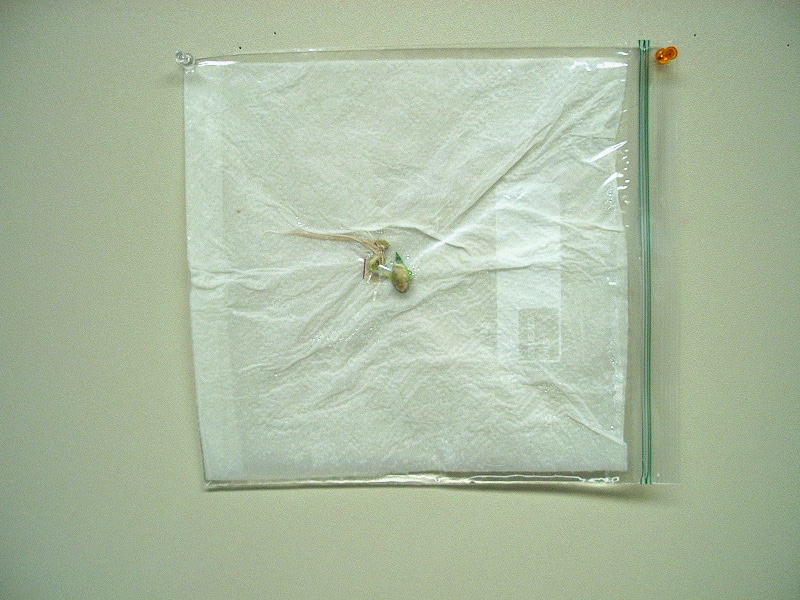
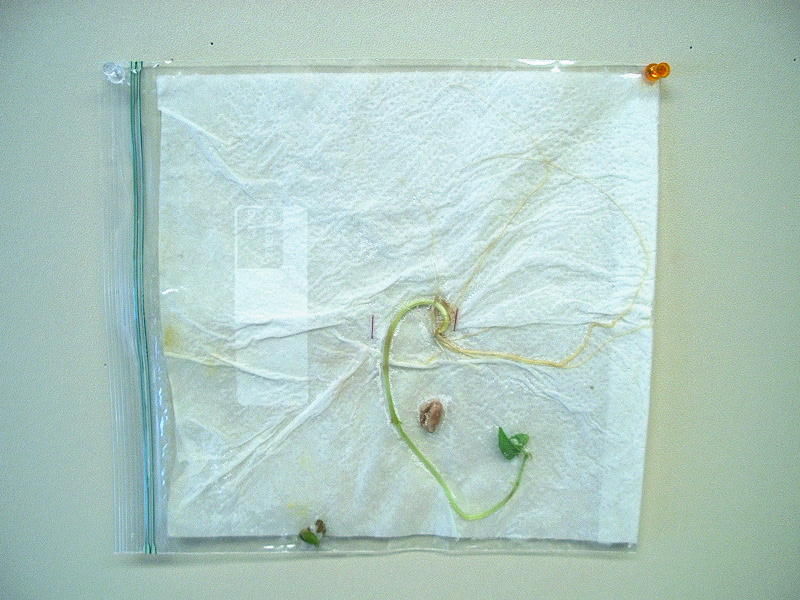
  • soaked bean seeds—I used different beans from a soup mix
  • a container with soil
PHOTO: The materials for the maze are displayed.
You’ll need a shoe box, cardboard dividers, seeds, a pot with soil medium, and of course scissors and tape for constructing the maze.

Stand the box on its side. Then cut two pieces of cardboard to fit in the box and make divisions. You’ll want these to fit as snugly as possible inside the box, but they don’t have to be perfect. The tape will fix that. Cut a large window in each divider. Cut a window on one end of the box. Tape the dividers in place as shown in the picture.

PHOTO: The maze assembly is shown in the shoebox. There are two dividers with cut out windows and a whole in the side of the box for light to shine sideways on the sprouting bean seeds.
Pardon the crude appearance of this maze. I wasn’t going for style points.

Plant the seeds in the soil and put the container on the side opposite of the hole you cut. Just for fun, I used several different seeds from a bean soup mix to see if one kind would get through the maze better than the others. It was like a bean-seed “race.” You can try whatever you like.

Make sure the holes in the divisions are big enough to allow lots of light in from the side, and don’t vary the height too much. Remember, we are fighting the plant’s tendency to grow up—if it’s too challenging, it won’t work. Trust me, I learned this the hard way.

When the maze is complete, give your beans a last bit of water, and maybe a kiss, and then close the box. Apply tape along the top edge, to secure it and reduce light. Then put it next to a window and wait.

And wait.

It’s going to take a few weeks. Remember, horticulturists are very patient. Open the box every few days or so to be sure it has not dried out. Add a little water, but only enough to moisten the soil if it is very dry.

When you see the bean plant emerging through the open window in the box, open it and take a look. How long this will take will depend on the kind of beans you use, how far the plant has to grow, and how warm the room is.  

The beans have sprouted and are moving toward the light

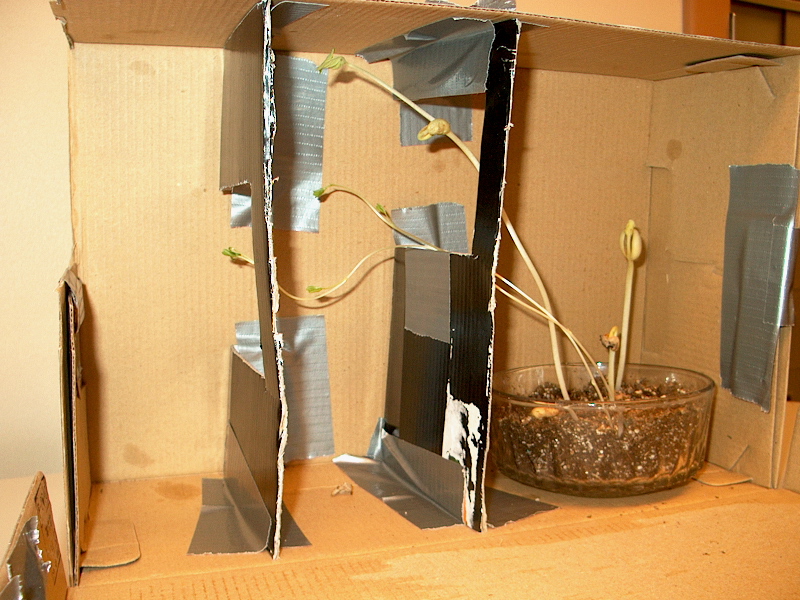
 It took my beans about five weeks to grow through the second window.


PHOTO: all of the bean sprouts are leaning toward the light.
The beans were definitely torn between growing up and growing in the direction of the light.


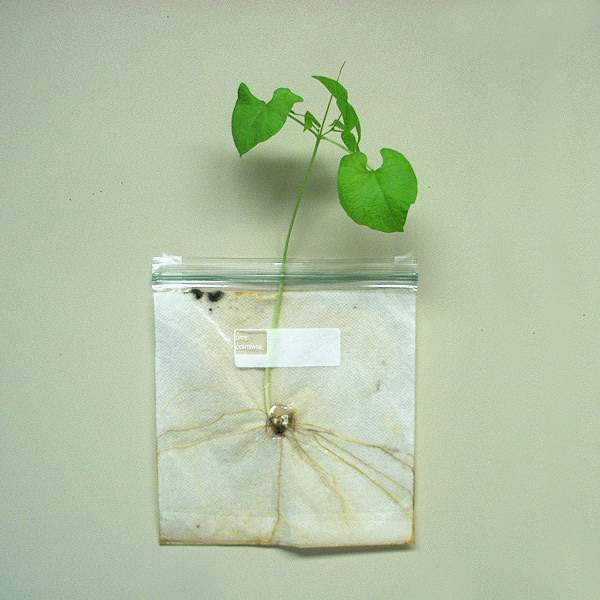
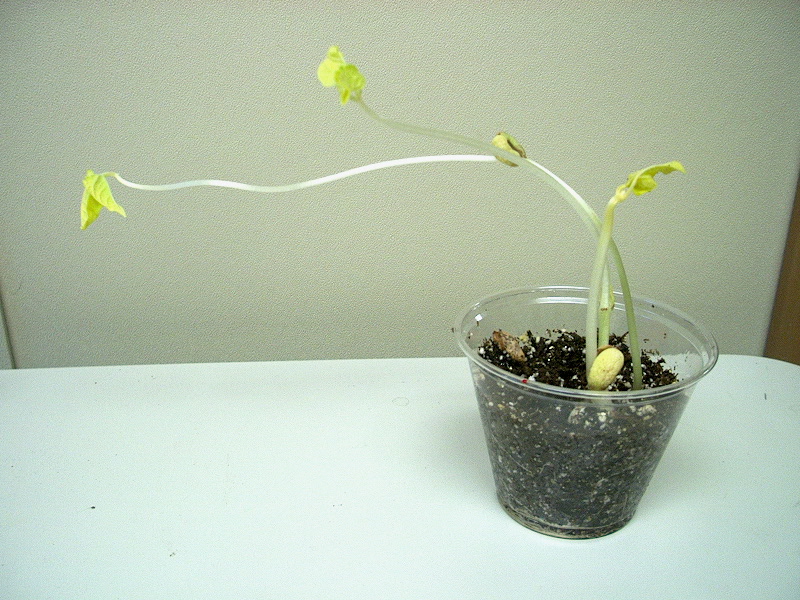
The winning sprouts, which I believe were lentils, did not actually make it through to the last window when I took this picture, and I’m not sure it has enough “umph” to do it. Still, notice how all of the plants leaned toward the light and most of them grew through the first window. That is a positive result!

What is going on here?

This activity demonstrates phototropism. Photo is the Latin word for “light,” and you will remember that a tropism refers to an organism’s response to stimulus, so that phototropism means plants grow toward the light.

It makes sense for plants to reach for the light because they need light to make sugars, their source of energy. Normally, growing up against the pull of gravity is also growing toward the light. In this activity, we changed that condition, forcing the beans to deviate from their normal course to get the light they needed.

The sprouts that grew the farthest and were closest to completing the maze had leggy stems that would not support growth upward to the last window. If I leave them a few more weeks, they could possibly grow along the bottom and then up the side of the box. I’ll have to wait and see.


©2013 Chicago Botanic Garden and my.chicagobotanic.org

Stories in the Snow

When a coyote pirouettes in the snow, you start to wonder. Where was it going? And what made it turn?

After a big snow, I love looking for wildlife tracks and the stories they tell. The paw prints and other tracks in the snow are among the small wonders of winter.

In a recent blog, we talked about finding awe on winter walks—turning attention outside yourself for emotional well-being. By following animal tracks, you lose yourself in a different world and take a fresh look at the nature that surrounds you. You can do so in your neighborhood or at places including the Chicago Botanic Garden, where I’m director of youth education.

One winter, after a snowstorm, I decided to look for evidence of wildlife near the Garden’s Regenstein Learning Campus. My first sighting was the tracks of at least one coyote running through the snow.

The individual track was not a clear footprint, but it was the right general shape and size to be a coyote.

PHOTO: the single track of a coyote is seen in the snow.
The coyote track looks like that of a medium-sized dog, with padded feet making toe impressions in the snow.

The tracks formed a few paths across the Campus.

PHOTO: two coyote trails are seen very clearly running through the snow, close to the treeline.
A coyote ran through the snow toward the right of the picture, then ran back and rejoined its original trail.

The tracks did not follow the paths that people walk, but instead ran closer to trees. This makes sense for an animal that is trying to stay hidden from other animals. I also found a spot where the coyote seemed to run up, do a little turnaround, and take off in another direction.

PHOTO: The tracks in the snow look like the coyote ran and make a circle in the snow.
The tracks look like a coyote circled around after running out of the woods.

This isn’t the clearest picture, but you can still see that the coyote came from the wooded area toward the front of the picture. Then it turned around and sank down on its front paws, right where you see two clear side-by-side holes in the snow. It turned and ran to the right of the picture frame. You can imagine a spirited puppy, running excitedly as it plays in the new snow and leaves tracks like these. Was the coyote playing? Hunting? Running away? If you’re walking with someone, especially kids, it’s fun to come up with a story.

I was also hoping to find evidence of animals interacting. The closest thing I found was this set of rabbit tracks.

PHOTO: a set of rabbit tracks appears from behind the corner of the building, turns around and goes back in the direction it came from.
The rabbit that left these tracks decided to turn around and go back instead of coming around the corner of the building.

Here, the rabbit hopped to the corner of the building, stopped, and then turned around and went back the way it came. Did it possibly see or smell the coyotes that were running around and decide to go back to hiding?

I also spotted squirrel, bird, and mouse tracks. And then I found these strange marks in the snow.

PHOTO: a nice layer of snow on top of a hedge row has long parallel lines from students dragging their fingers along the hedge as they walked past.
Fingerprints in the snow?

What could these strange lines be? “It’s elementary, Mr. Watson!” These “fingerprints” were left by elementary school students as they dragged their hands along the snow.

Here are some tips on how to look for wildlife stories:

  • Go out and look when the snow is fresh.
  • Think about which animals you have actually seen around, and where you have seen them. Look there.
  • Do a little research on the habits of animals you might see and look for tracks in places where that animal finds food, water, or shelter.
  • Search around trees and shrubs, especially if there are places a small animal might crawl into for shelter. Watch you head as you duck under branches.
  • Take photos to compare them to pictures of animal tracks posted online.

And if you don’t spot any animal tracks, no worries. You got in a walk and fresh air and took in the beauty of a winter wonderland.


©2013 Chicago Botanic Garden and my.chicagobotanic.org

How to Train Your Plant

Since it’s winter, and we’re all stuck looking at leafless plants outside, why not try growing some plants indoors? Better still, why not experiment with your plants to understand them better?

In this activity, you will confuse a bean sprout and train it to grow in any direction you want. Sound like fun?

You will need:

  • a gallon-size zip-top bag
  • paper towels, preferably 2-ply (if they are single-ply, double them)
  • a pinto, lima, or kidney bean (try whatever you have) soaked in water overnight
  • a stapler
  • water
  • tape

Lay the paper towel flat inside the plastic bag. If it doesn’t fit exactly, fold the edge of the paper towel.

Put a staple in the middle of the bag, and place the bean just over the staple. Add two staples that are separated by more than the length of the bean. 

IM000700

The staples hold the bean in place, but should give enough room for the bean to grow between the staples. Watch to see how the bean grows and needs the space. Add just enough water to the bag to wet the paper towel. Take care not to have a pool of excess water in the bag.

Now tape the bag to a wall, or your refrigerator, or a window if it’s not cold. That’s right, put it right on a vertical surface. Don’t close the bag, because it’s good to allow water and air to move in and out. The picture shows you what it should look like. (Ignore the four staples, only put three on yours. I discovered that four staples trap the seed and ruin the activity.)

IM000624

As soon as your plant has grown a root and a stem that is 1-2 inches long, turn the bag one quarter turn and put it back. You may have to wait a week – less if your bean is warm, more if your bean is in a cooler location, like my office.

This is what it may look like at this stage after I turned it.

IM000679

Now wait. When the sprout has grown another inch or so, turn the bag again in the same direction. Since the opening of your bag will now be on the bottom, you should seal it. Then wait.

Yes, I know, you have to wait a while to get results. The timing will depend on the level of light and the temperature. That’s the way it goes with growing plants. Horticulturists – the people who grow plants – are some of the most patient people you will ever meet!

Here are the results of one bag I started in early January, about three weeks ago. Since I turned the bag clockwise, the roots and stem appear to be going around counter-clockwise.

IM000701

From here on it’s up to you.  Let the plant grow and turn the bag when you want to change the direction of growth, let it go for as long as you like.  Can you make it grow in a full circle around the middle of the bag? 

What is Going On Here?

Plants are affected by the gravitational pull of the earth. When you turn the bag, you change the direction of the force and the plant responds by changing direction of growth. This phenomenon is called geotropism. A tropism describes an organism’s response to a stimulus. In this case, the “geo” refers to the Earth, and it is the scientific way of saying that the earth makes leaves grow up and roots grow down. This phenomenon may also be called gravitropism.

The Garden’s horticulturists play with gravitropism. Look at this picture of the Visitor Center bridge in fall. Notice the gorgeous pink mums hanging from the trellis.

i-ZST28XH-L

Left alone, the stems of these plants would naturally grow up like the mums planted on the sides of the bridge. Our horticulturists train the stems to grow down, cascading over the sides of their container, by tying small weights on the stems while the plants are growing in the greenhouses. They actually use metal nuts from a hardware store! The weights are removed before the planters go on display, and they look fabulous, thanks to the horticulturists’ success in playing with the plant’s response to gravity.


©2013 Chicago Botanic Garden and my.chicagobotanic.org

Play with Your Pine Cones

I was walking under some pine trees near the Learning Campus and I took a picture of the cones I found.

PHOTO: The ground under the pine tree is covered in dry, brown pine needles and cones that are open, closed and in between.
I found two different kinds of cones on the ground under the pine tree.

When I was young, I noticed there were two different kinds of cones — some solid cones like the three in the lower left corner of the picture, and others are more like the open, branched cones at the top. I thought the pine tree made two different kinds of cones. Actually, they are different forms of the same kind of cone. I will show you how this happens.

I took three cones that were the same size and shape. Then I soaked one cone in a bowl of water. 

PHOTO: Pictured here are three pine cones of similar size, shape, and color.
I started with three pine cones of the same kind, shape, and size.


PHOTO: One pine cone is floating in a white bowl full of water while the other two are resting on the right side of the bowl.
I placed one cone in a bowl of water. It slowly began to change.


PHOTO: One pine cone is in the white bowl, now almost fully closed after ten minutes, while the other two are dry and unchanged at the side.
After about ten minutes, the wet pine cone is almost completely closed, while the dry cones are still open.


PHOTO: A wet, closed cone is shown next to a dry open cone.
Wet cones are closed, dry cones are open, and that is why cones from the same tree come in different shapes.

Then I let the wet and dry cones sit on my desk overnight. Guess what happened. Try it yourself to get the answer! Go outside and find a pine, spruce, or other conifer tree. Bring pine cones from those trees inside and watch them over time as they adjust to the warm, dry conditions in your home. Put one in bowl of water and see what happens. Let it dry and see if it changes again. 

What is going on here?

Pine, spruce, Douglas-fir and other conifers are so named because they produce cones that bear their seed. When conditions are favorable for the seeds to fall and grow, the cones open and release them. The seeds have the best chance to survive when the air is dry and windy, so they can blow to a nice fertile spot away from the shade of the mother tree. When conditions are wet and not so good for a traveling seed, the cones close to protect them.

Though the cones I found under the tree had released their seeds a long time ago, they still responded to the moisture levels of the ground and air. These cones were in between being damp from the rain over the weekend and drying in the sun.

Pine cone history

By the way, all conifers belong to a group of plants called gymnosperms. This means they produce “naked seeds” — seeds that are not contained within a fruit. Conifers do not grow flowers. Before there were dinosaurs on the planet, all plants reproduced by either spores or naked seeds. The seeds of some conifers can take up to three years to mature. Flowering plants (angiosperms) have a much more rapid reproductive cycle. Some angiosperms flower and produce mature seed in just one week. Understanding how cones and flowers have evolved is what Dr. Pat Herendeen is trying to figure out from plant fossils.


©2013 Chicago Botanic Garden and my.chicagobotanic.org

Snacker, Flapper, Sleeper, Napper

All animals that inhabit this area, including humans, have to cope with the changing of the seasons. There are four basic responses to the cooler temperature and shorter daylight. Which is your favorite strategy for surviving the winter?

Do you eat more food during this time of year, loading up on high calorie goodies? You may be a Snacker. It is a natural instinct. You are like the squirrels, rabbits, and some birds that fatten up and keep going all winter long.  


PHOTO: a gray squirrel poses as it feeds on bird seed dropped from a bird feeder.
Squirrels fatten up on seeds and stay active all winter long.

Do you travel to warmer climates during the winter? Wings are not required to be a Flapper. Count yourself in the company of warblers, monarch butterflies, and herons if you leave the area in winter. You may be migrating to escape the cold, but these animals are generally traveling to find more plentiful supplies of food.

Do you become sleepy and hibernate for four or five months every year? Then you are a Sleeper, like a bear, turtle, or frog. These animals undergo physical changes that shut down their respiratory systems and metabolism during the winter. You are probably not a true sleeper, even if it sounds appealing.

PHOTO: This bronze model of a painted turtle on a rock can be seen a Kleinman Family Cove yearround.
This bronze turtle can be seen all year at the Kleinman Family Cove, while the real turtles are hibernating in the mud at the bottom of the lake in winter.

If you are prone to feeling tired and sleeping more in the winter, then it’s more likely that you are a Napper. Animals like skunks and opossum cozy up in burrows or under deep piles of leaves and sleep. Occasionally they emerge, find something to eat, and then go back to bed.

PHOTO: A small skunk is feeding on squirrel corn on a dark winter evening.
A skunk wakes up from its nap and feeds on some seeds during a winter evening.


PHOTO: A baby opossum is seen in the snow surrounded by dormant plant stalks.
Like the skunk, this baby opossum emerged from its nap and is looking for something to eat before it returns to its shelter.

Snacker, Flapper, Sleeper, Napper — try to say that three times fast as you prepare for another midwestern winter!


©2012 Chicago Botanic Garden and my.chicagobotanic.org