It’s so easy: Plant garlic now

PHOTO: The blooming flower stalk of Sicilian honey garlic.
Reminiscent of Fritillaria, Sicilian honey garlic (Nectaroscordum siculum) is a beautiful ornamental allium selection.

Garlic is so easy to grow that the instructions could be just one sentence long:

In October, separate a large head of garlic into individual cloves, and plant 3–4 inches deep in well-amended, well-drained, and well-mulched soil until harvest next July.

But let’s dig a little deeper into that sentence for a few tips on growing a gorgeous garlic crop.

In October… Fall is the season for planting garlic in our area. Wait until the first light frost to plant, and don’t worry if you see a few garlic sprouts popping up before winter sets in.

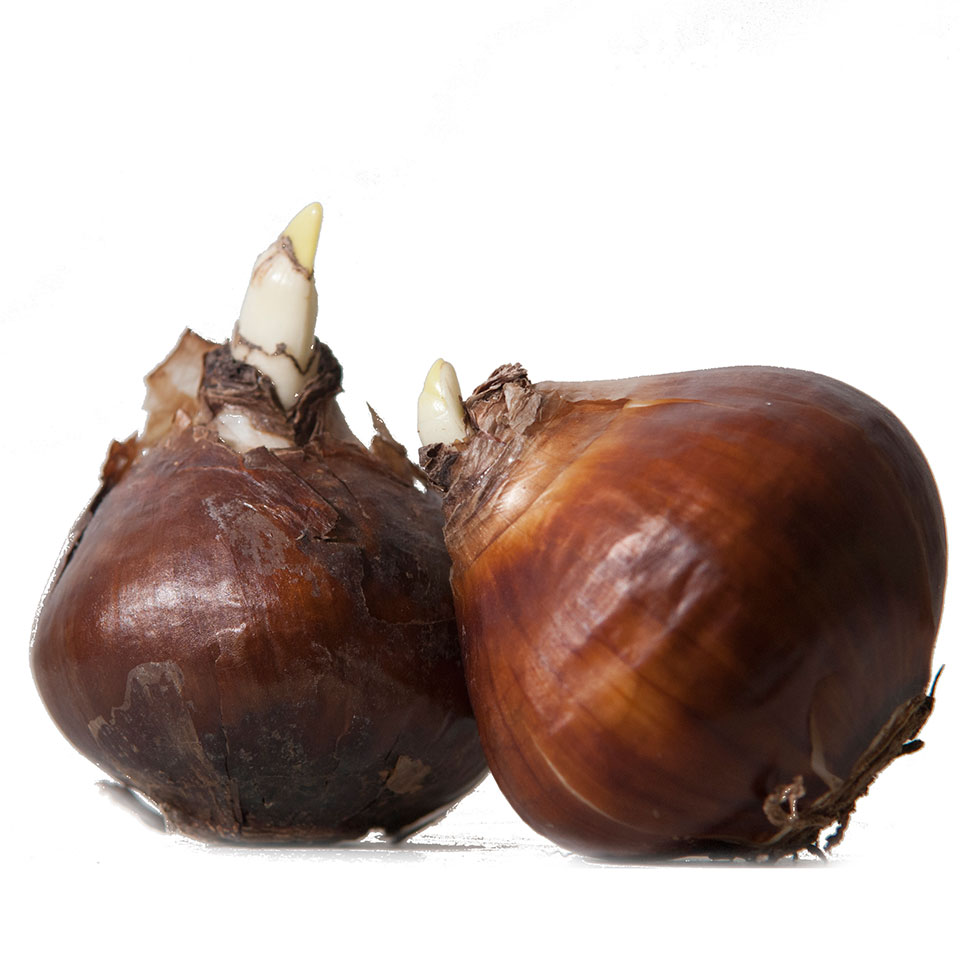
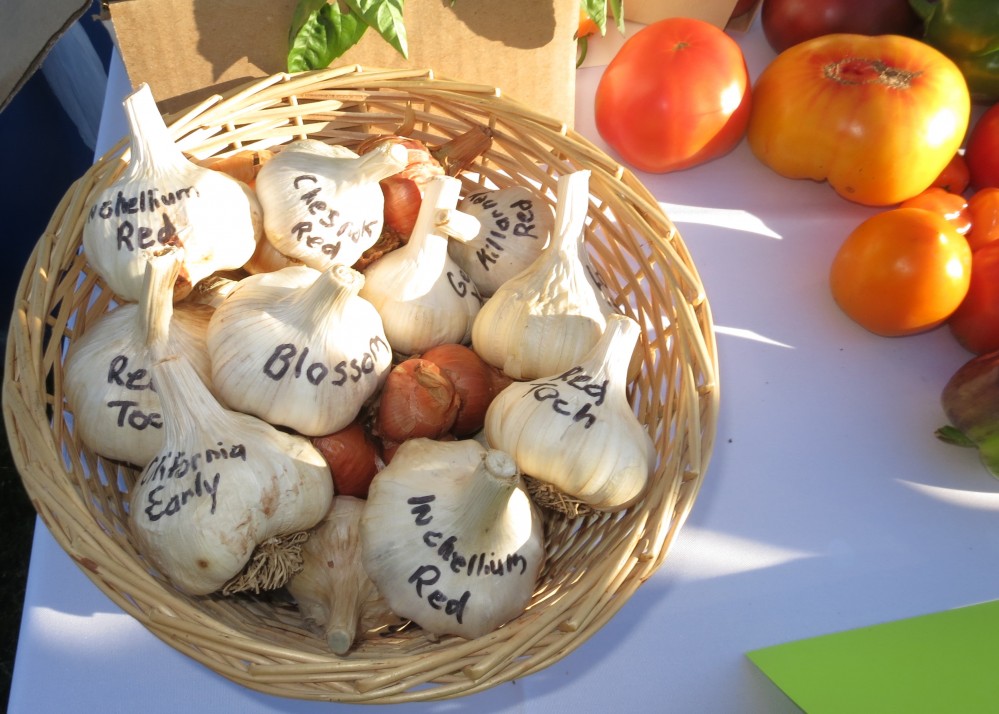
…separate a large head of garlic… Which garlic to plant? Experiment with different varieties to find the flavor you like best. Nurseries and seed catalogs offer seed garlic (grocery store-bought garlic isn’t as reliable as seed). There are two main types:

  • Hard-necked varieties grow well in northern climates like ours, where winter is cold and spring is long. As the name implies, hard-necks produce a rigid flower stalk  or “scape” with aerial bulbs. The scape should be cut off at about 10 inches long so that the plant continues to put its energy into the underground bulb. Don’t toss the scapes—eat them, instead, in soups, sautés, etc. ‘Music’, ‘German Extra Hardy’, and ‘Chesnok Red’ are hard-neck varieties known for their wonderful, complex flavors.
  • Soft-necked varieties don’t produce scapes; their soft foliage can be braided for easy hanging/storage. While soft-necks flourish in the South, some varieties, such as ‘Inchelium Red’, can be successfully grown here.
PHOTO: A basket of garlic, with each bulb labeled with its cultivar name.
Try growing different garlic varieties to find the flavor you like best! Photo: Lisa Hilgenberg

…into individual cloves… To grow the largest garlic heads, plant only the largest garlic cloves, and leave the papery “tunic” intact. Cloves can rot without their protective tunic! Hard-necked garlic heads yield large cloves in small numbers (often 4–6), while soft-necked garlics bear more numerous cloves, often in several layers.

…and plant 3–4 inches deep… Plant cloves roots down, points up, about 6–8 inches apart.

…in well-amended… Soil prep is key to a successful crop, no matter what type of soil you have. Garlic is a heavy feeder, so the soil needs to provide plenty of nutrients, air, and water. Amend your soil with compost or well-aged manure until it feels loose and airy. Aim for a neutral pH of 6.5.

…well-drained… While it needs to be kept watered, it is important to plant it in a spot where the soil is moist, but not too wet. Garlic doesn’t like “wet feet.” Once foliage appears in spring, water consistently (about 1 inch per week) until two weeks before harvest in July.

…and well-mulched soil… After a hard frost, cover the garlic bed loosely with a thick layer of mulch (about 6 inches of straw, leaves, and/or grass clippings). Mulch acts like a blanket over the bulbs and soil, holding in moisture and keeping down weeds, which can easily overwhelm and outcompete garlic. Leave mulch intact through the season—garlic sprouts will make their way through it—but remove it when things warm up in the spring.

…until harvest next July. In July, garlic foliage begins to turn brown, signaling that harvest is near. Wait until just five green leaves are left on the plant. Then use a pitchfork to gently loosen the soil beneath the bulbs and bring them to the surface. Resist the urge to pull them by their stalks, taking care not to damage the papery tunic! Brush off most of the dirt, then allow your harvest to cure:

  • Spread out the bulbs (with foliage intact) on screens, or tie them in loose bundles and allow to dry in a shady, well-ventilated area, such as a back porch or garage.
  • Do not wash the bulbs to remove soil! Leave them undisturbed for 4–6 weeks, during which time they’ll dry out completely. 
  • After curing, trim the roots and cut stalks to about 1 inch from the bulb. 
PHOTO: Garlic bulbs in storage on a shelf (with artful lighting).
Curing garlic: also a wonderful photographic still life. Photo: Karen Zaworski

Many of these same cultural practices follow for shallots and other allium varieties.

One last tip: Store your garlic at 50 to 70 degrees—but not in the refrigerator, as cold makes bulbs sprout early! With proper curing and storage, your bulbs should last about four months.


©2013 Chicago Botanic Garden and my.chicagobotanic.org

Planter Puzzler

Looking for a fun and novel table decoration for a special event? Here’s an idea. We turned our table decorations into a game for the School Gardening Conference.

PHOTO: Oregano sprigs in an oregano spice jar.
Oregano in its namesake jar was our Planter Puzzler example.

We paired unusual plant containers with plants that had some relationship to those planters and asked teachers to guess the connections. We provided an easy example to start. You can duplicate this game using our examples or invent your own combinations. Start with a plant that has a fun name that lends itself to ideas for containers based on the shape, color, or function of the container. You can also start with a container and then select a plant or seeds to match.

If you have one or the other and can’t think of good pairing, do an internet image search for related words. We had a gumball machine, so we tried “gum plant,” “ball plant,” and other ideas just to play around with the idea before we decided to fill it with sweet gum tree seeds. (Sorry, I did not get a good photo of it.)

PHOTO: birdseed growing in a birdhouse.
I had a ceramic birdhouse, so I filled it with soil and planted birdseed (actually, millet and sunflower seeds).
PHOTO: Goldfish plant growing in a fish bowl.
It was easy to find the right container for this goldfish plant (Hypocyrta glabra)—a fish bowl!
PHOTO: A pitcher plant growing in a pitcher.
A pitcher plant growing inside a beverage pitcher was a favorite table display. (This pitcher is a species of Nepenthes.)

Here are a few practical tips for doing this at home:

Since these containers were not made for plants, you may need to line them with a plastic bag or insert a plastic cup or pot. If you want to keep the plants in this container for any length of time, you’ll need to provide drainage or the roots will rot. Follow directions from Tim Pollack for planting a terrarium in this YouTube video.

You may have to alter the container to make it work. I had to take apart a toy drum to turn it into a planter for beets. (Beets in a drum—get it? If you want to impress, don’t shy away from puns, references to popular stories, or inside jokes.)

In addition to the ideas mentioned above, we also used these plant-container pairings:

  • chamomile in a Peter Rabbit teapot
  • radishes in a Peter Rabbit ceramic bowl
  • mint in a teacup
  • lettuce in a wooden salad bowl
  • chain of hearts in a valentine chocolate box
  • spider plant in a “Big Bugs” coffee mug
  • herbs in a recipe box
PHOTO: Chain of Hearts plant grows in a Valentine's Day chocolate tin.
A heart-shaped chocolates tin from Valentine’s Day—the perfect home for a string of hearts plant (Ceropegia woodii)

©2013 Chicago Botanic Garden and my.chicagobotanic.org

How to Train Your Plant II

Blog followers will remember that in the first “How to Train Your Plant” post, we demonstrated how plants respond to the gravitational pull of the earth. Geotropism is difficult to overcome, but that didn’t stop me from trying to make a plant grow sideways through a maze. You can try this activity at home.

You will need these items:

  • a shoebox (or any kind of box)
  • cardboard to make dividers
  • duct tape (or any opaque tape)
  • soaked bean seeds—I used different beans from a soup mix
  • a container with soil
PHOTO: The materials for the maze are displayed.
You’ll need a shoe box, cardboard dividers, seeds, a pot with soil medium, and of course scissors and tape for constructing the maze.

Stand the box on its side. Then cut two pieces of cardboard to fit in the box and make divisions. You’ll want these to fit as snugly as possible inside the box, but they don’t have to be perfect. The tape will fix that. Cut a large window in each divider. Cut a window on one end of the box. Tape the dividers in place as shown in the picture.

PHOTO: The maze assembly is shown in the shoebox. There are two dividers with cut out windows and a whole in the side of the box for light to shine sideways on the sprouting bean seeds.
Pardon the crude appearance of this maze. I wasn’t going for style points.

Plant the seeds in the soil and put the container on the side opposite of the hole you cut. Just for fun, I used several different seeds from a bean soup mix to see if one kind would get through the maze better than the others. It was like a bean-seed “race.” You can try whatever you like.

Make sure the holes in the divisions are big enough to allow lots of light in from the side, and don’t vary the height too much. Remember, we are fighting the plant’s tendency to grow up—if it’s too challenging, it won’t work. Trust me, I learned this the hard way.

When the maze is complete, give your beans a last bit of water, and maybe a kiss, and then close the box. Apply tape along the top edge, to secure it and reduce light. Then put it next to a window and wait.

And wait.

It’s going to take a few weeks. Remember, horticulturists are very patient. Open the box every few days or so to be sure it has not dried out. Add a little water, but only enough to moisten the soil if it is very dry.

When you see the bean plant emerging through the open window in the box, open it and take a look. How long this will take will depend on the kind of beans you use, how far the plant has to grow, and how warm the room is.  

The beans have sprouted and are moving toward the light

 It took my beans about five weeks to grow through the second window.


PHOTO: all of the bean sprouts are leaning toward the light.
The beans were definitely torn between growing up and growing in the direction of the light.


The winning sprouts, which I believe were lentils, did not actually make it through to the last window when I took this picture, and I’m not sure it has enough “umph” to do it. Still, notice how all of the plants leaned toward the light and most of them grew through the first window. That is a positive result!

What is going on here?

This activity demonstrates phototropism. Photo is the Latin word for “light,” and you will remember that a tropism refers to an organism’s response to stimulus, so that phototropism means plants grow toward the light.

It makes sense for plants to reach for the light because they need light to make sugars, their source of energy. Normally, growing up against the pull of gravity is also growing toward the light. In this activity, we changed that condition, forcing the beans to deviate from their normal course to get the light they needed.

The sprouts that grew the farthest and were closest to completing the maze had leggy stems that would not support growth upward to the last window. If I leave them a few more weeks, they could possibly grow along the bottom and then up the side of the box. I’ll have to wait and see.


©2013 Chicago Botanic Garden and my.chicagobotanic.org

How to Train Your Plant

Since it’s winter, and we’re all stuck looking at leafless plants outside, why not try growing some plants indoors? Better still, why not experiment with your plants to understand them better?

In this activity, you will confuse a bean sprout and train it to grow in any direction you want. Sound like fun?

You will need:

  • a gallon-size zip-top bag
  • paper towels, preferably 2-ply (if they are single-ply, double them)
  • a pinto, lima, or kidney bean (try whatever you have) soaked in water overnight
  • a stapler
  • water
  • tape

Lay the paper towel flat inside the plastic bag. If it doesn’t fit exactly, fold the edge of the paper towel.

Put a staple in the middle of the bag, and place the bean just over the staple. Add two staples that are separated by more than the length of the bean. 

IM000700

The staples hold the bean in place, but should give enough room for the bean to grow between the staples. Watch to see how the bean grows and needs the space. Add just enough water to the bag to wet the paper towel. Take care not to have a pool of excess water in the bag.

Now tape the bag to a wall, or your refrigerator, or a window if it’s not cold. That’s right, put it right on a vertical surface. Don’t close the bag, because it’s good to allow water and air to move in and out. The picture shows you what it should look like. (Ignore the four staples, only put three on yours. I discovered that four staples trap the seed and ruin the activity.)

IM000624

As soon as your plant has grown a root and a stem that is 1-2 inches long, turn the bag one quarter turn and put it back. You may have to wait a week – less if your bean is warm, more if your bean is in a cooler location, like my office.

This is what it may look like at this stage after I turned it.

IM000679

Now wait. When the sprout has grown another inch or so, turn the bag again in the same direction. Since the opening of your bag will now be on the bottom, you should seal it. Then wait.

Yes, I know, you have to wait a while to get results. The timing will depend on the level of light and the temperature. That’s the way it goes with growing plants. Horticulturists – the people who grow plants – are some of the most patient people you will ever meet!

Here are the results of one bag I started in early January, about three weeks ago. Since I turned the bag clockwise, the roots and stem appear to be going around counter-clockwise.

IM000701

From here on it’s up to you.  Let the plant grow and turn the bag when you want to change the direction of growth, let it go for as long as you like.  Can you make it grow in a full circle around the middle of the bag? 

What is Going On Here?

Plants are affected by the gravitational pull of the earth. When you turn the bag, you change the direction of the force and the plant responds by changing direction of growth. This phenomenon is called geotropism. A tropism describes an organism’s response to a stimulus. In this case, the “geo” refers to the Earth, and it is the scientific way of saying that the earth makes leaves grow up and roots grow down. This phenomenon may also be called gravitropism.

The Garden’s horticulturists play with gravitropism. Look at this picture of the Visitor Center bridge in fall. Notice the gorgeous pink mums hanging from the trellis.

i-ZST28XH-L

Left alone, the stems of these plants would naturally grow up like the mums planted on the sides of the bridge. Our horticulturists train the stems to grow down, cascading over the sides of their container, by tying small weights on the stems while the plants are growing in the greenhouses. They actually use metal nuts from a hardware store! The weights are removed before the planters go on display, and they look fabulous, thanks to the horticulturists’ success in playing with the plant’s response to gravity.


©2013 Chicago Botanic Garden and my.chicagobotanic.org

Green Thumbs at Work

What it takes to plant 26,000 tulip bulbs in the Crescent Garden in just 3 hours:

  • 4 dozen doughnuts
  • 2 boxes of coffee
  • 2 gallons of orange juice

And 20 dedicated volunteers and staff fueled by the above.

Bulb planting
By 11:00 a.m., 26,000 tulip bulbs were planted in the Crescent Garden last Thursday.

It’s time to plant bulbs for next spring, and the weather’s cooperating nicely. In your yard, plant tulip bulbs 6-8 inches deep in well-drained soil. Remember, bulbs will rot where there’s too much water from gutters, irrigation, or poor drainage. Plant plenty: tulips look wonderful in clusters, in drifts, and in vases all around the house next spring!

Horticulturist Benjamin Carroll has a great video on how to plant bulbs at home. Check it out (along with other planting information) here.