Science Activity: Albino Plants

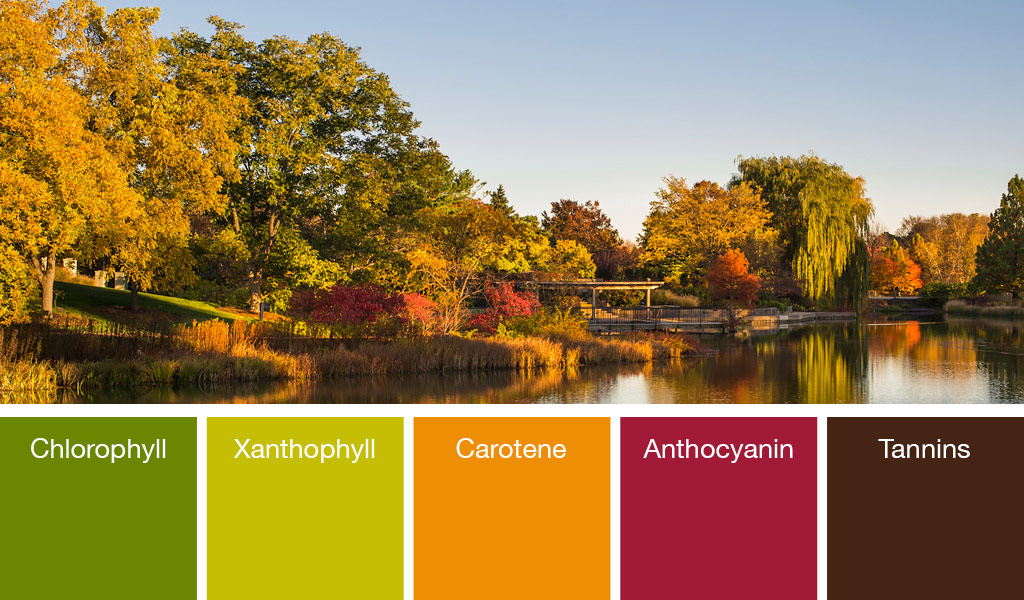
Leaves are green. There are very few exceptions in healthy living plants, and most of the exceptions are partially green with red, yellow, orange, or white patterns; or they look white, but upon closer inspection they are actually whitish, bluish-green, and not pure white. The pigments that give all leaves their color are essential for the plant’s ability to harness energy from the sun and make sugars in the process we know as photosynthesis.

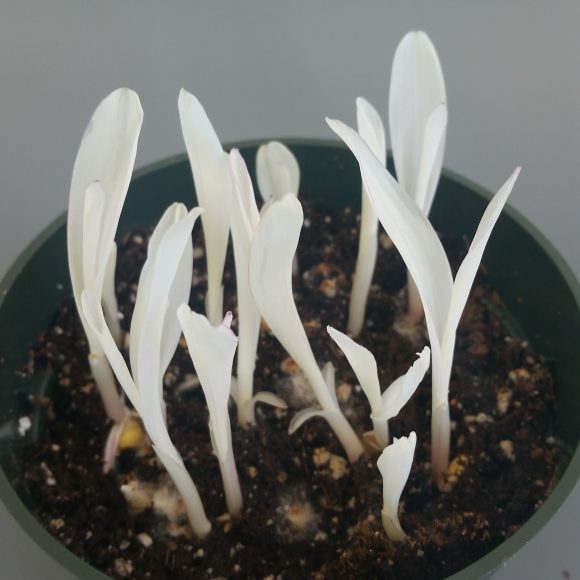
But every once in a while, a completely white seedling sprouts from a seed. This happened with some basil I grew a few years ago. 


PHOTO: this picture shows two seedlings, one has two green seed leaves and the other is white and only half as big.
The green and albino seedlings came up at the same time, but the albino seedling never grew true leaves, and eventually withered and died.

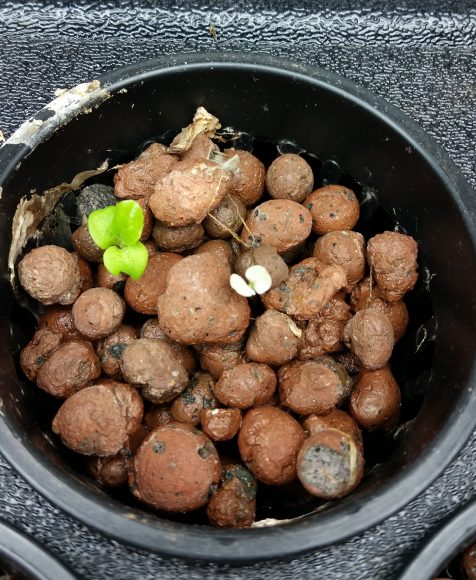
My albino basil survived only a few days. Without any chlorophyll—the green pigment necessary for photosynthesis—this seedling was doomed. That is the case with all albino plants. The gene mutation that gives rise to albino plants is fatal to the plant, because without the ability to make sugars, the plant runs out of energy to live.

So when I was perusing the online Burpee seed catalog and came across “variegated cat grass” I was curious. VERY curious, and perhaps you are, too.

PHOTO: a potted plant of white grass leaves.
How can this albino plant survive? (Photo permission from W. Atlee Burpee Company)

I had several questions: 

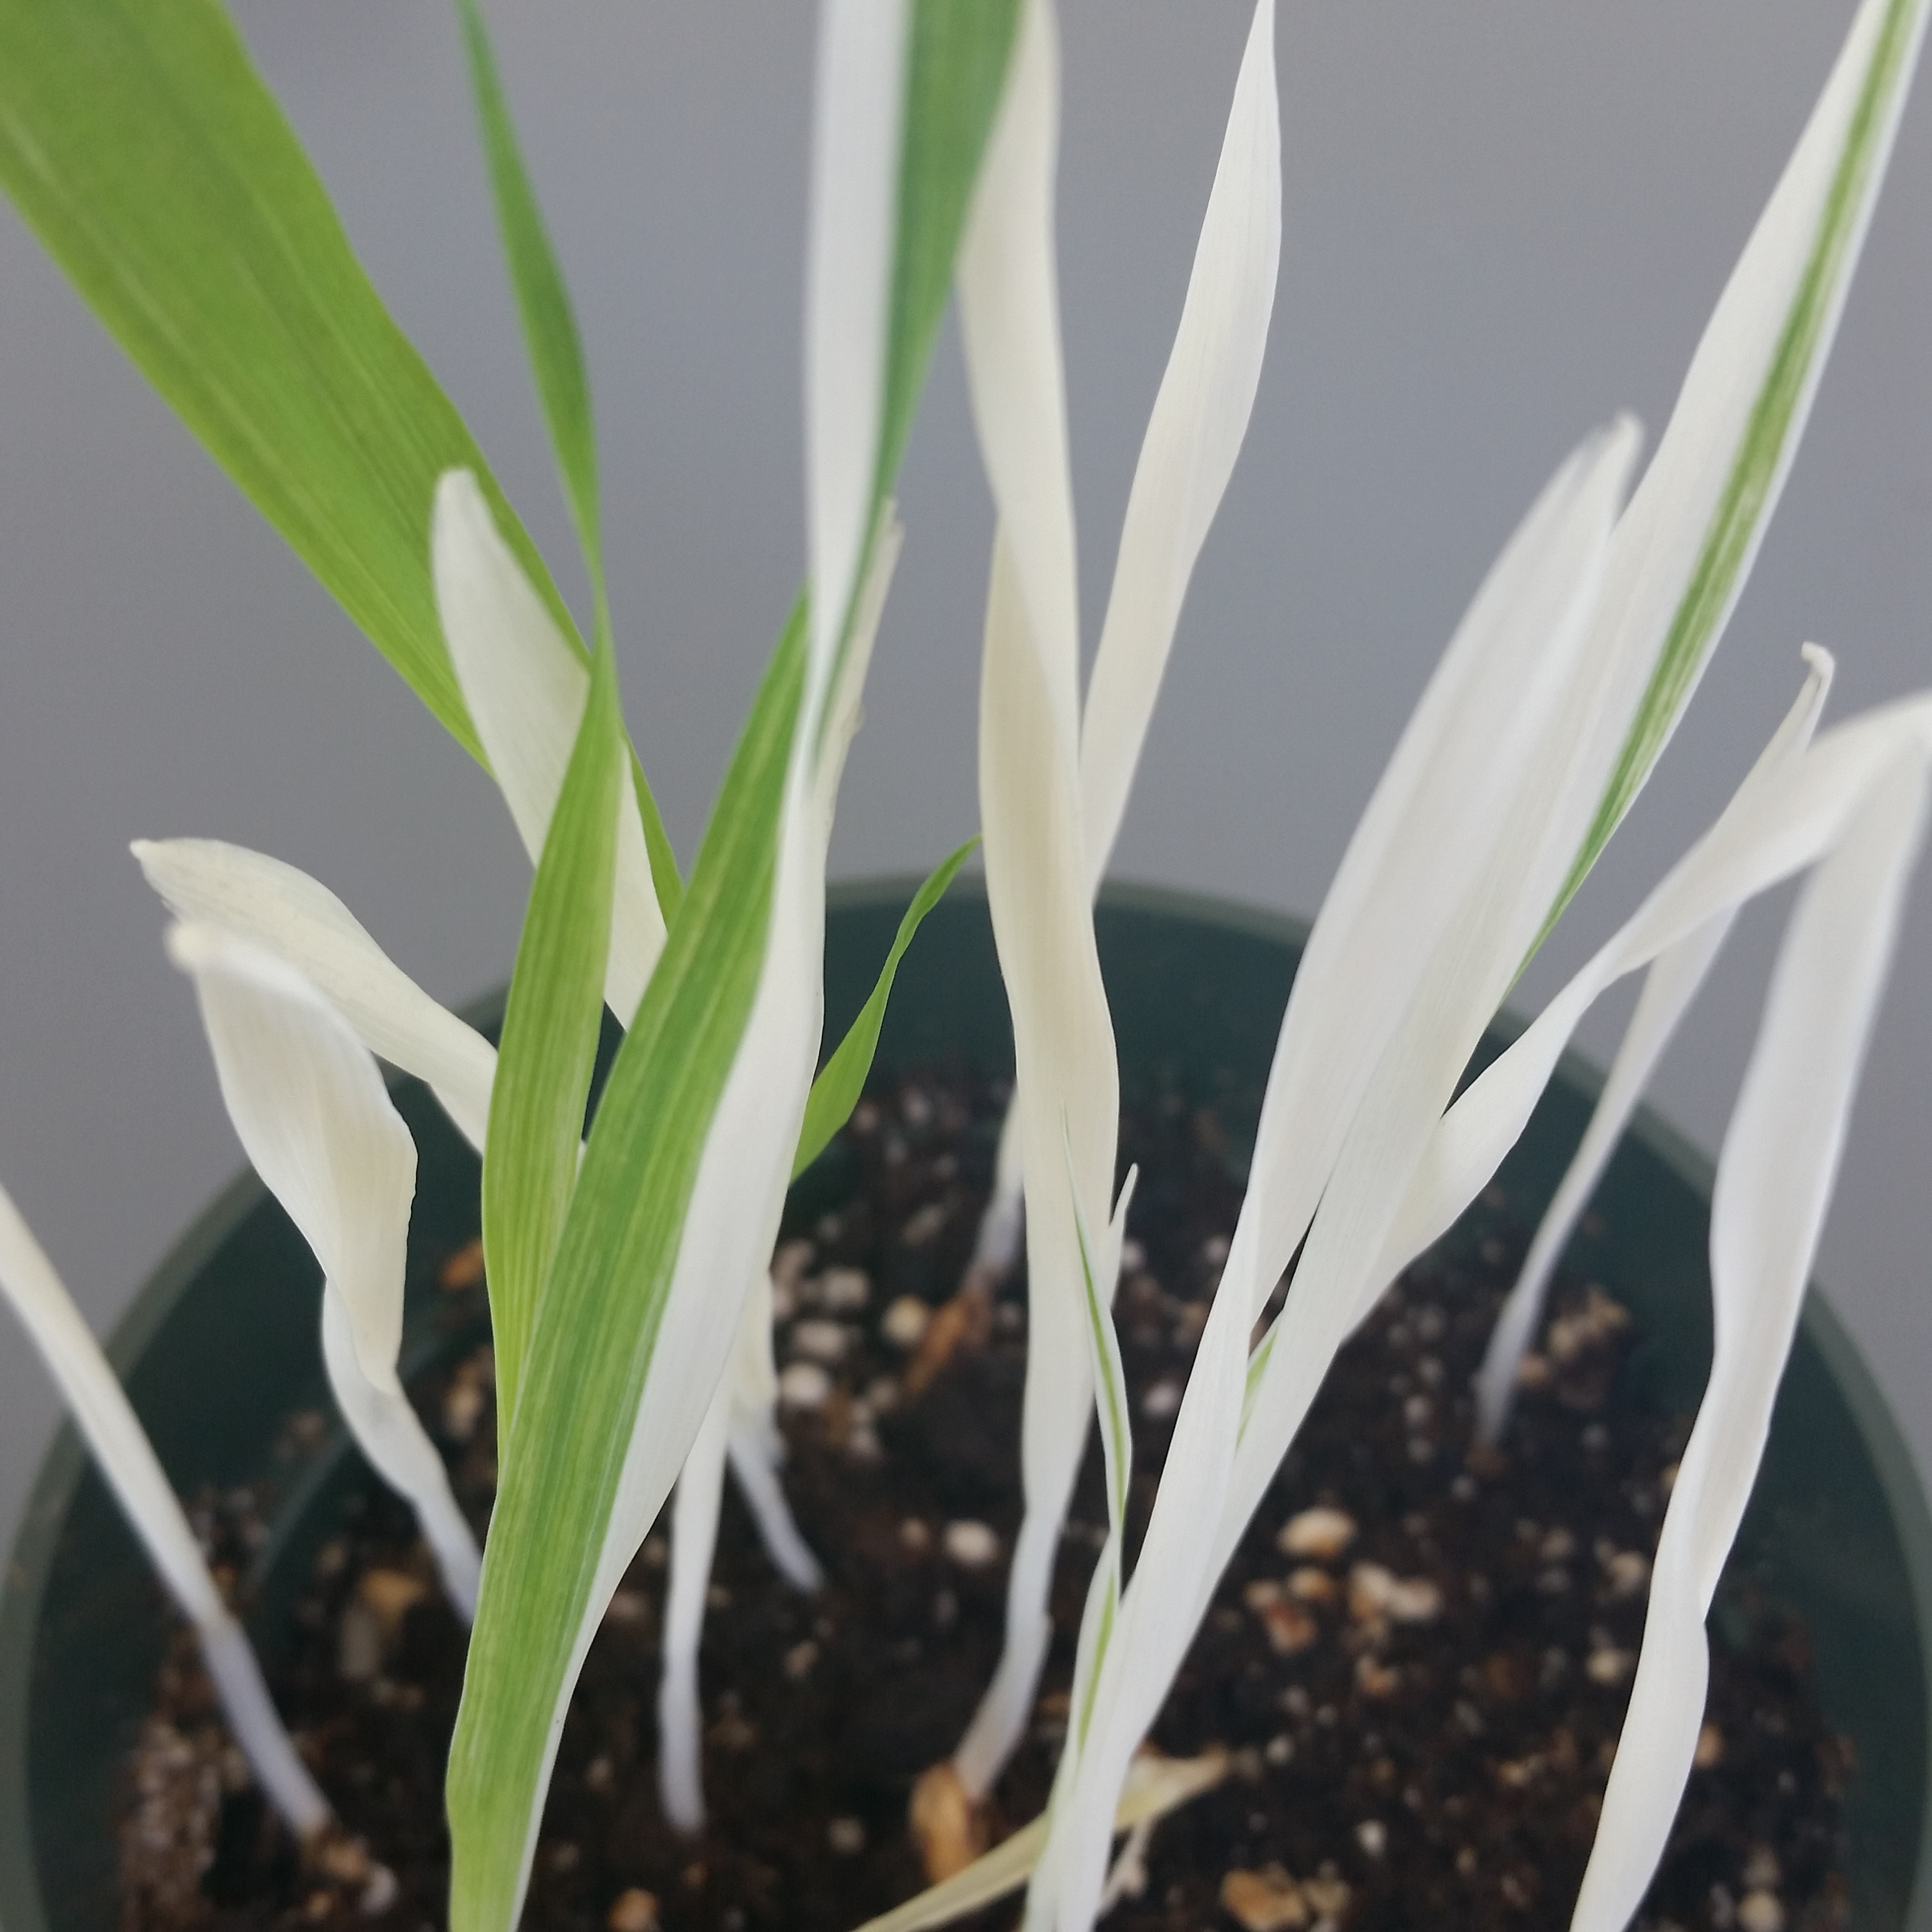
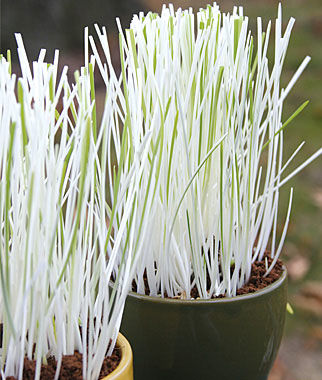
  • The term “variegated” implies that the leaves would be striped or multicolored, but in the picture it appears that there are all white leaves. What will this grass actually look like?
  • How long will it take to sprout?
  • How easy it to grow?
  • Is there enough green on those leaves for the grass to survive or will it die off like my basil?
  • If it does survive, how long can I keep it growing?

And most importantly:

  • Would this make an awesome science activity for students in the classroom and at home to investigate the importance of chlorophyll in plants?

There was only one way to find the answers. I ordered the seeds and grew some variegated cat grass in our nature lab at the new Learning Center. You can do this in your classroom to find answers to my questions and your own. 

Before I give you directions for growing cat grass, you may be wondering:
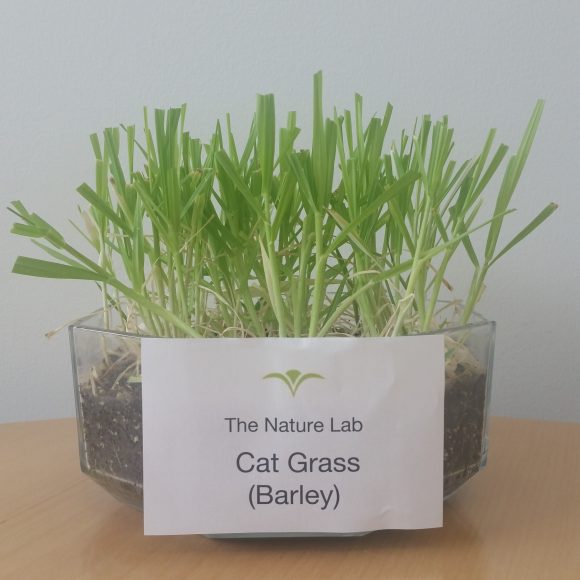
What IS cat grass?

The cat grass you may have seen sold in pet stores is usually a type of wheat, or Triticum. Our “variegated cat grass” is a type of barley (Hordeum vulgare variegata). Both are cereal grains that have been cultivated as food for hundreds of years. Both are sold commercially as cat grass because some cats like to chew on the leaves. Not being a cat owner, I don’t know if cats actually like this stuff, but apparently it sells.

Variegated barley was the result of science experiments on genetic mutations in barley seeds in the 1920s. The hybrid barley seeds have been packaged and sold by different seed companies because…well, they’re attractive and intriguing—they caught my attention.

How to plant cat grass, barley, wheat, or any grass seeds

You need:

  • A container that will hold soil at a depth of at least 2 inches; drainage holes are best, but not necessary
  • Variegated cat grass seeds (sold as “cat grass, variegated” and available at Burpee and other seed suppliers)
  • Potting soil
  • Water
  • A warm, sunny location for your plants


PHOTO: Twelve plants have sprouted, one green, three green and white striped, and the rest all white.
In less than a week, a few more than half of the twenty variegated cat grass seeds planted in this 4-inch pot grew to 4 – 6 inches tall. The taller plants are ready for a trim.

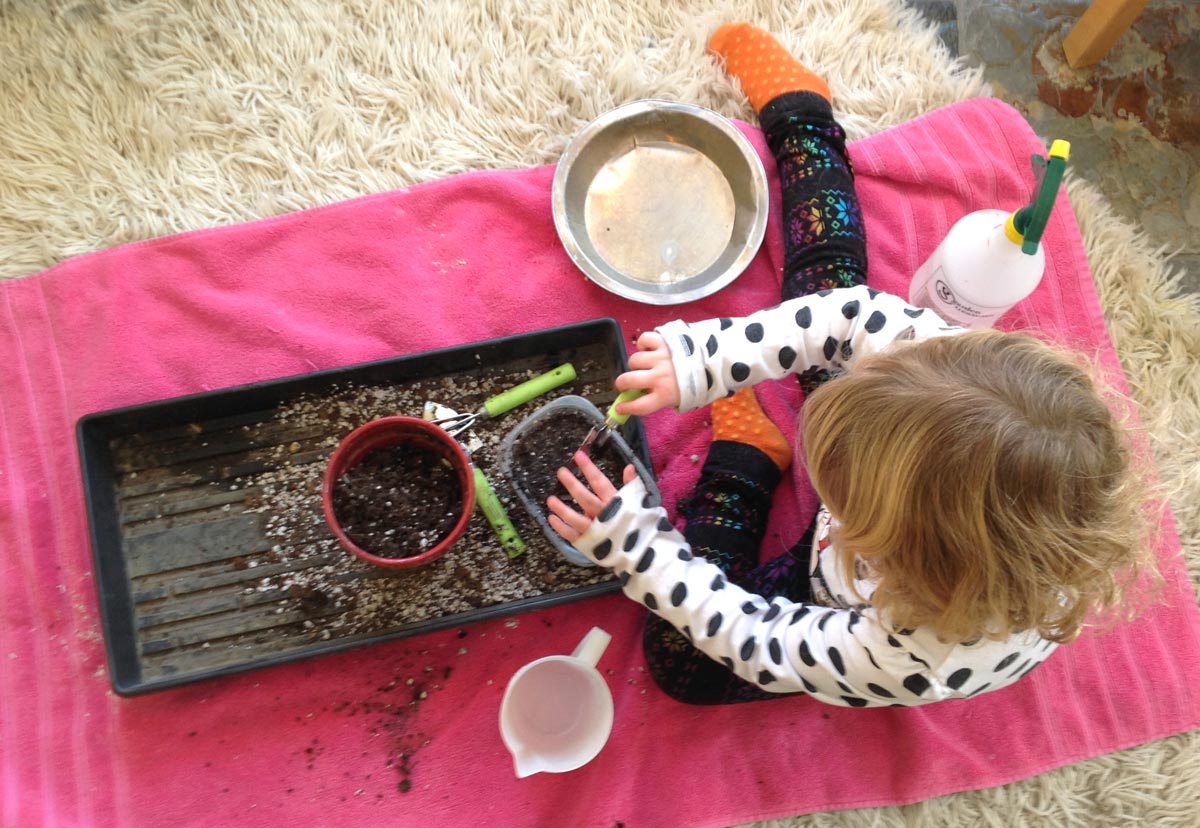
Fill the container with moist potting soil. Spread seeds on the surface of the soil. Cover seeds with a thin layer of moist soil and tamp the soil down so that most of the seeds are covered. It’s all right if you can see some of the seeds through the thin layer of soil. Place in a warm, bright location. The seeds will sprout in a few days, but may take a week depending on the room temperature.

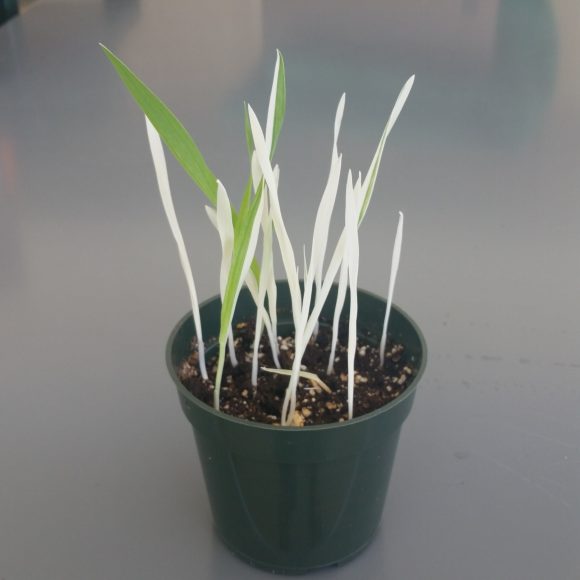
If students plant their own individual pots, have them place 20 – 30 seeds in each 3-inch container. The seeds I bought came 300 to a pack, so that means you need at least two (maybe three) packs to have enough for everyone in the class.

PHOTO: most of the grass is all white, but there are nine or ten all or partially green leaves.
Half of the 100 seeds planted in this 8-inch pot have sprouted, and more should be coming up soon.

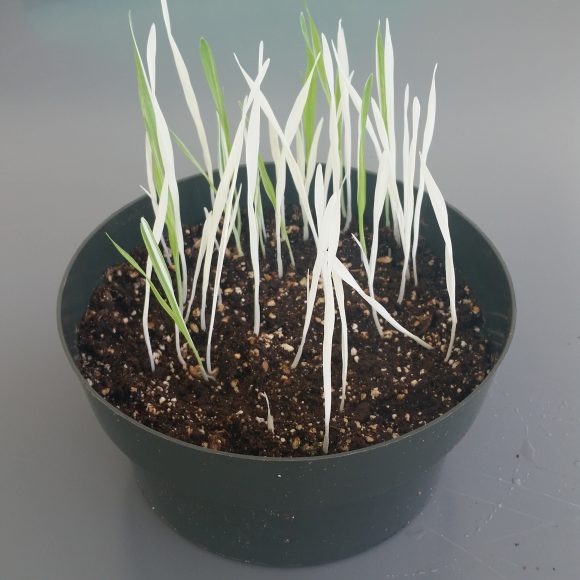
You can also use the whole pack in a 8- to 10-inch container, or even spread more seeds in a foil baking pan filled with soil to grow a carpet of grass. The more densely you plant the seeds, the closer the plants will grow together and it will look and feel more like a healthy lawn. A sparser planting makes it easier to observe individual plants. It’s up to you how you want to do it, really.

Keep the grass in a warm, sunny location. Water when dry, but do not allow it to dry out. When the grass leaves are more than 3 inches tall, use a sharp pair of scissors to trim them to a uniform height just as you would mow a lawn. This will prevent the grass from going to seed and keep it alive longer. You can plant new seeds in the same planter to revitalize in two to three weeks when it starts looking a little tired.

Now the REAL science part: 

Whether you make a single classroom planter or have each student plant her own pot, observe your variegated cat grass for the next four to six weeks, or even longer. Keep it watered and trimmed. Measure its growth. Take photos or sketch it to record how it grows and changes. Ask your own questions and try to find answers, and ultimately reach a conclusion about what happens to white plants. If you and your class are really interested, plant some more cat grass and change the procedure to test your own ideas. It’s that easy to do plant science in your classroom.

Want more albino plant science? Read on.

More activities for inquiring minds

You can experiment with other genetically modified albino seeds available through science supply companies.

PHOTO: A packet of genetically modified corn seeds and instruction booklet
Seed kits enable you to investigate different genetic traits, including the albino mutation.

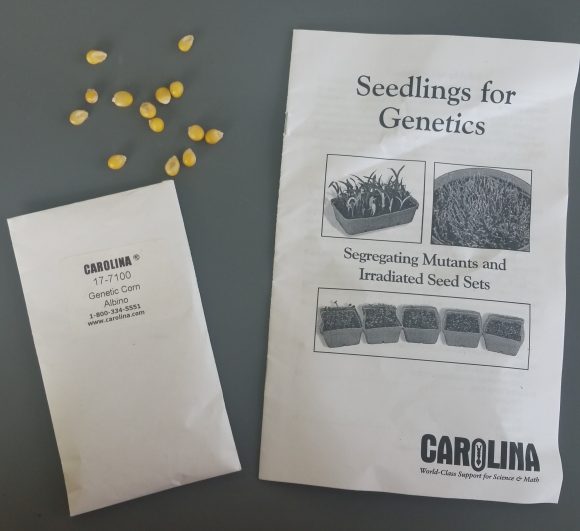
Carolina Biological Supply Company sells hybrid corn that will grow white leaves and stems. I have planted these seeds and they work pretty well, but require a bright window or light and a warm environment to sprout successfully. A classroom kit contains soil, planting trays, and 500 seeds for a classroom investigation, and costs about $100. You can order just the seeds in packs of 100 genetic corn seeds that are all albino (90 percent of the seedlings will grow to be albino) for $18.50, or a green/albino mix—which means about 75 percent of seedlings will be green and 25 percent white, for $10.50. The latter enables you to compare the mutation to the normal strain. 

PHOTO: Ten white corn seedlings are a few inches tall.
Five days after planting, albino corn seedlings are beautiful, but ill-fated.

Nasco sells seeds and kits to investigate albino plants. Their “Observing the Growth of Mutant Corn Seeds” kit serves up to 40 students and costs $62.50. Nasco also has albino tobacco seeds with 3:1 green to white ratio, 1,200 seeds for $12.05. Tobacco seeds are smaller, and therefore more difficult for little fingers to handle than corn or barley. I have never tried growing them, but that might be my next science project this fall.

PHOTO: eight inch glass planter with green grass and label that says: Cat Grass (Barley).
After a two months, my densely planted variegated cat grass is thriving at the nature lab, even though it no longer resembles the catalog photo.

The answer to my question? Yes! This is an awesome science activity for students because it’s easy and demonstrates something really important—in fact, something essential to our existence!

You don’t need to purchase the fancy kits to investigate why plants are green. You can get a lot of good science learning out of a pack of variegated cat grass. All you really need to do is look around you and notice the colors in nature. Do you see white leaves anywhere? If you do, then there is probably a science investigation waiting for you.


©2016 Chicago Botanic Garden and my.chicagobotanic.org

Color the leaves to understand the shades of fall

Fall is a wonderful time to take a guided or self-field trip to the Chicago Botanic Garden. Children will love to learn about the many shades of fall leaves.

During the summer, tree leaves produce all the pigments we see in fall, but they make so much chlorophyll that the green masks the underlying reds, oranges, and yellows.

In fall, days get shorter and cooler, and trees stop producing chlorophyll. As a result, the green color fades, revealing the vibrant colors we love. Eventually, these colors also fade, and the leaves turn brown, wither, and drop. Then the trees become dormant for winter.

Download a coloring activity.

Fall Color at the Garden

There are four pigments responsible for leaf colors:

  • Chlorophyll (pronounced KLOR-a-fill) – green
  • Xanthophyll (pronounced ZAN-tho-fill) – yellow
  • Carotene (pronounced CARE-a-teen) – gold, orange  
  • Anthocyanin (pronounced an-tho-SIGH-a-nin) – red, violet, can also be bluish

Leaves are brown when there are no more photo-sensitive pigments; only the tannins are left.


Color these leaves according to the pigments they produce:

honeylocust leaf
Honey locust

Leaves turn color early in the season; the lighter carotenes glow warmly against the blue sky and green grass.


sugar maple leaf
Sugar maple

The fading chlorophyll, combined with xanthophyll, carotene, and anthocyanin, produce the spectacular show we anticipate every year. Leaves change slowly and over time may be any combination of the four pigments, ending in a brilliant flame of anthocyanin.


japanese maple leaf
Japanese maple

The darker anthocyanin hues turn these feathery leaves the color of shadows—fitting for the spooky month of Halloween.


sweetgum leaf
Sweetgum

Like the maple, this tree puts on an awe-inspiring display of xanthophyll, carotene, and anthocyanin all together.


ginkgo leaf
Ginkgo

Light filtering through the xanthophyll and lighter carotene of these leaves creates an ethereal glow. The ginkgo drops all of its leaves in a day or two.


sumac leaf
Sumac

The anthocyanin in these leaves makes them the color and shape of flames, and appears as fire against the duller colors of the surrounding landscape.


buckeye leaf
Buckeye

Carotenes recede quickly around the edges of the leaves as they prepare to parachute to the ground.


tulip tree leaf illustration
Tulip tree

A pale hint of chlorophyll mixes with xanthophyll and a touch of carotene as this tree shuts down for winter.


pin oak leaf illustration
Pin oak

This stately tree holds its anthocyanin-rich leaves through the fall. The color eventually fades, but the tree holds its pigment-less leaves through the winter.


Download a coloring activity. 

Facts about fall leaf colors:

  • Trees use the sugars they produce through photosynthesis to make all of the pigments we see.
  • The best fall color display comes in years when there has been a warm, wet spring; a summer without drought or excessive heat; and a fall with warm, sunny days and cool nights.
  • Chlorophyll, carotene, xanthophyll, and anthocyanin are also responsible for the coloring of all fruits and vegetables, including corn, pumpkins, beans, peppers, tomatoes, and berries.
  • Peak fall color comes earlier in northern latitudes than southern latitudes, so if you miss the best of the sugar maples in Chicago, take a trip south to get your color fix.
  • You can preserve a leaf by ironing it between sheets of wax paper.

Fall color(ing) activity correct colors:

Fall Color(ing) Activity Answers


Illustrations by Maria Ciacco
©2016 Chicago Botanic Garden and my.chicagobotanic.org

Catch Summer and Pokémon at the Chicago Botanic Garden

Pokémon hunting in the Garden can be a great way to stop and take a closer look at some of the gardens while connecting with other visitors. Ordinarily, we love our visitors to enjoy our gardens with their senses, not their phones, but with the new Pokémon GO app, you can do both.

PHOTO: Screen shots of Pokémon GO game being played at the Garden.
Tagging us on Facebook, Pokémon hunter Patricio28 shared these screen shots of the forest of PokéStops and Gyms at the Garden.

Essentially an app that lets you run around and catch Pokémon using GPS and the camera on your phone, Pokémon GO has taken over the imaginations of kids and adults alike since its recent release. The game is global—users can play anywhere in the world—and the Garden is one of the locations with many features for those using the game.

Nearly 50 PokéStops dot the Garden grounds, typically tied to sculptures and commemorative plaques embedded in walkways. In addition, six Gyms—virtual locations where players can train and battle their Pokémon—are currently found on-site.

But that’s not all that’s to be found: the gardens are a mass of blooms and butterflies, herons and hostas, and beautiful sunsets. The best of both worlds—real and virtual—is here.

The Circle Garden in summer
Circle Garden Fountain Pokemon Screenshot
Two PokéStops can be found at the Circle Garden.
PHOTO: Birds on Eggs by Sylvia Shaw Judson is a Poké Stop at the Garden.
Hidden behind tall corn and sunflowers at the Regenstein Fruit & Vegetable Garden, Birds On Eggs by Sylvia Shaw Judson would ordinarily be missed in the height of summer, but as a PokéStop, visitors get to enjoy the sculpture and explore the path to the orchard behind it.
PHOTO: Olivier Sequin's  Caricia sculpture .
A Pokémon Gym location near Olivier Sequin’s Caricia sculpture takes visitors on a path less traveled behind the Farwell Landscape Garden.

As you discover the Garden and the Pokémon here, please keep these tips in mind:

Look up! Please always be aware of people around you, especially in the Visitor Center. This is a popular location to plant Lures, as people take a break and eat at the Garden View Café and on outdoor decks. When you find a Pokémon on a path or in a garden, please take a moment to look around you first—you want to frame your screen shot nicely, but you also don’t want to ruin the visitor experience for our other guests, who may not have any idea what you are doing with your phone. 

PHOTO: Goldeen Pokémon at the Visitor Center bridge.
Goldeen
PHOTO: Psyduck Pokémon at the Visitor Center bridge.
Psyduck
PHOTO: Kukuna Pokémon in the Heritage Garden.
Kakuna
PHOTO: Meowth Pokémon at the Visitor Center entryway.
Meowth

Walk away, and walk back. If the GPS signal stops or you can’t get to a particular PokéStop, just keep walking. There is probably another one close by that’ll spit out more PokéBalls, eggs, and potions.

The perimeter of the Garden is less crowded with Pokémon hunters, and it is a beautiful 2.3-mile walk. Hatch an egg or five while you take in the sights from afar. The Dixon Prairie is in full bloom, and the East Road offers a lovely vista of the Elizabeth Hubert Malott Japanese Garden. Visit the Daniel F. and Ada L. Rice Plant Conservation Science Center Green Roof Gardens (where a Pikachu was spotted earlier this week), and get back to the main gardens over the Trellis Bridge. 

The Daniel F. and Ada L. Rice Plant Conservation Science Center Rooftop Garden
The Daniel F. and Ada L. Rice Plant Conservation Science Center Rooftop, and its view of the Garden.
Summer Evenings at the Garden

Find nighttime Pokémon as you picnic at our evening concerts. The Garden is open through 9 p.m. all summer, so stay late, and join us Monday through Thursday nights for open-air concerts at the Garden. Pack a picnic and some lawn chairs—and maybe an extra battery charger. Activate a lure in the app to attract Pokémon to one of the PokeStops nearby while you enjoy the music.

Get creative. The Garden is always a great place to take photos. Get creative by trying to screenshot your Pokémon frolicking on the grounds. Get a shot of Goldeen swimming in a fountain, position Pidgey on the branch of a Linden tree, or catch Charmander riding a train in the Model Railroad Garden. The photos are also a great way to remember what you saw in the Garden, since the app’s journal tells you when you caught certain Pokémon but not where. Use the photos as visual reminders of the places you enjoyed on your Pokémon hunt and as a way to mark what you’d want to experience further on a future visit, either on another virtual adventure or for an unplugged trek.

Tell us what you find. Grab a screen shot and tag us on social media with #CBGPokemonGO—we’d love to know what you find and share with our other visitors.

We have found that Meowth is almost always hanging around the entrance to the Garden, which is also a Gym location, as well as the path to the Visitor Center. Psyduck is usually on the southern end of the Garden, but a Golduck has been spotted by the Crescent Garden. There’s a lot of water here, so expect to catch Goldeen, Magicarp, Polliwag, Shellder, and Staryu. A garden is full of birds and bugs, and ours is no exception—Pidgey and Spearow abound; Weedle, Metapod, Caterpie, and Kakuna are out and about. Ratata can be found near buildings, of course, and Eevee can be found throughout the Garden. Dratini and Bellsprout were lurking here this morning. 

©2016 Chicago Botanic Garden and my.chicagobotanic.org

All-Season Nature Crafts for Kids

As a mom and working artist, I try to think of ways I can introduce my 3-year-old daughter to the outdoors and the power of imagination through craft projects. And as an employee at the Chicago Botanic Garden, I am inspired by all sorts of family programs and drop-in activities for kids and families that celebrate the outdoors.

What’s fun about nature art is that it starts with an adventure and ends with a surprise. For instance,  the “family of owls” that we created may appear in story time later.

Here are some of the nature-inspired activities and kid-friendly crafts that have come out of my journey as a mother and continue to get the best reviews from Laila, my toughest little critic.

Dirt is cool

Even when she was a baby, my daughter was intrigued by dirt. She is still fascinated by it, in any form. In the long winter, when we’re tired of being cooped up, we bring a little of the outdoors inside and put together a mud pie prep kitchen. Supplies include dropcloth, potting soil, spray bottle, pouring cups, pie plates, and sticks, rocks and/or sand for decorating.

PHOTO: Mudpie in progress.
Don’t forget to have an old towel underneath your creation station.
PHOTO: Laila holds her finished mudpie.
The finished muddy treat

Happiness is when mom says it’s OK to play with your food

This is the best way to distract a picky eater, or wow guests with an inexpensive dish you can design with your kids. Laila and I made these creations out of various fruits, vegetables, herbs, and cheeses.

PHOTO: A cheese and fruit plate in a holiday theme is fun for kids to graze.
Bite-sized holiday snacks are great for kids who graze.
PHOTO: A vegetable butterfly makes for delicious, healthy snacking.
A vegetable butterfly makes for delicious, healthy snacking.

It’s an outdoors treasure hunt

Laila and I start by taking adventure walks and filling our pockets or a basket with sticks, leaves, flowers, and other found art objects. Everywhere you look, there are free art supplies.

PHOTO: Laila through the year, enjoying the outdoors.
Every season has something outside to explore.
PHOTO: Sticks and grass make a portrait of our house; Laila works on a mulch sun.
We made a portrait of our house. Sticks and grass set the scene; Laila works on a mulch-made sun.
PHOTO: Onion skins provide the fall leaves for our tree painting.
Take gatherings inside to make nature scenes or collages inspired by the seasons. Here, onion skins provide the fall leaves for our tree painting.

Rock ’n’ roll with it

Hand-picked rocks can be collected, cleaned, painted, and polished to transform into precious stones with a story attached. Even little nature lovers can apply homemade or washable paint to their rocks before an adult adds a clear topcoat finish. The rock art can be used as a paperweight or embellishment to a potted plant. Add a pipe cleaner and clothespin to make it a photo holder.

PHOTO: Laila collects stones on the beach; the painted stones below.
Every child likes to collect rocks.
PHOTO: A photo holder made from a painted stone, clothespin, and colorful pipe cleaner.
Collected stones can be painted or polished as keepsakes. Here, we’ve added a pipe cleaner and clothespin for a photo holder.

Impromptu art

One day we found pine cones and added fabric, buttons, and ribbon to create a family of owls that found a new home in our Christmas tree. Another time we used sticks, wire, glitter, and beads to build a twinkling mobile.

PHOTO: A family of hand-made pinecone owls using buttons for eyes and ribbon feet.
A family of pine cone owls made great Christmas ornaments.

When the projects are done, we talk about what we made, where our supplies came from, and who we can share our creations with.

Some of my favorite childhood memories are of outdoor exploration with my mom. I hope Laila someday will feel the same way.

Want to get more nature into your child’s education? Learn about our Nature Preschool program.


©2016 Chicago Botanic Garden and my.chicagobotanic.org

Painting with Veggies

We’ve discovered a fun way to encourage the Garden’s Camp CBG campers to try a salad. Many kids turn up their noses when they hear the word, but after painting with food, our campers are eager to “dig into” their creations.

For little ones, this project is easy and fun to do with a grown-up and provides opportunities to identify colors and start learning about plant parts. Older kids can use new kitchen tools (with adult supervision) and discuss what is really a fruit or a vegetable. 

Watch Painting with Veggies on YouTube.

Supply list:
Cutting board
Sharp knife
Food processor or grater
White plates

Recipe:
1 red bell pepper (see notes)
2 carrots
¾ cup chopped pineapple
½ head red cabbage
1 head broccoli (see notes)
Favorite salad dressing—we used ranch

Notes from the chef/artists:

  • Bell peppers don’t work well in the food processor. I recommend finely chopping them with a good knife. 
  • Broccoli was a bit difficult to work with. Next time I’d use a bag of broccoli slaw.
  • Other vegetables I’d like to try are fresh corn (off the cob), chopped celery, black beans, and dried fruits or nuts.
  • This would be fun to do with a spiralizer, which would add a different texture. Check out this post by fourth-grade teacher Lindsay for eight great spiralizer ideas.

Prepare veggies by shredding in a food processor, and place each kind in a bowl. Use your imagination to “paint” your canvas (plate). Make sure to take a picture before digging in. Once you are done creating, top with dressing and enjoy.


©2016 Chicago Botanic Garden and my.chicagobotanic.org