We gathered around a table at the Garden View Café the other day to taste something that only one of us had ever tasted before: powdered orchid roots.
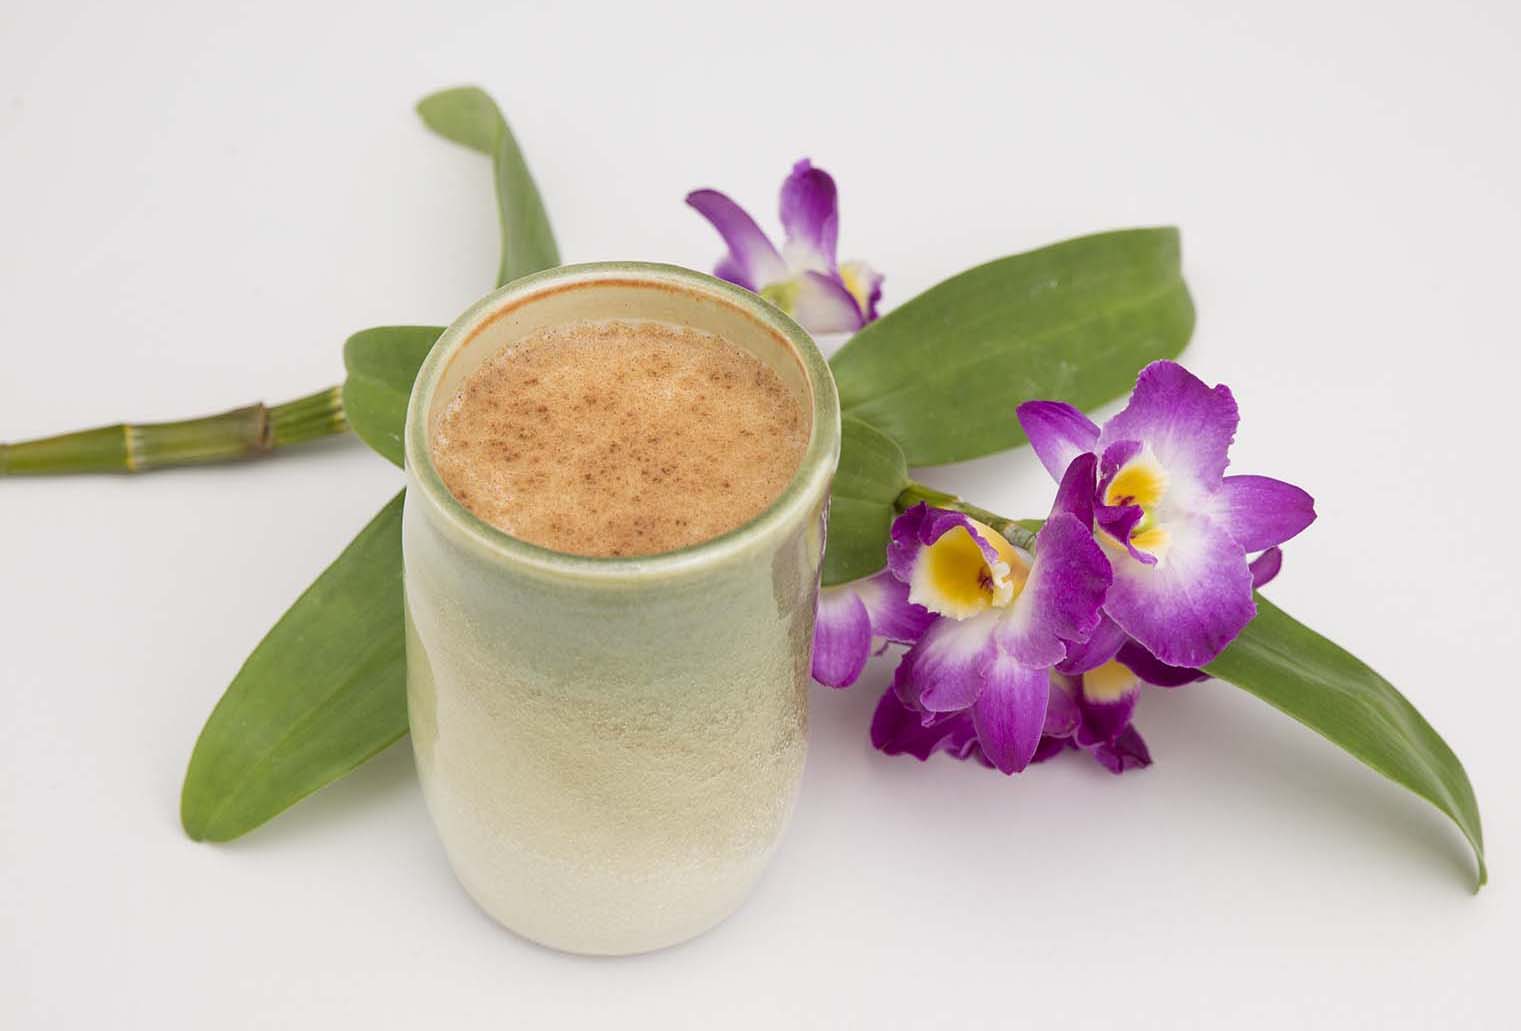
A traditional winter drink in the cafés and restaurants of Turkey, salep is made from the tuberous roots of orchids—specifically, terrestrial orchids in the genus Orchis. Dried and powdered, the resulting flour is combined in a drink mix with other ingredients, much as hot chocolate or chai spices would be: sugar, cornstarch, powdered milk, cinnamon, and vanillin (the main flavor component in vanilla) are added.
A warm cup of salep is perfect on a wintry day.
The instructions are hot-chocolate simple, too: mix 1½ tablespoons of powdered salep into 6 ounces of steamed or boiling milk. Sprinkle with cinnamon. Serve in small cups.
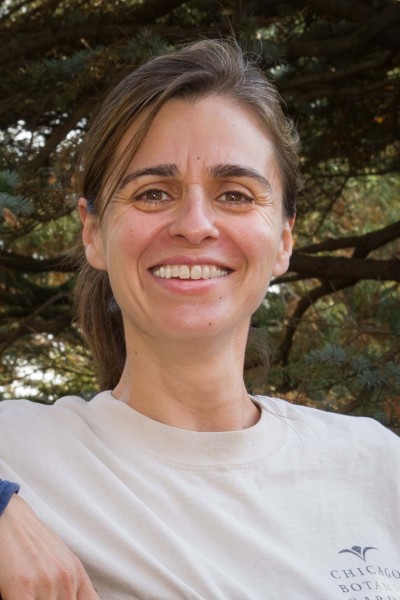
Our lesson in salep came from the one person who had not only tasted salep before but had grown up drinking it—horticulturist Ayse Pogue, who hails from Istanbul.
Horticulturist Ayse Pogue
Salep is not readily available in America; it arrived here courtesy of Ayse’s mother, Figen Ormancioglu, who kindly brought it with her on a recent visit. (The family surname translates as “son of the forester”—Ayse’s love of botany is in her blood.)
What does salep taste like? “Chai,” “junipers,” and “I’ll have another glass,” were three answers; the flavor is hard for American taste buds to define. Sweet and savory and spicy all at once, there’s a note of bark or tree in it—Ayse explains that gum arabic, made from the sap of the acacia tree, is also an ingredient, one more familiar to eastern palates than western.
And what is served with salep? “Good conversation,” Ayse says, as is true of all café drink orders. Heading to Istanbul? You’ll spend $4 to $5 on a cup of salep in a city café.
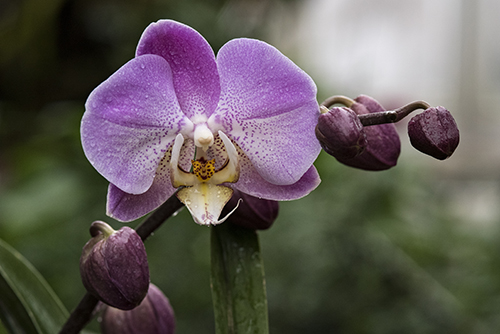
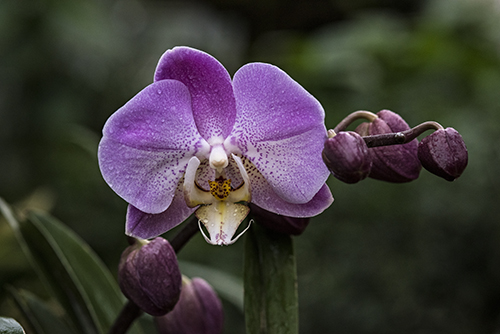
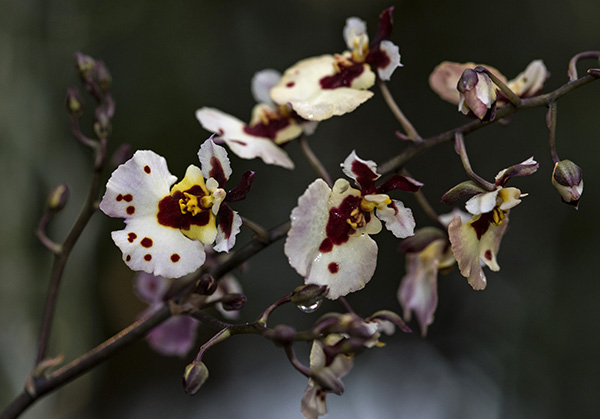
Edible Orchids
We’ve been talking a lot about edible orchids recently, especially with vanilla as a prominent part of this year’s Orchid Show. While vanilla is, by far, the most well-known food produced from orchids (it’s the bean-like fruit of the vining orchid Vanilla planifolia), other orchids are eaten in different ways around the world.
Chikanda is a Zambian food made from pounded orchid tubers and thickened to the consistency of jelly, then served in slices.
Olatshe is a daily dish in Bhutan, where Cymbidium orchids are cooked with spices and cheese.
Some Dendrobium flowers are edible, and the bamboo-like canes are ingredients in Asian stir-fries and sauces.
Turkish ice cream, or dondurma, is also made from salep; some dondurma is so chewy and elastic that it can be sliced and eaten with a knife and fork.
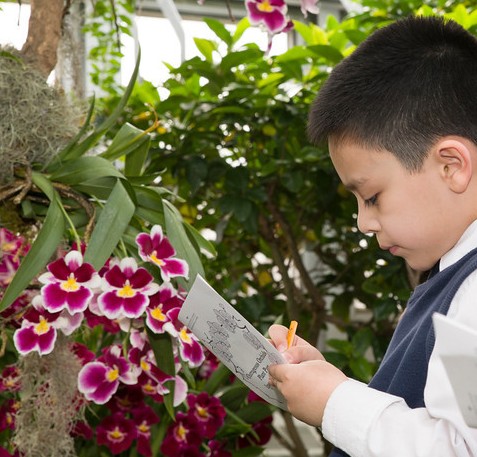
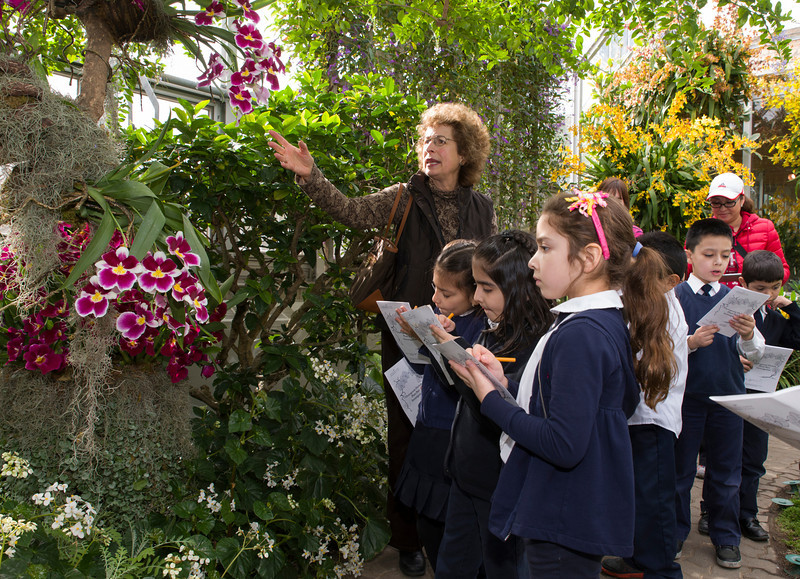
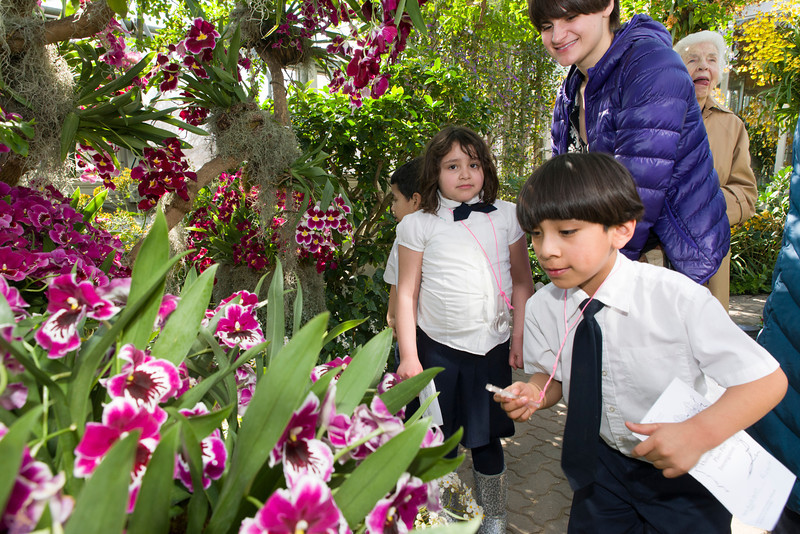
The Garden has a bright and cheery answer for overcoming classroom winter doldrums: take a field trip to see the Orchid Show!
Students observe how orchids are adapted to the wet environment—they grow aerial roots that can absorb water from the humid air.
At a time when schools are tightening budgets and limiting field trips, you might think that an Outrageous Orchids experience is a frivolous excursion—but, in fact, this is a luxurious way to learn life science principles. Our programs are grounded in fundamental science concepts outlined in the Next Generation Science Standards. From Valentine’s Day to St. Patrick’s Day, students get meaningful science lessons as they enjoy the sensational display of colors and aromas in our Greenhouses.
Field trips are tailored to suit different grade levels. Younger students study the variety of color and shapes found in the exhibition to identify patterns. Early elementary level students examine the structures of orchids to understand their functions. Upper elementary students recognize how tropical orchids have adaptations for survival in a rainforest. These core ideas about orchids apply to all plants and are essential for understanding ecosystems. There isn’t a more beautiful way to study plant science anywhere else in the Chicago region.
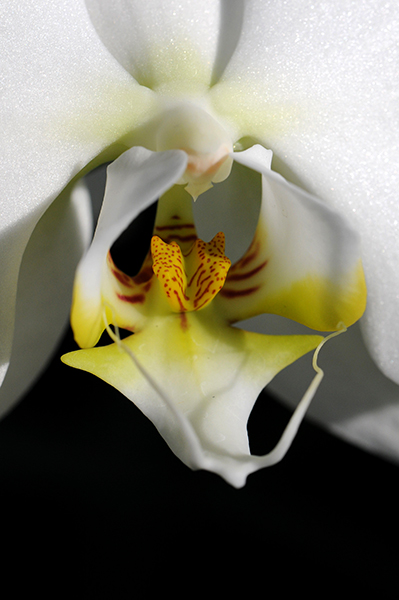
It is easy for students to see how this flashy orchid attracts pollinators as well as people.
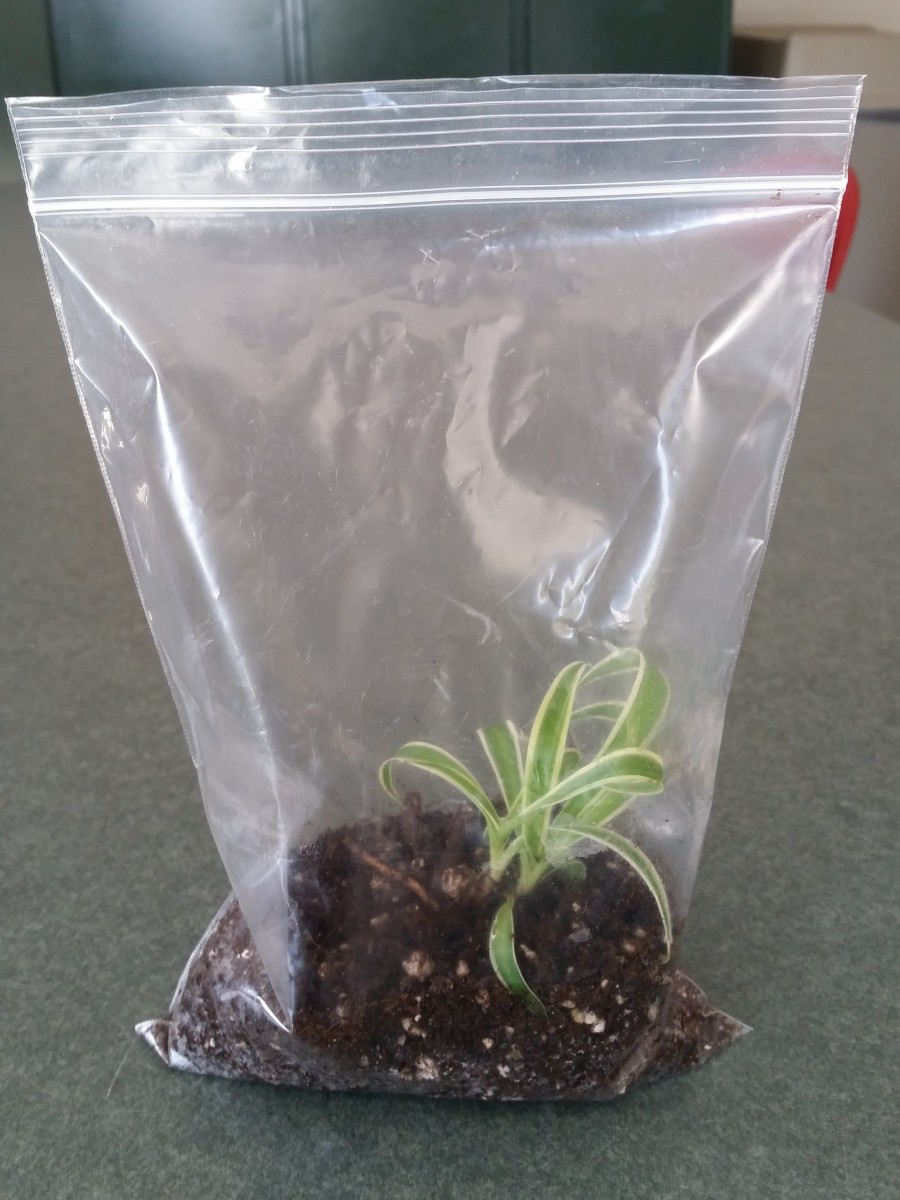
As if being surrounded by gorgeous flowers in the dead of winter weren’t enough to engage a person’s brain, each student also gets to transplant and take a tropical plant to continue the learning after the visit.
The Baggie Terrarium is a mini-ecosystem that reminds students of the water cycle and enables them to observe plant growth.
Make a Baggie Terrarium
We call this a “baggie terrarium.”
Supplies:
1 zip-top bag (quart-size or larger)
Potting soil, moistened
A small plant or plant cutting (during Outrageous Orchids classes, we let students take a spider plant “pup” from a very large spider plant)
Pour soil into the bag to fill about 2-3 inches deep. Use a finger to create a hole in the soil for the plant.
Bury the roots of the plant in the hole and gently tap the soil around the base of the plant. If you are planting a stem cutting, place the stem in the soil and tamp around the base. If you have a larger bag, you can add more than one plant. Three different plants in a gallon size bag can make an attractive terrarium.
Seal the bag, leaving about a 1-inch opening. Blow into the bag to inflate it and quickly seal the last inch tight so the air doesn’t all escape. The carbon dioxide in your breath is good for the plant, and will give the bag enough substance to stand up.
Place the terrarium in a bright location, but not in direct sunlight. Remember that most tropical plants grow under the canopy of taller trees and do not need full sun. In fact, too much direct sun makes their leaves fade!
Watch for tiny water droplets forming on the sides of the bag. These will gradually roll down the sides of the bag and re-water the soil. As long as the bag is completely sealed, it will stay moist and you will never have to open the bag or add more water. But if it dries out, you will need to water the plants.
You can leave your terrarium alone for a long time and not do anything but watch the plants grow. Eventually, they will outgrow the bag. Then you can transplant them to a pot if you like, or take cuttings and start another baggie terrarium.
Like all of our programs, Orchid Show field trips inspire young people to learn more about plants! Visit our website at chicagobotanic.org/fieldtrips for more information about these programs.
Compared to photographing flowers outside, photographing in the Greenhouses will be much more challenging and darker than you think.
Photograph the Orchid Show through March 13, 2016. Tripods and monopods are allowed in the Orchid Show on Wednesdays during public exhibition hours. Enter your photos in our digital photo contest here.
It may be bright outside, but the light in the greenhouses is being filtered through glass and other plant material; be aware that it will be even darker on overcast days. Most people will be hand-holding cameras, so getting shots that are sharp will take some adjustments. Here are a few things you can try:
Use a shorter lens.
This will be a bit of a compromise, as many of the orchids are up high or hard to reach. It would be nice to use a longer lens to get photographic access to more of the flowers in the Greenhouses. However, a shorter lens—100mm or less—is easier to hand-hold, and has a better chance of capturing sharp images at a slower shutter speed. (Typically, you want to have at least 1/400th of a second for a 400mm lens, or 1/100th of a second for a 100mm lens, etc., so the shorter lens will gain you two stops in this example—a significant benefit when taking hand-held shots.)
It is easy to be distracted by the beauty of the orchids and then get home and realize there are many unwanted elements in your photos. One easy option is to move in closer. When you get closer to the flower, you will get less background around the flower. Find flowers that are near the edge of an aisle—you will then be able to move your camera slightly up or down, or left to right, to get a pleasing background. Sometimes just an inch of movement can make all the difference.
Many of the newer cameras have improved sensors that let you increase the ISO and still get clean images with little noise. I like to do an ISO test before going out to shoot to see just how far I can push the ISO and still get images I find pleasing. It’s best to do this before you are on site so you will be able to review the images on a large screen and know what will be acceptable to you on the day of your visit. Every camera is different, and what may work for me may be too grainy for you. Most cameras will provide nice images in the 400 to 800 ISO range, and some can go much higher.
I much prefer natural lighting, but in the Greenhouses on a cloudy day, there may be no other option for getting that shot of “the most beautiful orchid you have ever seen” that is hiding in the shadows.
Orchids are tricky to photograph, even in ideal conditions. Many of them are deep flowers and require a large depth of field to get a pleasing amount of the flower in focus. Increasing the depth of field, however, comes with a price, as the increased depth will often allow much of the background to be in focus as well. And in the greenhouses, you may not want what is in the background to be in focus, especially windows, people, or other parts of the building. Hand-in-hand with depth of field is plane of focus. Many orchids have very interesting centers, almost like faces. Be sure to get those features in focus to make the whole photo look sharper.
Have fun, experiment with different apertures, and get creative with composition! There is no right or wrong way to photograph these amazing flowers. They are here for your enjoyment and all that is needed is your appreciation.
Some orchid stories are epic—like the ancient Central American myth of a goddess who rooted herself into the Earth as a vanilla vine in order to be near the mortal man she loved.
Some orchid stories are swashbucklers—tales of the high seas and the plant explorers (and pirates) who braved them in search of orchids from exotic lands.
And some orchid stories are mysteries—like the early struggle to understand how orchids reproduce (scientists could not see the microscopic seeds).
While gathering orchid stories for this year’s Orchid Show, I came across a story that isn’t quite epic or swashbuckling, but is, in its lovely way, a bit mysterious.
Here at the Garden, graphic designer Nancy Snyder has contributed her graphic and artistic talents in one capacity or another for 30 years. Print, banners, signage, exhibition design (her latest project is the Orchid Show)—Nancy has done it all, including teaching classes in drawing and painting at the Joseph Regenstein, Jr. School of the Chicago Botanic Garden.
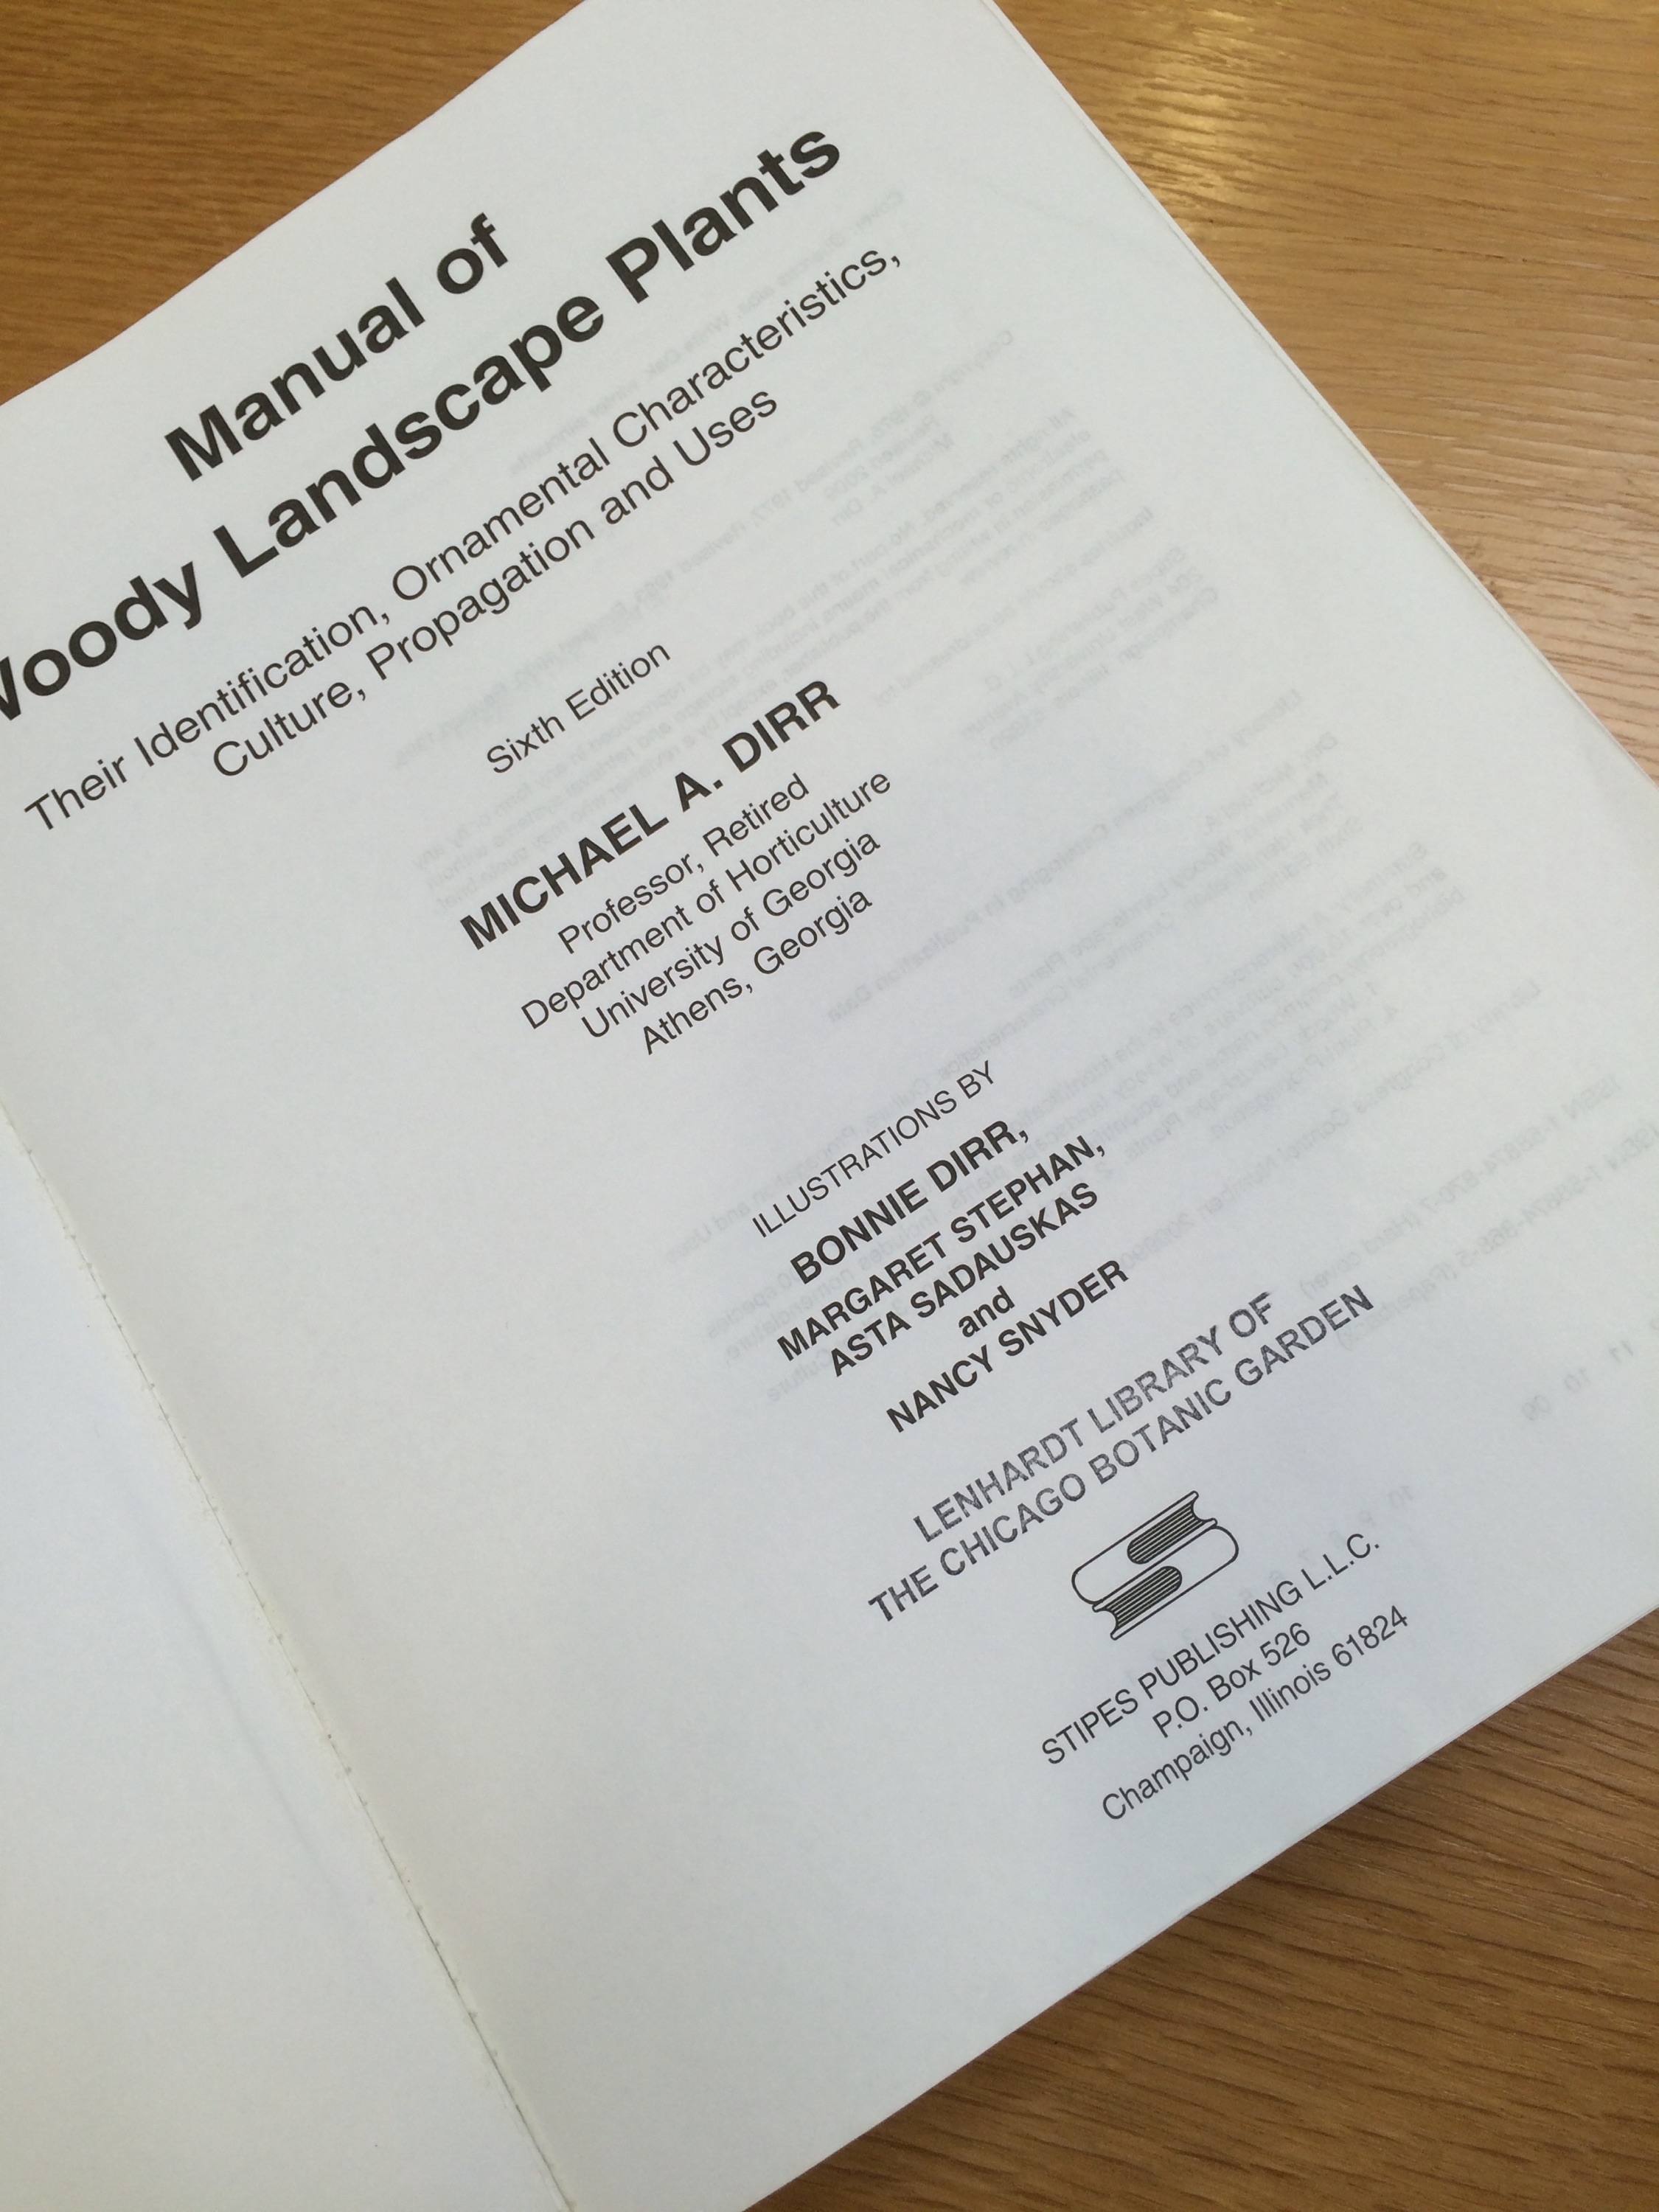
Nancy got her start at the University of Illinois, where she majored first in horticulture and later in medical illustration. The two subjects merged one day when she heard that one of her teachers, Dr. Michael Dirr, was working on an updated edition of his now-legendary Manual of Woody Landscape Plants.
Our own Nancy Snyder’s illustrations grace Dr. Michael Dirr’s classic Manual of Woody Landscape Plants.
“I asked if he needed any illustrations,” Nancy recalls now, “and he handed me a star magnolia twig to draw. I took it home, worked all night, and slipped the finished drawings under his office door the next morning.
“The next day, in the middle of Dr. Dirr’s lecture, he looked my way and announced, ‘By the way, Nancy, I got your illustrations, and they’re good. You’re hired.'”
And a botanical illustrator was born.
Fast forward to 2007.
Artist Heeyoung Kim moved to the Chicago area after studying education/psychology and teaching English in her native Korea and, later, in Germany.
“I had always drawn, and painted in oils as well, but at age 43, I wanted to do something more serious with art. One day I lined up all my drawings and realized that they were all of flowers.” Shortly thereafter, the Chicago Botanic Garden magazine (now Keep Growing) arrived in her mailbox, and she went in search of the Garden.
The first class that she signed up for was Botanical Illustration with Derek Norman. Heeyoung’s natural drawing talent was quickly recognized: eventually, Derek introduced Heeyoung to the native plants of Illinois, a subject that has become a personal passion in her art.
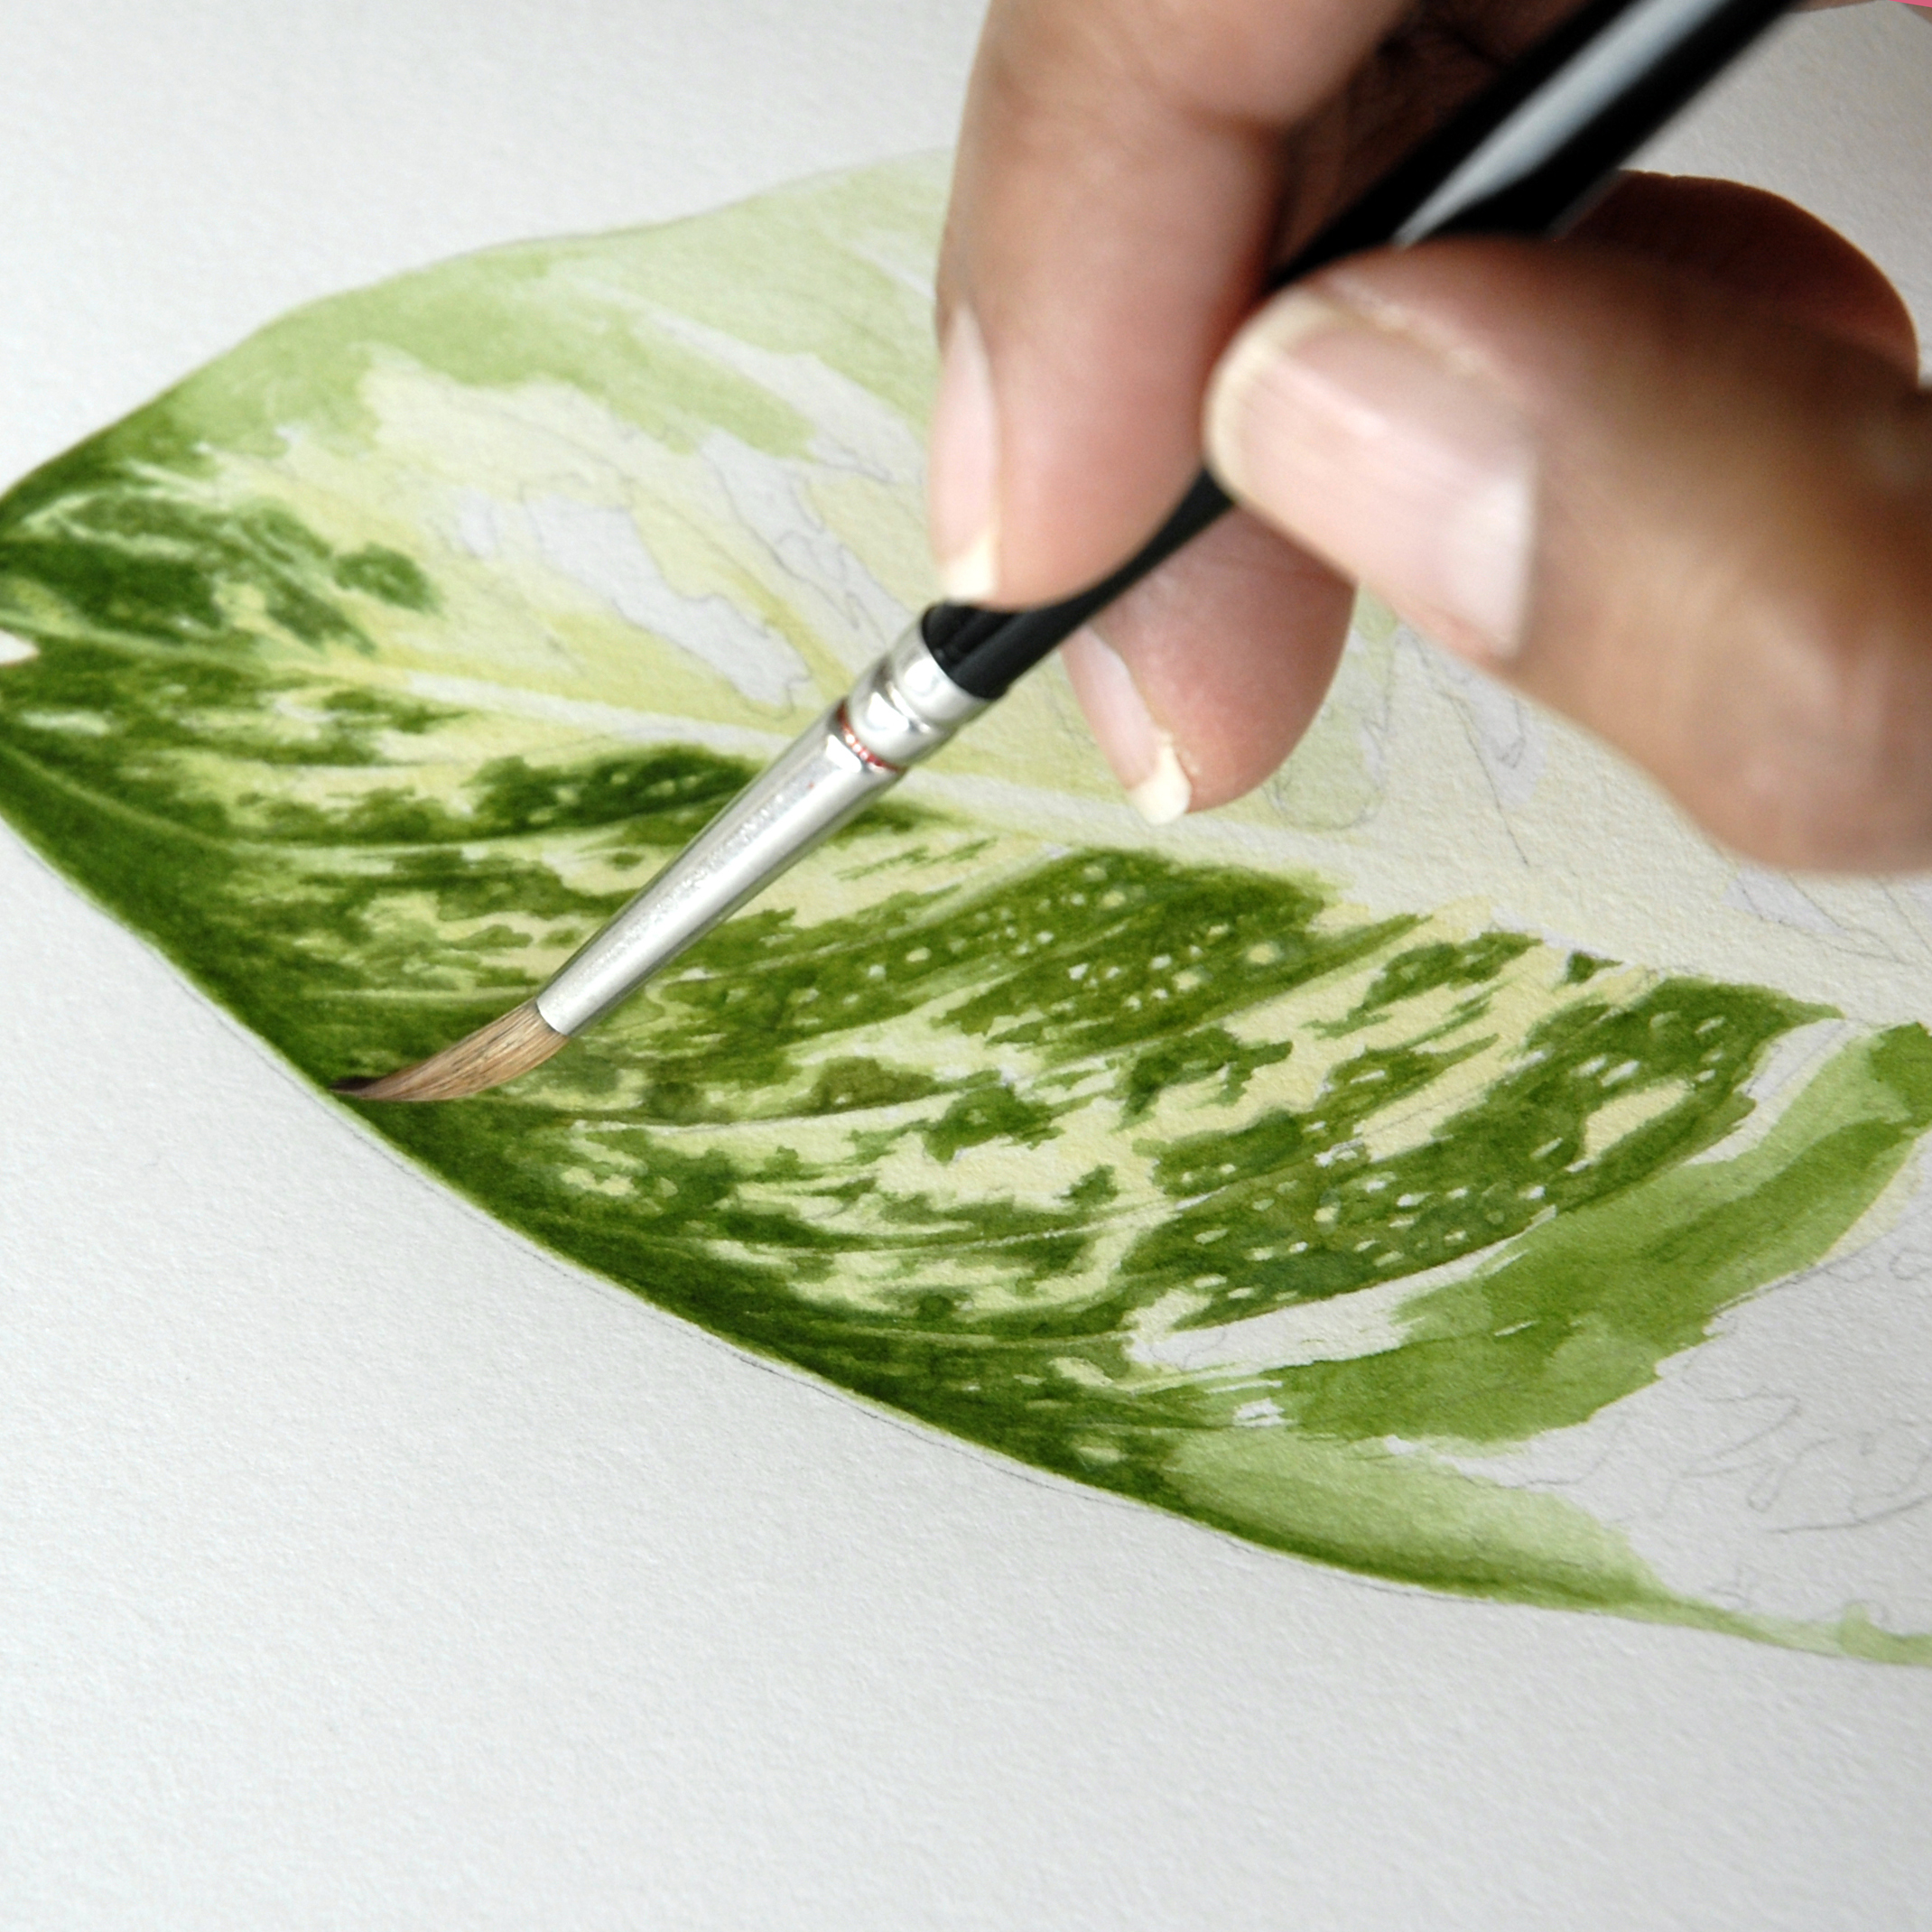
The technique of layering thin watercolor washes over and over again produces unexpectedly rich color “that still captures the transparent quality of living plant tissue,” says Nancy Snyder.
And then she signed up for her first watercolor painting class. Ever. The teacher: Nancy Snyder.
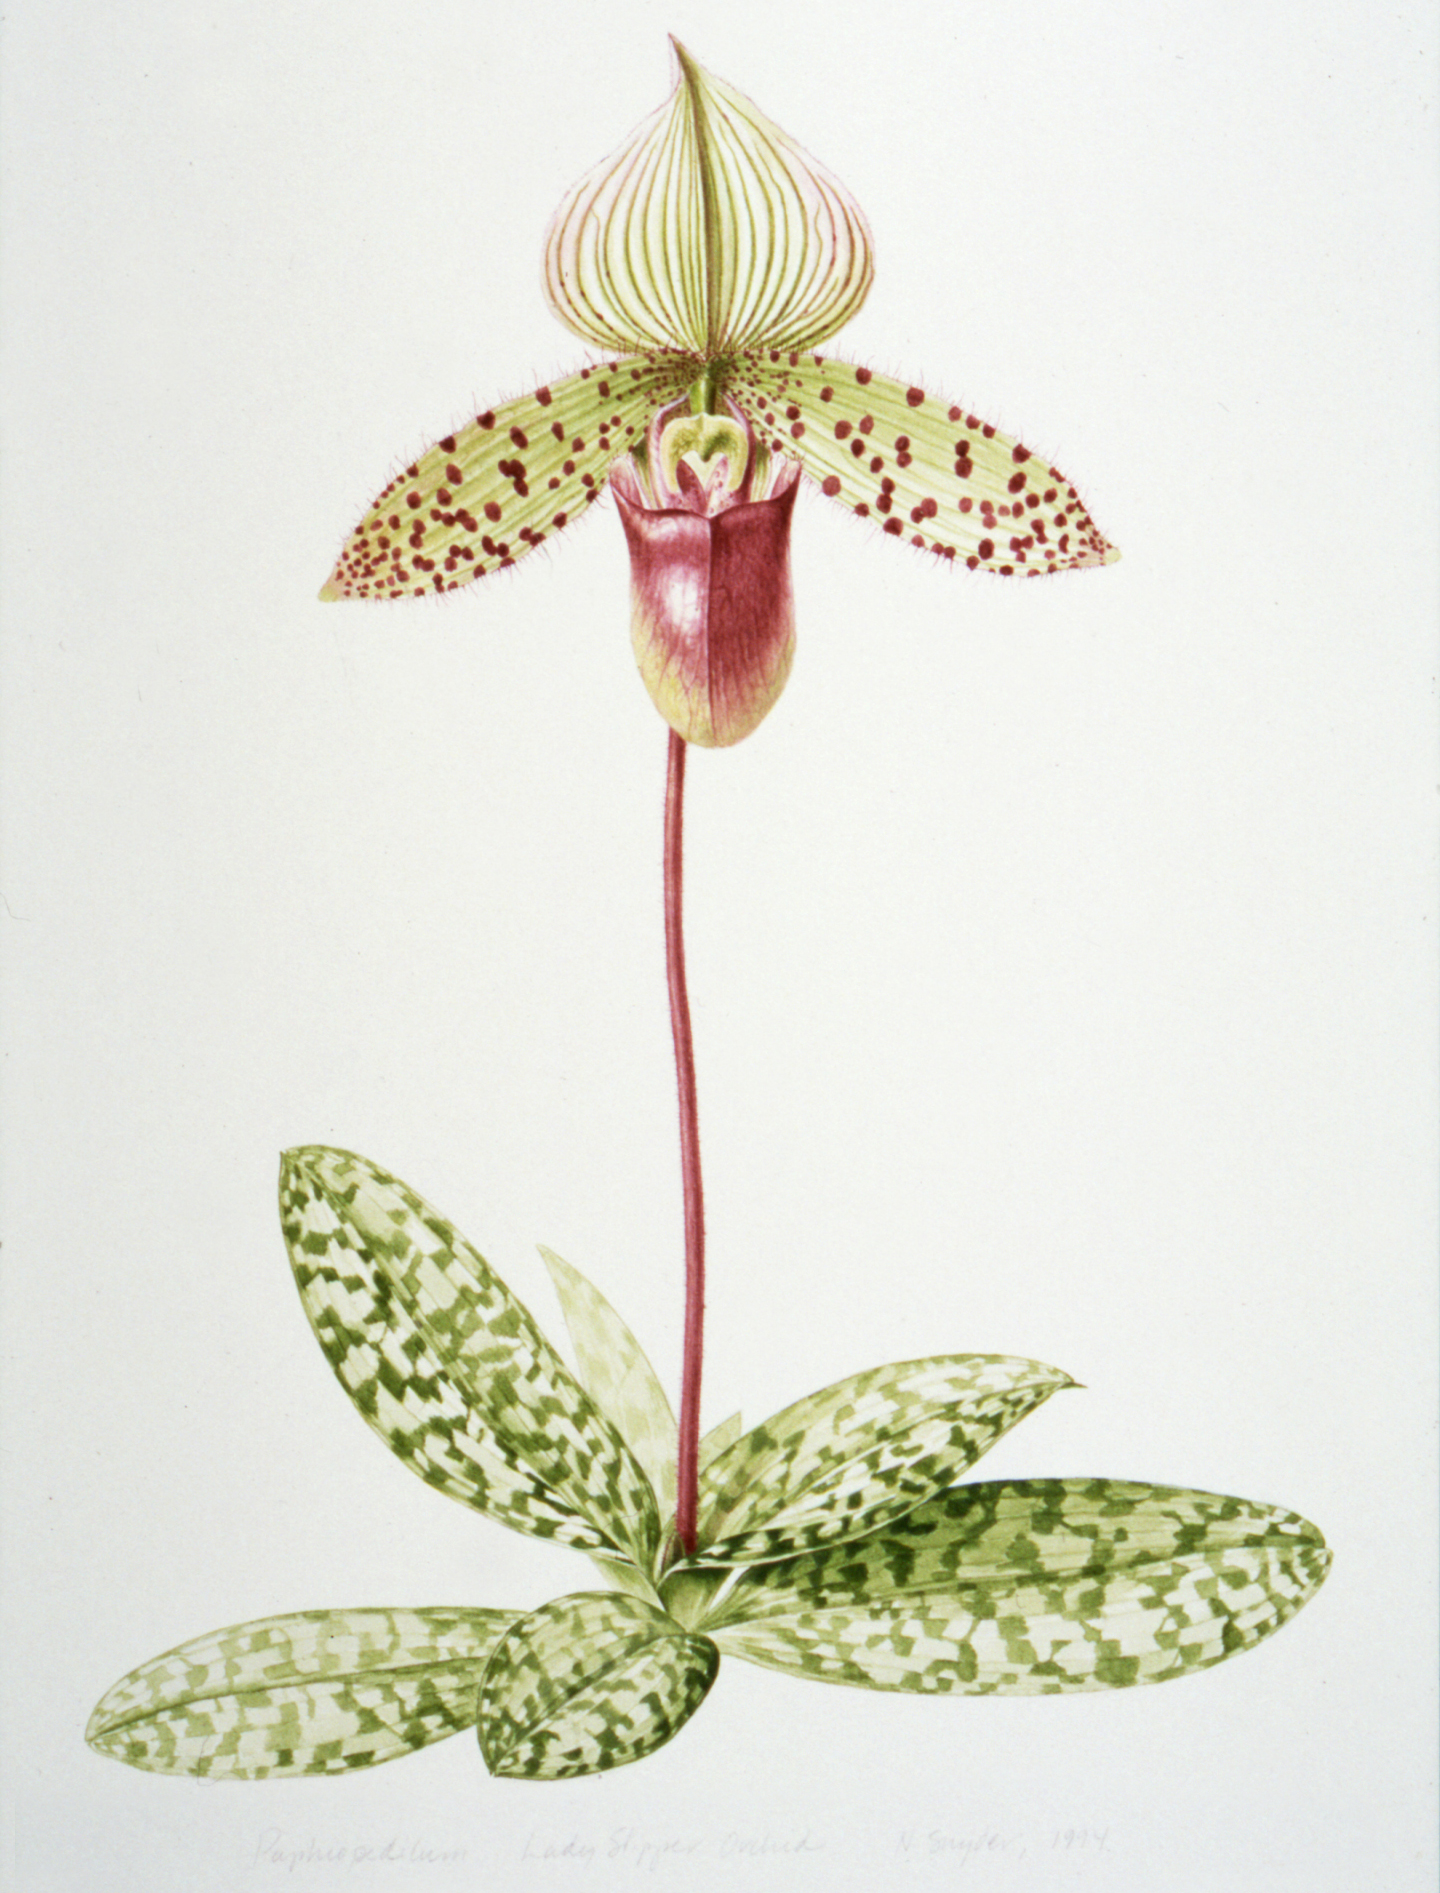
“I saw how Nancy layered the color washes over and over again,” Heeyoung says, “and after her demonstrations in class, I just sat down and started to paint.” Below is Heeyoung’s finished watercolor of a lady slipper orchid from the class.
“I’d use orchids as our models,” Nancy explains, “because they’re long-lasting. You can set up your little studio and paint for two weeks before the flowers change much—day after day it still looks the same. Speaking as a teacher,” Nancy adds, “some students come in with all the right raw ingredients, and just need guidance about materials or techniques or to see how it’s done. Then they take that information and synthesize it into their own style. That’s what happened with Heeyoung.”
A Phragmipedium orchid watercolor by artist/graphic designer/teacher Nancy Snyder.
Phragmipedium ‘Jason Fischer’, watercolor on paper, Heeyoung Kim, 2008
Works in Progress
“I’ve worked hard, and things are happening fast,” Heeyoung Kim says of two exciting upcoming events.
Heeyoung Kim has a solo show opening March 27, 2015, at Joel Oppenheimer Gallery in Chicago. She is the first living artist to be represented by that gallery.
Three of her drawings have been accepted for inclusion in the Transylvania Florilegium, presently being created under the aegis of the Prince’s School of Traditional Arts, founded by HRH The Prince of Wales.
Fast forward to 2015.
Last November I ran into Heeyoung Kim at the Daniel F. and Ada L. Rice Plant Conservation Science Center and asked her what she’d been working on lately. “An orchid,” she replied, as she pulled out an extraordinary illustration of Cypripedium candidum, one of Illinois’s 45 native orchids. In classic botanical illustration style, each plant part is documented, so that the plant may be identified in every stage of growth.
Now, in a delicious twist of fate, Heeyoung’s intricate and delicate drawing is one of the illustrations that Nancy has chosen for the Orchid Show. And that bit of mystery I mentioned at the outset? Heeyoung started teaching classes at the Regenstein School in July 2012.
Student…teacher. It’s a good story. At the Orchid Show you’ll not only see 10,000 orchids, but also the talents of two students who became two Garden teachers.