Moving Houseplants Back Indoors

In spite of the recent 90 degree temperatures, it’s time to start thinking about moving your houseplants inside.

The best time to do this is when temperatures outside are relatively close to the temperatures indoors, meaning mid- to late September. Before you move everything in, however, there are four quick steps you’ll want to take to help ensure a successful winter of windowsill gardening.

The same care tips also apply to overwintering tropical plants such as palms and bromeliads
The same care tips also apply to overwintering tropical plants, such as palms and bromeliads.

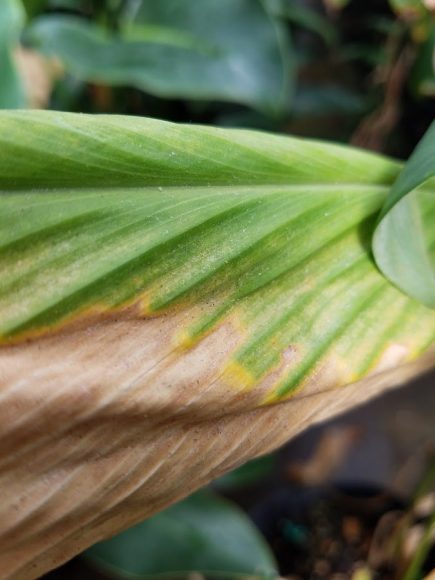
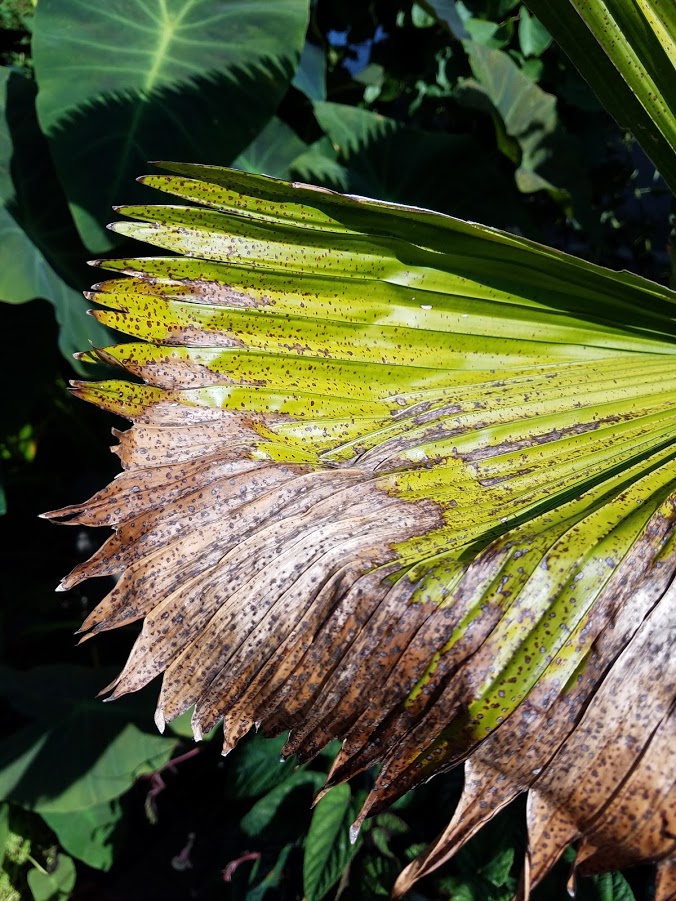
1. Clean up any dead or damaged growth.

Why bring any additional mess indoors when you don’t have to? Carefully remove any broken branches, sunburned leaves, or otherwise unsightly growth from your plants.

2. Lightly trim back plants as needed.

This step is a bit optional, and you really only need to do it if your plants have become large and overgrown. Never remove more than one-third of the growth at a time. Removing more can stress the plant and send it into shock, which can be hard to recover from indoors.

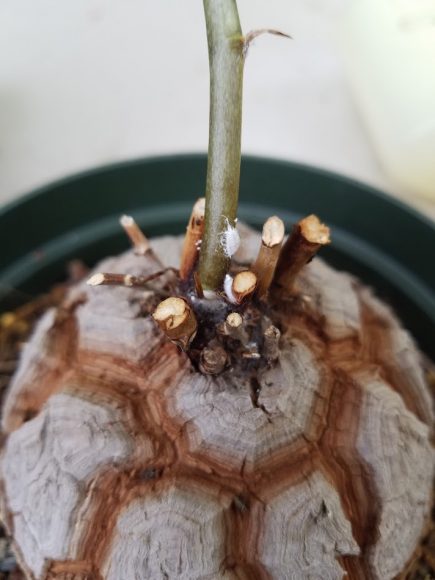
3. Check thoroughly for pests, and treat as needed.

One of the biggest ways to set yourself up for success is to start with clean plants. There are several pests that can cause problems indoors. The most common are mealybugs, spider mites, scale, and aphids. Insecticidal soap is a lower toxicity insecticide that is safe for most houseplants and will take care of nearly any pest problem you might have. As with any chemical, make sure to follow all package instructions. It is NOT recommended to use soapy water—this eats away at the cuticle (a protective waxy layer on the leaf), making it more vulnerable to disease problems in the future. For specific pest recommendations, contact our Plant Information Service.

Large-leaved plants are particularly susceptible to spider mites.
Spider mites can also cause brown edges that mimic sunburn. Look for the telltale webbing to determine if you have mites.
Mealybug feeding on the stem of Dioscorea elephantipes
Sunburn causes brown spots on leaves.
Sunburn causes brown spots on leaves. Trimming off damaged leaves helps keep plants looking good all winter.

4. Finally, resist the urge to repot unless necessary.

Sometimes plants have simply grown too large for their pots, in which case it’s OK to repot. But don’t repot if the plant doesn’t need it, as this will add unnecessary stress that could harm the plant in the long term. Always use soil specifically for containers (potting soil). Black dirt is too heavy and will encourage rot. When repotting, select a new pot that’s only 1 or 2 inches larger in diameter. Anything much larger than that will encourage rot because the soil will stay wet for a long time.


©2017 Chicago Botanic Garden and my.chicagobotanic.org

Getting That Tropical Look

This season’s Brazil in the Garden exhibition features a bold tropical look at the Chicago Botanic Garden—you can get that same vibrant feel in your home garden, using perennial plants.

Surprisingly, there are a number of plants that thrive in the Chicago area in spite of their tropical looks. With attributes ranging from huge leaves, delicious fruits, or potent fragrances, these trees and shrubs will add a tropical splash to your backyard year after year.

Magnolia ashei is one of the most tropical-looking plants at the Chicago Botanic Garden. It features huge leaves, huge flowers, and huge fruits. The leaves can grow up to 36 inches long, the flowers can be more than a foot across, and the fruits are up to 5 inches long and turn bright red. Magnolia ashei has an irregular growth habit and makes a bold specimen. Look for this one in the Native Plant Garden (however, this plant is not an Illinois native).

PHOTO: Magnolia ashei
Magnolia ashei has beautiful leaves and intriguing fruit.

Another large leaf magolia, Magnolia tripetala x obovata, is similar in most respects; however, it features a broad, round form and is a bit more formal in the landscape. This magnolia can be found in the Waterfall Garden.

PHOTO: Magnolia tripetala x obovata
The blooms of Magnolia tripetala × obovata can be up to a foot across.

Campsis radicans is a native vine with large, orange-red, trumpet-shaped flowers all summer long. The flowers are a hummingbird magnet, which just adds to the tropical allure, and are available in numerous colors, including red, orange, and yellow. This is a large, growing vine so give it room to grow. It does tolerate pruning but blooms best when allowed to grow uninterrupted. Even the seed pods are ornamental, looking almost like green bananas hanging from the flower clusters. Look for it in the Waterfall Garden, and the fence surrounding the Graham Bulb Garden, where we have red and yellow varieties mixed together.

PHOTO: Campsis radicans
Campsis radicans grows in the Waterfall Garden.
PHOTO: Asimina triloba
Pawpaw (Asimina triloba) fruits hang high in the tree.

Another native plant that wouldn’t look out of place in the rain forest is the pawpaw tree (Asimina triloba). This native tree has green leaves that can reach a foot long. It’s a beautiful understory tree that will grow well in dappled shade with ample moisture (but never standing water). However, the real reward with pawpaws are the fruit. These large fruits have an incredibly tropical flavor, like a mix of mango, pineapple, and bananas. The fruit are among the last to ripen in the late summer and well worth the wait. To get a good crop of fruit, make sure to plant two varieties.

Pawpaws also get beautiful golden fall color, which only adds to their appeal. One note of caution however: the trees can sucker, so make sure to plant your pawpaw somewhere where this isn’t a problem, or make sure to remove the suckers as they sprout. Look for pawpaws in the Bulb Garden, Regenstein Fruit & Vegetable Garden, and Native Plant Garden.

And finally, what is a tropical garden without lush fragrances? Clethra alnifolia is a hardy shrub that thrives in partial shade and boasts intensely fragrant blooms in late summer.

PHOTO: Clethra alnifolia 'Rosea'
Clethra alnifolia ‘Rosea’ has cheerful pink flowers that hummingbirds love.
PHOTO: Clethra alnifolia 'September Beauty'
Clethra alnifolia ‘September Beauty’ is one of the latest-blooming summer-sweet cultivars.

Clethra flowers have a rich smell similar to gardenia, but with spicy undertones. The flowers are tall spikes of white or pink and are a magnet for pollinators such as honeybees and hummingbirds. With careful planning, you can mix varieties of clethra and have blooms that last from mid-July through late August. Several varieties of clethra can be found in the Sensory Garden.

See Brazil in the Garden through October 15, 2017.


©2017 Chicago Botanic Garden and my.chicagobotanic.org

Repotting Cactus

Repotting a cactus can be intimidating, but a few simple tricks can make the project a lot less painful—and result in beautiful, healthy plants.

When repotting a cactus, there a few essential tools you’ll need:

  • Chopstick or small dowel
  • Cactus soil
  • Container with drainage
  • Gloves
  • Newspaper

Cactus soil is a special blend of potting soil that is formulated for fast drainage. It is usually a blend of peat moss and sand, sometimes including coconut fiber, perlite, or vermiculite. With the increase in popularity of growing cacti and succulents, it has become a garden center staple and can be found at most garden centers and hardware stores.

View video on our YouTube channel

You’ll want to use a container—preferably one that is made from terra cotta—with drainage holes. This allows the water to drain away from the roots rapidly. Cacti are native to dry environments and do not like to have their roots sitting in water. If the drainage hole on your pot is especially large, it can be partially covered with a rock to prevent soil from draining out the bottom when you water. Most cacti are slow growing and should never be planted in a pot that is more than an inch larger in diameter than their previous container. This is to help prevent rot.

Winter is a great time to warm up in the Greenhouses and see our cacti collection.

Weingartia lanata in bloom.
Weingartia lanata in bloom

Repotting your cactus is in many ways very similar to repotting almost any other houseplant.

  1. Begin by filling the new pot ½ to ¾ full with soil.
  2. Remove your plant from its old pot. 
    • Make sure to wear gloves.
    • Roll up a sheet of newspaper to make a strip approximately the same width as a belt. 
    • Wrap your newspaper strip around the plant and use it as a handle to gently lift the plant from the pot.
  3. If the plant is really root bound, gently loosen the soil around it to encourage new growth. (I like to leave some of the soil intact. This provides some weight to help keep the plant anchored. If the soil is poor quality, all of it should be removed.)
  4. Using the newspaper handle, set your plant into its new pot.
  5. Using the chopstick, firm the soil around the base of your plant. Keep adding soil until it reaches the same level as the old soil. (This should be approximately ½-1 inch below the lip of the container.)
  6. Water your plant throughly. 

Your cactus now has much more room to grow, which also means much more soil to stay moist. Make sure to check before watering again—the soil can stay moist for a long time, even if it is a mix made for cacti.


©2017 Chicago Botanic Garden and my.chicagobotanic.org

So You Want To Buy A Christmas Tree

Christmas tree lots carry a dazzling array of trees ranging from fragrant balsam firs (Abies balsamea) to shimmering Colorado blue spruces (Picea pungens). With so many choices, how does one choose?

The three most commonly encountered groups of Christmas trees are firs, pines, and spruces.

PHOTO: Siberian fir tree (Abies sibirica).
Siberian fir

(Abies sibirica)

Fir (Abies sp.)

The most common firs available are Canaan fir, noble fir, and balsam fir. All make terrific trees with a classic piney fragrance. They feature dark green needles (often with silver undersides) and are known for their rounded needles, which minimize injuries. They’re among the longest-lived Christmas trees and most resistant to needle drop. The main downside is that some varieties can be very expensive.

PHOTO: Colorado blue spruce (Picea pugens 'Procumbens')
Colorado blue spruce

(Picea pungens ‘Procumbens’)

Spruce (Picea sp.)

Spruces come in colors ranging from dark green to icy blue, but they all share one thing in common; incredibly sharp needles. While they make terrific trees for outdoor decorating, they do not hold up very well to the dry air indoors. If you select a spruce, it is critical that it is kept away from any sources of heat that might dry it out. The branches are strong and can support ornaments well, and their color range is quite appealing. When used properly, spruce can be an excellent plant for holiday decorating.

PHOTO: Pinus cembra 'Blue Mound'.
Pinus cembra ‘Blue Mound’ showcases its long, soft needles.

Pine (Pinus sp.)

Pines are another popular Christmas tree. The most commonly available pines are white pine and Scots pine. Pines feature long needles and tend to have a more clumpy look on the branches so the overall effect is less formal than the firs and spruce. The branches are generally more stiff than other evergreens, which makes them great for hanging ornaments. The biggest downside to pines is that they often turn a duller green for the winter. Many tree lots dye them a darker green to make them more attractive.

As you can see, every type has its pluses and minuses, but a few things hold true no matter which type of tree you select:

  1. Ask to unbag the tree before purchasing it. Many tree lots have the trees in netted bags, which makes it hard to see if the tree has a flat side or a bald spot. If this is a concern, just ask.
  2. Give the tree a good shake. If you find lots of needles falling off, that means the tree is dried out and will not last long.
  3. Look for trees with healthy, firm needles. Dull, brittle needles are a sign of a dried-out tree.
  4. Always give the trunk a fresh cut before placing it in water. If you have the ability to do this at home, that’s best, but your tree will be fine if you have it done at the lot just before bringing it home.
  5. Get your tree into water as soon as possible. Once the cut end scabs over, the tree will have a hard time taking up water and will lose needles rapidly.
  6. Never allow the water dish to dry out. It’s not uncommon to refill the dish every day, especially for the first week.
  7. Christmas tree food (a liquid food similar to the packets of cut flower food you receive in bouquets) helps extend the life of your tree.
  8. Avoid placing your tree near radiators or heating vents. This will cause needles to dry out very rapidly and can quickly become a fire hazard.
  9. At the end of the season, trees can be “planted” in the snow and used as seasonal decor and shelter for birds, or composted.

©2016 Chicago Botanic Garden and my.chicagobotanic.org

Planting Bulbs in Containers for Winter Blooms

Why wait until spring? Plant a bulb container for a preview of blooms to come.

In this video, the Chicago Botanic Garden shows how to create a bulb garden in a pot for winter forcing so you can enjoy a preview of spring in the midst of winter’s chill. Forcing is the act of putting plants through a cold period in order to stimulate blooming during an atypical time of the year. By potting up your bulbs now, you’ll be able to enjoy a spring garden in your living room in ten weeks.

What you need:

  • A shallow container with drainage holes
  • Enough spring bulbs to fill the container (plan on planting them close together, with an inch of space between bulbs)
  • Slightly moist potting soil

Assemble your container:

  1. Cover the bottom of the pot in one inch of soil.
  2. Add your largest bulbs in a layer, leaving approximately one inch between plants.
  3. Cover these bulbs. If adding another layer of smaller bulbs, leave 1½ inches of space from the top of the pot. Add the small bulbs in this layer, leaving one-half inch of space between plants. Fill with soil to within one-fourth inch of the rim.
  4. Lightly water the container.
  5. Place your container in a cool, dark location. The container must never get above 50 degrees or below freezing. Ideal spots are an unheated garage or, if you do a small pot, the crisper drawer of your refrigerator.
  6. In ten weeks your plants can be moved to a warm, sunny location. You should start to see growth within a week. (If you don’t want to bring your plants out at this time, they can hold  for several months in a cool location.)
  7. Once the plants begin to show flower buds, move to a less sunny location to prolong the blooming period.
  8. After blooming, plants should be discarded. Forced bulbs rarely transplant well into the garden.

The best plants for forcing tend to be on the smaller side. Tulips and narcissus work very well, especially the smaller cultivars. Larger blooms will require staking, especially if they don’t receive enough sunlight. Iris reticulata, Scilla siberica, Crocus, and Muscari are all wonderful bulbs for forcing: they stay small, and come in beautiful jewel tones that will brighten up any winter windowsill.

PHOTO: Muscari 'Pink Sunrise'.
Muscari ‘Pink Sunrise’

©2016 Chicago Botanic Garden and my.chicagobotanic.org