Slow Flowers

Recently, I enjoyed a lecture at the Garden by Debra Prinzing, the author of Slow Flowers:  Four Seasons of Locally Grown Bouquets from the Garden, Meadow, and Farm.

PHOTO: color chart by sophia siskel

While Debra helped us discover how to use the best locally grown cut flowers all year long, I’ve been on a “slow flower” journey of my own this winter, taking Botanical Drawing with Colored Pencil with instructor Derek Norman and 13 other Garden members in the Design Studio at our Regenstein Center. Slow processes (cooking, springtime, gardening, travel, motherhood) always demand patience, and constantly toe the line between joy and frustration. Drawing is no exception!

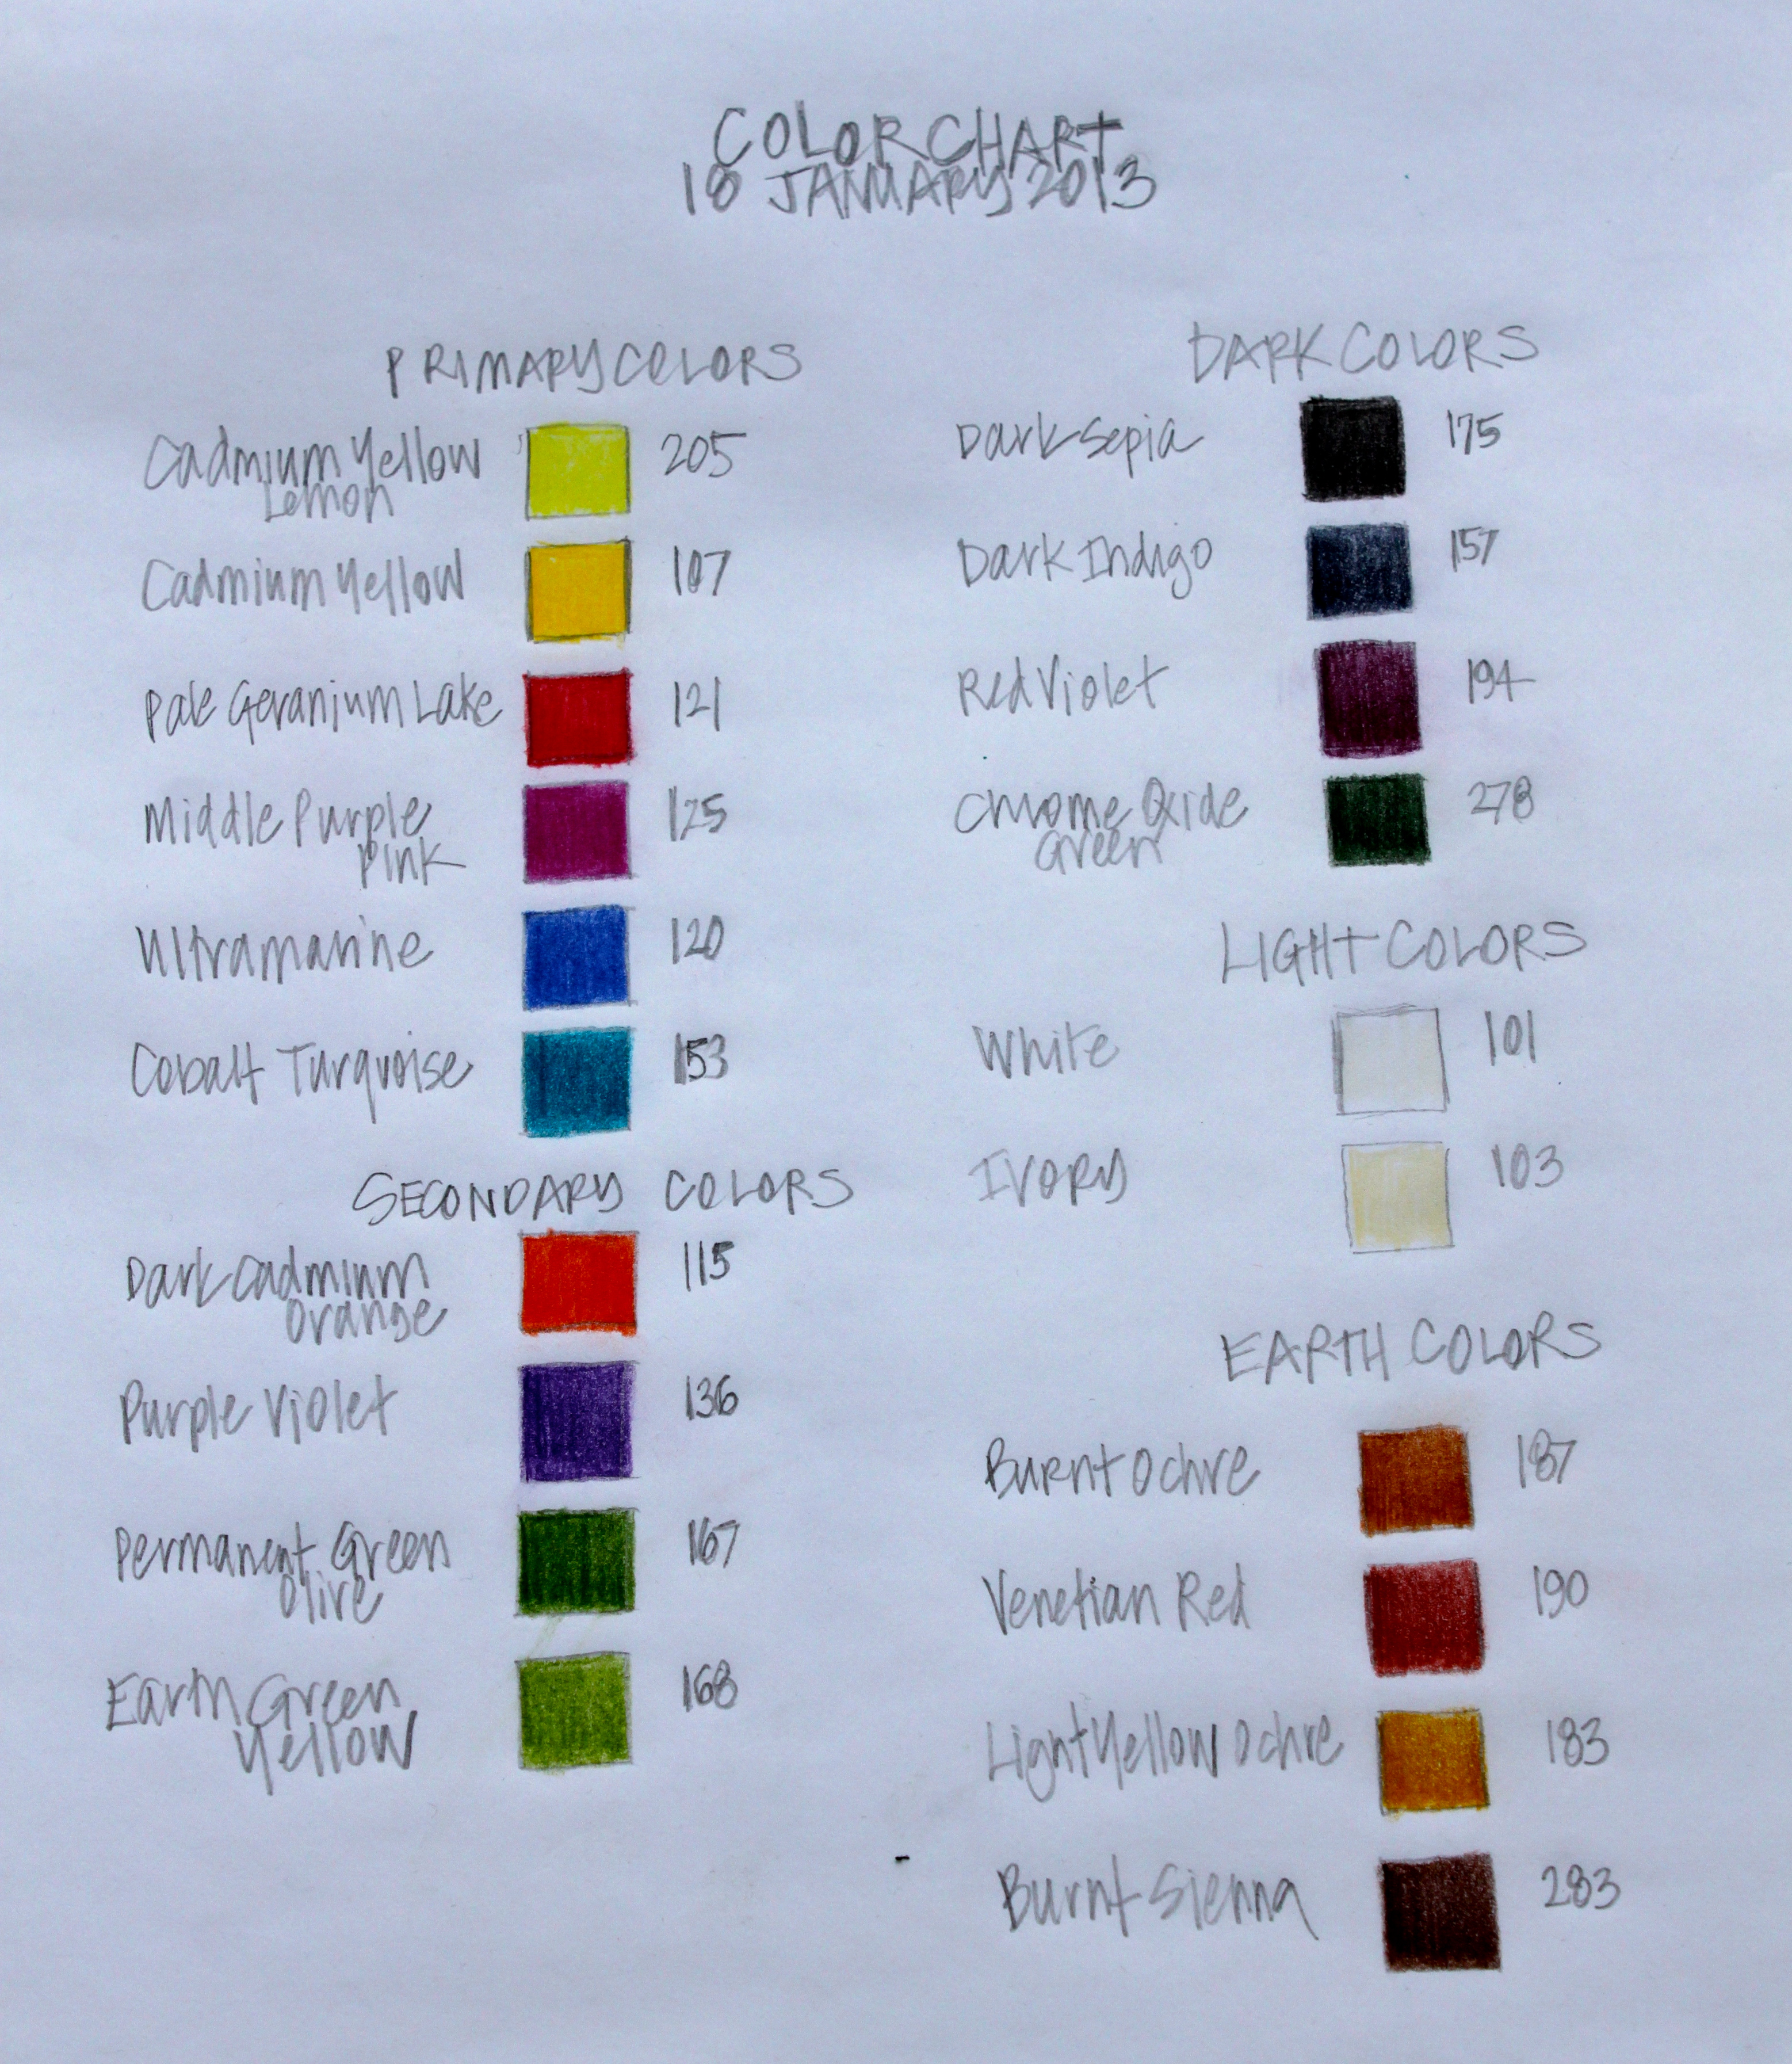
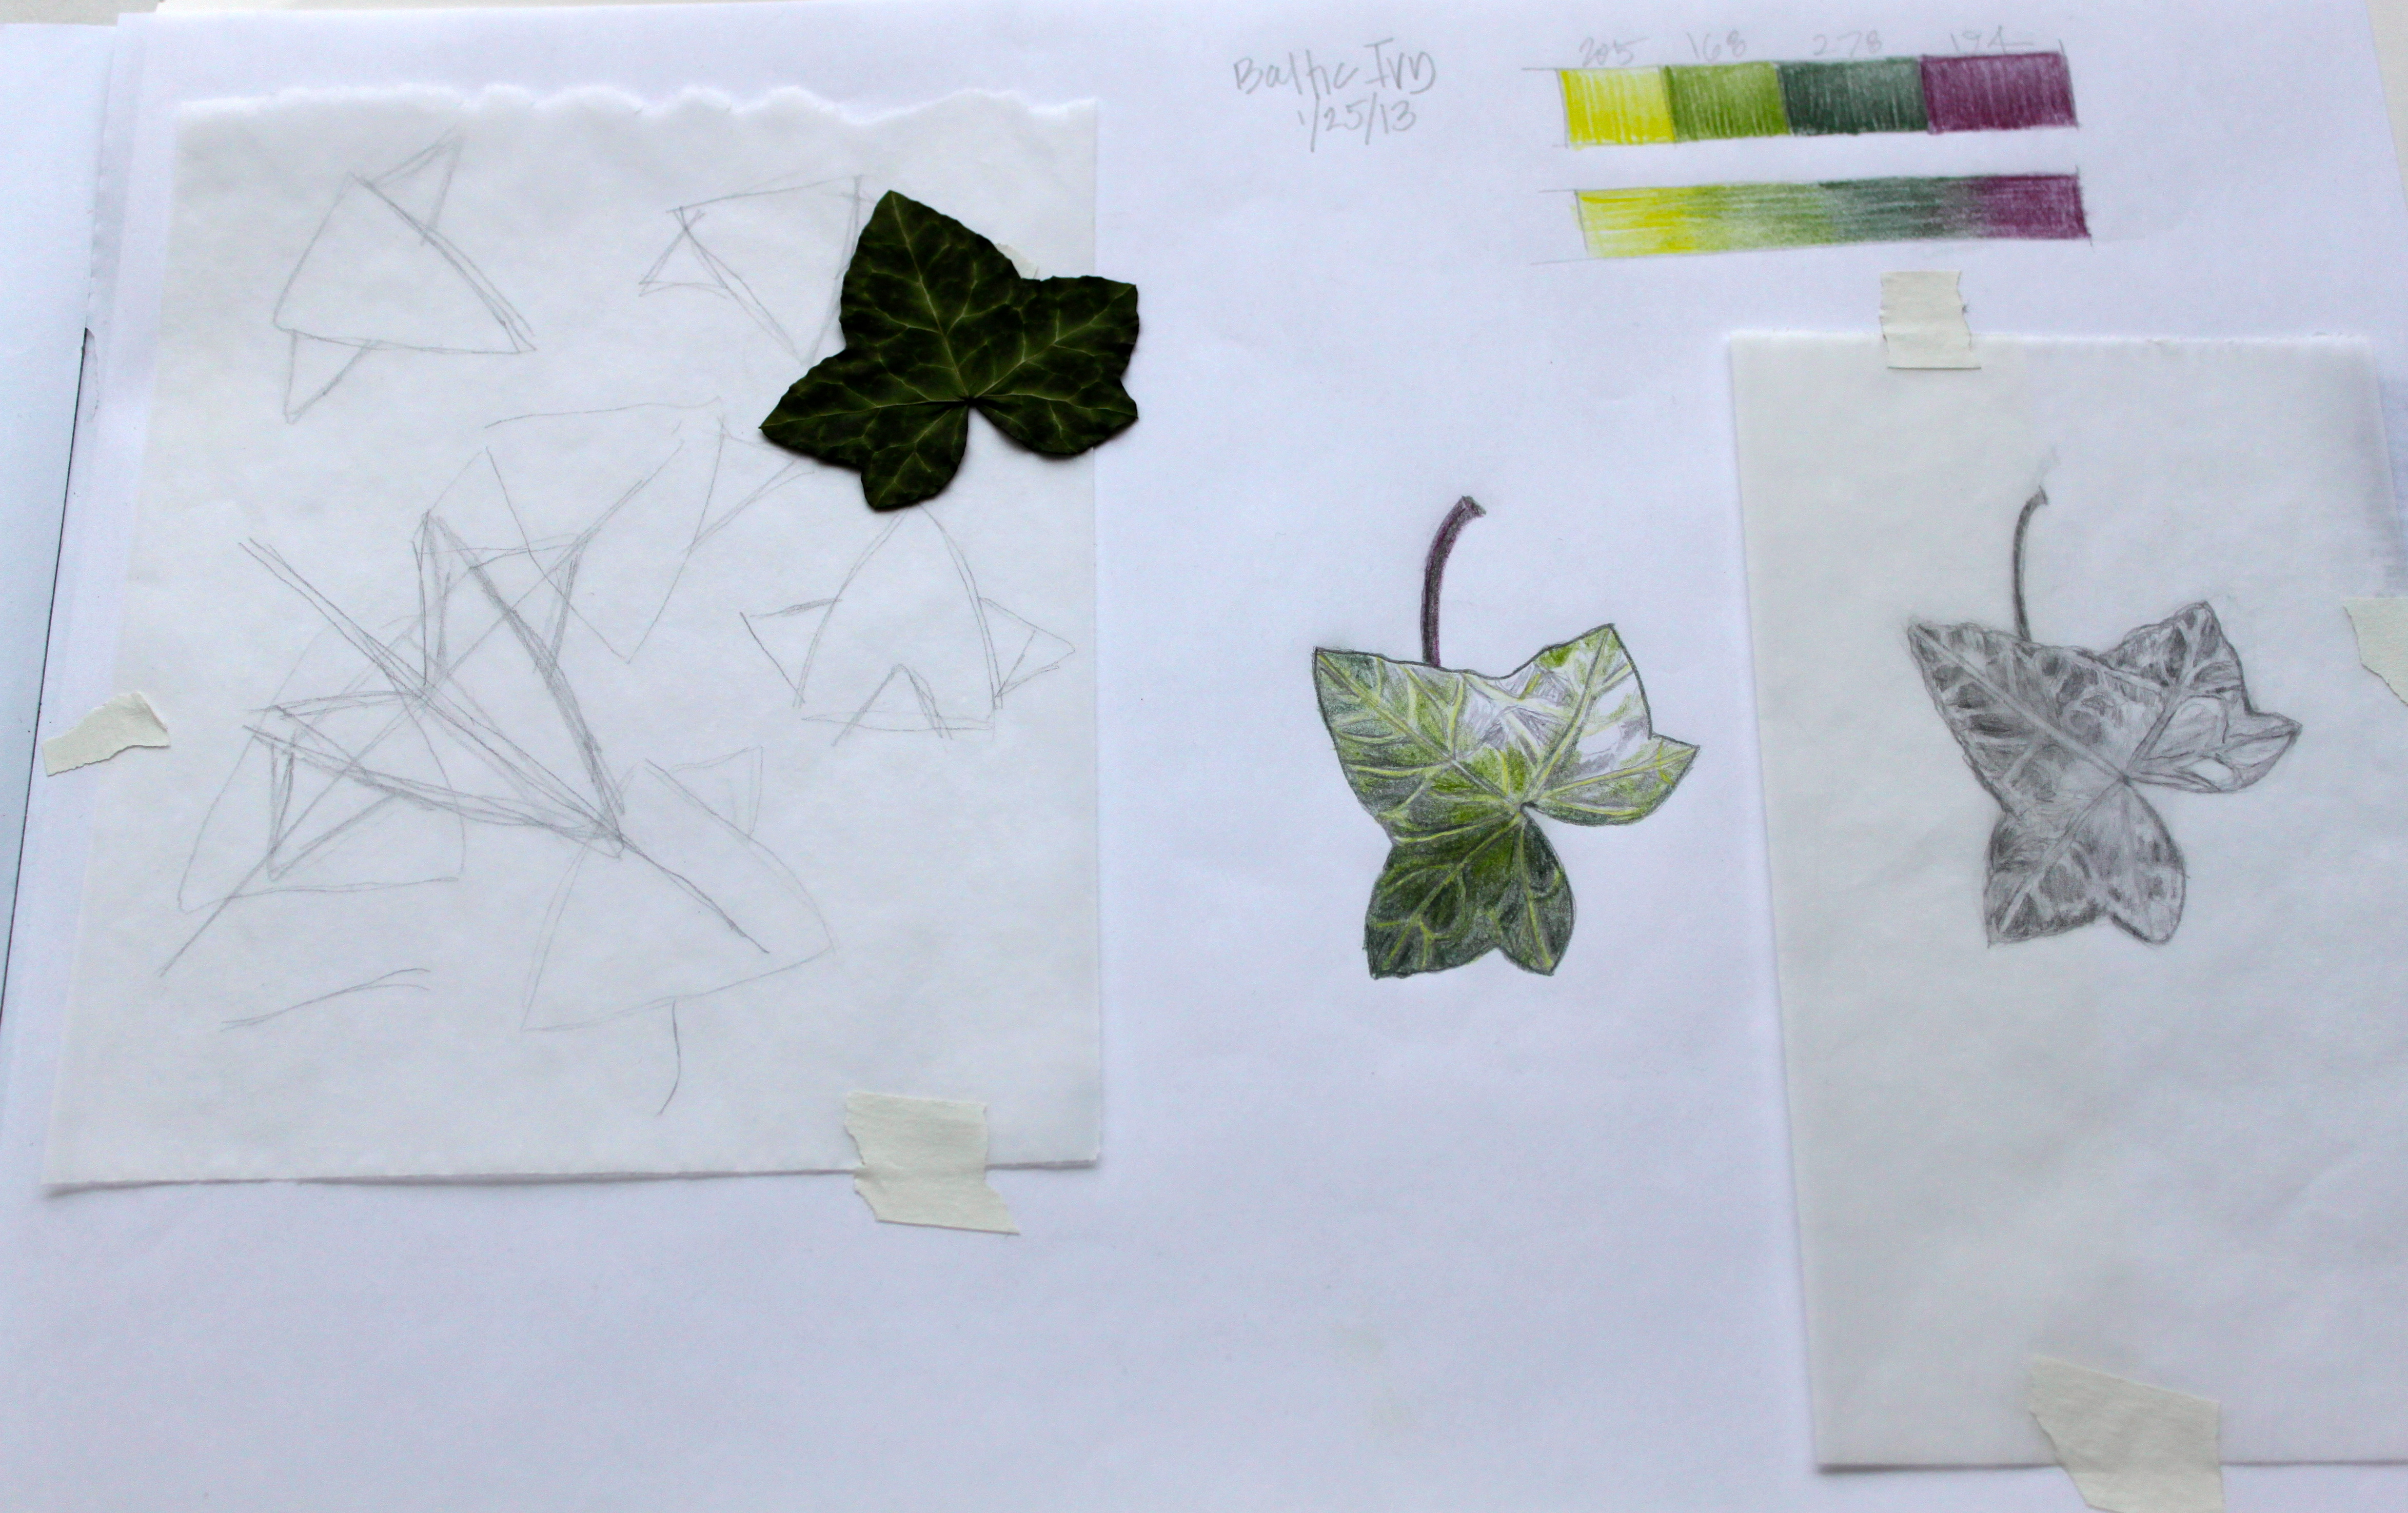
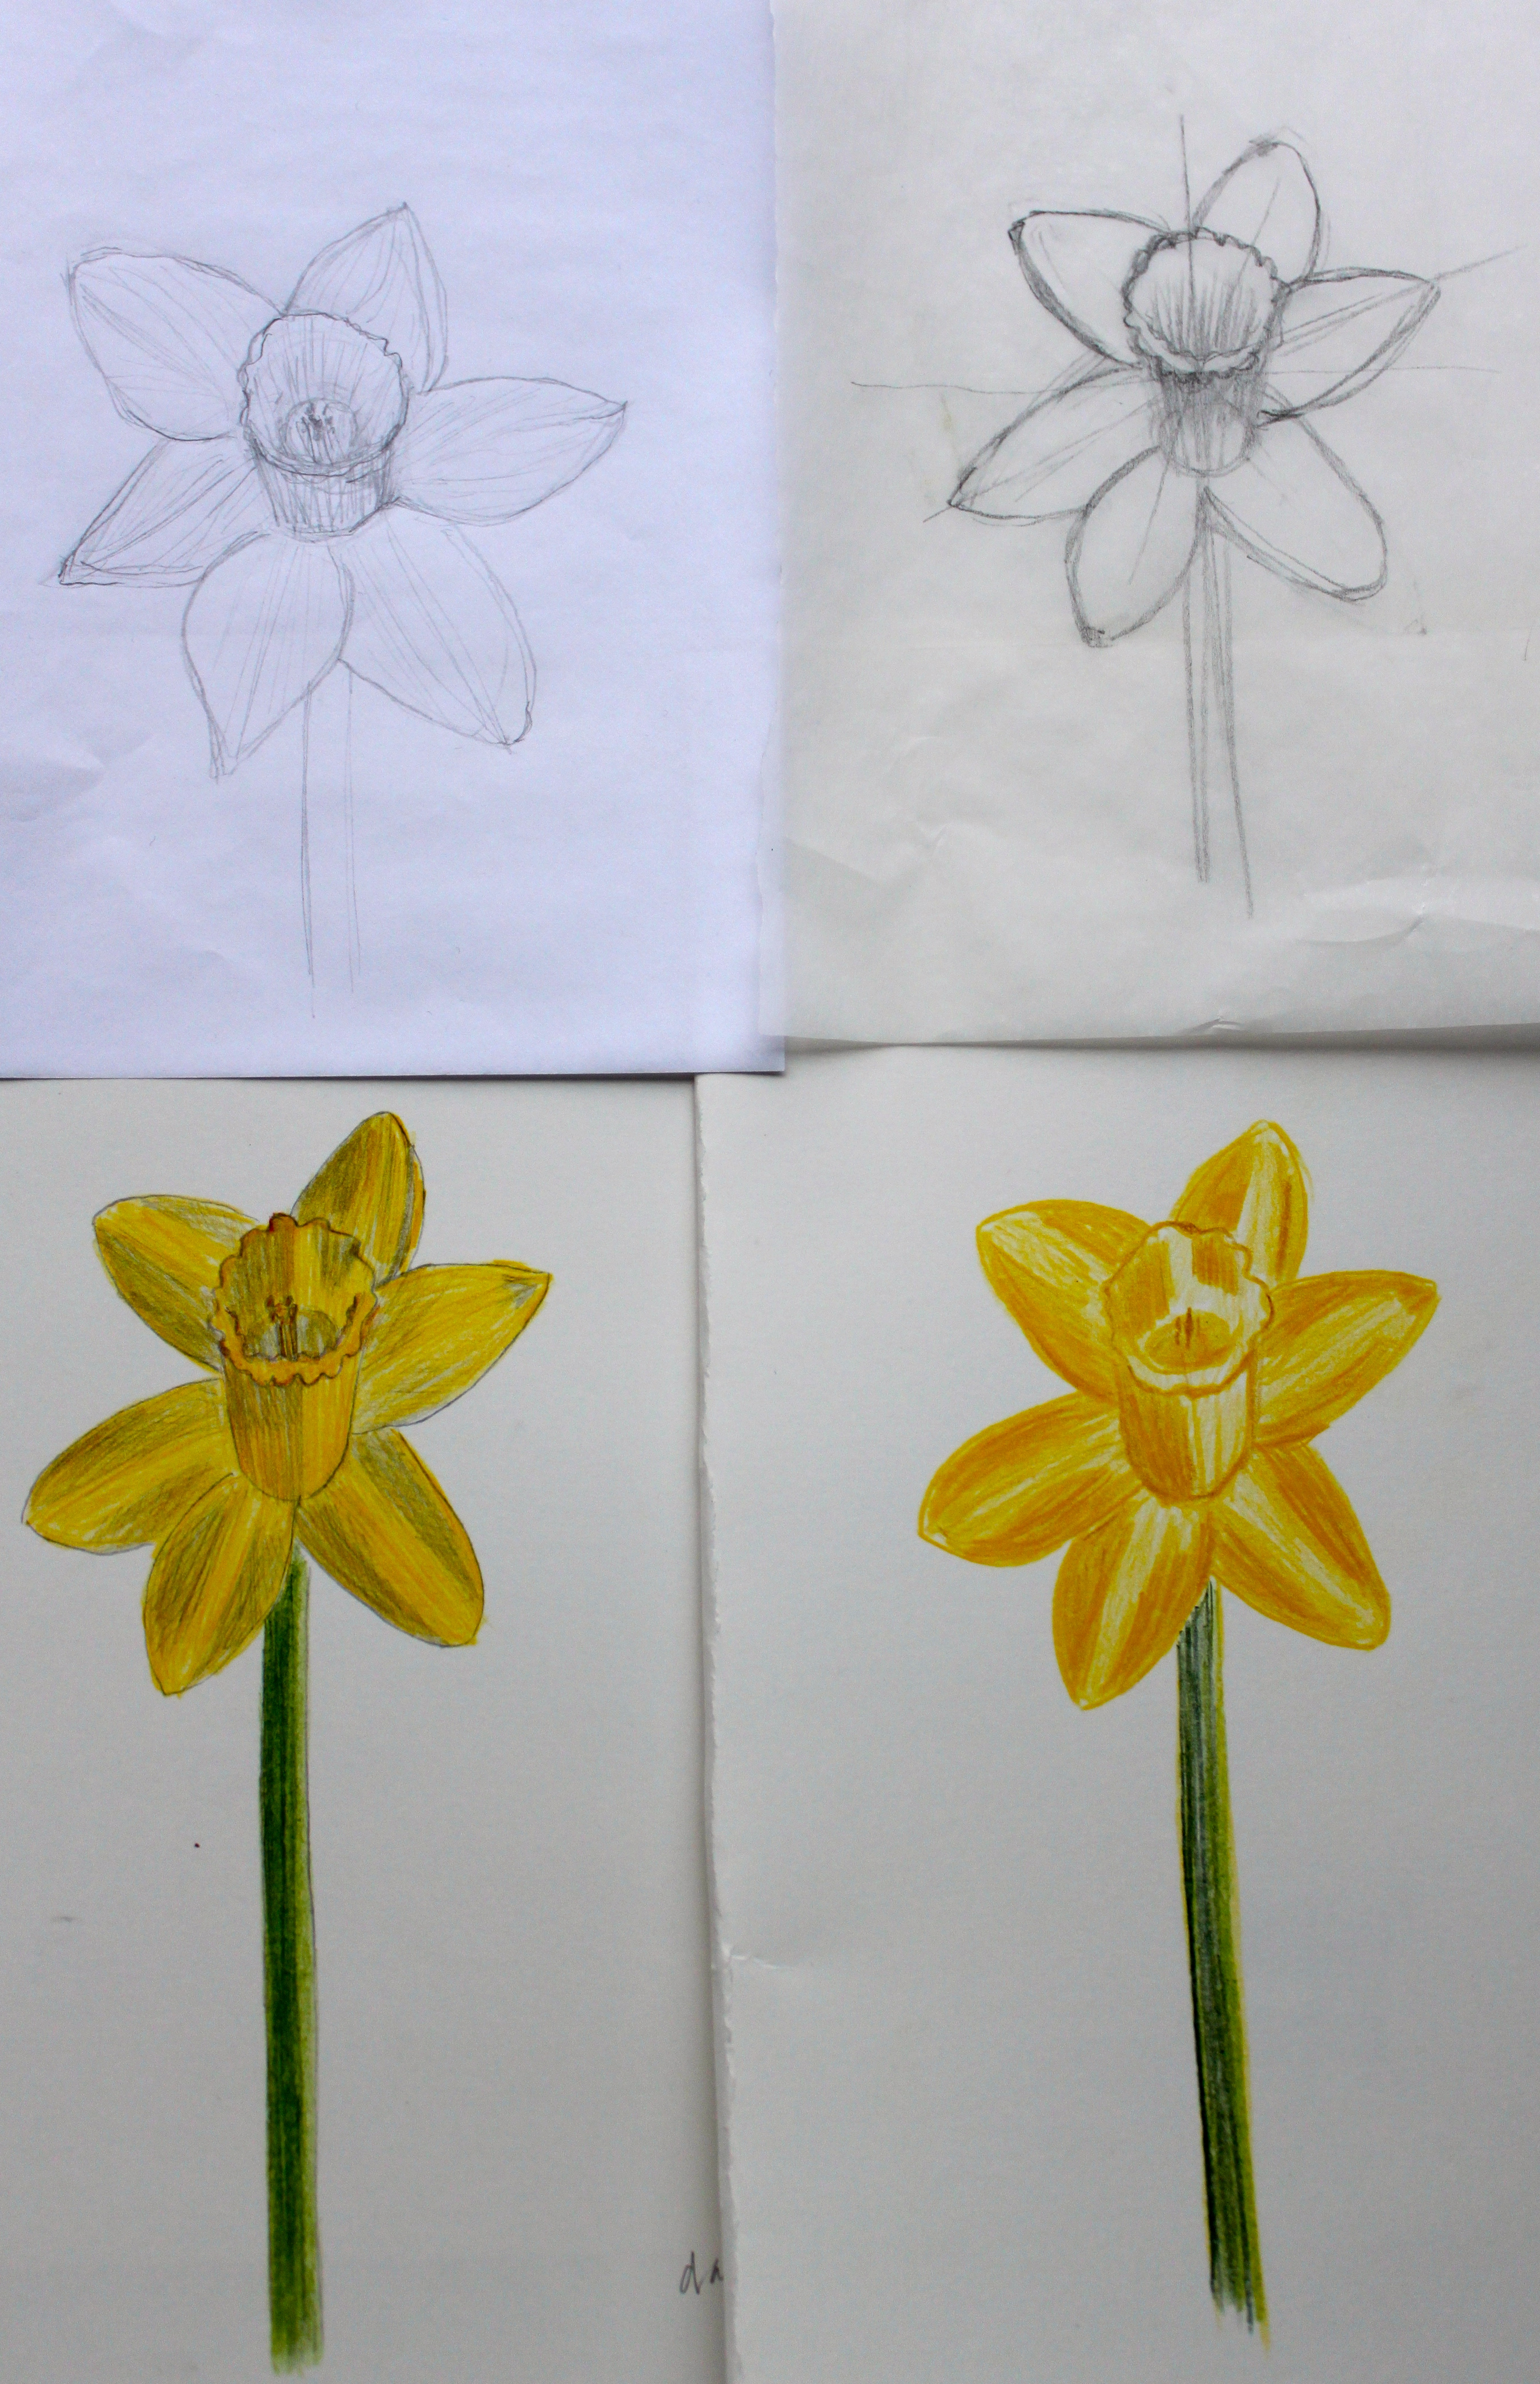
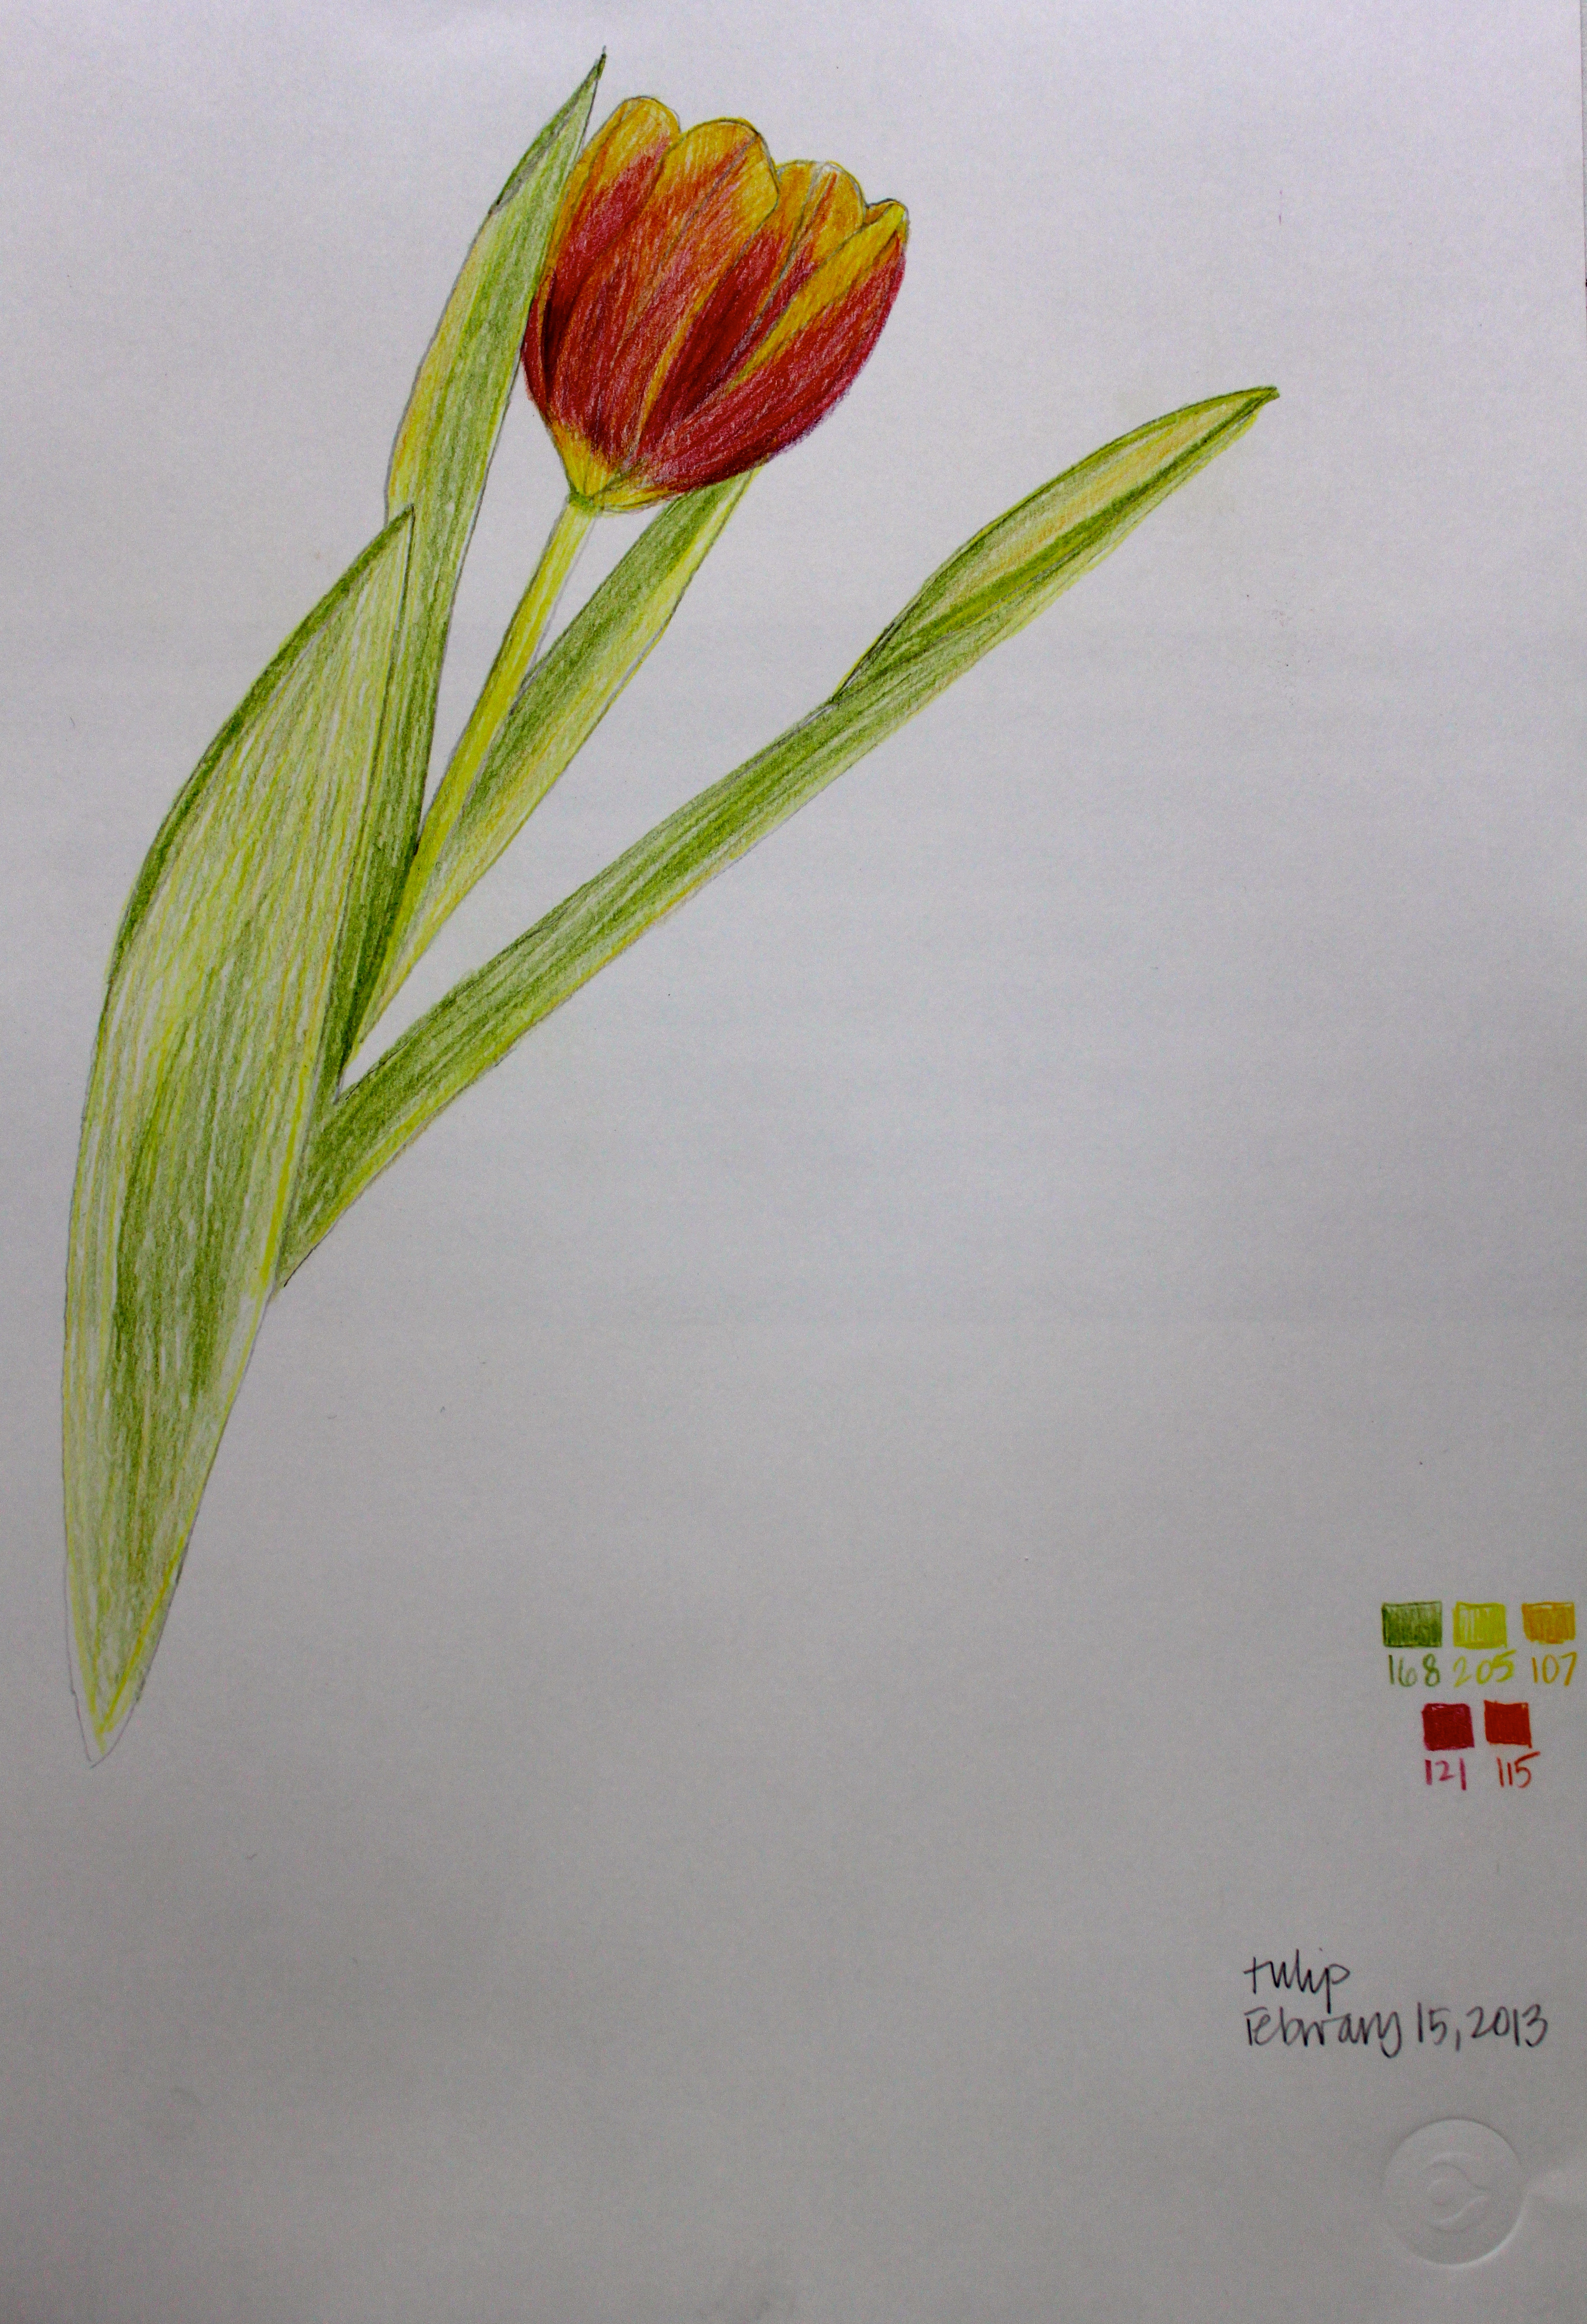
Derek brought in fresh flowers or leaves weekly and led us in studying their forms and showing us how to render them—in our own ways—on different kinds of paper with colored pencils, which we got to know by number, not color name.

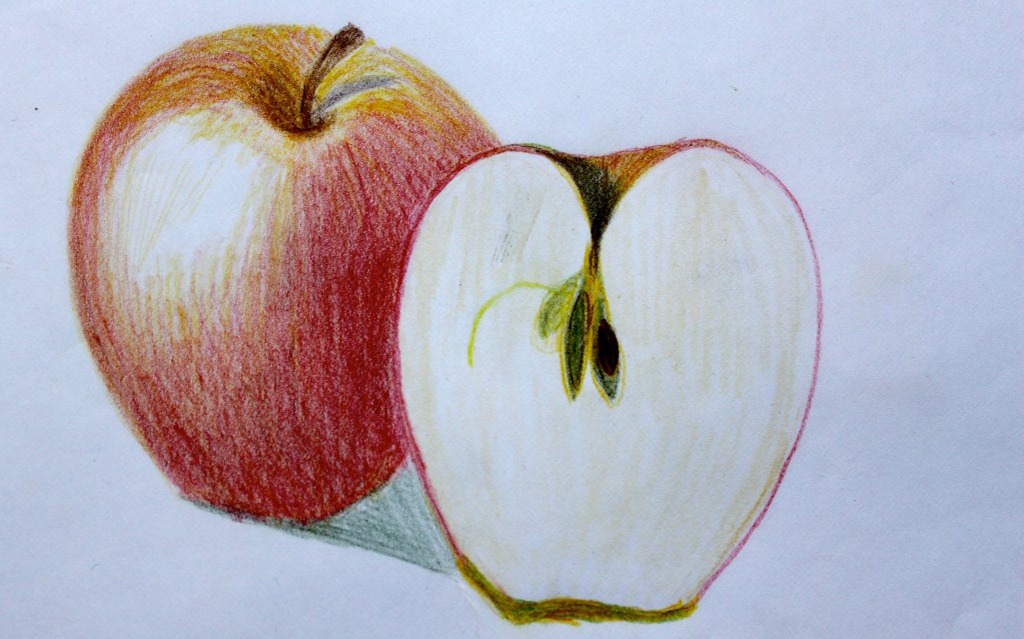
During some class sessions, when I could work without self-consciousness and distraction, I felt freedom and joy—a pure relaxation I rarely experience. And I was proud of my work:

ILLUSTRATION: Apples by Sophia Siskel

ILLUSTRATION: Ivy Leaf by Sophia Siskel

Some sessions proved challenging and exhausting, especially those that followed my visit to the wonderful Picasso exhibition at the Art Institute or a weekend examining the exquisite botanical drawings by Ellsworth Kelly. I was full of doubt and frustration, and the drawing experience and images suffered.

ILLUSTRATION: Narcissus sketches by Sophia Siskel    ILLUSTRATION: Tulip sketch by Sophia Siskel

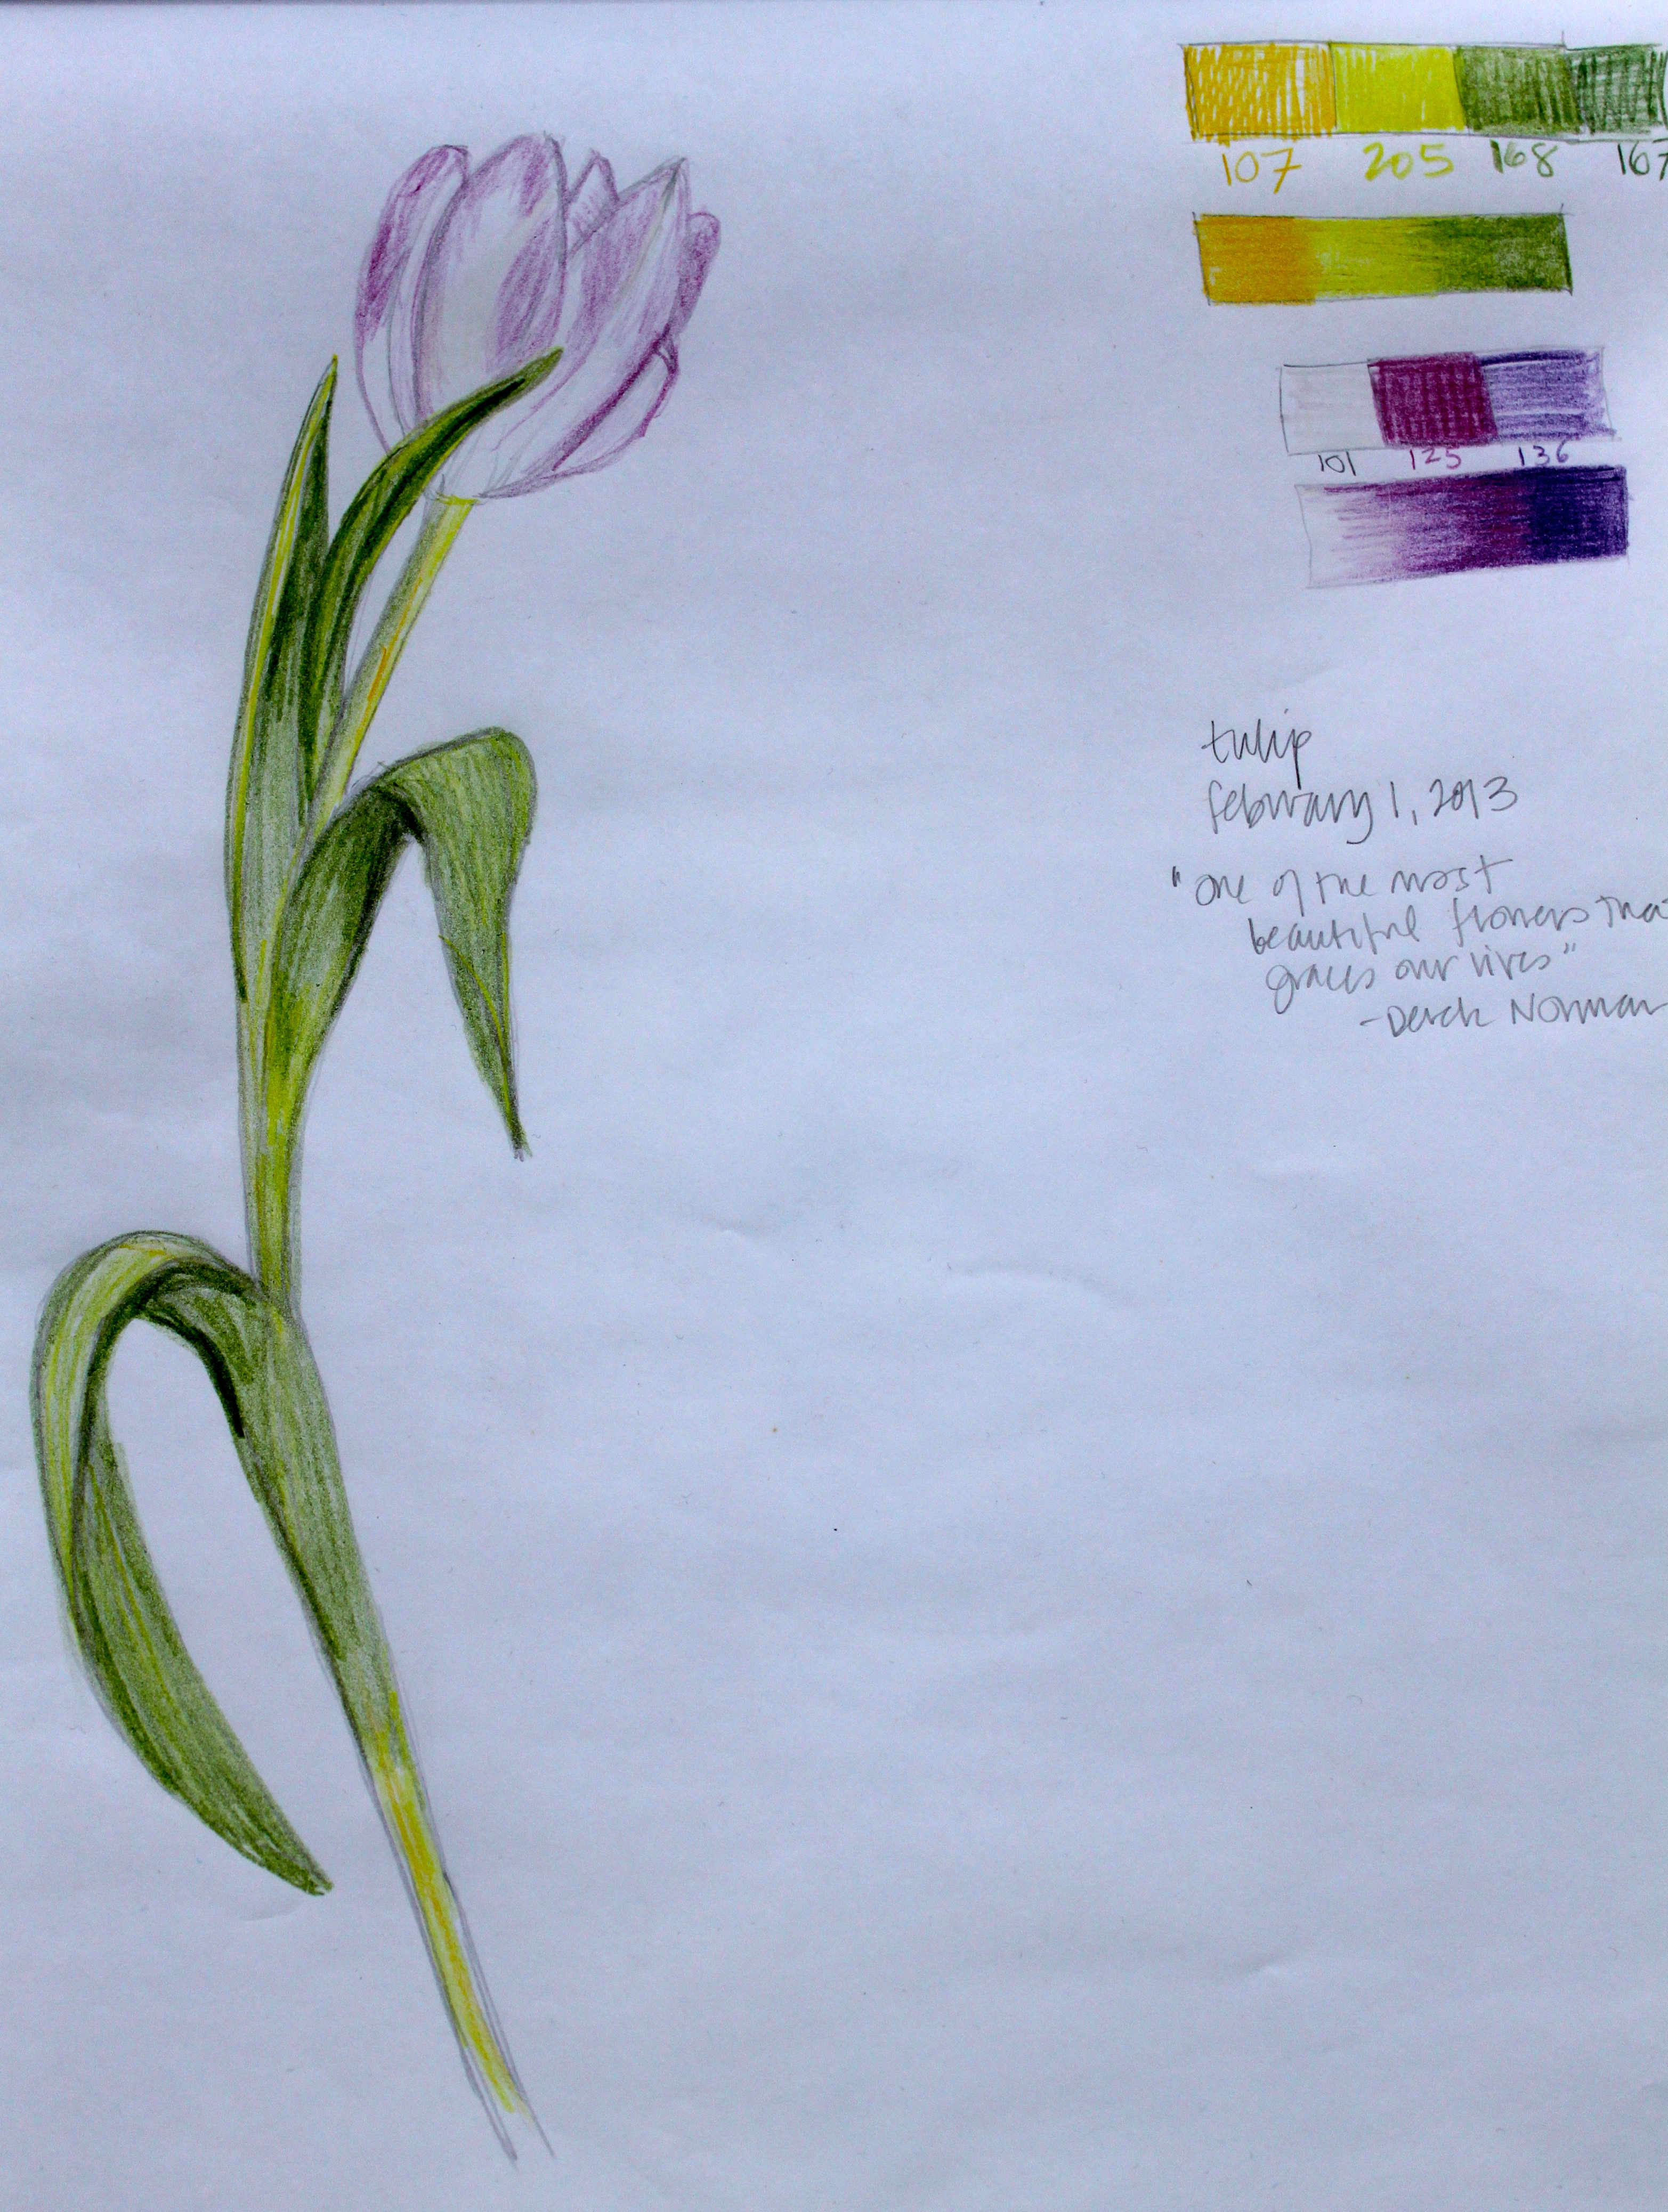
I am not an experienced artist. (The last time I took a drawing course was as a student at Wellesley.) And since I’ve been working at the Garden I have seen (and been intimidated by) so many remarkable botanical illustrations, like those produced by the members of the American Society of Botanical Artists or shown at the Garden’s Annual Student Botanical Arts Exhibition.

ILLUSTRATION: Waterfall by Marian Scafidi
Waterfall by Marian Scafidi (©2012)
ILLUSTRATION: Shitake Mushrooms by Christina Lovering
Shiitake Mushrooms by Christina Lovering (©2012)

ILLUSTRATION: Tulip by Sophia SiskelBut last summer, my sister-in-law, nephew, and I spent an afternoon in Wisconsin drawing pansies and wild geranium. What alternating feelings of joy and frustration! I’d make progress on my petals only to look up and see that my sketch looked nothing like the plant on the picnic table before me. But my 7-year-old nephew gave me the encouragement I needed. He told me enthusiastically, “Just go for it, add some watercolor, don’t worry!” His sweet voice cut through my filters of, “I can’t, I won’t, I’m scared,” and I added some purple paint…and eventually felt inspired to sign up for the Garden class.

I am glad I did. I learned new skills, used new tools, and got to know myself—and the Garden—better. I made new friends, whose works of art I so admire. I’ll be back—sketching at the Garden and signing up for another class (maybe even watercolors!) as soon as possible. 


©2013 Chicago Botanic Garden and my.chicagobotanic.org

I made that?!


One of the advantages to working as an editor here is being among the first to read about new classes offered by the Joseph Regenstein, Jr. School of the Chicago Botanic Garden. Last summer, after proofing a description of a prairie plant wall tile class led by artist Janet Austin, I immediately registered for it, as did my web-design colleague Christina. I was a bit dubious, having last taken an art class in sixth grade, but this workshop sounded too intriguing to pass up.

When that Sunday rolled around, Christina and I joined a group of other adults eager to make art using plants. After we had gathered in our Garden classroom, Janet introduced herself and explained that we would be choosing among the prairie flowers and grasses collected in several vases and pressing them into clay. After that, we were to use tiny dried pasta letters to spell out the plants’ names—or anything else we wanted to “write.“ The pasta would be incinerated in the kiln, leaving only the imprinted letters. Clever!

We both chose bold purple coneflower. I thought it had a shape that would translate readily onto clay, unlike (I thought) the spindly looking Queen Anne’s lace next to it. I resumed my seat and looked down at my slab of clay, fighting a kidlike impulse to begin squishing it around madly. My mature adult nature asserting itself, I carefully pressed my coneflower into the slab, then lifted it up and took a look. Hmm. Not much there. I pressed harder. This time, I could see the contours of the leaf, the stem, and an array of pinprick dots left by the stiff cone.

Next came the letters. I shook the box of alphabet pasta over my desk, then began searching for the correct letters to spell out “purple coneflower” while Christina used the plant’s Latin name, Echinacea purpurea. Then we students wandered around, admiring what the others were doing. Best of all was picking  up our tiles a few weeks later, after Janet had applied verdigris glaze and fired the pieces. Amazing! Beautiful! Artistic! I made that?!

PHOTO: Prairie plant wall tile from Janet Austin's workshop at the Garden.

I gave my tile away as a holiday gift, but Christina still has hers, pictured here. As it turned out, one of the most beautiful tiles of all featured Queen Anne’s lace. Who knew its delicate beauty would translate to clay so well? The grasses were gorgeous, too.

Janet is offering another wonderful prairie plant tile class on Thursday, March 14 — the Garden Marker Tile Workshop — creating the same style of tile, but in a set of hanging row markers for your garden’s bounty. Don’t miss out on the fun!


©2013 Chicago Botanic Garden and my.chicagobotanic.org

How to Plant a Glass Jar Terrarium

Tim Pollak, outdoor floriculturist here at the Chicago Botanic Garden, recently taught a fun class, a glass jar terrarium workshop, with the Joseph Regenstein, Jr. School of the Chicago Botanic Garden. I went down to the production greenhouse that morning to learn how to plant a terrarium so I could share some tips with you. Follow the steps below to make your own! Need a little more direction? In the video below, we build a terrarium and give a few extra tips for success.

First, select a container such as a glass bottle, glass vase or bowl, miniature glass greenhouse, fish bowl, or something similar. Use a tightly closed, clear glass or plastic container to retain the most humidity. Open containers also work, but will require more frequent watering.

Let’s build the layers (from the bottom up):

1. Start with a layer of coarse sand or pebbles, usually no more than 2 inches deep.

2. Cut a sheet of landscape fabric or weed barrier to fit over the pebbles.

3. Add 1/4- to 1/2-inch activated charcoal (available at an aquarium store) to help filter the air and water and keep the terrarium fresh, especially if it’s a closed terrarium.

4. Use a clean, well-drained growing medium that is high in organic matter. A blend of peat moss, vermiculite, and perlite is a good choice. Soil should be slightly moistened prior to planting. If planting a desert garden, use the proper type of soil. Add about 2 inches of soil.

5. Select small plants that are suited to your light conditions. Add a mixture of plants with small or large leaves, short and tall in height, and other variations. Add color, either with foliage color and interest, or with flowering plants.

6. Add accents and ornaments to complete the look you are trying to create. Create a miniature landscape or theme.

Caring for your terrarium

Watering: Water until moistened after planting, being careful not to let water pool in the bottom where it cannot be removed. Leave the closed terrarium uncovered until the foliage has dried. A closed terrarium may not need to be watered for 4 to 6 months — look for condensation to form on the inside of the container to check the moisture level. Open terrariums need watering occasionally but not as frequently as other houseplants. Watering should be light to avoid standing water. 

Light: Keep out of direct sunlight as the terrarium could heat up too much and you could injure the plants.  Most plants suitable for terrariums prefer medium to low light. Bright, indirect sun is preferred. If you need to supplement light with an artificial light, a 100-watt bulb placed close to the terrarium or fluorescent lights placed directly over the terrarium will be helpful. Supplemental lighting should be provided 14 to16 hours per day.

Fertilizer: Generally, plants in a terrarium should not grow rapidly and should seldom need fertilizer. Do not fertilize more than one to two times per year. Use a slow-release pellet fertilizer at 14-14-14. 

Temperature: Keep terrariums in a warm location (65 to 70 degrees Fahrenheit). Avoid cold drafts as much as possible. Certain plants, such as desert plants and succulents, may prefer warmer temperatures.

Pruning: Many plants in a terrarium will gradually outgrow their limited space. Pruning will keep them in their space and often promote side-shoot growth that will help fill out the plants. Be sure to remove all trimmed vegetation from the terrarium when complete. As the plants mature, it may become necessary to remove certain plants or add others.

2013Feb11_9901Mark your calendar for 1 p.m. on Saturday, March 30, when Nancy Clifton, horticultural program specialist, will give demonstrations on terrariums in the Garden Shop. Visit the Shop online to see the selection of terrariums available for purchase as well!


©2013 Chicago Botanic Garden and my.chicagobotanic.org

The Guerrilla Gardener Comes to the Garden

Richard Reynolds, a self-proclaimed guerilla gardener and blogger, comes to the Garden on Tuesday, February 8 to give us an inside scoop on his involvement with this movement. Check out this video on planting sunflowers in public spaces and then come join the discussion during his presentation. View the video on YouTube here.

For more information and to register, visit http://www.chicagobotanic.org/school/symposia/

Harry Potter’s Herbology Class Taught with Rare Books

In the Harry Potter books and movies, Harry attends a class on herbology taught by Professor Sprout. Ed Valauskas uses the Garden’s rare book collection to teach a similar class on how people’s notions of plants changed during the Renaissance. Learn about the legend of the vegetable lamb of tartar and so much more! Ed teaches this class again at 10 a.m. on July 10, 2010. Visit register.chicagobotanic.org to register.

The Lenhardt Library’s rare book collection is available by appointment. Visit www.chicagobotanic.org/library for more information.