Kathy J. has been learning and teaching kids about nature for more than 20 years. She collects bugs, watches squirrels, does not get a rash from poison ivy, practices “snacker” behavior in winter, and is always on alert for interesting plants and animals. When she’s not watching something in the trees or spending time with her teenage daughters, she’s overseeing programs for teachers and students at the Garden.
Having three daughters in middle school means trying to find a nice way to show my appreciation to all of their teachers. When I say “all” for the middle grades, that is not just three teachers any more, because they have separate teachers for each subject, as well as “special” teachers for art, gym, music, and library. And then there is the office staff members who were really nice and helpful during the year.
Do I need to give everyone something? Certainly not. But I would like to end the year on a pleasant note and say “Thanks!” for serving my three children—without spending too much money, that is. The answer is plants (which is what you expected from a Chicago Botanic Garden blogger, right?).
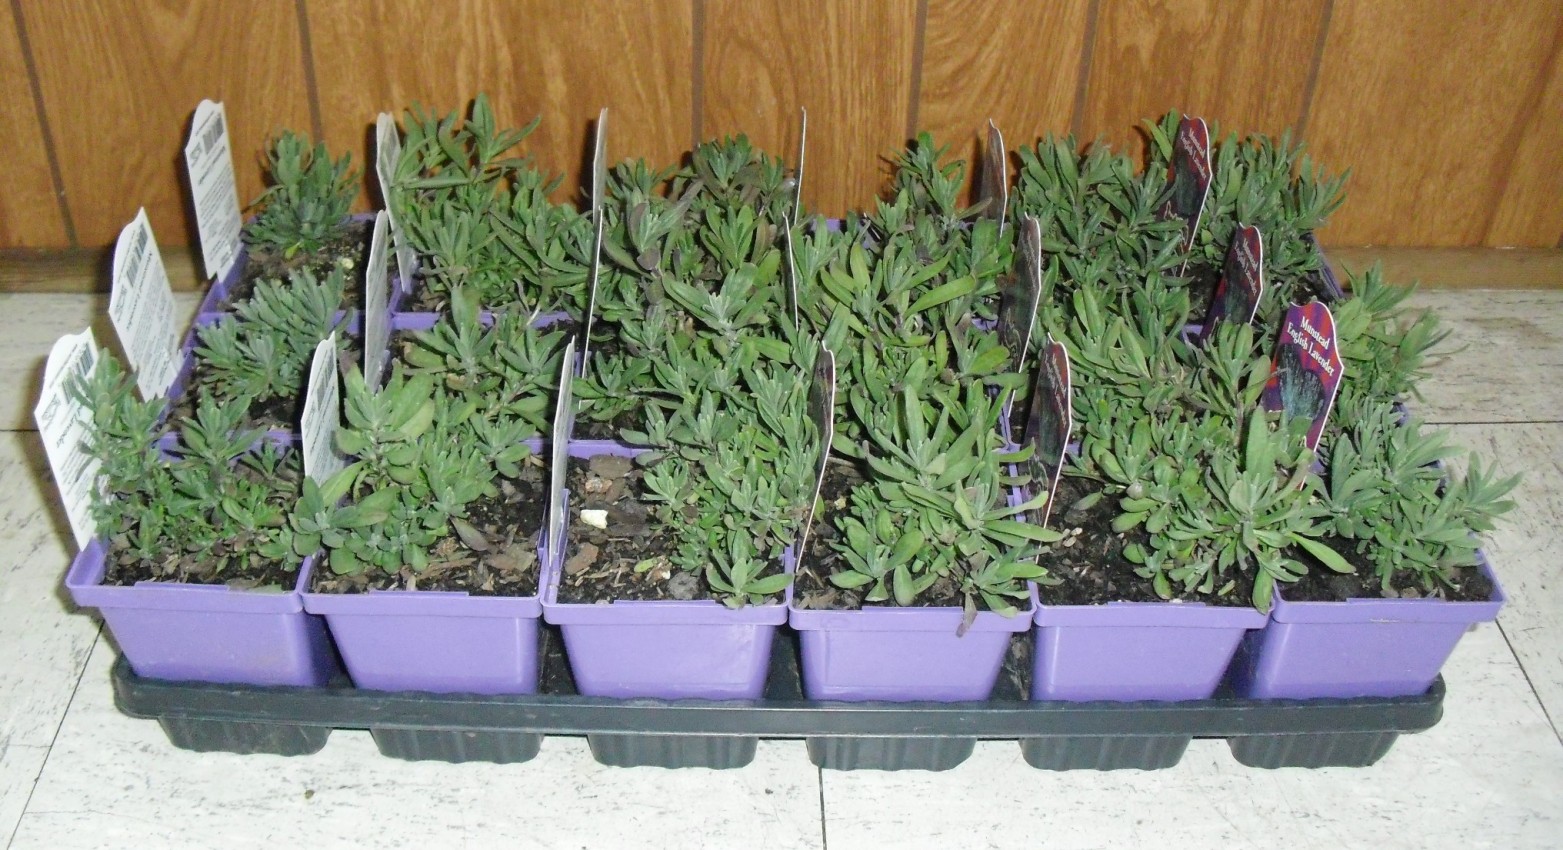
This flat of lavender came in pots with care labels. All we need to do is add thank-you notes.
Every year, I go to a local nursery and buy a few flats of herbs or flowers. I prefer going to a local, small nursery or greenhouse rather than a large franchise store that sell other products. The plants tend to be in better condition, and supporting local businesses is good for the community. And it’s fun meeting and getting to know small business owners.
My daughters help choose the plants, which means we usually get purple flowers of some kind. If the plants come in cell packs, we transplant them to inexpensive containers. Otherwise, we give them as they come from the nursery. It does not have to be fancy to make everyone happy.
We make a thank-you note on the computer. It includes information about how to care for that plant. Then we use use bamboo skewers (left over from making rock candy!) or plastic forks to hold them in place.
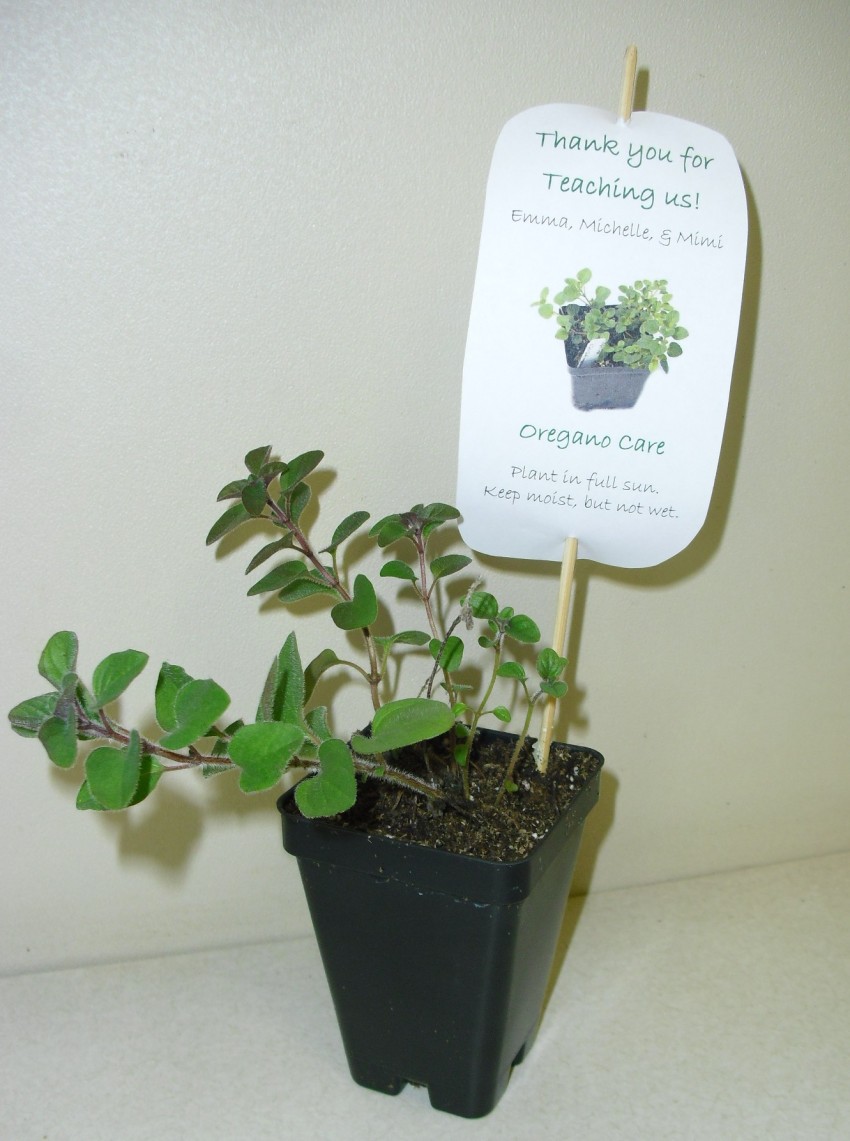
We used a bamboo skewer to attach a thank-you note and oregano care instructions.
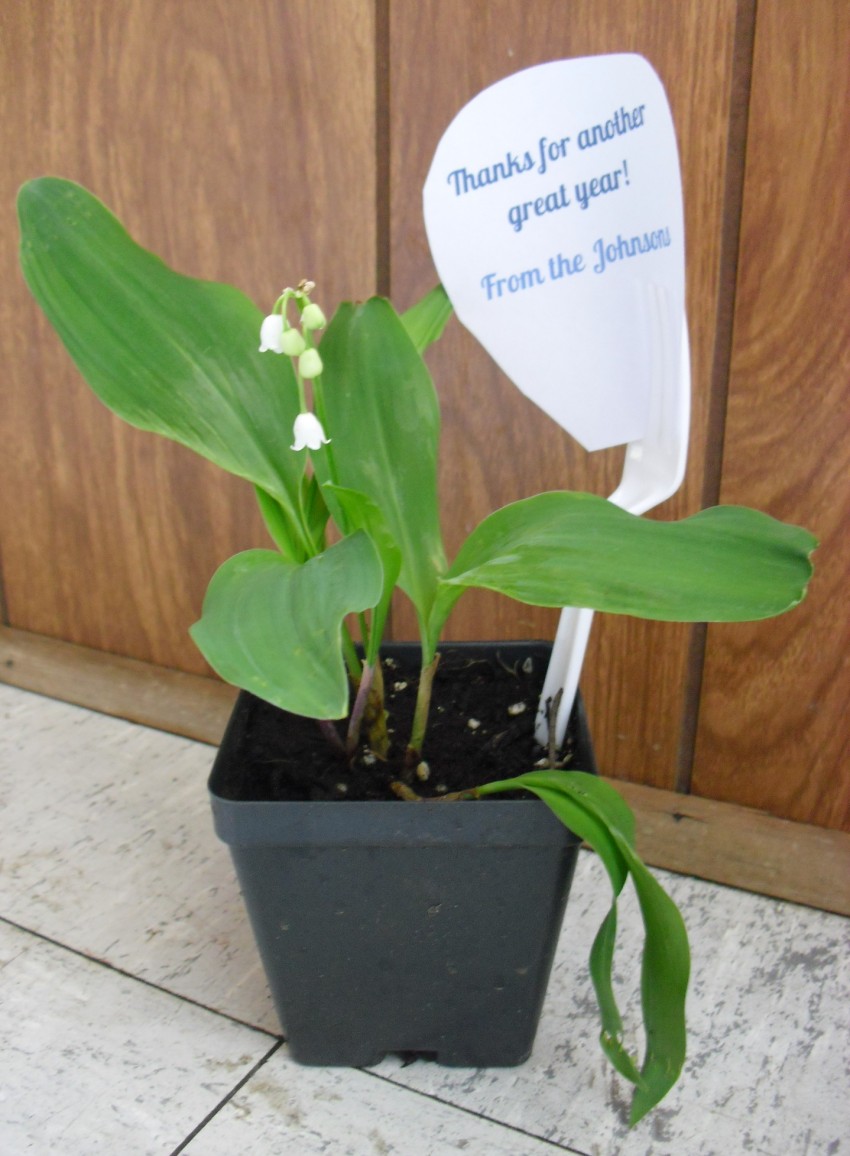
One teacher requested a plant for a shady yard, so we included some lily of the valley in the selection, and used a fork to attach a thank-you note.
I set aside one plant for each daughter to personally present to her homeroom teacher. I bring the rest of the plants to the school office during the last week. After years of doing this, the office staff now anticipates the delivery as if it’s Christmas. (I also bring a package of paper lunch bags so teachers have a clean way to carry their plants home.)
The principal makes an announcement during the school day that any teacher who would like a plant can pick one up in the office—first come, first served. Even if a teacher doesn’t want to take a plant (I’m pretty sure the computer lab instructor at our school is not interested), he or she can enjoy looking at them and smelling them in the office. That takes care of everyone I want to thank. All plants are claimed by the end of the day.
Creative wording makes writing the notes fun.
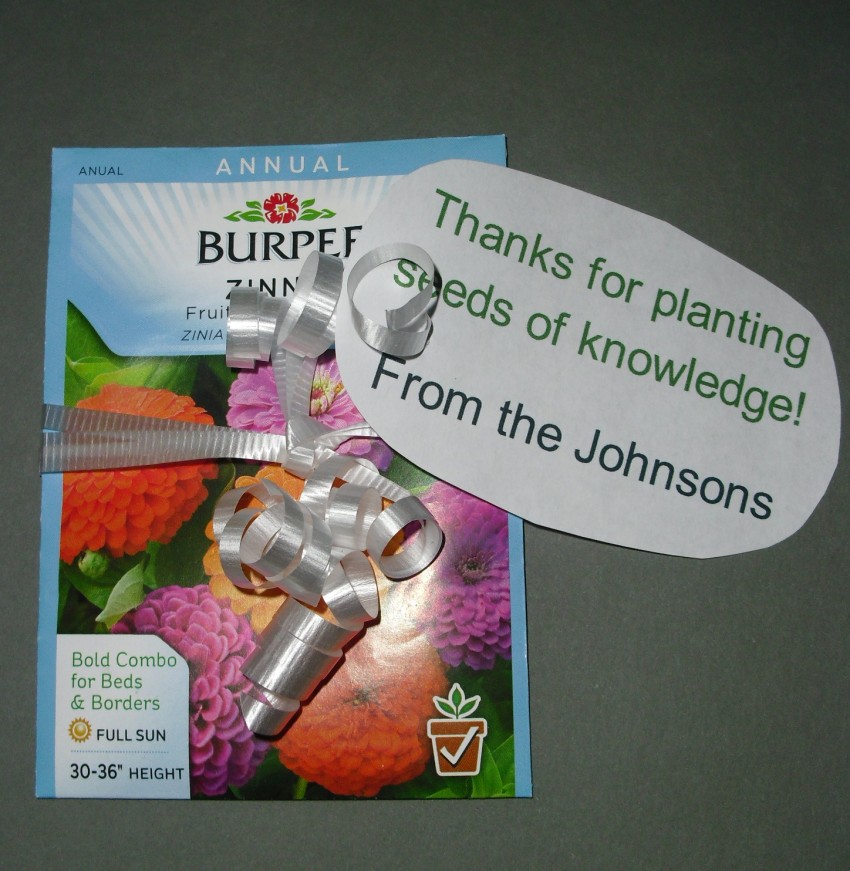
If this works for me, it can work for you, too. If plants are too much of a hassle or expense, consider giving seeds instead. Attach a ribbon with a note to let the teacher know your gratitude. You can say something cute such as “Thanks for helping me grow!”
Or use a clever rhyme:
Just like the year I spent in your room, I hope these seeds germinate, grow up, and bloom.
Looking for another idea? There’s always Bottle Cap Bouquets, which delight teachers and mothers alike. Cheap and cheerful!
I wasn’t sure how much the teachers appreciated the plants until one teacher asked my daughter if I would be bringing plants again, and what kind they might be. She was looking forward to the end of school, but she was also looking forward to taking home a plant to start the summer.
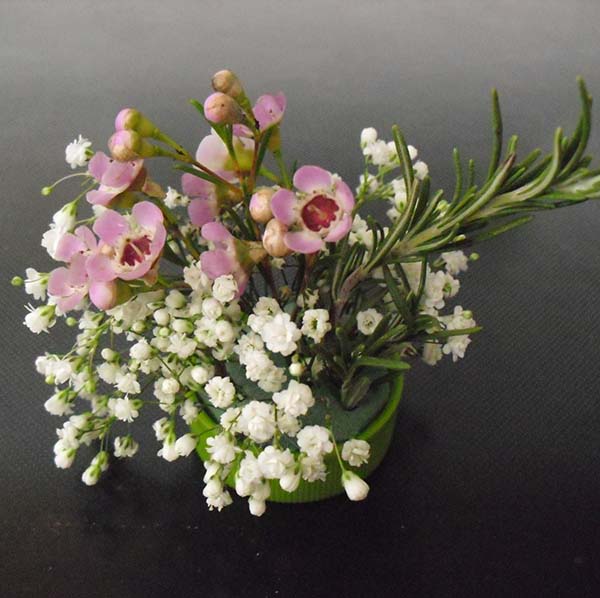
Miniature flower arrangements offer a charming and whimsical gift for mom, grandma, or anyone special. A nice feature of these tiny bouquets is that you can show off the beauty of small flowers that always sing backup to showier blossoms in large arrangements. Also, you can use aromatic herbs with small leaves as filler greens to add a pleasant scent.
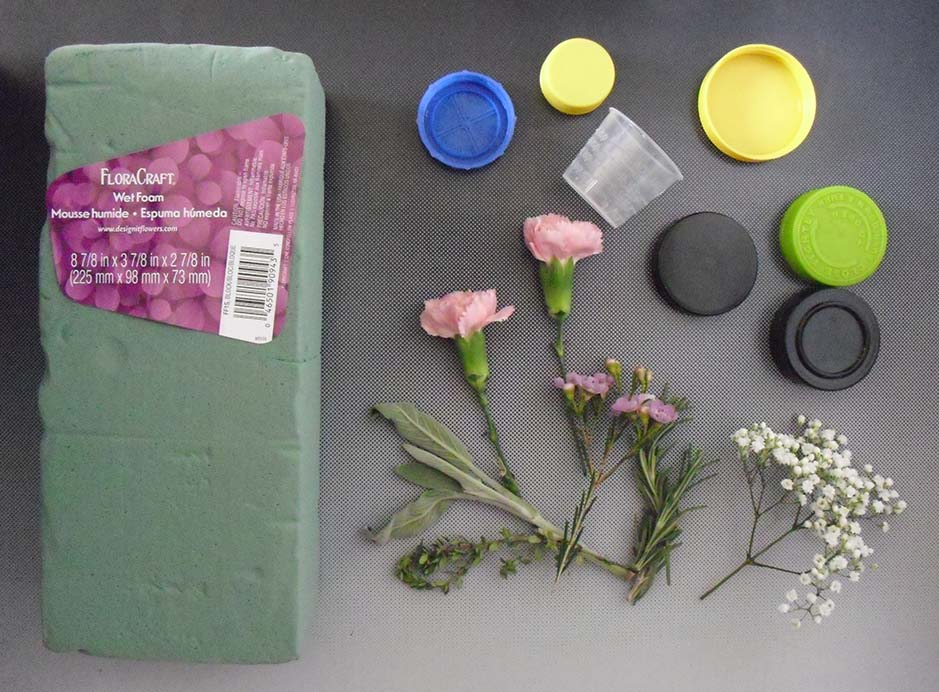
The supplies for creating bottle cap bouquets.
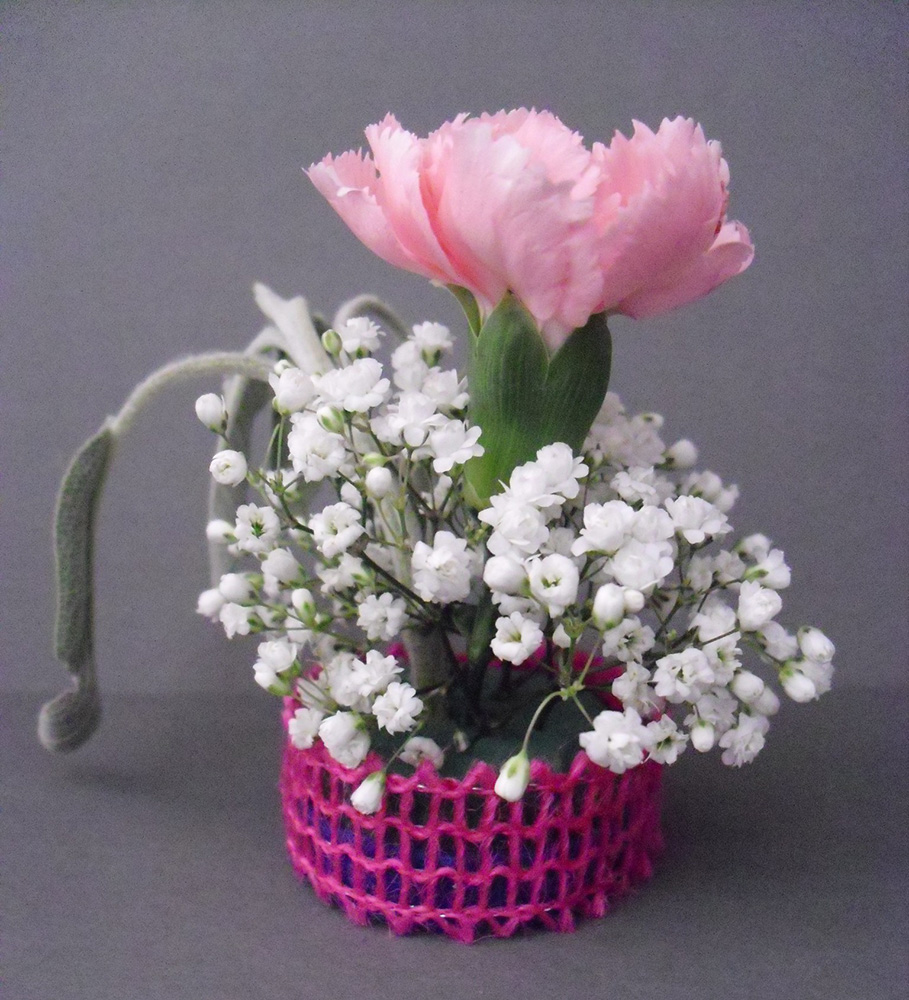
This little arrangement of mini-carnations, baby’s breath, and a sprig of sage has pink burlap ribbon wrapped around the bottle cap to mimic a fancy basket of flowers.
What you need:
A cap from a plastic bottle, such as a milk container or soda bottle
Floral foam (the wet kind)
A bunch of small flowers—I used mini-carnations, waxflowers (Chamelaucium uncinatum), and baby’s breath (Gypsophila paniculata)
Fresh herbs (thyme, rosemary, and lavender work well because they have stiff stems)
Optional: ribbon for added decoration
The directions are pretty simple.
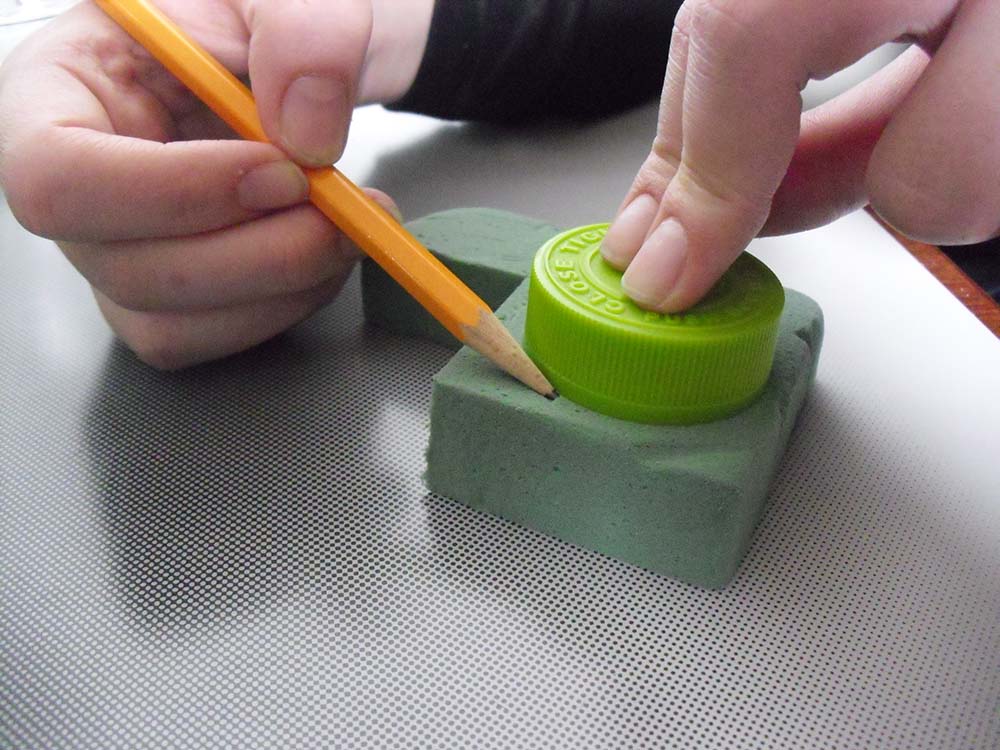
Cut the floral foam to fit the inside of the bottle cap. Start a little larger than you need, and then trim it to fit. Push it into the cap. If your cap is narrow, like a milk bottle cap, you may want the foam to be above the level of the cap so there is enough room to hold the flowers. Otherwise, trim the top so the foam does not stick up. Add water to soak the foam.
Trace the cap on a piece of foam and then carve the foam with a butter knife to fit inside the cap.
Begin sticking the flowers into the foam. Here, we started with a waxflower in the center and added smaller flowers and herbs around it.
Cut the flower and herb stems about 3 inches. You can trim them shorter depending on the desired height in the arrangement. Stick them into the foam. You might want to start with one of your larger flowers in the center and then add smaller flowers and herbs around it.
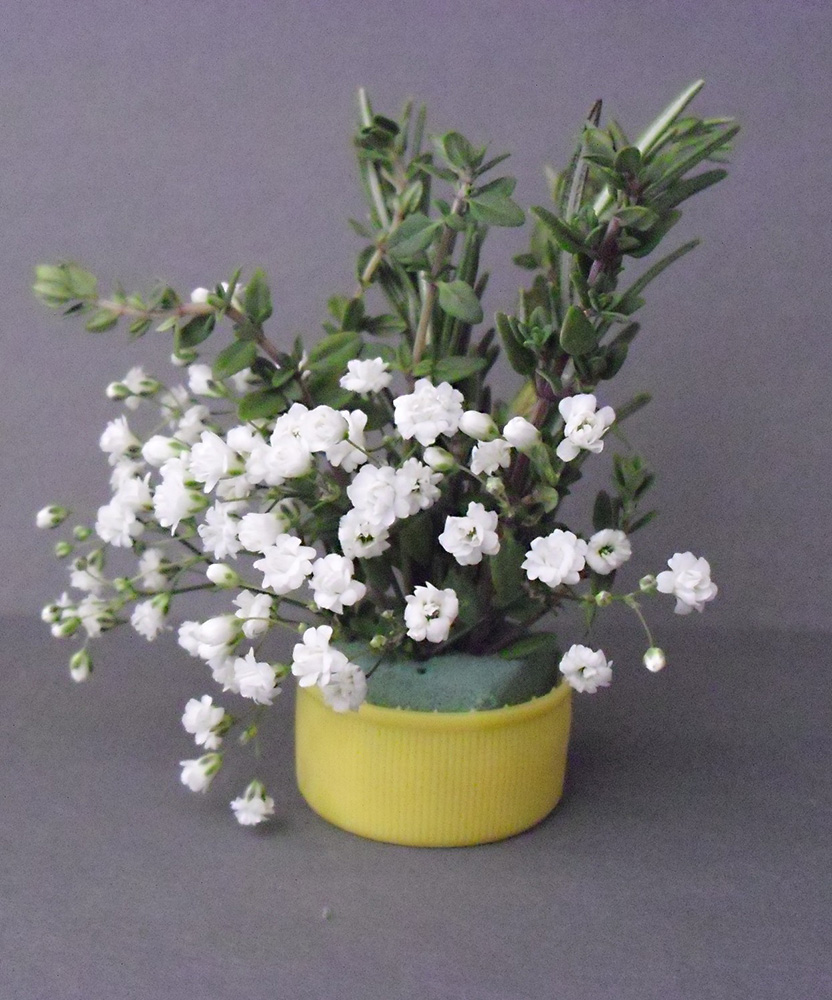
Waxflower, baby’s breath, and rosemary complete this delicate arrangement.
Not into pink? This yellow cap with baby’s breath and thyme is fragrant and cheerful.
When you are satisfied with your floral creation, you can either leave it as is—especially if the color of the bottle cap looks nice with the flowers—or you can tie a ribbon around the bottle cap. The best way to keep it in place is by using a few drops from a hot-glue gun.
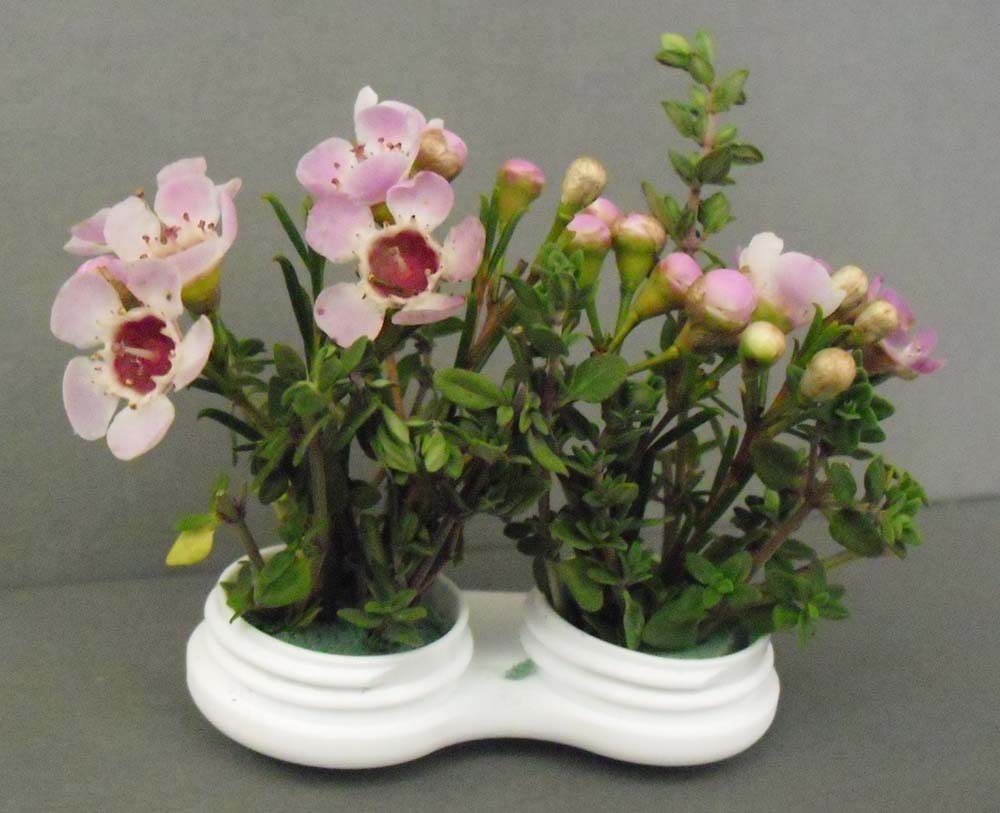
Surprise! An old contact lens case becomes a miniature garden of waxflower and thyme that smells as amazing as it looks.
Tips
When using a shallow bottle cap, limit the number of larger flowers like mini-carnations or mini-daisies to three or fewer. Floral foam has limits. Adding too many flowers will cause the foam to fall apart and the flowers to flop over. If the first attempt suffers from floppy flowers, start over with a new piece of foam and add fewer flowers.
If you really want more than three large flowers, use a taller cup, such as a medicine cup from a bottle of cough syrup, as the vase. Even then, take care not to overload the foam. This is a small bouquet, after all!
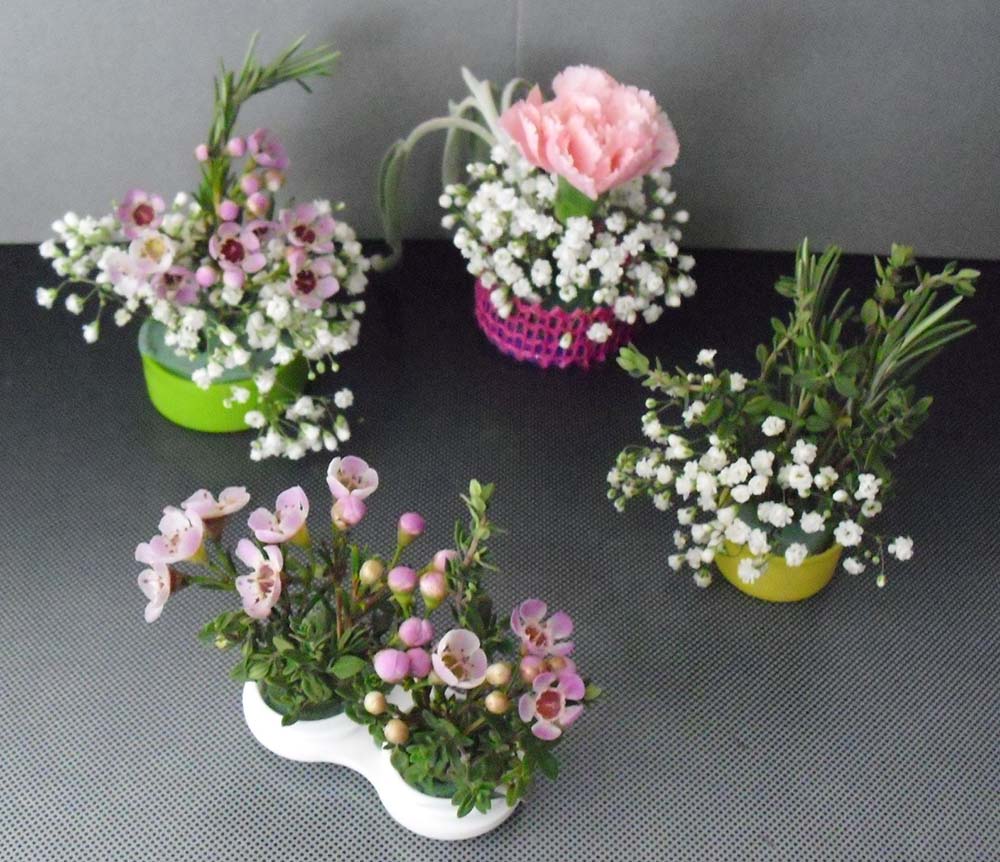
Precious and colorful, these-mini bouquets will stay fresh and bring cheer for a few days.
Floral foam is irresistible. Your kids, even teenagers, will want to play with it. Parcel it out in small pieces so they don’t play around with the whole block before you can use it.
You can use the same procedure to make a mini-dried flower arrangement; just don’t wet the foam. Any way you make them, these little bouquets are sure to bring big smiles from someone you love.
Are you tired of winter? Silly question—we all are. Spring is way overdue.
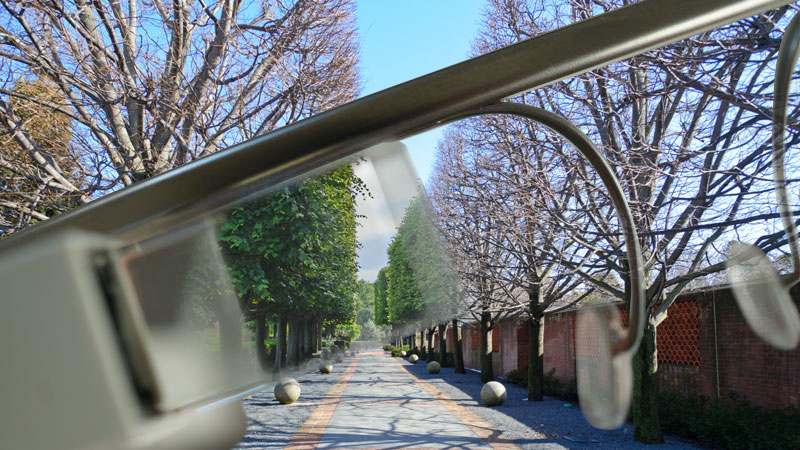
Cheer up! The Garden has an answer to the dragged-out-winter blues: Vertverre™ (green vision) glasses. Put on a pair of these specially designed glasses and you’ll see the drab landscape turn into a time when spring came six weeks early.
Using Google.AFD glass technology, the user’s experience of spring seems real.
Our sense of sight is a curious thing, and it can be manipulated to affect our outlook on the world. In the 1950s, a scientist created a set of vision-flipping goggles that made the world appear upside down. The first people who tested these glasses couldn’t even walk without stumbling when first wearing them. Eventually the brain adjusts, so that wearers see the world right side up again through the lenses. That is part of the scientific principle behind Vertverre.™
Garden staff approached Google.AFD about this idea two years ago when we realized the wonderful health benefits of experiencing an early blooming spring. Google.AFD works with not-for-profit organizations like the Garden to develop tools and technology for a better world. While creating sense-altering vision seemed like a stretch, Google.AFD techies were already working on several devices to enhance retina viewing, so the partnership turned out to be a natural fit.
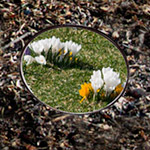
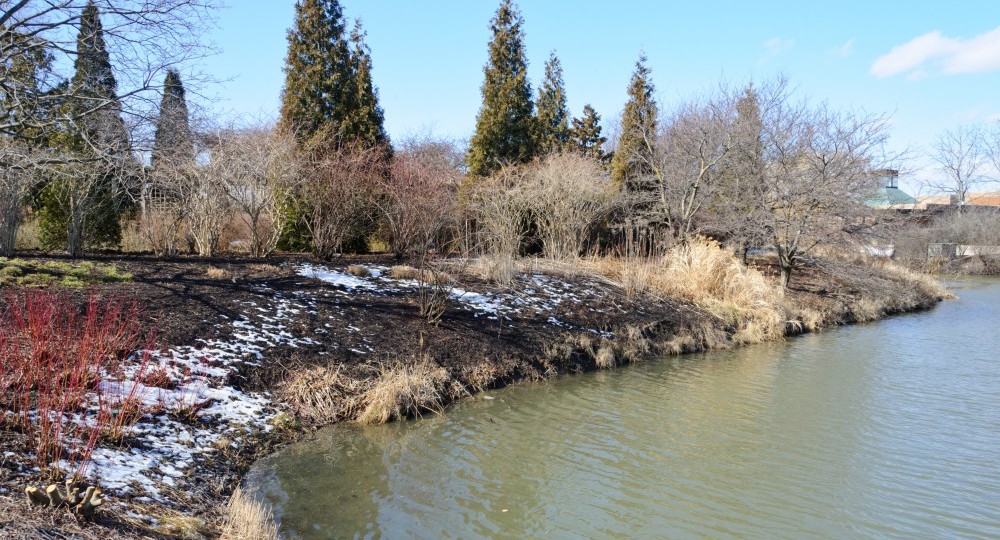
Vertverre™ technology turns the clock forward, turning this…
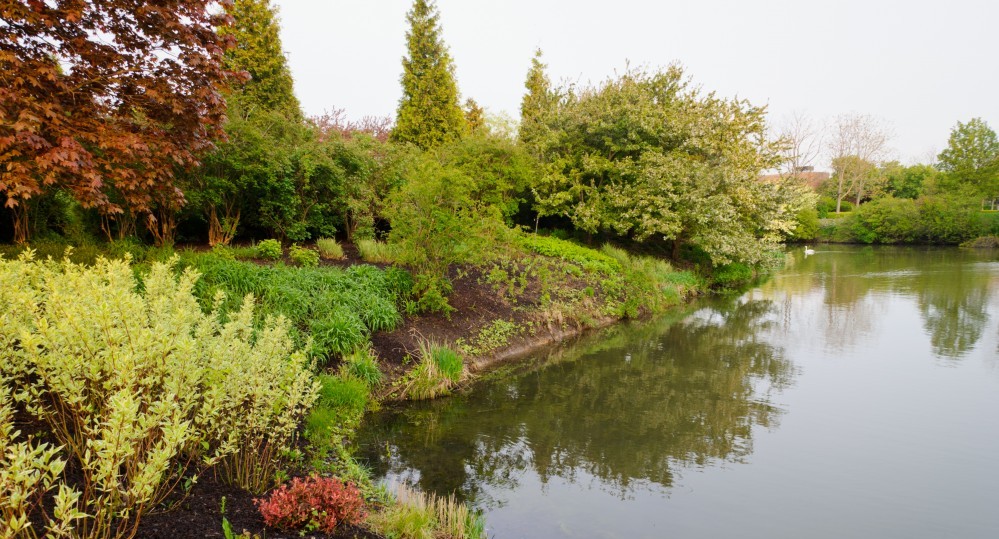
…into this lush, verdant landscape.
How does Vertverre™ work? The lenses in these glasses send a signal to your retina, which transmits to your visual cortex, releasing a memory of that early blooming spring from years past. When you look at the landscape, Vertverre™ tricks your eyes into remembering spring flowers, green grass, from warmer times. The effect is so stunning that it has the same mood-enhancing effect as light therapy. Instantly you feel healthier and have a more positive outlook on life.
As the French philosopher Henri Bergson wrote: “The eye sees only what the mind is prepared to comprehend.” Come visit the Garden and see for yourself. We only have a limited number of prototype models for our visitors and are taking reservations on a first come, first serve basis.
Mushrooms reproduce by making billions of spores that spread and grow into new organisms. You can take advantage of this phenomenon to make a beautiful print on paper.
How to Make Spore Prints
All you need are some fresh, open mushrooms, paper, and a bowl. You can use mushrooms found growing outside or buy them from the market. When selecting mushrooms for spore prints, look for these things:
The cap should be fully open with the gills exposed
The gills should look good, not wet and mushy
The mushroom should feel slightly moist but not wet; dry mushrooms will not work
There shoud not be mold spots on the mushroom
They should look like mushrooms you want to eat
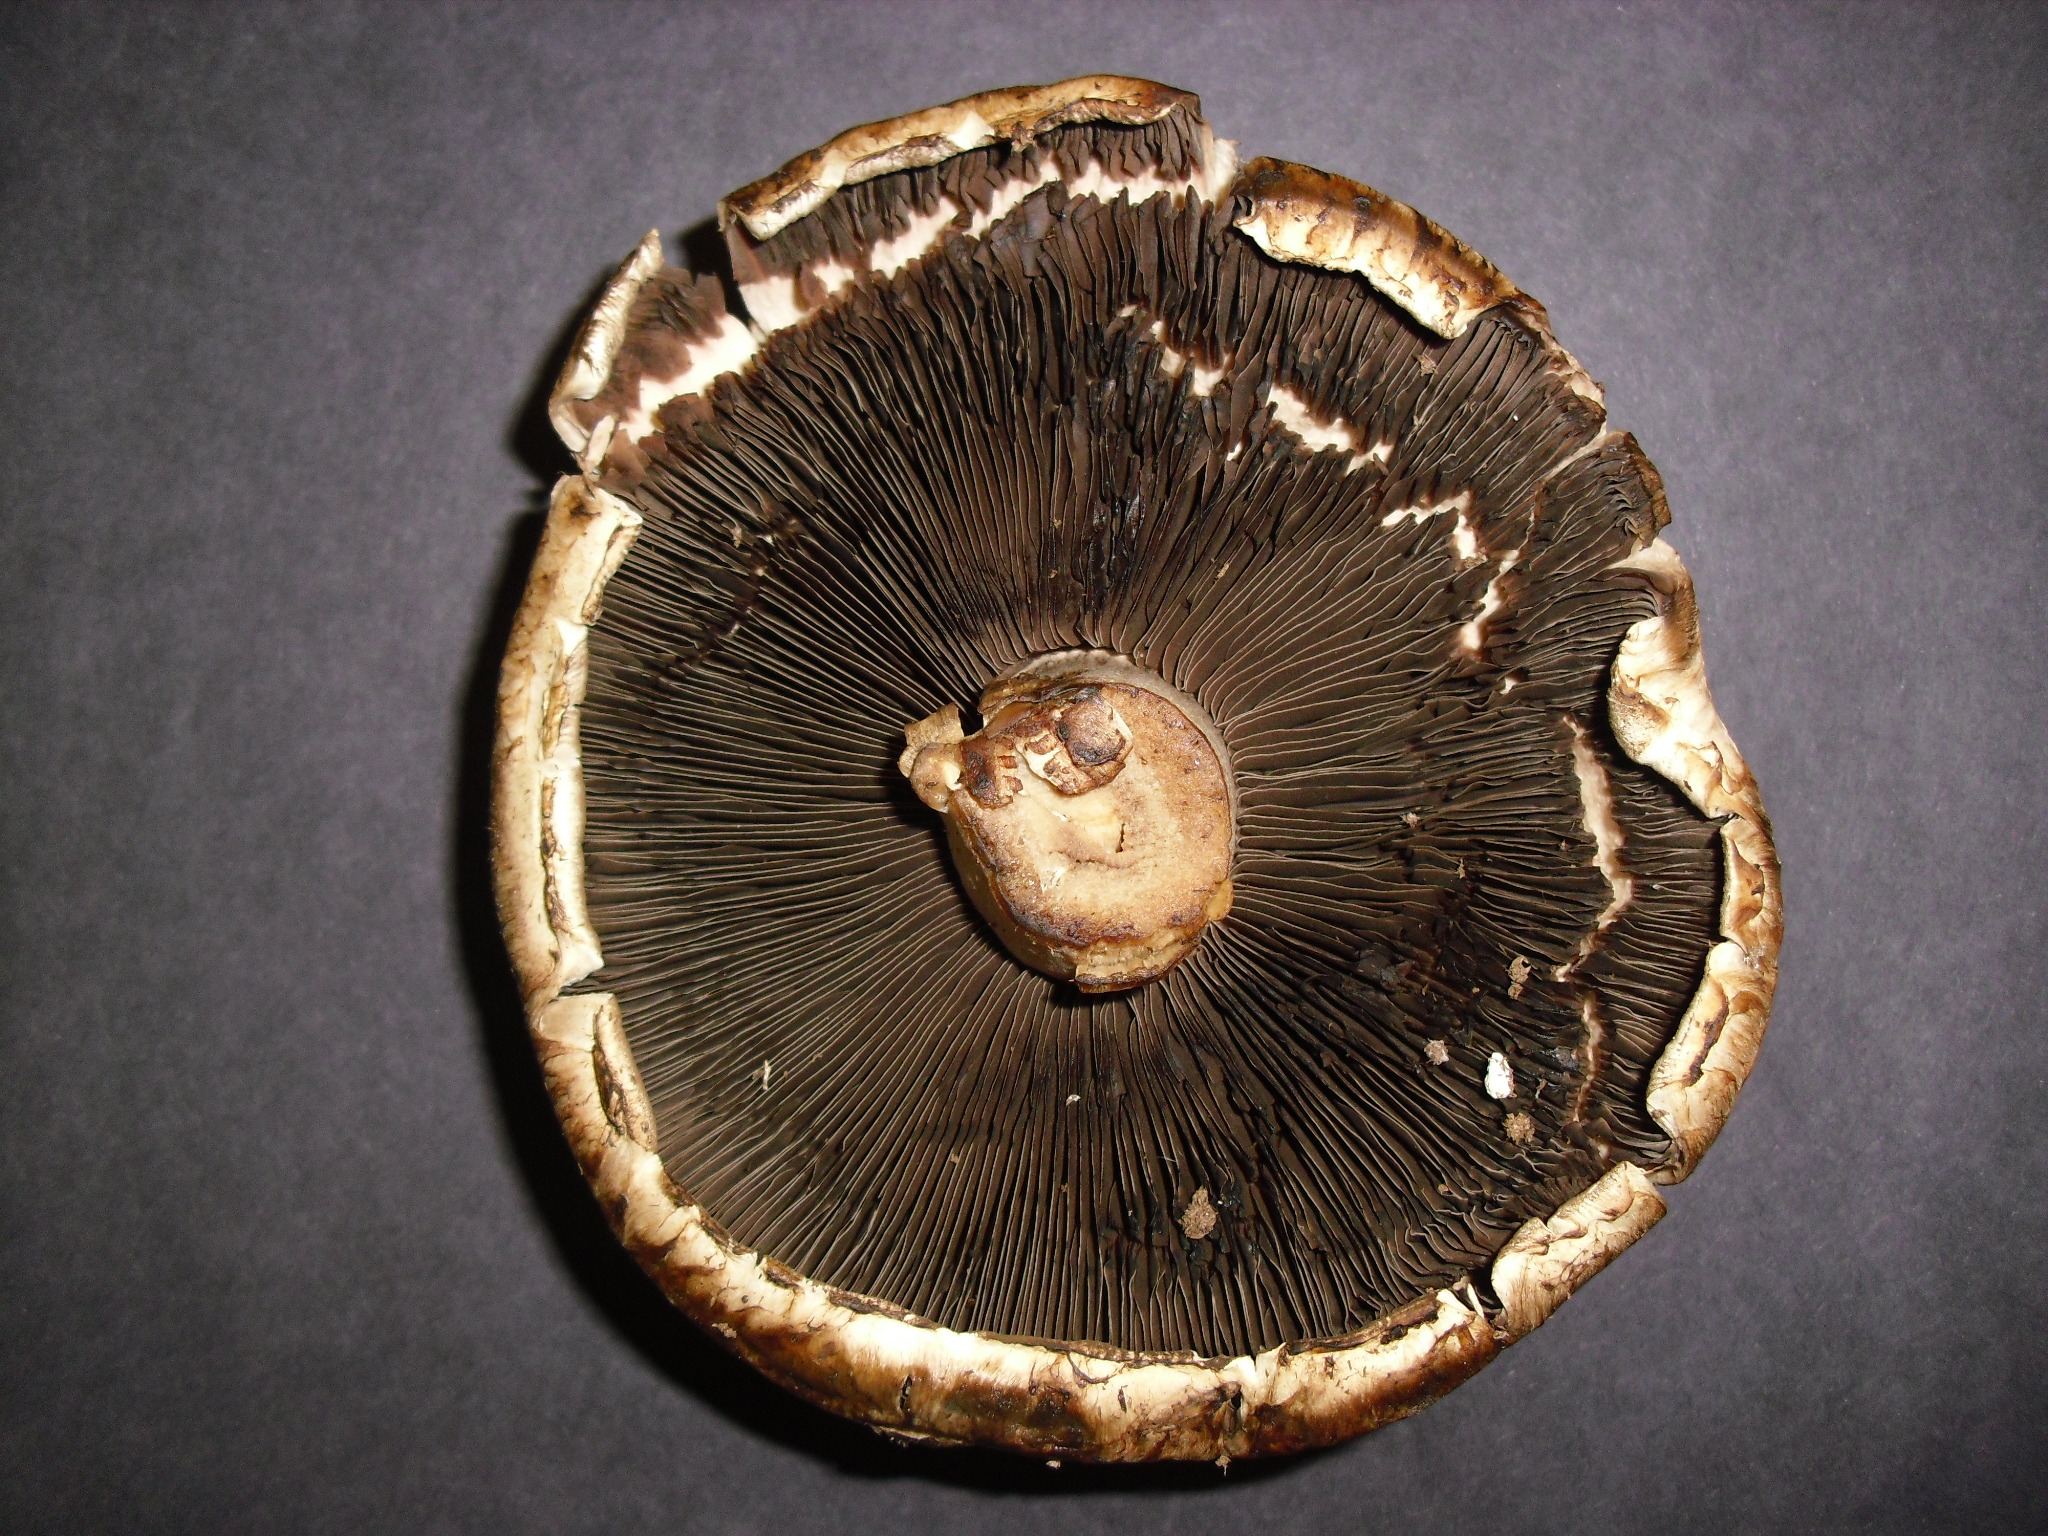
This portabello mushroom is good for making spore prints.
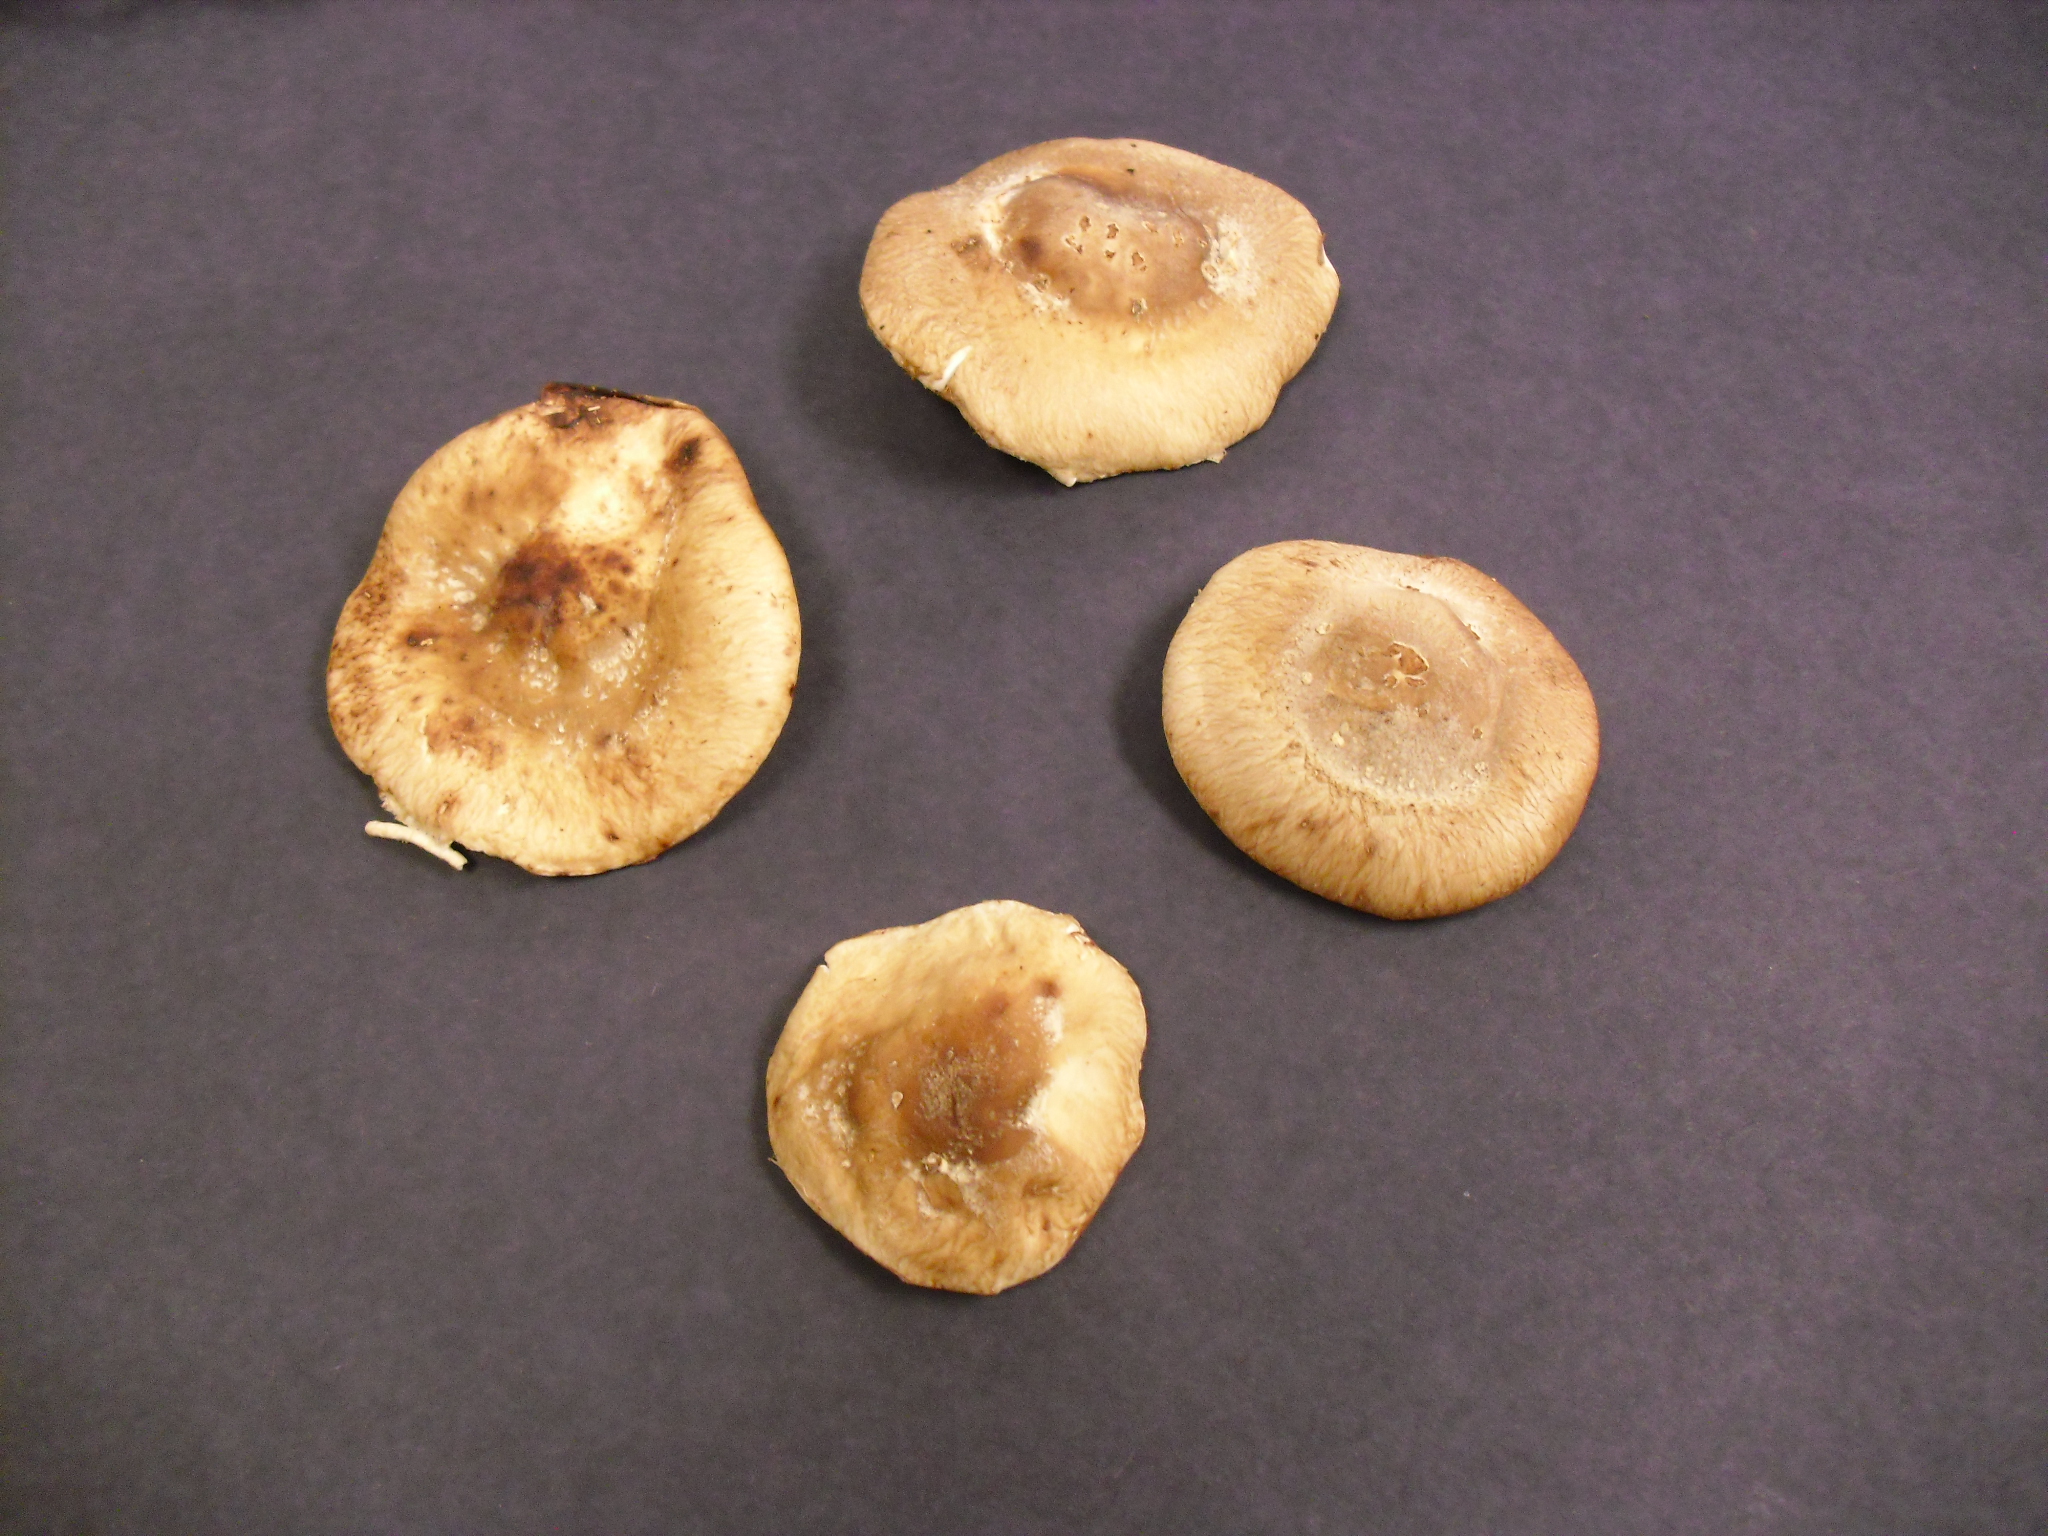
This shiitake mushroom may be a little old—notice the brown spots on the cap’s edges—but should work.
First, you should remove the stems. I use scissors so I don’t pull up or damage any of the gills.
Place the mushrooms with the gill side down on a piece of paper. Mushrooms with dark gills, like portabellos, have dark spores that show up well on white paper. Shiitake mushrooms have white gills and spores that will show up better on black paper. Some mushrooms make both dark and light spore prints.
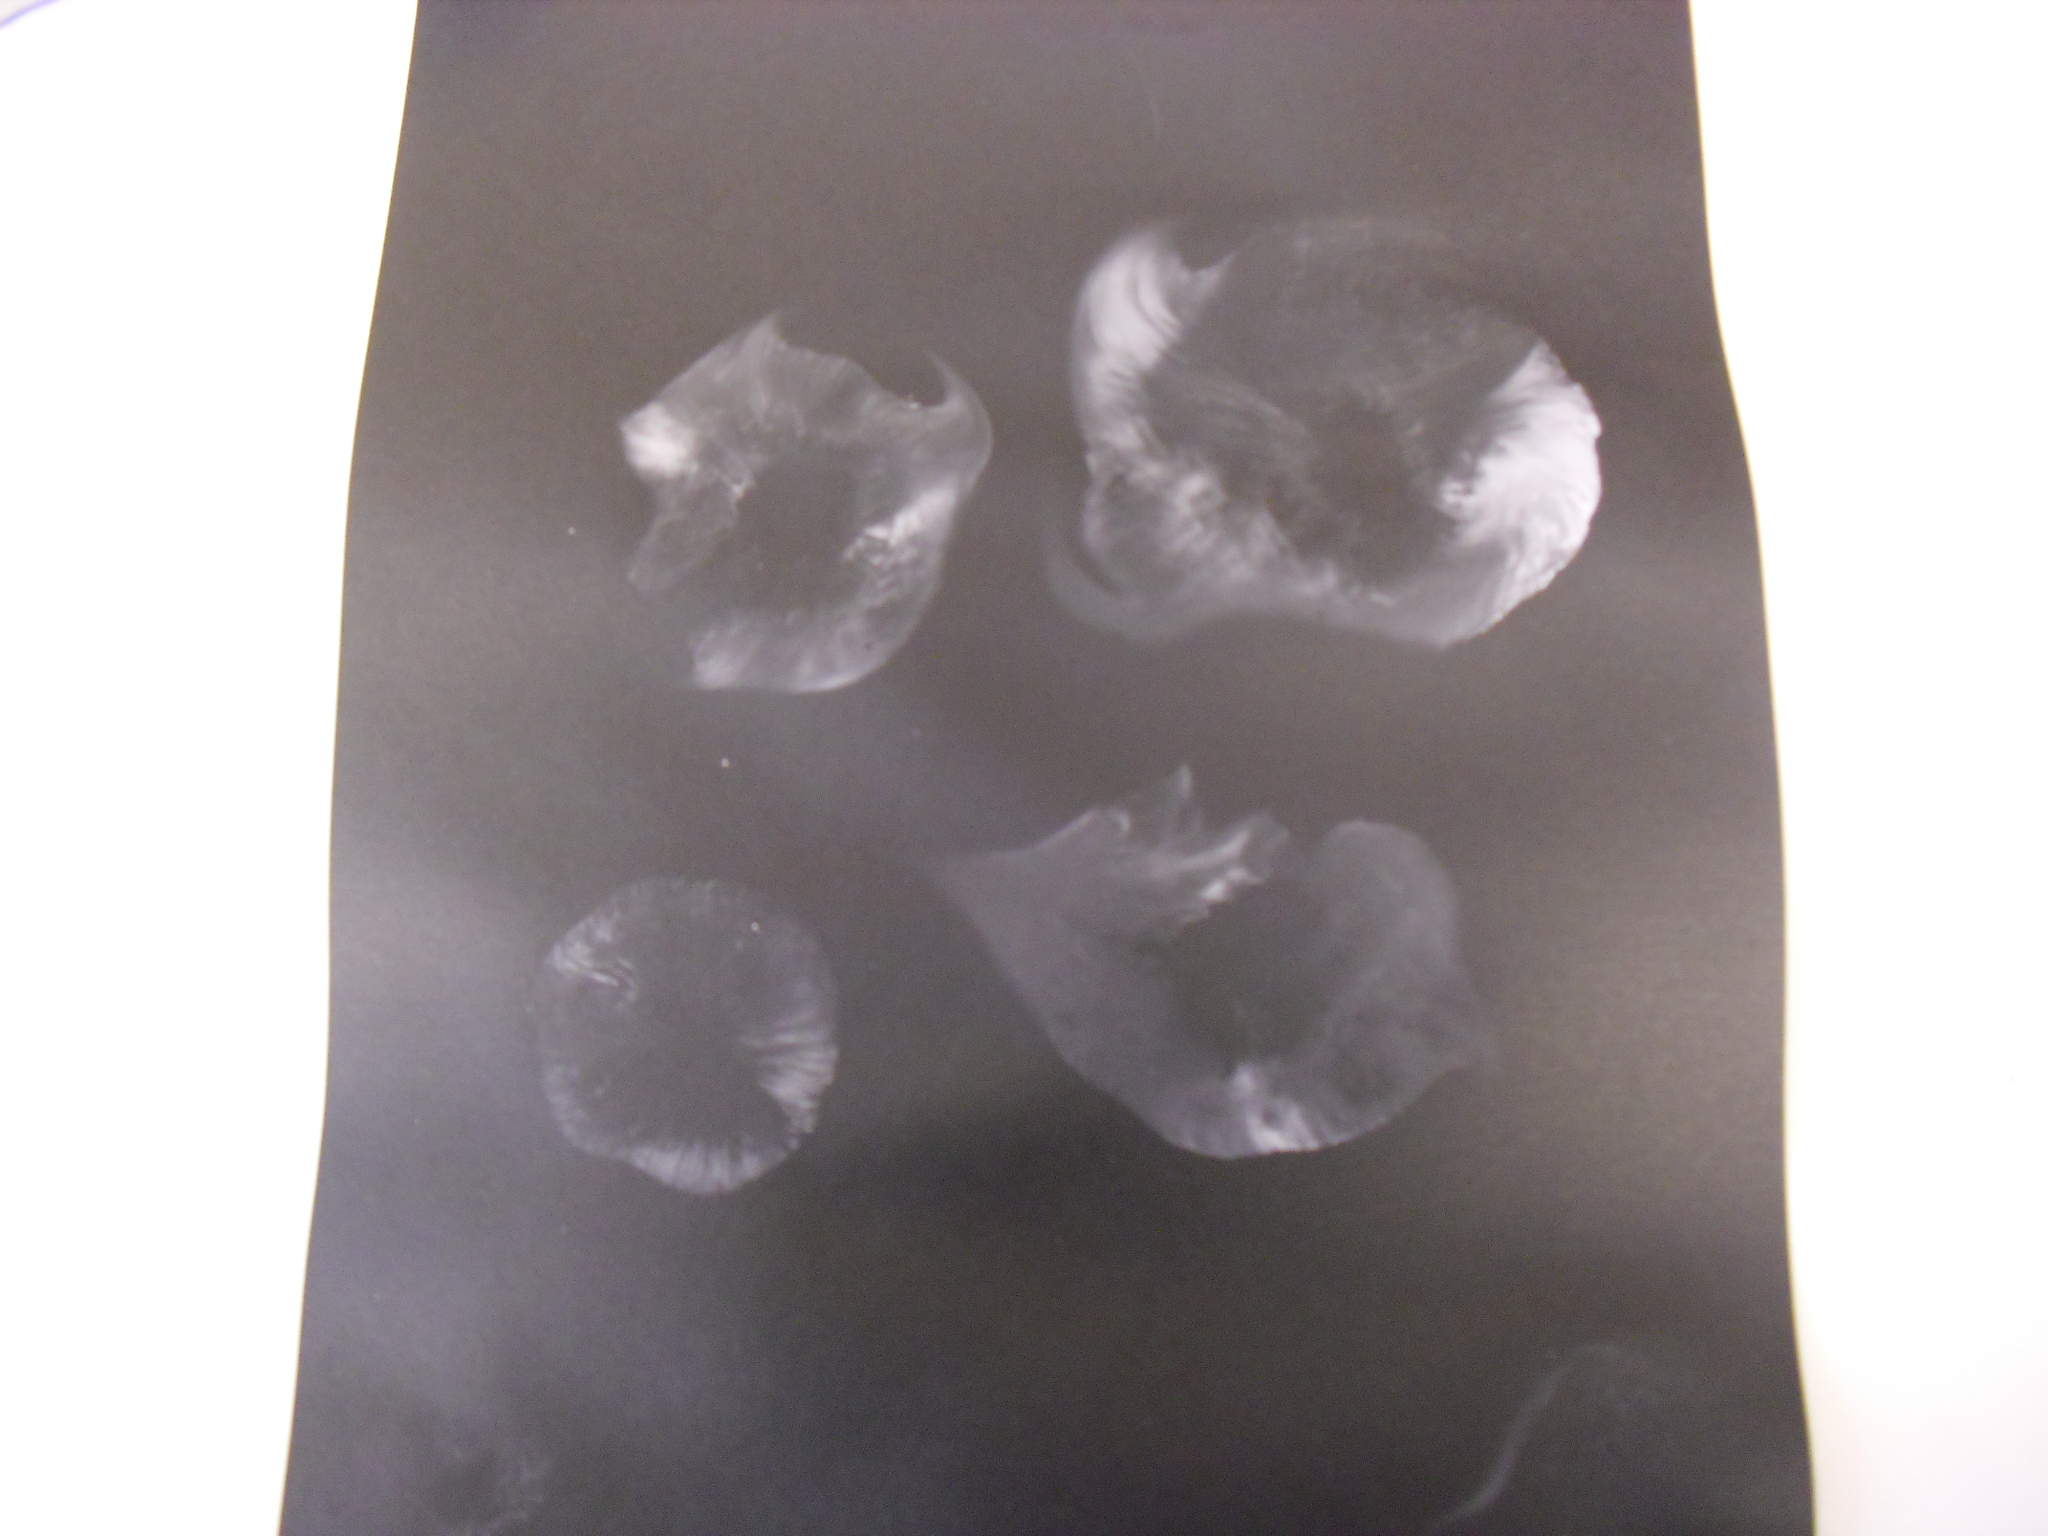
These four shiitake mushrooms were placed on black paper. They will be covered with a bowl and then left overnight.
Place the paper on a tray or other surface that can handle something wet sitting on it because moisture from the mushrooms will soak into the paper and anything underneath it. Cover the mushrooms with a bowl to prevent them from drying out. Really ripe mushrooms will make a print in an hour, but I suggest that you leave them overnight to be sure you get results.
In the morning, carefully lift your bowl and the individual mushrooms and see what you get. If the paper absorbed a lot of moisture from the mushrooms, it may need to dry before you see the print very well—especially prints made on black paper. Portabello prints often show well-defined gills. Shiitake gills are not as straight and rigid as portabello gills, so you’ll get less gill definition in the print and a more wavy, swirling print. If your mushrooms are too wet, or are starting to rot, you’ll get more of a watercolor effect instead of a sharp print.
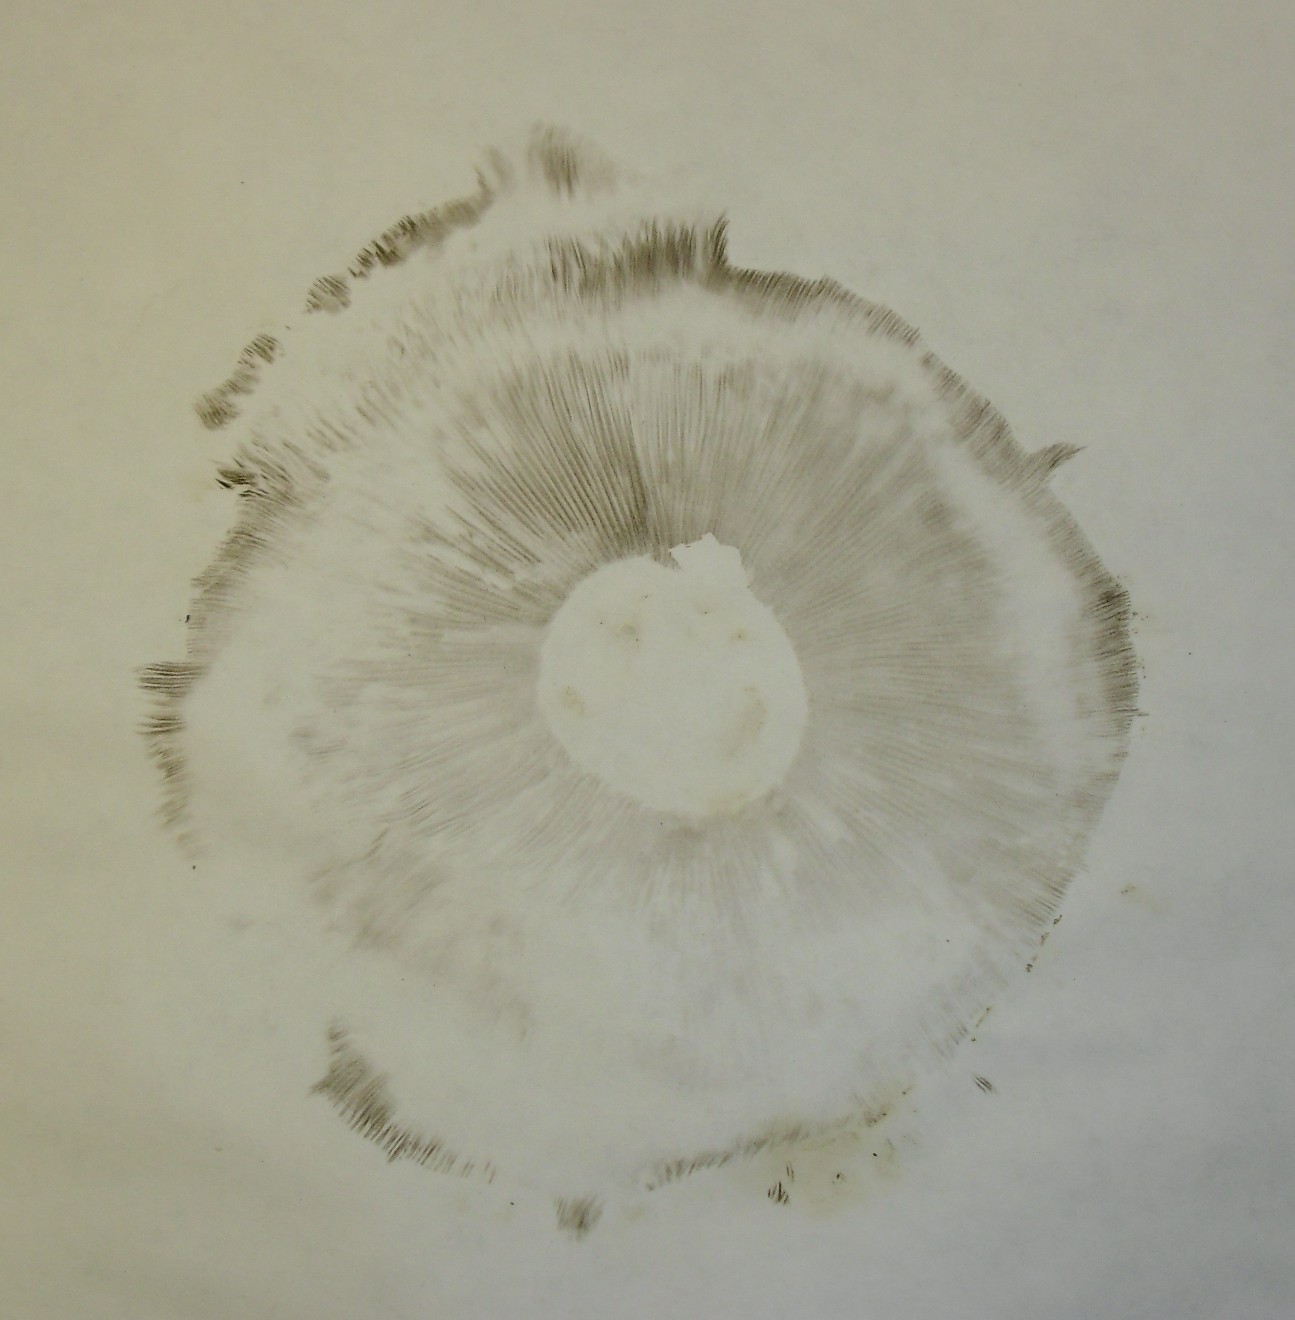
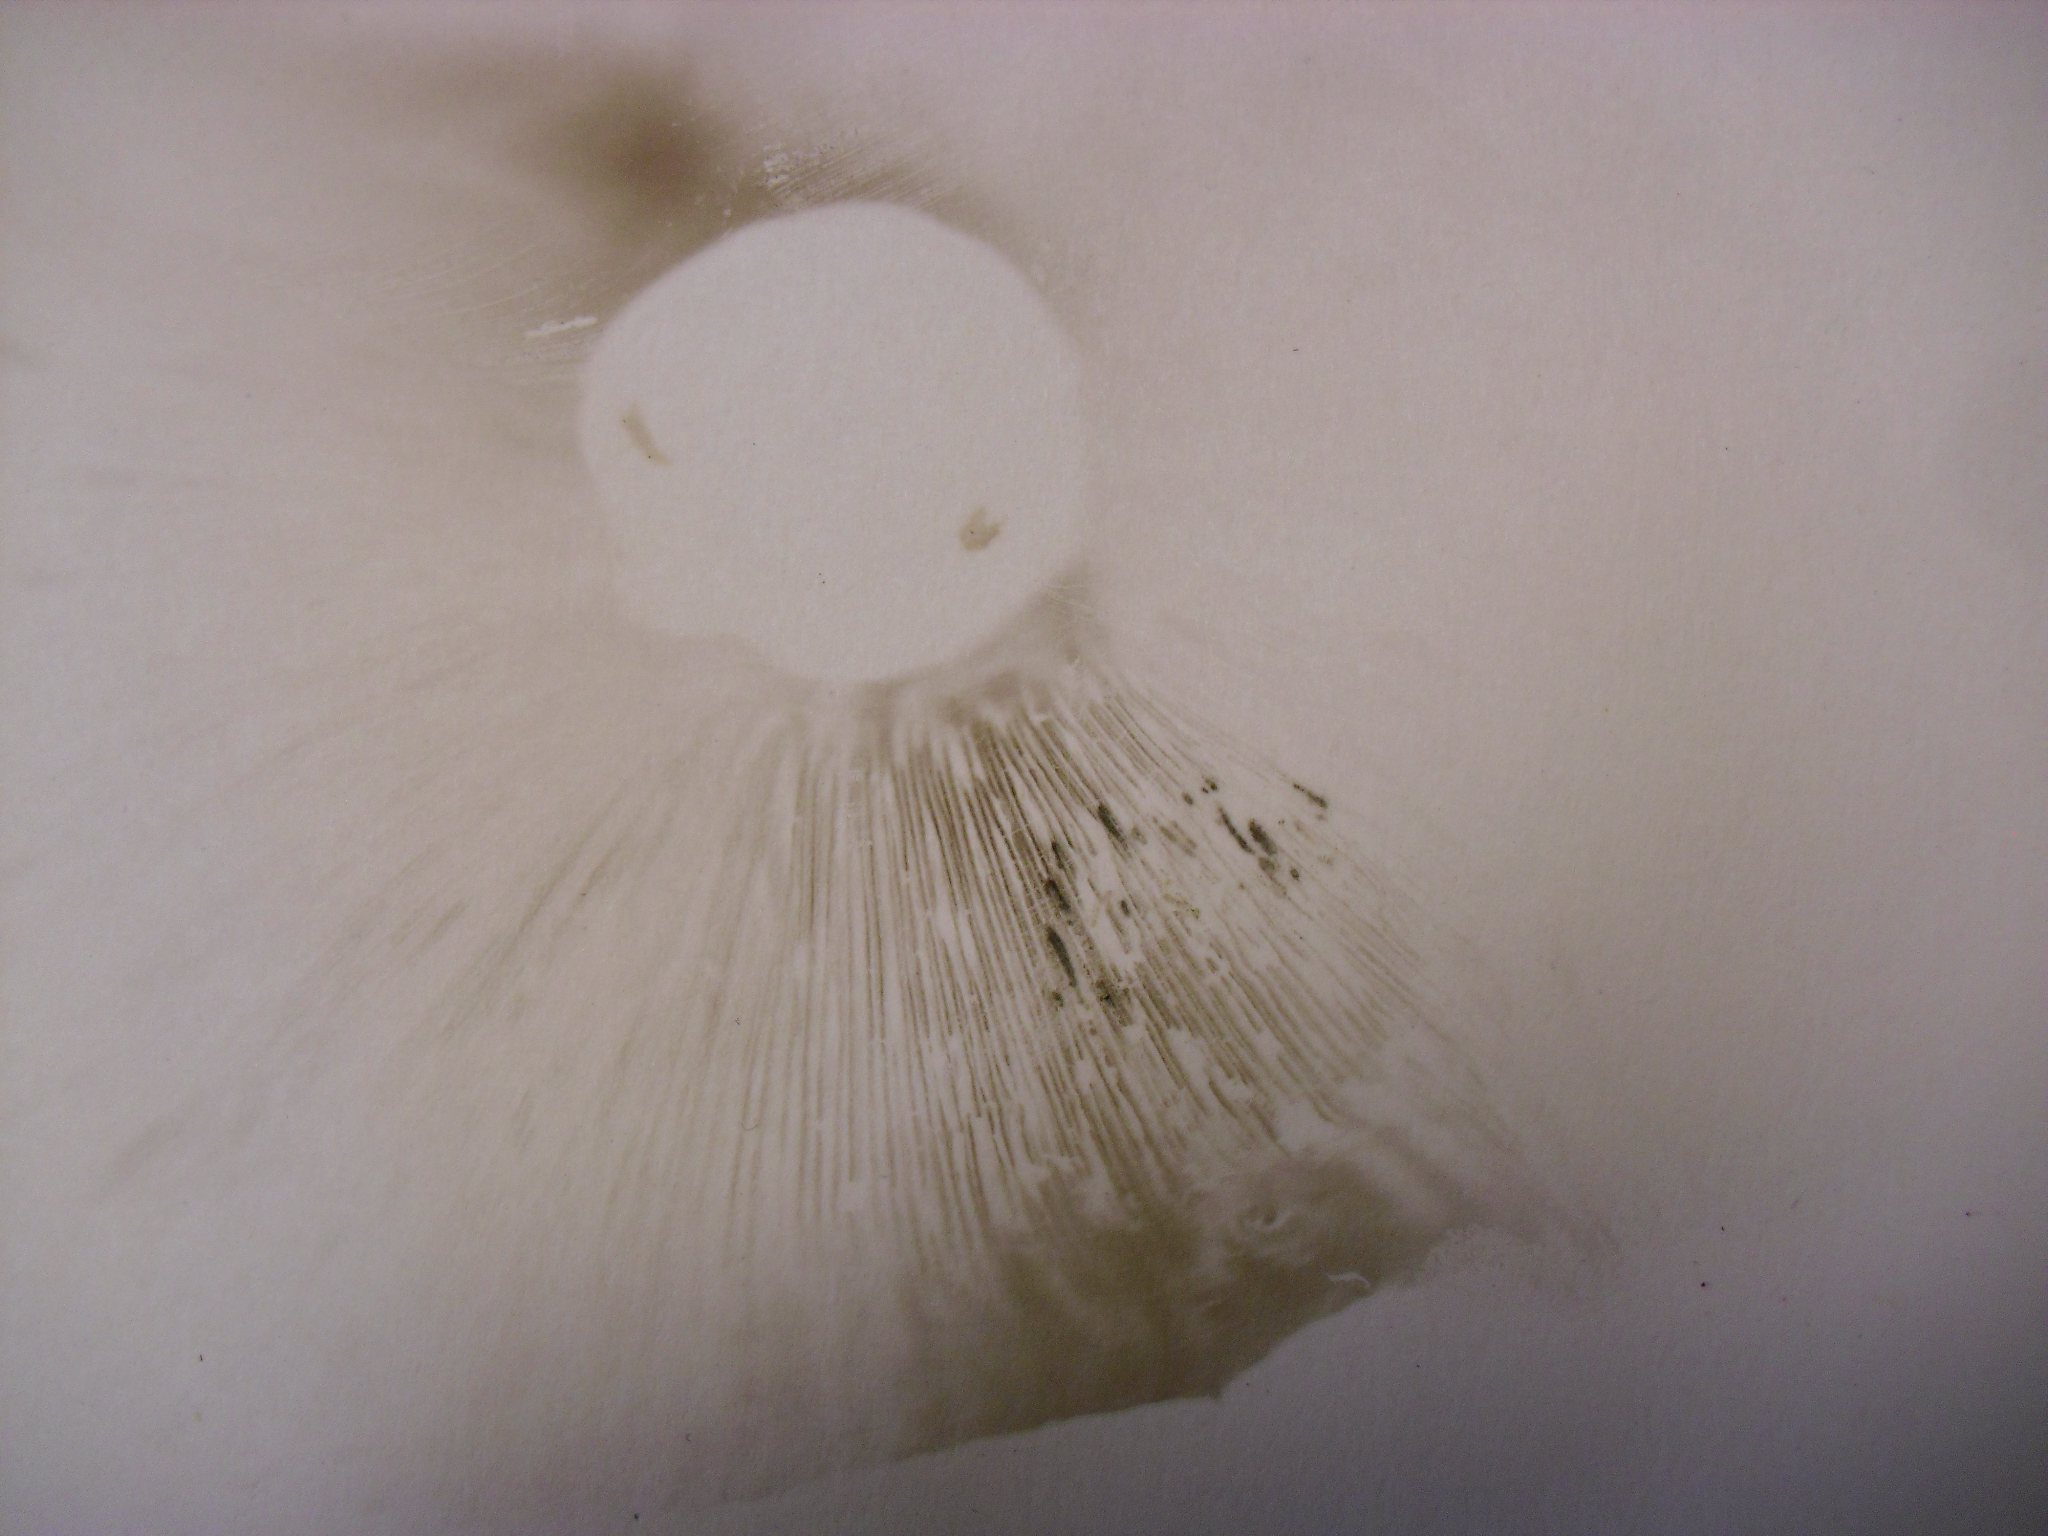
If all goes well, billions of spores will fall from the mushroom and produce a pattern that resembles the gills on the underside of the cap, like this portabello mushroom print.
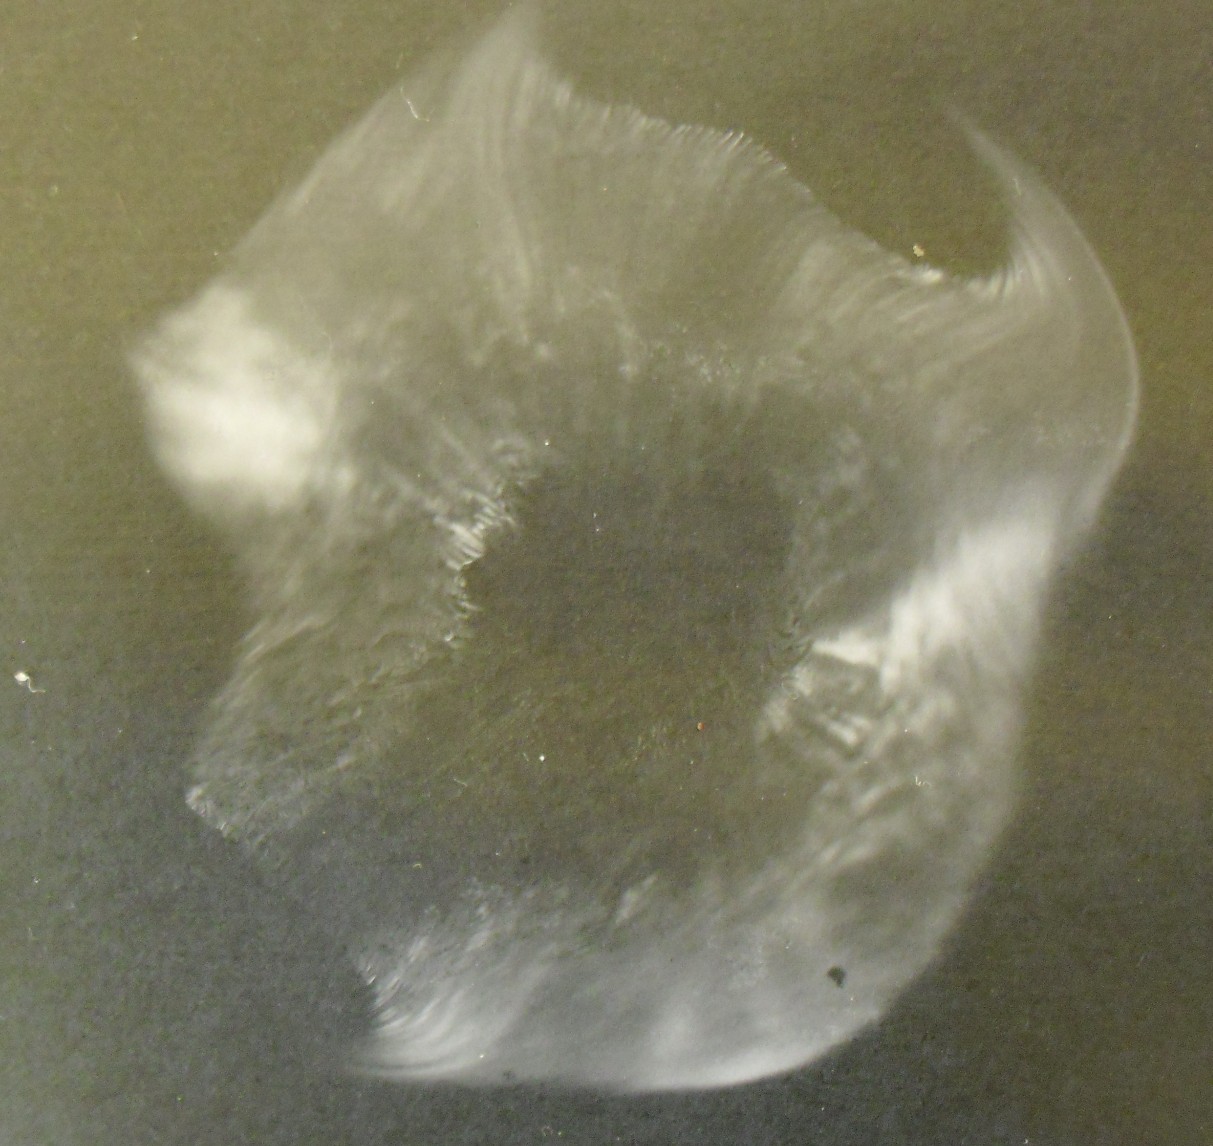
Four shiitake mushrooms leave ghostly impressions on black paper. The swirled edges were made by the uneven surfaces of the mushroom caps.
The fine lines on this print look like they might have been drawn by an extremely sharp pencil, but the spores that compose the image are much smaller than the tip of a pencil.
A Little More about Mushroom Spores
Garden scientist Louise Egerton-Warburton recently told me, “Plants are cool, but fungus rules.” As a mycologist, fungus is her passion. Now, we aren’t really interested in competition or ranking organisms by levels of interest or importance because every living thing needs the others to survive. But the fact remains that we tend to forget about smaller things, especially those that tend to be hidden from view, so let’s take some time to meditate on mushrooms.
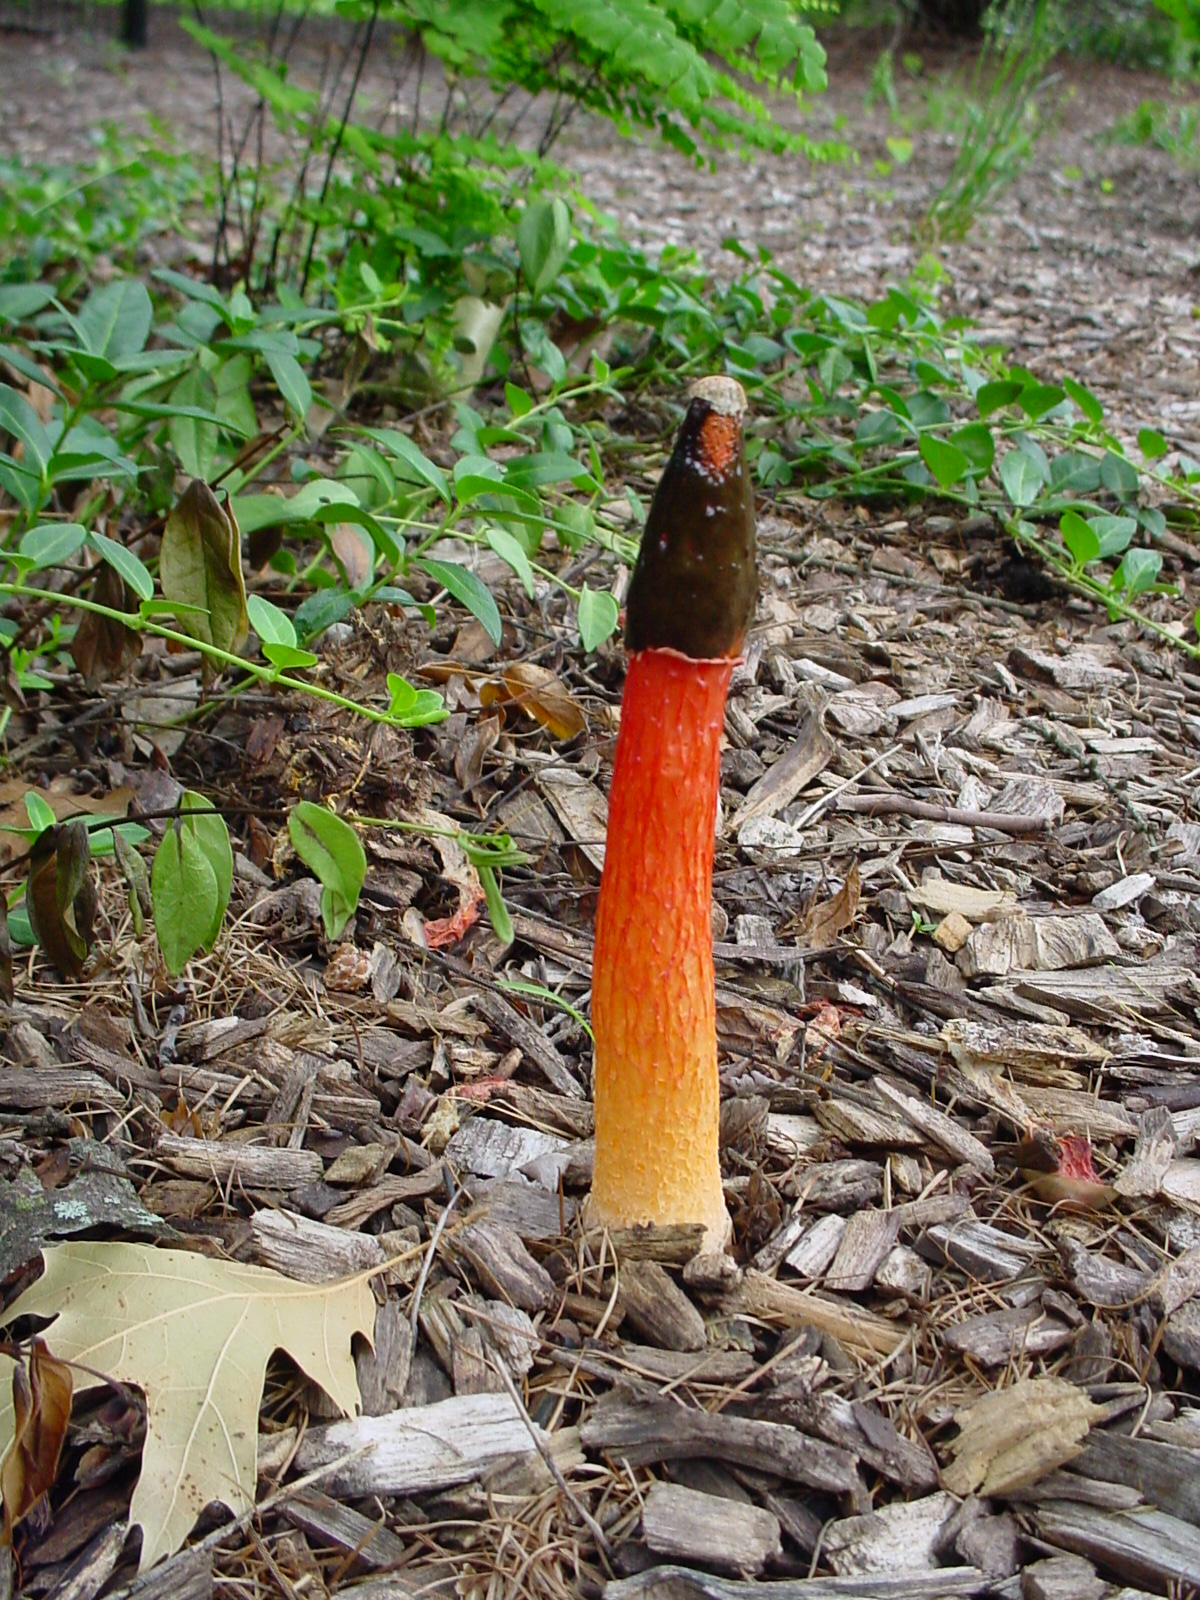
This stinkhorn fungus, Mutinus elegans, is growing out of the ground, but that is where its resemblance to green plants ends. It’s named for its obnoxious odor, which attracts flies that help distribute its spores.
Scientists used to think of mushrooms and other fungi as special kinds of plants. The problem is that, unlike plants, fungi do not get energy from photosynthesis. They are composed of different kinds of cells, they complete a different life cycle, and let’s face it: they don’t really even look like plants. So fungi are now grouped in their own kingdom of organisms, and nobody expects them to be anything like plants.
There are many different kinds of fungus, so for simplicity, let’s just think about the familiar mushroom with its stem and cap. This structure is actually the reproductive part of the organism, in the same way fruit is a reproductive structure in plants. (But we are not comparing plants and fungus!) Beneath the soil where you find mushrooms growing, there is a network of branching thread-like structures, called “hyphae,” which grow through the dead plant and animal matter in the soil and absorb nutrients. This is the main “body” of the fungus. As the fungus digests organic matter, it decomposes, making it useful for plants.
This “chicken of the woods” fungus, Laetiporus sulphureus, doesn’t look like a mushroom, but it also produces spores.
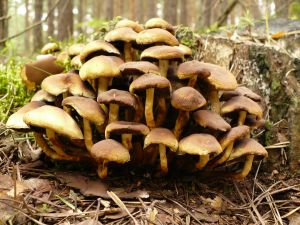
The fungus that produces these mushrooms is decomposing leaves and sticks that have fallen to the forest floor.
Back above ground, when conditions are favorable, a mushroom grows up from the hyphae. It matures and releases spores, which are like seeds. (It’s really hard to get away from comparing fungus with plants!) Spores are structurally different from seeds, even though they function to spread the organism in a similar way. Spores are microscopic and are so small that mycologists measure them in microns. A micron is one millionth of a meter.
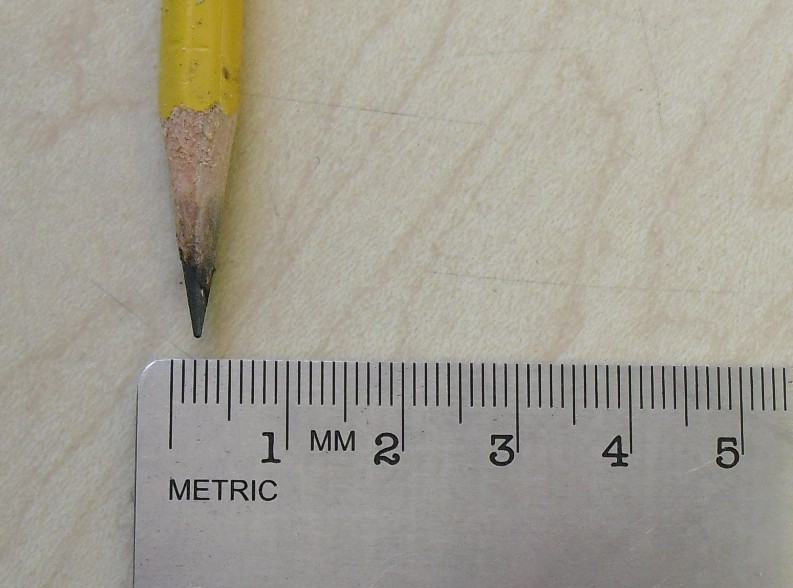
How many spores could fit on the tip of a sharp pencil? A lot! No wonder the spore print is so fine and delicate!
Look at a metric ruler. See the smallest lines that mark millimeters? Imagine dividing a millimeter into one thousand equal parts. Fungus spores measure 3 to 12 microns. It hurts my eyes trying to imagine a spore sitting on my ruler. We can only see them when there is a mass of them on a spore print. Mycologists use a micron ruler built into their microscopes to measure the individual spores.
While you are staying inside this season, join me in contemplating the sweetness of plants.
The common sugar beet, Beta vulgaris (this one is cultivar ‘Bull’s Blood’), is the source of our refined white sugar—not sugar cane!
All sugar comes from plants. All of it. Plants are the only thing on earth that can make sugar, and plants are made of sugars. Even plant cell walls are composed of a substance called cellulose, which is a compound sugar. Sugars from plants are the basis of our food chain.
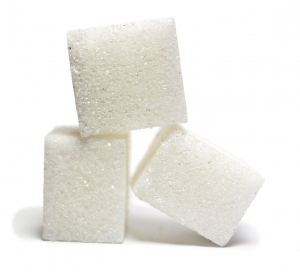
Our favorite dietary sugar, sucrose, comes from the juices of sugar cane or sugar beets, which are boiled until the water evaporates, leaving the sugar crystals we all know and love as table sugar. Now that you know where your candy comes from, let’s use some sucrose to make a treat.
How to Make Rock (Sugar) Candy
Rock candy is pure, crystallized sucrose, and you can make it at home. This will take one to two weeks, so get started now if you want to give it to someone special for Valentine’s Day.
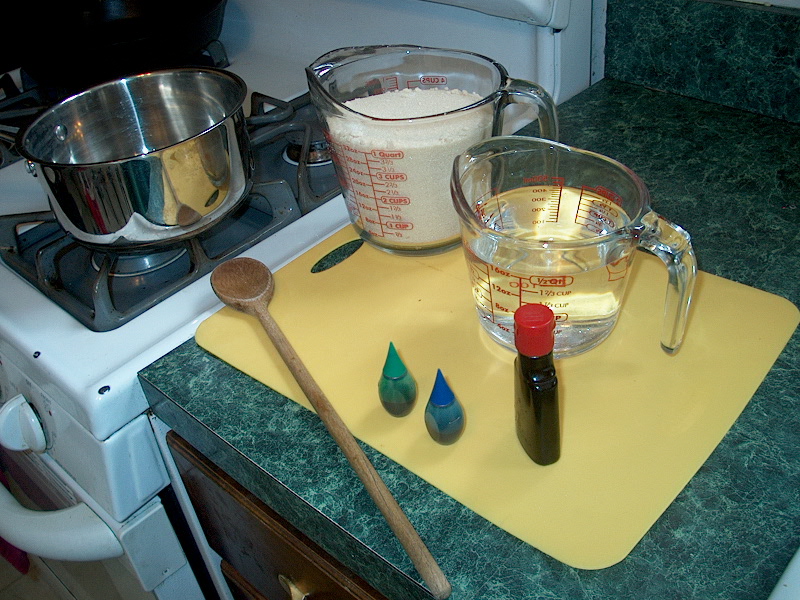
You will need
1 cup water
3 cups sugar, plus about a spoonful extra to coat the skewers
Food coloring (optional)
Flavoring (optional)
Bamboo skewers
Very clean, heat-resistant drinking glasses or glass jars (like Ball or Mason jars)
2 clothespins
All the ingredients for the solution are assembled and ready to go. Note: the flavoring pictured here is not the best to use, because it contains alcohol. Use an essential oil for better results.
Directions
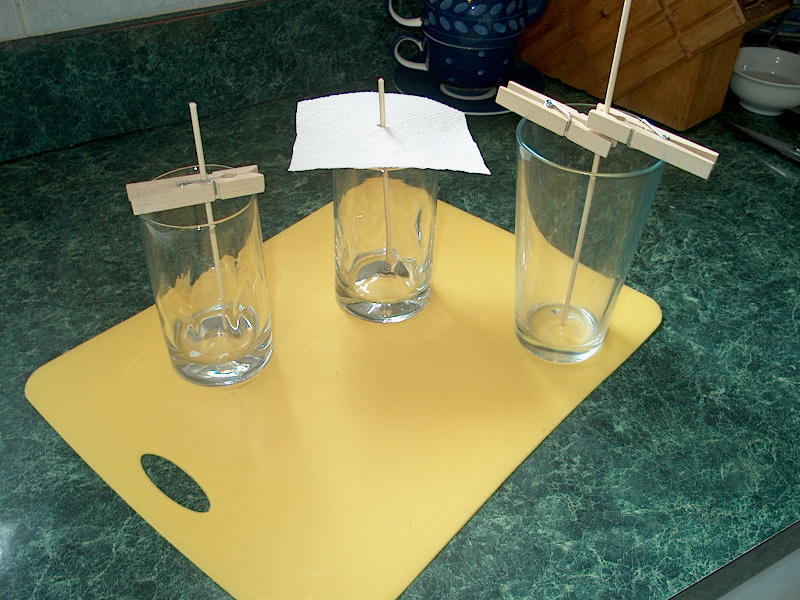
First, assemble the hardware. Cut the bamboo skewer to 6–8 inches, depending how long you want it. Attach two clothespins to one end. They will rest on the edges of your glass, suspending the skewer straight down in the glass without allowing it to touch the sides.
Cut a piece of paper towel with a hole in the center. This will go over the top of your glass to prevent dust from settling on the surface of the solution. Remove the paper towel and skewers; you’ll reassemble this after you’ve poured the solution in the glasses.
Suspend the skewers using one or two clothespins as pictured here, and be ready to cover loosely with a piece of paper towel like the glass shown in the middle.
Important tip: The directions I followed (from a reputable source) instructed me to moisten the end of the skewer with water and roll it in some sugar to “seed” the formation of new crystals. When I tried this, the sugar crystals all fell off the skewer the minute I put them into the solution. Crystals will not grow on a bare skewer. What did work was dipping the skewer into the sugar solution (which you are about to make) and then rolling it in sugar. This kept the tiny sugar crystals stuck on the skewer and allowed larger crystals to grow.
Making the sugar solution. Pour 1 cup of water in a saucepan and heat to boiling. Then turn the heat to low. You do not want to boil the water after you have added sugar, or you will make a syrup that is stable and will not yield crystals. Add the 3 cups of sugar gradually, and stir to dissolve. Push down any crystals that form on the sides of the saucepan during heating to dissolve in the water. This takes some time! Your final solution should be clear—not cloudy at all—and you should not see any crystals.
You can choose to pour the liquid into two small glasses or one larger jar.
If you want to color or flavor your candy, now is the time. Add 2 to 3 drops of food color and/or 1/2 tsp of food-grade essential oils (like peppermint), and stir in thoroughly. Avoid using alcohol-based extracts like the bottle you see pictured in the blog. I’m not sure if this caused a failure during one of my trials, but I can say with certainty that I had better results when I used a flavoring oil.
Dip the end of the skewer a few inches into the solution and remove. Let the excess sugar water drain into the pot, and then roll the sticky end in dry granulated sugar to coat evenly. Set aside.
Pour the warm solution into the glass container(s), and fill to the top. With this recipe, you will get about 3 and 1/2 cups of solution, which will fill one jar or two glasses. You can scale the recipe up if you want more.
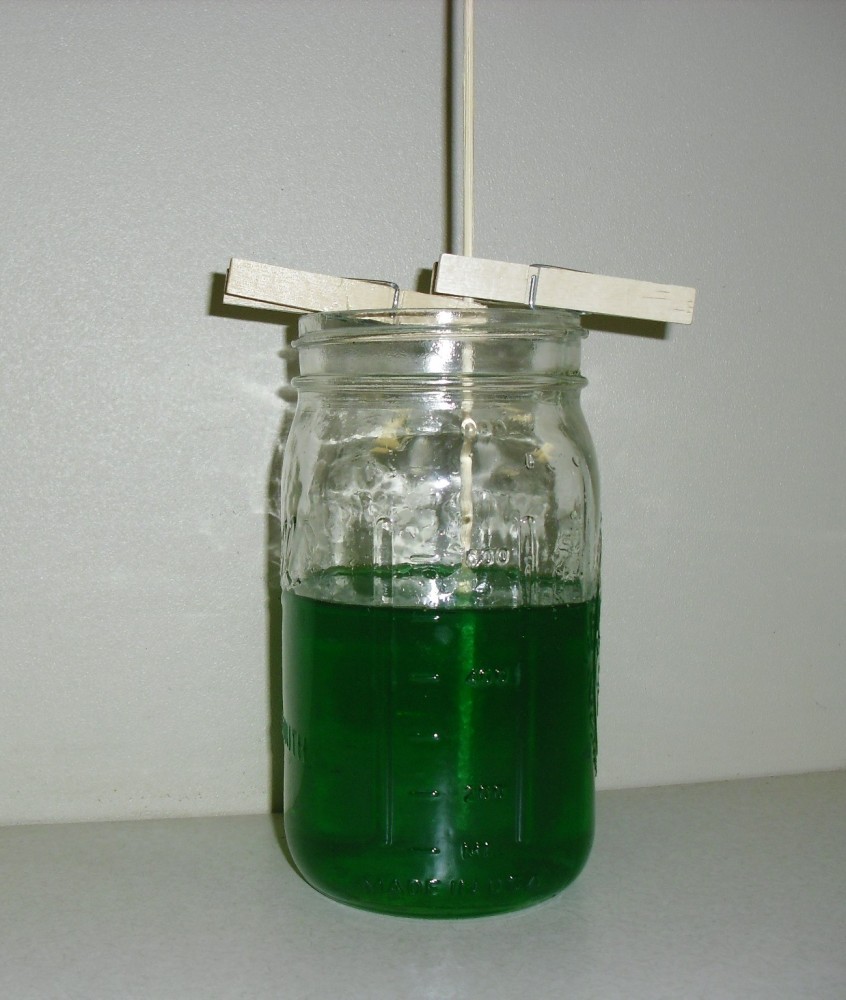
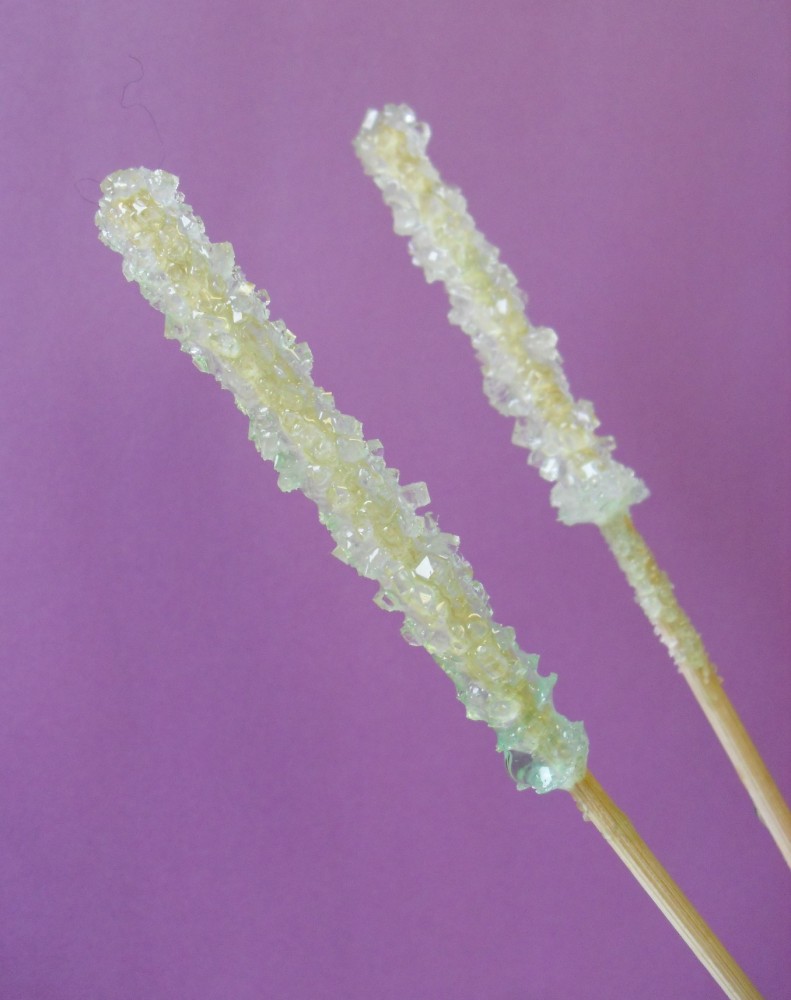
After about eight days, you can see the cube-shaped sugar crystals on these skewers. The longer you leave them in the solution, the larger the crystals will grow.
Carefully lower the sugar-coated skewer into the solution, holding it in place with the clothespins. Cover lightly with the paper towel and place it in a safe location where nothing will bump it or land in it for at least one week—two weeks if you want larger crystals. Do not totally seal your glass or jar. The water needs to evaporate for the sugar to come out of solution and crystalize on the skewer. If all goes well, then over the next week you will see large crystals forming only on the skewer.
Got candy? Remove the skewer and drain the syrup. Eat immediately, or allow to dry, wrap in plastic, and save for later. Now that is what I call cultivating the power the plants!
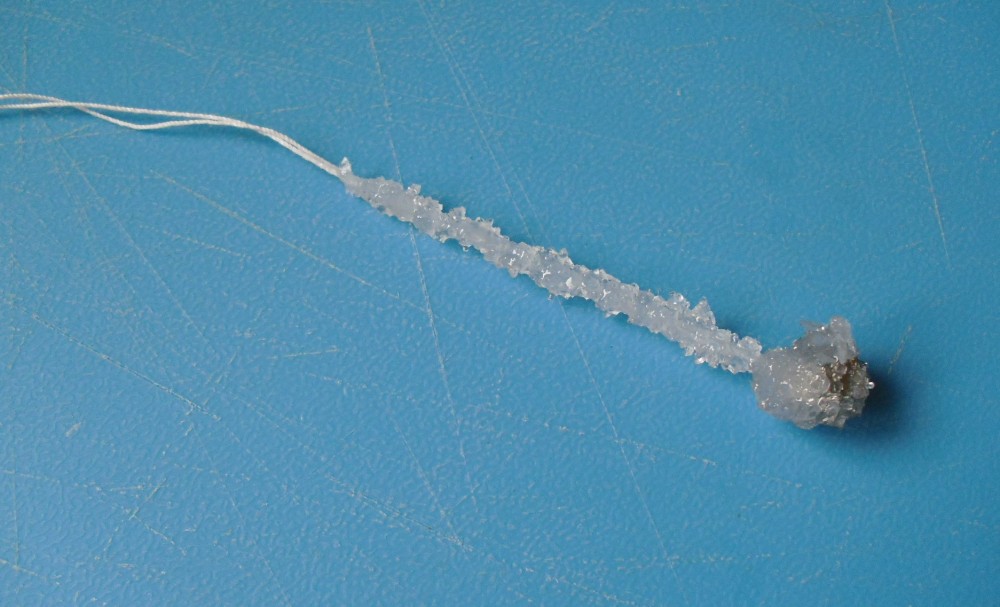
One more thing: You can use string instead of a stick. Tie a small weight on the bottom and tie the top to the a pencil balanced on top of the glass so that the string hangs in the liquid.
The string was weighted with a metal nut so it would sink into the solution.
While you are waiting for your sucrose to crystalize, let’s contemplate where it came from.
Sugar from Plants
You probably know that plants harness energy from the sun to convert water and carbon dioxide into sugar and oxygen in a process we call photosynthesis.
This basic diagram shows photosynthesis in action.
The product of the reaction is a sugar called glucose, which is chemical energy that a plant can use to build plant cells and grow. The formula looks like this:
6CO2 + 6H2O (+ light energy) C6H12O6 + 6O2.
Translated, it means that inside plant cells, six carbon dioxide molecules and six water molecules combined with energy from the sun are converted into one sugar molecule and six oxygen molecules.
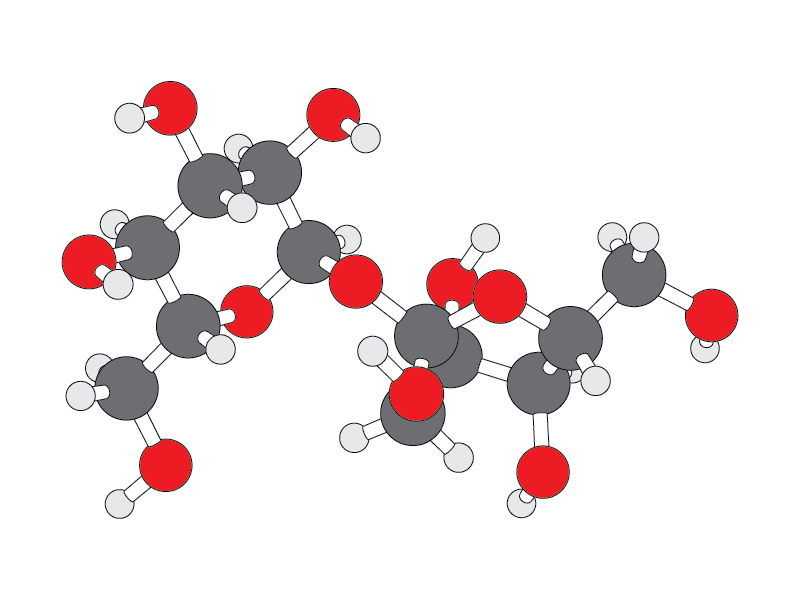
Glucose molecules are combined to form more complex sugars. Sucrose, or table sugar, has a molecular formula C12H22O11. It looks like two glucose molecules stuck together, but missing one oxygen and two hydrogen atoms (or one water molecule).
This sucrose molecule looks good enough to eat!
Just kidding. It looks better in normal scale.
As I mentioned earlier in this post, plants are the only thing on earth that can make sugar. Through modern chemistry, food scientists have figured out how to extract and modify plant sugars more efficiently. They have also developed different kinds of sweeteners, because the food industry is always striving to develop less expensive ways to satisfy our craving for sweets, as well as supply alternative sweeteners for different dietary needs. Some sugars you may see on food labels include dextrose (which is another name for glucose), sucrose, fructose, high fructose corn syrup, maltose, and sucralose. All of these “natural” sweeteners were processed from plants, even though they do not exist without help from a laboratory.
Have you noticed that all of these sugars, including the sugars in plant cell wall structures, have names that end in “ose”? That is no accident. The suffix “ose” is the conventional way chemists identify a substance is a sugar. Go ahead, share that information at your next party as you consume goodies made from plant sugars. Having some chemistry facts at your sticky fingertips makes you sound smart while you’re nibbling on sweet treats.
Yum!
Please enjoy sucrose crystals responsibly, as part of a balanced diet that includes forms of sugars closer to their origins. (In other words, eat fruits and vegetables, too.) And remember to brush your teeth!


")