Kathy J. has been learning and teaching kids about nature for more than 20 years. She collects bugs, watches squirrels, does not get a rash from poison ivy, practices “snacker” behavior in winter, and is always on alert for interesting plants and animals. When she’s not watching something in the trees or spending time with her teenage daughters, she’s overseeing programs for teachers and students at the Garden.
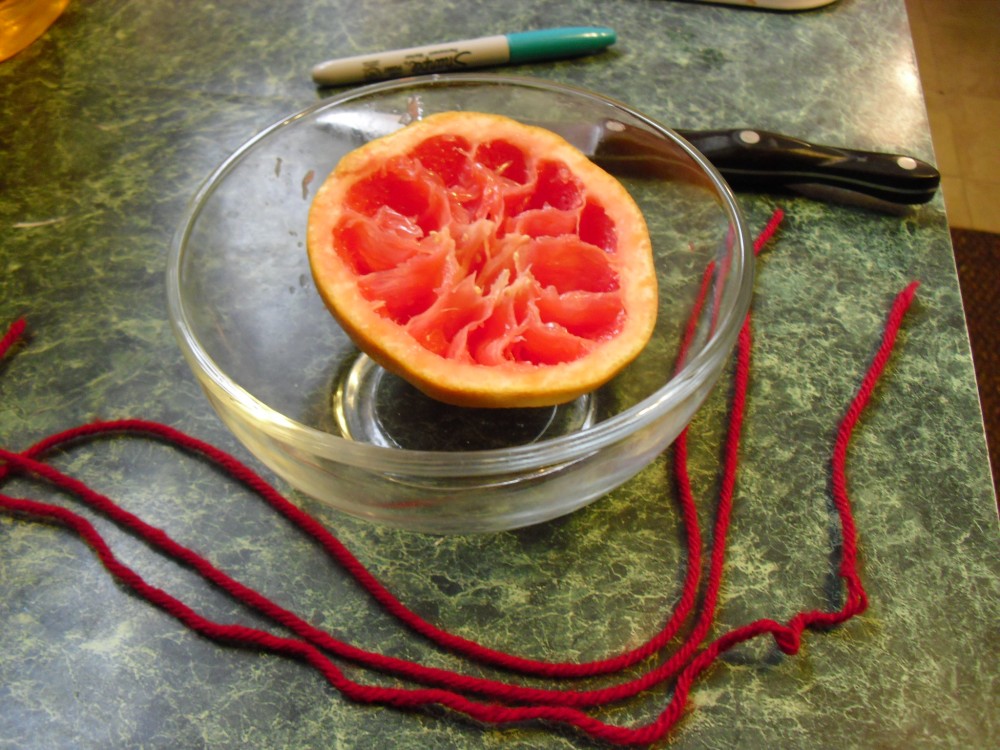
My daughters love fresh grapefruit—and birds. So we decided to keep the rind and make a bird feeder. This is a fun, easy project.
The grapefruit sections have been cut and eaten; the rind is ready to become our bird feeder.
To make a grapefruit bird feeder, you will need the following:
Half a grapefruit rind (you can also use an orange)
Three pieces of yarn, each cut about 18 inches long
A knife, skewer, pointed scissors, or other sharp tool
Birdseed
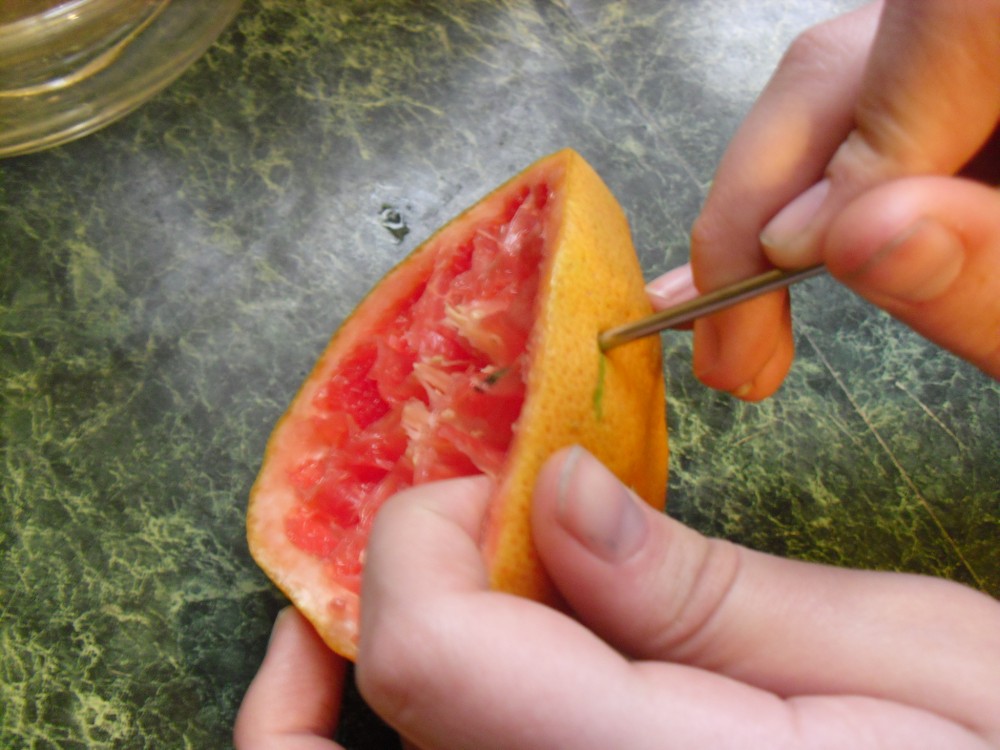
First, eat the grapefruit and drain the remaining liquid. Then, use the skewer or knife to poke three holes in the grapefruit. They should be about half an inch from the top edge and spaced evenly around the circumference. (Some people do this with four strings, but I find that using three strings makes it easier to balance the fruit.)
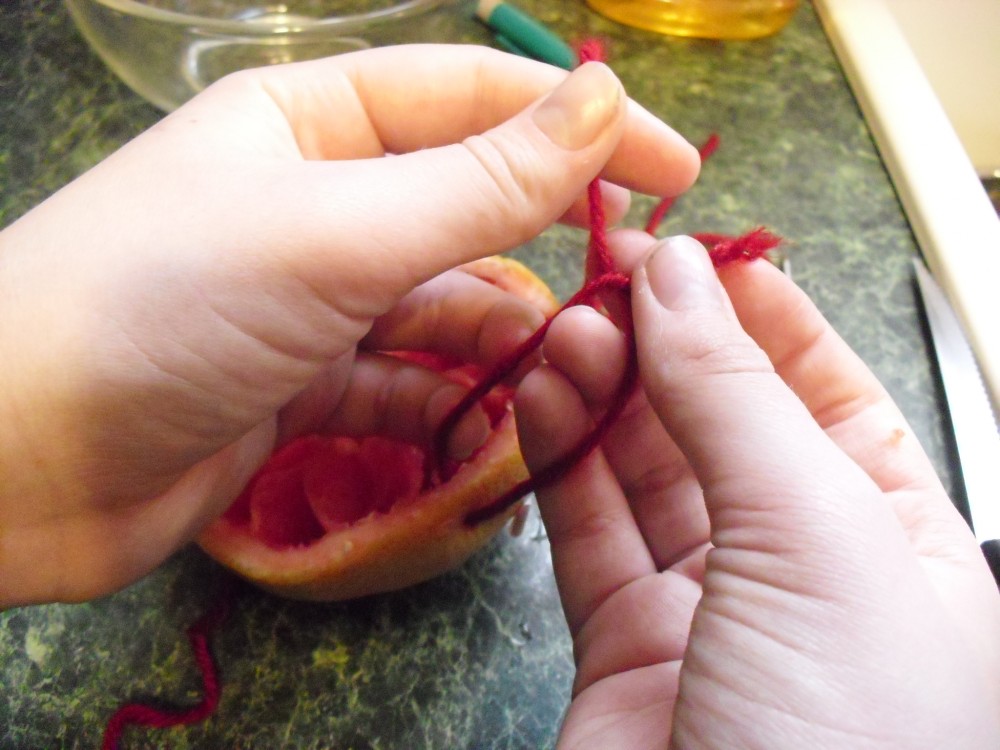
Push a piece of yarn through each hole and tie it off.
Hold the grapefruit firmly with one hand while you poke the skewer through the rind. Be careful not to poke your finger!
Pull 2-3 inches through the rind and tie the short end to the longer strand.
Hold the grapefruit up by all three strings and adjust the length of the strands so the fruit is not tipping. When it is balanced, knot the strings together about 4 or 5 inches from the top. (The ends will probably be uneven, and that is all right.) Make a loop knot with those top ends, so you will be able to hang it from a branch.
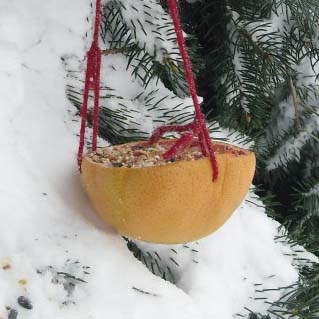
Our grapefruit bird feeder is balanced, full of seed, and ready to hang outside.
Finally, fill the fruit with birdseed and hang it outside for your feathered friends to enjoy. If you like, you can add a little suet, but you may find it doesn’t stick well to the wet fruit. Here in the Chicago area, you’ll probably find that most of your winter guests are black-capped chickadees, nuthatches, dark-eyed juncos, common redpolls, and downy or hoary woodpeckers, which balance their primary diet of insects and grubs with bits of suet and sunflower seeds.
One more thing: Make sure it’s tied to the branch firmly so that your local (determined) squirrels — who will also find this bird feeder appealing — don’t knock it down.
Don’t worry if you don’t have any visitors the first few days after you’ve placed your feeder. It can take up to two weeks for birds to discover their new food source, but once they do, they tell all their friends in the neighborhood.
The final product is ready for visitors.
What is birdseed?
You probably know that if you plant birdseed, you won’t grow a bird. And there is no such thing as a birdseed plant. So what plants make birdseed? What we call “birdseed” most commonly comes from two sources: millet, which is a grass, and sunflower. Other seeds used to feed birds include thistle, safflower, cracked corn, and sorghum seed, which is also called milo. Some birds have a preference for certain kinds of seeds, so bird lovers stock their feeders with seeds to attract their favorite birds and keep them visiting the feeder.
After you hang your bird feeder, take some of the seed and plant it to see what grows. Maybe you can grow your own food for the birds this year!
Quick quiz: is this boy holding a twig of conifer, evergreen, or both?
Every winter, as a public garden, the Chicago Botanic Garden turns its educational programming attention—as well as its decorations—to the only plants that stay green through the season: the evergreens. We teach class after class of school children how to identify different kinds of evergreens by their needles and cones.
It’s a lesson in sorting and classifying plants—in other words: taxonomy.
Conifer vs. Evergreen
Every year we remind students of the meanings of the words “evergreen” and “conifer”—they are not the same thing!—and every year, someone is confused. I blame Christmas trees.
The “Christmas Tree” intersects both of the sets “evergreens” and “conifers”—it’s both!
First, it’s important to understand that evergreens are any plants that remain green through the winter, like pine, spruce, fir, and Douglas fir. Conifers, on the other hand, are a classification of trees that produce seeds inside cones. These trees include pine, spruce, fir, and Douglas fir. Wait a minute…those are are the same trees!
You see, the problem is that our Christmas trees tend to be both evergreen and conifer, and as a result, many of us have forgotten the difference. To help us illustrate the definitions of the two terms, let’s look at some evergreens and conifers that do not fall into the intersection of those groups.
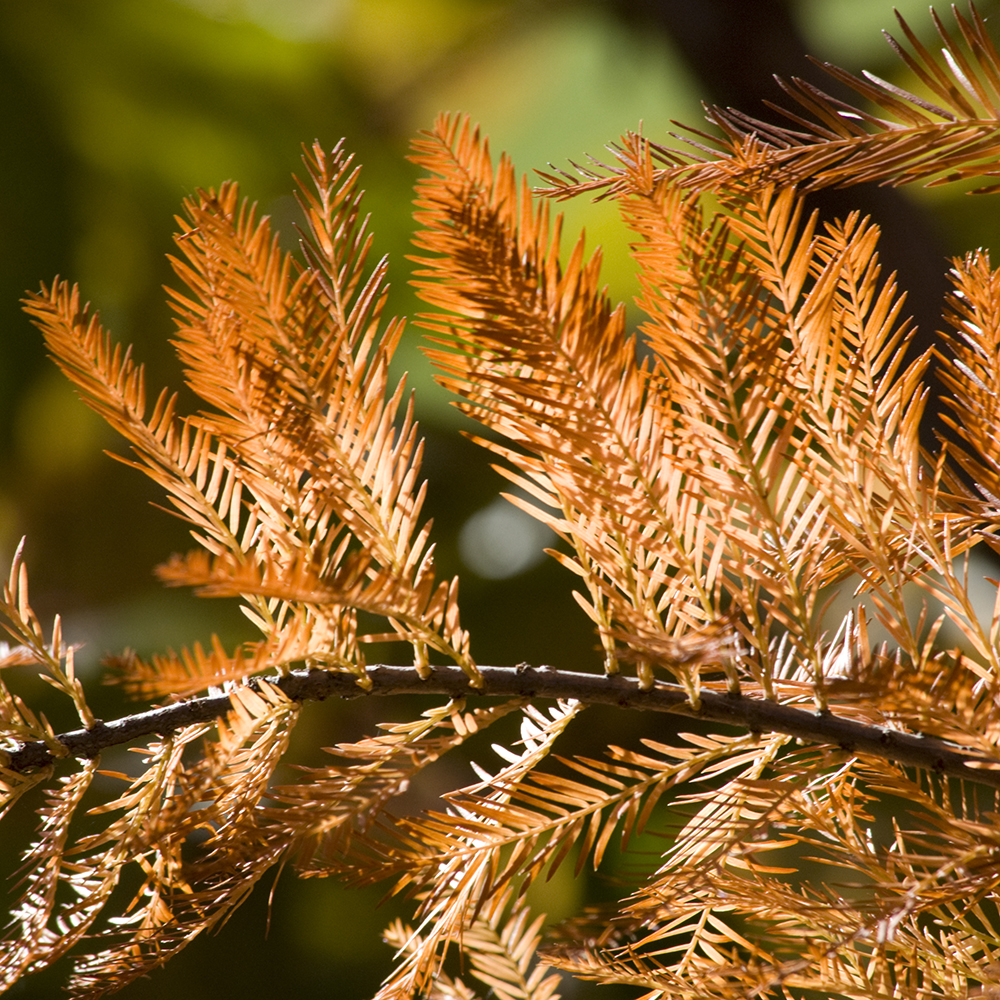
Charlie Brown’s tree might have been a bald cypress.
One conifer that loses its needles, and therefore is not an evergreen, is the bald cypress. These can be very attractive when covered in snow. (The bald cypress trees growing in the Heritage Garden have been pruned at the top and look like candelabras.) The needles on these trees change color in fall—the same way deciduous trees like maples and oaks do—and drop to the ground, making them look, well, bald.
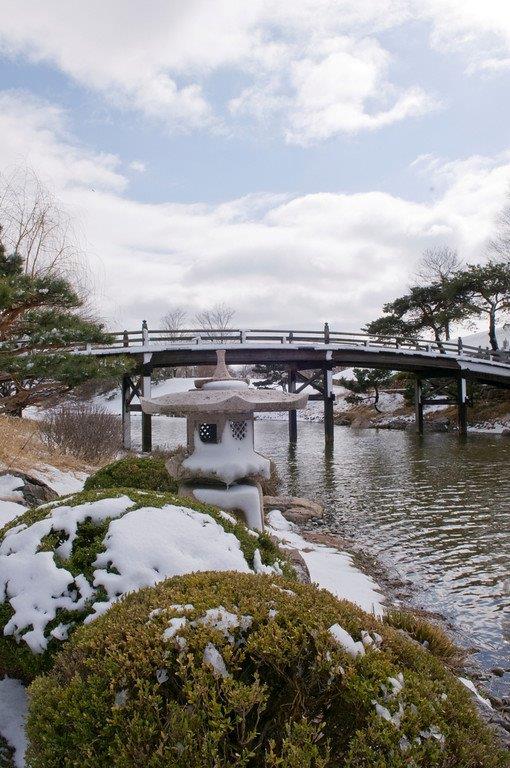
Boxwoods and rhododendrons are woody plants that keep their green leaves all winter, but they do not produce cones. Boxwoods are occasionally used in wreaths and can be found in many places around the Garden.
Bald cypress (Taxodium distichum) is called “bald” for a reason—its needles change color and fall in autumn just like deciduous trees such as maples and oaks.
Boxwood in winter in the Malott Japanese Garden: these true evergreens may yellow a bit with winter, but keep their foliage.
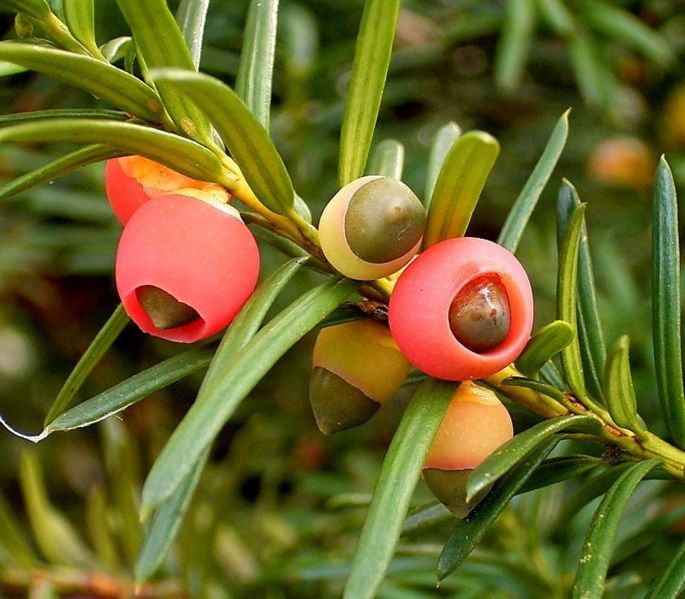
Now here is where things actually do get confusing. Female yews produce a bright red “berry” that might make you think they are just evergreens. Actually, when you take a close look at the hard core at the center of this berry, you would see small, closed scales like those on any other “pine” cone. Yep. Juniper “berries” are also modified cones. That means yew and juniper are both evergreen and conifer.
Yew berries (Taxus baccata) Photo by Frank Vincentz, via Wikimedia Commons
So call your Christmas tree an evergreen or a conifer—you will be correct either way. But it’s worth remembering what the two terms mean. Recognizing how things are alike and different is the driving force behind taxonomy and is also fundamental to understanding the natural world.
This is a treasure hunt to find trees. Follow the clues to find them with ease.
Each clue has a hint to the tree’s location, And a few facts for identification.
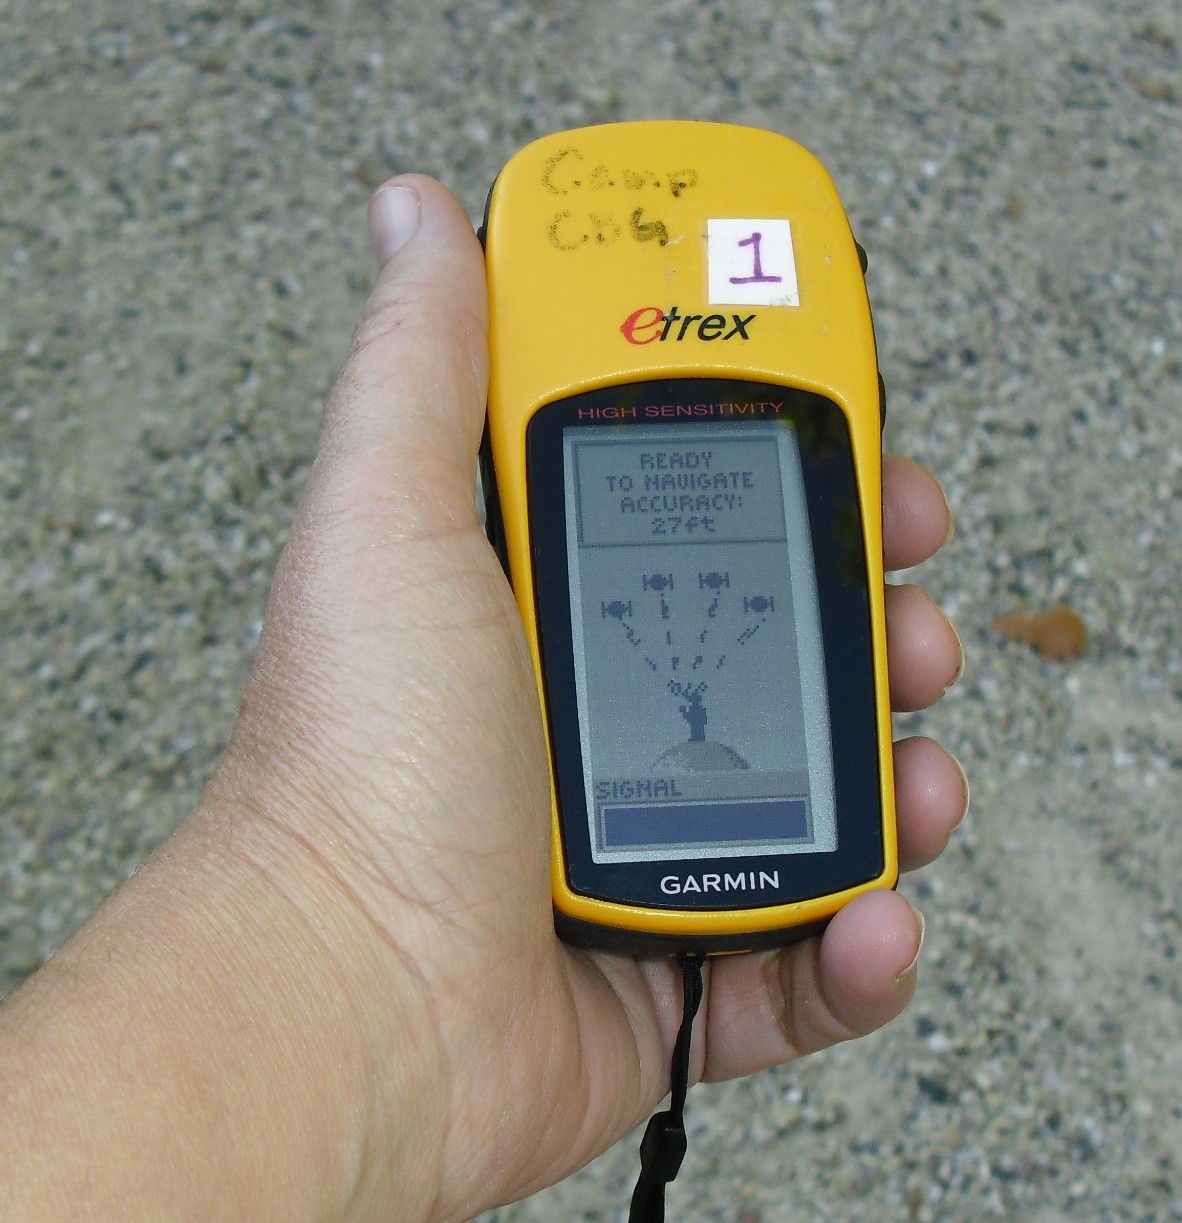
The numbers provided are GPS* clues, Just in case our rhyming stumps you.
When you get to each tree you’re meant to find, Read the message on the large brown sign.
*GPS coordinates give the general area and my not be exact. Use them to get in the vicinity, then look for a tree that fits the clues. (All trees can be found in adjacent gardens on the west side of the main island.) Don’t have a GPS device? You can use your iPhone or Android phone’s compass utility to follow the clues. Remember: leave any seeds you find for the critters that need food for winter!
Tree #1
1.
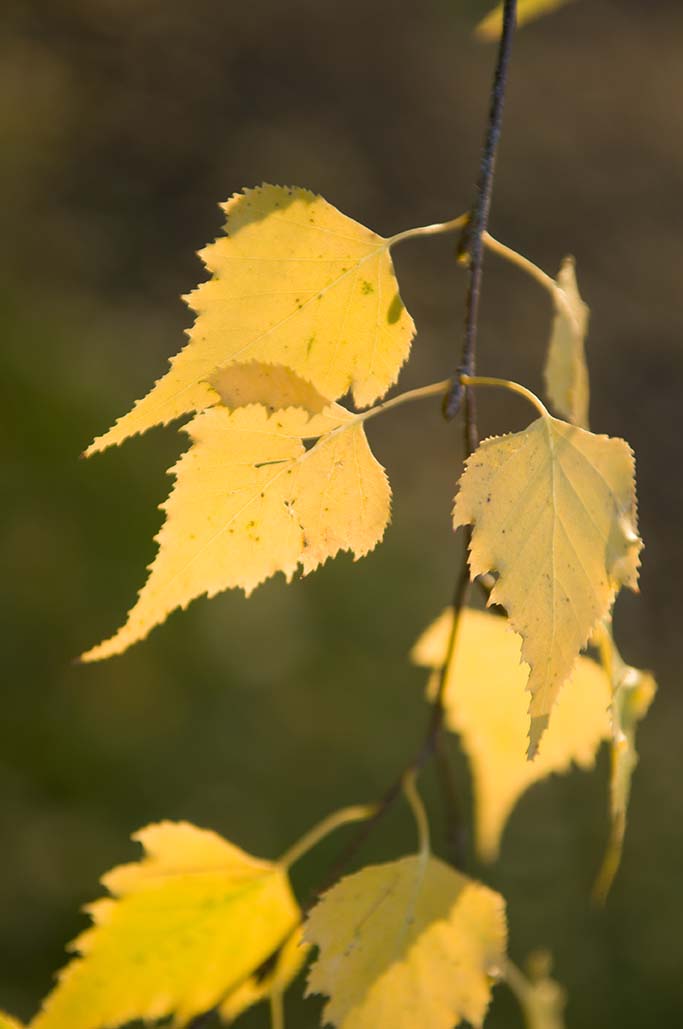
Enter a Garden of native flowers and grasses; Walk ’round the fence and try not to pass this.
It’s tall and stately, and rough is its bark; Look up to see woody, small berries, which are dark.
If you go past the fliers, frozen midflight, “backtrack” your footsteps to the tree that is “right.”
GPS: N 42˚08.899′, W 087˚47.510′ iPhone Compass: N 42˚ 08’54” W 87˚ 47’31”
Tree #2
2.
If these trees were shorter, this clue’d be a hard one. Follow the path through the Landscape Garden.
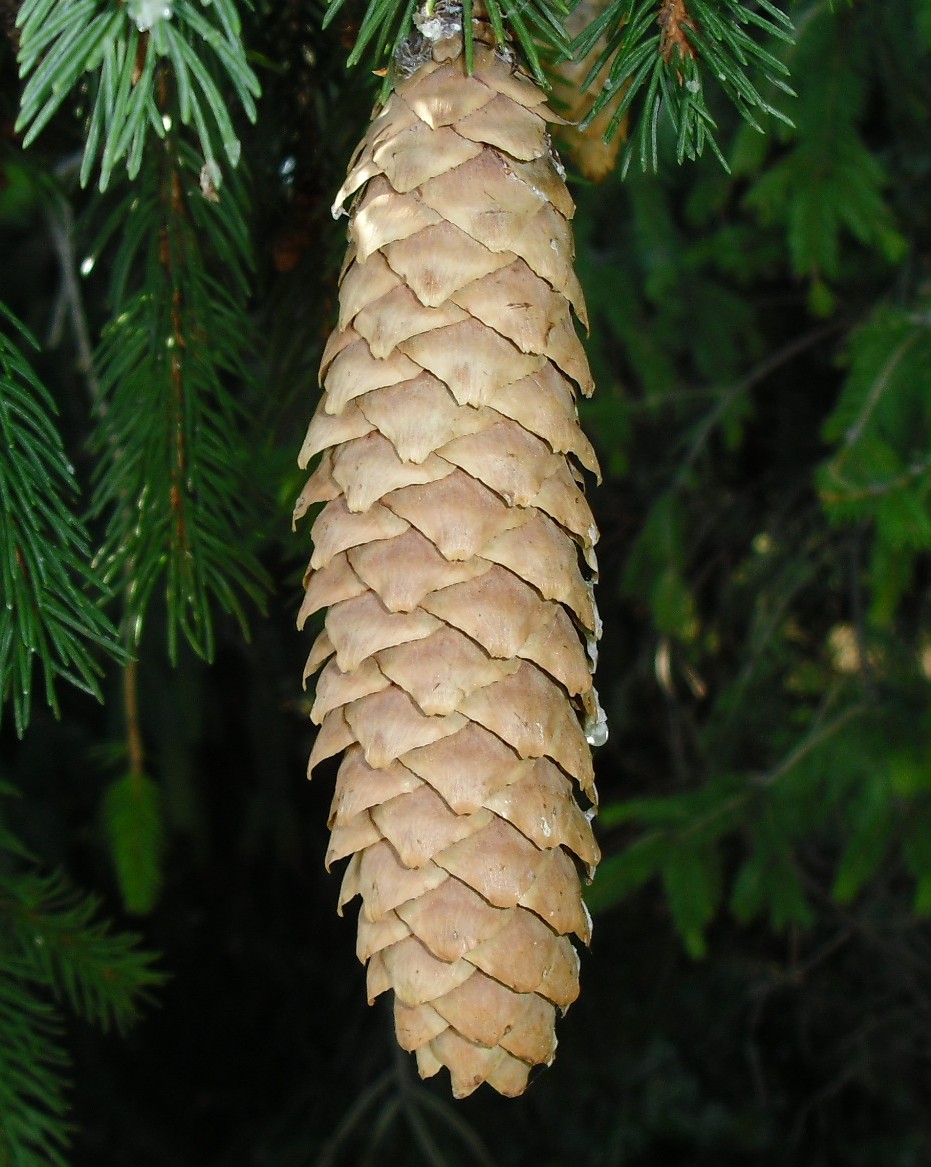
An evergreen trio are loaded with seeds; They form narrow cones—look up high to see.
You may cross a stream discover these gems, Enjoying the moisture, to the water they bend.
GPS: N 42˚08.879′, W087˚47.499′ iPhone Compass: N 42˚ 08’53” W 87˚ 47’31”
Tree #3
3.
For those who love fall color it’s plain to see, Edna Kanaley Graham would have loved this next tree.
Come into the garden, where spring bulbs sleep. Look right in the entrance and take a quick peep.
This tree’s fruits (now all fallen) are small prickly balls, Star-shaped leaves are what’s left now—orange and yellow in fall.
GPS: N 42˚08.890′, W 087˚47.566′ iPhone Compass: N 42˚ 08’53”, W 087˚ 47’34”
Tree #4
4.
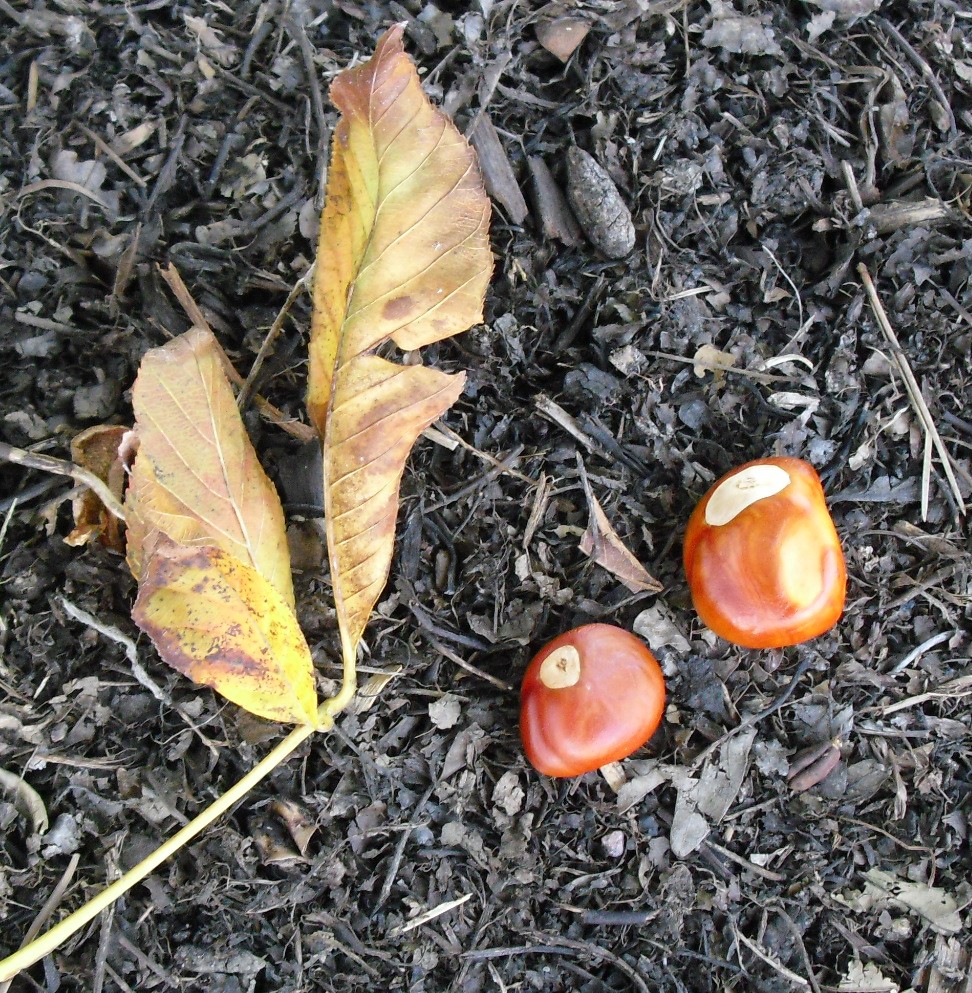
Near the Circle Garden and the whistling of trains, A group of large trees makes nuts from sun, air, and rain.
Squirrels and critters think that these nuts are great; It’s also a favorite of Ohio State!
Can’t find our trees on your wander? Look down: This time of year, fruit and husks litter the ground.
GPS: N 42˚ 08.849′, W 087˚47.465′ iPhone Compass: N 42˚ 08’50”, W 087˚47’34”
Tree #5
5.
From here, it’s off to the Enabling Garden you go; Where a smattering of these trees you’ll find in a row.
This specimen grows very large heart-shaped leaves; Long, narrow seed pods hang from its eaves.
Either side of the path they drip like fresh wax; We hope from these clues you discover the facts.
GPS: N 42˚08.810′, W 087˚47.416′ iPhone Compass: N 42˚ 08’49”, W 087˚ 47’25”
Our ephemeral signs have now been removed from each site, but here are the answers:
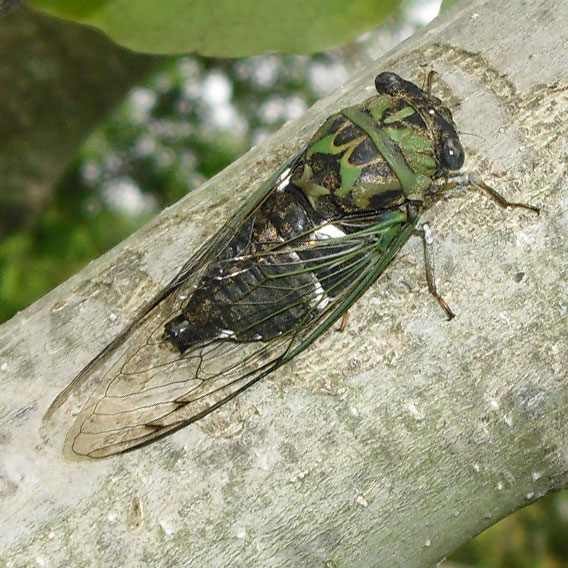
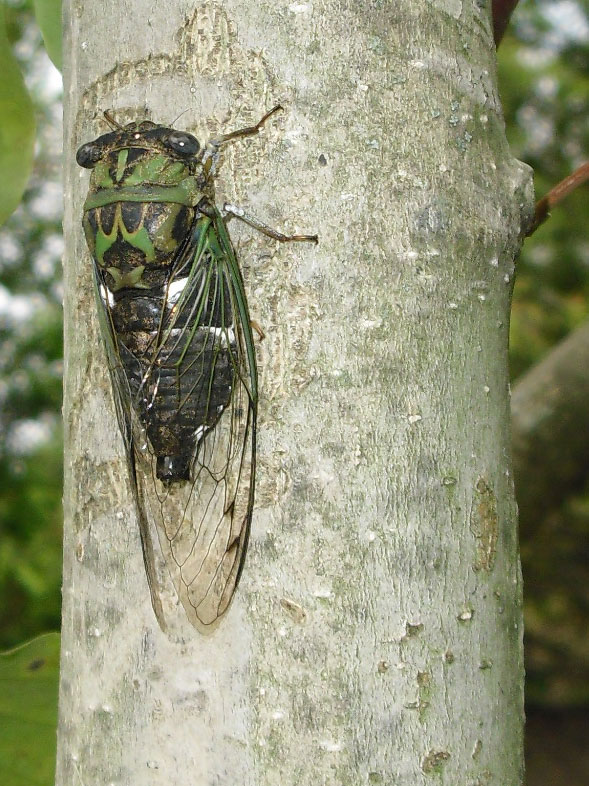
Cicadas have been out and singing for a while now. If you live around trees, you may be enjoying their late summer serenade. You also may be finding them on the ground. After they emerge from underground burrows, they molt and enter their adult stage. Then they mate, lay eggs, and die. When you find one, you can examine it to learn more about these big bugs.
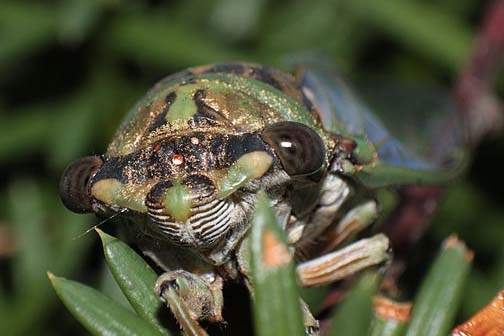
Did you know that cicadas have five eyes?
In school we learn that insects have compound eyes, and we use toy bug eye viewers to get a sense of what dragonflies and bees see. But the real picture is a little more complicated. In addition to the pair of compound eyes, many insects, including cicadas, have three simple eyes. They are easy to see on a cicada if you look carefully.
This cicada’s three simple eyes show up as three spots reflecting the flash from the camera.
The simple eyes are called ocelli, and they are usually arranged in a triangle between the compound eyes, like those in picture of the cicada’s face. Grasshoppers, bees, and praying mantids also have them.
The Latin name for this cicada is Tibicen canicularis. “Canus” is the Latin word for dog. Why do you think he’s called the Dogday cicada?)
Let’s do some cicada math! If you find a cicada on a tree or the ground, see if you can count:
1 mouth part to drink sap from trees
2 antennae that grow under the eyes and look like whiskers
It’s that time of year again—time for student science fair projects. Many students I know struggle to find a good idea, and sometimes wait until the last minute to do their experiments. We in the Education Department of the Chicago Botanic Garden are committed to helping make science fair a painless and even fun learning experience for students, parents, and teachers by offering some simple ideas for studying plants.
A no-brainer botany project is testing germination of radish seeds in different conditions. Radish seeds are easy to acquire, inexpensive, large enough to see and pick up with your fingers, and quick to germinate under normal conditions. Testing germination does not take weeks, doesn’t require a lot of room, and is easy to measure—just count the seeds that sprout!
Radishes come in different varieties—here are two very different kinds. They all work for germination experiments.
To set up a seed germination experiment, use this basic procedure:
Gather three or more small plates, depending on how many ways you will be treating your seeds.
Place a folded wet paper towel on the plate.
Place ten seeds on the wet paper towel. You can use more seeds—the more you have, the more reliable your results will be—but using multiples of ten makes it easier to calculate percentages.
Cover with a damp paper towel; label the plates.
Treat the seeds the same way in every respect except for one thing: the condition you are testing. That condition is your “independent variable,” which may also be called the “experimental variable.” No matter what you are testing, one plate should be set up with the basic directions and no treatment. That plate is the “control” that all the other plates can be compared with.
When the seeds sprout root and leaves, remove the top paper towel. Compare the number of seeds that germinate and the time it takes for seeds in each condition. You should be able to wrap this up in less than a week.
These seeds are ready to be covered with a damp paper towel and tested.
Now all you need are some ideas for conditions to test. Here are eleven questions you can investigate at home or school using the same basic proceedure:
1. Do seeds need light to germinate?
Place your plates of seeds in different light conditions: one in no light (maybe in a dark room or a under a box), one in indirect/medium light (in a bright room, not near the window), and one in direct light (by a south-facing window). Compare how well the seeds germinate in these conditions.
2. Do seeds sprout faster if they are presoaked?
Soak some seeds for an hour, a few hours, and overnight. Place ten of each on a germination plate, and and compare them with ten dry seeds on another plate.
3. Does the room temperature affect germination rate?
You’ll need a thermometer for this one. Place seed plates on a warming pad, in room temperature, and in a cool location. Monitor temperature as well as germination rate. Try to ensure that the seeds have the same amount of light so it’s a fair test of temperature and not light variation.
Like magic, after just one day, these seeds are swollen and beginning to germinate. Notice the tiny white nubs on some seeds, which shows they are starting to grow.
4. Do microwaves affect germination?
Put seeds in the microwave before germinating and see if this affects them. Try short bursts, like one and two seconds as well as ten or 15 seconds, to see if you can determine the smallest amount of radiation that affects seed germination.
5. Does pH affect germination rate?
Wet the paper towels with different solutions. Use diluted vinegar for acidic water, a baking soda or mild bleach solution for alkaline conditions, and distilled water for neutral.
6. Does prefreezing affect the seed affect germination?
Some seeds perform better if they have been through a cold winter. Store some seed in the freezer and refrigerator for a week or more before germinating to find out if this is true for radishes or if it has an adverse affect.
After about three days, all ten seeds have grown roots and early leaves. That’s 100 percent germination!
7. Does exposure to heat affect germination rate?
Treat your seeds to heat by baking them in the oven briefly before germinating. See what happens with seeds exposed to different temperatures for the same amount of time, or different amounts of time at the same low temperature.
8. How is germination rate affected by age of the seeds?
You can acquire old seeds from a garden store (they will be happy to get rid of them), or maybe a gardener in your family has some old seeds hanging around. Find out if the seeds are any good after a year or more by germinating some of them. Compare their germination rate to a fresher package of the same kind of seed.
9. Do seeds germinate better in fertilized soil?
Instead of using the paper-towel method, sprout seeds in soils that contain different amounts of Miracle-Gro or another soil nutrient booster.
Speaking of seeds, this sprout is about a half-centimeter long, complete with testa, radicle, and first leaves. Now go look up those terms for your report! While you’re at it, look up hypocotyl, cotyledon, and plumule.
10. Does scarification improve germination rate?
Some seeds need to be scratched in order to sprout—that’s called “scarification.” Place seeds in a small bag with a spoon of sand and shake for a few minutes and see if roughing them up a bit improves or inhibits their germination.
11. Does talking to seeds improve their germination rate?
Some people claim that talking to plants increases carbon dioxide and improves growth. Are you the scientist who will show the world that seeds sprout better if you read stories to them? Stranger discoveries have been made in the plant world.
That eleventh idea may seem silly, but sometimes science discoveries are made when scientists think outside the seed packet, so to speak. Students should design an experiment around whatever question interests them—from this list or their own ideas—to make the research personal and fun. As long as students follow the scientific method, set up a controlled experiment, and use the results of the experiment to draw reasoned conclusions, they will be doing real science. The possibilities for botanical discovery are endless, so get growing!