Build a DIY Native Bee Home

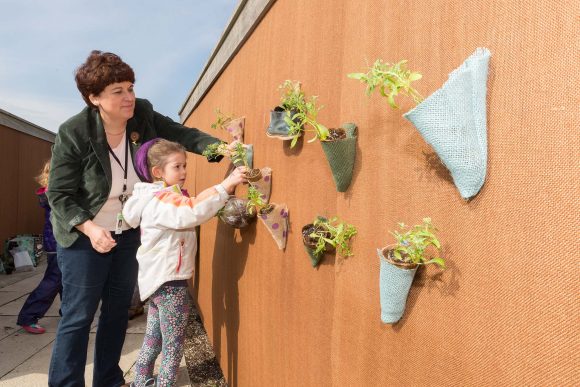
Pollinators are crucial to the health of the planet, helping with everything from the food we eat to the cycle of life. At the free Unearth Science festival this weekend, the Chicago Botanic Garden will celebrate pollinators with activities including a workshop on making native bee homes. We’ve got a sneak peek for you below.

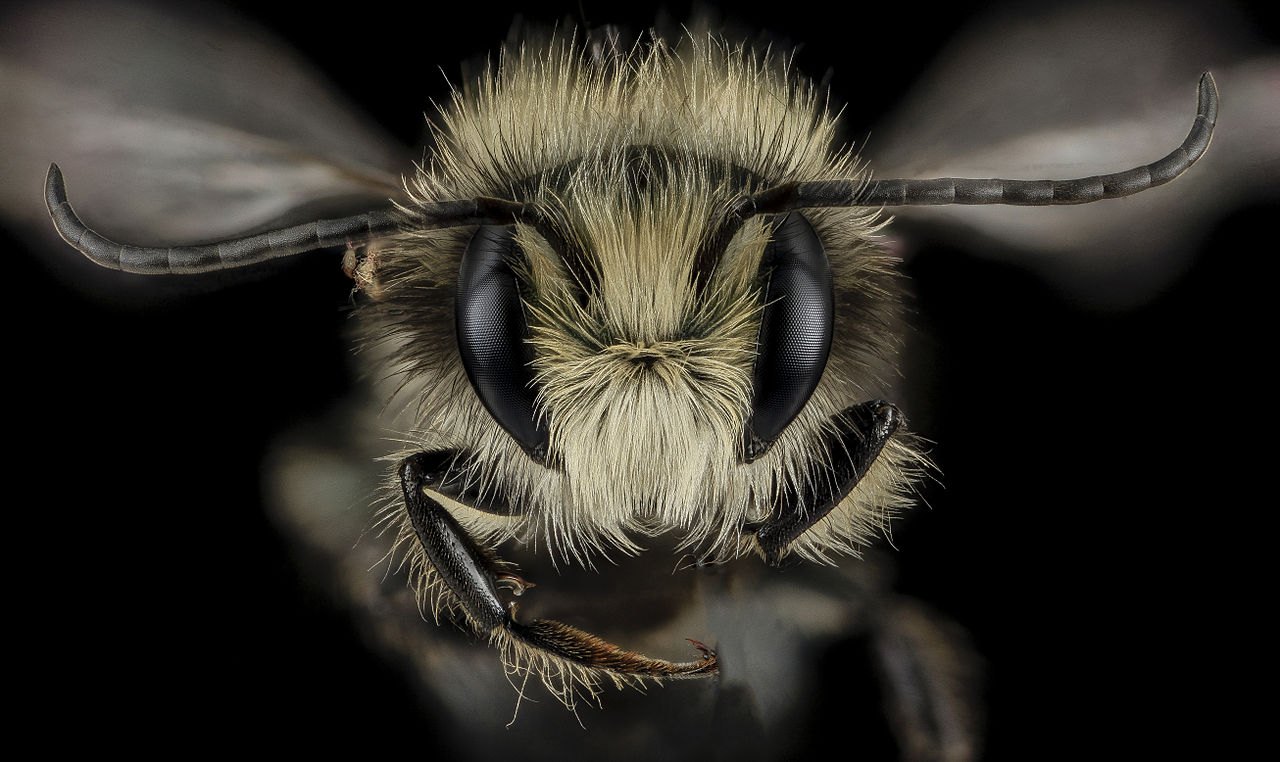
Did you know that native bees are better and more efficient pollinators than honeybees when it comes to fruit trees? Honeybees carry pollen in sacks on their hind legs, which doesn’t always make it to the stigma of the flowers they visit (anthers are where the pollen grains are picked up; stigma is where they are deposited for successful pollination). Mason bees (Osmia lignaria) carry pollen all over their bodies, which means that the pollen has a greater chance of reaching the stigma for proper pollination. One mason bee can pollinate as many flowers as 100 honeybees. 

PHOTO: Mason bee (Osmia lignaria)
Mason bee (Osmia lignaria)

Mason bees pollinate a wide variety of flowers, in addition to fruit trees, with a particular emphasis on the rose family. They are generalists though, so they pollinate many types of vegetables too. If you are interested in growing fruit trees and vegetables in your yard, you may want to attract and support more mason bees.

Are you avoiding bees because they sting? Another reason to invite mason bees into your yard is that they are nonaggressive. Honeybees and bumblebees may defend their nests if disturbed, so bee skeps—or domed hives—are usually located on larger plots of land, not in typical backyards. Male mason bees do not have stingers, and the females only sting if they are trapped, so there is little reason to fear them.

We asked horticulture program specialist Nancy Clifton for a preview of her workshop at the Unearth Science festival with Northwestern University graduate student Marie Faust. The workshop, Native Bee Homes, is a free event that requires registration. You’ll find instructions for how to make a mason bee home below. Bring your questions about pollinators and other science-related topics to the festival, where dozens of scientists and horticulturists will be happy to answer them.

How to Make a Mason Bee Home

DIY native bee house

Supplies you’ll need:

  • Clean, 15-ounce metal can
  • Phragmite reed tubes
    (6 inches long)
  • 2¼-inch-wide bark ribbon
  • Cling floral adhesive (or similar putty tape)
  • Duct tape
    (camouflage blends in well)
  • Scissors
  • Rubber bands

Instructions:

Step 1: placing the reeds. They will stick out of the can quite a bit, so you can extend the lip of the can with duct tape around the reed bundle.
Step 1

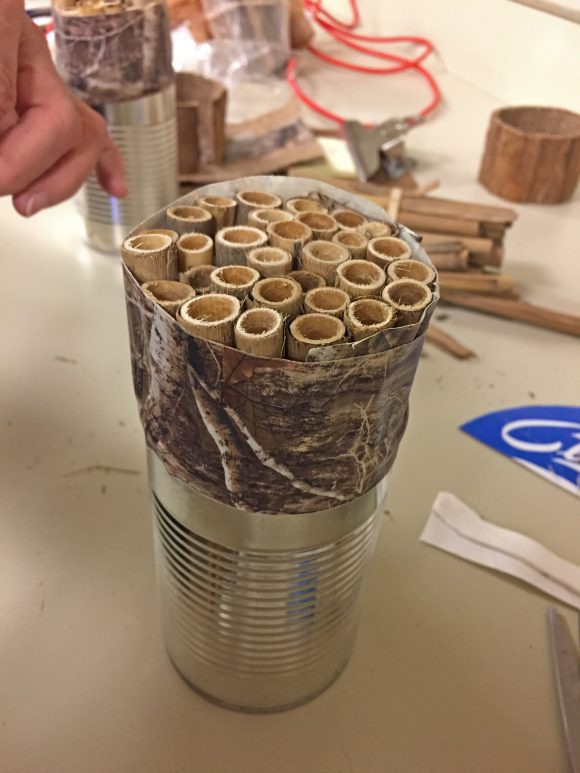
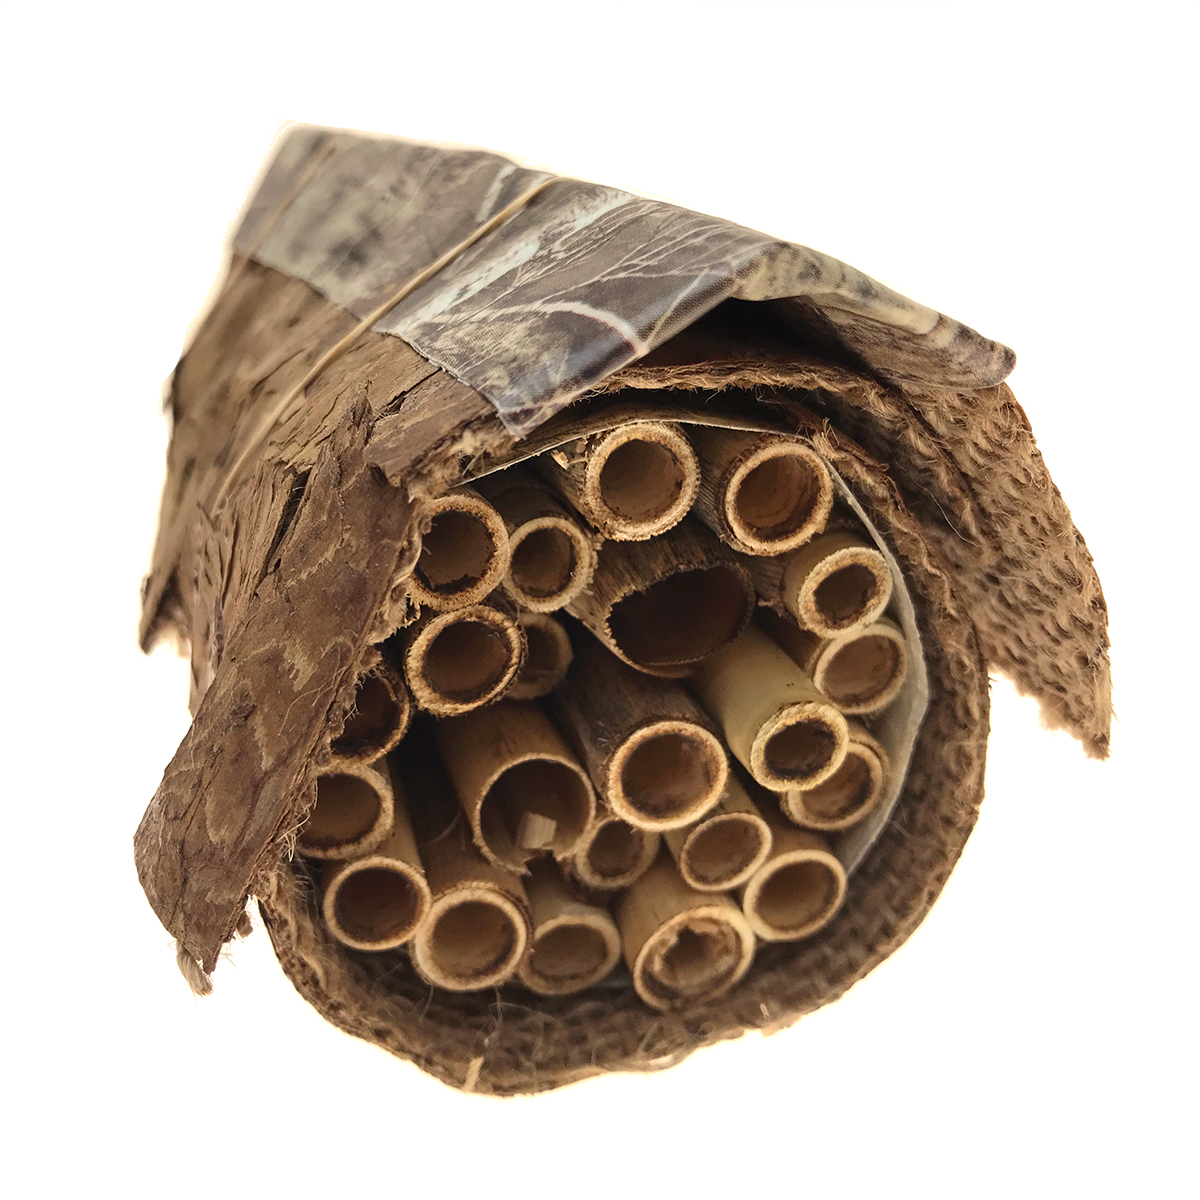
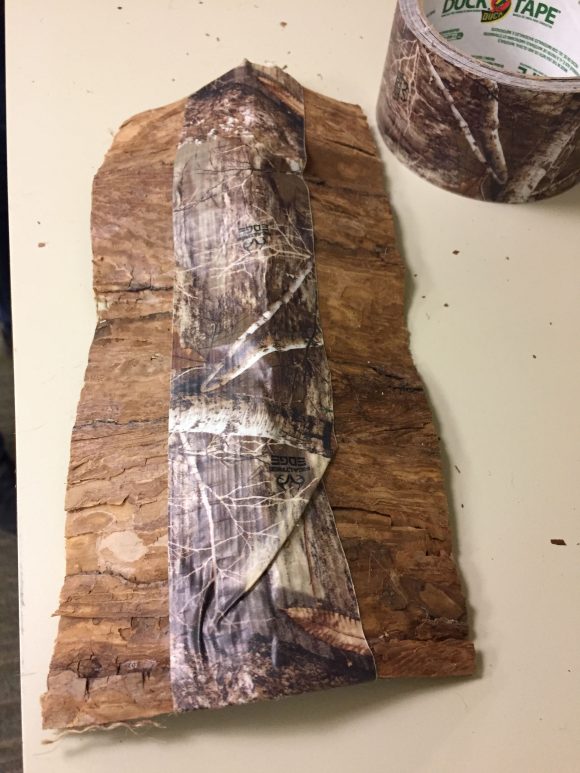
Fill the metal can with as many reeds as you can tightly pack inside. Ensure the open ends of the reeds are facing out. Use duct tape to encircle the parts of the reeds that are sticking out of the can.

Wrap 3 strips of bark ribbon around the can and extension.
Step 2

Cut three strips of bark ribbon to wrap around the can and the duct-taped extension. Use bits of Cling adhesive to adhere the bark ribbon to the can in three sections, so it is completely covered.

Make a roof with bark ribbon and duct tape.
Step 3

Cut two 8-inch-long pieces of bark ribbon and duct tape them together along the long edge. Place this over the top of your can as a roof. You want to create a small gable that overlaps ½ inch over the end of the tube to keep the reeds dry when it rains.

Place the bee house against a flat surface in a protected area, with a southwest exposure.
Step 4

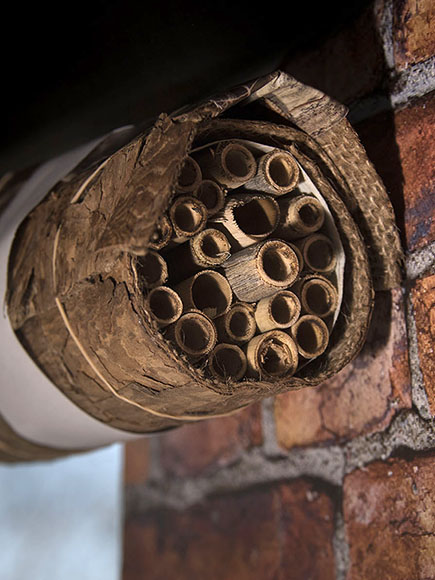
Use bits of Cling to adhere the roof to the house. If needed, further secure the roof with two rubber bands. Place the completed bee house fairly in a protected area, against a flat surface with a southwest exposure. Placing the house fairly high up ensures that bees will not mingle with people when entering and exiting their new home.

Leave your house out all summer and you should find mason bees filling the tubes with larvae. For information about storing and incubating mason bees for next year, visit seedsavers.org.

Sign up for the free workshop on making native bee homes with horticultural specialist Nancy Clifton and Northwestern University graduate student Marie Faust at the Unearth Science festival, April 20–22, 2018. You’ll make your own native bee home just as described above.


©2018 Chicago Botanic Garden and my.chicagobotanic.org

The Power of Plants: Botanical Weightlifters

There are things I look forward to seeing every season.

In spring, I watch for “mighty plants” that emerge from the ground with enough force to heave the soil above ground. These botanical weightlifters—the bulbs, grasses, and other emergent plants—pushing up soil that was compressed by a blanket of snow never fail to impress me. I am in awe of the strength of plants. 

PHOTO: Daffodil leaves have pushed through the mulch, lifting it off the ground.
Daffodil leaves erupted from the ground in March and lifted the mulch in the beds around the Regenstein Learning Campus.

Seeing bulbs coming up all around me inspires lots of questions. I want to understand how this is possible and I want to test their strength. So I spent a few weeks playing around with this phenomenon in the Learning Center’s Boeing Nature Laboratory. 

To begin, I wanted to demonstrate that seeds will lift soil in a pot. I soaked bunch of wheat seeds overnight and planted them in a pot. I covered them with a generous amount of potting soil (about a 1/2-inch layer) and I tamped the soil down gently so that it would be compressed—like the topsoil might be after a winter of snow cover. Three days later, I had results! I sprayed the soil disk to give it a little adhesion, so I could see how long it would hold together as the grass lifted it up.

PHOTO: A few days after planting the soaked wheat seeds, they are already sprouting and pushing up the soil.
Day 3 after planting the seeds: They are pushing up the compressed layer of soil.
PHOTO: The wheat leaves have grown to an inch over the pot and are holding up a disk of soil.
Day 4: The leaves have pushed the soil up a little more.
PHOTO: The wheat is 2-3 inches above the pot and still suspending the disk of soil.
Day 5: The soil is light and there are a lot of wheat plants, so they continue to lift the soil.
PHOTO: The grass is now 4-5 inches tall and the disk of soil is on top, but leaning to the side, about to fall off.
Day 6: “Get off me, Soil! – Umph!”
PHOTO: The disk of soil that was lifted by the grass has fallen to the side of the pot.
Day 7: Phew!

That was so much fun, I tried the same thing with a bunch of bean seeds.

PHOTO: the top of the soil is rising about a half inch out of the pot.
Bean sprouts pushing…
PHOTO: the sprouting beans can be seen pushing up the top of the soil, now 1-2 inches over the top of the pot.
…pushing…
PHOTO: a dozen bean plants are growing out of the pot and pushing the top soil disk to the side.
…and bursting from inside the pot.

This demonstration was pretty easy and impressive. It is a simple activity to illustrate how plants and other living things change their environment to suit their needs (which is a disciplinary core idea in Next Generation Science Standards for kindergarten). I recommend doing it in the classroom or at home, just for fun.

This is just the beginning. I will be sharing the results in a future blog post. But before I do, I would like to make a few points about the nature of science and how scientists work. 

  1. Science is a collection of established facts and ideas about the world, gathered over hundreds of years. It is also the process by which these facts are learned. Science is both “knowing” and “doing.”
  2. Discoveries start when you watch nature and ask questions, as I did in watching spring bulbs come up. Before beginning an experiment, scientists play. They mess around with materials and concoct crazy ideas. They are constantly asking, “I wonder what will happen if I do ___ ?” That is when discoveries actually happen.
  3. Scientists do formal experiments with purpose, hypothesis, procedures, results, and conclusions after they think they have made a discovery. They use the experiment to test their discovery and provide convincing evidence to support it. In some cases, the experiment disproves a fact or idea, which is a different kind of new understanding about the world. 

I have to agree with Boyce Tankersley, the Garden’s director of Living Plant Documentation, who recently wrote “The SciFi Rant.” Those of us who lean toward botany instead of horticulture are more interested in growing plants to yield ideas rather than meals. In my continuing investigation, I have two goals, and neither is to produce anything to eat.

First, I want to determine the strength of sprouting seeds and see how far I can push them. For example, how many bean sprouts will it take to lift a coconut? I want to find a standard way to measure seed strength.

Second, I want to establish a reliable method for experimenting with seed strength so teachers and students can replicate the procedure, modify it as needed, and use it for their own investigations without going through the awkward phase of figuring out the best way to do this.

PHOTO: a 6 inch square pot is topped with a round plastic lid and a coconut.
Will the mighty beans sprouting under this menacing coconut have the power to lift it off the top edge of a pot? Stay tuned…

I invite you on my journey.
(To be continued.)


©2018 Chicago Botanic Garden and my.chicagobotanic.org

Growing Plants in Martian Soil

The Martian: Many of us watched and loved the movie. Some of us read the book. A few of us got inspired to use the story to teach plant science to students.

PHOTO: Book cover art for The Martian: a novel
If you are a science enthusiast, I highly recommend reading the book.

The Martian by Andy Weir tells the fictional story of NASA astronaut and botanist Mark Watney, who becomes stranded alone on Mars and has to figure out how stay alive until the next NASA mission returns to rescue him. He plants six potatoes and successfully propagates a crop of potatoes in Martian dirt fertilized with human poop.

The story got me wondering if we could replicate Martian soil with local ingredients and use it for plant experiments. So I contacted the Garden’s soil scientist, Louise Egerton-Warburton, and asked her if this was possible. She responded with a recipe:

  • Mix two parts crushed volcano rock, two parts basalt dust, one part sand, plus 0.2 parts feldspar
  • Autoclave (heat to very high temperature) three times to kill microbes
  • Experiment away!

You know you work in a great place when you can ask a colleague for directions for making Martian soil and you get an immediate, enthusiastic response with suggestions for how to use it. I acquired the materials and cooked up a batch.

PHOTO: a box of basalt, a cup of sand, a bag of feldspar, and a glass beaker containing the Martian soil mixture
I keep the ingredients for Martian soil in my office, in case Mark Watney drops by. Because you just never know. Matt Damon and Andy Weir are also welcome, but I hear they have both moved on to other projects.

One important thing I must mention: technically speaking, this mixture is not truly “soil.” Soil is the upper layer of material on the Earth that serves as an ideal medium for growing plants. It contains inorganic minerals from weathered and broken rocks combined with organic material from the decomposed remains of dead plants and animals. Real soil hosts microscopic bacteria and fungus that facilitate a cycling of nutrients through the ecosystem and convert minerals to a form plants can absorb and use. Soil also supports many little macroscopic critters, like worms and mites, that increase the porosity and affect other properties of the mixture.

The substance we would find on the surface of Mars is called regolith, which is mineral particles that result from weathering of rocks. Since my mixture is an approximation of what might be found on Mars, but made from Earth-sourced ingredients, it should actually be called simulated Martian regolith. But that’s a mouthful, so from here on I’m going to call it Martian soil and ask you, dear readers, to accept the inaccuracy for the sake of simplicity. OK?

I took my Martian soil and set out to answer my first question: what happens if we try to plant seeds in this stuff? Put another way, is it possible to grow plants in Martian soil without adding anything? To answer this question, I took a polystyrene egg carton and planted marjoram seeds (because I had some laying around) in my Martian soil and in some Earth potting soil for comparison.

PHOTO: an 18 egg egg carton that has the 9 cells on the left planted with Martian soil and the nine cells on the right planted in earth potting soil; marjoram has sprouted in all 18 cells.
It was overcast outside when I took this picture in the greenhouse—you’ll have to look closely to see that the marjoram seeds sprouted in both Martian and Earth soils. So far, so good.

The Martian soil is completely different from the potting soil in appearance and texture, and it responds differently when watered. Shortly after the seeds germinated in all of the cells, the Mars side went south. It didn’t hold water very well; it dried out and became hard, almost like concrete. It was no surprise that all of the seedlings on the Mars side died soon after germination. Plants on the Earth side continued to grow and thrive.

PHOTO: The same 18 cell egg carton now has nine Martian soil cells with no plants and nine cells with healthy marjoram growing in Earth potting soil.
It is clear from this test that the Martian soil needs to be amended to grow plants. We were told this in The Martian, but now I know it from personal experience. We can use our observations to understand why Martian soil is not a good medium for plants. That’s real science learning!

In the book, Watney used a bucket of Earth soil and human waste to amend the Martian soil for his potato crop. The book and the movie differ on this part—likely because the process required to make Martian soil suitable for growing potatoes was long and tedious. It wouldn’t make for riveting cinema. Instead of cultivating the soil over time, movie-Watney planted a spoonful of rehydrated human poop next to each piece of potato. 

While movie-Watney’s actions remind us of stories about the Pilgrims teaching the indigenous people to place a piece of fish next to each kernel of corn to improve the crop yield, there are some problems with applying this method to our Martian soil. The Martian soil would still lack sufficient organic materials and therefore not be able to hold water (as I demonstrated with my marjoram seed experiment). There would be an insufficient population of microbes to break down the human waste. Furthermore, the fecal matter might be so concentrated in nutrients that it could actually be toxic to the potato plants. I don’t believe it would actually work.

This compelled me to do some myth busting for my next experiment: since “humanure” would be unsafe—and gross!—I used worm poop, or vemicompost, which I have in plentiful supply from worm bins in our Learning Center nature laboratory. Also, I discovered that you can order “Martian Regolith Simulant” from a company online (who knew?). Although it’s expensive, it saved me the effort of crushing rocks, so I’m using it from now on.

This time I planted russet potato pieces and some sweet potatoes that had sprouted in my pantry at home (oops!) in azalea pots. I set up three conditions: Martian soil, Martian soil plus vermicompost, and Earth potting soil for comparison. 


PHOTO: Three 10-inch pots with potatoes planted in each of the soil conditions: Martian soil, potting soil, and mixture of Martian soil with vermicompost
In spite of my doubts, I’m actually hoping that the potatoes in Martian soil plus vermicompost out-perform the potatoes in plain Martian soil, because bringing worms on a space voyage could prove to be a good solution for future colonists on Mars! But we’ll have to wait and see.

Underlying these experiments (and few other I have tried) is a basic investigation of what plants need to survive. By testing to find the right combination of Martian soil and amendments, and limiting solutions to those that could be transported by a spaceship to another planet, we are using engineering practices because we are trying to solve a problem. This is real-world science and engineering that students could do in the classroom. 

PHOTO: Kathy J. sitting in her office wearing a space suit.
Here I am, working on my next astro-botany experiment, for myself, for teachers, and for science!

Besides satisfying my personal curiosity, these experiments are paving the way for some science lessons we are writing for teachers and students.

If you are a teacher interested in learning more about how to teach NGSS-aligned life science lessons using Martian soil, sign up for our workshop, STEM: Growing Plants in Martian Soil on Saturday, December 2, 2017. And watch for other Martian soil training opportunities in the future. 

We may never need to grow crops in Martian soil. But as we investigate the challenges of colonizing another planet, we can learn more about what plants need to thrive and also develop a genuine appreciation for how amazing our Earth soil is.


©2017 Chicago Botanic Garden and my.chicagobotanic.org

DIY Living Plant Wall

This year, the Living Wall in the Grunsfeld Children’s Growing Garden needed to be replanted. The metal cells that hold the plants to the wall were removed and taken to the Garden’s greenhouse nursery to grow new plants before placement outside for the summer.

This left us with four empty walls at the entrance to the Growing Garden. So we decided to get creative. We made an “alternative” living wall. 

PHOTO: sixteen cone-shaped pockets containing small plants are displayed on the brown walls.
The south-facing wall is now covered with burlap pocket planters containing alyssum, lettuce seedings, grass, and coriander.

Our carpenters covered foam boards with brown burlap and installed these panels on the living wall frame where the plant cells had been removed. Students from the Garden’s Nature Preschool planted seeds and transplanted seedlings into small pots. We placed the plants into colored burlap planters and pinned them to the foam walls, and voila! We have a vertical garden again.

You can do this at home. Making planting pockets is simple and fun.

  1. Plant seeds or transplant small plants and let them sprout. We used biodegradable Fertilpots, but you could also start seeds in egg cartons, newspaper pots, or plastic pots.

2. Cut the burlap into squares that are twice as long and wide as the pots.

PHOTO: The picture shows the size of the burlap square next to the pot that was used.
Our Fertilpots were 4″ tall, so I cut the fabric roughly into 8″-x-8″ squares. This does not need to be exact.

3. Fold the square in half diagonally and sew a seam along the side. You can use a heavy duty needle with a sewing machine or do this by hand with a darning needle. It might be possible to use a hot glue gun to make the seam, but I did not try this.

PHOTO: This shows what the burlap looks like after it is sewed in half.
I used a sewing machine because I made more than 100 of these. They could be sewn by hand.

4. Turn the triangle inside out to form the pocket. Slip the planted pot into the pocket and get ready to hang it on a wall.

PHOTO: This shows the pocket with a pot inside.
The seam side of the pocket is the back, and the pointed front top can either be folded down or cut off.

5. To hang on the wall, pinch the extra fabric so the burlap fits snugly around the pot. Fold down the point in front or cut it off—your choice. Push a long pin through the pot and the fabric and pin the pocket to the wall. (I had pins used by our horticulturists to propagate cuttings; you could use T-pins or other pins with large heads.) You could also lace a ribbon around the top of the pocket and cinch the fabric, then hang the planter by the ribbon.

PHOTO: The picture shows a hand holding the fabric to make the pocket fit around the pot.
Gathering the extra fabric will help hold the pot better, and it will look neater on the wall.

Students in our Nature Preschool enjoyed helping to grow the plants and pin them to the Living Wall. Each child wanted to place his or her planter next to a friend’s planter so they could grow close together.

wall KJ with girl

Just for fun, we experimented with some other kinds of planters, including plastic bottles and shoes.

PHOTO: a 2 liter plastic bottle turned sideways and filled with soil and oregano plants is pinned to the wall.
If you want to try growing a plant in a 2-liter bottle, cut a rectangular opening in the side of the bottle, poke six to eight holes on the opposite side for drainage, fill with soil, plant, and hang it up.

The preschoolers are fascinated by the soda bottle planter. They like to look in the round opening on the side. The toddler shoe makes everyone smile. We may add more surprising planters over the next few weeks, just to keep it interesting.

PHOTO: a toddler shoe with alyssum growing in it is laced with twine and hanging on the wall,
An old shoe can become a whimsical planter that sparks imagination.

If you decide to try something like this at home, be advised that the small pots need to be watered frequently (ours need watering daily) because they tend to dry out faster than larger containers. It’s a good project for young children because they will get to do a lot of watering without harming the plants.

Our “alternative living wall” is only temporary. Stop by the Grunsfeld Children’s Growing Garden between now and June 12 to see how it’s growing. After that, the real living wall will be installed for the rest of the year.


©2017 Chicago Botanic Garden and my.chicagobotanic.org

Play a game to learn about water conservation

A few years ago, my Daisy and Brownie Girl Scout troop was working on their Household Elf badge. We needed a fun way to teach about conserving water at home—not a lecture—because let’s face it, after a full day of school, 6- to 9-year-old girls would will not sit still and listen to another lesson. I decided to make a board game for them. The main message of this game was a really important one: in Chicago, all of our water for drinking, cleaning, and recreation comes from Lake Michigan. If we waste water, then we waste the lake. It is that simple. 

PHOTO: Board, cups, beads, and game tokens are arranged for the water conservation game.
The Water Conservation Game is set up and ready to play.

The girls responded very well to the activity. I am sharing it on the Garden’s blog for others to use, because at the Chicago Botanic Garden, we would also like people to understand the importance of conserving water from our lakes and other sources. Obviously this game was created for Chicago residents, but the same principles apply everywhere, in every community. The game could be adapted for another location by replacing the image of the Lake Michigan with an image to represent the local water source. (For most cities, that is groundwater.)

Download the game board

Click to download the water conservation game.
Click the image above to download your copy of the Water Conservation Game.

I discovered, to my surprise, that many of my Brownie Scouts were not familiar with board games. Most millennials have lots of experience pushing virtual buttons on a screen and competing against friends in cyberspace, but tossing a die and moving a token around a board with actual friends? Not so much. Anyone replicating this activity may find they need to explain how a game like this works. Also, it was also important to require that the players actually read the board squares in order to understand why they are taking two or three or ten beads as they move around the board. Having a discussion at the end of the game proved essential to getting the message across. 

After playing the game with my Scouts, I shared it with a group of middle school girls who were studying conservation in an after-school program. Believe it or not, it worked well with the older students, too. In fact, they loved it—mostly because they got to make a bracelet. But hey, whatever works, right?! 

To use this activity with your group, make one complete game set for every three to five students.

A game set includes:

  • 1 game board, printed on 11″ x 17″ paper
  • 1 six-sided die
  • Place marker tokens; one per person (these can be any small object, or borrow them from another board game set)
  • About 100 pony beads (I like to use transparent blue plastic beads because they look like water)
  • 1 small cup per person, plus one cup to serve as the bead reservoir
  • Elastic thread cut into 8-inch pieces; one per person (this is to make bracelets)

Game rules

  1. The object of this game is to move around the board and be the person who uses the least water. Remind players that every time we use water, we take a little more out out of Lake Michigan.
  2. Put about 100 beads in a cup and place it in the middle of the lake. The beads represent water from Lake Michigan. Players will keep track of how much water they use by collecting the beads in their cups as they move around the board.
  3. Players place their markers on “Start.” Each player rolls the die; the player with the highest roll goes first. If there is a tie, roll again to break the tie. The player sitting on the left of the first person goes second and players take turns going around the board in a clockwise direction. (I had to explain this to the girls in my troop.)
  4. The first player rolls the die and moves that number of spaces on the board in the direction of the arrows. The player lands on a square, reads what it says and follows the directions, collecting the beads from the reservoir and putting them into her own cup. Each player takes a turn and until everyone has moved around the board once and ended at the lake. It is not necessary to roll a perfect number to reach the end.
  5. When everyone is swimming in the lake at the end, tally up the number of beads each player has collected. The player with the fewest beads wins, because she used less water than the other players. 
  6. Return beads to the reservoir and play again once or twice to give others a chance to win. 

What is this game telling us? 

Ask the players to think about water use. The questions below can stimulate discussion. This can be brief, but it is important to reinforce the message that all of our water comes from Lake Michigan and we need to be responsible with water use.

  • What activities in the game used a lot of water and made someone lose the game?
  • What are some ways people waste water?
  • What practices use less water? 
  • What would happen if everyone was careless and used all the water from the lake? 
  • What can you do at home to reduce the amount of water you take out of Lake Michigan? 


PHOTO: Package of 620 pony beads and a bracelet made from the beads
Transparent blue pony beads resemble water and make a nice bracelet.

Make a water bead bracelet

For a fun wrap up, each player can make a bracelet using the beads and elastic string. Wear the bracelet to remember to try and use less water at home. The bracelet makes a nice reward for learning outside the classroom.

One last important note

When teaching young children about water conservation, avoid the temptation to bring up stories of environmental problems that are beyond their ability to solve right now in their lives, like unpleasant images of industrial pollution, drought, and famine. Child development experts will tell you that when we burden children with messages about how they need to help save the planet, we actually do more harm than good by making them feel overwhelmed, hopeless, and less inclined to adapt sustainable habits. Focus on things they can do, like turning off the water when they brush their teeth. It is enough that they learn not to use more water than they need at home so that they can share it with all of the creatures they love. This is a message we can respond to positively at any age.


©2016 Chicago Botanic Garden and my.chicagobotanic.org