Students Learn that Science Can Be Beautiful

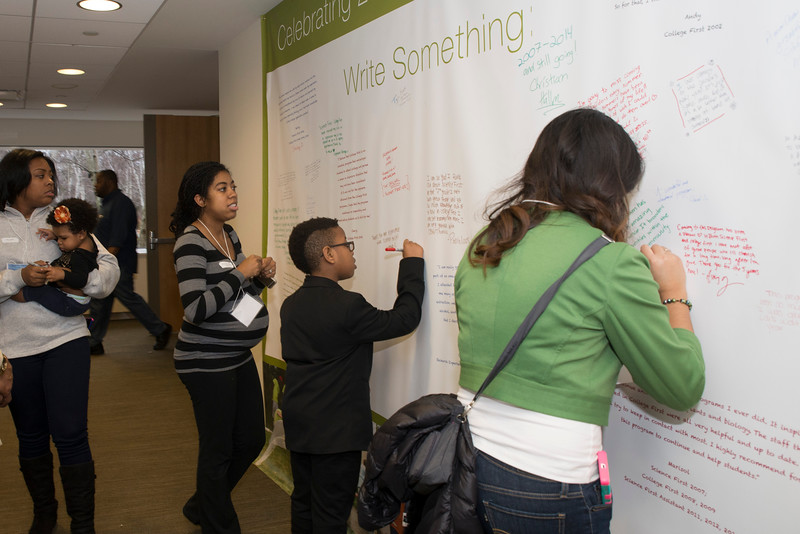
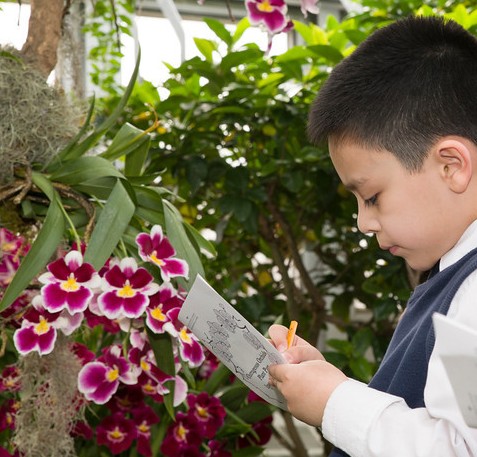
The Garden has a bright and cheery answer for overcoming classroom winter doldrums: take a field trip to see the Orchid Show

PHOTO: Students observe how orchids are adapted to the wet environment -- they grow aerial roots that can absorb water from the humid air.
Students observe how orchids are adapted to the wet environment—they grow aerial roots that can absorb water from the humid air.

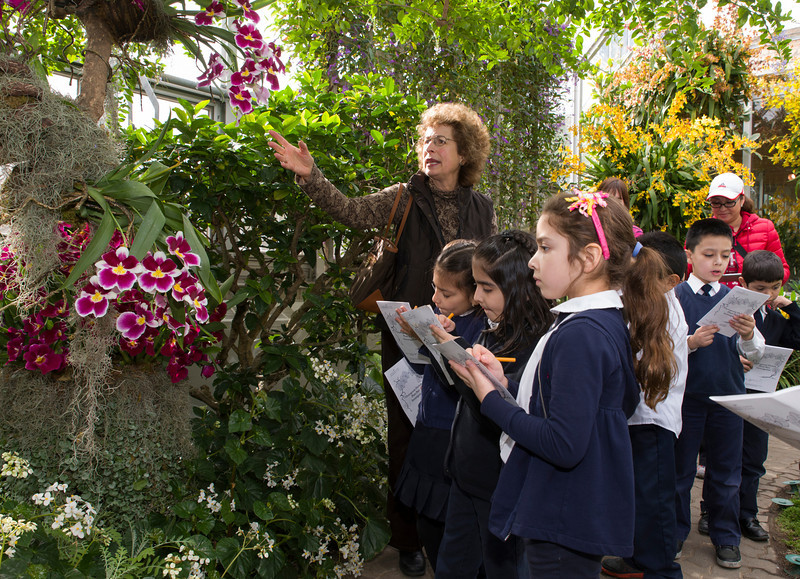
At a time when schools are tightening budgets and limiting field trips, you might think that an Outrageous Orchids experience is a frivolous excursion—but, in fact, this is a luxurious way to learn life science principles. Our programs are grounded in fundamental science concepts outlined in the Next Generation Science Standards. From Valentine’s Day to St. Patrick’s Day, students get meaningful science lessons as they enjoy the sensational display of colors and aromas in our Greenhouses. 

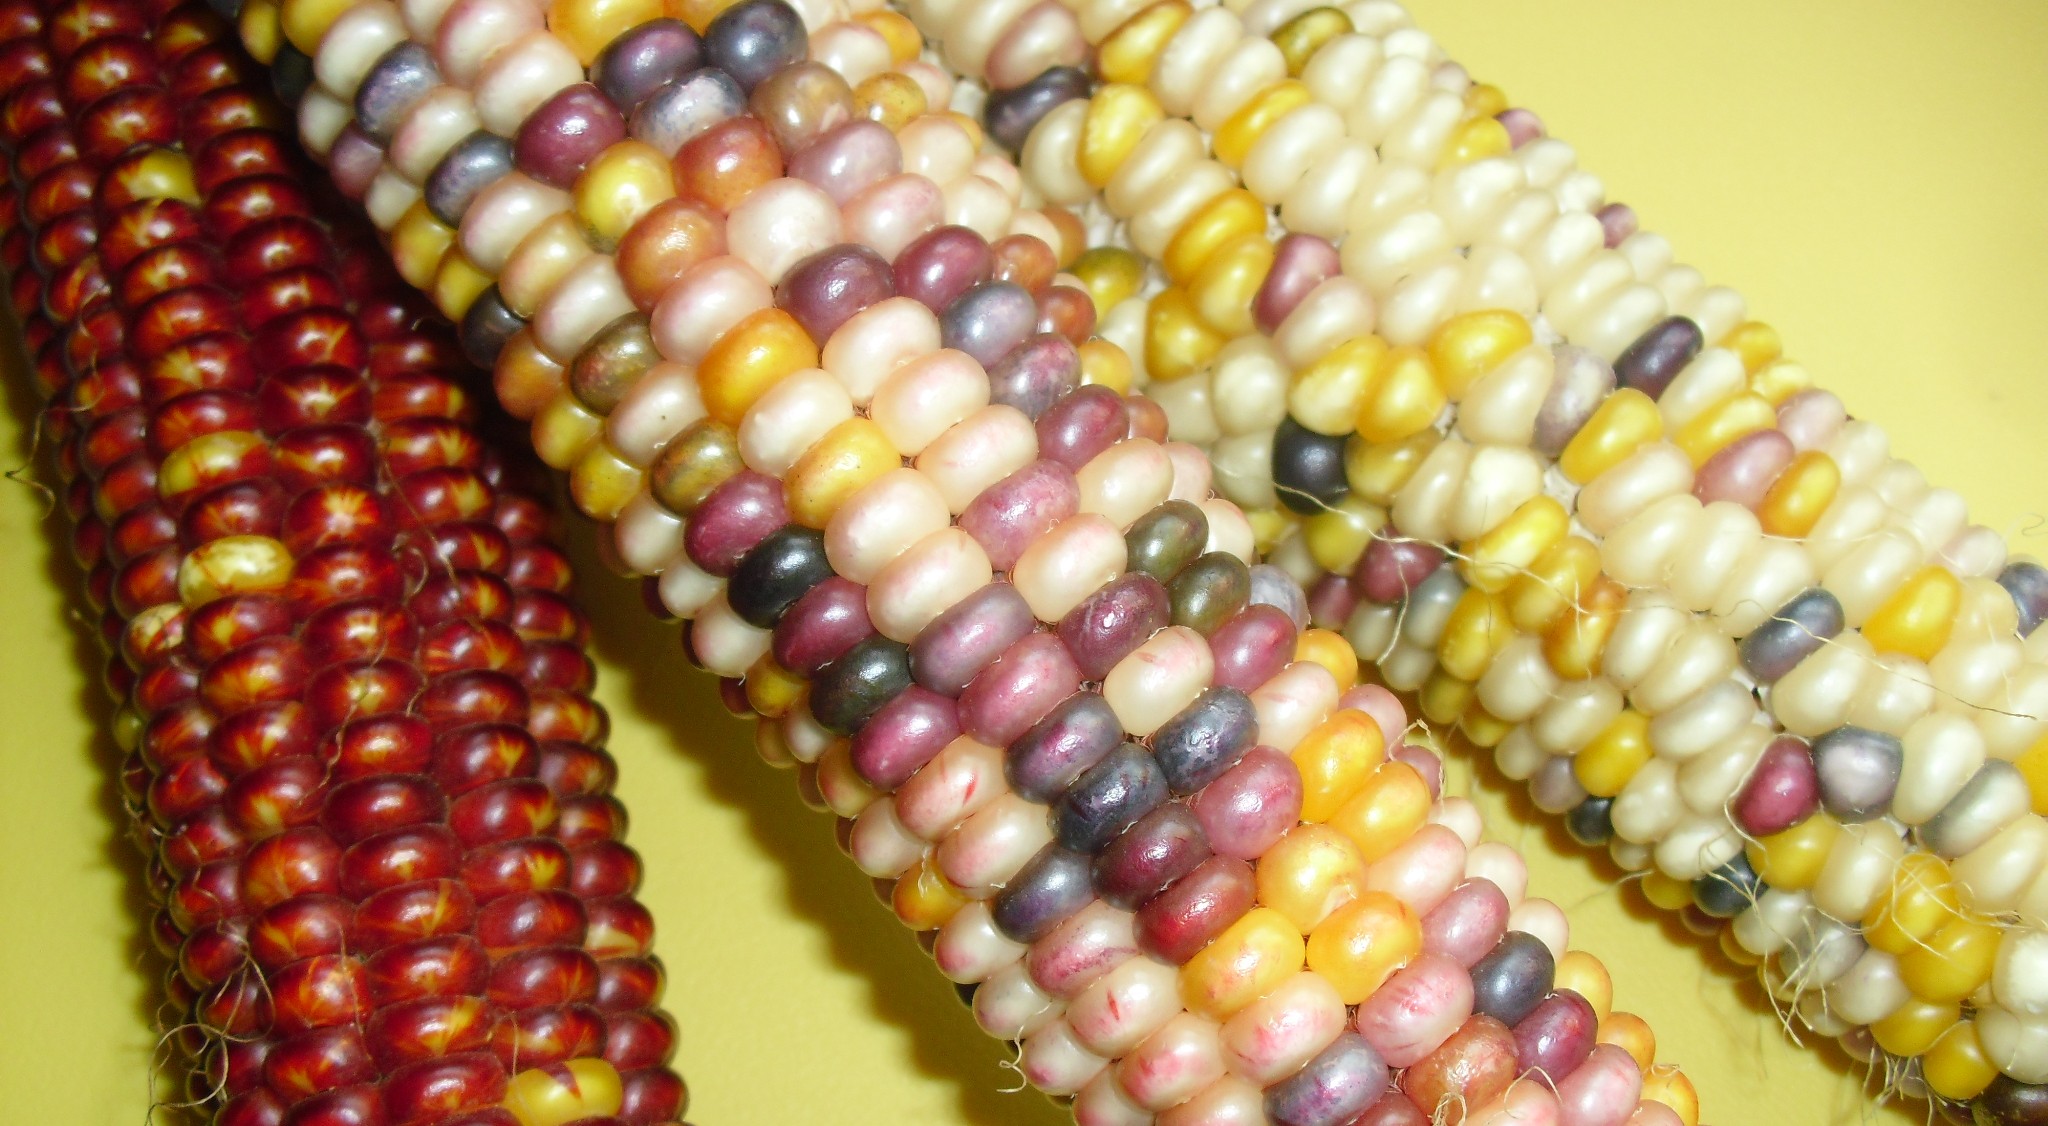
Field trips are tailored to suit different grade levels. Younger students study the variety of color and shapes found in the exhibition to identify patterns. Early elementary level students examine the structures of orchids to understand their functions. Upper elementary students recognize how tropical orchids have adaptations for survival in a rainforest. These core ideas about orchids apply to all plants and are essential for understanding ecosystems. There isn’t a more beautiful way to study plant science anywhere else in the Chicago region.

PHOTO: It is easy for students to see how this flashy orchid attracts pollinators as well as people.
It is easy for students to see how this flashy orchid attracts pollinators as well as people.

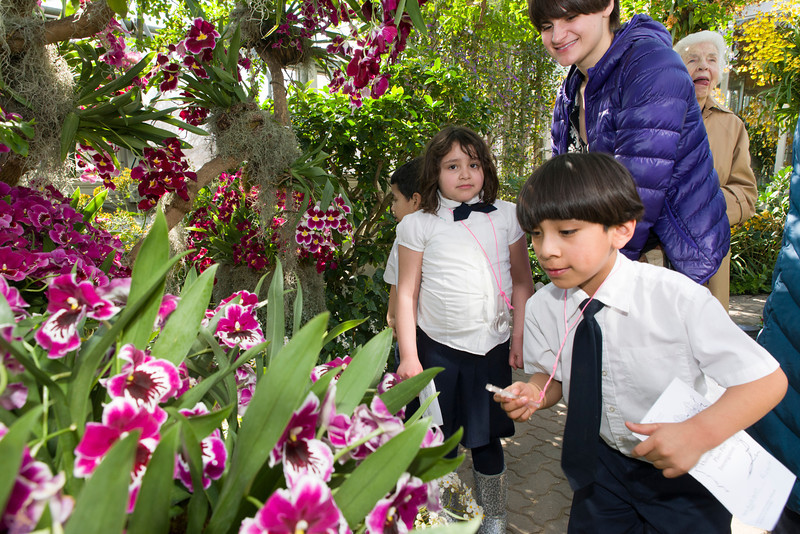
As if being surrounded by gorgeous flowers in the dead of winter weren’t enough to engage a person’s brain, each student also gets to transplant and take a tropical plant to continue the learning after the visit. 

The Baggie Terrarium is a mini-ecosystem that reminds students of the water cycle and enables them to observe plant growth. 

Make a Baggie Terrarium
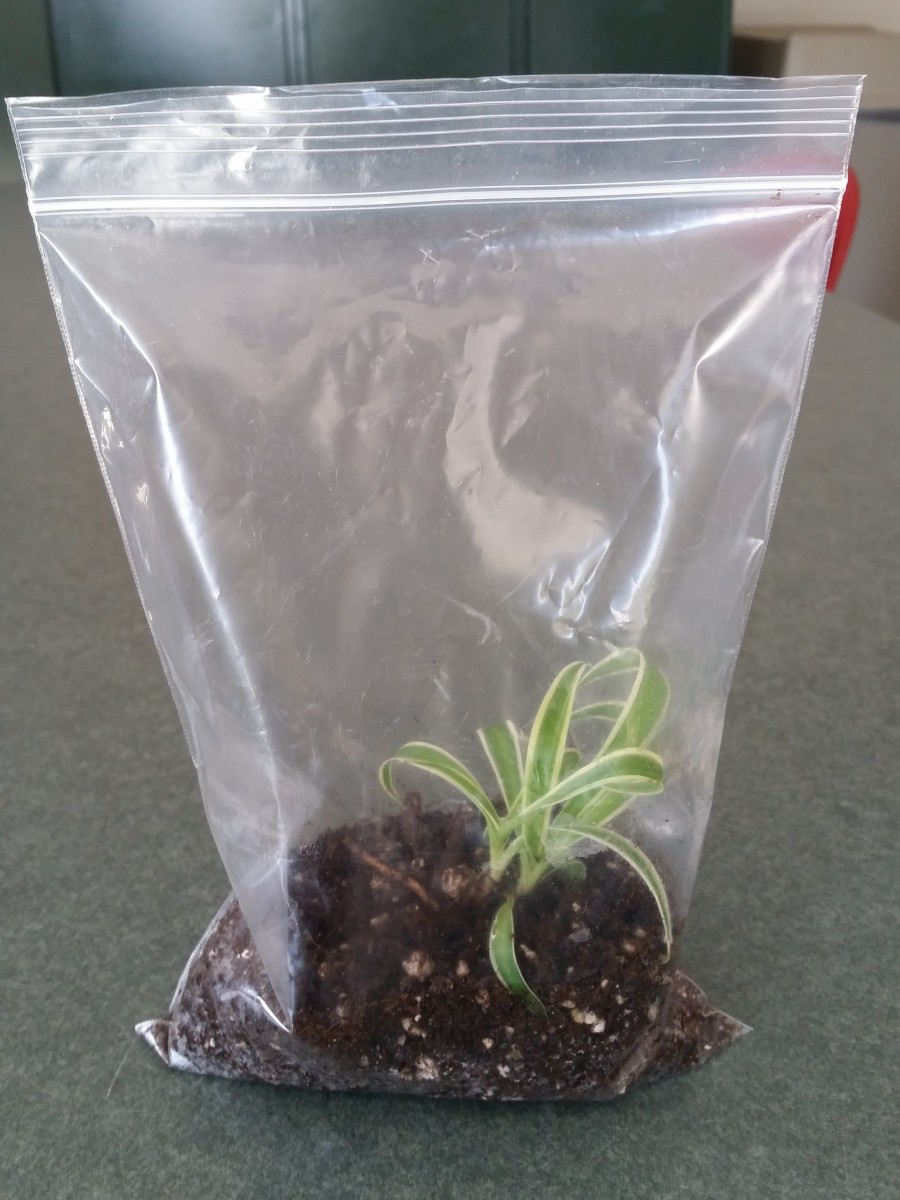
PHOTO: Baggie terrarium.
We call this a “baggie terrarium.”

Supplies:

  • 1 zip-top bag (quart-size or larger)
  • Potting soil, moistened
  • A small plant or plant cutting (during Outrageous Orchids classes, we let students take a spider plant “pup” from a very large spider plant)
  1. Pour soil into the bag to fill about 2-3 inches deep. Use a finger to create a hole in the soil for the plant.
  2. Bury the roots of the plant in the hole and gently tap the soil around the base of the plant. If you are planting a stem cutting, place the stem in the soil and tamp around the base. If you have a larger bag, you can add more than one plant. Three different plants in a gallon size bag can make an attractive terrarium.
  3. Seal the bag, leaving about a 1-inch opening. Blow into the bag to inflate it and quickly seal the last inch tight so the air doesn’t all escape. The carbon dioxide in your breath is good for the plant, and will give the bag enough substance to stand up.
  4. Place the terrarium in a bright location, but not in direct sunlight. Remember that most tropical plants grow under the canopy of taller trees and do not need full sun. In fact, too much direct sun makes their leaves fade!
  5. Watch for tiny water droplets forming on the sides of the bag. These will gradually roll down the sides of the bag and re-water the soil. As long as the bag is completely sealed, it will stay moist and you will never have to open the bag or add more water. But if it dries out, you will need to water the plants.

You can leave your terrarium alone for a long time and not do anything but watch the plants grow. Eventually, they will outgrow the bag. Then you can transplant them to a pot if you like, or take cuttings and start another baggie terrarium.

Like all of our programs, Orchid Show field trips inspire young people to learn more about plants! Visit our website at chicagobotanic.org/fieldtrips for more information about these programs. 


©2015 Chicago Botanic Garden and my.chicagobotanic.org

20 Years of College First at the Garden

Twenty years ago, I was running school field trip programs at the Chicago Botanic Garden when then-education manager Alan Rossman received a grant to start a brand new program called “College First.” This program would use the Garden site and staff to introduce 12 students from three Chicago Public Schools to careers in the green industry. He hired retired teacher Gwen Yvonne Greenwood to coordinate the program and enlist staff from all over the Garden to mentor and teach these young people.

PHOTO: Six high school students are posing in the Fruit and Vegetable Garden, wearing dark green uniform College First T-shirts
These six students from 2003 are all college grads with jobs now.

At the time, there weren’t many programs like College First anywhere in the country. College First was even unique among the other museum teen program start-ups, in that our goals were not merely to make the institution more relevant to this age group, but also to provide a springboard to meaningful careers in science-related fields. Who knew that 20 years later, with some changes and improvements along the way, this small program would evolve and grow into the Science Career Continuum we have today?

We now bring 60 students (like Mely Guzman, whom I blogged about earlier this year) from all over Chicago to the Garden every summer and expose them to environmental and conservation sciences, with the hope that a few of them will be inspired to pursue a career in this field, and maybe go on to do something important for our planet. To date, College First has served more than 500 students from 116 schools. The majority of them have attended college and have entered—or are entering—productive careers. Many of them have pursued science-related careers as a direct result of their experiences at the Garden.

PHOTO: At the reception of the College First 20-year reunion.
Program manager, Amaris Alanis Ribeiro (standing on the right) reminds a group of former students to visit Wonderland Express after they are finished eating.

We celebrated the success of College First on December 14, with a reunion party at the Garden, including a visit to Wonderland Express, for all past students, instructors, mentors, donors, and their families. More than 200 people attended the event. In between the many reunion hugs, congratulations, and words of encouragement for current students, we gave all program participants an opportunity to reflect on their experiences by telling us their stories on video, writing comments on a talk-back wall, and tweeting about the event while a live Twitter feed displayed the comments.

PHOTO: College First participants shared their thoughts and feelings on a mural outside the auditorium.
College First participants shared their thoughts and feelings on the comment wall outside the auditorium.

A former program coordinator, William Moss, is now a gardening guru and media celebrity. (Even our instructors have moved on to great things in their careers!) William presided as master of ceremonies during a presentation to recognize all the people who have made this program possible. We honored staff mentors, Louise Egerton-Warburton, Jeremie Fant, and Tom Soulsby as outstanding mentors. The College First 20th Anniversary event was made possible by the generous support of Joel Friedman of the Alvin H. Baum Family Fund. Awards were presented to Annette Kleinman and family of the Sheridan Foundation, the W.P. & H.B. White Foundation, and the Lloyd A. Fry Foundation for their generous financial support over the years.

PHOTO: William Moss at the podium.
William Moss—television celebrity, author, gardener, and all-around good guy—helped us to honor all the people who have made this program successful.

For me, this was a very rewarding event. It was such a pleasure to see so many past and present students coming together and sharing in the success of this program, especially those who are now adults with spouses and children of their own. This group represents our scientific future.

PHOTO: Group photo of past College First participants.
A total of 57 past and present College First participants attended the celebration and posed for a picture. Wow!

I wish each and every one of these smart and talented young people a happy new year and all the best in their bright futures!


©2014 Chicago Botanic Garden and my.chicagobotanic.org

Wearable Indian Corn

I always look forward to seeing Indian corn in the market and finding it in autumn decorations. Indian corn—in its range of hues from blue to deep maroon to oranges, golds, and yellows—extends the colors of the season long after the tree leaves have faded and been raked away. It is one of November’s icons, reminding us of the cultural and botanical history of the continent.

“You call it corn; we call it maize.”

Or so the 1970s TV ad for Mazola margarine told us.

Long ago, “corn” used to be the term for any grain seed, including barley, wheat, and rye, so naturally the new world plant “maize”—botanically known as Zea mays—was labeled as another kind of corn when it was introduced in Europe. For some reason, the name stuck, and we all think of the sweet yellow stuff on our dinner plates (and its close relatives) as the one and only “corn.”

ILLUSTRATION: A comparison of teosinte vs. modern corn, Zea mays.
This drawing shows the similarities between modern corn and its ancestor, teosinte, after 10,000 years of cultivation. Illustration by Nicolle Rager Fuller, National Science Foundation

There are actually many varieties of maize-corn. Archaeologists are pretty sure that all of them resulted from the domestication and selective cultivation of the grass teosinte (pronounced tay-oh-SIN-tee), around 10,000 years ago by the people living in what is now Mexico. Over time, maize became a staple crop, yielding different varieties of nutritious and versatile grains throughout the American continent.

PHOTO: Three ears of Indian corn leaning against a pumpkin.
The farmers in my neighborhood sell Indian corn in bundles of three alongside gourds, pumpkins, and bundles of straw.

Indian corn is related to popcorn. These kinds of maize differ from other kinds in that they have a harder outer coating and a starchy interior with a bit of water inside the seed, or kernel. Popcorn pops when the kernel is heated quickly at a high temperature, causing the water inside the seed to suddenly turn into steam, inflating the starch. The sweet corn we love to eat and the dent corn used for tortilla chips and livestock feed will not produce a fluffy white snack when heated.

We can exploit these properties of Indian corn and turn the kernels into necklace beads to wear during the season. 

How to make an Indian corn necklace

You will need the following:

  • Indian corn (one average-size cob will make two necklaces)
  • a sharp embroidery needle, long, with a large eye
  • string; you can use ordinary sewing thread, but a little heavier is better
  • a pot of water to cook and soften the corn
PHOTO: Indian corn.
My daughter chose this bundle of Indian corn because she liked both the deep red of cob on the left and the pinkish seeds of the one in the middle—but not for the same necklace.

First, remove all the kernels from the cob. You can wedge a butter knife between the rows of kernels and twist to pop out the seeds. Once you get some of the cob stripped, you can rub the kernels loose with your thumb.

PHOTO: a bowl full of colored corn seeds, or kernels.
These seeds have been removed from the cob and are ready for boiling to soften them.

Place the corn kernels in a pot of water and boil for 30 minutes. (This isn’t hot enough for the corn to pop.) Test for doneness by removing three  kernels. If you can push a needle through each of them easily, they are ready. Remove the pot from the heat and allow to cool. You can add cold water to cool them faster, but be sure to leave them soaking so they do not dry out, even when you are stringing them. (Pushing the needle through dry kernels can be a painful experience.)

While the corn is cooling, cut a string about three times as long as you would like your necklace to be. (You can work in shorter sections and tie them together, but it won’t look as nice.) Thread the needle and double the string; then knot the ends.

Now, select kernels in the colors you like, or pick them up randomly so the string resembles the color pattern of the corn cob. Try to pick softer pieces. Hold each kernel by the sides, and push the needle through the middle of the kernel so that the needle is not pointing toward your finger. Then slide it down the string. Leave a few inches of string below the first piece so you have some string to tie when you’re finished.  

PHOTO: This image shows how holding the seed by the sides puts fingers out of the way of the sharp end of the needle.
It is very important to hold the kernel by its sides as you poke the needle through the middle of the seed.

If the kernel is too hard and resists piercing, do not force it! Try to push the needle through at another angle, or discard that piece and select a softer one. This is important because you will prick yourself with the sharp needle if you are not careful. In fact, you’ll probably stab yourself at least once even if you are careful, so this is not a project for very young children. 

Pack the moist seeds close together on the string. As they dry, they will shrink in size. You may want to slide them together a little tighter so the string doesn’t show, but you’ll also want to leave enough wiggle room so the necklace has flexibility. When your string of corn is long enough, allow the seeds to dry completely. Then tie the ends together and you will have an attractive necklace to wear to Thanksgiving dinner or other festive gatherings!

PHOTO: Indian corn necklaces.
The finished necklaces look great layered in different lengths and colors.

One final note: when I made a corn necklace in third grade as part of a unit on Native American culture, I was under the impression that indigenous people of long ago made and wore necklaces like this. No way. All corn was grown for food, and it  was needed to sustain the population, so it would not have been turned into jewelry. This season, we can be thankful for the plentiful food we have to eat, and we can appreciate the beautiful colors of the corn as decoration during the feast.

©2014 Chicago Botanic Garden and my.chicagobotanic.org

A Halloween Treat: Pumpkin “Roll-ups”

Parents! Here’s a kid-friendly, fun-to-make idea from Kasey Bersett Eaves, who “talked squash” with fall-minded visitors at the Regenstein Fruit & Vegetable Garden on a gorgeous fall weekend.

With winter squash and pumpkins readily available at grocery stores and farmers’ markets, a nicely spiced fruit leather is a great way to use a post-Halloween pumpkin (uncarved) or extra can of purée—and to get kids to eat their vegetables in a new and tasty way. Super simple to assemble, it’s a whole lot healthier than candy!

Kids AND adults love the cinnamon-y pumpkin flavor.
Kids and adults love the cinnamon-y pumpkin flavor.

Pumpkin-spiced Snack Leather

  • 1 can of plain pumpkin or 3½ cups of cooked pumpkin pulp*
  • 1 cup of unsweetened applesauce
  • Cinnamon, nutmeg, cloves, and honey according to taste

Purée all ingredients together by hand or in a blender or food processor.

Spread purée on a foil-lined or greased cookie sheet, and smooth until just a little more than ¼-inch thick. Bake on your oven’s lowest setting (around 150 degrees) until no longer sticky to the touch (this takes close to eight hours).

Remove and cool until you can lift the edges and corners of the pumpkin leather off the foil or cookie sheet. Peel off and cut into strips. Roll each strip into plastic wrap and refrigerate until ready to eat.

If you have a food dehydrator, it’s even simpler. Spread the purée on the plastic sheeting provided with your dehydrator—or wax paper—and dehydrate until no longer sticky. Roll, refrigerate, and snack away!

It's a kid-friendly process: first, blend puree with applesauce and spices to taste.
It’s a kid-friendly process: first, blend purée with applesauce and spices to taste.

A tin foil base rolls up easily.
A tin foil lining makes cleanup easy.

*Basic Technique for Cooked Squash

Fresh-cut pumpkin (which is actually a squash) has a much higher water content than canned pumpkin. You will need to cook your pumpkin first, and use more fresh pulp. Cut your squash in half and remove the seeds. Place the squash skinside down on a baking dish, and bake at 350 degrees until the flesh is tender and the cut edges have caramelized. Remove the squash from the oven and let it rest until cool. Scoop out the pulp and discard the cooked skins.

See Kasey’s summer post, too — “Herbal Mixology


©2014 Chicago Botanic Garden and my.chicagobotanic.org