DIY Living Plant Wall

This year, the Living Wall in the Grunsfeld Children’s Growing Garden needed to be replanted. The metal cells that hold the plants to the wall were removed and taken to the Garden’s greenhouse nursery to grow new plants before placement outside for the summer.

This left us with four empty walls at the entrance to the Growing Garden. So we decided to get creative. We made an “alternative” living wall. 

PHOTO: sixteen cone-shaped pockets containing small plants are displayed on the brown walls.
The south-facing wall is now covered with burlap pocket planters containing alyssum, lettuce seedings, grass, and coriander.

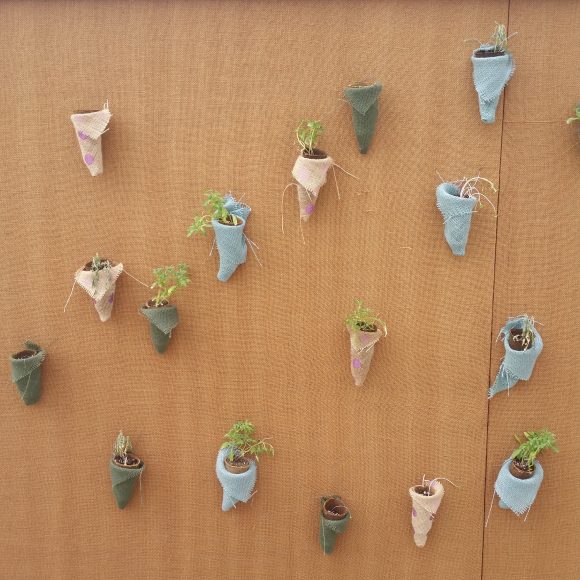
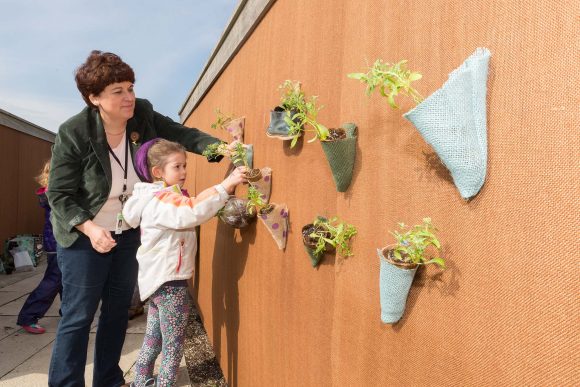
Our carpenters covered foam boards with brown burlap and installed these panels on the living wall frame where the plant cells had been removed. Students from the Garden’s Nature Preschool planted seeds and transplanted seedlings into small pots. We placed the plants into colored burlap planters and pinned them to the foam walls, and voila! We have a vertical garden again.

You can do this at home. Making planting pockets is simple and fun.

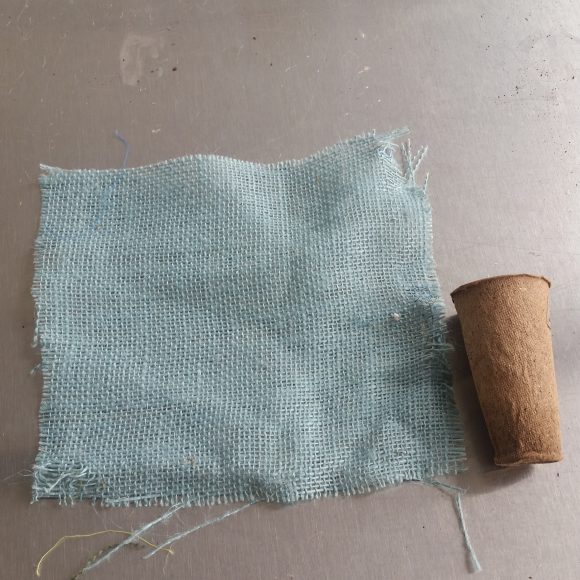
  1. Plant seeds or transplant small plants and let them sprout. We used biodegradable Fertilpots, but you could also start seeds in egg cartons, newspaper pots, or plastic pots.

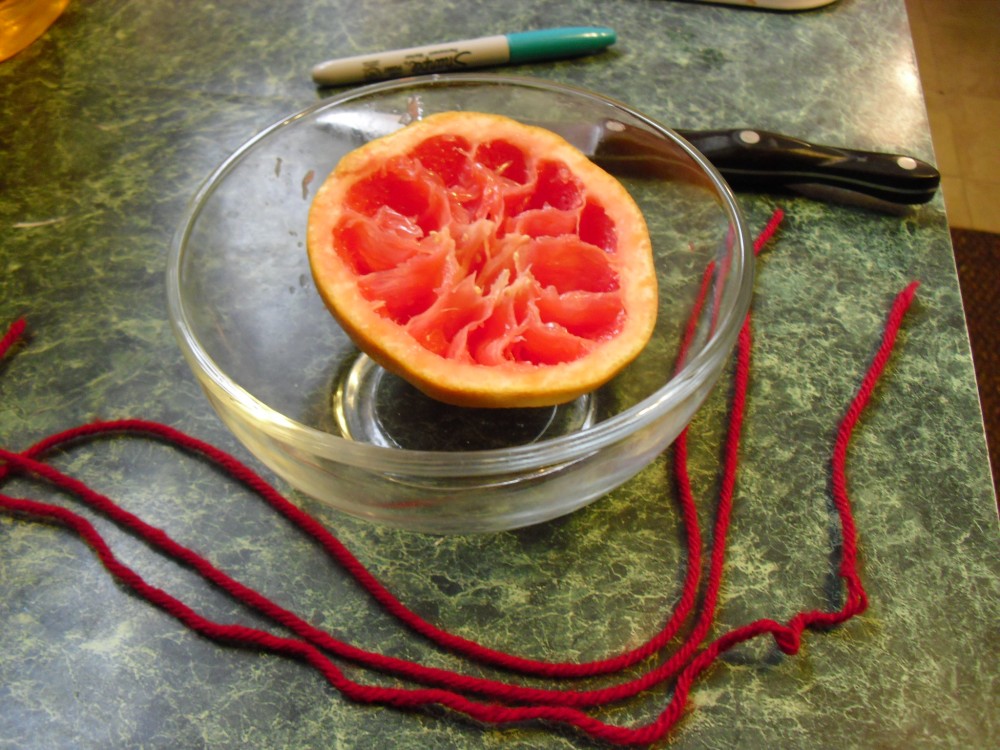
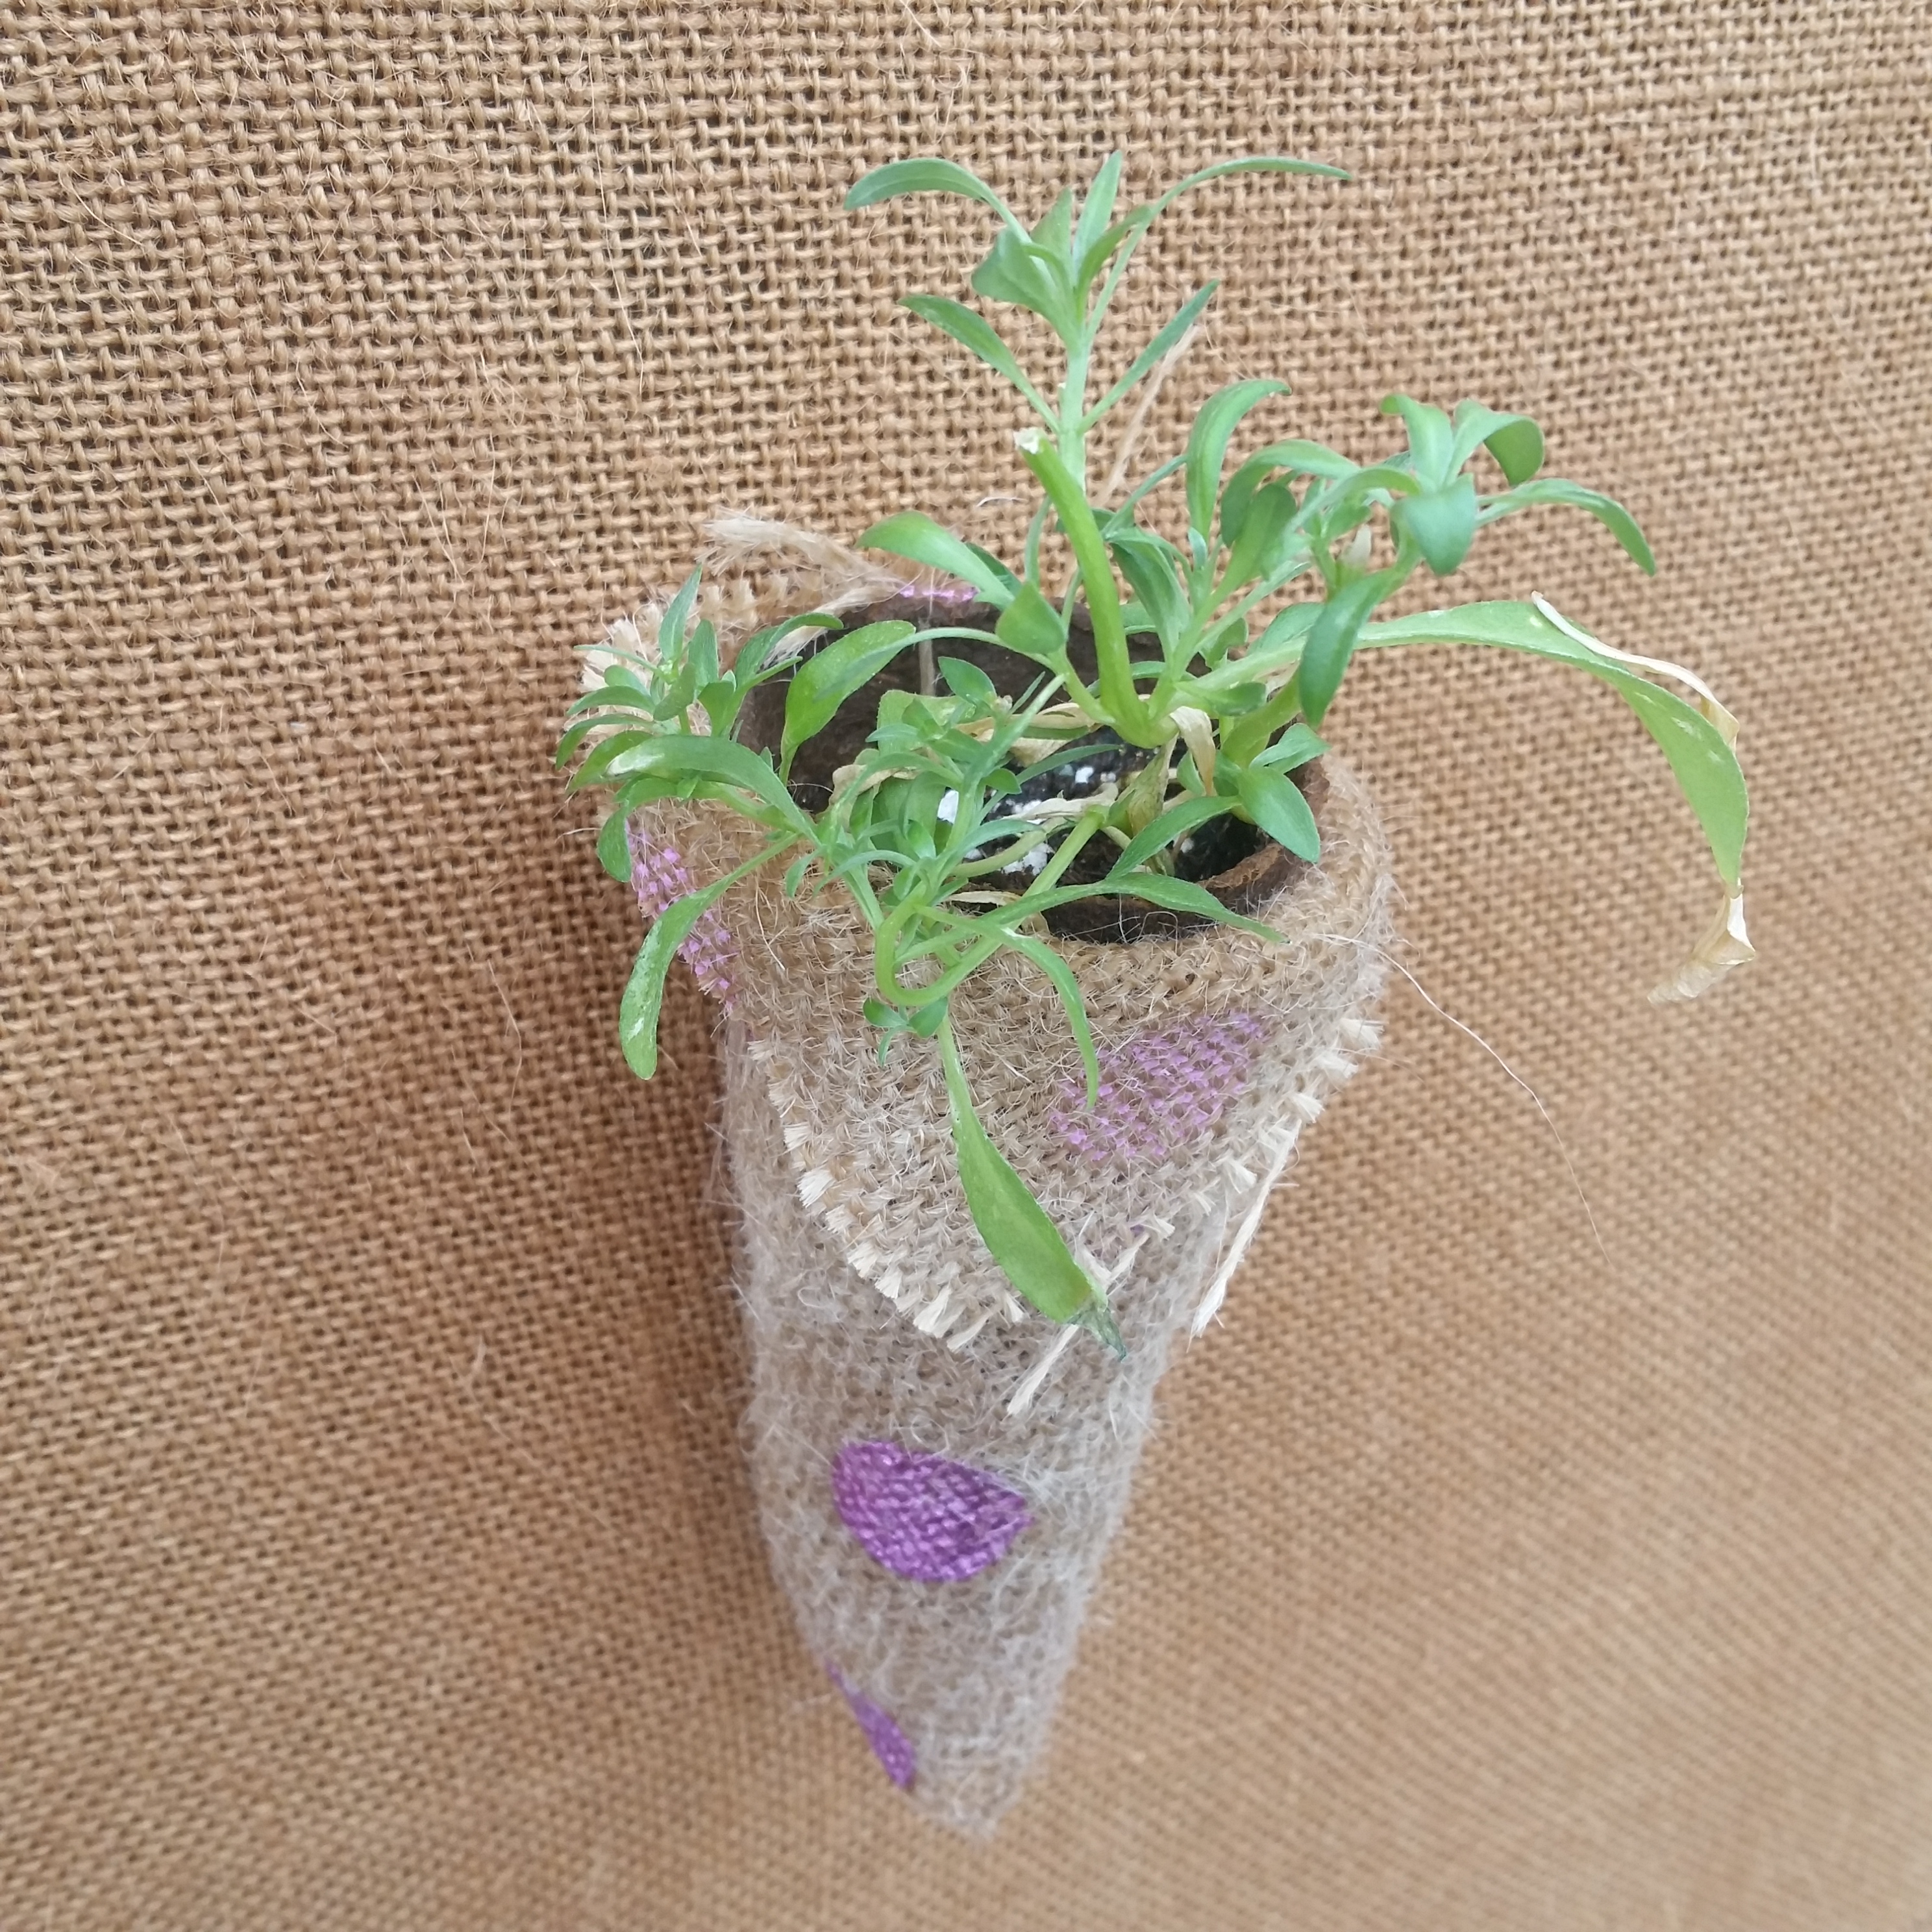
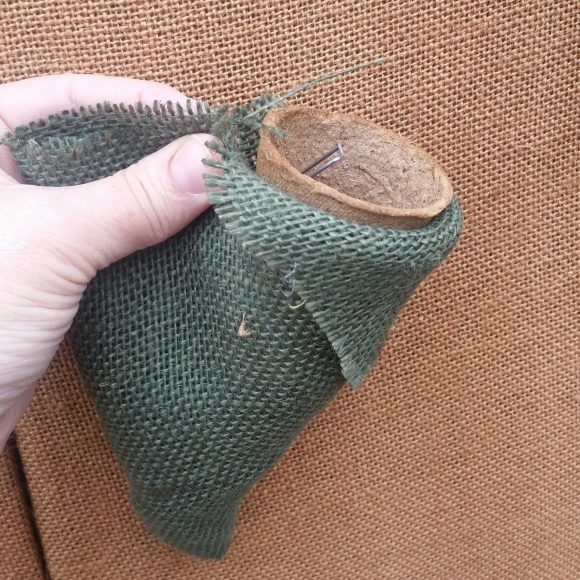
2. Cut the burlap into squares that are twice as long and wide as the pots.

PHOTO: The picture shows the size of the burlap square next to the pot that was used.
Our Fertilpots were 4″ tall, so I cut the fabric roughly into 8″-x-8″ squares. This does not need to be exact.

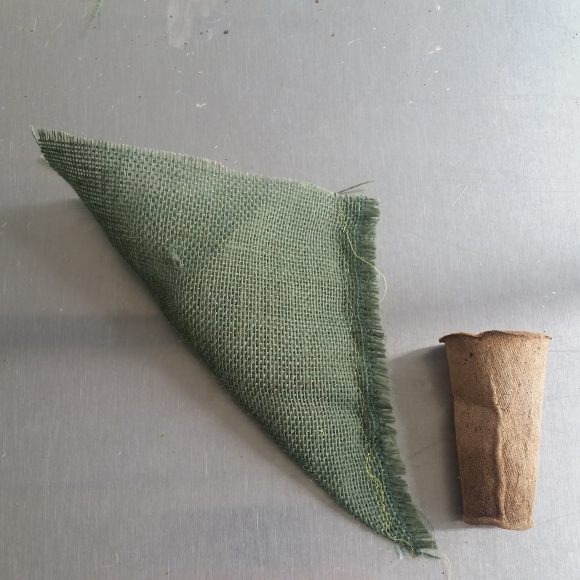
3. Fold the square in half diagonally and sew a seam along the side. You can use a heavy duty needle with a sewing machine or do this by hand with a darning needle. It might be possible to use a hot glue gun to make the seam, but I did not try this.

PHOTO: This shows what the burlap looks like after it is sewed in half.
I used a sewing machine because I made more than 100 of these. They could be sewn by hand.

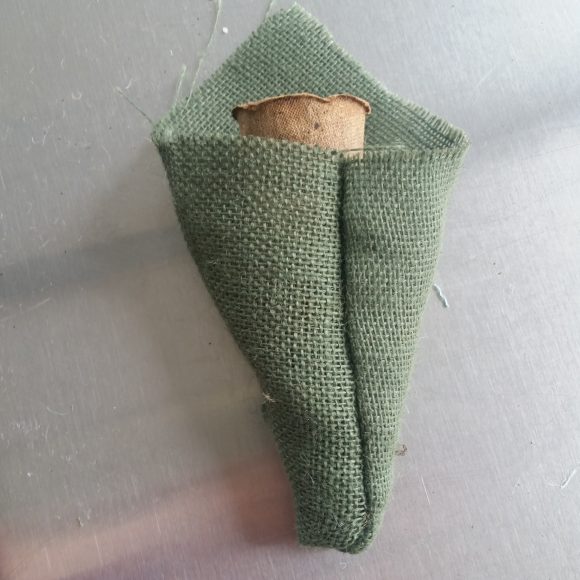
4. Turn the triangle inside out to form the pocket. Slip the planted pot into the pocket and get ready to hang it on a wall.

PHOTO: This shows the pocket with a pot inside.
The seam side of the pocket is the back, and the pointed front top can either be folded down or cut off.

5. To hang on the wall, pinch the extra fabric so the burlap fits snugly around the pot. Fold down the point in front or cut it off—your choice. Push a long pin through the pot and the fabric and pin the pocket to the wall. (I had pins used by our horticulturists to propagate cuttings; you could use T-pins or other pins with large heads.) You could also lace a ribbon around the top of the pocket and cinch the fabric, then hang the planter by the ribbon.

PHOTO: The picture shows a hand holding the fabric to make the pocket fit around the pot.
Gathering the extra fabric will help hold the pot better, and it will look neater on the wall.

Students in our Nature Preschool enjoyed helping to grow the plants and pin them to the Living Wall. Each child wanted to place his or her planter next to a friend’s planter so they could grow close together.

wall KJ with girl

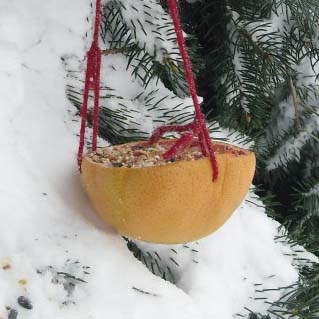
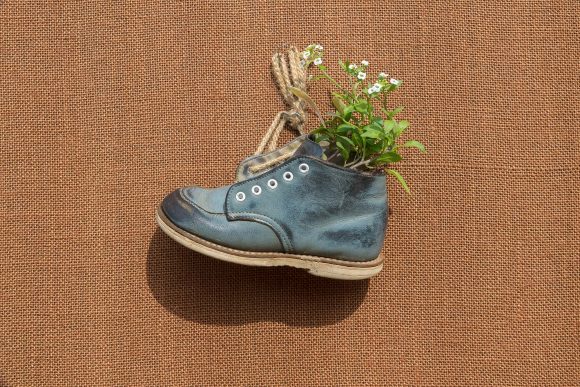
Just for fun, we experimented with some other kinds of planters, including plastic bottles and shoes.

PHOTO: a 2 liter plastic bottle turned sideways and filled with soil and oregano plants is pinned to the wall.
If you want to try growing a plant in a 2-liter bottle, cut a rectangular opening in the side of the bottle, poke six to eight holes on the opposite side for drainage, fill with soil, plant, and hang it up.

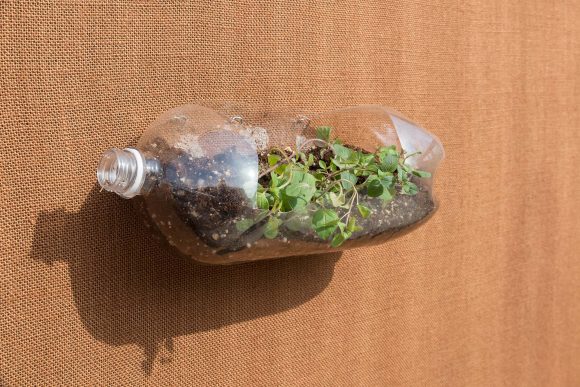
The preschoolers are fascinated by the soda bottle planter. They like to look in the round opening on the side. The toddler shoe makes everyone smile. We may add more surprising planters over the next few weeks, just to keep it interesting.

PHOTO: a toddler shoe with alyssum growing in it is laced with twine and hanging on the wall,
An old shoe can become a whimsical planter that sparks imagination.

If you decide to try something like this at home, be advised that the small pots need to be watered frequently (ours need watering daily) because they tend to dry out faster than larger containers. It’s a good project for young children because they will get to do a lot of watering without harming the plants.

Our “alternative living wall” is only temporary. Stop by the Grunsfeld Children’s Growing Garden between now and June 12 to see how it’s growing. After that, the real living wall will be installed for the rest of the year.


©2017 Chicago Botanic Garden and my.chicagobotanic.org

Pumpkin Seed Math Games

If you carve a pumpkin for Halloween or make pumpkin pie from scratch, you’re going to have a lot of pumpkin seeds. You can put them to good use by turning them into “dice” and playing math games this fall.

First, you’ll need to remove, clean, and dry the seeds. After scooping the pulp from your pumpkin, place it in a bowl of water and gently rub the stringy pulp off the seeds. Rinse them in a colander and let them drain. Prepare a baking sheet with a layer of parchment paper. Do not add any oil. Spread seeds in a single layer on the paper. Bake in an oven preheated to 300 degrees Fahrenheit for 30-40 minutes to dry them. Store them in a plastic bag or airtight container.

PHOTO: Pumpkin seeds on baking tray.
These seeds were baked for just over 30 minutes at 300 degrees. After they have cooled, they will be ready to become instruments of learning.

The kind of dice you make will depend on the game you want to play, but for all games the basic idea is the same. Players will toss the seeds and the side that lands face up is the number they will work with. You’ll want to select seeds that are more flat than rounded. Remove any transparent skin that remains on the seeds, so it won’t dissolve in the marker ink and make a mess. Use a regular fine Sharpie or other permanent marker. I find that the extra fine markers tend to dry out while writing on the seed. You can use any color, but for some games the color matters. You’ll also want to establish a top and bottom of the seed. I write all the numbers with the point of the seed on the bottom so 6s and 9s don’t get confused. 

Here are some games you can make:

PHOTO: Pumpkin seeds painted like dominoes.
To make a game of “Count the Dots,” draw dots on one side of each seed as shown.

Count the Dots

This works well for young children learning to count. Take six pumpkin seeds. On one side of each seed draw dots like those on a die. Leave the other side blank. To play, toss the seeds and let them land. Count all the dots facing up. The person with the most dots wins!

Add the Numbers

Older children who are learning to add can play with numbers instead of dots. You can vary this depending on the skills of the children. For early learners, make two each of 1, 2, and 3. For children practicing higher number adding, make a range from 1 to 9. To practice adding higher numbers, make a set with all 6s, 7s, 8s, and 9s. Those are scary numbers to add until you get the hang of it, which is the whole point of this game.

To play, toss the seeds, then move the blanks out of the way. Line up the numbers so they are easier to see and add up.

Addition and Subtraction

Working on subtraction? Write the number on one side of the seed in black and write the same number on the opposite side in a different color such as red. Now when you toss the seeds, add all the black numbers and subtract the red numbers. The result could be a negative number!

PHOTO: Numbered pumpkin seeds.
Playing with addition-subtraction rules where black numbers are added and red numbers are subtracted, this toss would be 1 – 7 – 2 + 4 + 8 – 6 – 9 + 3 + 5 = -3.

Evens/odds

This game works with dots or numbers, but requires a set with writing on one side only. Players take turns predicting the outcome of the toss adding up to an odd or even number. The first player calls “odds” or “evens,” tosses, checks the results. S/he gets a point if s/he is right, a point goes to his or her opponent if s/he guessed wrong. 

Numbers and Symbols

You can have more than numbers on your dice. Make a set of seeds that include numbers and function symbols: + , -, ×, and ÷. Each player should have her own identical set of seed dice. All players toss at the same time and the person who can make the number sequence with the highest answer wins. In this game, players are allowed to combine numbers to make a larger number. For example, a 1 and a 2 can become 21, as long as all the exposed numbers and symbols are used. The simplest rules for this game will be to take the order of operations from left to right, but players who want to stick to the “PEMDAS” order of operations (parentheses, exponents, multiplication, division, addition, subtraction), can certainly work that into the game. 

PHOTO: Numbered pumpkin seeds and some with math symbols.
Working with numbers and symbols gives a score of 413 for this toss.

Matching Equations

To make the game more cooperative, play the same game above, only this time the two players try to make their two number statements equal each other, or get as close as possible. This is more difficult to accomplish. so it’s all right to be a little flexible with the rules, since the players are not competing and you won’t have to settle disputes.

Players can make up their own games. They can also work in more complicated operations like exponents, or they can arrange the placement seeds above and below a line to represent division (this may require paper and pencil). Chances are, if they have reached this level of sophistication with mathematical operations, they would prefer eating the seeds to playing with them, but it’s still a fun challenge.

Whatever their level, when players have exhausted their interest in the seeds, be sure to take a break and enjoy some pumpkin “pi.” Sorry, I had to include that, because let’s face it, if you’re playing math games for fun, you’re a person who appreciates this humor!

PHOTO: Pumpkin with carved numbers for facial features.
“Pascal Pumpkinhead” gave the seedy contents of its head for mathematics.

©2014 Chicago Botanic Garden and my.chicagobotanic.org

Make a Grapefruit Bird Feeder

My daughters love fresh grapefruit—and birds. So we decided to keep the rind and make a bird feeder. This is a fun, easy project.

PHOTO: The supplies needed for the project.
The grapefruit sections have been cut and eaten; the rind is ready to become our bird feeder.

To make a grapefruit bird feeder, you will need the following:

  • Half a grapefruit rind (you can also use an orange)
  • Three pieces of yarn, each cut about 18 inches long
  • A knife, skewer, pointed scissors, or other sharp tool
  • Birdseed

First, eat the grapefruit and drain the remaining liquid. Then, use the skewer or knife to poke three holes in the grapefruit. They should be about half an inch from the top edge and spaced evenly around the circumference. (Some people do this with four strings, but I find that using three strings makes it easier to balance the fruit.)

Push a piece of yarn through each hole and tie it off.

PHOTO: Skewering the grapefruit rind.
Hold the grapefruit firmly with one hand while you poke the skewer through the rind. Be careful not to poke your finger!
PHOTO: Tying yarn to the grapefruit to hang it.
Pull 2-3 inches through the rind and tie the short end to the longer strand.

Hold the grapefruit up by all three strings and adjust the length of the strands so the fruit is not tipping. When it is balanced, knot the strings together about 4 or 5 inches from the top. (The ends will probably be uneven, and that is all right.) Make a loop knot with those top ends, so you will be able to hang it from a branch. 

PHOTO: The final product.
Our grapefruit bird feeder is balanced, full of seed, and ready to hang outside.

Finally, fill the fruit with birdseed and hang it outside for your feathered friends to enjoy. If you like, you can add a little suet, but you may find it doesn’t stick well to the wet fruit. Here in the Chicago area, you’ll probably find that most of your winter guests are black-capped chickadees, nuthatches, dark-eyed juncos, common redpolls, and downy or hoary woodpeckers, which balance their primary diet of insects and grubs with bits of suet and sunflower seeds.

One more thing: Make sure it’s tied to the branch firmly so that your local (determined) squirrels — who will also find this bird feeder appealing — don’t knock it down.

Don’t worry if you don’t have any visitors the first few days after you’ve placed your feeder. It can take up to two weeks for birds to discover their new food source, but once they do, they tell all their friends in the neighborhood.

PHOTO: Grapefruit birdfeeder hung from a snow-covered fir.
The final product is ready for visitors.

What is birdseed?

You probably know that if you plant birdseed, you won’t grow a bird. And there is no such thing as a birdseed plant. So what plants make birdseed? What we call “birdseed” most commonly comes from two sources: millet, which is a grass, and sunflower. Other seeds used to feed birds include thistle, safflower, cracked corn, and sorghum seed, which is also called milo. Some birds have a preference for certain kinds of seeds, so bird lovers stock their feeders with seeds to attract their favorite birds and keep them visiting the feeder.

After you hang your bird feeder, take some of the seed and plant it to see what grows. Maybe you can grow your own food for the birds this year!


©2014 Chicago Botanic Garden and my.chicagobotanic.org

Meet Naranjilla

We get a lot of questions about one particular plant in the Grunsfeld Children’s Growing Garden: Naranjilla (pronounced nahr-ahn-HEE-yah). It’s easy to see why.

PHOTO: The naranjilla plant has thick green leaves that are about 10-12 inches long, 8-10 inches wide, with deeply serrated edges. Leaves have dark purple hairs on the veins and petioles.
You can find this naranjilla (Solanum quitoense) in Bed #10 in the Growing Garden.

This attractive plant has large, thick, green leaves, is about 10–12 inches long and 8–10 inches wide, with deeply serrated edges, and is completely covered in tiny, purple hairs (which are not really hairs—in the botanical world they are called “tricomes”). It is native to Ecuador and other South American countries.

There is more to notice about this intriguing plant than its gorgeous coloring, interesting texture, and striking presence. First, the naranjillas in this small garden bed, number 10, were put there for a reason. All but one of the plants in this bed are in the nightshade family, Solanaceae. This family includes tomato, eggplant, potato, and petunia. Naranjilla is cousin to these more familiar plants.

CIMG0876
Upon closer inspection, it’s easy to see how these plants are related.

When you’re in the garden, take a look at the flowers on these plants. You will see the similarities that characterize plants in the nightshade family. Notice that they all have five petals that are fused so that they look like a funnel with five lobes. You’ll easily be able to pick out the one plant that does not belong in the family.

PHOTO: close-up of a bright pink petunia.
See how this ‘Pink Dreams Fuseable’ petunia (Petunia x hybrida ‘Pink Dreams Fuseable’) has five petals fused together, so it is like one continuous petal? You’ll find the same bloom design on tomato and other nightshade flowers.

The naranjilla won’t bloom until much later in the summer, and when it does you’ll recognize the similar flower shape. Naranjilla means “little orange” in Spanish, because the fruits are small, yellow, and spherical like little oranges. Unfortunately, our growing season in Chicago is not long enough for naranjilla plants to produce the sweet fruits, which are juiced for beverages in Ecuador.

Another interesting thing about the naranjilla—a detail that separates it from other members of the family—is that the leaves look soft and fuzzy, but they can grow sharp thorns along the veins. As you might expect, the thorns discourage large animals from eating the leaves. They are not as sharp and menacing as rose thorns, but you wouldn’t want to stroke a naranjilla leaf that bears thorns.

PHOTO: this close up of a naranjillo leaf shows sharp thorns sticking up from the veins of the leaf.
This naranjilla leaf, which is growing in a container on the Learning Center deck, is covered in thorns. There are no thorns on the plants in the Growing Garden. (The white things on this leaf are stamens fallen from the nearby “bunny tail” grass.)

Stop by the Growing Garden at the Learning Campus from noon to 4 p.m. Monday through Friday, and 10 a.m. to 4 p.m. on weekends this summer to see our naranjilla plants and enjoy free family drop-in activities.

Please note: the Growing Garden is closed on weekday mornings while Camp CBG is in session.


©2013 Chicago Botanic Garden and my.chicagobotanic.org

Growing a Bean in a Bag

Garden blog followers may remember that in “How to Train Your Plant” I demonstrated a way to grow a bean seed in a plastic bag to test geotropism. I started working on that project around Thanksgiving week last year. At that time, I started a few bean bags just to see what would happen. I kept one seed growing in the bag all winter, adding water as needed.

PHOTO: A ziptop bag was used as a container to grow a bean plant. Roots, stem, leaves, and the remains of the original seed are visible.
The bean plant grew for five months, leaning toward the window in my office.

The plant produced a white flower about a month ago. I should have taken a picture. Now this week I discovered a seedpod growing where the flower had been! In the picture, you can see the wilted flower petals still hanging from the tip of the reddish colored pod. Botanically speaking, this is the fruit of the plant, even though you might not think of beans as fruit in your diet.

PHOTO: a red bean pod, about 2 and a half inches long is attached to the stem of the plant.
The red fruit was hidden under the leaves.

So if you try this activity, and you stick with it for six months, you, too, may be rewarded with a little treasure!


©2013 Chicago Botanic Garden and my.chicagobotanic.org