Science Activity: Albino Plants

Leaves are green. There are very few exceptions in healthy living plants, and most of the exceptions are partially green with red, yellow, orange, or white patterns; or they look white, but upon closer inspection they are actually whitish, bluish-green, and not pure white. The pigments that give all leaves their color are essential for the plant’s ability to harness energy from the sun and make sugars in the process we know as photosynthesis.

But every once in a while, a completely white seedling sprouts from a seed. This happened with some basil I grew a few years ago. 
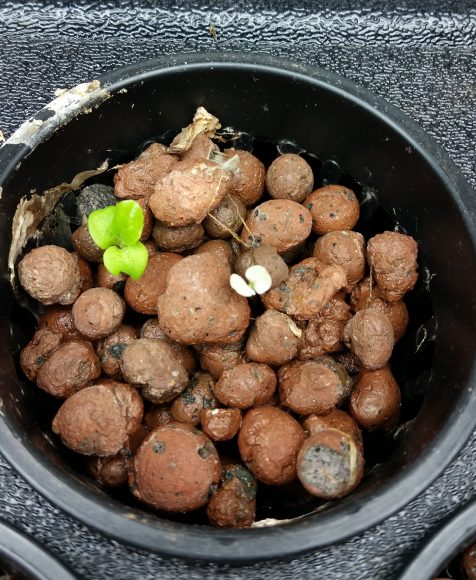
 

PHOTO: this picture shows two seedlings, one has two green seed leaves and the other is white and only half as big.
The green and albino seedlings came up at the same time, but the albino seedling never grew true leaves, and eventually withered and died.

My albino basil survived only a few days. Without any chlorophyll—the green pigment necessary for photosynthesis—this seedling was doomed. That is the case with all albino plants. The gene mutation that gives rise to albino plants is fatal to the plant, because without the ability to make sugars, the plant runs out of energy to live.

So when I was perusing the online Burpee seed catalog and came across “variegated cat grass” I was curious. VERY curious, and perhaps you are, too.
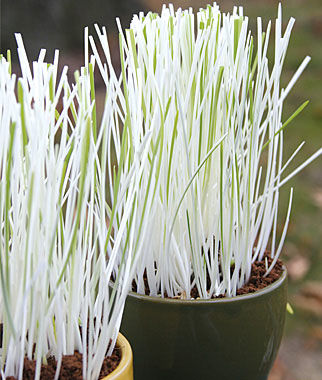
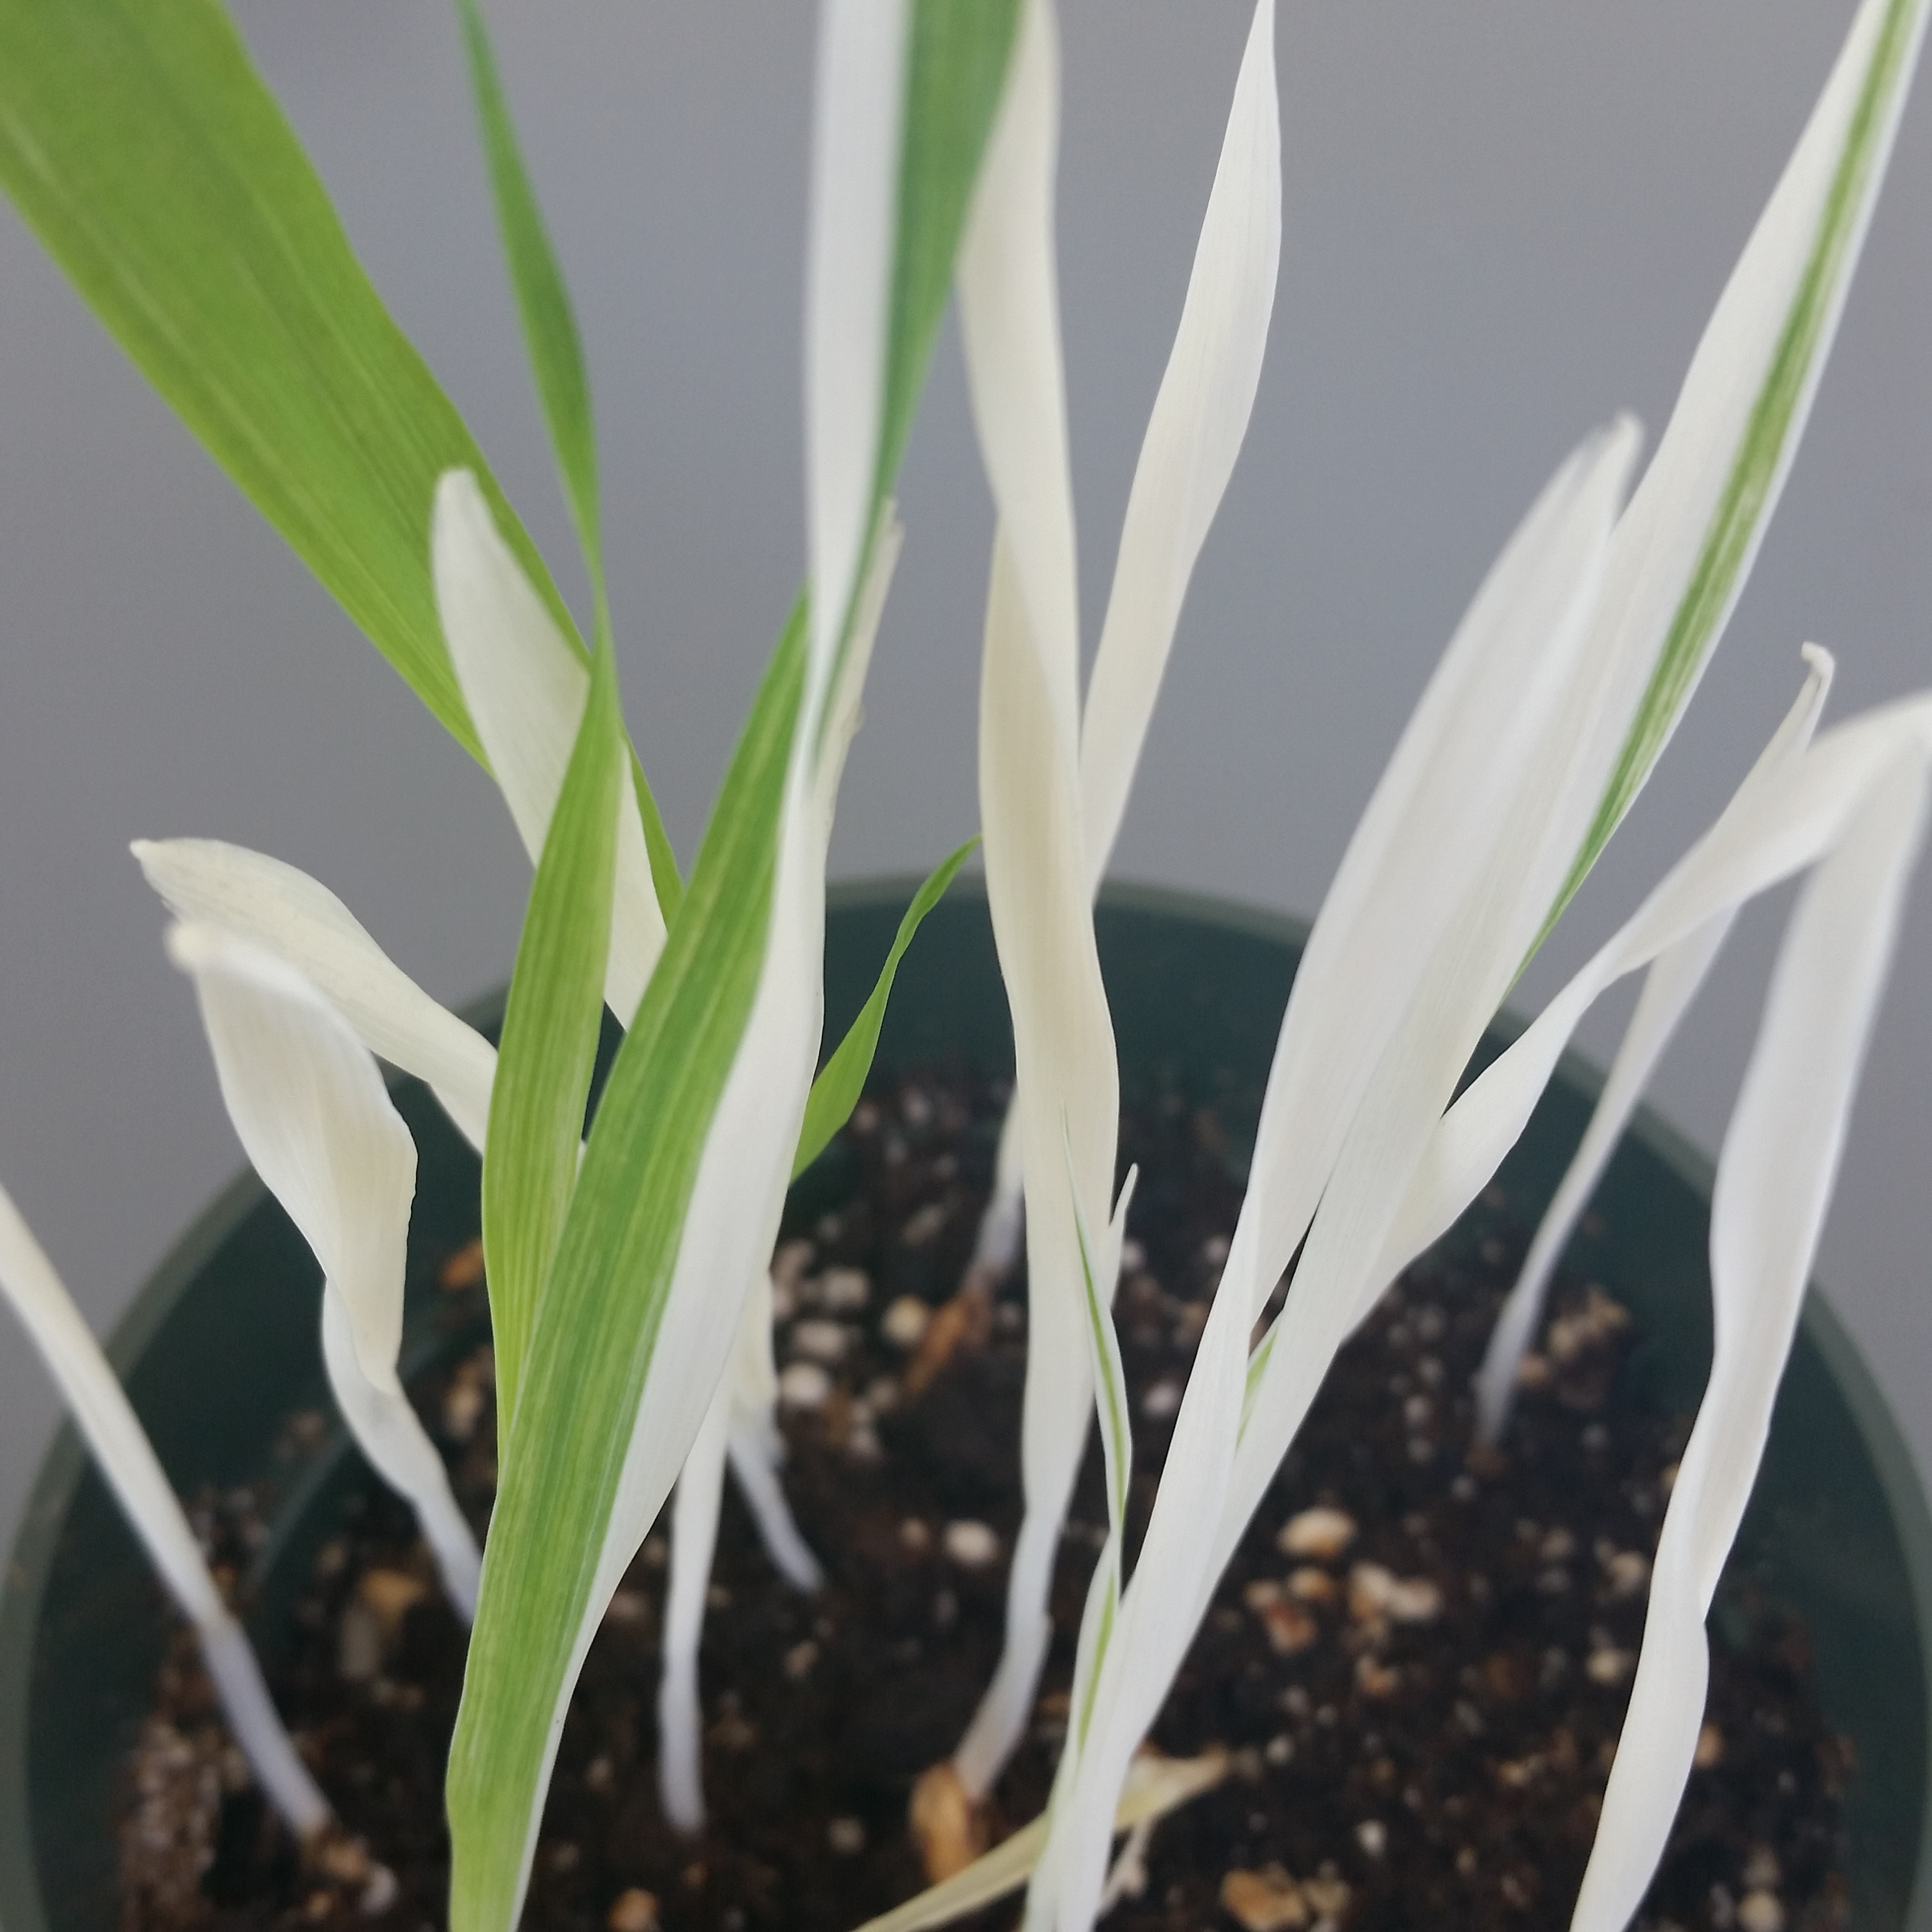
PHOTO: a potted plant of white grass leaves.
How can this albino plant survive? (Photo permission from W. Atlee Burpee Company)

I had several questions: 

  • The term “variegated” implies that the leaves would be striped or multicolored, but in the picture it appears that there are all white leaves. What will this grass actually look like?
  • How long will it take to sprout?
  • How easy it to grow?
  • Is there enough green on those leaves for the grass to survive or will it die off like my basil?
  • If it does survive, how long can I keep it growing?

And most importantly:

  • Would this make an awesome science activity for students in the classroom and at home to investigate the importance of chlorophyll in plants?

There was only one way to find the answers. I ordered the seeds and grew some variegated cat grass in our nature lab at the new Learning Center. You can do this in your classroom to find answers to my questions and your own. 

Before I give you directions for growing cat grass, you may be wondering:

What IS cat grass?

The cat grass you may have seen sold in pet stores is usually a type of wheat, or Triticum. Our “variegated cat grass” is a type of barley (Hordeum vulgare variegata). Both are cereal grains that have been cultivated as food for hundreds of years. Both are sold commercially as cat grass because some cats like to chew on the leaves. Not being a cat owner, I don’t know if cats actually like this stuff, but apparently it sells.

Variegated barley was the result of science experiments on genetic mutations in barley seeds in the 1920s. The hybrid barley seeds have been packaged and sold by different seed companies because…well, they’re attractive and intriguing—they caught my attention.

How to plant cat grass, barley, wheat, or any grass seeds

You need:

  • A container that will hold soil at a depth of at least 2 inches; drainage holes are best, but not necessary
  • Variegated cat grass seeds (sold as “cat grass, variegated” and available at Burpee and other seed suppliers)
  • Potting soil
  • Water
  • A warm, sunny location for your plants
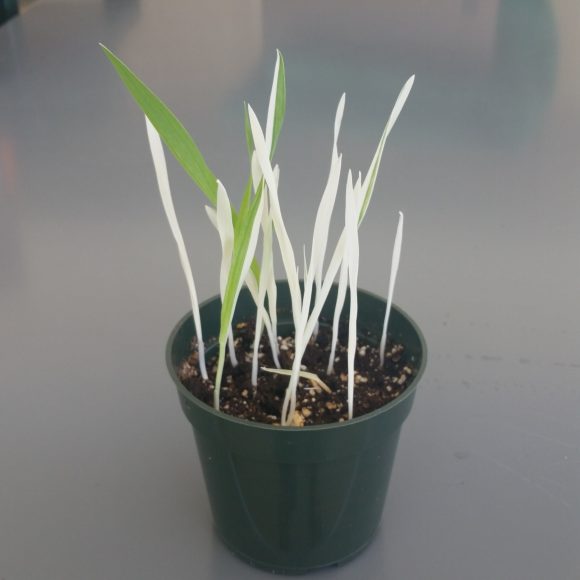
 

PHOTO: Twelve plants have sprouted, one green, three green and white striped, and the rest all white.
In less than a week, a few more than half of the twenty variegated cat grass seeds planted in this 4-inch pot grew to 4 – 6 inches tall. The taller plants are ready for a trim.

Fill the container with moist potting soil. Spread seeds on the surface of the soil. Cover seeds with a thin layer of moist soil and tamp the soil down so that most of the seeds are covered. It’s all right if you can see some of the seeds through the thin layer of soil. Place in a warm, bright location. The seeds will sprout in a few days, but may take a week depending on the room temperature.

If students plant their own individual pots, have them place 20 – 30 seeds in each 3-inch container. The seeds I bought came 300 to a pack, so that means you need at least two (maybe three) packs to have enough for everyone in the class.
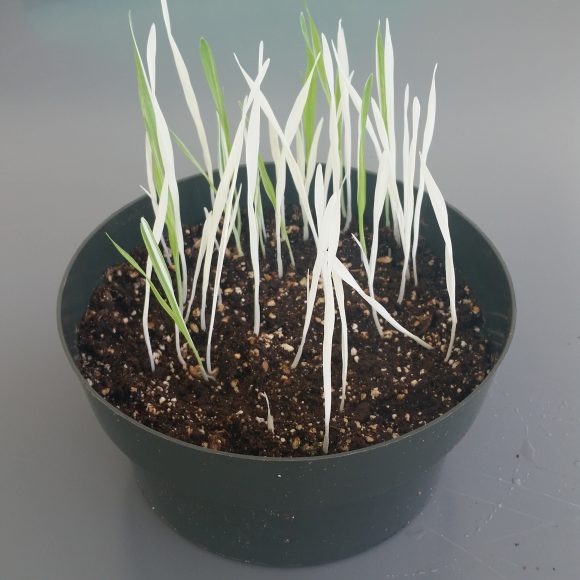
PHOTO: most of the grass is all white, but there are nine or ten all or partially green leaves.
Half of the 100 seeds planted in this 8-inch pot have sprouted, and more should be coming up soon.

You can also use the whole pack in a 8- to 10-inch container, or even spread more seeds in a foil baking pan filled with soil to grow a carpet of grass. The more densely you plant the seeds, the closer the plants will grow together and it will look and feel more like a healthy lawn. A sparser planting makes it easier to observe individual plants. It’s up to you how you want to do it, really.

Keep the grass in a warm, sunny location. Water when dry, but do not allow it to dry out. When the grass leaves are more than 3 inches tall, use a sharp pair of scissors to trim them to a uniform height just as you would mow a lawn. This will prevent the grass from going to seed and keep it alive longer. You can plant new seeds in the same planter to revitalize in two to three weeks when it starts looking a little tired.

Now the REAL science part: 

Whether you make a single classroom planter or have each student plant her own pot, observe your variegated cat grass for the next four to six weeks, or even longer. Keep it watered and trimmed. Measure its growth. Take photos or sketch it to record how it grows and changes. Ask your own questions and try to find answers, and ultimately reach a conclusion about what happens to white plants. If you and your class are really interested, plant some more cat grass and change the procedure to test your own ideas. It’s that easy to do plant science in your classroom.

Want more albino plant science? Read on.

More activities for inquiring minds

You can experiment with other genetically modified albino seeds available through science supply companies.
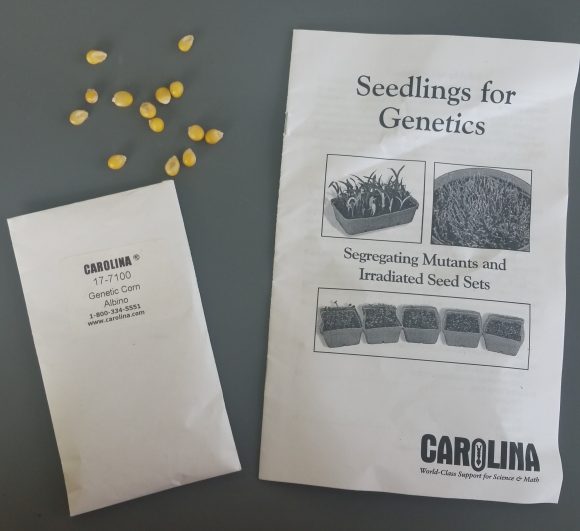
PHOTO: A packet of genetically modified corn seeds and instruction booklet
Seed kits enable you to investigate different genetic traits, including the albino mutation.

Carolina Biological Supply Company sells hybrid corn that will grow white leaves and stems. I have planted these seeds and they work pretty well, but require a bright window or light and a warm environment to sprout successfully. A classroom kit contains soil, planting trays, and 500 seeds for a classroom investigation, and costs about $100. You can order just the seeds in packs of 100 genetic corn seeds that are all albino (90 percent of the seedlings will grow to be albino) for $18.50, or a green/albino mix—which means about 75 percent of seedlings will be green and 25 percent white, for $10.50. The latter enables you to compare the mutation to the normal strain. 
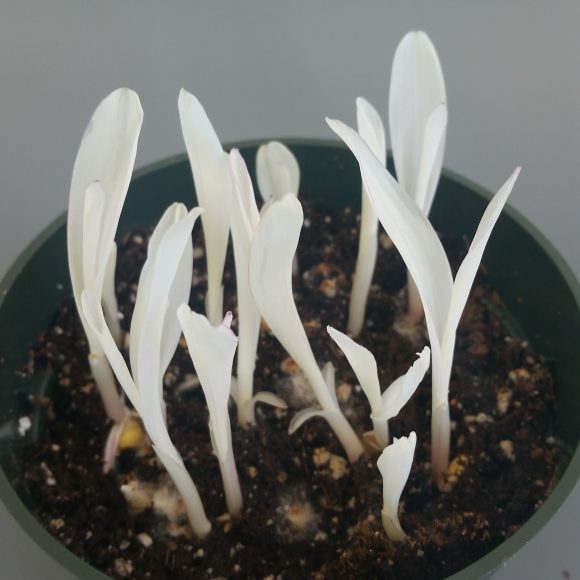
PHOTO: Ten white corn seedlings are a few inches tall.
Five days after planting, albino corn seedlings are beautiful, but ill-fated.

Nasco sells seeds and kits to investigate albino plants. Their “Observing the Growth of Mutant Corn Seeds” kit serves up to 40 students and costs $62.50. Nasco also has albino tobacco seeds with 3:1 green to white ratio, 1,200 seeds for $12.05. Tobacco seeds are smaller, and therefore more difficult for little fingers to handle than corn or barley. I have never tried growing them, but that might be my next science project this fall.
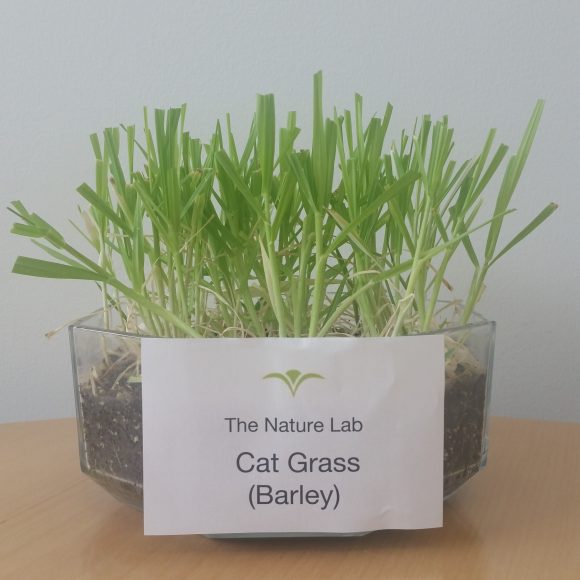
PHOTO: eight inch glass planter with green grass and label that says: Cat Grass (Barley).
After a two months, my densely planted variegated cat grass is thriving at the nature lab, even though it no longer resembles the catalog photo.

The answer to my question? Yes! This is an awesome science activity for students because it’s easy and demonstrates something really important—in fact, something essential to our existence!

You don’t need to purchase the fancy kits to investigate why plants are green. You can get a lot of good science learning out of a pack of variegated cat grass. All you really need to do is look around you and notice the colors in nature. Do you see white leaves anywhere? If you do, then there is probably a science investigation waiting for you.


©2016 Chicago Botanic Garden and my.chicagobotanic.org

5 Perennials for Spectacular Fall Color

As fall approaches and the leaves begin to change, the Chicago Botanic Garden bids adieu to our beautiful summer blooms until next year. The air starts to get crisper (and your summer plants will too), but September isn’t the expiration date for color and excitement at the Chicago Botanic Garden—and it shouldn’t be in your garden either.

We asked Tim Pollak, outdoor floriculturist, and Cindy Baker, manager of horticultural services, for their favorite fall-blooming perennials that will make your landscape pop this season.

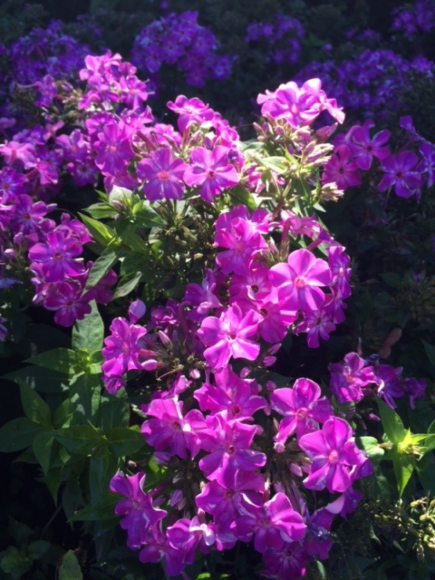
PHOTO: Phlox paniculata 'Barfourteen' Purple Flame® garden phlox.
Purple Flame® garden phlox (Phlox paniculata ‘Barfourteen’)


Phlox paniculata
Garden phlox

Look no further for a long-blooming and beautiful native perennial that provides a whole palette of color options for your garden. Phlox cultivars add shades of showy pink, lavender, or white in clusters of delicate-looking flowers. Their sweet fragrance will attract late-season butterflies and hummingbirds to your own backyard. Garden phlox are generally hardy plants and will grow well in sun or shade. Plant in midspring with a layer of mulch to retain soil moisture for maximum flower production.

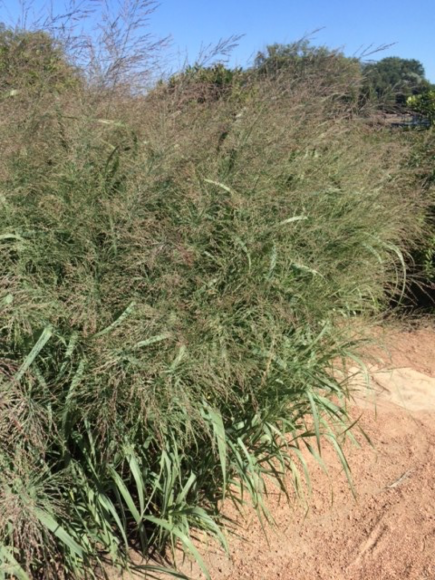
PHOTO: Panicum virgatum 'Dallas Blues' switchgrass.
Switchgrass (Panicum virgatum ‘Dallas Blues’)

Panicum sp.
Switchgrass

Ornamental grasses may not seem like an obvious choice for garden excitement but they can help to create texture and movement. Switchgrasses are an environmentally smart choice as they are native to tallgrass prairies in the United States. Cultivars are variable in color with red to light golden blooms and deep green to blue blades. Switchgrasses are low maintenance and will tolerate nutrient-poor soils, but plant in full sun to keep plants upright and blooming all fall. Because they can grow up to 8 feet in height, consider planting toward the back of your beds and place smaller plants in front.

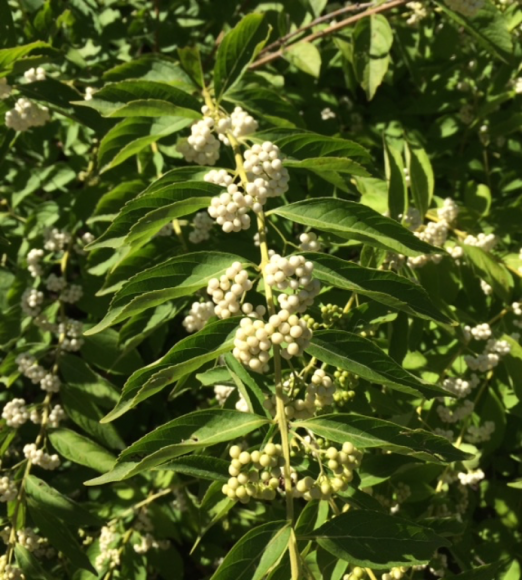
PHOTO: Callicarpa japonica 'Leucocarpa' (Japanese beautyberry).
Japanese beautyberry (Callicarpa japonica ‘Leucocarpa’)

Callicarpa sp.
Beautyberry

This small shrub has something to offer year-round; it blooms in the summer, then its flowers are replaced by small berries that last until winter. Depending on the species, Callicarpa can have shiny white or bright purple berries—both are a big hit with birds. All species have long, arching branches that cascade outward but with pruning, the shape is variable. Beautyberry should be planted in rich soil and pruned in early spring but otherwise requires little attention throughout the year. Ensure your shrub receives adequate moisture for maximum fruit production all fall long.

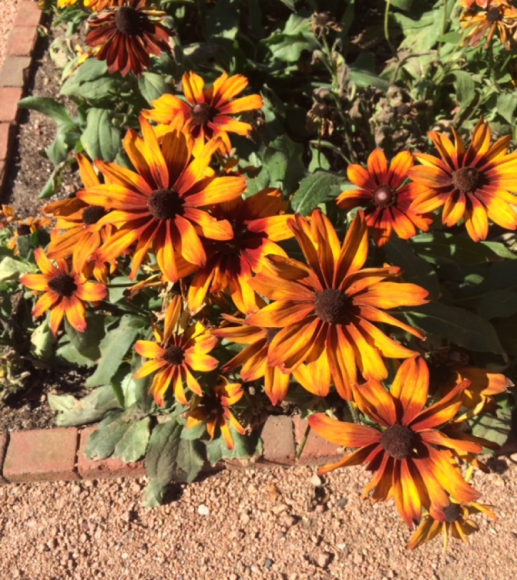
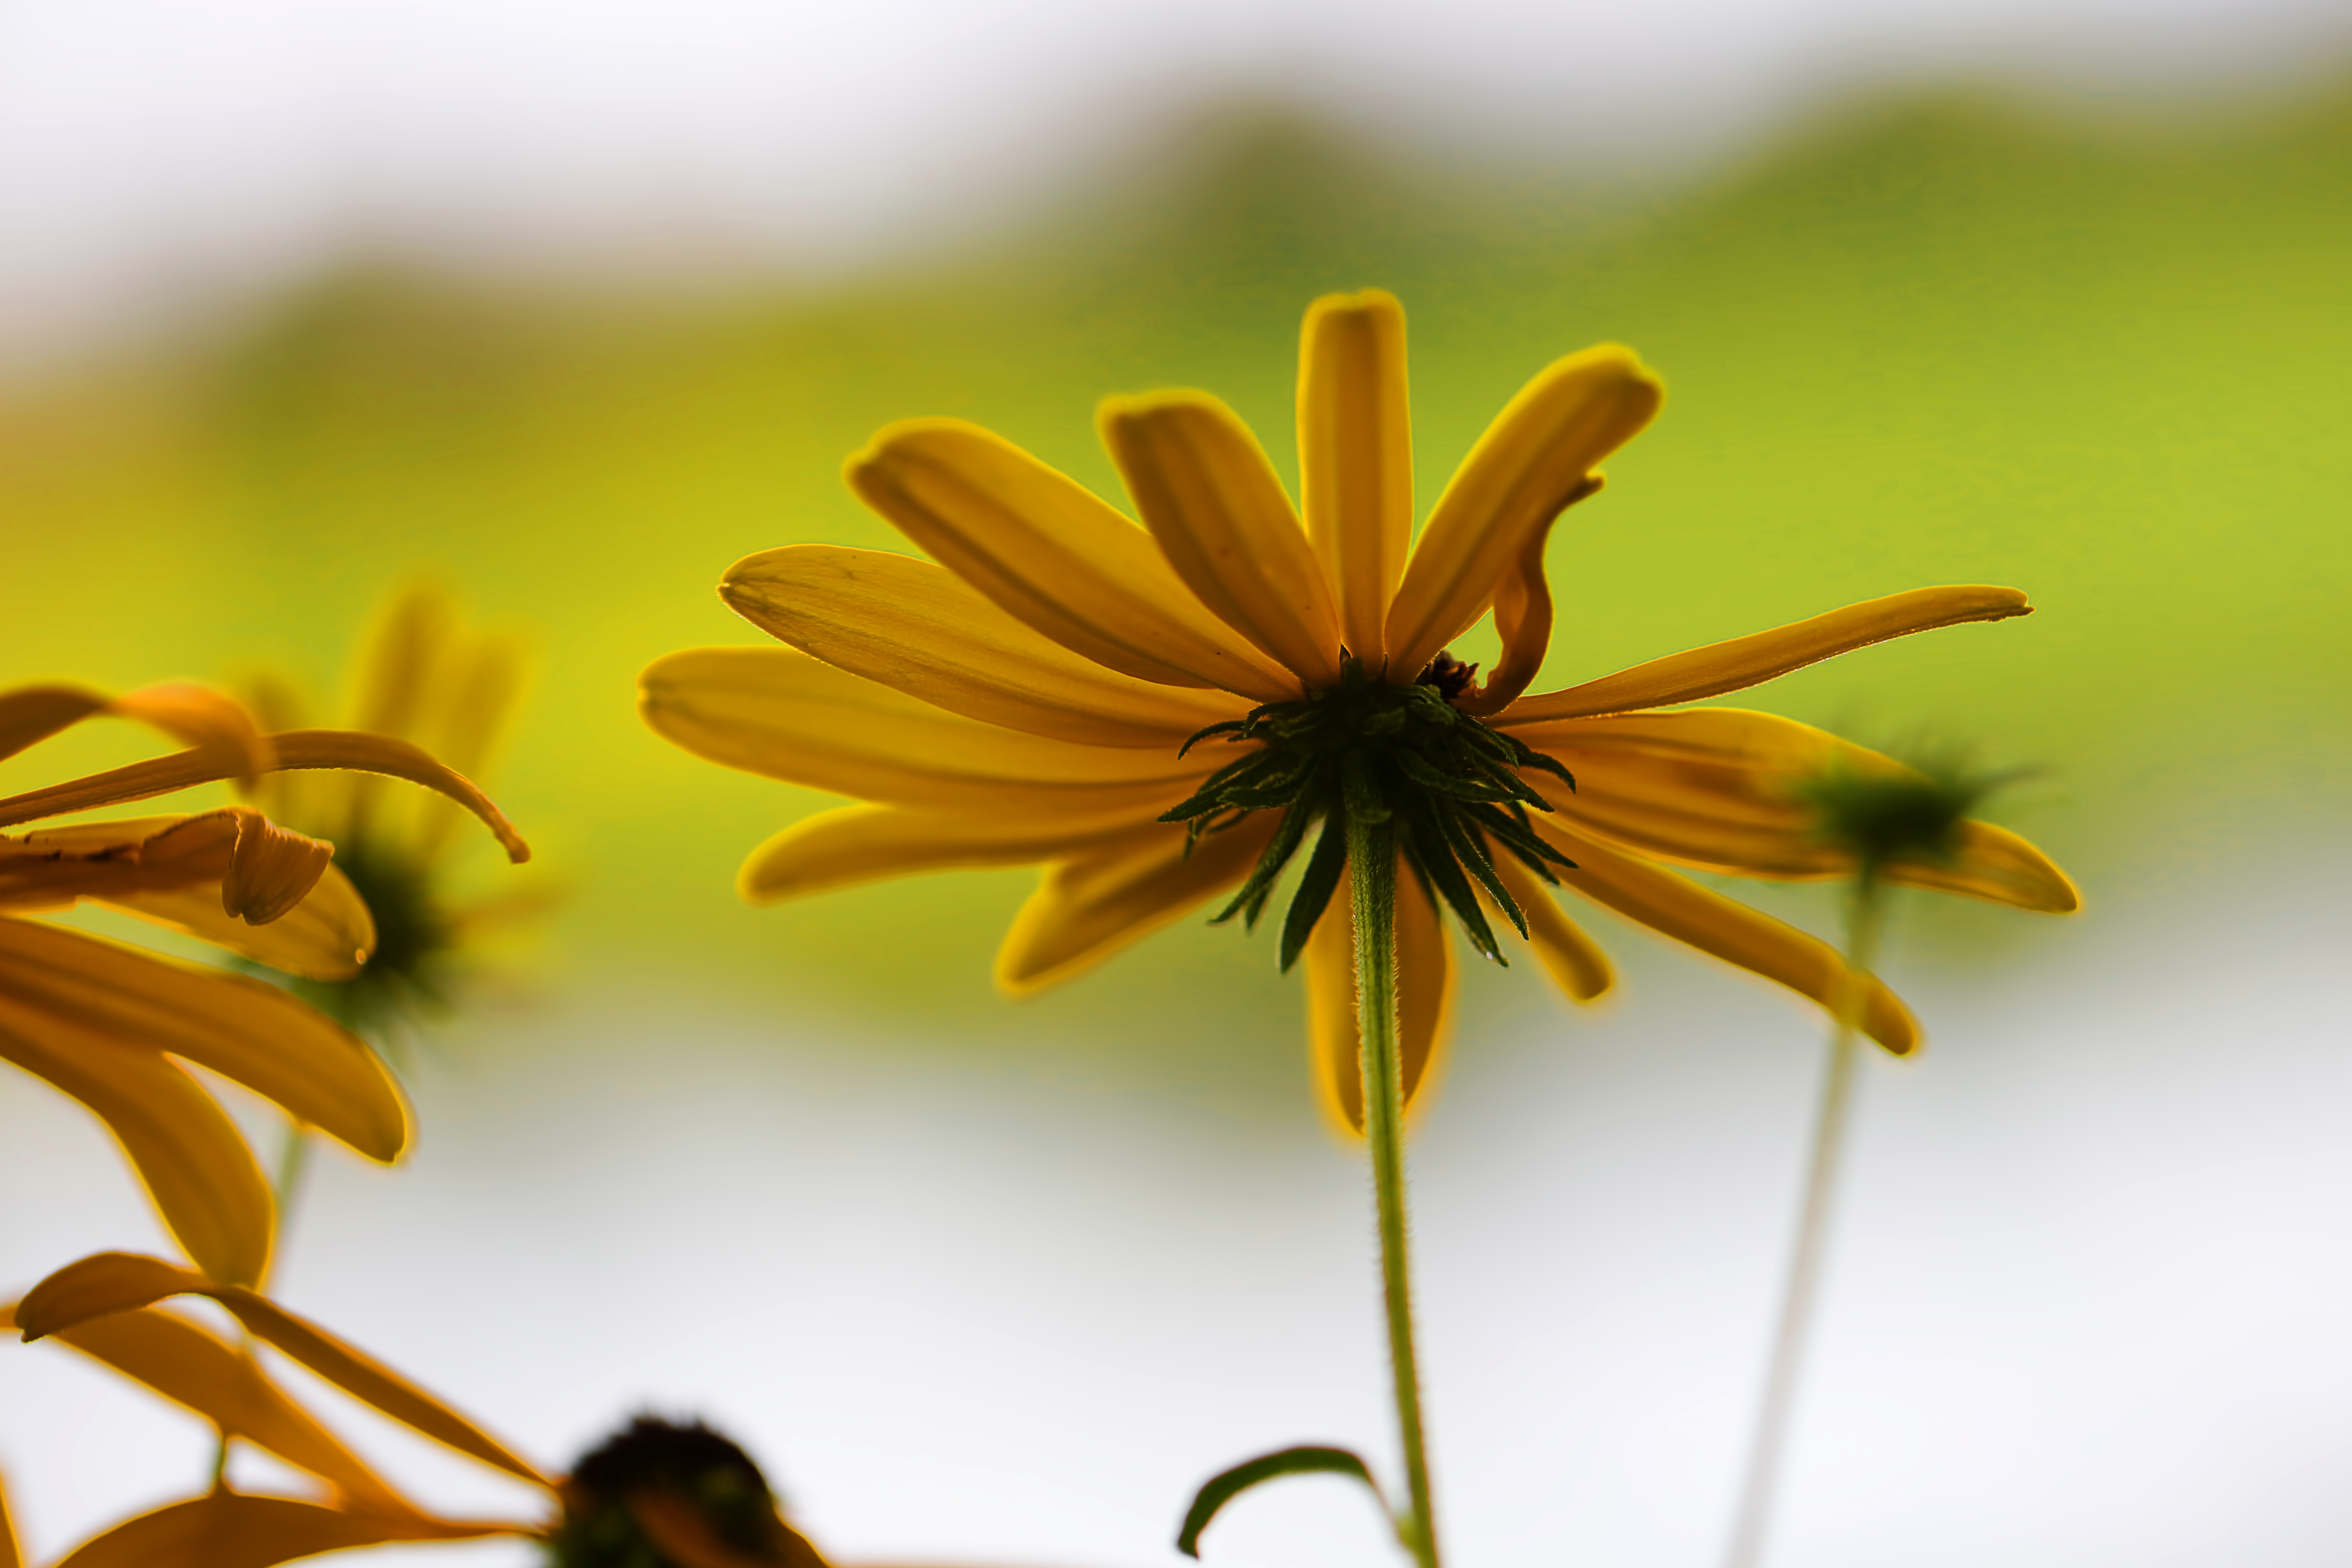
PHOTO: Rudbeckia hirta 'Autumn Colors'.
Black-eyed Susan (Rudbeckia hirta ‘Autumn Colors’)

Rudbeckia cultivars
Black-eyed Susans and coneflowers

With familiar daisy-like flowers that will bloom through all of fall, it is no wonder that species of Rudbeckia are a fall favorite. Petal colors can range from shades of bright yellow to orange-gold, and some cultivars have flushes of red on the petals. Rudbeckia will respond well to deadheading or alternatively, leave the dried flower heads on the plant to attract migrating birds to your garden. This will also allow the flowers to reseed because not all cultivars of Rudbeckia will act as perennials in colder climates.  These flowers are low maintenance if planted in well-drained soil.

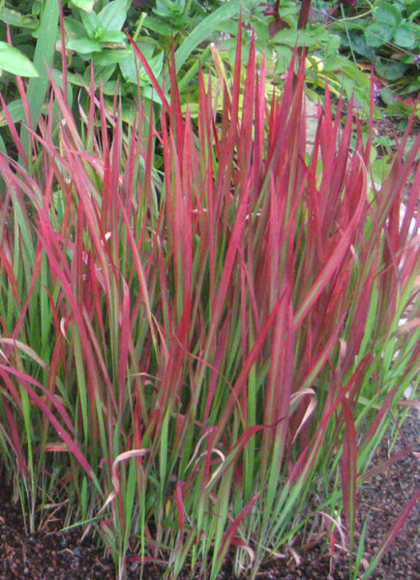
PHOTO: Imperata cylindrica 'Rubra', or Japanese blood grass.
Japanese blood grass (Imperata cylindrica ‘Rubra’)
Photo by Jim Hood, via Wikimedia Commons

Imperata cylindrica ‘Rubra’
Japanese blood grass

Japanese blood grass is another low maintenance ornamental grass. Usually smaller in stature than switchgrass, it introduces a dramatic splash of deep red into your landscape. Although nonnative and normally a fiercely invasive plant, this cultivar does not produce seed and spreads slowly. This grass is best used as a border plant in well-drained soils.


©2016 Chicago Botanic Garden and my.chicagobotanic.org
Planting Bulbs in Containers for Winter Blooms

Why wait until spring? Plant a bulb container for a preview of blooms to come.

In this video, the Chicago Botanic Garden shows how to create a bulb garden in a pot for winter forcing so you can enjoy a preview of spring in the midst of winter’s chill. Forcing is the act of putting plants through a cold period in order to stimulate blooming during an atypical time of the year. By potting up your bulbs now, you’ll be able to enjoy a spring garden in your living room in ten weeks.

What you need:

  • A shallow container with drainage holes
  • Enough spring bulbs to fill the container (plan on planting them close together, with an inch of space between bulbs)
  • Slightly moist potting soil

Assemble your container:

  1. Cover the bottom of the pot in one inch of soil.
  2. Add your largest bulbs in a layer, leaving approximately one inch between plants.
  3. Cover these bulbs. If adding another layer of smaller bulbs, leave 1½ inches of space from the top of the pot. Add the small bulbs in this layer, leaving one-half inch of space between plants. Fill with soil to within one-fourth inch of the rim.
  4. Lightly water the container.
  5. Place your container in a cool, dark location. The container must never get above 50 degrees or below freezing. Ideal spots are an unheated garage or, if you do a small pot, the crisper drawer of your refrigerator.
  6. In ten weeks your plants can be moved to a warm, sunny location. You should start to see growth within a week. (If you don’t want to bring your plants out at this time, they can hold  for several months in a cool location.)
  7. Once the plants begin to show flower buds, move to a less sunny location to prolong the blooming period.
  8. After blooming, plants should be discarded. Forced bulbs rarely transplant well into the garden.

The best plants for forcing tend to be on the smaller side. Tulips and narcissus work very well, especially the smaller cultivars. Larger blooms will require staking, especially if they don’t receive enough sunlight. Iris reticulata, Scilla siberica, Crocus, and Muscari are all wonderful bulbs for forcing: they stay small, and come in beautiful jewel tones that will brighten up any winter windowsill.

PHOTO: Muscari 'Pink Sunrise'.
Muscari ‘Pink Sunrise’

©2016 Chicago Botanic Garden and my.chicagobotanic.org
Do-It-Yourself Seed Balls

Spring is seed season—and a good time to think about gifting seeds to gardeners, friends, and green-thumbed moms (think Mother’s Day, May 8).

Musing about how to share some of the seeds that she gathered at February’s Seed Swap, horticulturist Nancy Clifton got interested in the guerrilla gardening-inspired idea of “seed balls” (or seed bombs, as they’re sometimes called). While the guerrilla gardening movement leans toward stealth seeding, Nancy thinks seed balls make an ideal gift item—they’re easy to make, easy to “plant,” and an easy way to teach kids about germination.

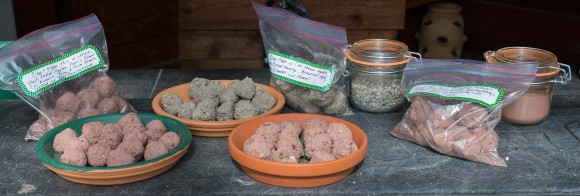
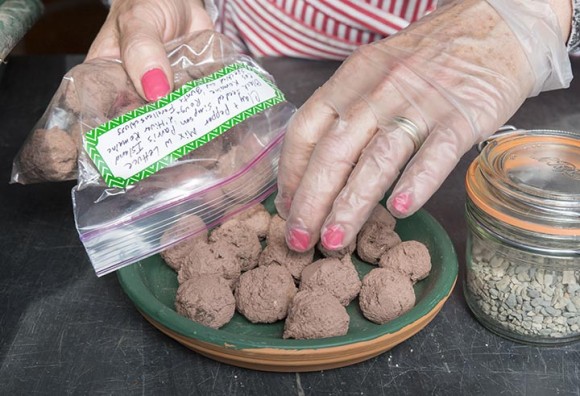
PHOTO: Seed balls made with different recipes.
Clay powder gives seed balls a reddish color and even texture; using clay chips makes a slightly chunkier, greenish seed ball. Both work equally well.

Here’s the easy seed ball recipe:

  • 1 cup powdered clay or potter’s clay (can be purchased online)
  • ½ cup dried compost (the finer, the better—Nancy used a pre-bagged compost mix)
  • 2 tablespoons desired seeds (see seed choice section below)
  • 1 tablespoon cayenne pepper (to deter critters from eating the sprouts)
  • Water

Mix the dry ingredients; then add ½ cup water. Stir, then begin to judge the consistency. Wearing gardening or plastic gloves, roll a teaspoon-sized ball in your hands (size can vary). Think “mud pie”—the ball should hold together when you squeeze it, without crumbling or dripping water.

Roll all of the mixture into balls; then let the balls dry on newspaper or waxed paper for two or three days. Don’t worry about smoothness—rustic-looking seed balls are as interesting as marble-smooth. The color will change to dark red/terra cotta as the balls dry. This recipe yields about 24 seed balls.

About Your Seed Choice

  • Less is more. You only want a few seeds to sprout from each seed ball. Too many seeds mean too many sprouts, resulting in too much competition for nutrients and water.
  • All sun. All shade. All herbs. All spring. Choose seeds with similar needs to maximize success in their container or garden spot. Nancy’s variations:
    • All summer annuals
    • All lettuces
    • All cool-season herbs
  • Use organic, non-treated seeds from your own garden or from trusted sources.
  • Choose native species for flowers and perennials that will grow successfully in our USDA Zone 5 region. Be responsible: do not use seeds from invasive species.
PHOTO: Nancy handles finished seed balls using plastic gloves.
Wear plastic or latex gloves when making seed balls. The mixture tends to be very sticky, and clay can dry out your hands very easily.

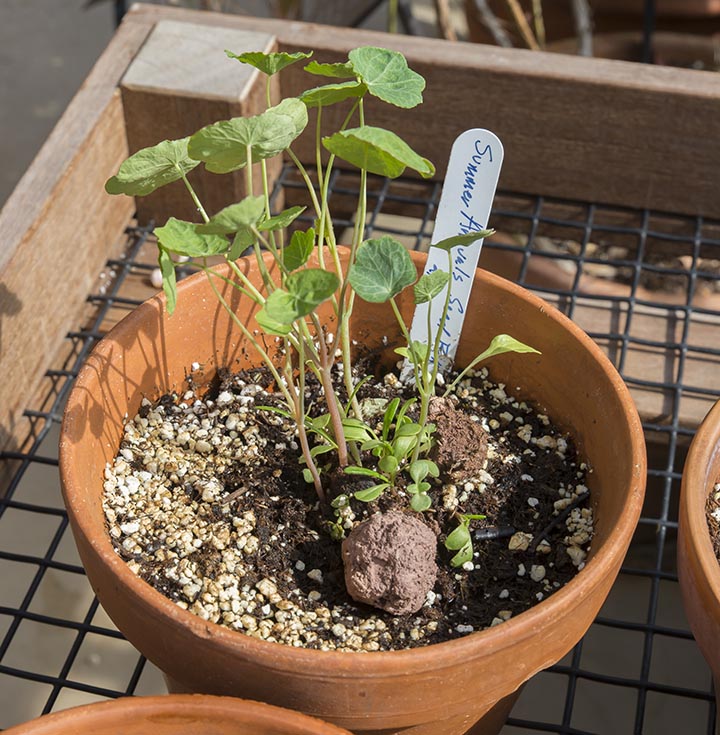
Seed balls can be set into a container of potting soil (sink it down just a bit into the soil), or placed, randomly or intentionally, on bare soil in the garden. A rainy day is the perfect day to “plant” seed balls—rain helps to break down the clay and compost, giving seeds a good dose of food and water to get started growing.

Throw one in your garden. Fill an empty space. Gift a brown- or green-thumbed friend. And happy spring, everyone!


©2016 Chicago Botanic Garden and my.chicagobotanic.org
D.I.Y. Mustards

What’s the oldest thing in your refrigerator? Chances are that it’s the almost-but-not-quite-empty jar of mustard.

Conditioned by decades of backyard barbecues, brightly colored squeeze bottles, and grab-’em-by-the-handful packets, Americans are at last tuning in to the taste of homemade condiments.

The time has come for homemade mustard—and you won’t believe how easy and tasty it is.

Start with the Basics

As always, we turned to program horticulturist Nancy Clifton to learn the how-to’s. Within five minutes of starting her demo for us, she had the first batch of mustard whipped up:

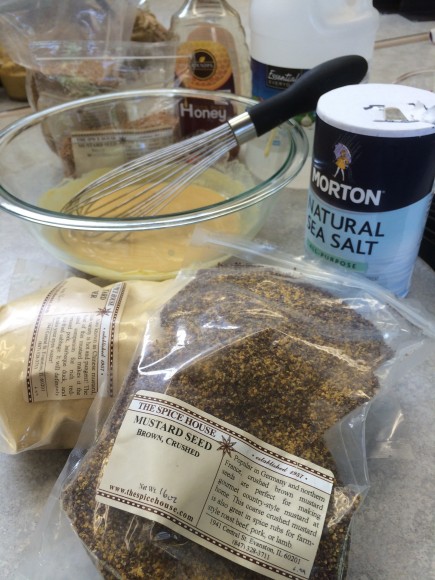
PHOTO: The ingredients for a basic, homemade mustard.
The basic mustard-making ingredients

Nancy Clifton’s Basic Mustard Recipe

½ cup dry mustard powder*
¼ cup cool water (see tips on temperature below)
¼ cup white vinegar
¼ teaspoon salt
2 to 3 teaspoons honey

Whisk ingredients together. Pour into clean Mason or Ball jars and set aside on a pantry shelf for two weeks, to allow the spice’s heat to mellow to the degree desired. Sample out of one jar periodically to test the heat level as you wait. It takes about two weeks for mustard to reach “mild.”

(*Local to the Chicago area? Find mustard powder available in bulk at Penzeys or The Spice House, or purchase online.)

Mustard-making Tips

  • Mustard powder makes a much stronger spread than mustard seeds. Best bet? A combination of both.
  • Hot water mellows mustard’s heat—use hot instead of cool in any recipe if you prefer less bite.
  • Soak whole grain seed in vinegar and water for 48 hours to soften it before using it in a recipe. Keep the seeds submerged, not floating.
  • Freshly made mustards should mellow for 2-4 weeks at room temperature on a pantry shelf. Refrigerate after the desired pungency is reached. Homemade mustards last 6 to 12 months in the refrigerator.
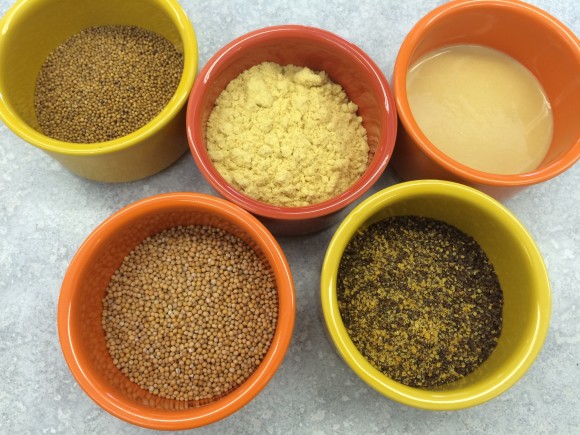
PHOTO: Mustard powders and seeds.
Clockwise from top left: hot mustard seed, yellow mustard powder, a finished basic yellow mustard, brown crushed mustard seed, and medium-hot mustard seed.

Next, Get Creative

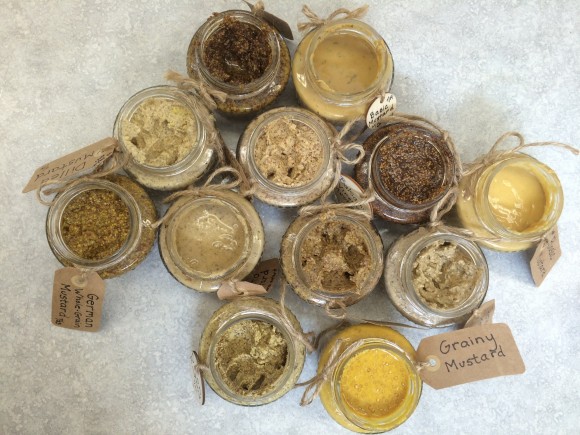
After making that first quick batch of basic mustard, Nancy passed around ten jars of flavored mustards for us to sample. Revelations all!

By tinkering with the basic ingredients—using cider or champagne or balsamic vinegars, adding fresh or dried herbs, experimenting with different whole mustard seeds, adapting recipes from cookbooks and the web—Nancy had us all exclaiming over the freshness, complexity, and surprise of mustards in these flavors:

  • Basic Mustard with Summer Savory
  • Herbed Tomato Mustard
  • Dilled Mustard
  • 5-Spice Mustard
  • Balsamic Vinegar Mustard
  • German Whole Grain
  • Dijon
  • Grainy Mustard
  • Herb & Shallot Mustard
  • Jalapeño & Cumin Mustard

Mustards make a sandwich (and a hot dog, as any self-respecting Chicagoan knows), and homemade mustards will forever change your approach to sandwiches. Try mixing hot mustards with mayo for a deliciously different spread. You’ll also rethink deviled eggs…potato salad…pork tenderloin…veggie sauces…and salad vinaigrettes.

A Hot Gift Item

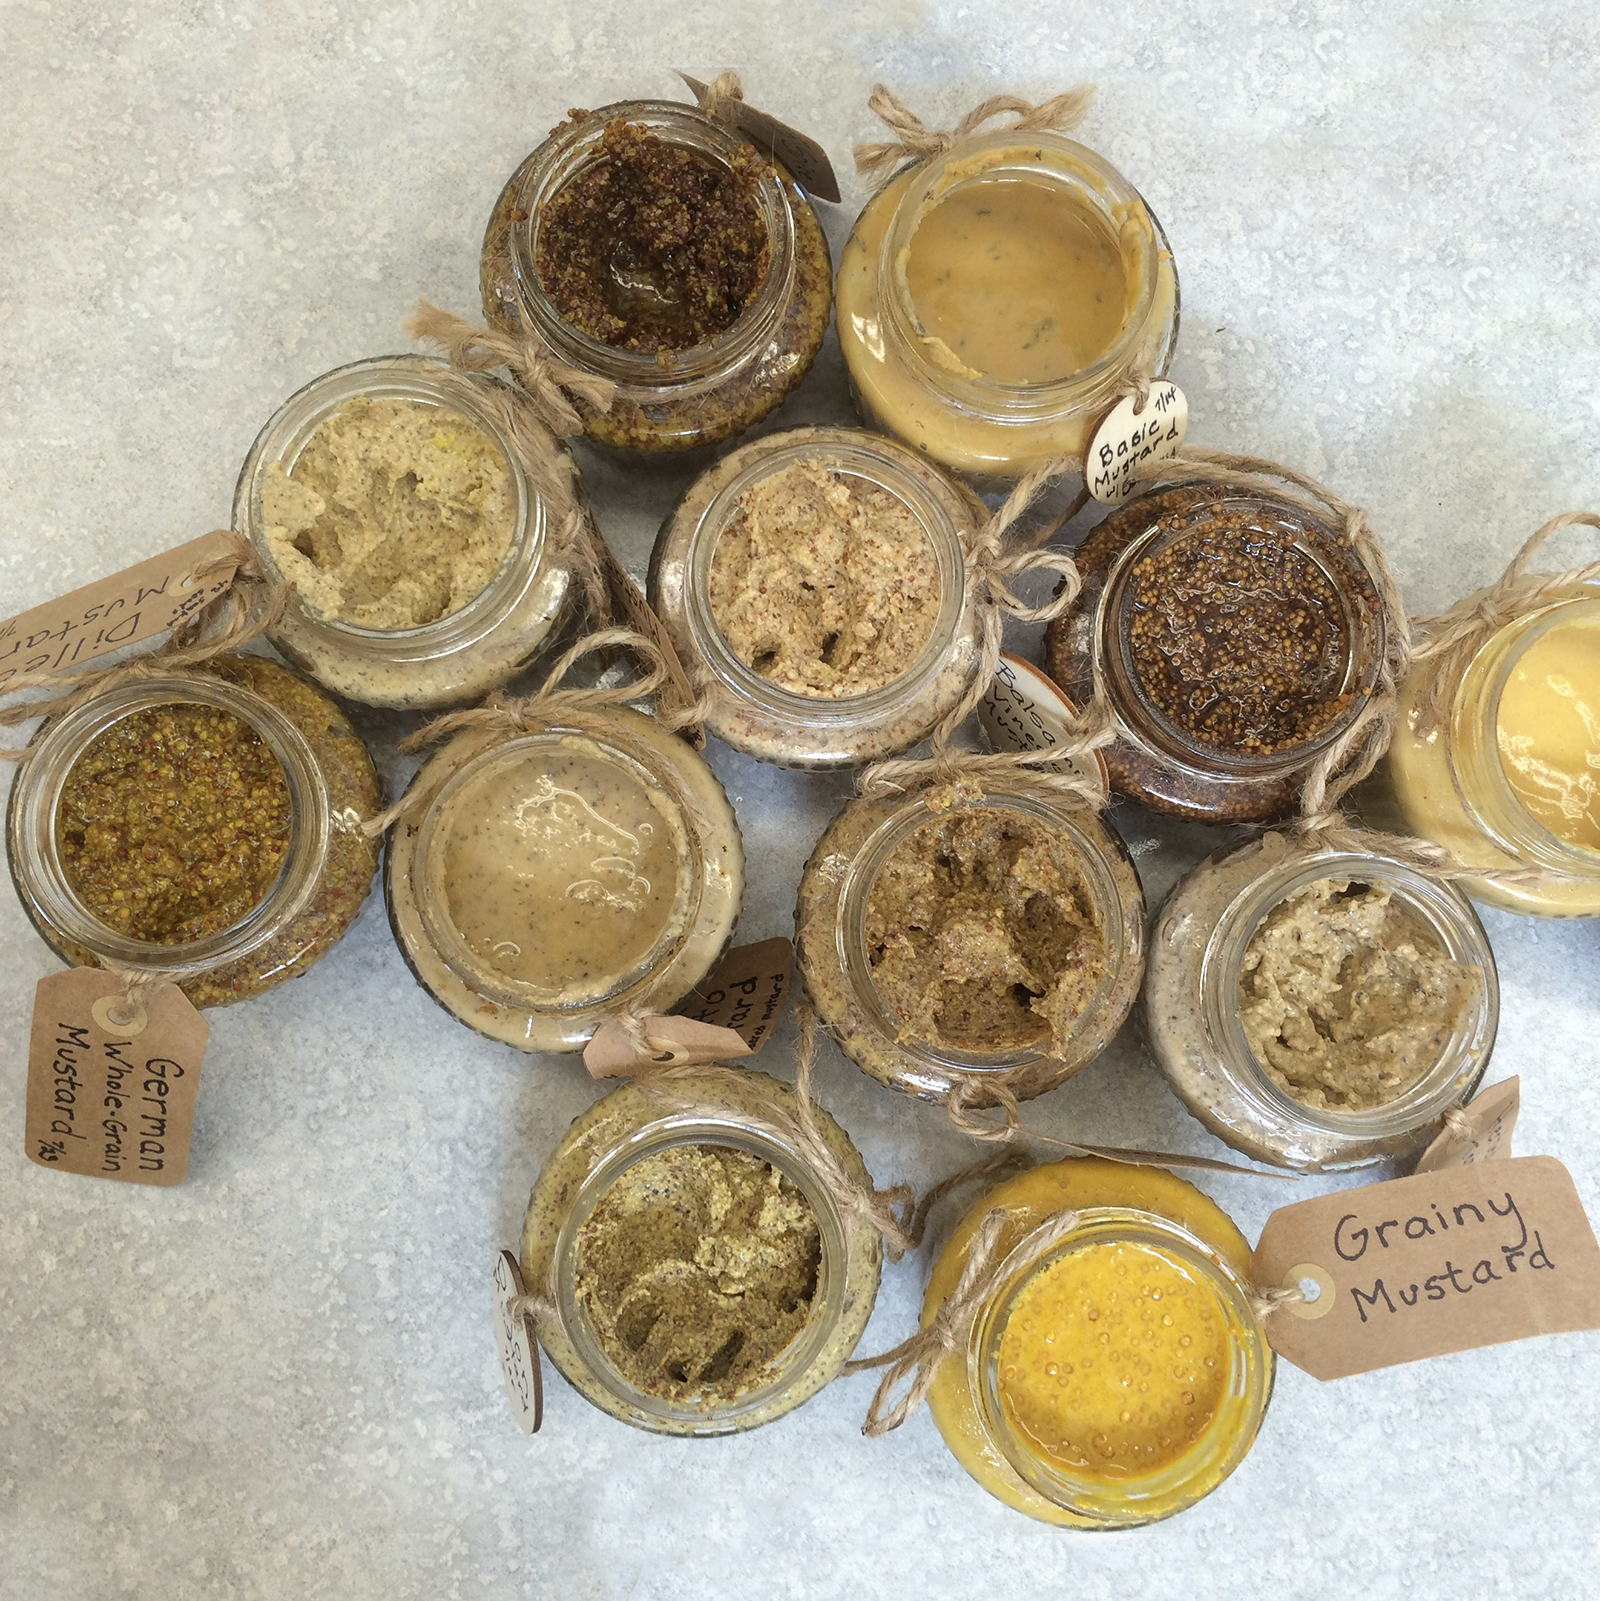
PHOTO: Uncapped mustard varieties showing different flavors, colors, and textures.
Homemade mustard in a single jar or assortment makes a great gift that’s sure to be enjoyed!

Homemade mustards make awesome gifts. Need a football season party gift? Check. Hostess gift? Check. During the holidays, gift neighbors, co-workers, and foodies with a package of three different mustards in quarter-pint jars—delicious and memorable!

Experiment, and build your gift stock—remember that it takes a couple of weeks for mustard to mellow—and the next time you’re cleaning out the refrigerator, recycle that old jar of yellow stuff and replace it with a jar of your own fresh, tasty, homemade mustard.

The Plant Connection 

PHOTO: Brassica nigra in seed and in flower. The seeds are contained in conical pods called silique.
Brassica nigra in seed and in flower. The seeds are contained in conical pods called silique.

Yes, mustard seed comes from a plant—three different plants, in fact. All are in the Brassica family.

Brassica nigra = black mustard seed
Brassica juncea = brown mustard seed
Sinapis alba = white mustard seed

And yes, you can grow your own mustard plants for seed—just be sure to harvest it all, as mustard can quickly self-sow and take over a garden bed.

Looking for more tasty, homemade gift ideas? Make some Vanilla Spice Apple Butter with scientist Pati Vitt, or see what other gifts gardeners give!

©2015 Chicago Botanic Garden and my.chicagobotanic.org