It’s easy to find fun outdoors—with sticks, chirpy crickets, magic circles, and more.
“Hands in earth, sand, mud: building, digging, sewing, baking—these are what humans DO.”
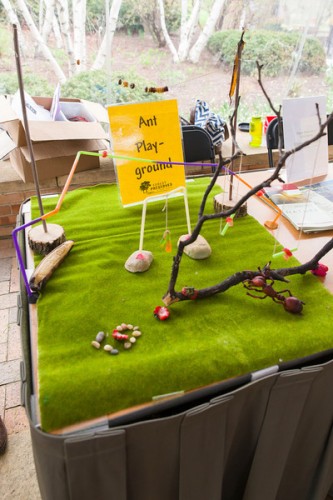
Build an ant playground out of sticks! Sue Dombro of the Forest Preserves of Cook County gave us tips for building one, adding this telling comment: “My daughter used to do this all the time, and now she’s a wildlife biologist.”
For fun, interesting, and education-based ideas, we turned to a fun, interesting, and education-based crowd: the 190 teachers, home educators, day care providers, park district staff, museum employees, librarians, and just-plain-curious caregivers who came together at the Garden for a Nature Play conference (sponsored by the Chicago Botanic Garden, Chicago Wilderness, and the Alliance for Early Childhood).
That morning, opening remarks were short, but sweet. A few thought-provoking highlights are quoted here. Then we did what any group of early childhood-oriented people would do: We all went outside to play.
At our outdoor “playground,” 19 organizations shared their fun, interesting, and education-based ideas for playing outside. You may recognize many from your own childhood.
1. Pick Up a Stick
How cool is this? In 2008, the stick was inducted into the National Toy Hall of Fame! It’s in great company: the jump rope, dominoes, the Frisbee, Tinkertoys and, yes, the Easy-Bake Oven are co-recipients of the honor. The possibilities of the stick are endless—it’s a musical instrument, a light saber, a wand, a fishing pole, a giant pencil for drawing in the dirt, a conductor’s baton, the first leg of a tepee, and anything else a child says it is.
2. Learn to Lash
If one stick is interesting, a pile of sticks has real 3-D potential. The art of lashing teaches kids to turn something small—two twigs lashed together—into something big: a ladder, a lean-to, a stool, a swing.
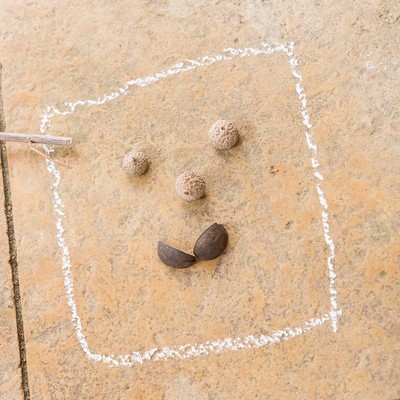
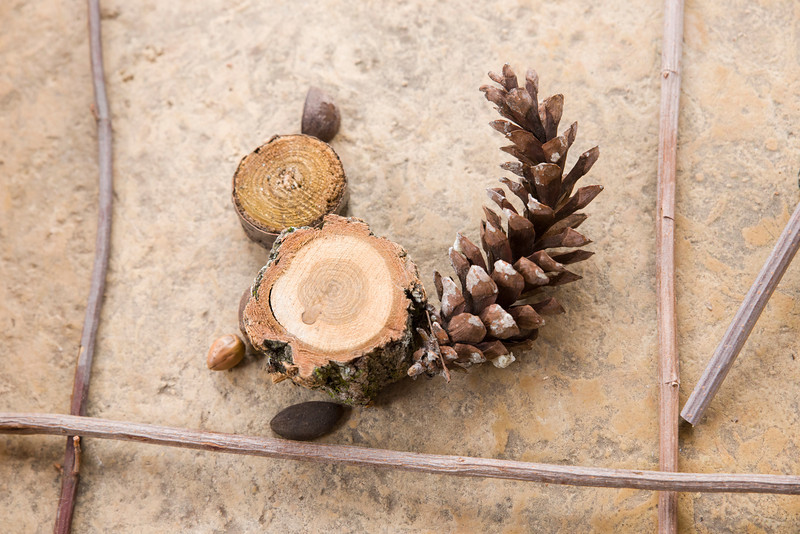
3. Find the Art in Nature
Twigs + stones + leaves + “tree cookies” + seeds = a nature “painting,” a sculpture, an imaginary animal, backyard trail markers, or utterly simple, charming drawings like the happy face made out of seeds shown with our headline.
“For children, the most powerful form of learning is with their hands.”
Imagination can run wild when kids are outside.
4. Nature as Paintbrush
Sure, you can use a standard brush to paint with, but feathers, pine needles, and arborvitae segments not only expand the creative possibilities but also feel wonderfully different in the hand.
5. Kid-Made Kites
Send the imagination soaring with a simple paper bag and a couple of kitchen skewers—in moments, it’s a kite! And then there’s the process of decorating it with ribbons and streamers…
6. Cricket Bug Box
Catch a cricket (or buy a dozen for $1 at the pet shop). Friendly and chirpy, crickets are many kids’ first experience with the insect world. Even little kids can collect the foliage, food scraps, and water-soaked cotton balls to accessorize a temporary shoe-box habitat.
“Nature is children’s real home.”
What’s under that log? Life.
7. Lift a Log
One of the simplest of all outdoor projects: lift up a log that’s been sitting on the ground and be amazed by the tiny wildlife that lives underneath it! Don’t forget to bring your magnifying glass.
8. Make a Magic Circle
Tuck a few wooden embroidery rings into a backpack. Placed on the ground in the woods, or the garden, or the sand, they become magical circles for kids to explore. What’s in yours?
9. D.I.Y. Dyeing
Rainy days need projects, too. Natural dyes made from vegetables (beets, onions), fruits (grape juice), or spices (turmeric, chili powder) transform undyed yarn or fabric into a personal style experience.
10. Paint Chip Color Hunt
One quick visit to the paint store can send kids off to hunt for hours, as they try to match nature’s colors to the humble paint chip card. (Handy to keep in the car for unexpected delays, too).
Simple but engrossing: match the colors in nature to the colors on a paint card
“A ring speaks of strength and friendship and is one of the great symbols of mankind.”
Those are the words of Jens Jensen, the great landscape designer who celebrated the native and the natural and often included circular council rings in his garden plans.
At the holidays, we hang wreaths on our doors as symbols of love, of welcome, of community.
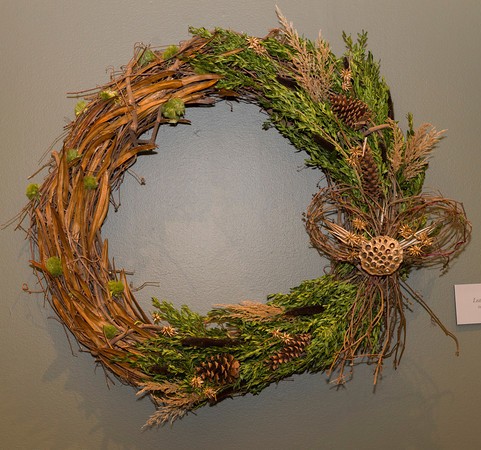
Ring in the new year with our staff’s creative interpretations of the circle, the ring, the wreath.
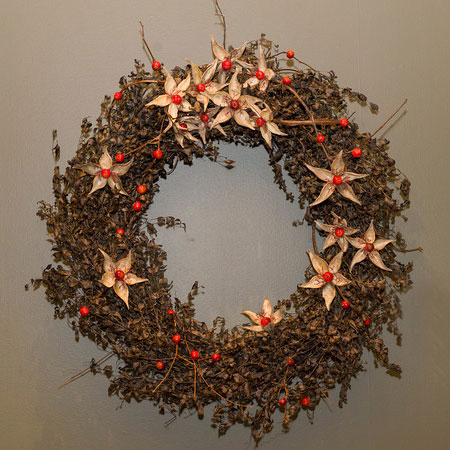
This is a BIG wreath—great for an outdoor wall.
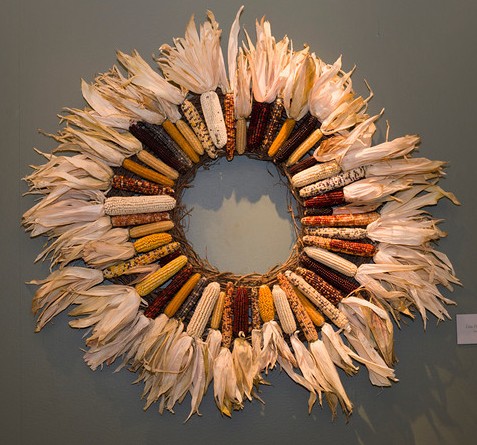
Flint. Dent. Sweet. Flour. Pod. Pop. Regenstein Fruit & Vegetable Garden horticulturist Lisa Hilgenberg celebrated these six major types of corn—and beautiful heirloom varieties with names like ‘Blue Jade’, ‘Glass Gem’, and ‘Golden Bantam’—in a seasonless sunburst.
The French saying on this wreath translates to, “the moon is my light and my joy.”
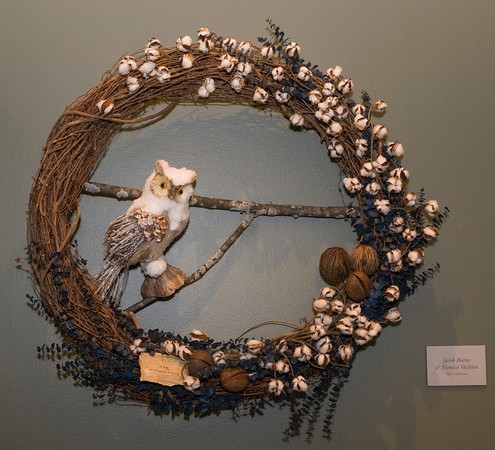
Monica Vachlon (administrative assistant of horticulture) and Jacob Burns (herbaceous perennial plant curator) built a wintry vignette around a charming mascot dubbed “Mr. Who.”
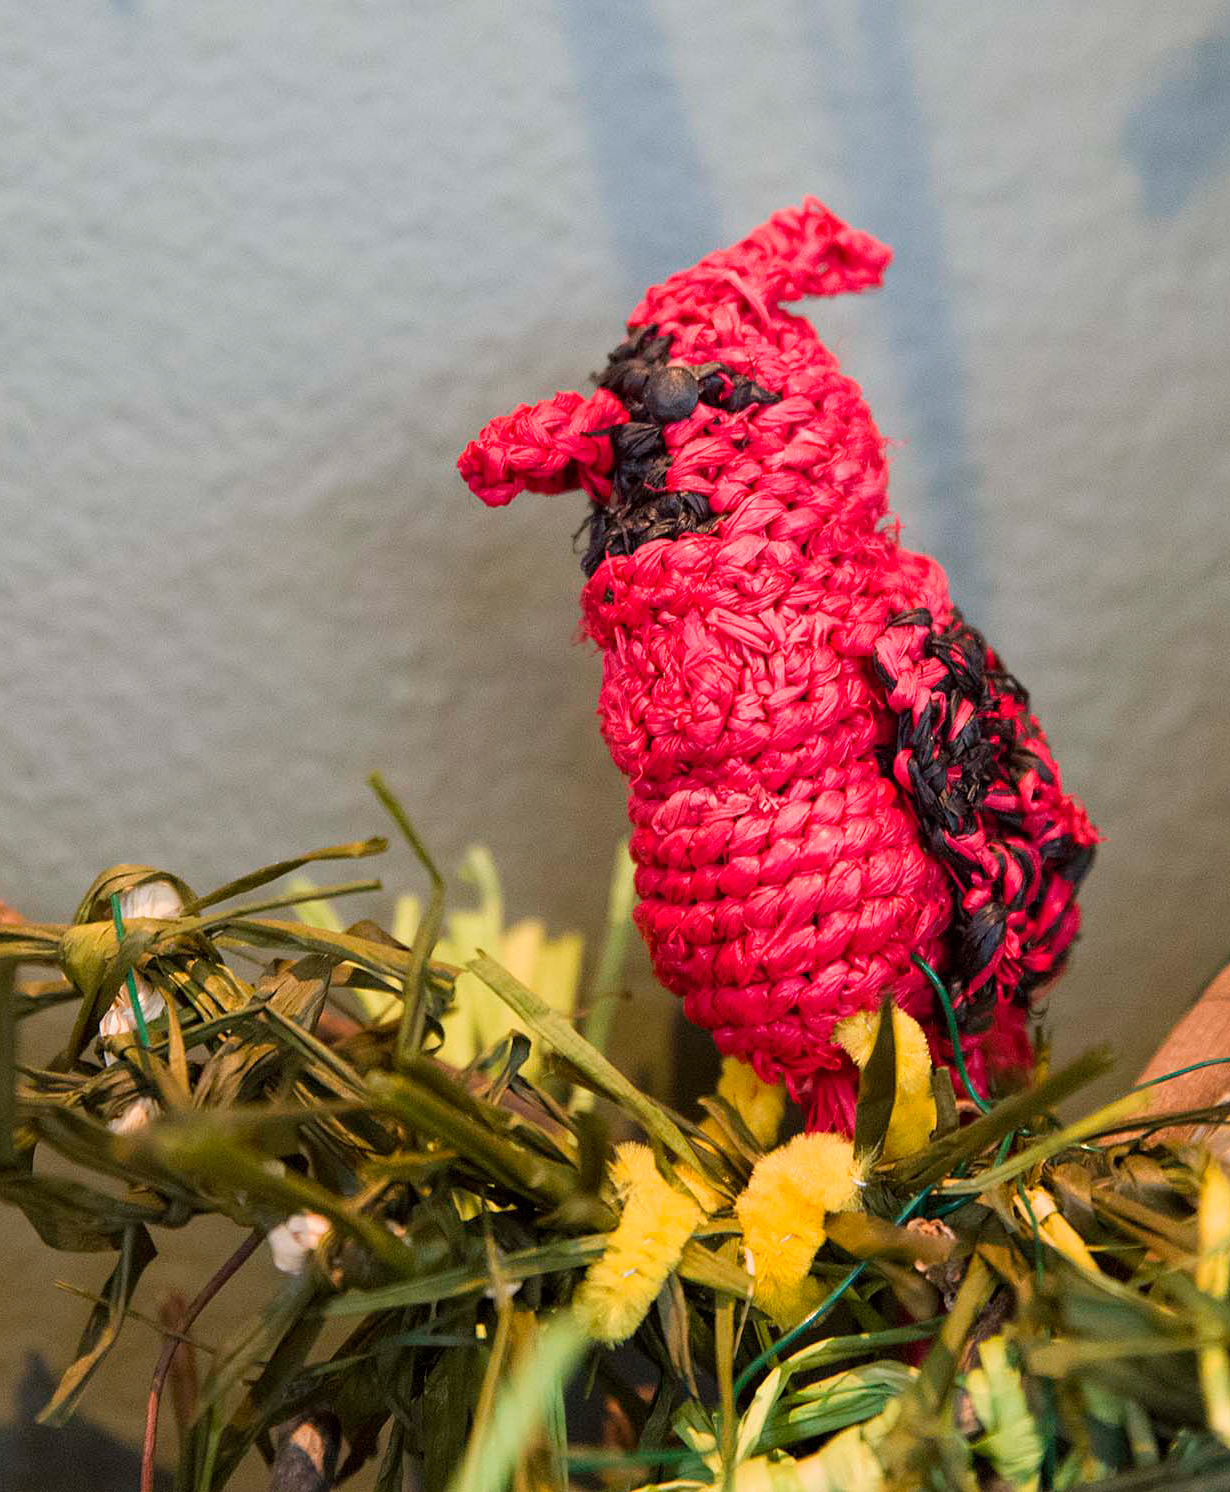
Children’s educator Kathy Johnson used just one ingredient for her made-by-hand wreath: natural raffia. It’s hand-knotted into evergreen sprays and red berries, and crocheted into a lifelike cardinal couple, nesting at the bottom.
Even the branches of this wreath are made of raffia.
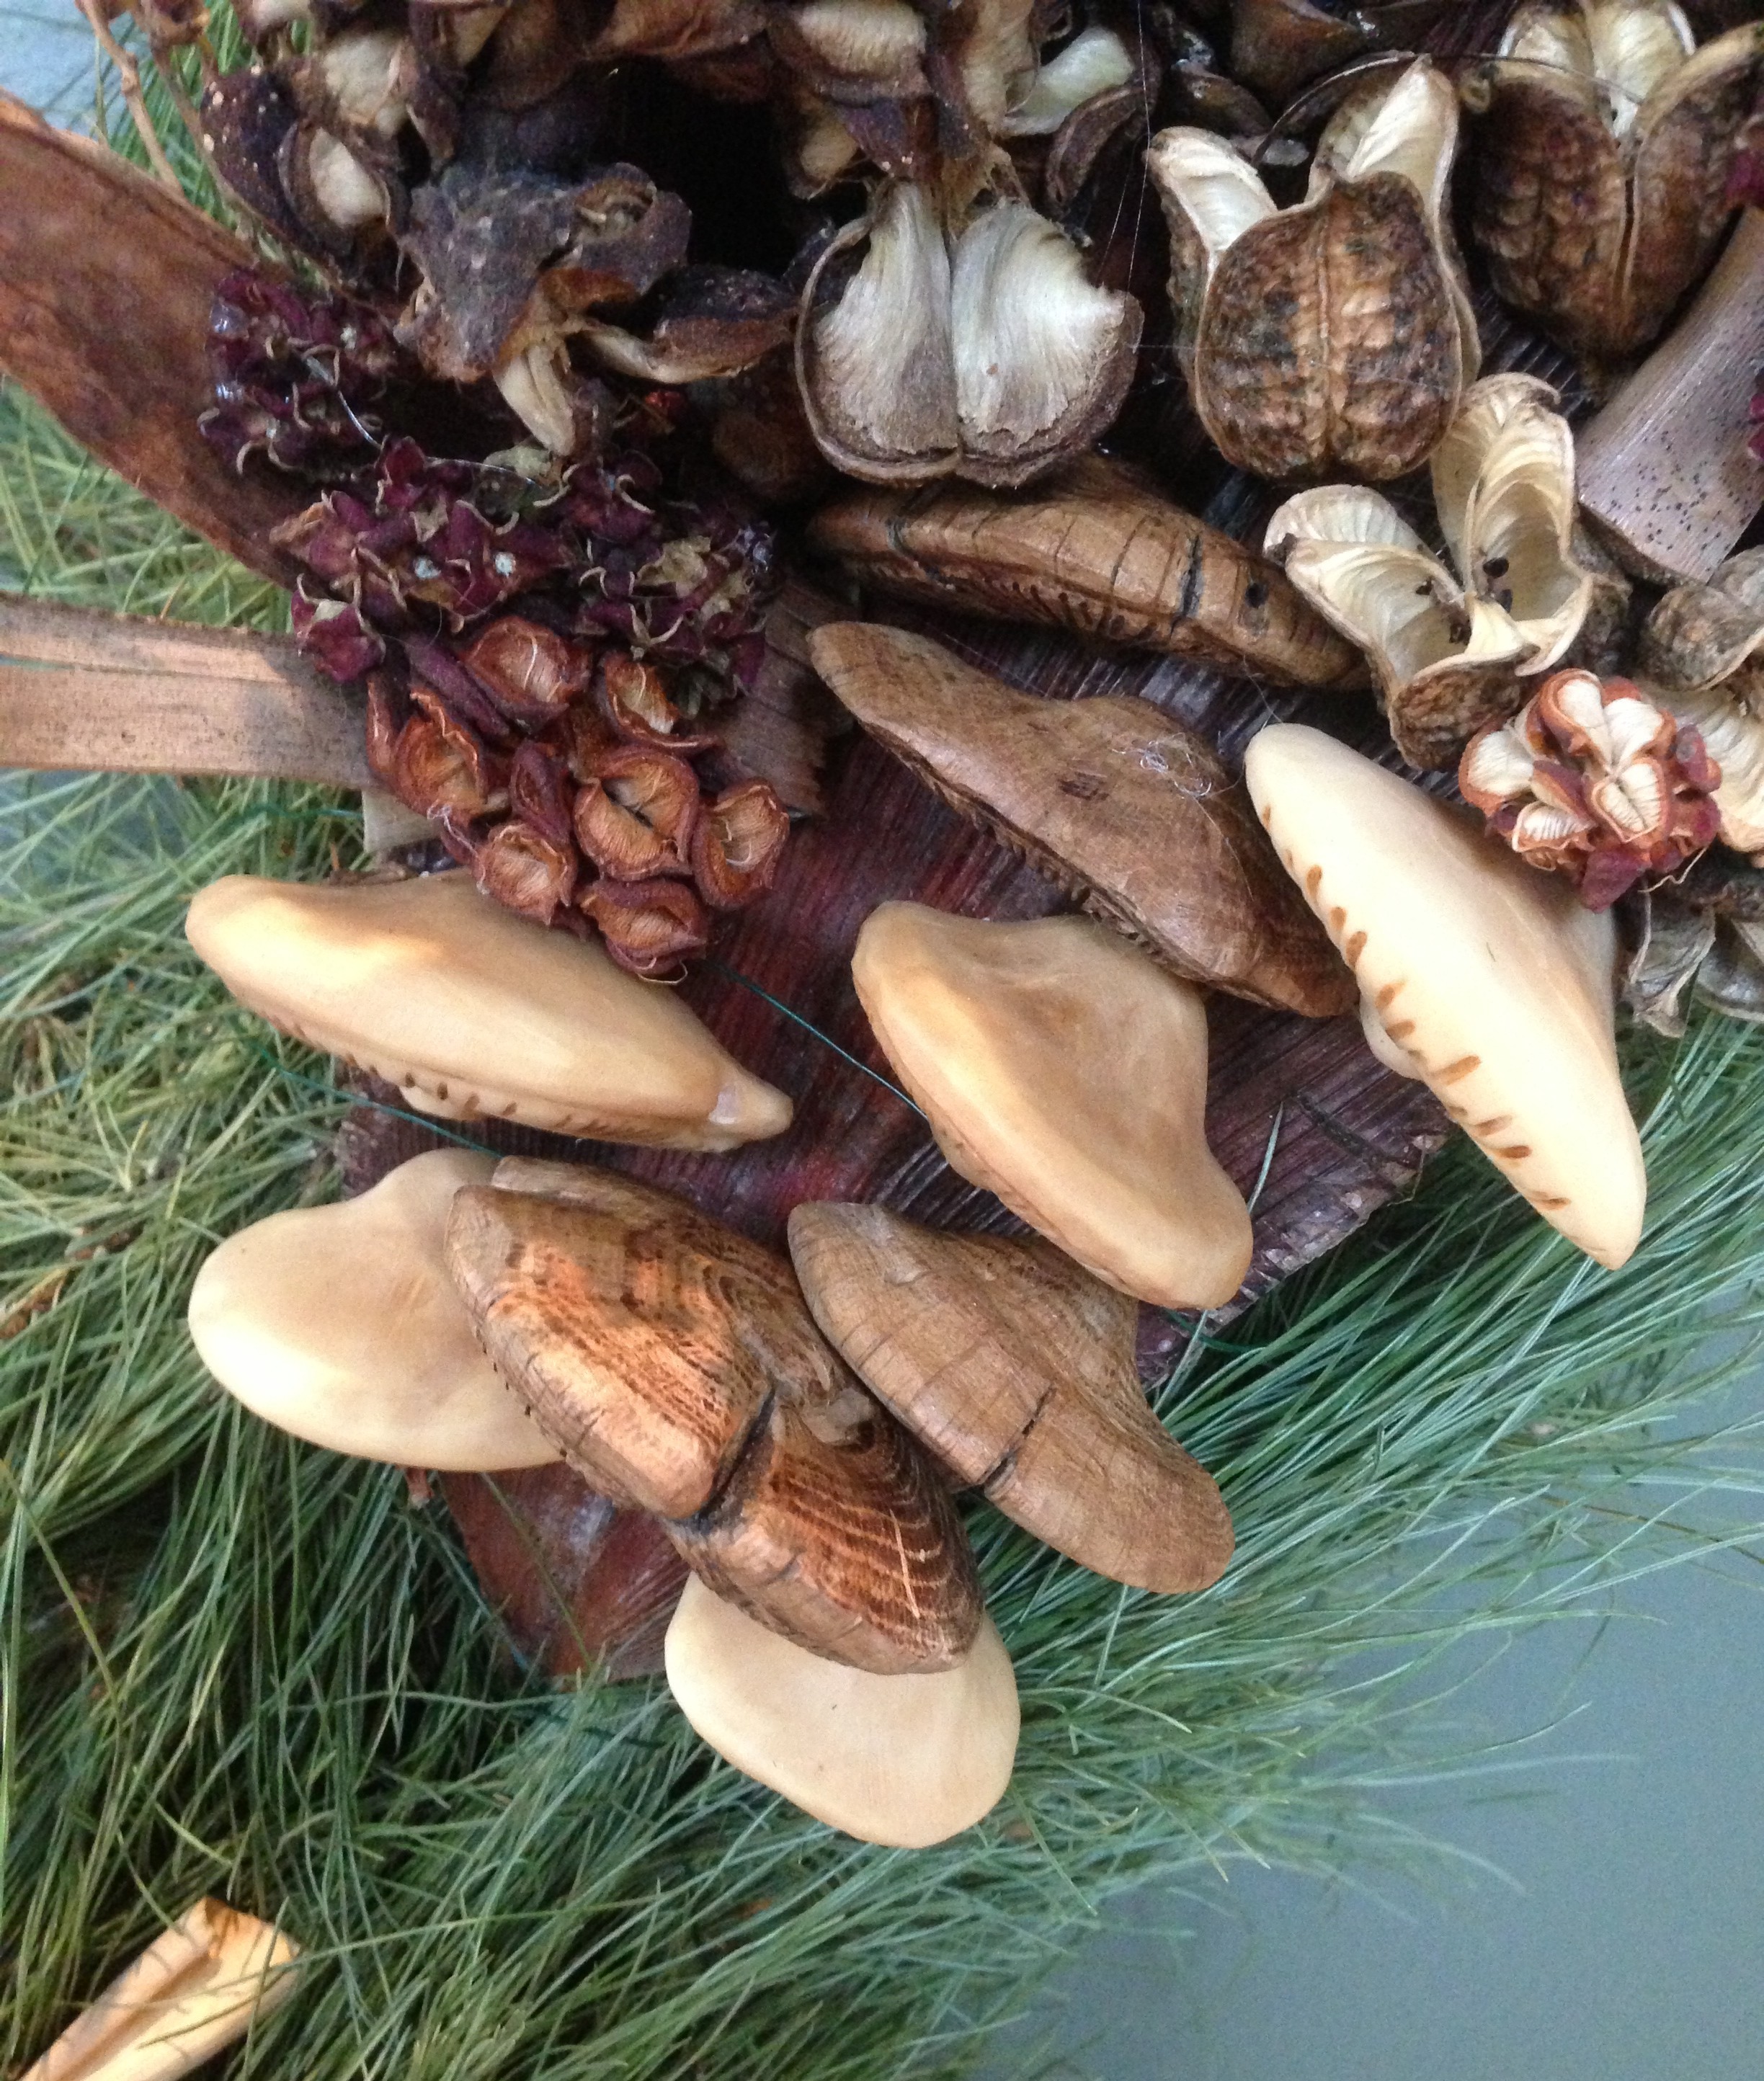
A nursery grower in our production greenhouse by day, Lorin Fox is an artist and woodcarver off-hours. A close look at his wreath reveals the mushrooms he hand-carved from tagua nuts and cedar.
Everlasting mushrooms were hand-carved from wood and nuts.
Star-shaped flowers are made from milkweed pods, with a crabapple at the center.
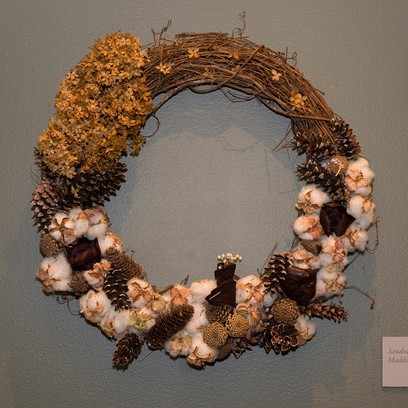
The supersized fruit of ‘Ralph Shay’ crabapple dot the centers of milkweed pod “flowers” on this dramatic, dried Baptisia wreath by ecologist Dave Sollenberger. He foraged all of the materials from gardens here and at home.
Cotton turned up as a natural and everlasting element in several wreaths.
So thoughtfully did the team from the Development Department (spearheaded by Lisa Bakker) brainstorm, gather, and plan for their wreath that it took them just two lunch breaks to assemble and decorate it.
All summer long, assistant horticulturist Leah Pilon kept a sharp eye out for materials that dried well: the Carex seed pods, okra, millet, dried flower heads (Green Ball dianthus), and Engelmann creeper vine (for the bow) were all collected in the Fruit & Vegetable Garden.
Even okra works on this wreath made from materials in the Fruit & Vegetable Garden.
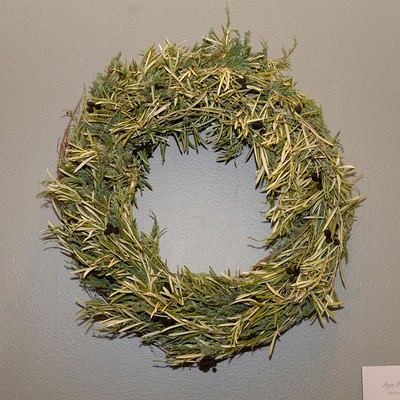
Horticulturist Ayse Pogue paid tribute to her Mediterranean roots with a fragrant wreath made of juniper and olive branches. Tucked in in delicate sprays, tiny spray-painted alder cones stand in for “olives.”
Real olive leaves, with faux olive fruit (they’re alder cones, painted black).
Christmas, New Year’s, Valentine’s Day, birthdays, showers, weddings: proof that one wreath can do it all.
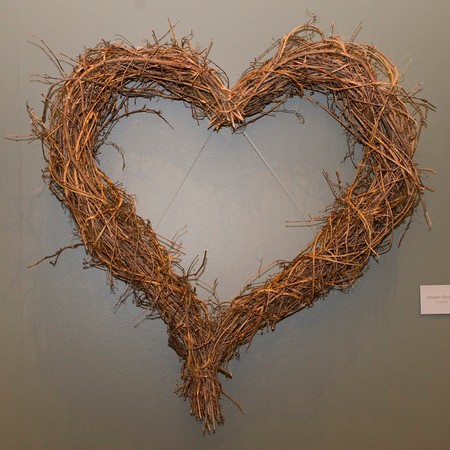
In simplicity is elegance. Made from grapevines growing in the McDonald Woods, this heartfelt wreath by senior horticulturist Heather Sherwood can hang indoors or out. Leave it up straight through February 14.
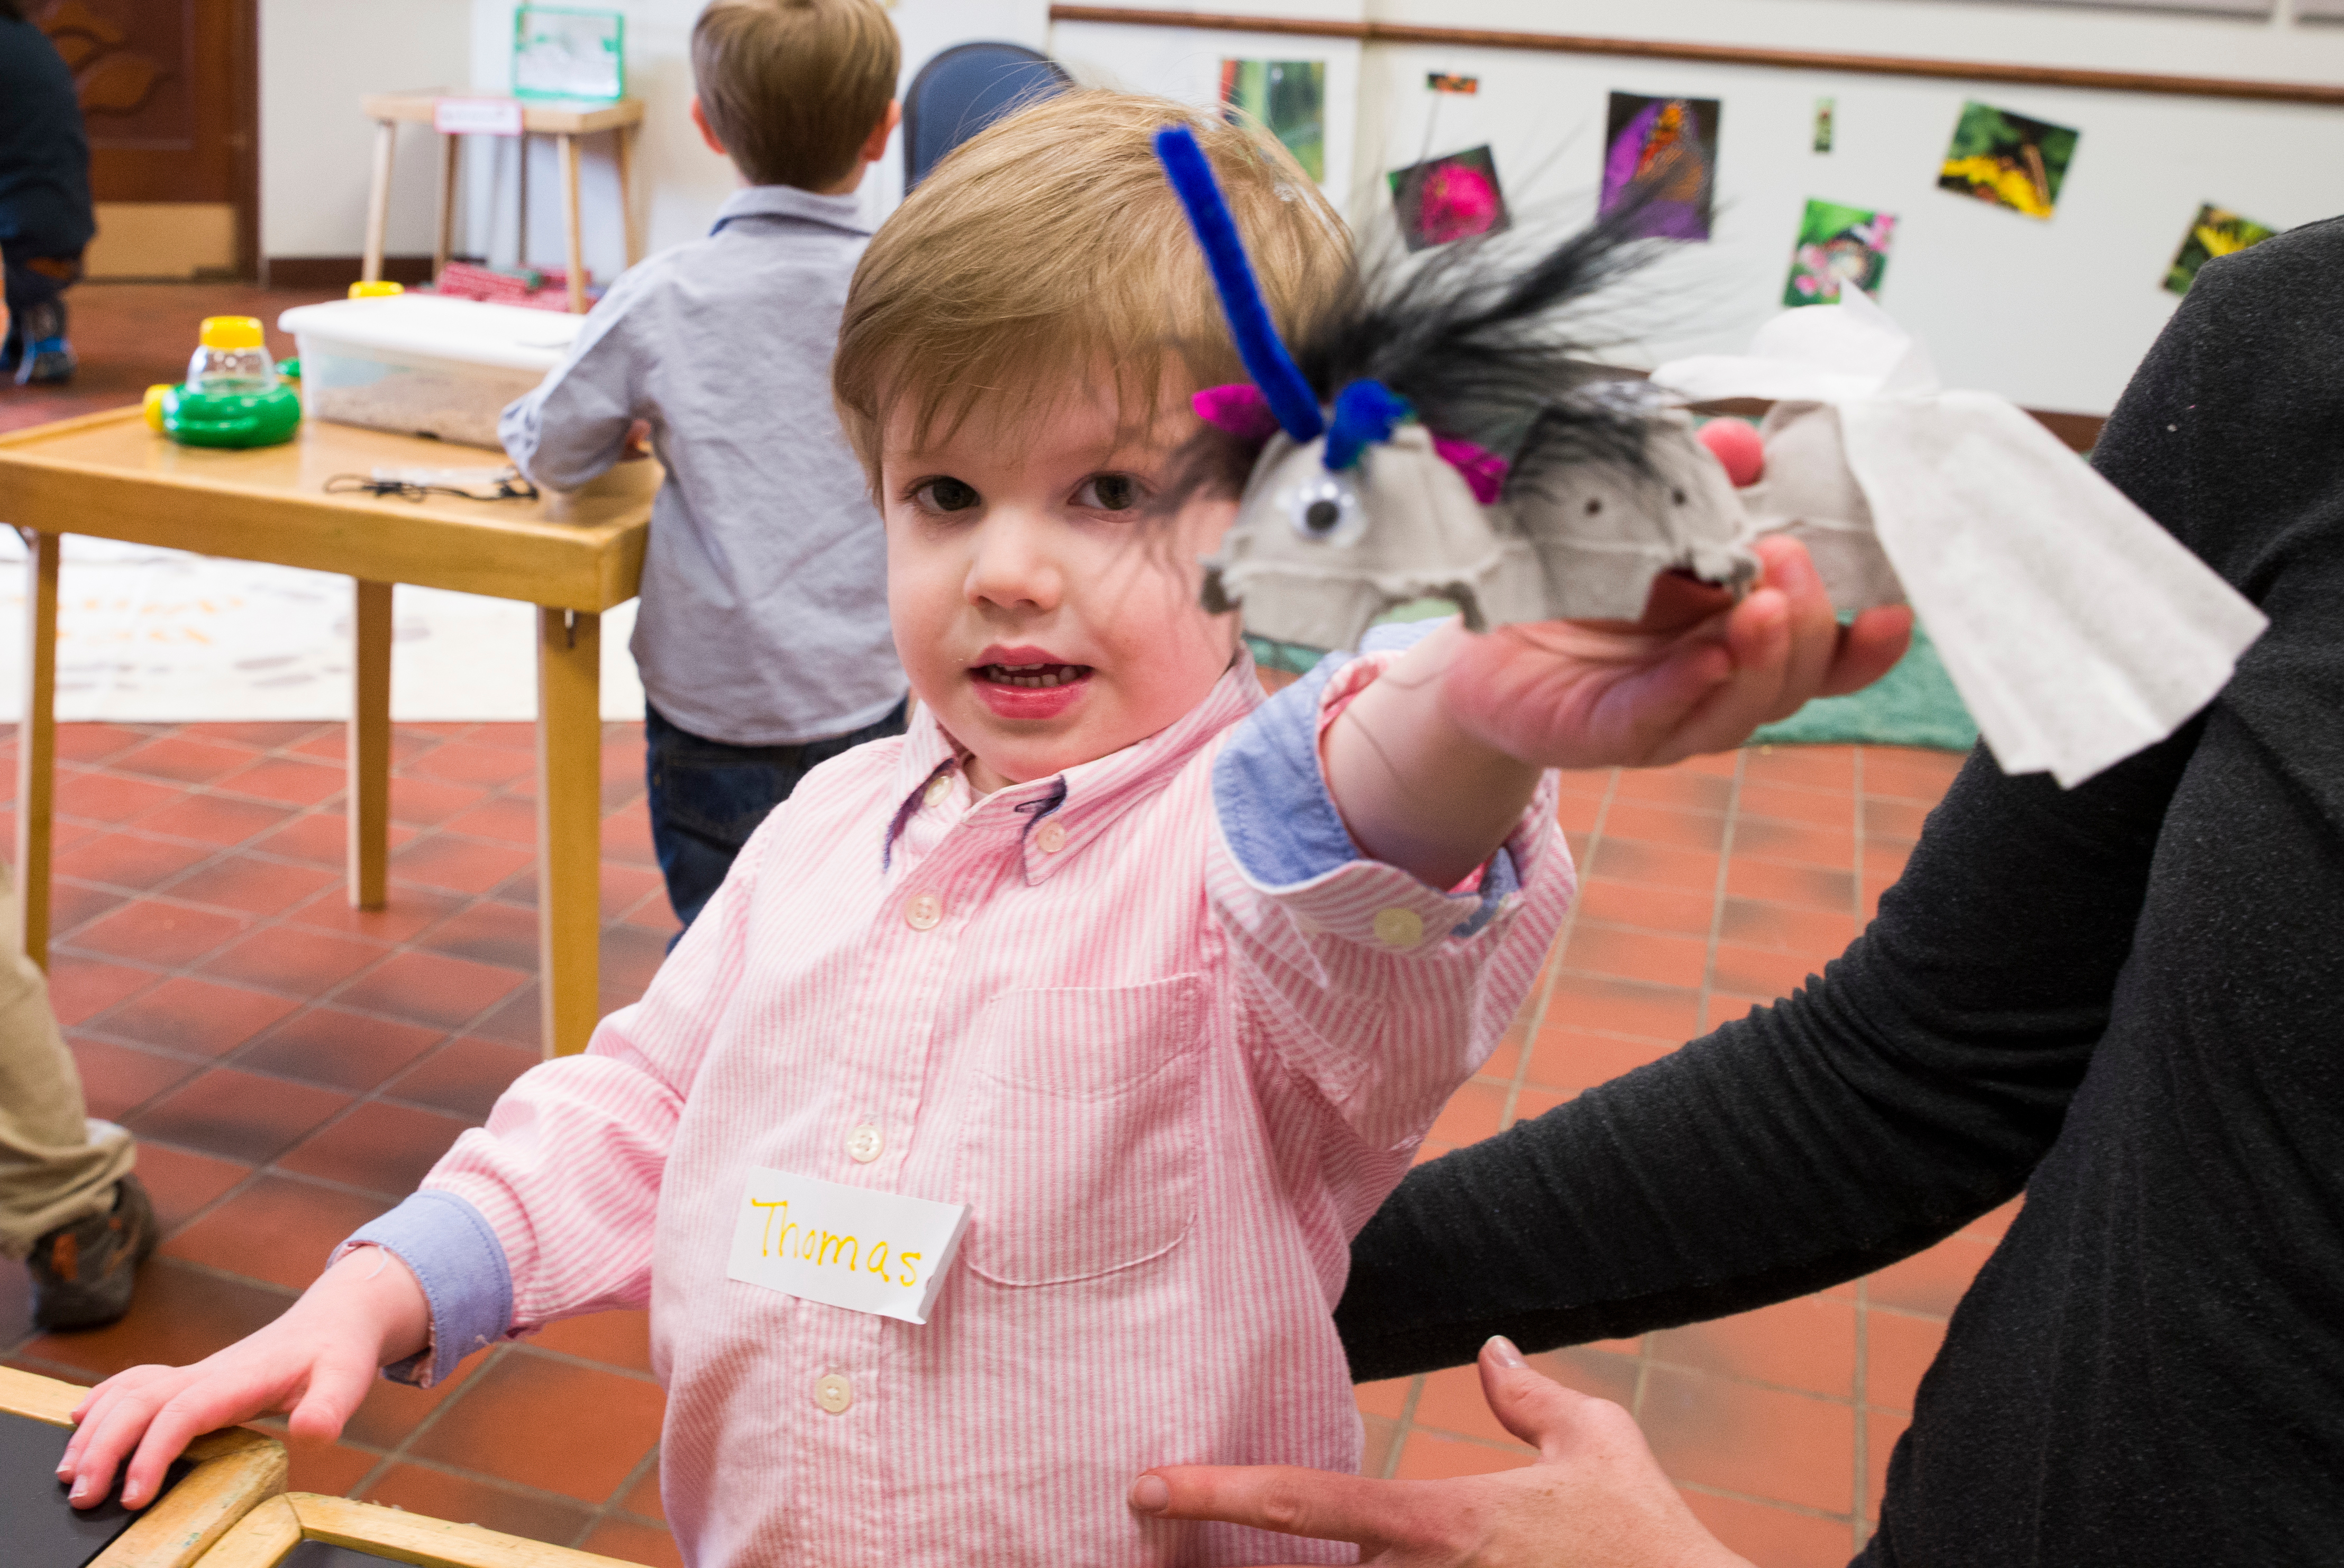
My 3-year-old son and I have enjoyed many seasons of Little Diggers. We have learned new things together and have had a lot of fun with the projects—one of our favorite projects was with insects. We got up close and personal with ants, butterflies, grasshoppers, and ladybugs. The instructor set up habitats in mesh containers where we could look at each group of insects with magnifying glasses and two-way viewers—the same tools real scientists use every day.
A friend investigating grasshoppers.
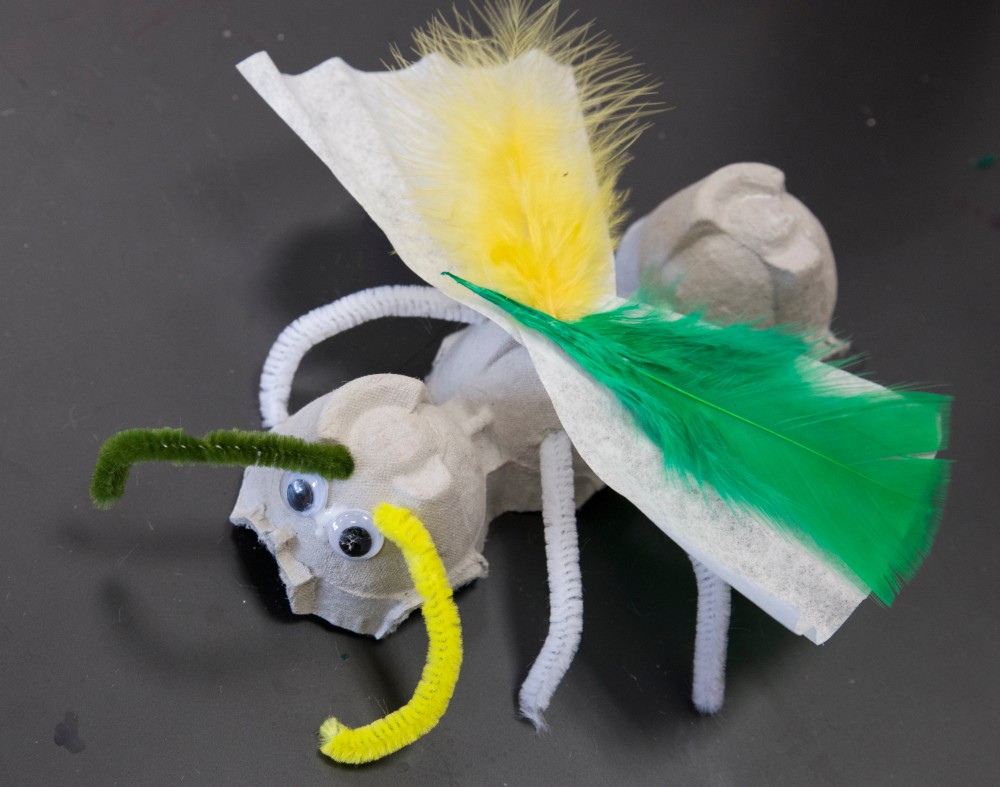
After looking at all the insects up close, we talked about all the different body parts an insect has, and why that makes an insect an insect and not a spider or another bug (even though they have a lot of the same body parts). All insects have three body parts (head, thorax, and abdomen), six legs, antennae, eyes—and sometimes wings! We remembered what the body parts were and where they go by building our own model insect. It was really easy—a fun and funny way to teach our kids about the different parts.
You can build your own model insect at home, too. Here’s what you’ll need:
An egg carton—Cut into strips of three eggs-worth. You can get four insect bodies out of one egg carton, so you can explore and make more than one kind of insect.
Coffee filters—Cut these each into six pieces for wings. You can see how to cut them from the photo of our completed insect below.
Pipe cleaners—Cut these into 3-inch pieces for legs.
Craft supplies to decorate and color your insect—Use feathers, googly eyes, crayons, gems, and tacky glue. Insects come in all shapes and sizes from simple black ants to very colorful, shimmery beetles. Have fun creating!
Use these materials to build your own insect.
As we built our insect and decided what it should look like, we talked about the different parts of our particular insect. We put antennae and one eye on the head, a feather and another eye on the thorax, and wings on the abdomen—and this was fine by me! While he was hesitant to put parts where they should go, he said “head,” “thorax,” and “abdomen” out loud as we built and talked about our insect. He was very proud of this final specimen.
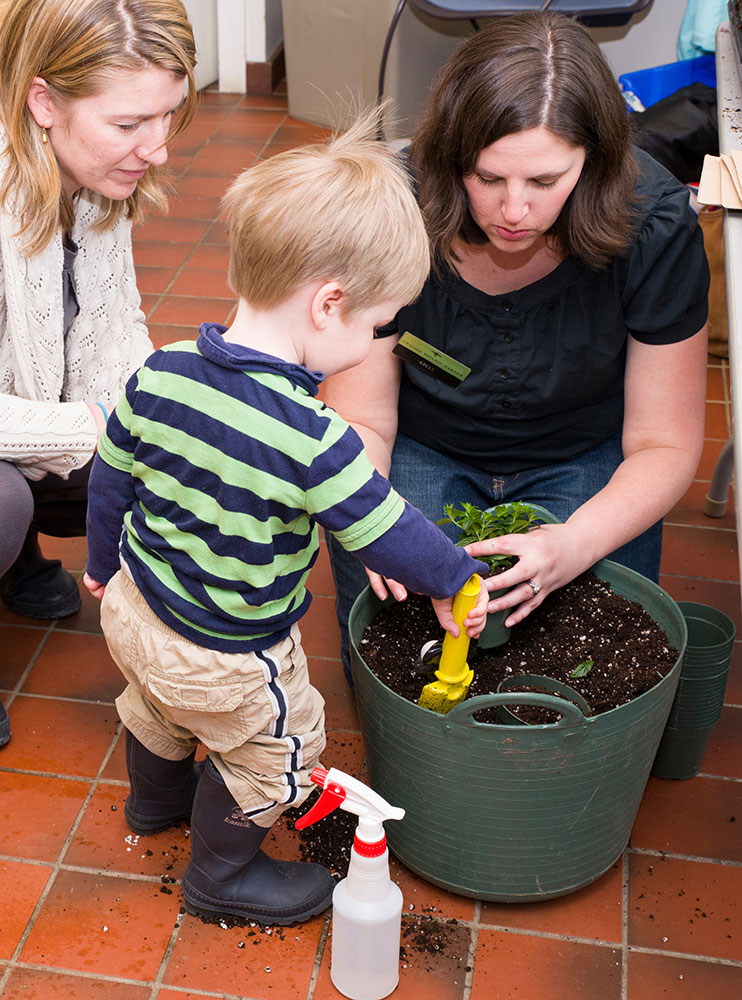
Every class we go to uses different activities to explore a different theme. We’ve used play dough, enjoyed circle time with great books, gone on Garden walks, and let’s not forget our favorite activity, planting! (This time we planted some Mexican heather as part of the insect theme. Butterflies and bees love the nectar from the flowers of this plant.)
A friend plants some Mexican heather to take home.
Our finished project!
We can’t wait until the fall season of Little Diggers, but if you don’t want to wait, you can sign up for My First Camp for 3-year-olds, and enjoy more hands-on science, art, food, and gardening.
Pastry chef Kathy Skutecki shows you how to decorate gingerbread houses like the ones she made for the entrance to the Wonderland Express exhibition. Visit http://www.chicagobotanic.org/wonderland for more information.