Wearable Indian Corn

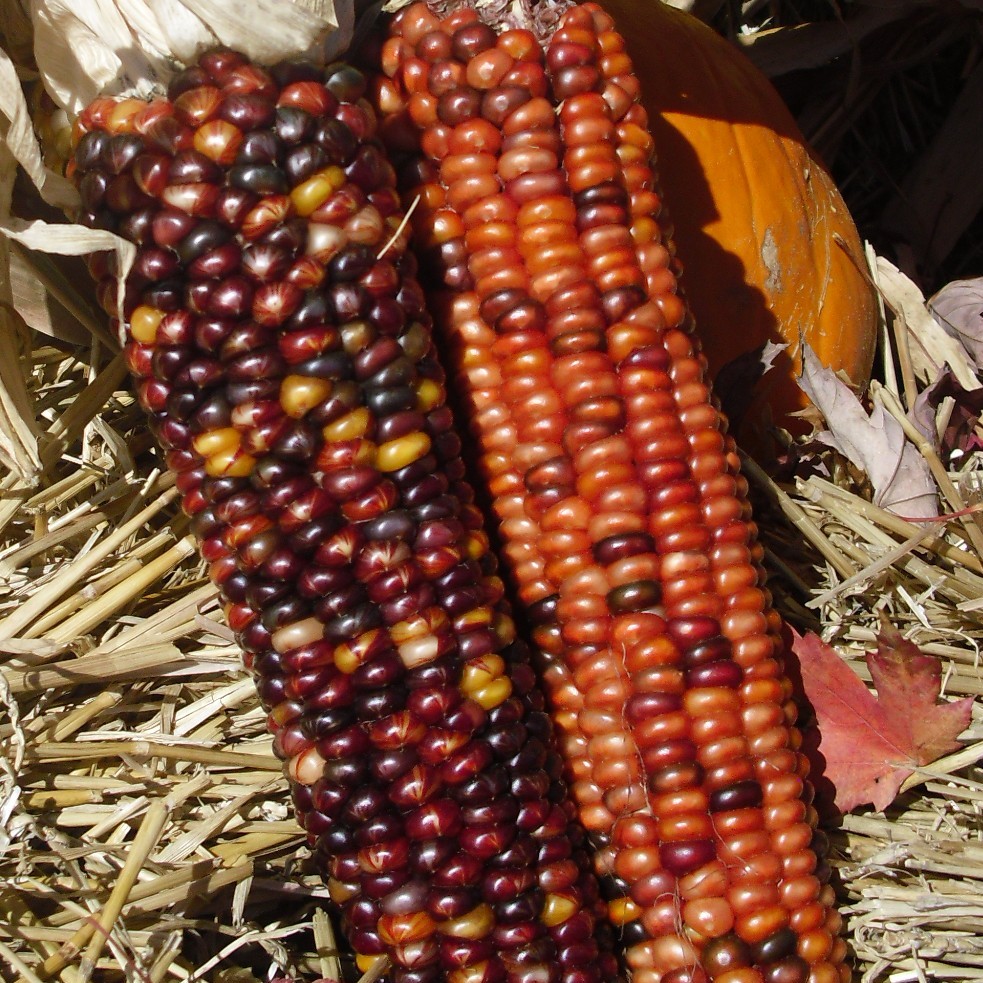
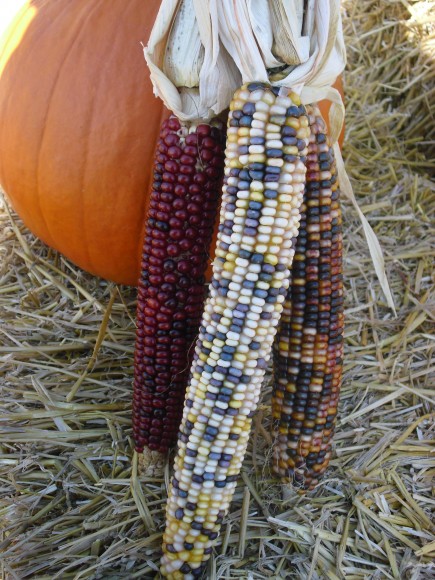
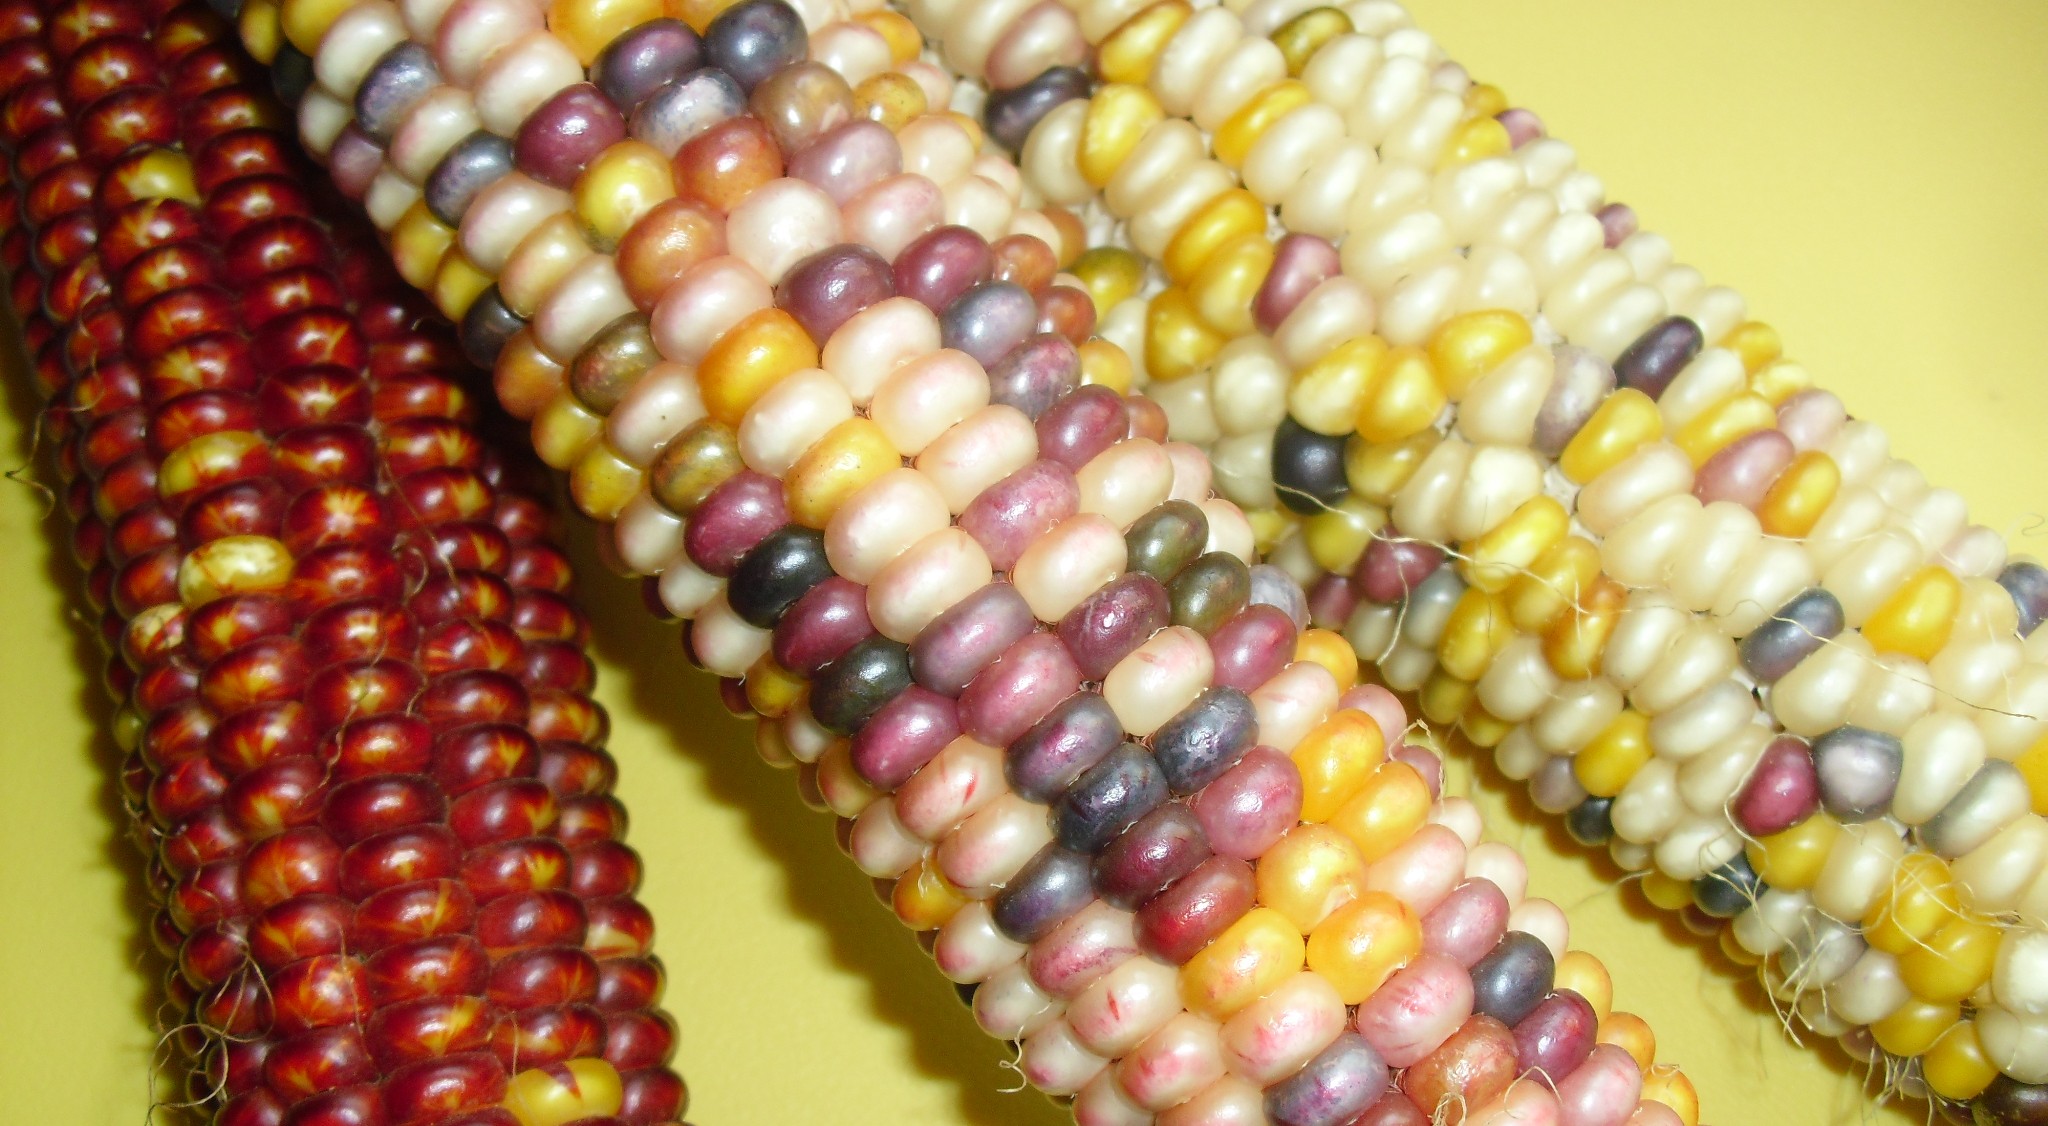
I always look forward to seeing Indian corn in the market and finding it in autumn decorations. Indian corn—in its range of hues from blue to deep maroon to oranges, golds, and yellows—extends the colors of the season long after the tree leaves have faded and been raked away. It is one of November’s icons, reminding us of the cultural and botanical history of the continent.

“You call it corn; we call it maize.”

Or so the 1970s TV ad for Mazola margarine told us.

Long ago, “corn” used to be the term for any grain seed, including barley, wheat, and rye, so naturally the new world plant “maize”—botanically known as Zea mays—was labeled as another kind of corn when it was introduced in Europe. For some reason, the name stuck, and we all think of the sweet yellow stuff on our dinner plates (and its close relatives) as the one and only “corn.”

ILLUSTRATION: A comparison of teosinte vs. modern corn, Zea mays.
This drawing shows the similarities between modern corn and its ancestor, teosinte, after 10,000 years of cultivation. Illustration by Nicolle Rager Fuller, National Science Foundation

There are actually many varieties of maize-corn. Archaeologists are pretty sure that all of them resulted from the domestication and selective cultivation of the grass teosinte (pronounced tay-oh-SIN-tee), around 10,000 years ago by the people living in what is now Mexico. Over time, maize became a staple crop, yielding different varieties of nutritious and versatile grains throughout the American continent.

PHOTO: Three ears of Indian corn leaning against a pumpkin.
The farmers in my neighborhood sell Indian corn in bundles of three alongside gourds, pumpkins, and bundles of straw.

Indian corn is related to popcorn. These kinds of maize differ from other kinds in that they have a harder outer coating and a starchy interior with a bit of water inside the seed, or kernel. Popcorn pops when the kernel is heated quickly at a high temperature, causing the water inside the seed to suddenly turn into steam, inflating the starch. The sweet corn we love to eat and the dent corn used for tortilla chips and livestock feed will not produce a fluffy white snack when heated.

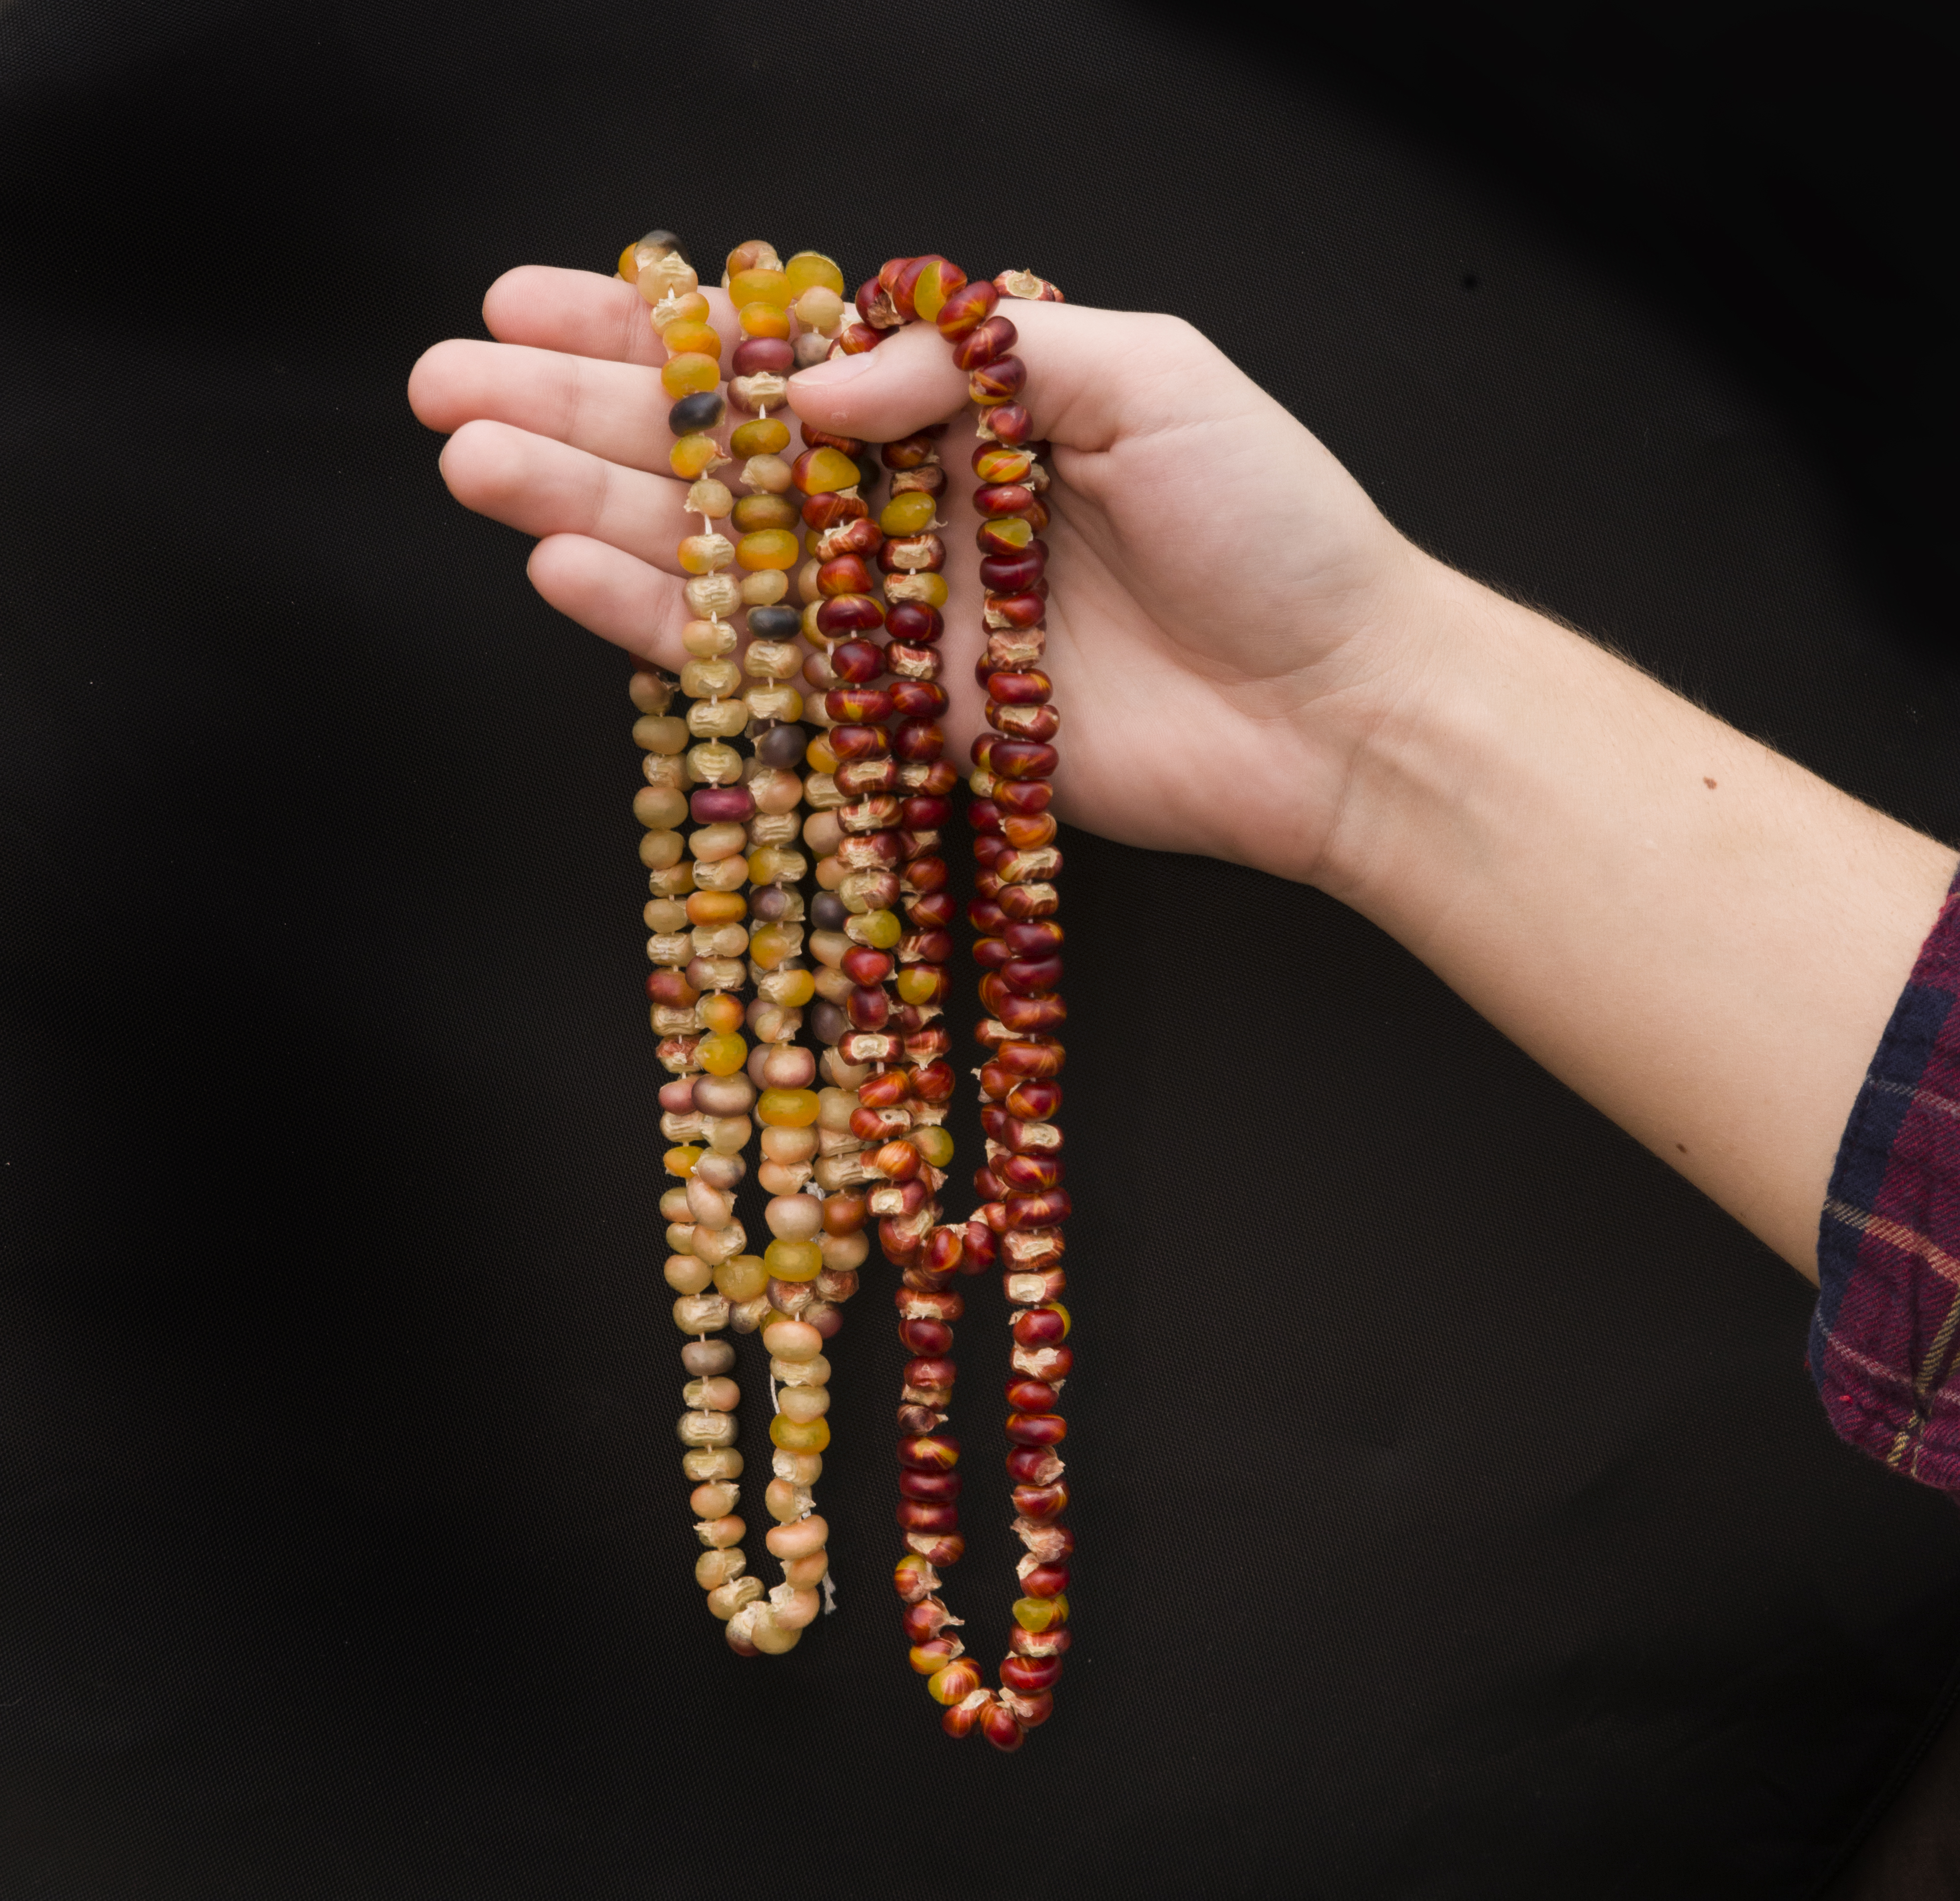
We can exploit these properties of Indian corn and turn the kernels into necklace beads to wear during the season. 

How to make an Indian corn necklace

You will need the following:

  • Indian corn (one average-size cob will make two necklaces)
  • a sharp embroidery needle, long, with a large eye
  • string; you can use ordinary sewing thread, but a little heavier is better
  • a pot of water to cook and soften the corn
PHOTO: Indian corn.
My daughter chose this bundle of Indian corn because she liked both the deep red of cob on the left and the pinkish seeds of the one in the middle—but not for the same necklace.

First, remove all the kernels from the cob. You can wedge a butter knife between the rows of kernels and twist to pop out the seeds. Once you get some of the cob stripped, you can rub the kernels loose with your thumb.

PHOTO: a bowl full of colored corn seeds, or kernels.
These seeds have been removed from the cob and are ready for boiling to soften them.

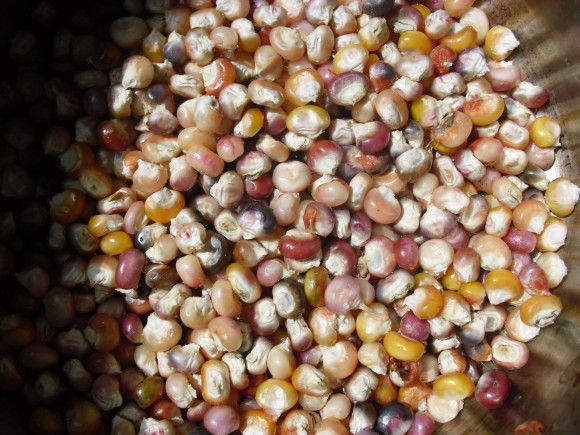
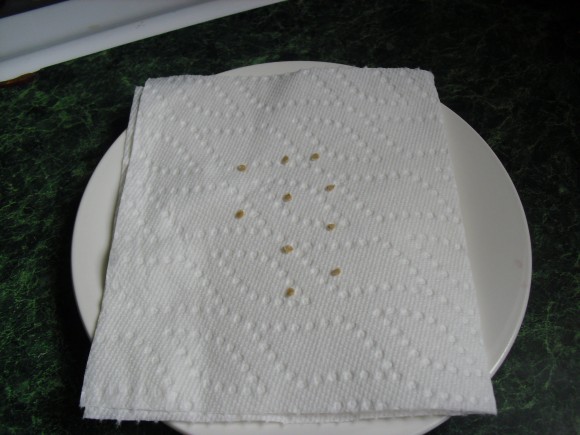
Place the corn kernels in a pot of water and boil for 30 minutes. (This isn’t hot enough for the corn to pop.) Test for doneness by removing three  kernels. If you can push a needle through each of them easily, they are ready. Remove the pot from the heat and allow to cool. You can add cold water to cool them faster, but be sure to leave them soaking so they do not dry out, even when you are stringing them. (Pushing the needle through dry kernels can be a painful experience.)

While the corn is cooling, cut a string about three times as long as you would like your necklace to be. (You can work in shorter sections and tie them together, but it won’t look as nice.) Thread the needle and double the string; then knot the ends.

Now, select kernels in the colors you like, or pick them up randomly so the string resembles the color pattern of the corn cob. Try to pick softer pieces. Hold each kernel by the sides, and push the needle through the middle of the kernel so that the needle is not pointing toward your finger. Then slide it down the string. Leave a few inches of string below the first piece so you have some string to tie when you’re finished.  

PHOTO: This image shows how holding the seed by the sides puts fingers out of the way of the sharp end of the needle.
It is very important to hold the kernel by its sides as you poke the needle through the middle of the seed.

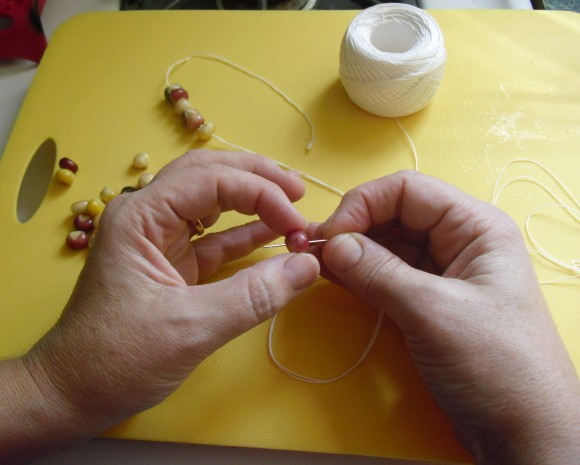
If the kernel is too hard and resists piercing, do not force it! Try to push the needle through at another angle, or discard that piece and select a softer one. This is important because you will prick yourself with the sharp needle if you are not careful. In fact, you’ll probably stab yourself at least once even if you are careful, so this is not a project for very young children. 

Pack the moist seeds close together on the string. As they dry, they will shrink in size. You may want to slide them together a little tighter so the string doesn’t show, but you’ll also want to leave enough wiggle room so the necklace has flexibility. When your string of corn is long enough, allow the seeds to dry completely. Then tie the ends together and you will have an attractive necklace to wear to Thanksgiving dinner or other festive gatherings!

PHOTO: Indian corn necklaces.
The finished necklaces look great layered in different lengths and colors.

One final note: when I made a corn necklace in third grade as part of a unit on Native American culture, I was under the impression that indigenous people of long ago made and wore necklaces like this. No way. All corn was grown for food, and it  was needed to sustain the population, so it would not have been turned into jewelry. This season, we can be thankful for the plentiful food we have to eat, and we can appreciate the beautiful colors of the corn as decoration during the feast.

©2014 Chicago Botanic Garden and my.chicagobotanic.org

Pumpkin Seed Math Games

If you carve a pumpkin for Halloween or make pumpkin pie from scratch, you’re going to have a lot of pumpkin seeds. You can put them to good use by turning them into “dice” and playing math games this fall.

First, you’ll need to remove, clean, and dry the seeds. After scooping the pulp from your pumpkin, place it in a bowl of water and gently rub the stringy pulp off the seeds. Rinse them in a colander and let them drain. Prepare a baking sheet with a layer of parchment paper. Do not add any oil. Spread seeds in a single layer on the paper. Bake in an oven preheated to 300 degrees Fahrenheit for 30-40 minutes to dry them. Store them in a plastic bag or airtight container.

PHOTO: Pumpkin seeds on baking tray.
These seeds were baked for just over 30 minutes at 300 degrees. After they have cooled, they will be ready to become instruments of learning.

The kind of dice you make will depend on the game you want to play, but for all games the basic idea is the same. Players will toss the seeds and the side that lands face up is the number they will work with. You’ll want to select seeds that are more flat than rounded. Remove any transparent skin that remains on the seeds, so it won’t dissolve in the marker ink and make a mess. Use a regular fine Sharpie or other permanent marker. I find that the extra fine markers tend to dry out while writing on the seed. You can use any color, but for some games the color matters. You’ll also want to establish a top and bottom of the seed. I write all the numbers with the point of the seed on the bottom so 6s and 9s don’t get confused. 

Here are some games you can make:

PHOTO: Pumpkin seeds painted like dominoes.
To make a game of “Count the Dots,” draw dots on one side of each seed as shown.

Count the Dots

This works well for young children learning to count. Take six pumpkin seeds. On one side of each seed draw dots like those on a die. Leave the other side blank. To play, toss the seeds and let them land. Count all the dots facing up. The person with the most dots wins!

Add the Numbers

Older children who are learning to add can play with numbers instead of dots. You can vary this depending on the skills of the children. For early learners, make two each of 1, 2, and 3. For children practicing higher number adding, make a range from 1 to 9. To practice adding higher numbers, make a set with all 6s, 7s, 8s, and 9s. Those are scary numbers to add until you get the hang of it, which is the whole point of this game.

To play, toss the seeds, then move the blanks out of the way. Line up the numbers so they are easier to see and add up.

Addition and Subtraction

Working on subtraction? Write the number on one side of the seed in black and write the same number on the opposite side in a different color such as red. Now when you toss the seeds, add all the black numbers and subtract the red numbers. The result could be a negative number!

PHOTO: Numbered pumpkin seeds.
Playing with addition-subtraction rules where black numbers are added and red numbers are subtracted, this toss would be 1 – 7 – 2 + 4 + 8 – 6 – 9 + 3 + 5 = -3.

Evens/odds

This game works with dots or numbers, but requires a set with writing on one side only. Players take turns predicting the outcome of the toss adding up to an odd or even number. The first player calls “odds” or “evens,” tosses, checks the results. S/he gets a point if s/he is right, a point goes to his or her opponent if s/he guessed wrong. 

Numbers and Symbols

You can have more than numbers on your dice. Make a set of seeds that include numbers and function symbols: + , -, ×, and ÷. Each player should have her own identical set of seed dice. All players toss at the same time and the person who can make the number sequence with the highest answer wins. In this game, players are allowed to combine numbers to make a larger number. For example, a 1 and a 2 can become 21, as long as all the exposed numbers and symbols are used. The simplest rules for this game will be to take the order of operations from left to right, but players who want to stick to the “PEMDAS” order of operations (parentheses, exponents, multiplication, division, addition, subtraction), can certainly work that into the game. 

PHOTO: Numbered pumpkin seeds and some with math symbols.
Working with numbers and symbols gives a score of 413 for this toss.

Matching Equations

To make the game more cooperative, play the same game above, only this time the two players try to make their two number statements equal each other, or get as close as possible. This is more difficult to accomplish. so it’s all right to be a little flexible with the rules, since the players are not competing and you won’t have to settle disputes.

Players can make up their own games. They can also work in more complicated operations like exponents, or they can arrange the placement seeds above and below a line to represent division (this may require paper and pencil). Chances are, if they have reached this level of sophistication with mathematical operations, they would prefer eating the seeds to playing with them, but it’s still a fun challenge.

Whatever their level, when players have exhausted their interest in the seeds, be sure to take a break and enjoy some pumpkin “pi.” Sorry, I had to include that, because let’s face it, if you’re playing math games for fun, you’re a person who appreciates this humor!

PHOTO: Pumpkin with carved numbers for facial features.
“Pascal Pumpkinhead” gave the seedy contents of its head for mathematics.

©2014 Chicago Botanic Garden and my.chicagobotanic.org

Fall Harvest Activities for Horticultural Therapy

I make no secret about the fact that fall is my absolute favorite season. Between the pumpkin-spiced treats, falling leaves, warm-toned landscape, and endless fall activities, I simply can’t get enough of the many opportunities that fall brings. 

Fall also happens to be my favorite season for horticultural therapy. This exciting time of year is when all the off-site therapy gardens are reaping the benefits from their summer of hard work. The fall programs begin after a brief hiatus upon the completion of the summer program, and many enthusiastic gardeners return to plentiful crops and beautiful blooms just waiting to be enjoyed. 

Today I’m describing three of my favorite fall activities and their therapeutic benefits: fall planters, mum pumpkins, and harvest herb dip. 


Fall planters

PHOTO: Students at Christopher School work to transition their school garden from summer to fall.
Students at Christopher School work to transition their school garden from summer to fall.

Creating fall planters—either in a personal, tabletop container or raised garden bed—is a great way to prepare your garden for the fall while adding seasonal interest. This activity works well for a group of any size or ability. 

During this activity, our groups begin to remove overgrown summer crops for composting while replacing them with edible fall crops and autumn blooms. For our off-site therapy gardens, we typically plant cabbage, kale, onions, pansies, and mums. This allows the group one more opportunity to work in their outdoor garden before the impending first frost.  

Therapeutic benefits

This activity brings a cyclical close to the gardening season. In the beginning of spring, we discuss seed germination and the life cycle of a plant. It is important to relate this activity back to the spring to highlight how far the garden has come during the harvest season. The theme and symbolic nature of this activity—events coming to a close or new beginnings—is useful in horticultural therapy groups. Take time to think about how you can relate this to your specific audience and how the message can resonate with them—either as a group or individually. 


Mum pumpkins

The mum pumpkin activity is always a big hit in horticultural therapy. The supplies needed for this activity are as follows: one small pumpkin (I use pie pumpkins), a spoon for scraping, cut flowers, and floral foam. This activity can also be done using soil and cell-pack flowers such as mums or pansies. 

The mum pumpkin activity has two large components to it: the carving out of the pumpkin and the planting or arranging of the flowers. It typically takes a full 60 minutes for a large group of horticultural therapy participants to complete this activity as well as a decent amount of space. 

PHOTO: A pumpkin planted with a selection of fall mums.
Beautiful mum pumpkins created in an off-site horticultural therapy facility.

The first step is carving out the pumpkins. For many of the contracts, we like to wash and save the seeds for future baking enjoyment. Often, hand-over-hand assistance is needed in order to help our participants scrape out the pumpkin innards. This creates a wonderful opportunity for fine motor and rudimentary skill exercise. Once the pumpkins are clear, the floral foam can be inserted for the mum arrangement. (If you choose to fill your pumpkin with a planted flower, I would recommend using 1-2 cell-pack pansies per pumpkin.)

Therapeutic benefits:  

One of my favorite aspects of this activity is the sheer joy that radiates from our participants after they create a beautiful, seasonal centerpiece. This activity allows participants to create something that is their own, something with their favorite colors, and plant material that will bring them joy every time they see it. It’s important to insert activities such as these to encourage self-expression and promote joy. That, after all, is one of the greatest benefits to gardening. 


Harvest herb dip 

Our simple and delicious harvest herb dip has been a late summer and fall favorite for many, many years. Why is that? It involves a beloved activity for all individuals—eating! For our harvest herb dip, we collect fresh herbs from our garden as well as cucumbers, tomatoes, peppers, and other goodies to create a delicious snack. 

PHOTO: Pepper plants.
Baby sweet peppers grow in the Christopher School Enabling Garden.

For our groups, we supply each participant with a paper bag and encourage them to pick items that they’d enjoy in their dip. We commonly collect chives, parsley, peppers, and cucumbers. Once each participant has collected their desired items, we head inside to wash and prep the ingredients. While the participants are chopping their various herbs and vegetables, the horticultural therapist and/or aides mix the two store-bought ingredients: whipped cream cheese and sour cream. We use roughly one 8-ounce container of cream cheese with 4 ounces of sour cream. (This recipe can also be made with greek yogurt in place of the sour cream. )  

With the base of the dip mixed, each participant gets a personal bowl of dip in which they can pour and mix their ingredients. Then, with some sliced cucumbers, peppers and crackers, the participants dig in! 

PHOTO: Student eating herb dip.
A student enjoys his homemade herb dip with garden cucumbers and peppers for dipping.

Therapeutic benefits:  

Inserting activities involving edible garden items is always rewarding. In my first year, I discovered that many horticultural therapy participants (namely students) had never seen a tomato, pepper, or cucumber grow on a plant—let alone one they tended to and cared for themselves. The therapeutic benefits for this activity relate to educational opportunities. We often take time to discuss what other food items can be made from our delicious garden harvest to get participants excited about healthy and sustainable foods. It never ceases to amaze me how much fun students have picking and eating delicious vegetables! 

There are many more activities that one can do with a group or individual in a therapy garden during the fall season. Simple and inexpensive garden-maintenance activities provide wonderful opportunities for socialization and conversation regarding healthy practices for living things.

Fall is a beloved season by all of our garden groups, and it’s important to squeeze in as much time as possible in our outdoor therapy gardens before the midwestern winter knocks at our door. With the beautiful fall colors, plentiful harvest, and mildly cool weather—it hard to imagine a more desirable place to be than a garden.

Happy harvest! 


©2014 Chicago Botanic Garden and my.chicagobotanic.org

Planting Bulbs with Children

Planting bulbs together is a great way for children to learn about a different kind of plant. In the spring, the results are thrilling.

PHOTO: Getting ready to drop in a bulb.
James’s favorite part of planting: dropping in little “flower bombs” (the bulbs).

Put your children to work! The general rule for planting bulbs is to dig down three times the height of the bulb. For example, if you have a narcissus bulb that is 3 inches tall, you would dig a hole 9 to 12 inches deep. For smaller children, pick smaller bulbs like ‘Tommy’ crocus (Crocus tomassinianus) or grape hyacinth (Muscari).

Digging a deep hole for large bulbs can be a big job. There are several different kinds of bulb digging tools. I prefer a long, slender trowel when planting bulbs. In loose soil, you can push the trowel into the ground, pull the soil back, drop in the bulb, and then pull the trowel out. In more compact soil, I prefer a bulb trowel that looks like a metal cylinder with teeth on one end and a handle on the other.

PHOTO: Finding a worm.
The bonuses of getting dirty in the garden: finding a worm!

My son is always eager to try out my gardening tools. We make a game of planting bulbs. We bury “flower bombs” (bulbs), water the soil and flower bombs when we are finished planting, and sometimes we even sprinkle some super food (bulb fertilizer) to help things along. The hard work pays off in the spring when those beautiful blooms push through the ground, show their leaves, and then burst open with spring color.

Learn more about new additions and old favorites at the Fall Bulb Festival on Saturday and Sunday, from 10 a.m. to 4 p.m. Preview shopping for members only will take place from 10 a.m. to 4 p.m. on Friday, October 10.


©2014 Chicago Botanic Garden and my.chicagobotanic.org

You Say Tomato, I Say Science Project

Here’s a science project students can do at home! Try tomato seeds.
tomato project

As I’ve stated before, we in the education department of the Chicago Botanic Garden are committed to helping parents and teachers find great projects that teach students how plants sustain and enrich life. Last year we talked about using radish seeds; this year, it’s tomato seeds. And like last year, this project can be done by an individual student, a small group or ecology club, or an entire class.

Let’s begin by thinking about tomato seeds. Cut open a tomato and try to pick out a single seed. Go ahead and try it, I’ll wait.

PHOTO: This close up of a tomato seed shows the transparent coating that surrounds the tomato seed.
These tomato seeds glisten and mock me when I attempt to pick them up with my fingertips. The little brats also resist sliding off the cutting board.

 
As you will discover (if you didn’t already know) the seeds are coated in a gelatinous substance that makes them slippery and difficult to handle. So the first question is, what purpose does the slimy coating serve?

This is not the kind of blog post where I give you all the answers. That would not be good science teaching. I will tell you that tomato seeds can pass through the digestive tract of an animal and still germinate. Not all seeds can do that. It is possible that in nature, the coating protects the seeds on their journey from the mother plant through the hostile environment of a hungry animal’s gut and on to wherever that animal relieves itself.

Another theory is that the coating prevents premature germination of the seeds while they are inside the warm, moist, ripening fruit. Whatever the true reason—and there may be several—seed savers find it’s better to remove that coating after the seeds are harvested, because they become easier to handle and store.

The natural way to remove the coating is to ferment the seeds in a jar or bowl. It’s a simple procedure.

1. Scoop or squeeze the seedy pulp out of the tomatoes and put it into a bowl. (I prefer glass, but some people use plastic.) Add water equal to the volume of tomato pulp. Cover the bowl with plastic wrap and poke a few holes in the top.

PHOTO: glass bowl about a third full of tomato pulp, covered with plastic wrap, sitting on the windowsill.
Here are the seeds from three medium-sized tomatoes, sitting by the window on the back porch, waiting to ferment.

2. Place the bowl in a warm location such as a sunny window. It is going to smell bad, so don’t put it in your dining room, unless you’re trying to reduce your appetite. You will also want to avoid fermenting your seeds next to bananas and other fruit ripening in your kitchen, because it can attract fruit flies. Leave it there for three to five days, depending on the conditions. Natural “beasties” in the air (yeast) will settle on the sugary goodness of the tomato. They will gorge themselves and reproduce, resulting in a yucky mess floating on top of the mixture. This is exactly what you want.

PHOTO: the bowl of tomato seeds is covered in white stuff.
In four days, my tomato seeds were ready, with a thin layer of white scum floating on top. Be very glad odors are not transmitted over the internet.

3. After you have grown a nice head of gunk on your seeds, remove that film and throw it away. (Unless you’d like to keep it for some reason.)  If you can’t skim all of it, no worries, the remaining goo will rinse off in the next step. Remove any floating seeds, too—they are not viable.

4. Pour the mixture into a sieve or wire strainer with fine mesh and rinse well, shaking the seeds gently to remove any remaining pulp and seed coatings.

PHOTO: The tomato seeds are spread out on a wax paper so they do not touch.
The most tedious part of the process is spreading out the seeds so they do not touch each other.

5. Dump the seeds onto wax paper. Poke at the seeds with a toothpick or other clean utensil to separate them. Remove any dark seeds that don’t look right. They are not viable. Let the seeds air dry on the wax paper in a protected place for about a week.

6. Store the completely dried seeds in an envelope until you are ready to use them.

PHOTO: close up of several tomato seeds - you can see the fuzzy outer layer of the seeds.
The cleaned and dried seeds are coated with tiny white hairs. These hairs were holding the gooey coating on the fresh seeds and now they will help the seeds soak up moisture when they are planted.

Now comes the science question: Do tomato seeds really need this kind of abuse to germinate?

The only way to find out is to experiment. Collect seeds from some ripe tomatoes—two or three tomatoes will do. Ferment half of the batch using the directions above. Rinse the remaining half with water in a sieve (to remove any attached tomato pulp), and then dry them on wax paper without any other treatment. When you have dried all the seeds, use the same procedure from Eleven Experiments with Radish Seeds to measure and compare germination rates.

PHOTO: Ten tomato seeds are arranged on a paper towel in three rows; the towel is on a plate.
These ten fermented and dried tomato seeds are ready for germination testing.

Since you’re curious and kind of into this now, see if you can figure out if there are other ways to remove the seed coating that result in equal or better germination success. Some seed savers skip the fermentation and instead clean their tomato seeds with a solution of Oxi Clean. You can add this treatment to your experiment by dividing your batch of tomato seeds into three parts for: untreated, fermented, and Oxi Clean treatments.

The Oxi Clean method goes like this:

  1. Put the tomato seeds in a measuring cup and add water to make 1 cup of liquid.
  2. Add 1 tablespoon Oxi Clean power to the mixture and stir to dissolve.
  3. Let the seeds soak for 30 minutes.
  4. Rinse thoroughly in a sieve and dry on wax paper, just as you would with the other treatments.

As you will see, the Oxi Clean method is faster and there is no offensive odor, but is it better for germination?

PHOTO: A 16 ounce container of Oxi Clean Versatile Stain Remover
This product contains sodium percarbonate and sodium carbonate, no bleach, and will work for your experiment.

Note: if you Google information about this, you will find articles that discuss Oxiclean (one word) vs. Oxi Clean (two words). The two commercial products are made of different chemicals. The former is a liquid that contains sodium hypochlorite (chlorine bleach), the latter, promoted by Billy Mays, does not. For the purposes of this experiment, the less caustic, powdered Oxi Clean pictured in this blog post works perfectly well. Students should report the actual chemical names in the materials list, not just the product name. It’s just like using the scientific name of a plant instead of the common name—it’s more accurate and less confusing for someone who wants to replicate the experiment.

If you are ambitious, try a treatment of your own. After all, three tomatoes are going to give you a lot of seeds to test. My daughter tried soaking some of her seeds in vinegar. Perhaps regular dish soap or ordinary laundry detergent will remove the seed coating. Or you could try a cleaner that contains chlorine bleach. It’s up to you. Please remember to wear goggles and plastic or latex gloves while handling any chemicals because, like the tomato seeds, your eyes and hands may need a protective coating to escape harm.

I’d like to tell you what is going to happen, but then I would totally lose street cred and face ridicule from my science teacher peeps. One hint, though: be sure to measure the timing of germination as well as the number of seeds that germinate in each condition. If you want to know what happens, you’ll just have to cut open some tomatoes and try it yourself.


©2014 Chicago Botanic Garden and my.chicagobotanic.org